
BioShock: The Collection Guide Bioshock 2 Evolve Today!
Plasmids
Skilled collection and use of the many Plasmids that exist in Rapture is paramount to your survival. While there is no denying the awesome firepower that is available to the watchful Big Daddy, drills and guns alone won’t bring success in Rapture. No, victory in Rapture requires a coordinated approach using the weapon in your right hand paired with the Plasmid-firing capabilities in your left. Plasmids give you the ability to launch incredibly powerful attacks from your fingertips by converting the EVE you inject into your system into a mighty fireball, or perhaps a hypnotic spell or even a swarm of insects!
Plasmids are genetic alterations that not only consume EVE with each use, but also require active participation on your part, unlike the Gene Tonics described later in this chapter, which provide passive benefits. Although you can eventually splice up to eight different Plasmids simultaneously and assign them to the Plasmid Radial, only one Plasmid can be selected for use at a time. (You being the game with three Plasmid Slots and each additional Plasmid Slot costs the following: 4=40, 5=50, 6=60, and 7=70. You get a free Plasmid Slot at the end of the game). Remember, Plasmid use does consume EVE, so make sure to keep a supply of EVE Hypos on hand. The Big Daddy automatically injects a fresh EVE Hypo into his arm when he runs out, but you can force-use an EVE Hypo on command by holding either the Switch Plasmid or Switch Weapon button and pressing the Reload button.
 Cyclone Trap
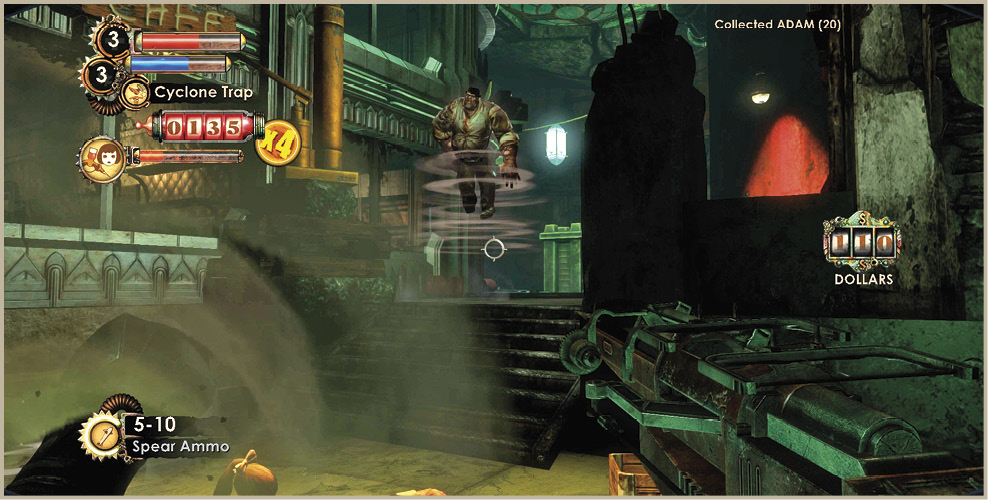
This Plasmid allows you to set a trap for enemies as they run towards you—perfect for doorways and other narrow openings where they have to funnel in. Cyclone Trap is a mighty vortex of wind that sends Splicers high into the air, often slamming them against the ceiling. Enemies not only become briefly disoriented, but they also suffer damage upon hitting the ground on the way down. This is a good Plasmid to use when dealing with large numbers of enemies. Throw down a Cyclone Trap, watch them get catapulted into the air, and unload on the staggering beasts with the Shotgun once they hit the floor! Cyclone Trap is an excellent Plasmid to use when defending a Gather, particularly because the traps won’t disappear unless you set too many active traps at once.
 Cyclone Trap
Location: At Gatherer’s Garden machines starting in Pauper’s Drop.
Effect: Create traps that launch Splicers into the air—and hurt them badly on the way down!
Need help defending what’s yours? Teach intruders a lesson they’ll never forget with Cyclone Trap from Ryan Industries.
 Cyclone Trap 2
Location: At Gatherer’s Garden machines starting in Siren Alley.
Effect: Charge up your traps with Plasmids for a variety of effects!
Get creative with your defenses! Charge up your Cyclone Traps with a variety of Plasmid powers!
 Cyclone Trap 3
Location: At Gatherer’s Garden machines starting in Dionysus Park.
Effect: Place traps on walls and ceilings!
Turn any room into a deadly snare with Cyclone Trap 3! Charge your Traps with Plasmids for even more variety. Intruders will never know what hit them!
 Decoy
Decoy
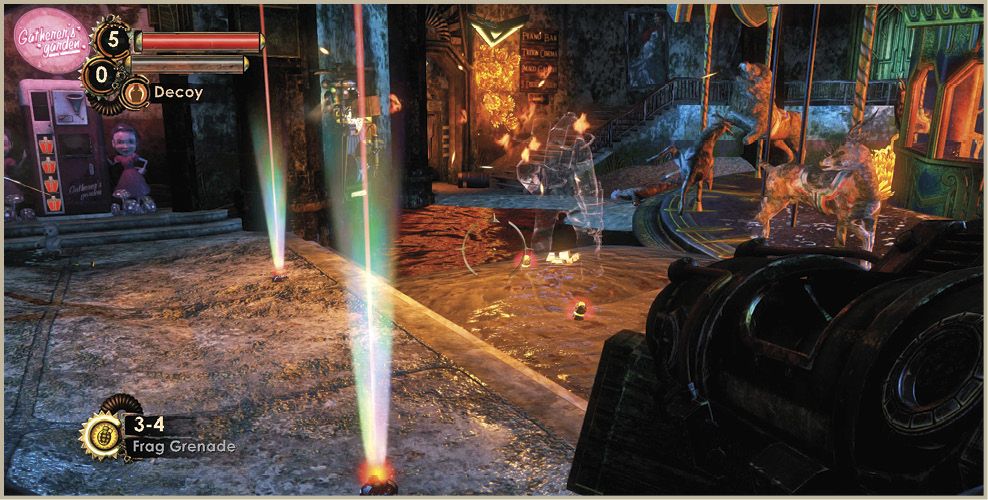
When all else fails, turn to Decoy and lure the enemies’ attacks away from you. This semi-transparent decoy stands right where you place him, attracting gunfire and other attacks away from you. The Decoy is great for times when you need to make a quick escape from a painful situation, but also perfect for luring a Big Daddy or Brute into a trap. Lay your defenses down, ready your weapons, then cast a Decoy off to the side to lure the enemy away from you. The Decoy is the perfect bait to spring a trap. Read ahead in this book to learn about surprise ambushes, and follow the tips outlined to know when to group up some flammable fuel drums, Proximity Mines, and a Cyclone Trap or two, then set your Decoy down in the middle of it all to guarantee success!
 Decoy
Decoy
Location: Available at Gatherer’s Garden vending machines starting at Pauper’s Drop.
Effect: Creates a Decoy that draws attacks away from you.
Enemies on your back? Distract their attention with a helpful Decoy. They take the heat… so you don’t have to!
 Decoy 2
Location: Available at Gatherer’s Garden machines starting in Fontaine Futuristics.
Effect: Creates a Decoy that draws attacks away from you and reflects damage back at foes.
Feeling overwhelmed? Even the odds with a more helpful Decoy! Now your Decoy can reflect damage back at his attackers, whittling away their health while they attack the wrong guy!
 Decoy 3
Location: Available at Gatherer’s Garden machines starting in Fontaine Futuristics.
Effect: Creates a Decoy that draws attacks away from you, reflects damage back, and gives it to you as health.
Need a health boost? Now your Decoy not only reflects damage back at attackers, he’ll also give you some back as health!
 Electro Bolt
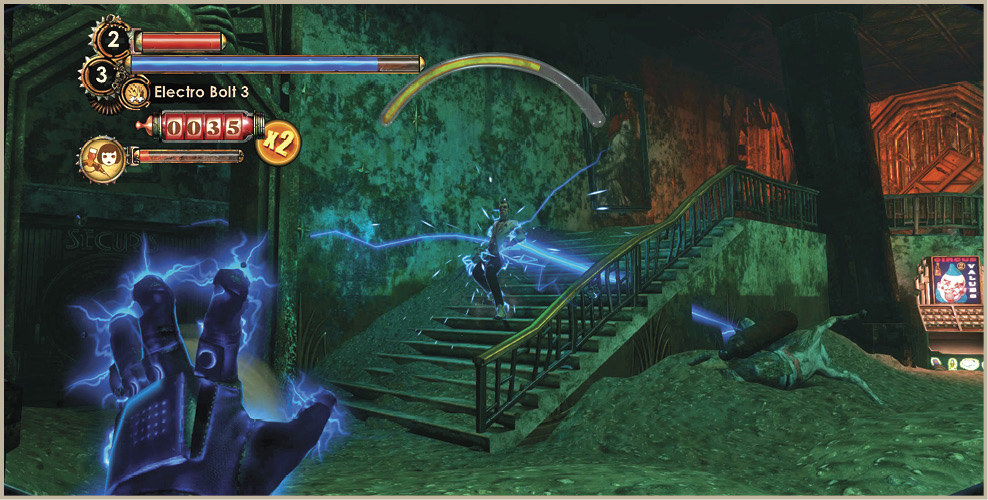
Electro Bolt gives you the ability to launch a blast of electricity from your hand that can be used to incapacitate enemies, both flesh-based and mechanical. One potent strategy for use against Splicers and enemies with little health left is to stun the foe with Electro Bolt, then rush forward and deliver a fatal melee attack. This tactic is an excellent way to conserve ammunition. Similarly, you can use Electro Bolt to temporarily stun a Turret, Security Bot, or Camera and make it harmlessly susceptible (temporarily) to hacking. Or, shoot Electro Bolt into a pool of water to electrocute wading enemies. Lastly, Electro Bolt can be used to surge short-circuiting control panels and open doors or other apparatus that may be on the fritz. Be sure to upgrade Electro Bolt when given the chance and charge up a powerful attack—the electricity can then jump from enemy to enemy, shocking multiple foes with a single blast!
 Electro Bolt
Location: Near the disabled Gatherer’s Garden machine in the Plasmid Therapies area of Adonis Luxury Resort.
Effect: A bolt of electricity that stuns both man and machine. Devastating against enemies in water.
Don’t be a dolt—use Electro Bolt!
 Electro Bolt 2
Location: At a Gatherer’s Garden machine beginning in Pauper’s Drop.
Effect: Stun multiple enemies with the power of Chain Lightning!
Shock multiple foes at once! Press and hold the Fire Plasmid button to charge up Chain Lightning!
 Electro Bolt 3
Location: Available at Gatherer’s Garden machines starting in Fontaine Futuristics.
Effect: Become a master of electricity with the power of Electrical Storm.
Now every attack causes Chain Lightning! Press and hold the Fire Plasmid button to release a continuous Electrical Storm.
 Hypnotize
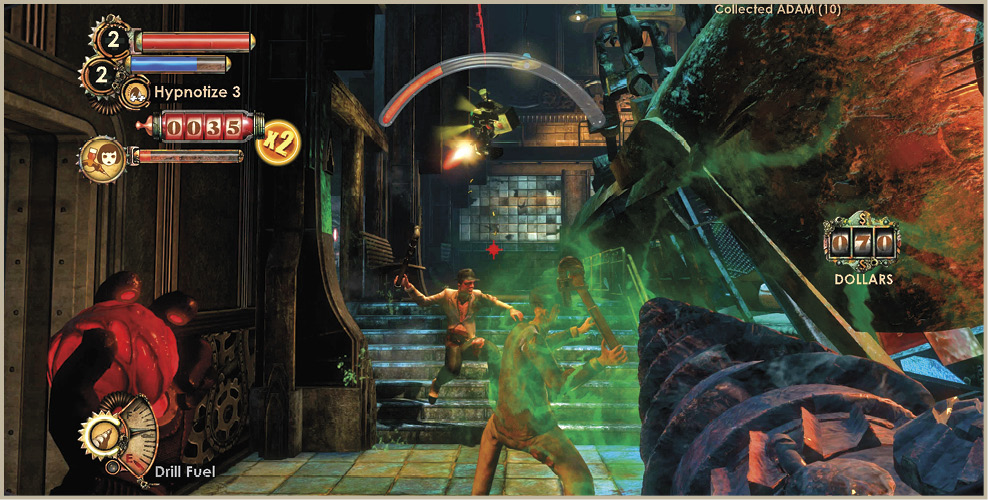
The Hypnotize Plasmid got a bit of a makeover this time around. The base version of Hypnotize works the same as the Enrage Plasmid from the original game—throw it at an enemy to turn him against another nearby foe. This works when there are multiple enemies present, otherwise the hypnotized enemy still attacks you. Upgraded versions allow you to charge a powerful Hypnotize attack that actually makes the target enemy become your friend and ally. The affected foe glows green in color and follows you wherever you go for a rather generous length of time. Your new friend attacks anything that tries to do you harm including Turrets and Security Bots. Purchasing Hypnotize 3 should be one of your top priorities—there’s nothing better than having a Big Daddy as your personal bodyguard!
 Hypnotize
Location: Just inside the Limbo Room, in the southeast corner of Pauper’s Drop.
Effect: Causes enemies to become hypnotized and attack anyone nearby!
Confuse your foes into attacking each other!
 Hypnotize 2
Location: Available at Gatherer’s Garden machines starting in Siren Alley.
Effect: Charge up to Befriend Splicers to join your cause!
Press and hold the Fire Plasmid button to charge up a Befriend attack and gain a new ally! (Big Daddies and Brutes cannot be Befriended.)
 Hypnotize 3
Location: Available at Gatherer’s Garden machines starting at Fontaine Futuristics.
Effect: Now you can Befriend the big boys!
Press and hold the Fire Plasmid button to charge up a Befriend attack that works on Big Daddies and Brutes! Add another Big Daddy to your side!
 Incinerate!
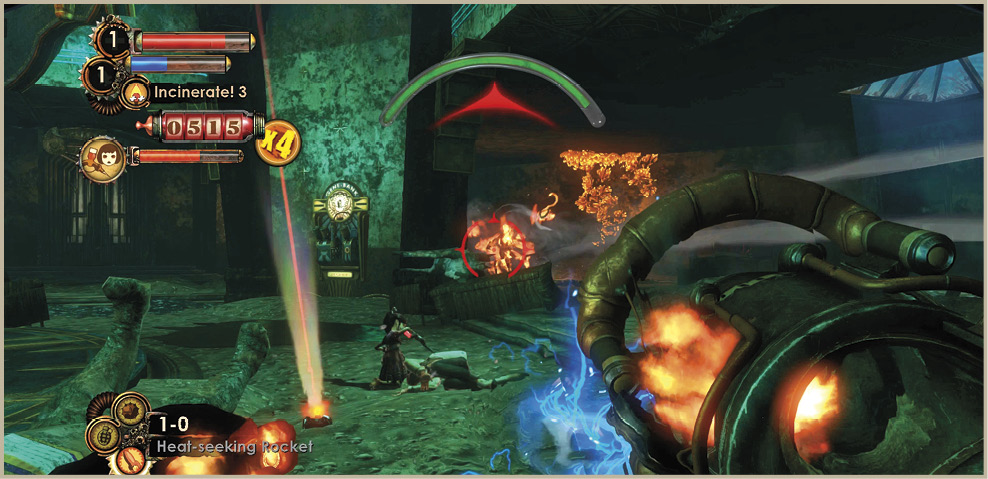
Incinerate! is the third Plasmid you acquire upon arriving in Rapture, and it is one that you will likely use throughout much of your journey. Throw a fireball from your left hand to engulf the enemy in flames. This fire continues to inflict damage for several seconds, thus giving you time to switch to a weapon and stack the damage while the enemy writhes about in agony. Also, keep your eyes peeled for oil slicks that can be used as booby-traps; wait for an enemy to step into the oil slick, then use Incinerate! to ignite the floor around them! Similarly, send a fireball into an explosive barrel or fuel cylinder for a massive explosion! You should upgrade to Incinerate! 2 as soon as possible to gain the ability to throw explosive fireballs, but Incinerate! 3 should take a backseat to other Level 3 Plasmids. Though extremely helpful, Incinerate! 3 consumes massive quantities of EVE and should be avoided unless you are having a lot of trouble staying alive.
 Incinerate!
Location: Purchase from the Gatherer’s Garden in the Hall of the Future at Ryan Amusements. This is a goal-oriented purchase, and is required to advance the story.
Effect: Set objects and creatures on fire. Ages 12 and up.
When it absolutely, positively has to erupt in flames, don’t wait—Incinerate!
 Incinerate! 2
Location: Available at Gatherer’s Garden machines starting in Siren Alley.
Light up the room with the new Fire Bomb ability!
Set multiple foes on fire at once! Press and hold the Fire Plasmid button to charge up an explosive Fire Bomb!
 Incinerate 3
Location: Available at Gatherer’s Garden machines starting in Fontaine Futuristics.
Effect: Set the world on fire with the new Eruption ability!
Now every use of Incinerate! sets off a Fire Bomb. Press and hold the Fire Plasmid button to charge up a continuous eruption of flame!
 Insect Swarm
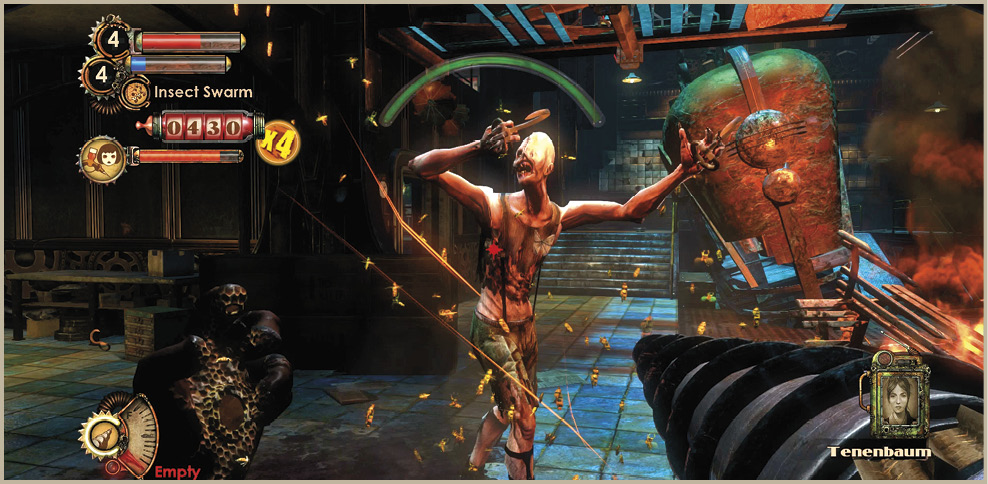
Insect Swarm is a fun Plasmid to use, since it can definitely be entertaining to watch those maniacal Splicers flee in horror as swarms of bees descend upon them. Insect Swarm is a great Plasmid to use against multiple enemies because it does a very good job of disrupting your enemies and altering their priorities in a significant manner. It can also be used to flush enemies out of hiding and seek out those pesky enemies hiding on balconies or other obscure places. One dose of Insect Swarm is all it takes to have your foes thinking far more about their own survival than your demise. Insect Swarm and its upgraded versions are particularly useful during Gathers in areas through Dionysus Park, as the Plasmid is less useful against Alpha Series enemies. This a Plasmid that arguably becomes less useful as the game progresses, as you transition from dealing with many low level enemies to fewer tougher foes.
 Insect Swarm
Location: Available at Gatherer’s Garden machines starting in Siren Alley.
Effect: Release a swarm of stinging insects that seeks out enemies.
Nothing clears a room like swarms of stinging bees. Perfect for flushing out unwanted guests! (Warning: not recommended for users with allergies.)
 Insect Swarm 2
Location: Available at Gatherer’s Garden machines starting in Dionysus Park.
Effect: Keep the room jumping with a more effective Insect Swarm!
Now your swarms split in two, jumping from target to target!
 Insect Swarm 3
Location: Available at Gatherer’s Garden machines starting in Fontaine Futuristics.
Effect: Keep your insects working for you with the new Swarm Bomb ability.
Turn fallen foes into deadly traps! Now your swarms can make nests in the bodies of your enemies, resulting in proximity-triggered Swarm Bombs when enemies approach.
 Scout
Scout
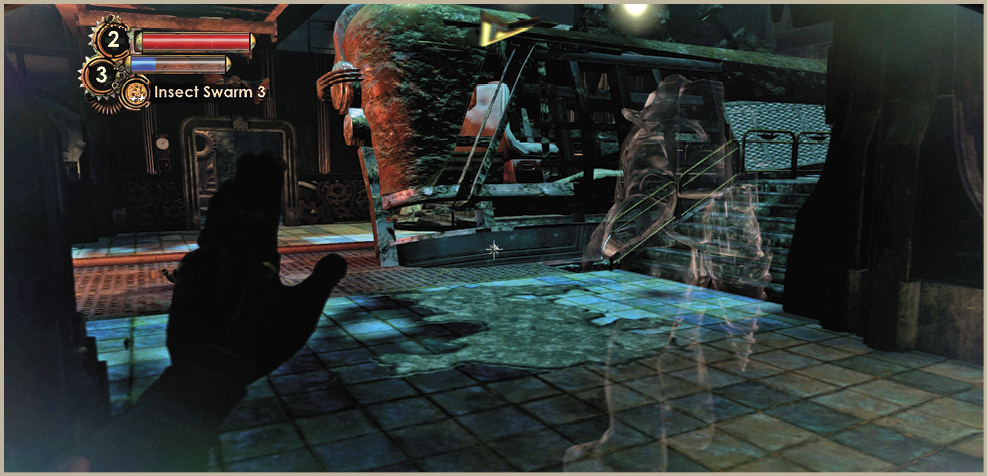
Curious about what’s coming around the corner? If so, park your Big Daddy character in a safe corner and use Scout to go on up ahead and check for danger. The semi-transparent Scout (similar to Decoy in appearance) can wield Plasmids and attack enemies. It can also help set traps with Cyclone Trap, or set up a Decoy. Though you may not use Scout much on Easy or Normal mode, this Plasmid is especially useful on Hard mode when it pays to move on up ahead and thin the herd of enemies before walking into an ambush. A word of warning, though: it can take awhile for your Scout to return if attacked, and the Big Daddy may suffer a lot of damage by the time you regain control of your normal body.
 Scout
Scout
Location: Available at Gatherer’s Garden machines starting in Siren Alley.
Effect: Move through the world as an invisible, Plasmid-wielding Scout!
Danger lurking around every corner? Scout ahead and get the drop on your attackers with your Plasmids! When in doubt—Scout it out!
 Scout 2
Location: Available at Gatherer’s Garden machines starting at Fontaine Futuristics.
Effect: Your invisible Scout can hack Security!
Get the drop on machines before they even see you! This upgrade to Scout can use Plasmids and hack machines for a small EVE cost.
 Security Command
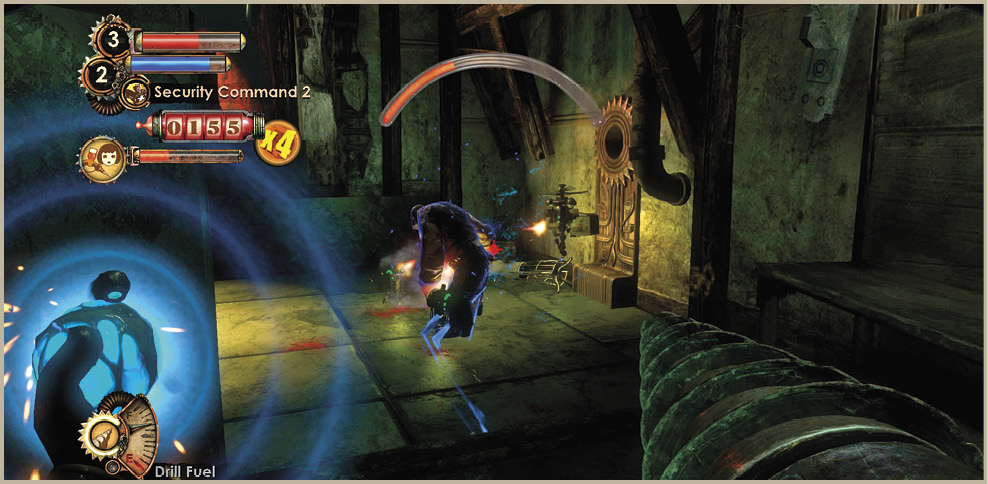
See an enemy up ahead near some un-hacked Security Cameras or Turrets? If so, hit ‘em with Security Command to make the Rapture Security System turn on the ones it’s supposed to protect. Security Command gives you the benefits of effectively hacking Turrets or Security Cameras without physically having to put yourself in harm’s way to do it! Security Command is particularly useful against Rumblers. Keep the Plasmid ready and throw it at the Rumbler as soon as he deploys a Mini-Turret. This technique forces the Mini-Turret to target the Rumbler instead of you! As important as this Plasmid sounds, Security Command 2 and Security Command 3 are far more useful. These upgraded versions give you the ability to summon up to two Security Bots whenever you want, giving you your own personal flying escort. Security Command 3 consumes a lot of EVE, but it is so worth it! Quite possibly the single most important Plasmid in Rapture!
 Security Command
Location: A gift from Eleanor inside the Maintenance Area of Siren Alley.
Effect: Retarget Security Cameras, Security Bots, and Turrets at your whim!
Take control of Rapture Security with Security Command! Enemy Security and your own friendly Security Bots and Turrets start following the blue ball, attacking with deadly force!
 Security Command 2
Location: At Gatherer’s Garden machines starting in Dionysus Park.
Effect: Call in a friend with the added ability to summon Security Bots.
Never be caught without some backup! Press and hold the Fire Plasmid button to summon a Security Bot whenever you wish—no need to set off an alarm!
 Security Command 3
Location: Available at Gatherer’s Garden machines starting at Fontaine Futuristics.
Effect: Summon upgraded Security Bots with Security Command 3!
Now your summoned Bot buddies are the most powerful Security Bots in Rapture! Press and hold the Fire Plasmid button to summon an Elite Bot!
 summon Eleanor
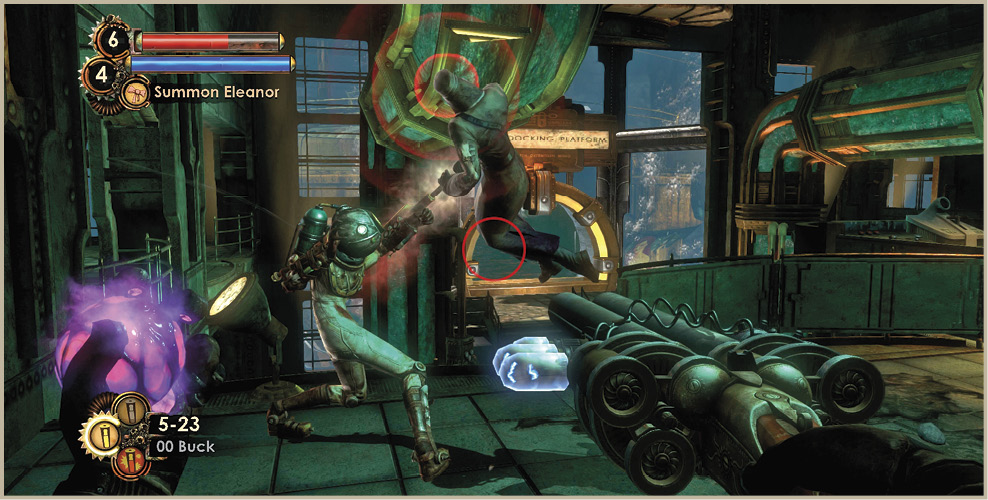
You won’t have a lot of time to experience this heart-warming, enemy-destroying Plasmid, but Summon Eleanor is as special as it sounds. With a flick of your wrist, you can instantly gain a Big Sister partner to fight alongside you for several minutes. She’ll follow you, she doesn’t take damage, and she’ll positively annihilate anything that intends to harm you!
 Summon Eleanor
Location: Eleanor presents this to you before leaving Persephone.
Effect: Summon Eleanor for a little help.
It’s Bring Your Daughter to Work Day! Summon Eleanor in her Big Sister form to help even the odds in overwhelming battles.
 Telekinesis
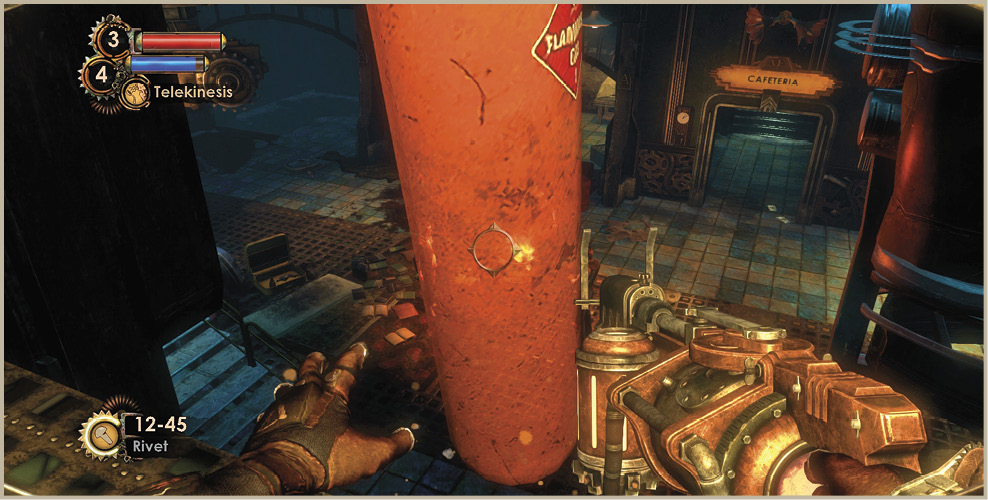
Telekinesis is the ultimate mind over matter Plasmid. This Plasmid not only gives you the ability to bring distant objects within reach through mental power, but you can pick up objects, carry them in front of you (as a shield, perhaps), and then hurl them elsewhere. The most common use for Telekinesis definitely lies in collecting out-of-reach EVE Hypos and First-Aid Kits, but there are other uses as well. For starters, catch the rockets and grenades Big Daddies and Splicers lob at you and throw them back at them! Additionally, you can pick up fuel cylinders or barrels and launch them at enemies to blow them to pieces. Upgrade to Telekinesis 3 to gain the ability to pick up live Splicers (not Brute Splicers) and hold them gently right in front of the barrel of your selected gun. Then, fling their corpse at other enemies!
 Telekinesis
Location: Inside the Jet Postal Office near the Drafting Room in Atlantic Express Depot.
Effect: Pulls an object to you, then hurls it (even enemy grenades!). Also useful for holding objects as a shield, or grabbing objects out of reach.
Pick up big stuff with your mind. Throw them at your enemies. What else do you need to know?
 Telekinesis 2
Location: At Gatherer’s Garden machines starting in Pauper’s Drop.
Effect: Stronger Telekinesis allows you to throw harder for more damage!
Throw objects with more force! Turn the world into your weapon!
 Telekinesis 3
Location: Available at Gatherer’s Garden machines starting in Inner Persephone.
Effect: Pick up live enemies and throw them around!
Now you can pick up smaller foes while they are still alive! Release the Fire Plasmid button halfway to move them in front of your reticule.
 Winter Blast
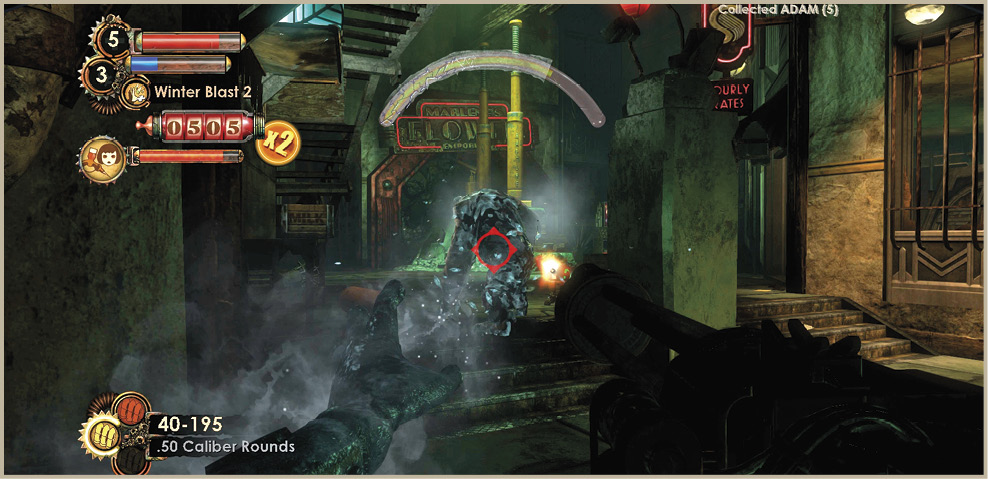
Winter Blast is a powerful Plasmid that not only can be used to stop an enemy in its tracks, but also gives you the opportunity to score what amounts to an instant-kill. Hit the enemy with Winter Blast to freeze it solid for a brief period of time. Although this attack doesn’t actually inflict any damage on the enemy, you can rush up to the frozen foe and shatter it into a thousand pieces with a melee strike or with a blast from your Shotgun. A frozen health meter of sorts appears over the frozen enemy. This is the meter that governs whether or not the enemy is going to shatter. Grab the Shotgun and open fire to completely obliterate the frozen enemy. Winter Blast 2 is a valuable Plasmid in that it really freezes enemies solid, but Winter Blast 3 consumes EVE so rapidly that you should really only use it when you are under heavy assault. Winter Blast 2 or 3 leaves a “lock box” for you to search, even after an enemy shatters.
 Winter Blast
Location: At Gatherer’s Garden machines starting in Pauper’s Drop.
Effect: Freeze your foes in place. Shatter them into a thousand pieces.
Don’t get caught without this powerful self-defense tool at the ready. Give your foes the cold shoulder with Winter Blast!
 Winter Blast 2
Location: At Gatherer’s Garden machines starting in Siren Alley.
Effect: Freeze your foes in a solid ice block!
Keep your foes on ice even longer! Press and hold the Fire Plasmid button to charge up a freezing ice block.
 Winter Blast 3
Location: Available at Gatherer’s Garden machines starting in Fontaine Futuristics.
Effect: Freeze and shatter multiple foes with continuous Icicle Assault ability!
Now every Winter Blast puts foes in an ice block. Press and hold the Fire Plasmid button to charge up a continuous Icicle Assault!