
UFC Undisputed 3 Guide Gameplay Positions and Moves
Clinch Positions
The following positions are available when both fighters are standing and grappling in the clinch.
While some clinch positions are considered neutral, favoring neither fighter, many others give one fighter a distinct advantage, putting the other fighter on defense.
Let’s review every clinch position you might find yourself in.
Single Collar Tie
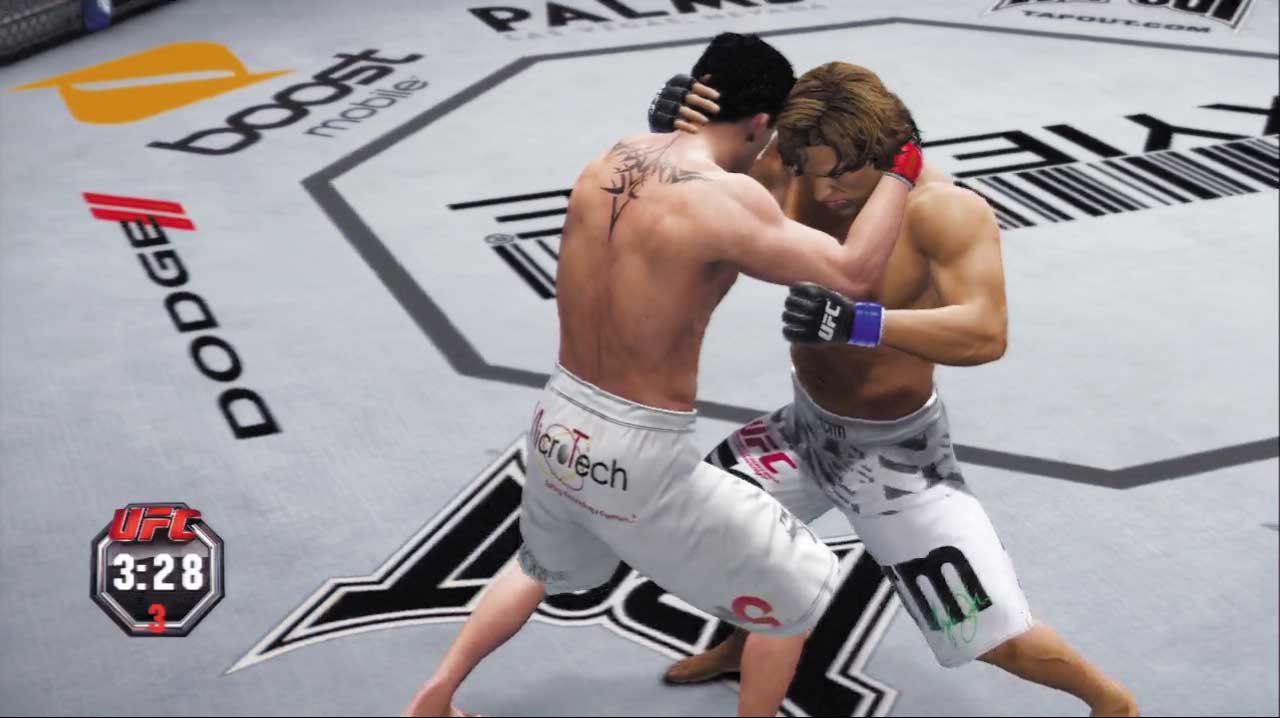
The Single Collar Tie is a neutral clinch position that favors strikers. Strong strikes can be thrown from this position, making it a more effective clinch position to strike from than other neutral clinch, the Over/Under Hook.
In the Single Collar Tie, both fighters are only one minor transition away from reaching the Muay Thai Clinch, Offense position, from which even nastier strikes can be thrown!
Attaining the Position
- Execute a minor transition from the Over/Under Hook clinch.
- Execute a minor transition from the Double Underhook, Offense clinch.
- Execute a minor transition from the Double Underhook, Defense clinch.
Available Strikes
- Strong strikes
- Strong strikes to body
- Strong strikes to legs
- Technique strikes (if possible)
Available Transitions
- Minor transition to Muay Thai Clinch, Offense
- Major transition to Over/Under Hook
- Takedown
Available Defense
- Strike defense high
- Strike defense low
- Grapple block
- Transition reversal
- Kick counter grapple
Single Collar Tie Cage, Offense
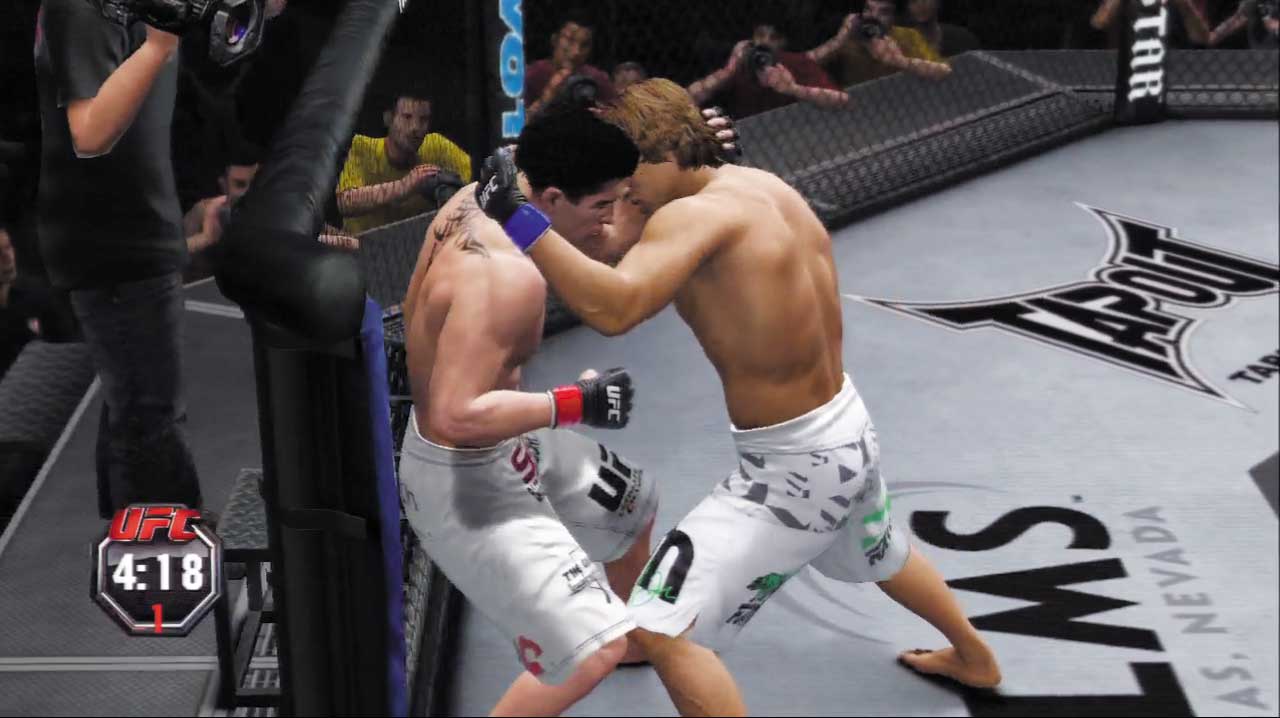
Like all clinch positions, the Single Collar Tie becomes even more effective when the opponent’s back is pressed against the cage. Now your strikes will carry more weight and land with greater impact, causing more damage with each blow.
The opponent’s strikes also become much weaker, and are nothing to fear.
Attaining the Position
- Move forward in the Single Collar Tie clinch and press the opponent’s back against the cage.
- Transition to the Single Collar Tie clinch when the opponent’s back is near the cage.
- Execute a minor transition from Over/Under Hook Cage, Offense.
Available Strikes
- Strong strikes
- Strong strikes to body
- Strong strikes to legs
- Technique strikes (if possible)
Available Transitions
- Minor transition to Muay Thai Clinch Cage, Offense
- Major transition to Over/Under Hook Cage, Offense
- Takedown
- Escape to Both Standing, Striking Range
- Technique transition (if possible)
Available Defense
- Strike defense high
- Strike defense low
- Grapple block
- Transition reversal
Single Collar Tie Cage, Defense
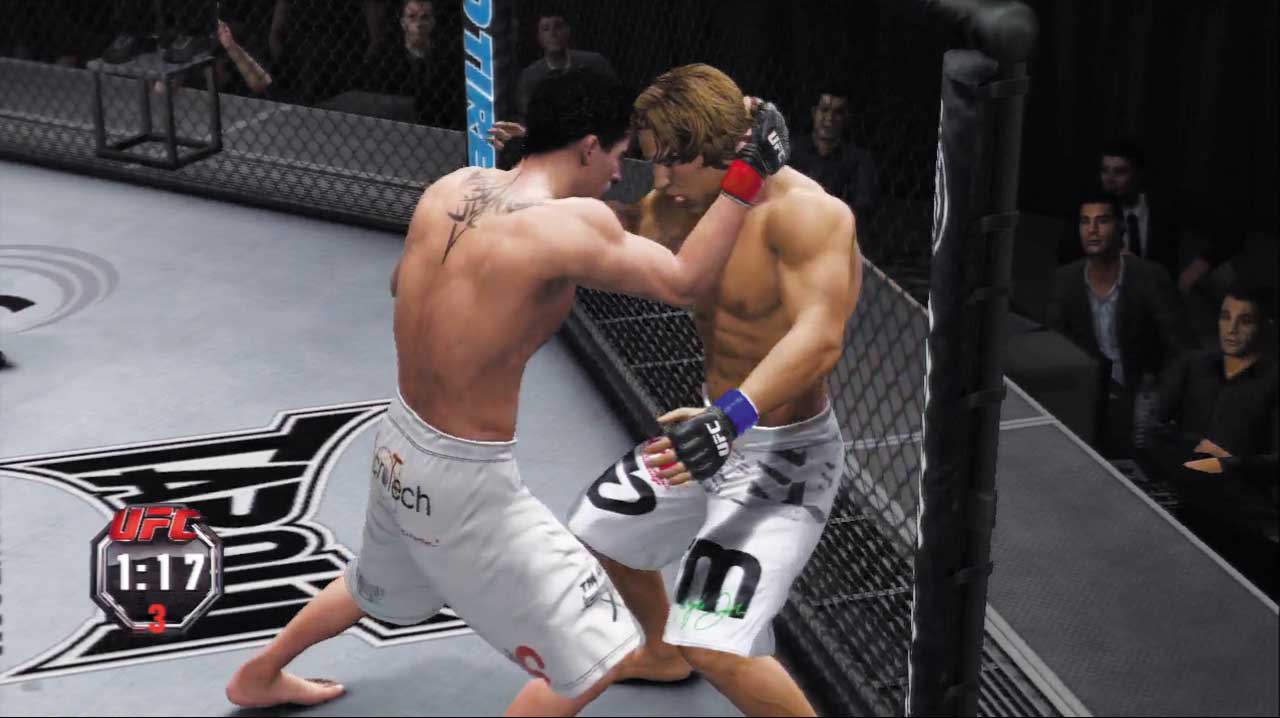
Being pinned against the cage puts you at a disadvantage when fighting in the Single Collar Tie clinch. Your striking power is significantly reduced in this position, while your opponent’s strikes come with greater force.
When stuck in this unfavorable position, defend against strikes and look for a chance to transition out.
Attaining the Position
- You end up in this position when the opponent presses your back against the cage in the Single Collar Tie.
- Execute a minor transition from Muay Thai Clinch Cage, Defense.
- Execute a minor transition from Over/Under Hook Cage, Defense.
Available Strikes
- Quick strikes
- Quick strikes to body
- Quick strikes to legs
Available Transitions
- Minor transition to Over/Under Hook Cage, Offense
- Major transition to Both Standing, Striking Range
Available Defense
- Strike defense high
- Strike defense low
- Grapple block
- Transition reversal
- Kick counter grapple
Muay Thai Clinch, Offense
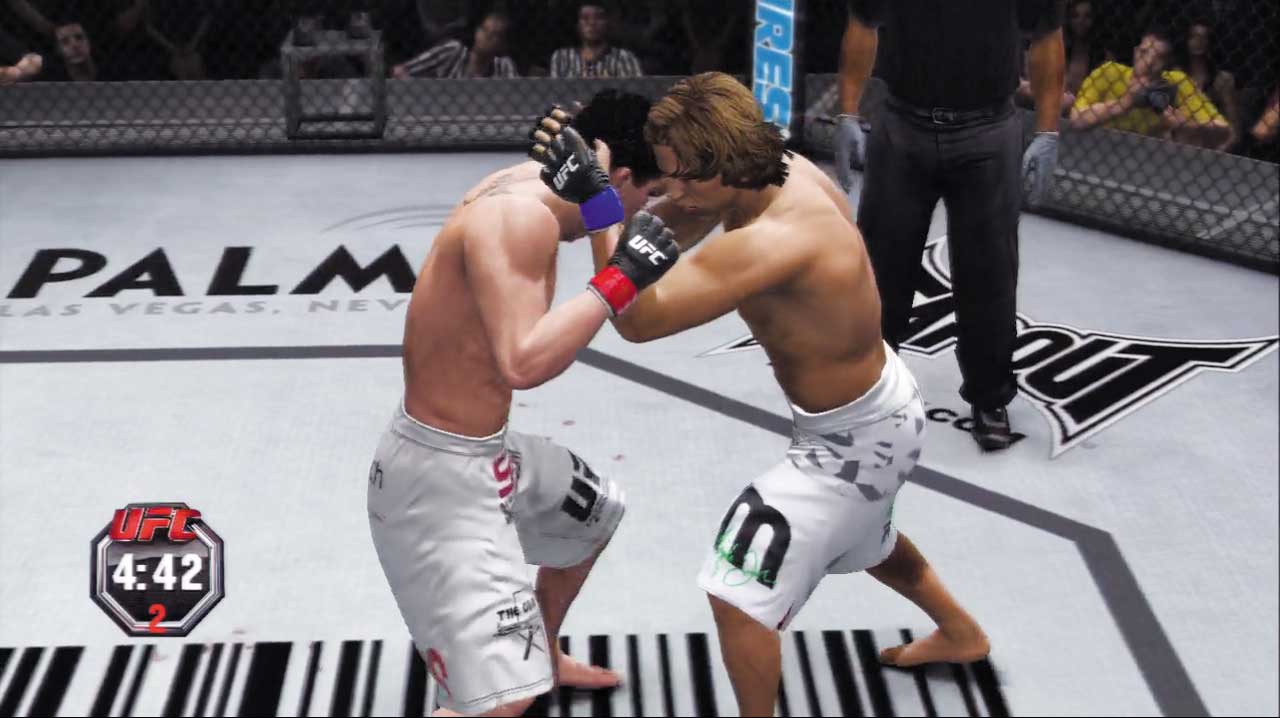
This dominant offensive clinch position heavily favors strikers—use it to really rough up your rival!
A broad selection of strong strikes can (and should) be thrown from here, and with little fear of retaliation—the defending opponent’s striking will be largely ineffective.
Skilled Muay Thai artists can also whip their opponents around by the head in this position, following up each whip with a powerful strike that devastates their foes!
Attaining the Position
- Skilled Muay Thai artists can perform a technique transition directly into the Muay Thai Clinch, Offense position from the Both Standing, Clinch Range position.
- Execute a minor transition from the Single Collar Tie clinch.
Available Strikes
- Strong strikes
- Strong strikes to body
- Strong strikes to legs
- Technique strikes (if possible)
Available Transitions
- Strong whip (if possible)
- Escape to Both Standing, Striking Range
- Takedown
Available Defense
- Grapple block
- Transition reversal
Muay Thai Clinch, Defense
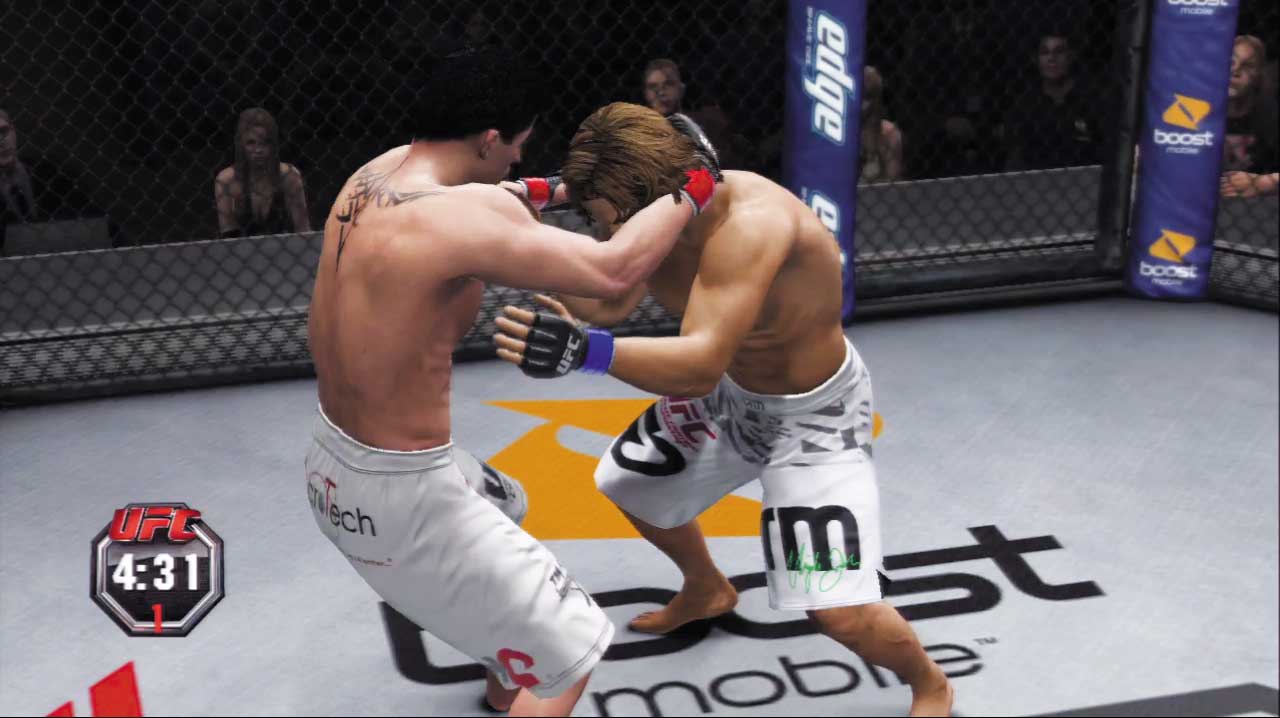
Getting caught in your opponent’s Muay Thai Clinch is no picnic—and neither is escaping it.
You’re certain to eat a few power shots when you’re stuck in this disastrous position, so try to avoid it altogether by maintaining your striking distance and blocking the opponent’s attempts to clinch.
If your rival is throwing lots of knees, a well-timed kick counter grapple may be your best hope of escaping this clinch.
Attaining the Position
You end up in this position when the opponent transitions to the Muay Thai Clinch, Offense position.
Available Strikes
- Quick strikes
- Quick strikes to body
- Quick strikes to legs
Available Transitions
- Minor transition to Single Collar Tie
- Technique transition (if possible)
Available Defense
- Strike defense high
- Strike defense low
- Grapple block
- Transition reversal
- Kick counter grapple
Muay Thai Clinch Cage, Offense
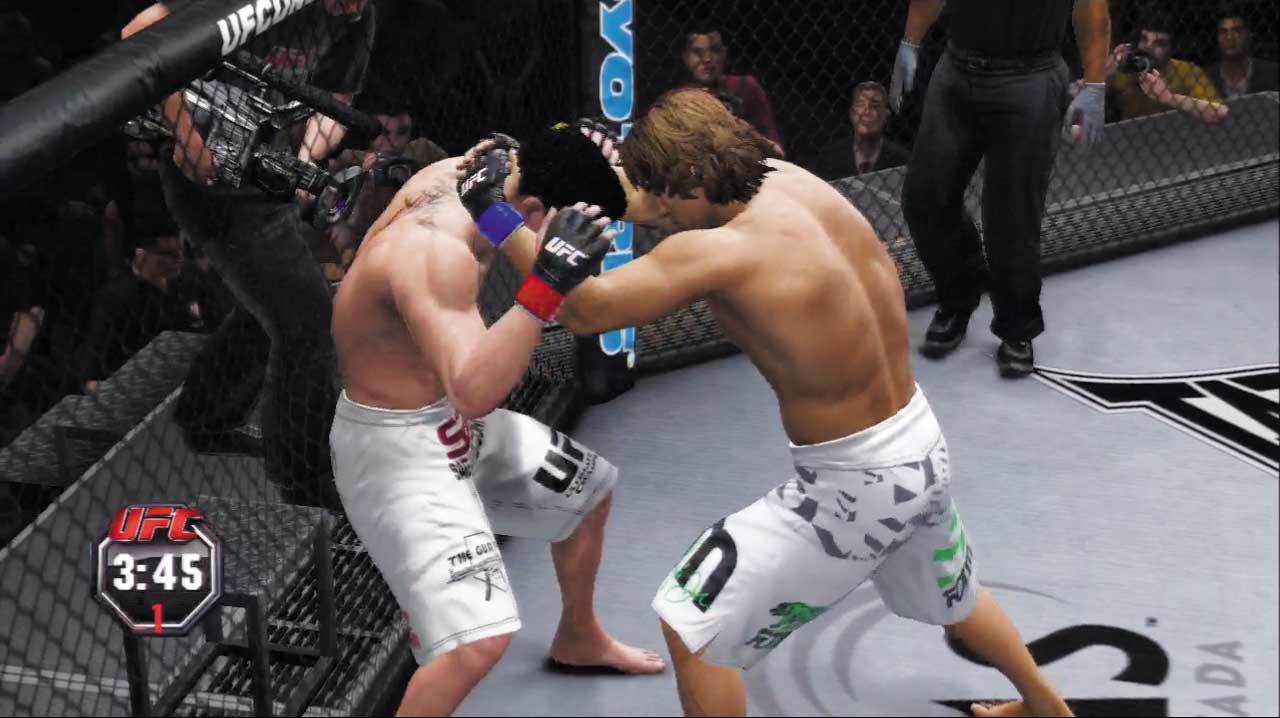
What’s better than locking in a Muay Thai Clinch? Stuffing your opponent against the cage afterward!
Every lethal strike you throw lands with crushing force in this dominant position, so unleash a few technique strikes and watch your opponent crumble.
Attaining the Position
- Move forward in the Muay Thai Clinch, Offense position and press the opponent’s back against the cage.
- Skilled Muay Thai specialists can use a technique transition to go directly into the Muay Thai Clinch Cage, Offense position when the opponent is standing near the cage.
- Execute a minor transition from the Single Collar Tie Cage, Offense clinch.
Available Strikes
- Strong strikes
- Strong strikes to body
- Strong strikes to legs
- Technique strikes (if possible)
Available Transitions
- Strong whip (if possible)
- Escape to Both Standing, Striking Range
- Takedown
Available Defense
- Grapple block
- Transition reversal
Muay Thai Clinch Cage, Defense
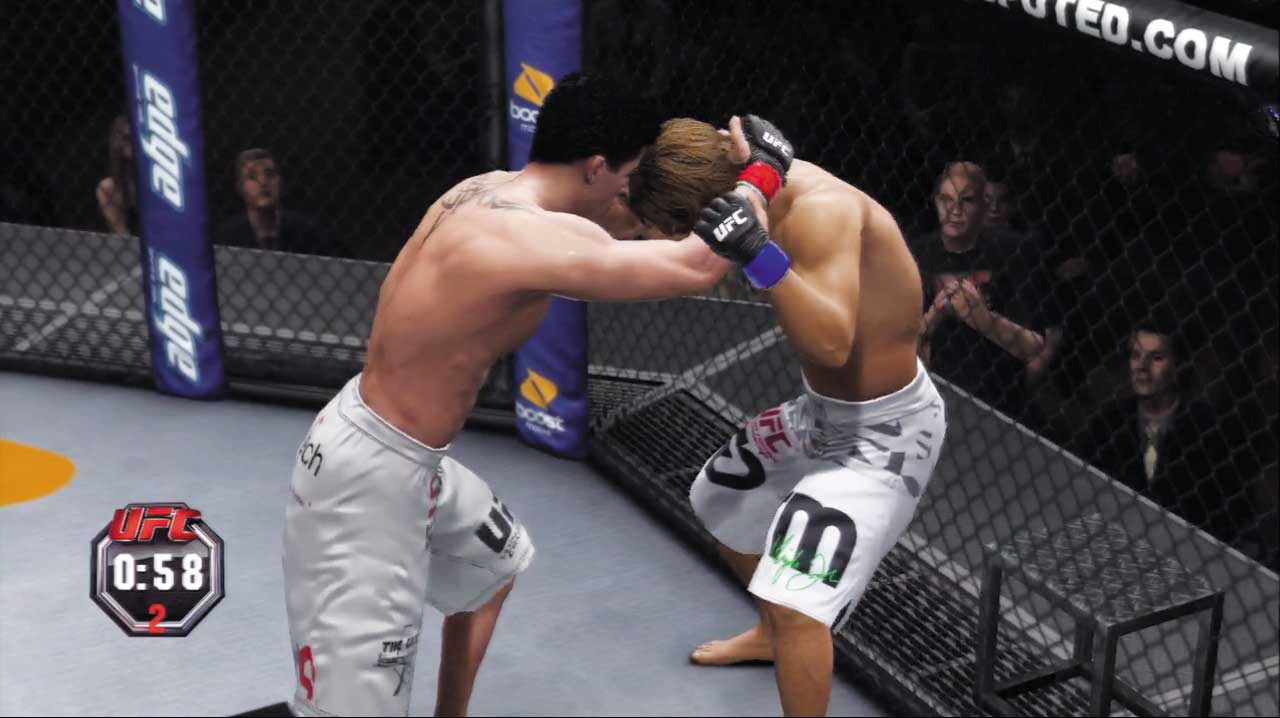
Keep away from the cage to avoid winding up in this most unfortunate position, where you’re certain to suffer serious damage from the opponent’s overwhelming clinch strikes.
Only skilled grapplers can instantly transition out of this forceful clinch—others must pummel to the Single Collar Tie Cage, Defense position first, prolonging their agony. Again, a timely kick counter grapple can be a lifesaver here!
Attaining the Position
- You end up in this position when the opponent transitions to the Muay Thai Clinch Cage, Offense position.
Available Strikes
- Quick strikes
- Quick strikes to body
- Quick strikes to legs
Available Transitions
- Minor transition to Single Collar Tie Cage, Defense
- Technique transition (if possible)
Available Defense
- Strike defense high
- Strike defense low
- Grapple block
- Transition reversal
- Kick counter grapple
Over/Under Hook
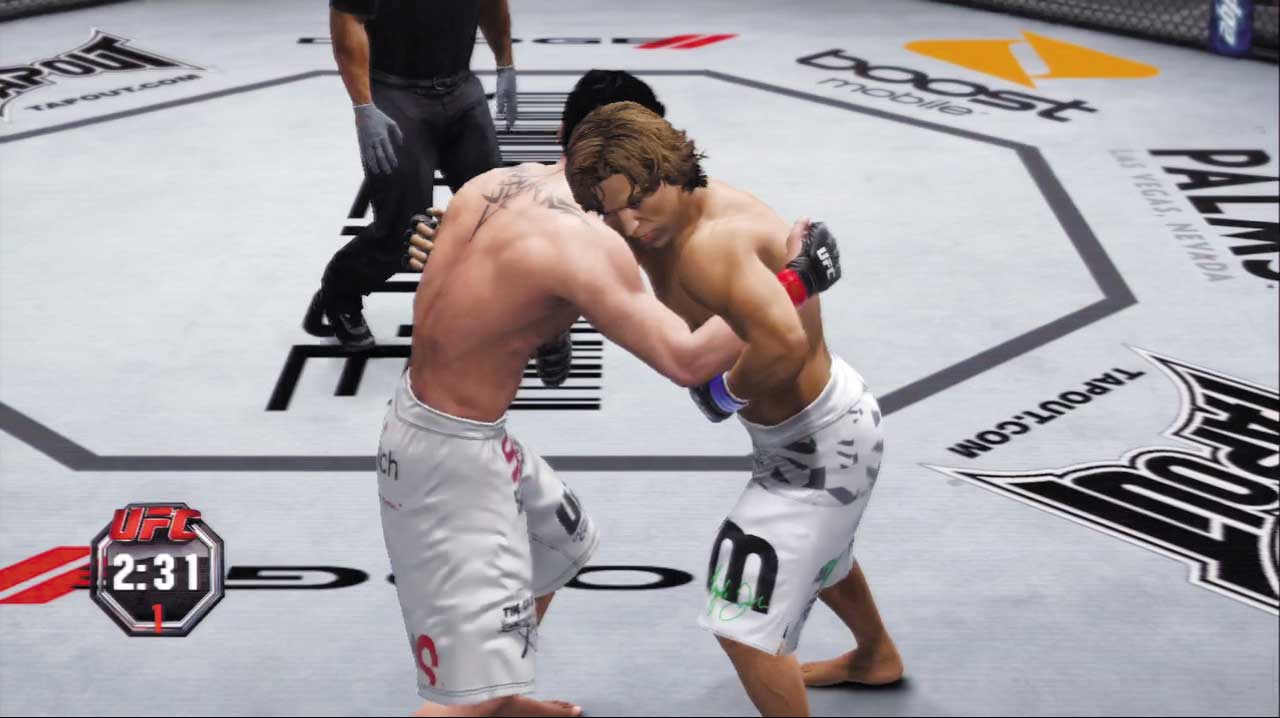
The Over/Under Hook is a neutral clinch position that favors grapplers. Takedowns are easier to complete in this position compared to the other neutral clinch, Single Collar Tie.
In the Over/Under Hook clinch, both fighters are only one minor transition away from reaching the Double Underhook, Offense position—an even more dangerous grappling clinch!
Attaining the Position
- Execute a major transition from the Single Collar Tie clinch.
- You end up in this position when the opponent transitions out of your Double Underhook, Offense clinch.
- You end up in this position when the opponent transitions out of your Single Collar Tie clinch, Offense position.
Available Strikes
- Quick strikes to body
- Quick strikes to legs
Available Transitions
- Minor transition to Single Collar Tie
- Major transition to Double Underhook, Offense
- Technique transition (if possible)
- Takedown
Available Defense
- Grapple block
- Transition reversal
Over/Under Hook Cage, Offense
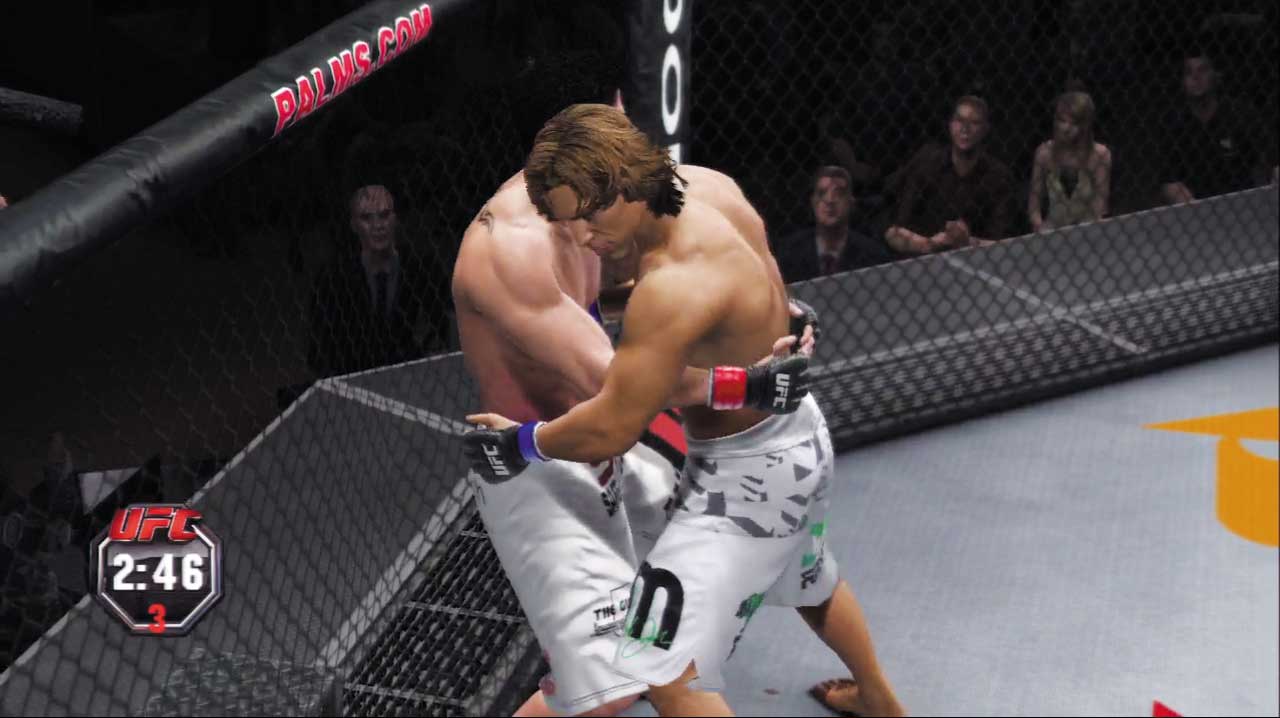
You may find yourself in the Over/Under Hook clinch with the opponent’s back pressed against the cage.
You enjoy even greater grappling strength in this position and may unleash more effective strikes, including painful foot stomps to the opponent’s vulnerable feet.
These rare strikes can quickly add up, so take the opportunity to hammer the opponent’s toes with foot stomps.
Attaining the Position
- Move forward in the Over/Under Hook clinch and press the opponent’s back against the cage.
- Execute a major transition from Single Collar Tie Cage, Offense.
- You end up in this position when the opponent transitions out from your Double Underhook Cage, Offense clinch.
Available Strikes
- Quick strikes
- Strong strikes to body
- Strong strikes to legs
- Strong strikes to feet
- Technique strikes (if possible)
Available Transitions
- Minor transition to Single Collar Tie Cage, Offense
- Major transition to Double Underhook Cage, Offense
- Technique transition (if possible)
- Escape to Both Standing, Striking Range
- Takedown
Available Defense
- Grapple block
- Transition reversal
Over/Under Hook Cage, Defense
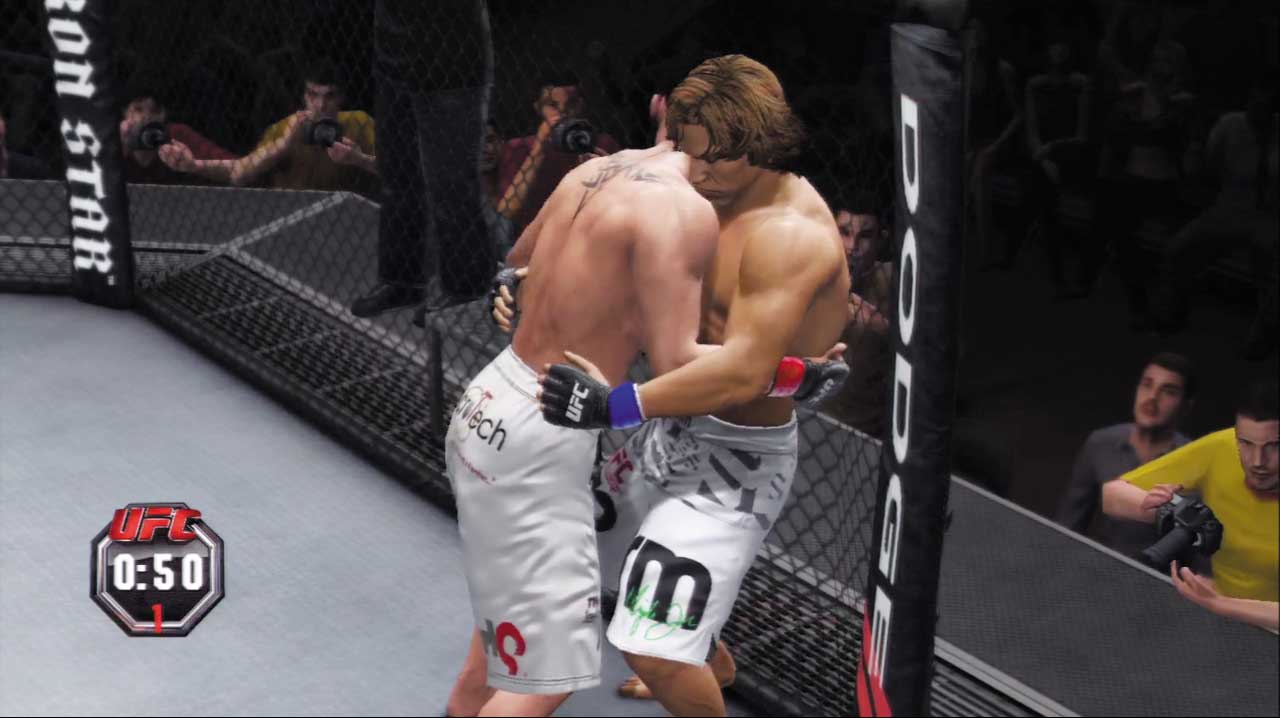
You won’t often find yourself in this position, but it’s possible that the opponent may press you up against the cage while vying for dominance in the Over/Under Hook clinch.
Don’t let your rival improve his position any further—execute a major transition out to a standing Over/Under Hook clinch to even the odds!
Attaining the Position
- You end up in this position when the opponent transitions to the Over/Under Hook Cage, Offense position.
- Execute a major transition from Double Underhook Cage, Defense.
- Execute a major or minor transition from Body Lock Cage, Defense.
- Execute a minor transition from Single Leg Clinch Cage, Defense.
Available Strikes
- Quick strikes to body
- Quick strikes to legs
Available Transitions
- Minor transition to Single Collar Tie Cage, Defense
- Major transition to Over/Under Hook
Available Defense
- Grapple block
- Transition reversal
Double Underhook, Offense
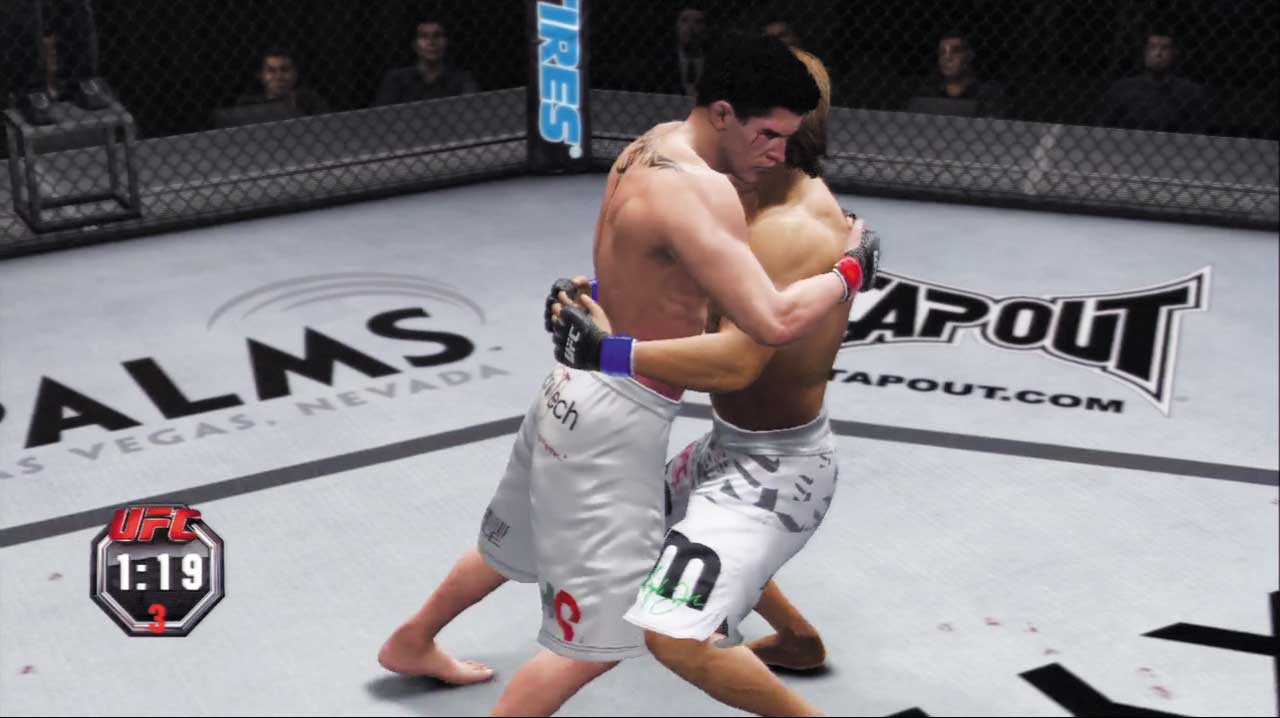
Fighters commonly enter this clinch after succeeding with a normal clinch attempt.
Because both arms are wrapped securely around the opponent’s midsection, this strong clinch limits your offensive striking, but it greatly increases your takedown prowess.
Score a big takedown from this clinch and you’ll commonly end up in the Side Control, Top position—a very advantageous position on the ground.
Attaining the Position
- Clinch normally with the opponent.
- Execute a major transition from the Over/Under Hook clinch.
- This occurs when the opponent transitions out of your Double Underhook Cage, Offense clinch.
Available Strikes
- Quick strikes to body
- Quick strikes to legs
Available Transitions
- Minor transition to Body Lock, Offense
- Major transition to Back Clinch, Offense
- Technique transition (if possible)
- Escape to Both Standing, Striking Range
- Takedown
Available Defense
- Grapple block
- Transition reversal
Double Underhook, Defense
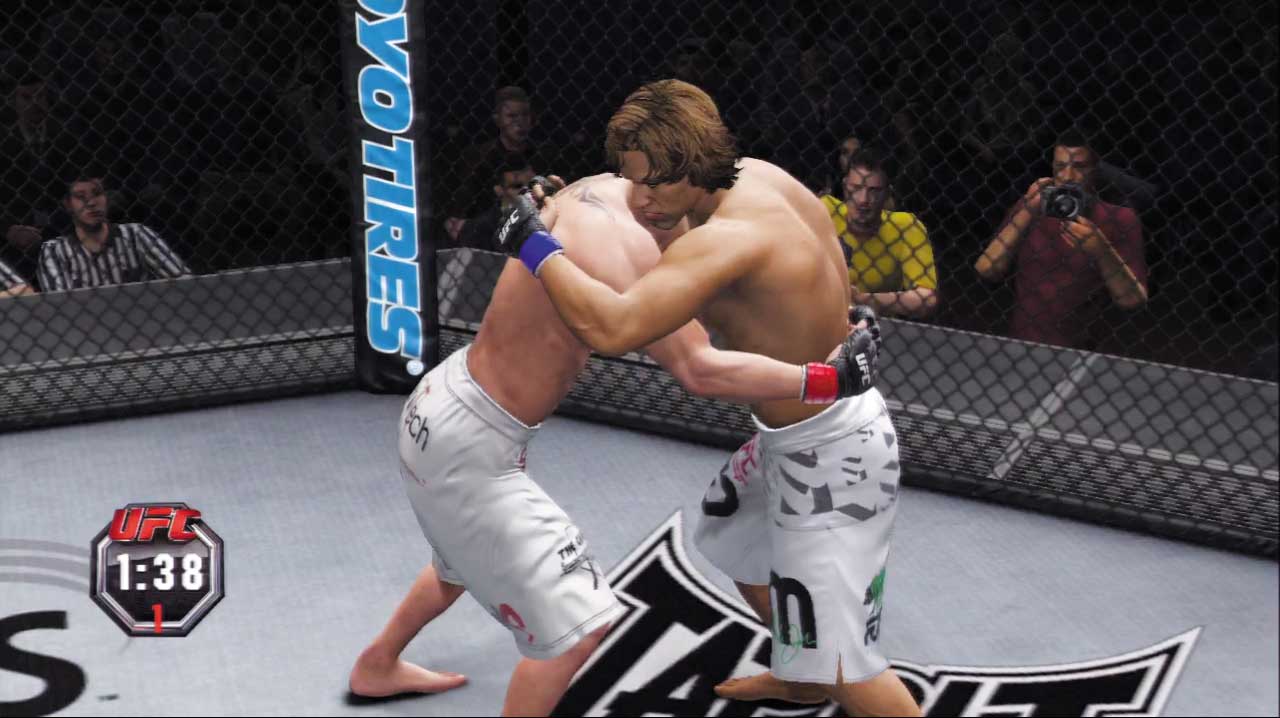
Beware of takedowns when the opponent grabs you up in a Double Underhook clinch—their takedown ability is significantly boosted when you’re caught in this disadvantageous position.
Fortunately, you don’t need to worry about your rival’s Quick strikes in this clinch—focus on improving your position and transitioning to a neutral stance.
Attaining the Position
- You end up in this position when the opponent transitions to the Double Underhook, Offense clinch.
- Execute a major transition from the Double Underhook Cage, Defense clinch.
Available Strikes
- Quick strikes to body
- Quick strikes to legs
Available Transitions
- Minor transition to Single Collar Tie
- Major transition to Over/Under Hook
- Technique transition (if possible)
Available Defense
- Grapple block
- Transition reversal
Double Underhook Cage, Offense
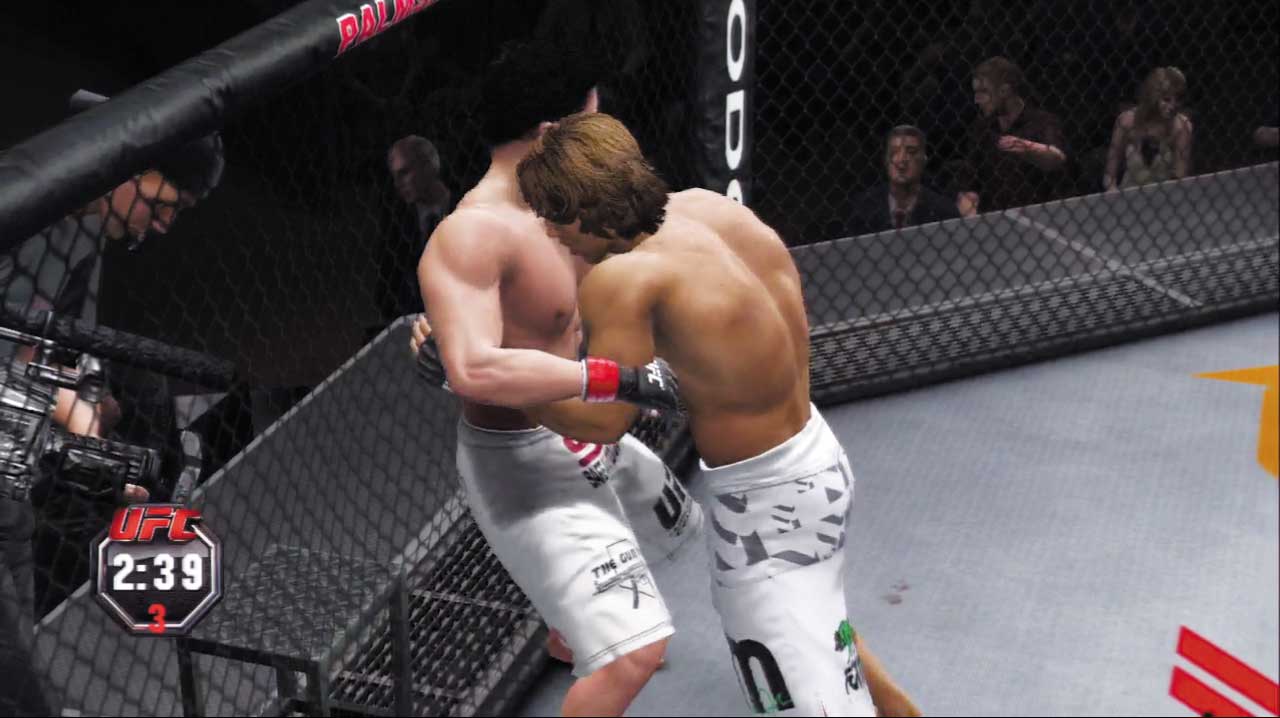
Double Underhook clinches are even more effective when you manage to press the opponent’s back against the cage. This position allows for rare yet painful foot stomps to be thrown to the defending opponent’s feet.
Soften up your rival with respectable clinch strikes such as these before planting them on the mat with a big takedown that lands you in dominant ground position.
Attaining the Position
- Clinch normally with the opponent when his back is near the cage.
- Execute a major transition from the Over/Under Hook Cage, Offense clinch.
- Execute a major transition from the Single Leg Clinch Cage, Offense position.
- Execute a minor transition from the Double Leg Clinch Cage, Offense position.
Available Strikes
- Quick strike
- Strong strikes to legs
- Strong strikes to feet
- Technique strikes to body (if possible)
Available Transitions
- Minor transition to Body Lock Cage, Offense
- Technique transition (if possible)
- Escape to Both Standing, Striking Range
- Takedown
Available Defense
- Grapple block
- Transition reversal
Double Underhook Cage, Defense
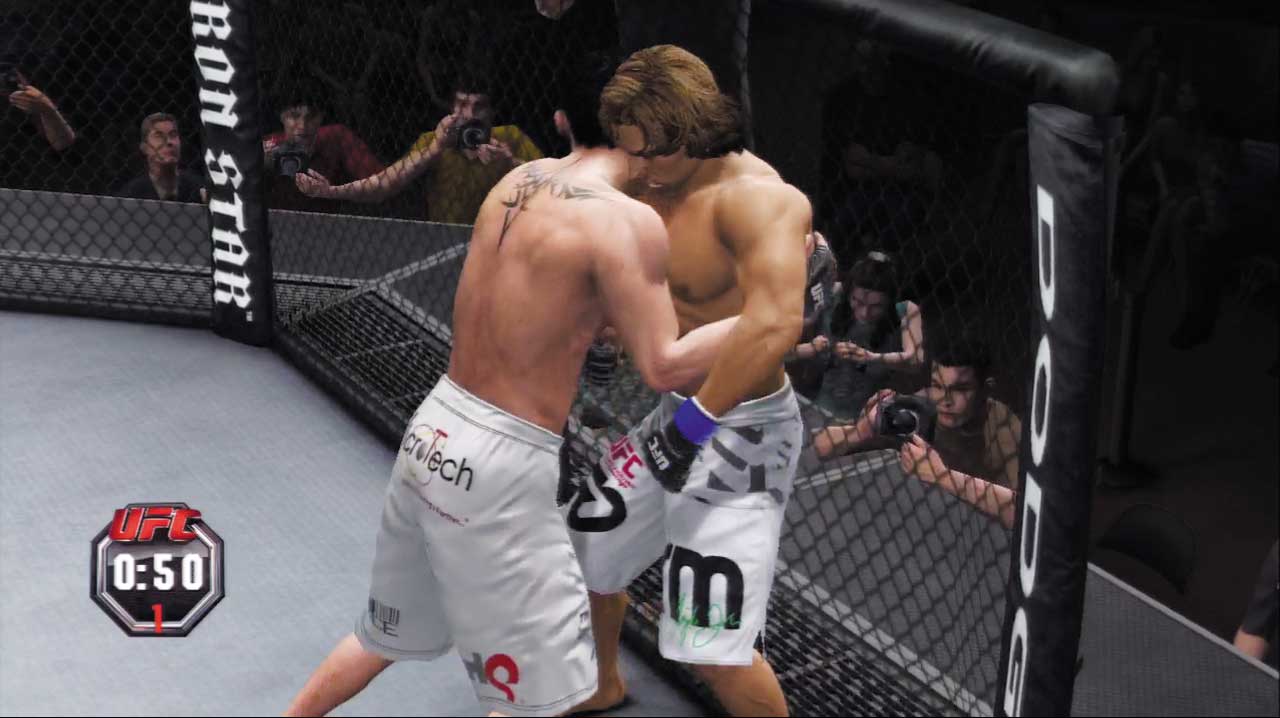
Your adversary’s strikes carry more weight when you’re stuffed against the cage in a defensive Double Underhook clinch, but you can’t let that worry you—strive to block their dangerous takedowns as you struggle to transition and improve your desperate position.
Attaining the Position
- You end up in this position when the opponent transitions to the Double Underhook Cage, Offense clinch.
- Execute a minor transition from the Double Leg Clinch Cage, Defense position.
Available Strikes
- Quick strikes to body
- Quick strikes to legs
Available Transitions
- Minor transition to Over/Under Hook Cage, Defense
Available Defense
- Grapple block
- Transition reversal
Body Lock, Offense
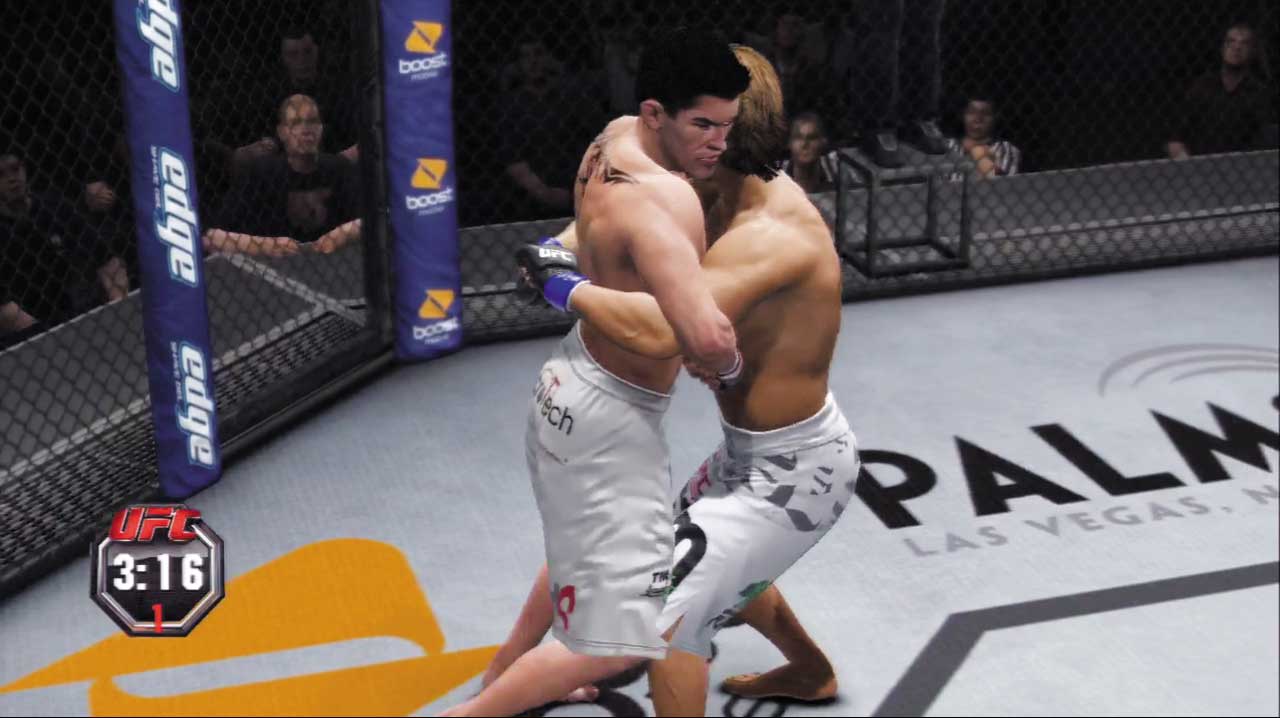
Takedowns are all but guaranteed once you’ve transitioned to this powerful grappling clinch.
Even without technique transitions, you have additional takedown options here:
drop down for a traditional takedown and end up in Side Control, or perform a minor transition to quickly throw the opponent, landing in top position on the ground. (The throw is easier to pull off, but the resulting ground position isn’t as dominant.)
Strong strikes can be thrown to the opponent’s body in the Body Lock position as well, giving you more options than you have in the Double Underhook clinch.
Attaining the Position
- Execute a minor transition from the Double Underhook, Offense clinch.
Available Strikes
- Strong strikes to body
- Quick strikes to legs
Available Transitions
- Minor transition throw to Open Guard, Top
- Technique transition (if possible)
- Escape to Both Standing, Striking Range
- Takedown
Available Defense
- Grapple block
- Transition reversal
Body Lock, Defense
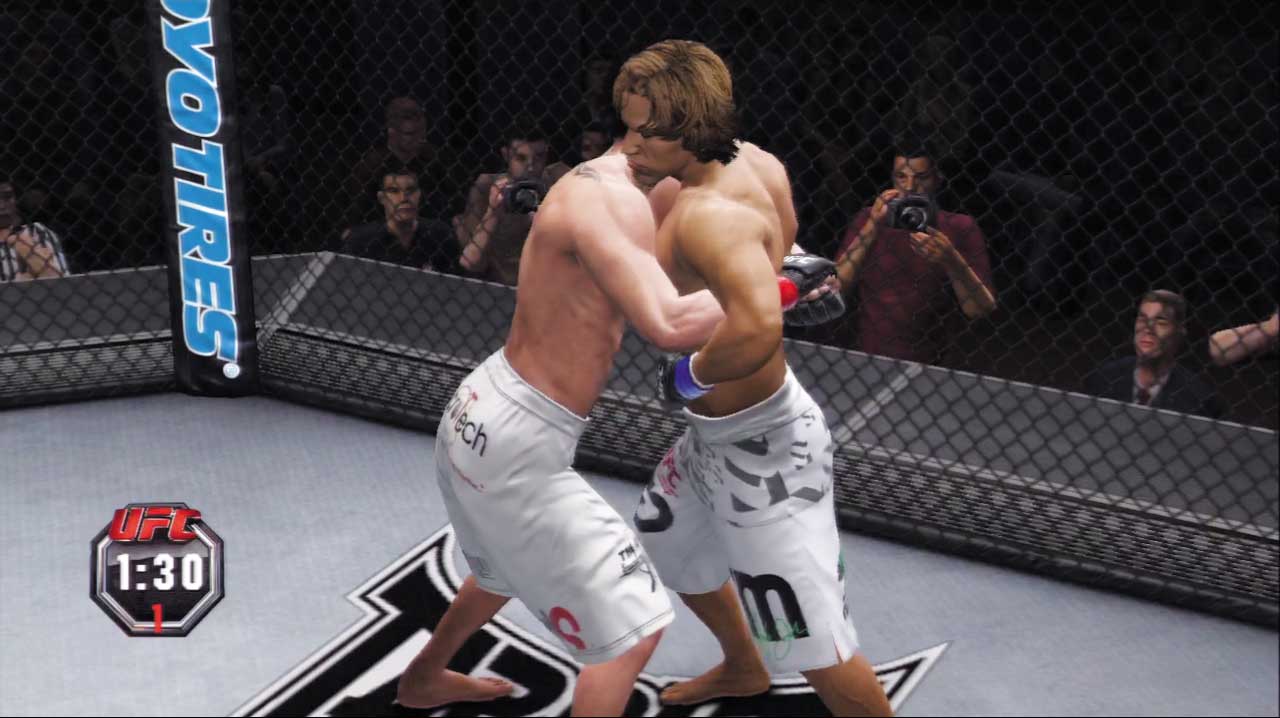
Your opponent gains additional takedown options when transitioning from Double Underhooks to a Body Lock, so blocking takedown attempts becomes all the more vital.
Don’t worry about the strikes you’re taking, even though they’ll eventually add up—you’re in severe danger of being dumped on your back, so strive to prevent takedowns and transition to a better position.
Attaining the Position
- You end up in this position when the opponent transitions to the Body Lock, Offense clinch.
Available Strikes
- Quick strikes to body
- Quick strikes to legs
Available Transitions
- Minor transition to Single Collar Tie
Available Defense
- Grapple block
- Transition reversal
Body Lock Cage, Offense
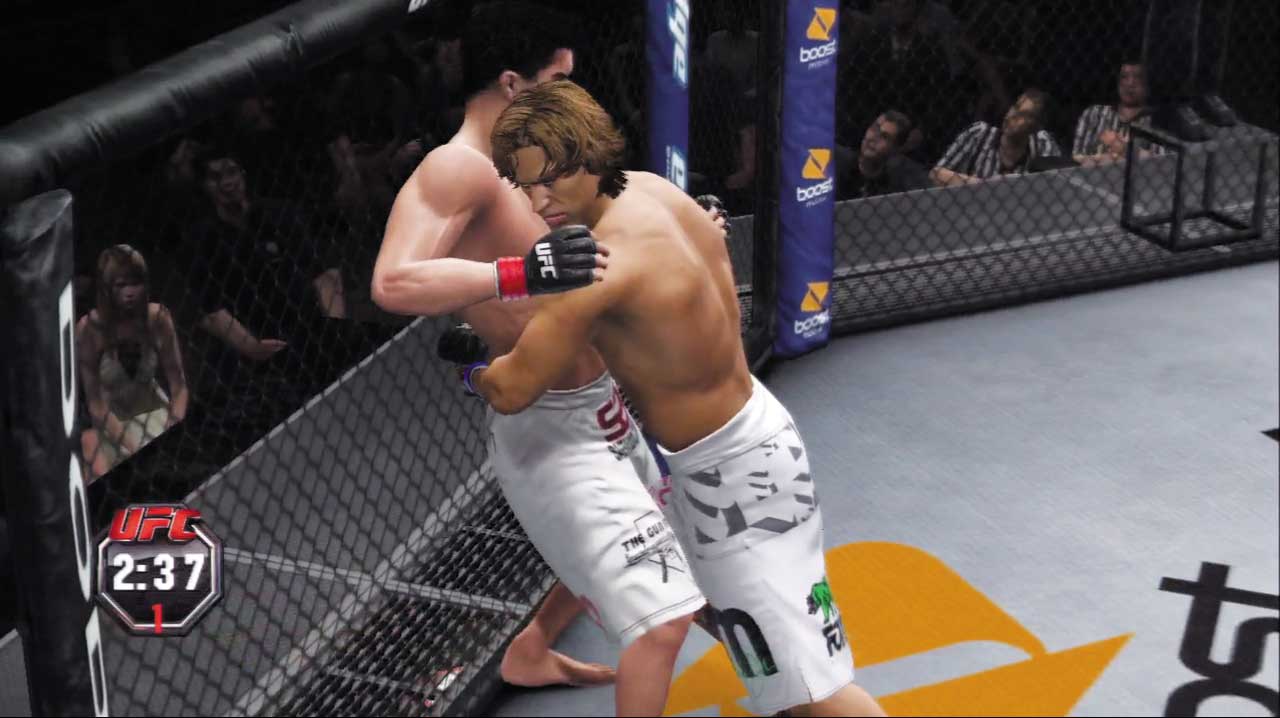
Grapplers can exploit the cage to make their Body Lock clinches all the more dangerous. Takedowns are still your bread and butter in this position, and they’re even easier to complete than they are in a normal Body Lock.
Also, as with a regular Body Lock, you have a few options when it comes to bringing your opponent to the mat: quick throws, traditional takedowns, and possibly even technique transitions (if your fighter is able).
Attaining the Position
- Move forward in the Body Lock, Offense clinch and press the opponent’s back against the cage.
- Execute a minor transition from the Double Underhook Cage, Offense clinch.
Available Strikes
- Quick strikes to body
- Strong strikes to legs
- Strong strikes to feet
- Technique strikes (if possible)
Available Transitions
- Minor transition throw to Open Guard, Top
- Technique transition (if possible)
- Escape to Both Standing, Striking Range
- Takedown
Available Defense
- Grapple block
- Transition reversal
Body Lock Cage, Defense
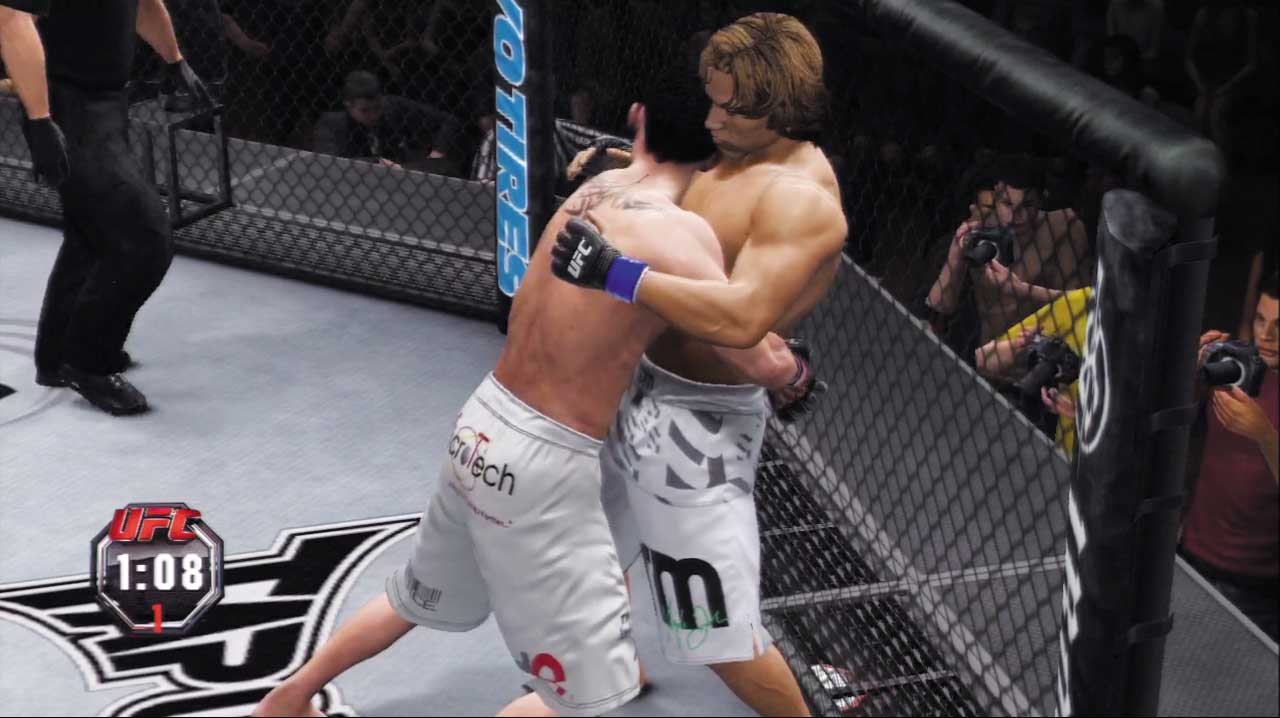
You’re in extreme danger of being taken down when your back’s against the cage in a defensive Body Lock position. Block the opponent’s takedown attempts at all costs as you look for chances to transition and improve your desperate position.
Attaining the Position
- You end up in this position when the opponent transitions to the Body Lock Cage, Offense clinch.
Available Strikes
- Quick strikes
- Quick strikes to body
- Quick strikes to legs
Available Transitions
- Minor transition to Over/Under Hook Cage, Defense
Available Defense
- Grapple block
- Transition reversal
Back Clinch, Offense
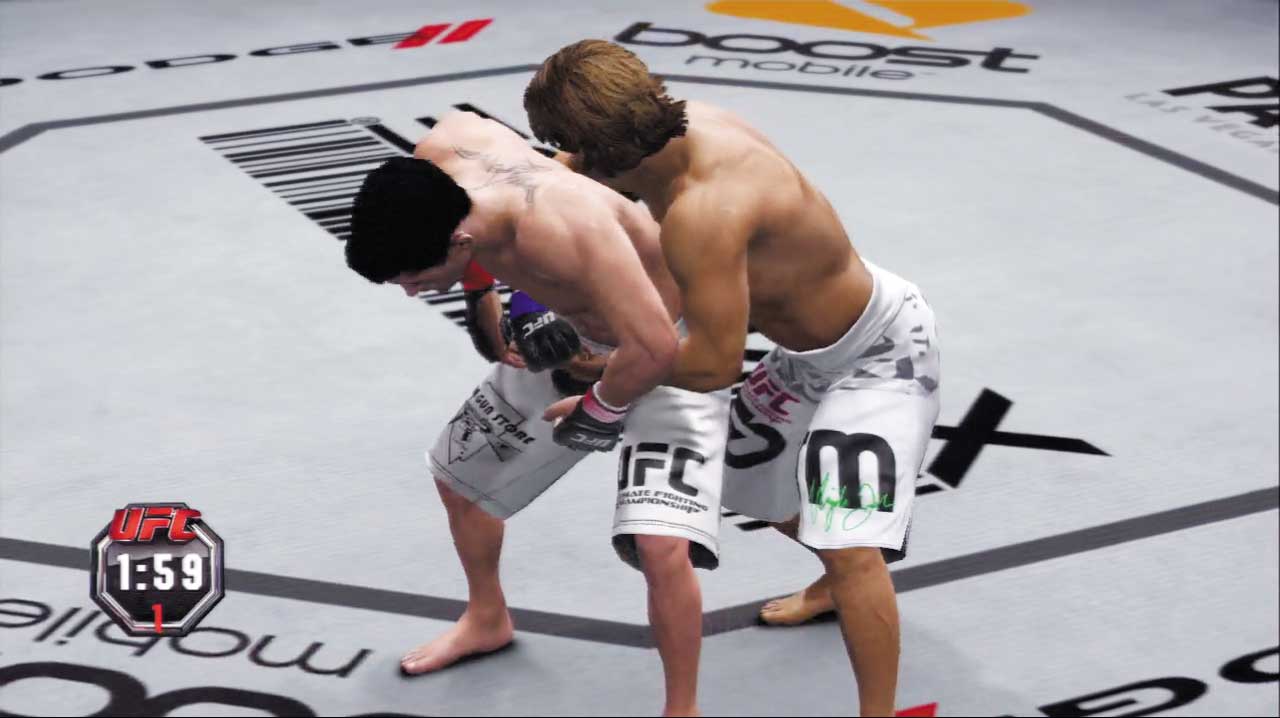
Taking the opponent’s back gives you a strong positional advantage, even when fighting in the clinch. From here, you’re able to perform a powerful throw that lands you in Back Side Control, Top on the ground—just one transition away from attaining the Back Mount!
Strong strikes can also be thrown to the opponent’s legs in the Back Clinch, but it’s the throws from this position that really make an impact on a fight—especially for those who like to set up chokes and submissions from behind.
You can also execute a minor transition back to Double Underhook, Offense from this position—something that can’t be done from the Body Lock, Offense clinch.
Attaining the Position
- Execute a major transition from the Double Underhook, Offense clinch.
Available Strikes
- Strong strikes to legs
Available Transitions
- Minor transition to Double Underhook, Offense
- Major transition throw to Back Side Control, Top
- Escape to Both Standing, Striking Range
Available Defense
- Grapple block
- Transition reversal
Back Clinch, Defense
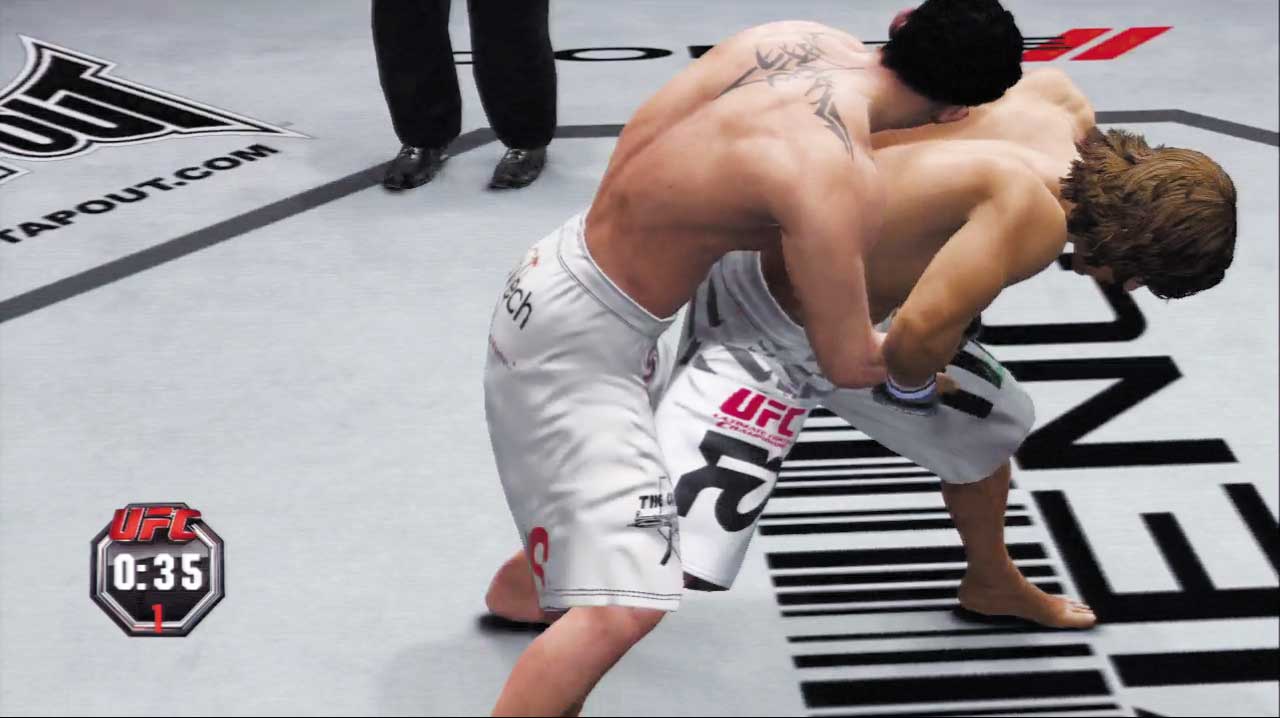
Giving up your back is extremely risky, but it does provide one advantage: It’s easier to break free and escape from your opponent’s clinch in this position compared to the Double Underhook, Defense and Body Lock, Defense positions.
Fight to block the opponent’s throws from here as you look for a chance to make a major transition out to standing position.
Attaining the Position
- You end up in this position when the opponent transitions to the Back Clinch, Offense position.
Available Strikes
- Quick strikes
Available Transitions
- Minor transition to Double Underhook, Defense
- Major transition to Both Standing, Striking Range
Available Defense
- Grapple block
- Transition reversal
Back Clinch Cage, Offense
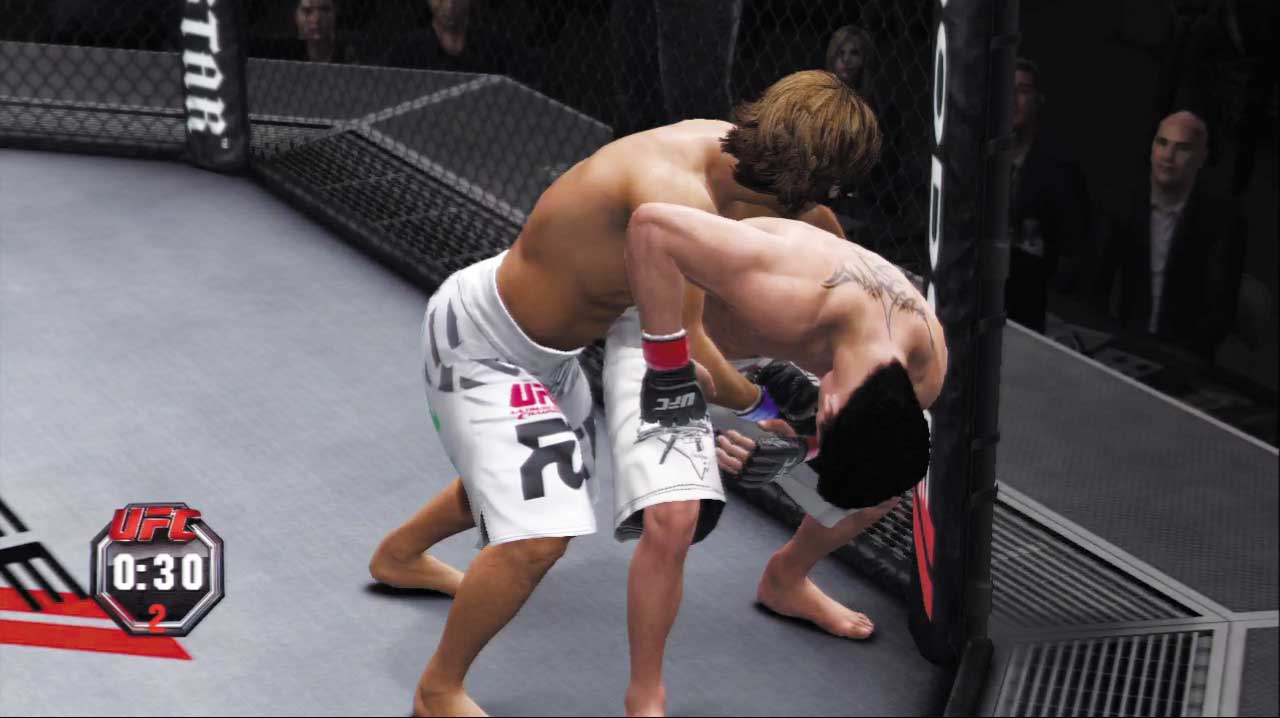
In this unusual yet dominant position, you have control of your opponent’s back, with their head and shoulder pressed against the fence.
Strong strikes can be landed from this clinch, including brutal Technique Strikes to the head (if your fighter is able).
These strikes cannot be blocked, allowing you to really work over your opponent before bringing him to his knees with a throw.
Attaining the Position
- Move forward in the Back Clinch, Offense position and press the opponent’s face and shoulder against the cage.
Available Strikes
- Strong strikes to legs
- Technique strikes (if possible)
Available Transitions
- Minor transition to Double Underhook Cage, Offense
- Major transition throw to Back Side Control, Top
- Escape to Both Standing, Striking Range
Available Defense
- Grapple block
- Transition reversal
Back Clinch Cage, Defense
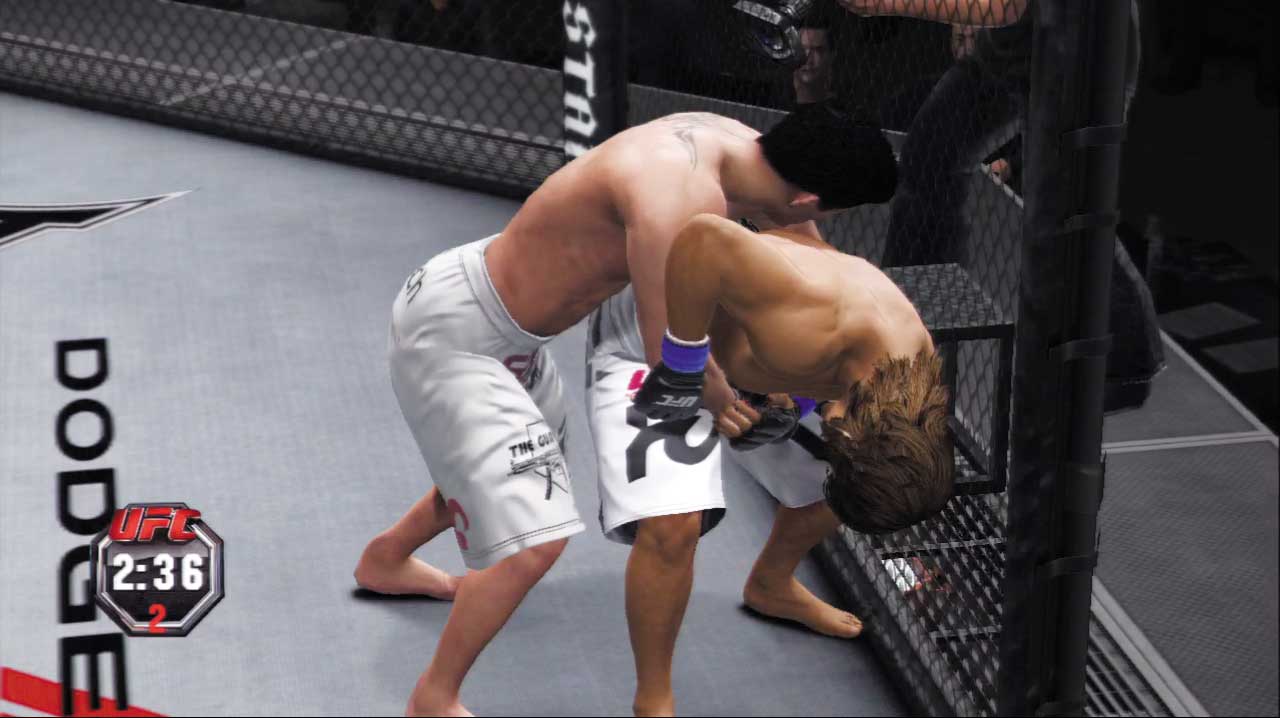
Striking isn’t an option when you’re stuck in this most unfortunate position, but that’s just as well—your goal is to escape from here, not to attack!
Block the opponent’s throws as you work at escaping out to a standing position—lucky for you, this can be accomplished by performing a major transition, just as you can in the normal Back Clinch, Defense position.
Avoid this nasty position by not pressuring the opponent when he’s near the fence—rushing in gives him a chance to clinch up, slip around you with a Back Clinch, and then stuff you into the cage!
Attaining the Position
- You end up in this position when the opponent transitions to the Back Clinch Cage, Offense position.
Available Transitions
- Minor transition to Double Underhook Cage, Defense
- Major transition to Both Standing, Striking Range
Available Defense
- Grapple block
- Transition reversal
Double Leg Clinch Cage, Offense
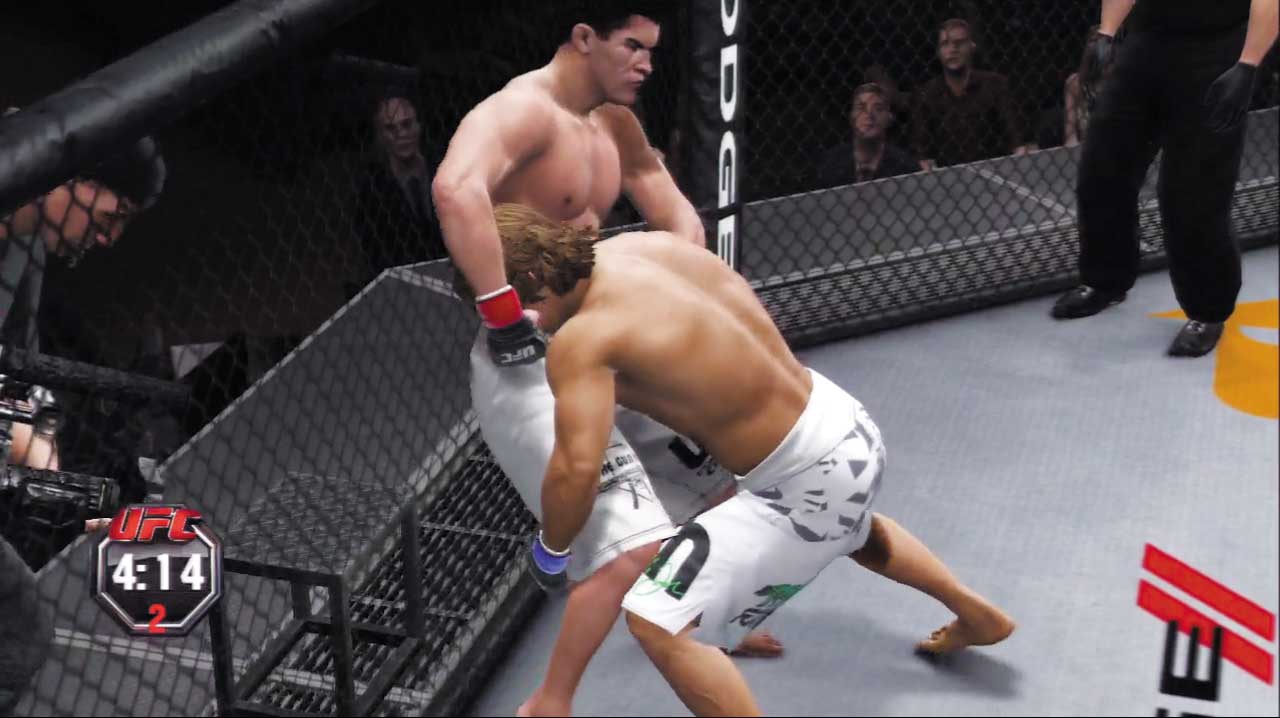
Aggressive takedown artists can exploit the cage to help bring their rival to the mat. Normal takedowns from this clinch will land you in the Open Guard Cage, Top position, where heavy ground strikes can be unleashed.
Powerful technique transitions are also available here, enabling skilled grapplers to land in even more advantageous positions on the ground.
Attaining the Position
- Shoot for a double leg takedown when the opponent is near the cage.
- Execute a minor transition from the Single Leg Clinch Cage, Offense position.
Available Strikes
- Strong strikes to legs
Available Transitions
- Minor transition to Single Leg Clinch Cage, Offense
- Major transition to Double Underhook Cage, Offense
- Technique transition (if possible)
- Escape to Both Standing, Striking Range
- Takedown
Available Defense
- Grapple block
- Transition reversal
Double Leg Clinch Cage, Defense
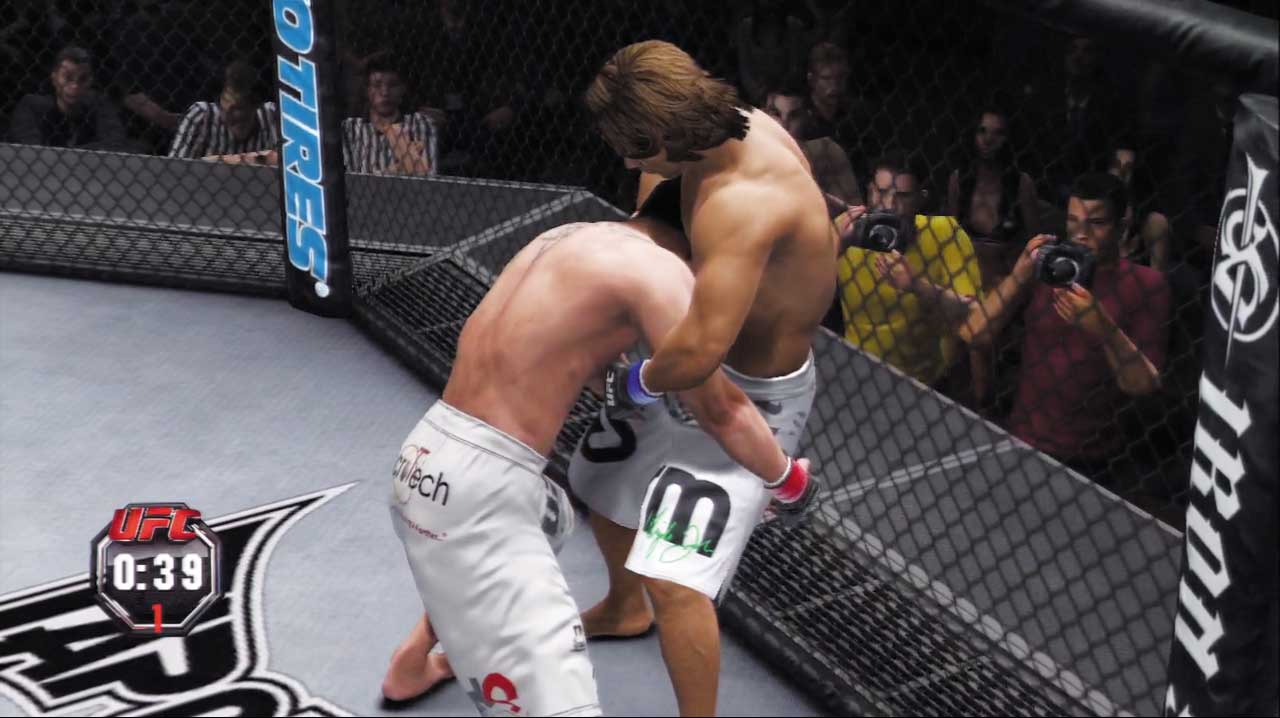
Takedowns are your primary fear when you’re stuffed against the cage in this position. Keep your cool and block the opponent’s transitions as you work at improving your position.
Better yet, perform a major transition and escape back out to standing!
Attaining the Position
- You end up in this position when the opponent moves to the Double Leg Clinch Cage, Offense position.
Available Strikes
- Quick strikes to body
Available Transitions
- Minor transition to Double Underhook Cage, Defense
- Major transition to Both Standing, Striking Range
Available Defense
- Grapple block
- Transition reversal
Single Leg Clinch Cage, Offense
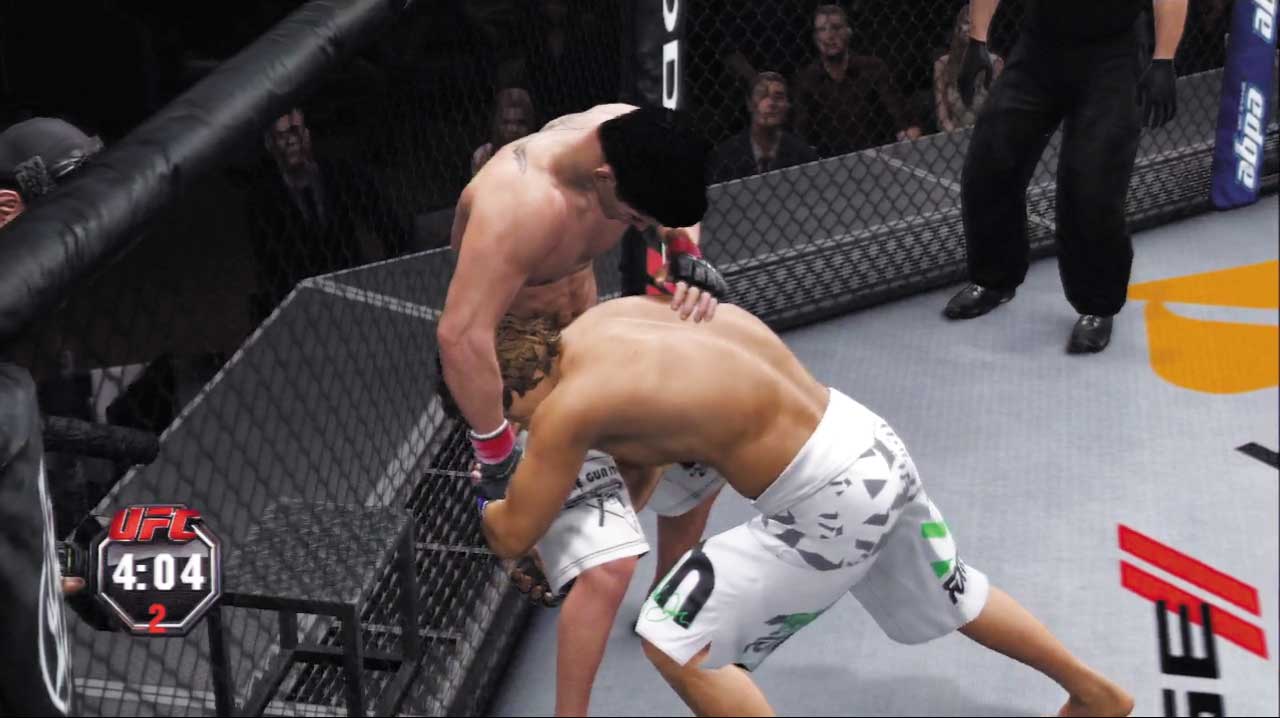
Some grapplers prefer to shoot for single leg takedowns instead of doubles, yet they’re just as good at using the cage to their advantage.
This position is very similar to Double Leg Clinch Cage, Offense—however, normal takedowns from here will land you in the Half Guard Cage, Top ground position, which many grapplers prefer over takedowns from Double Leg Clinch Cage, Offense.
Technique transitions are available from here as well.
Attaining the Position
- Shoot for a single leg takedown when the opponent is near the cage.
- Execute a minor transition from the Double Leg Clinch Cage, Offense position.
Available Strikes
- Strong Strikes to Legs
Available Transitions
- Minor transition to Double Leg Clinch Cage, Offense
- Major transition to Double Underhook Cage, Offense
- Technique transition (if possible)
- Escape to Both Standing, Striking Range
- Takedown
Available Defense
- Grapple block
- Transition reversal
Single Leg Clinch Cage, Defense
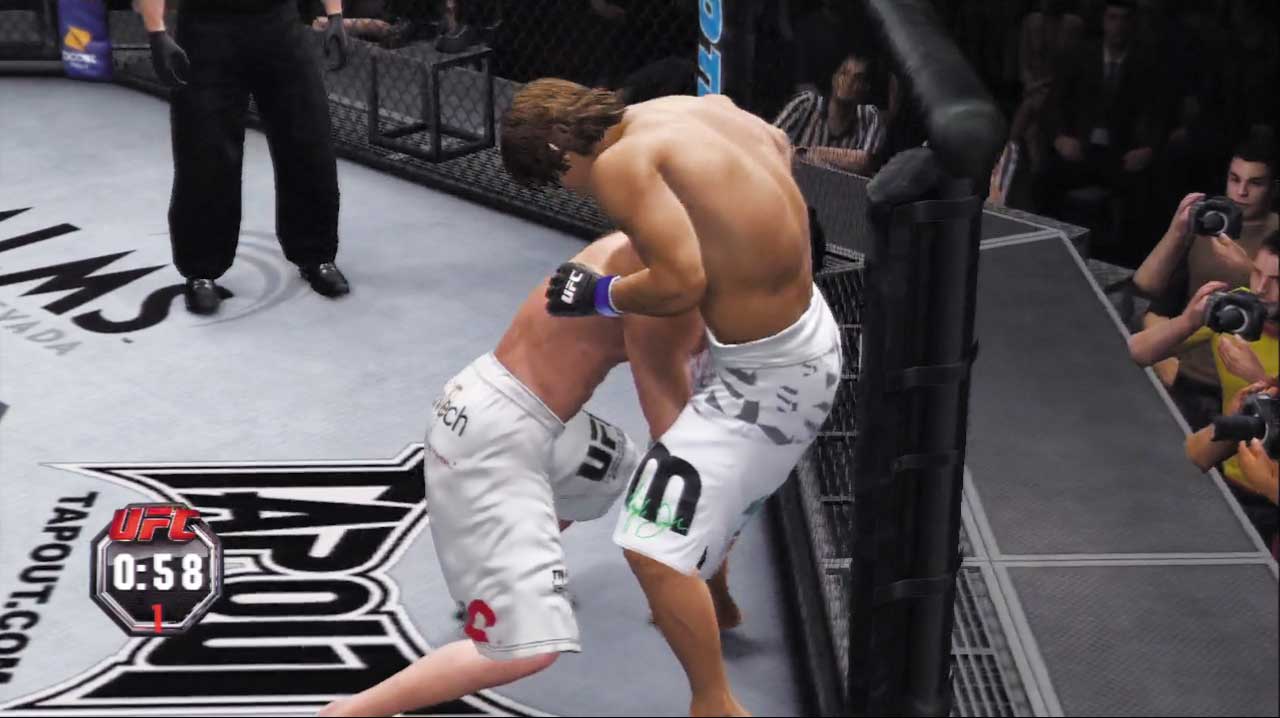
Takedown defense remains your focus when you’re stuffed against the cage in this position. Stay calm and deny the opponent’s transitions as you work at improving position or escaping back out to the stand-up game.
Attaining the Position
- You end up in this position when the opponent moves to the Single Leg Clinch Cage, Offense position.
Available Strikes
- Quick strikes to body
- Quick strikes to leg
Available Transitions
- Minor transition to Over/Under Hook Cage, Defense
- Major transition to Both Standing, Striking Range
Available Defense
- Grapple block
- Transition reversal