
Watch Dogs Guide SIDE MISSIONS
_GANG HIDEOUTS // THE LOOP
_NO PARKING
location: PALIN CORRECTIONAL FACILITY (PARKING LOT)
Enemy: THE CLUB
NUMBER OF TARGETS: 1 (Veteran) / He May Flee
NUMBER OF ENEMIES: 10 (Gunman x1, Veteran x9)
Shot-Callers x3 (Veterans)
HIDDEN CAMERAS X1 (VETERAN)
Difficulty: ($2,500 REWARD)
REINFORCEMENTS: Gunmen x4, UP TO FOUR VEHICLES (GUNMeN X2, VETERAN X2)
Commence this mission at the entrance to the Raven Building, across the road from the Palin Correctional Facility. You want to reach the multistory parking lot attached to the facility, to the east. Jog down the road until you’re on the street by the side of the structure and can begin to investigate this rectangular restricted area.
Insertion Points
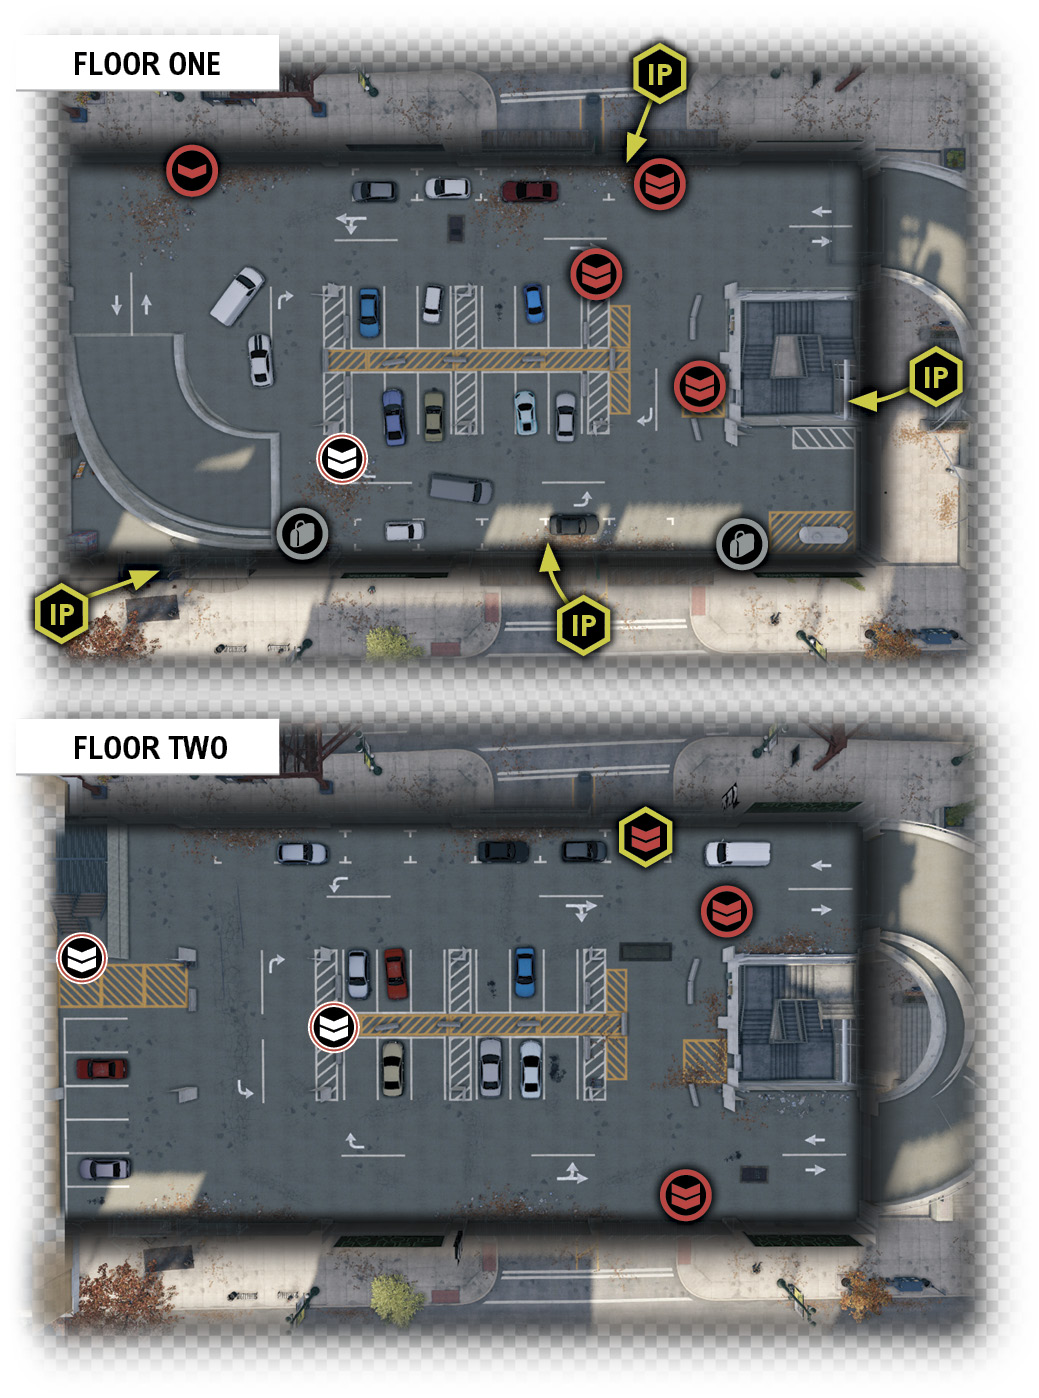
Although this location has four separate floors (including the roof), insertion points are limited to the four areas detailed below. However, just because you can’t access a location from a specific point doesn’t mean your options are that limited, as the Progression Plans reveal!
Newsstand Scissor Lift (Southwest)
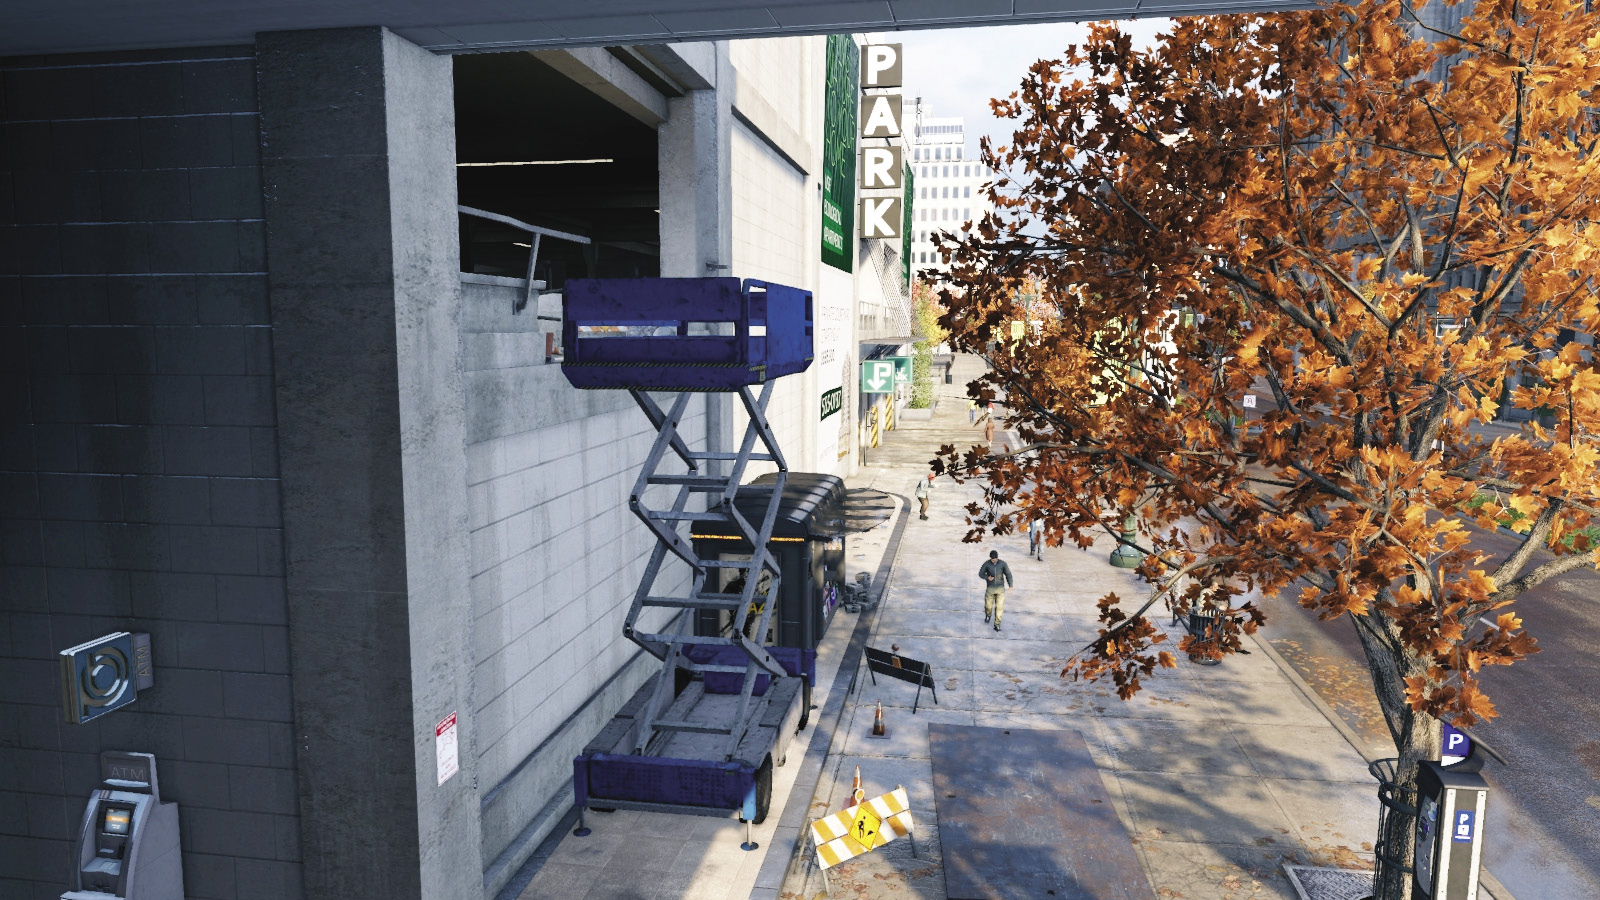
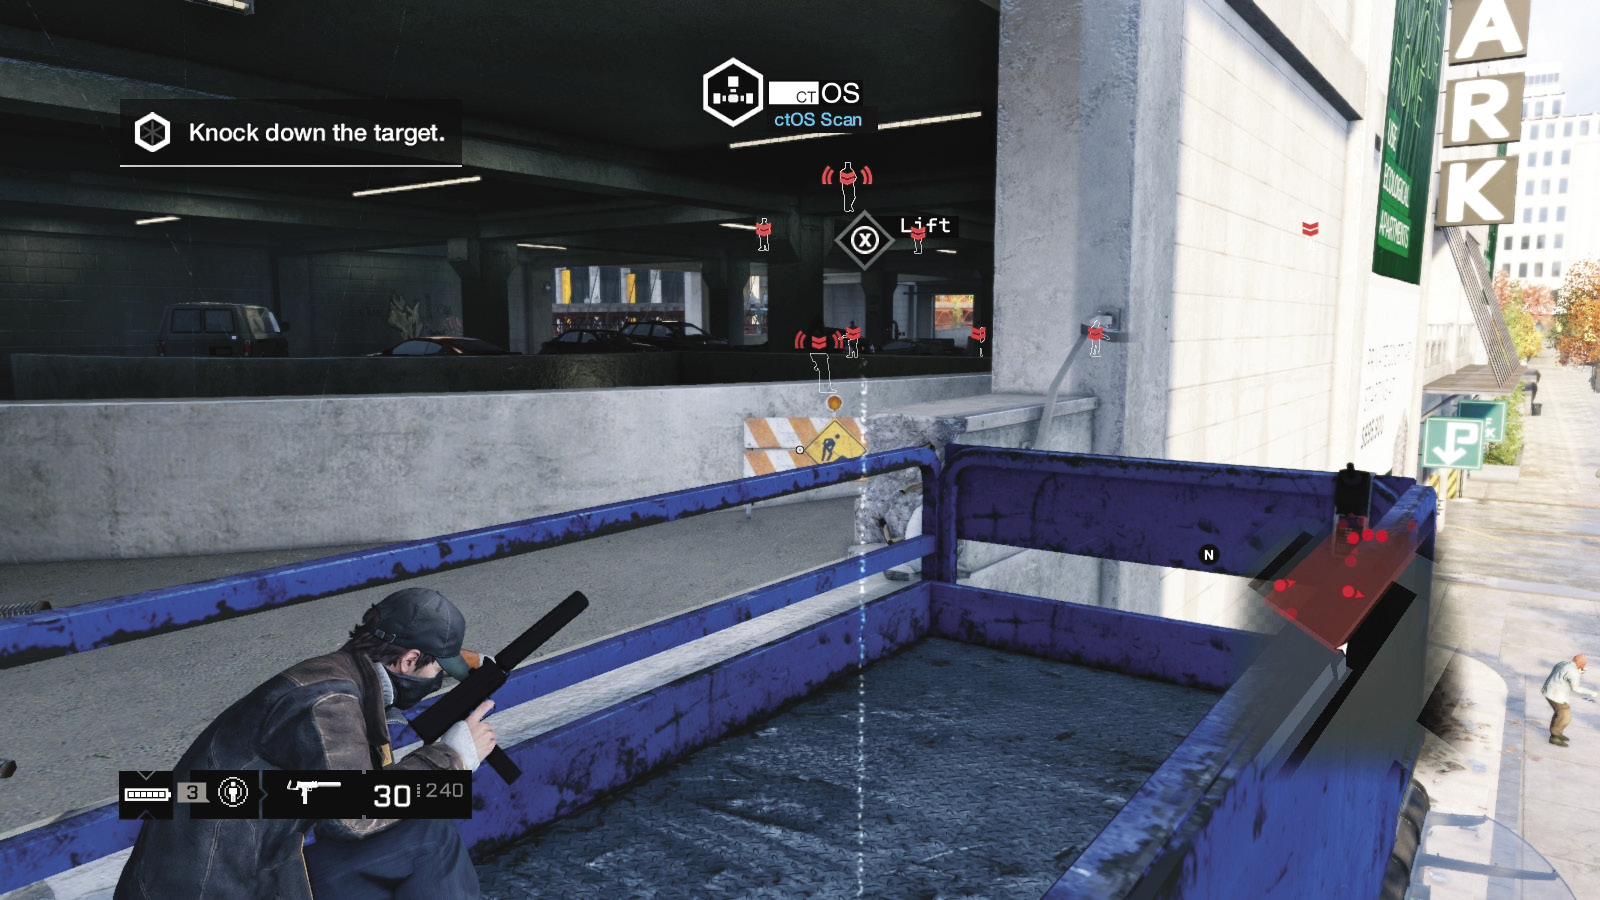
This is an excellent place to begin your more clandestine operations, as the gap in the parking lot wall one floor up allows access to the first of two floors of foes. You can sneak here or let rip with weapons. It’s also a good escape route if you need to drop down to catch the target if he’s escaping by vehicle.
Garage Doors (North and South)
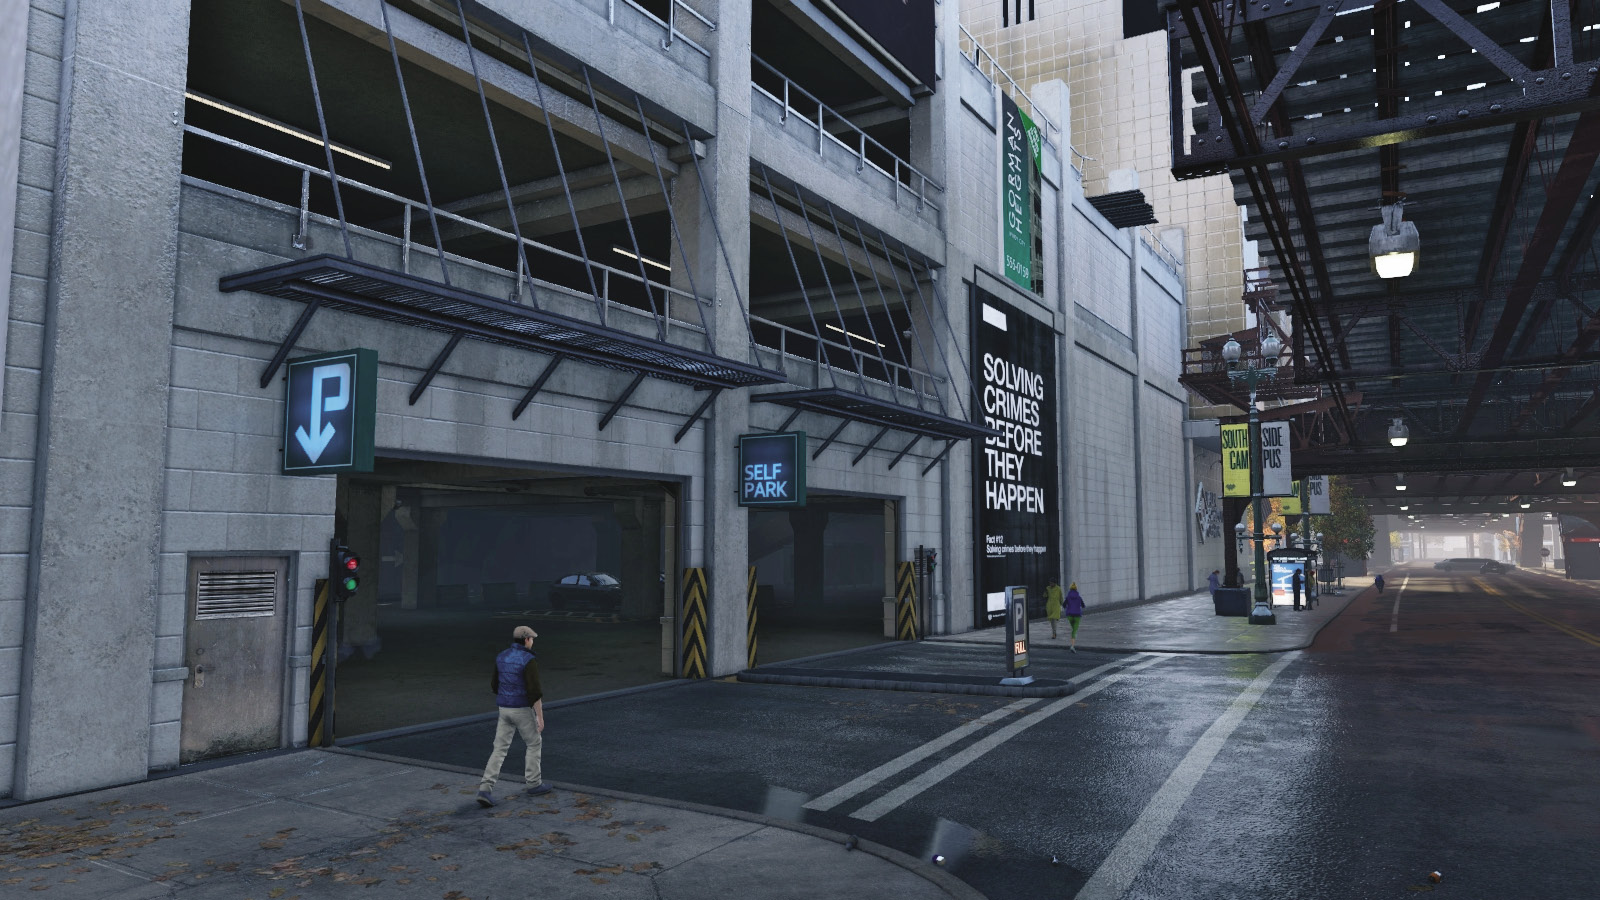
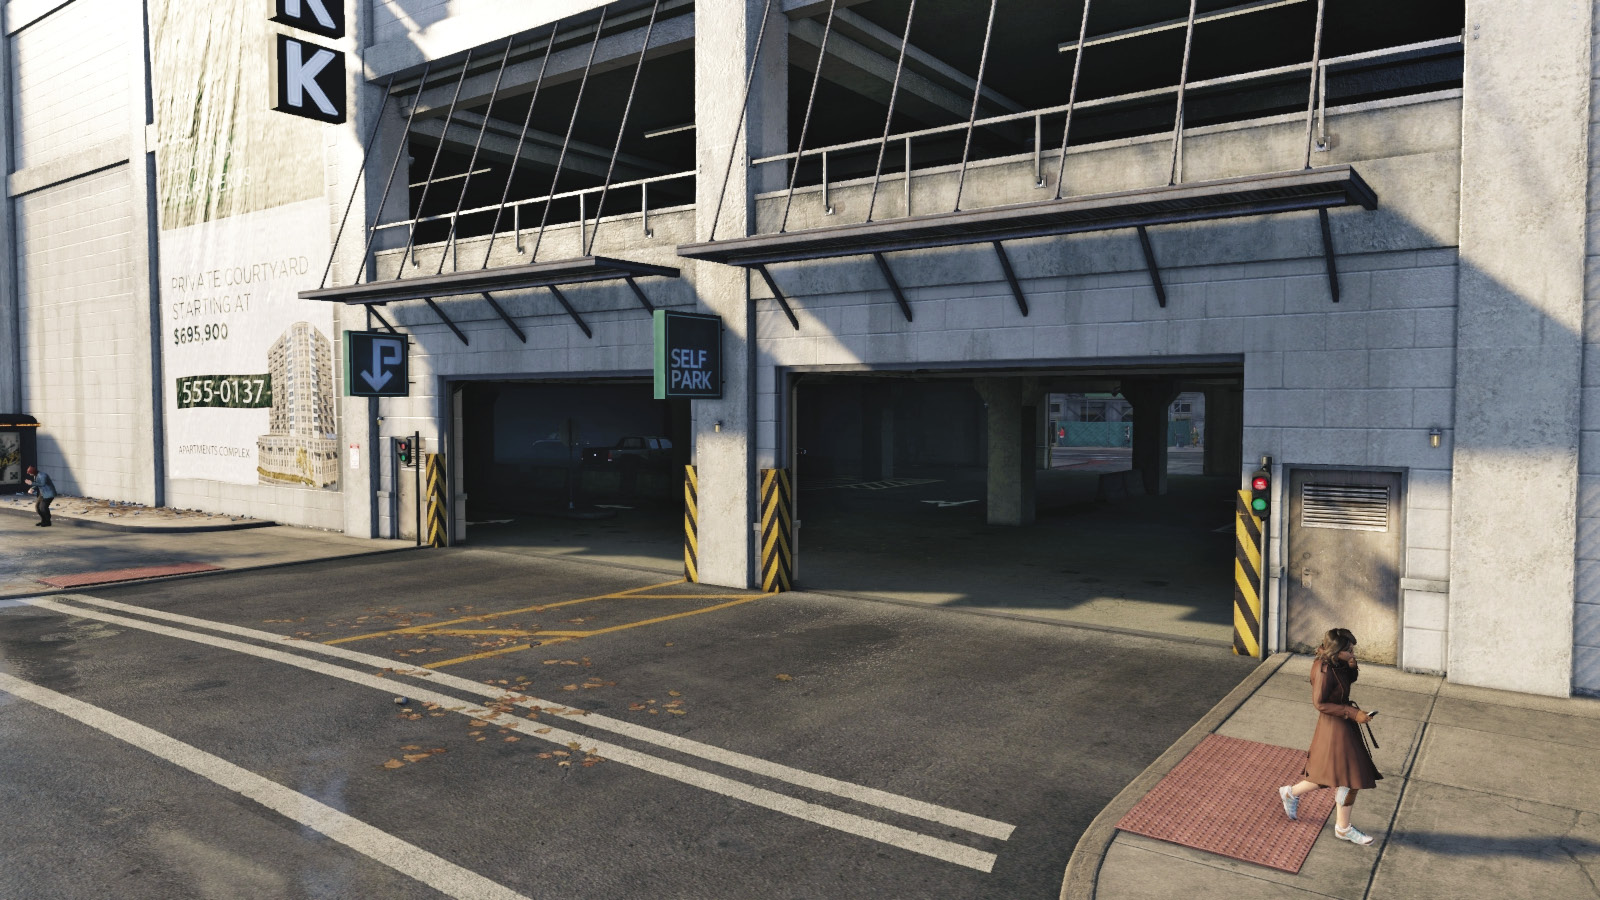
These are usually closed and on the ground floor of the lot. Close all four before you proceed; it takes the target an extra couple of seconds to escape if you let him enter his vehicle and leave. Not usually helpful when infiltrating, it’s still important to know these locations and perhaps block them with your own vehicles to hinder the target escaping.
Pedestrian Stairwell (East)
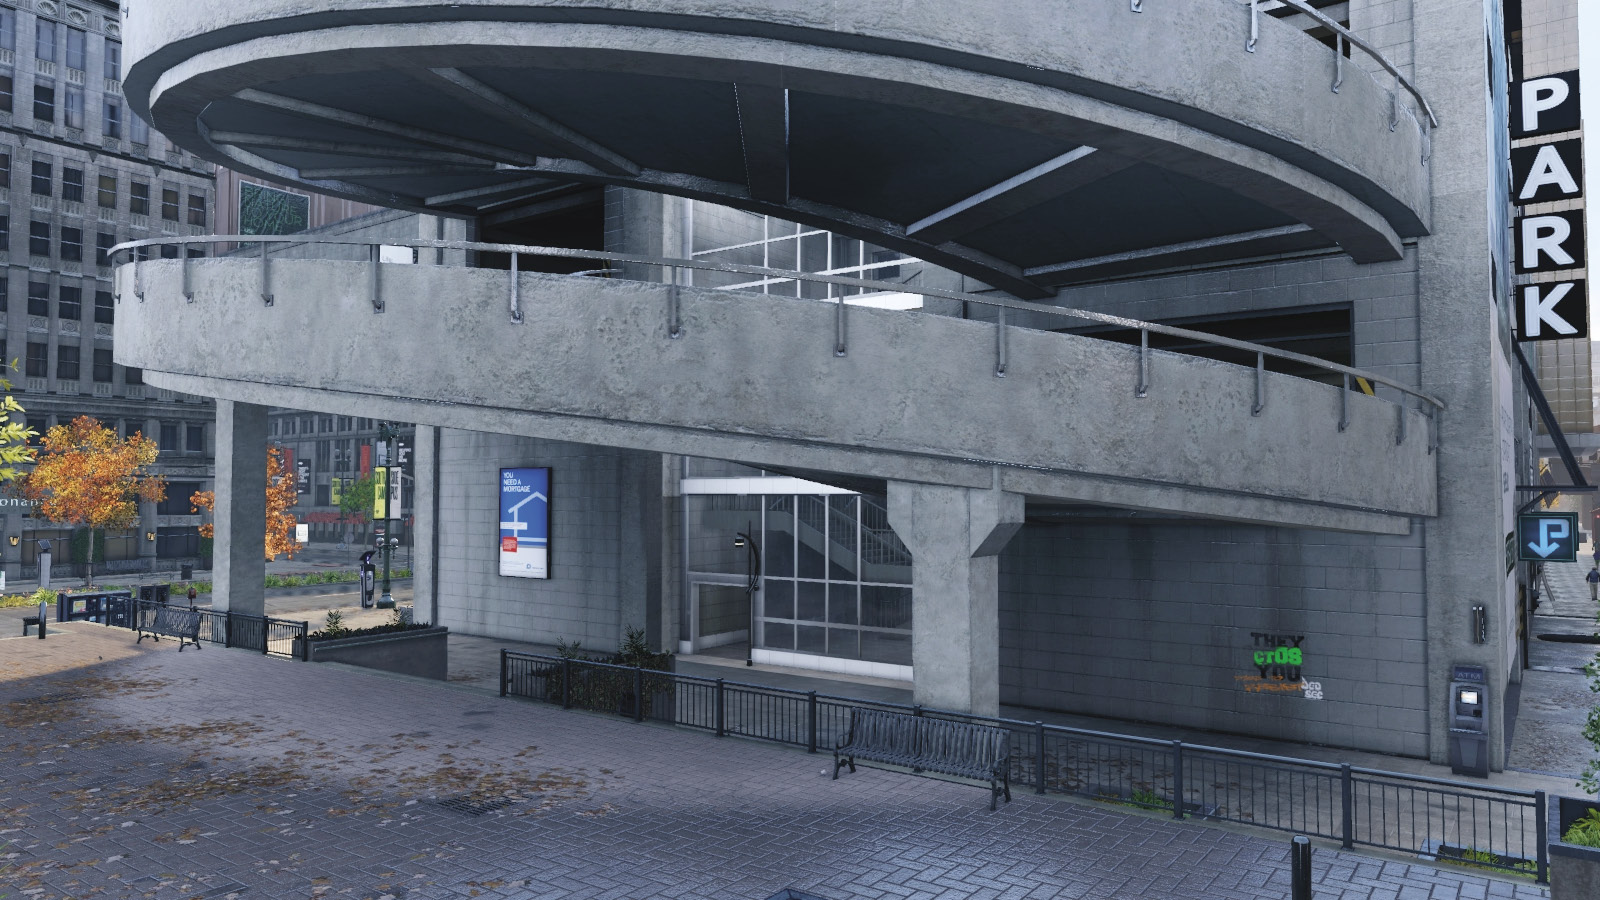
Another great place for infiltrating, this stairwell runs from the ground floor (no enemies) up to the lower-middle floor (five foes) and the upper middle (four foes, one of which is your target). You can also access the roof, which can provide a rather cunning secondary sneaking method of reaching your foes (see below). Watch for foes at the entrances to each interior floor as you climb.
Parking Lot Interior
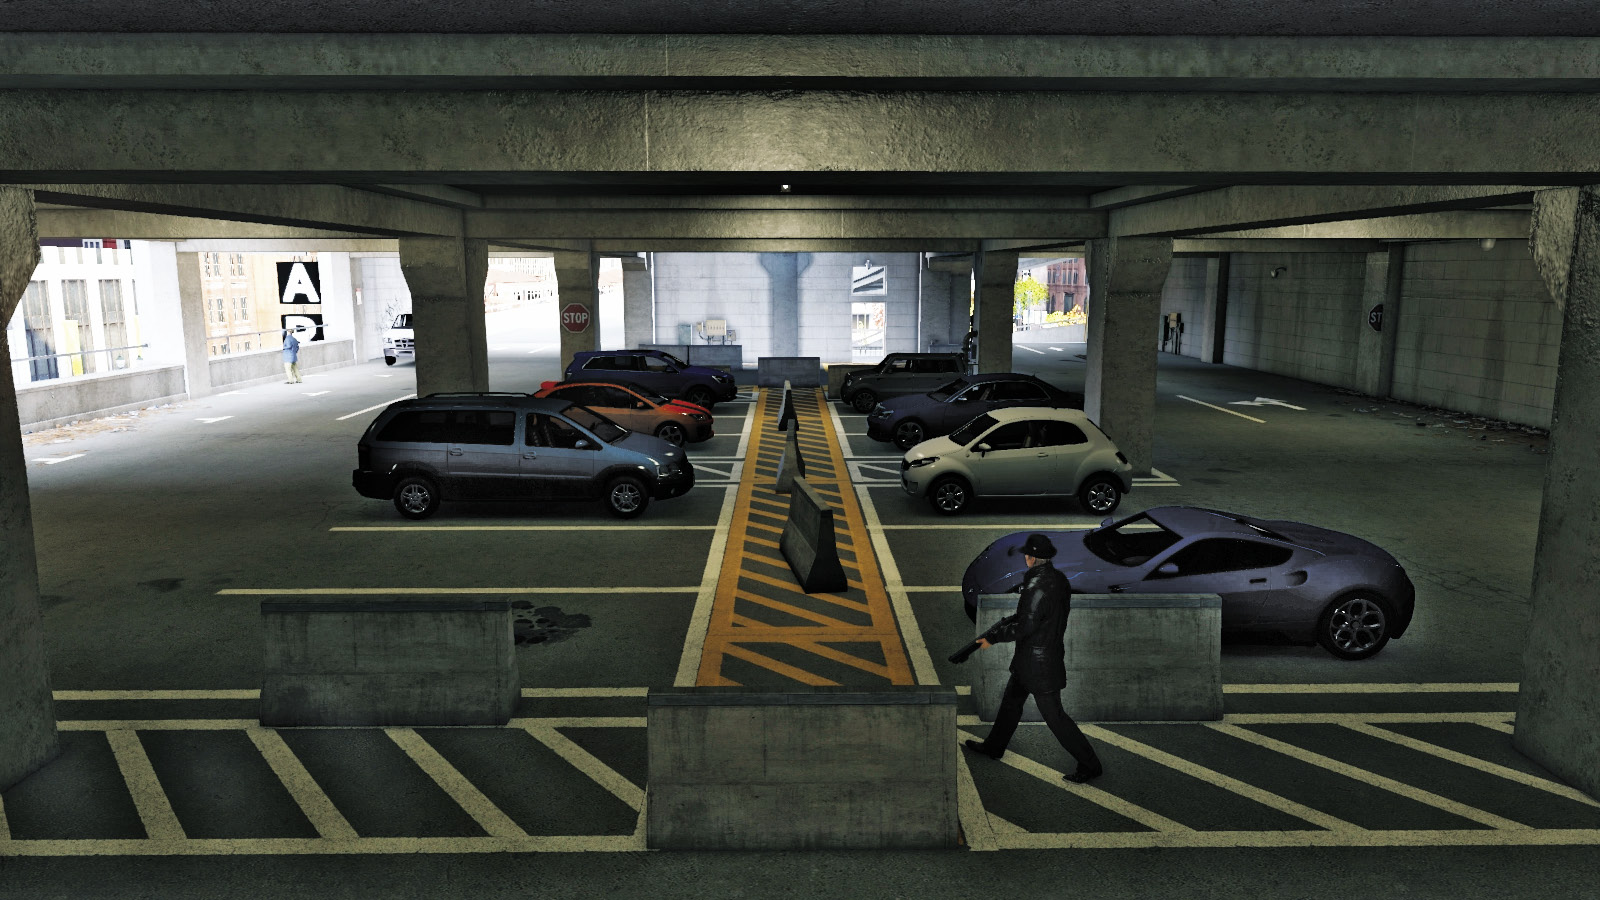
The ground floor has some parked vehicles and the vehicle ramp leading to one of four garage door exits. The lower-middle floor has five foes and several vehicles and isn’t necessary to enter. The upper-middle floor has four foes, one of which is the target standing above the north garage doors, close to the van he usually uses to escape. The roof has access to the opposite side of the upper-middle floor. All floors are connected via the stairwell and the curved vehicle ramp.
Progression Plans
There are two excellent methods of reaching your target using stealth (one involving few guard deaths, while the other has minimal casualties). There are some amusingly violent methods to complete this task too!
 Aggressive // Stealth: Attempting Not to Get Caught
 Difficulty:
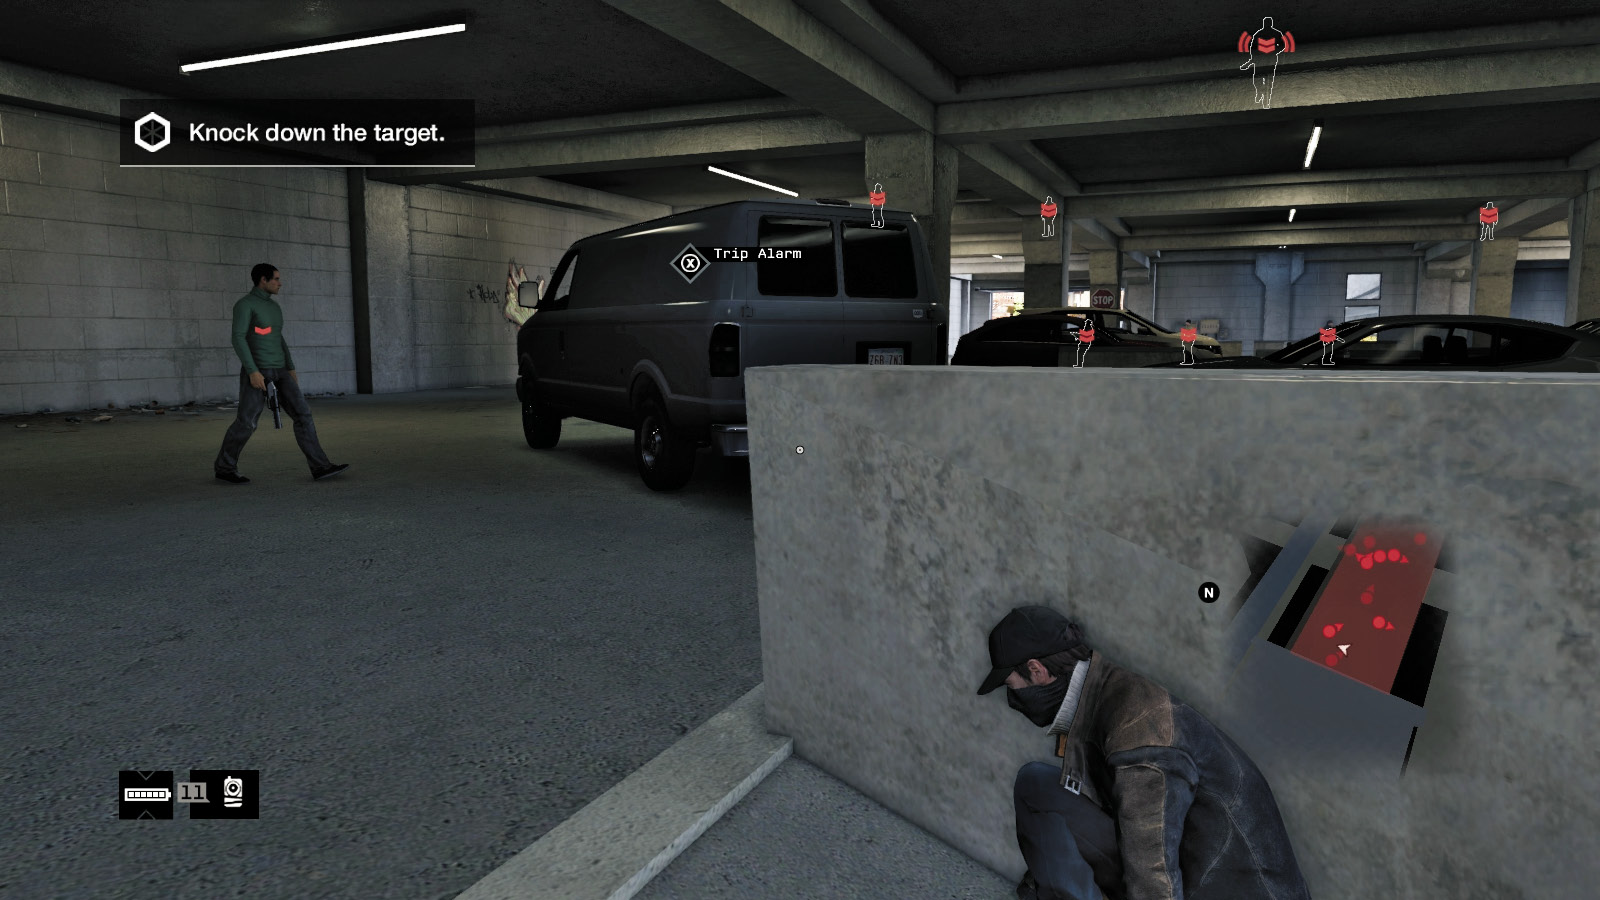
Use the scissor lift and scramble onto the vehicle ramp. Hide behind it and close to the foe under the camera, across from you. Mark him and use other cameras across this floor to mark the remaining enemies; then pounce on this enemy, close to the parked van. Then hide behind it.
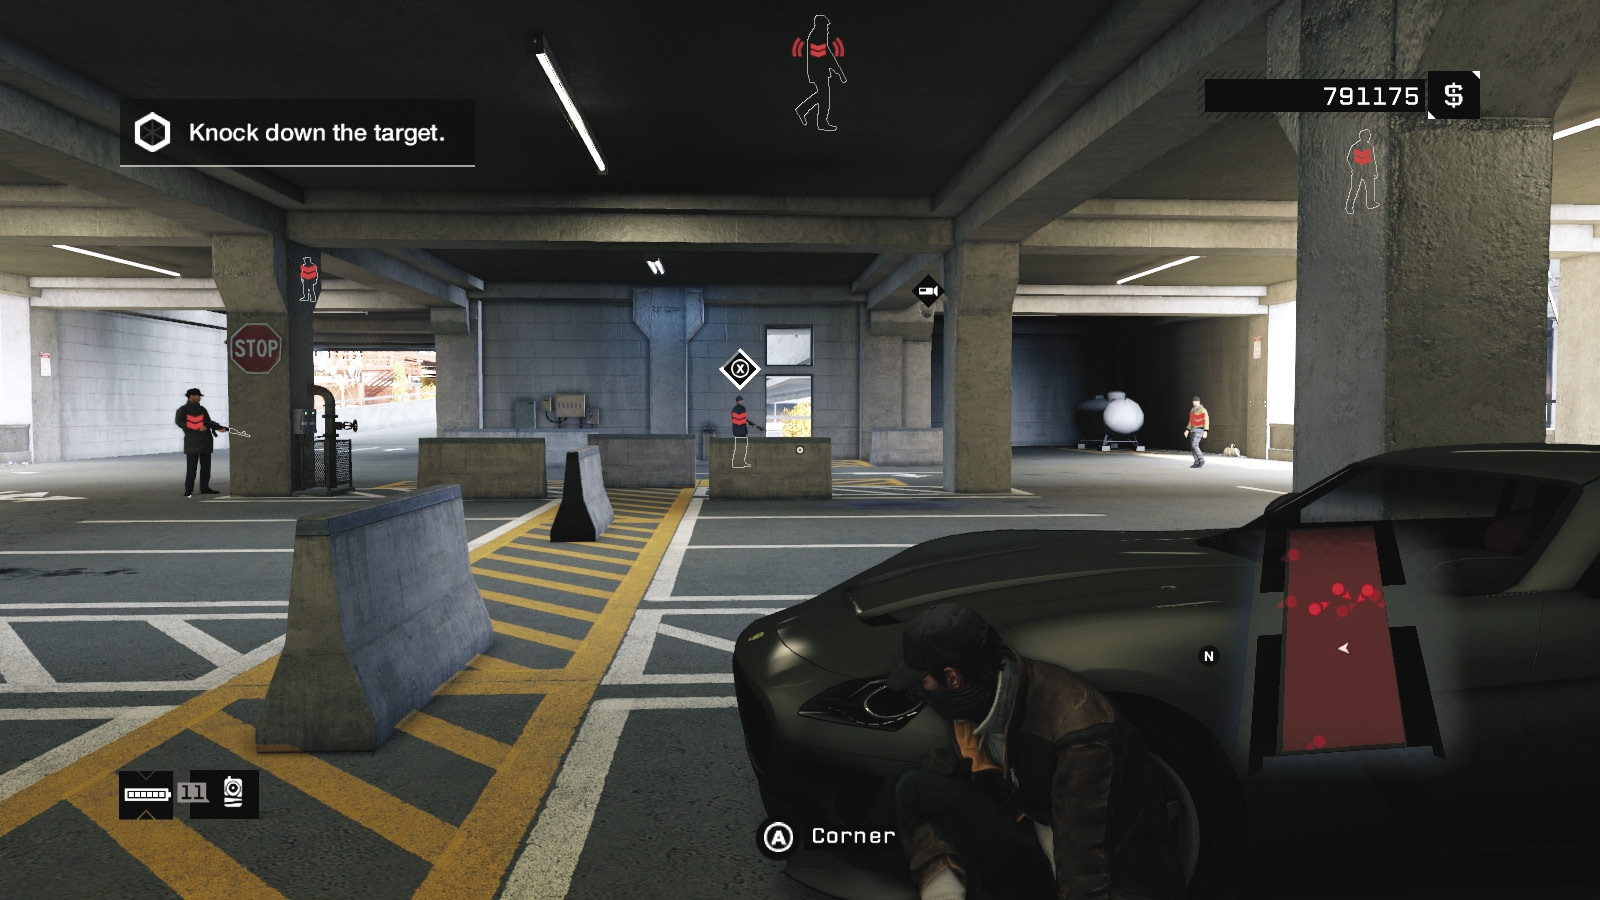
Venture across the room and melee-strike the guard leaning against the pillar, close to your location. There are three foes left; access the camera in the one by the stairwell, and watch it as he climbs the stairwell to the upper-middle floor, where you can mark the four remaining foes (except the one at the far end).
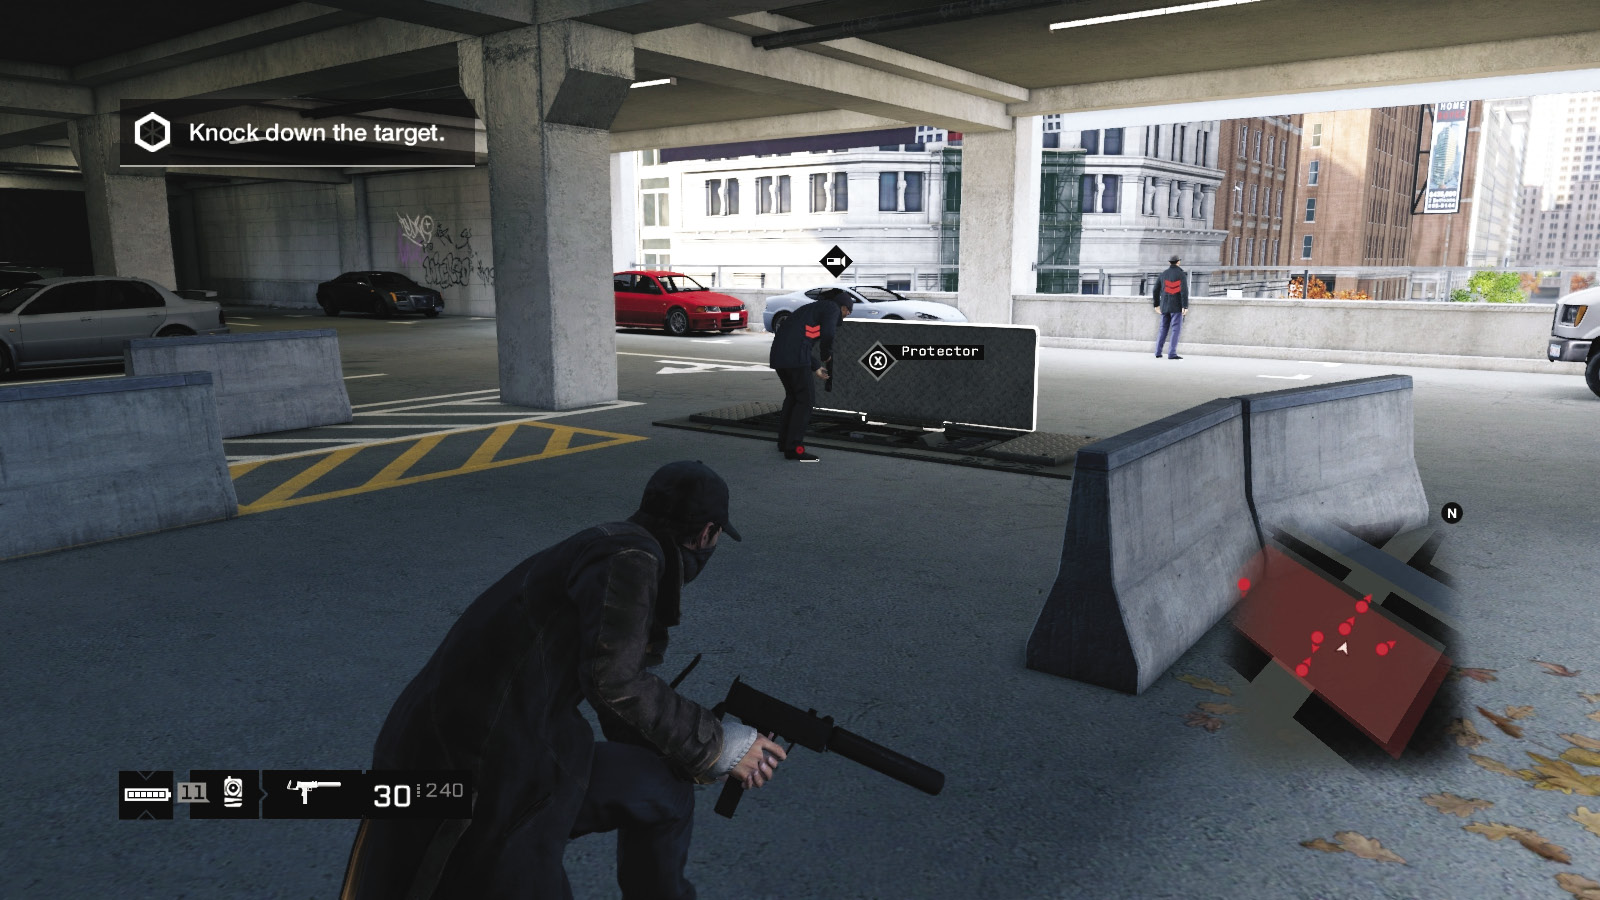
Step forward and either use the pipes or other explosive areas the guards are standing near (which alerts foes upstairs; not recommended). You can also use lures to ensure you remove the last two guards on this level in silence. Then climb the stairwell, or the curved vehicle ramp, and begin to tackle the remaining foes on the upper floor. With only five left, you can resort to ranged violence if you need to, as long as you understand the target will bolt for his vehicle.
 Aggressive // Stealth: Creeping through the Parking Lot
 Difficulty:
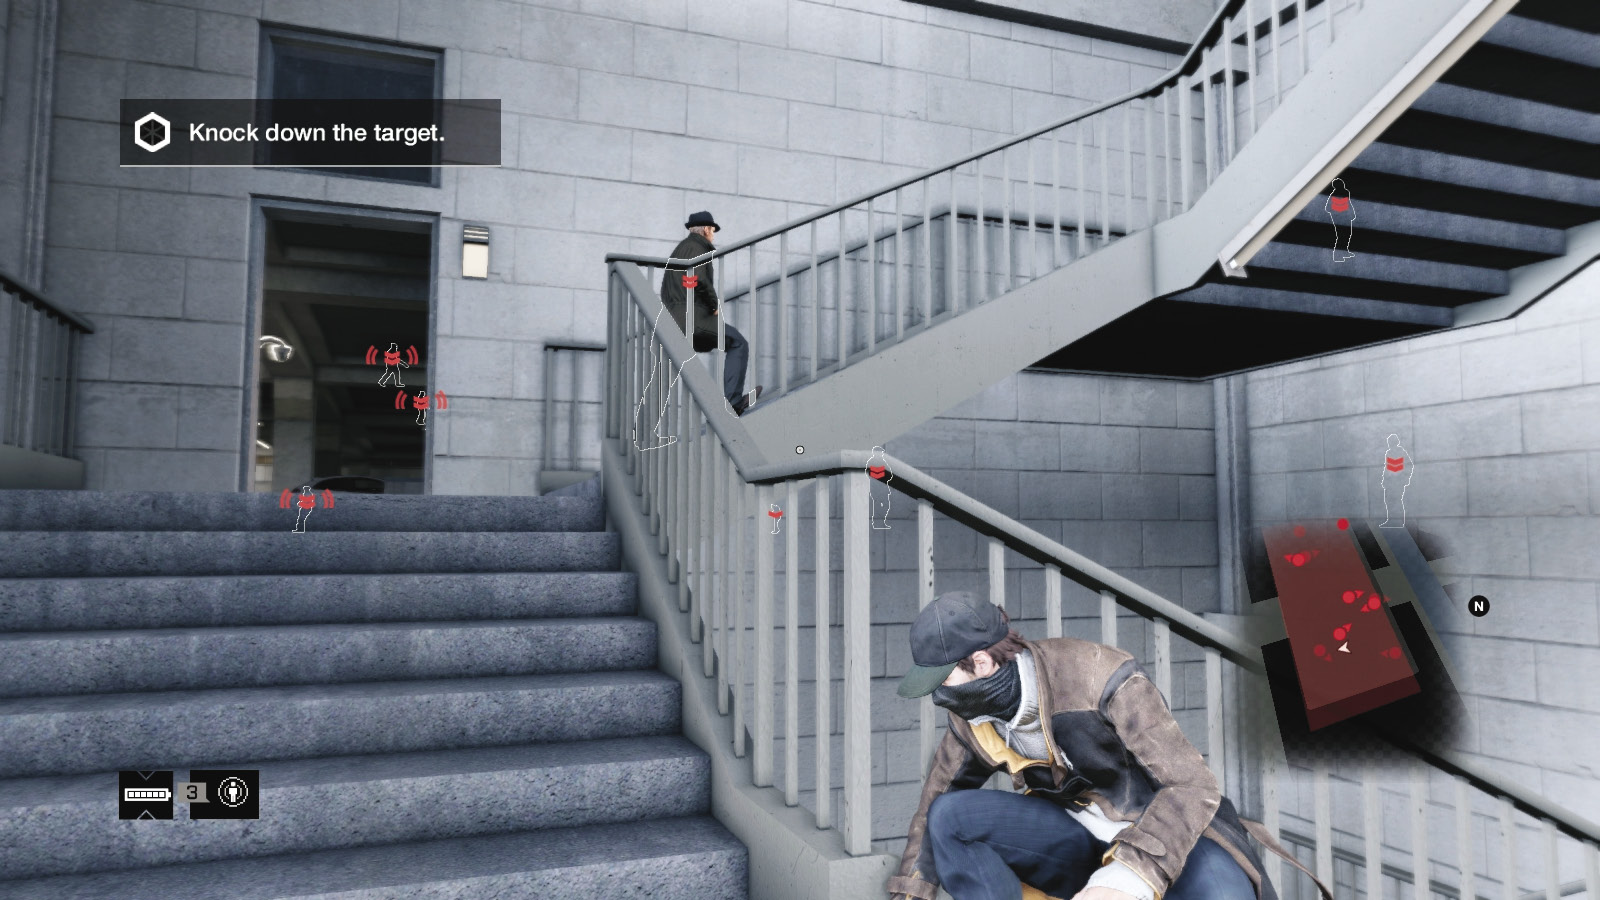
Use the stairwell to reach the steps just below the lower-middle floor, where the foe with the camera is waiting. Access the camera so the foe heads into your stairwell. Follow him up and strangle him, and continue up to the roof. Ignore all enemies on the lower-middle floor at this point (at least until you neutralize the target).
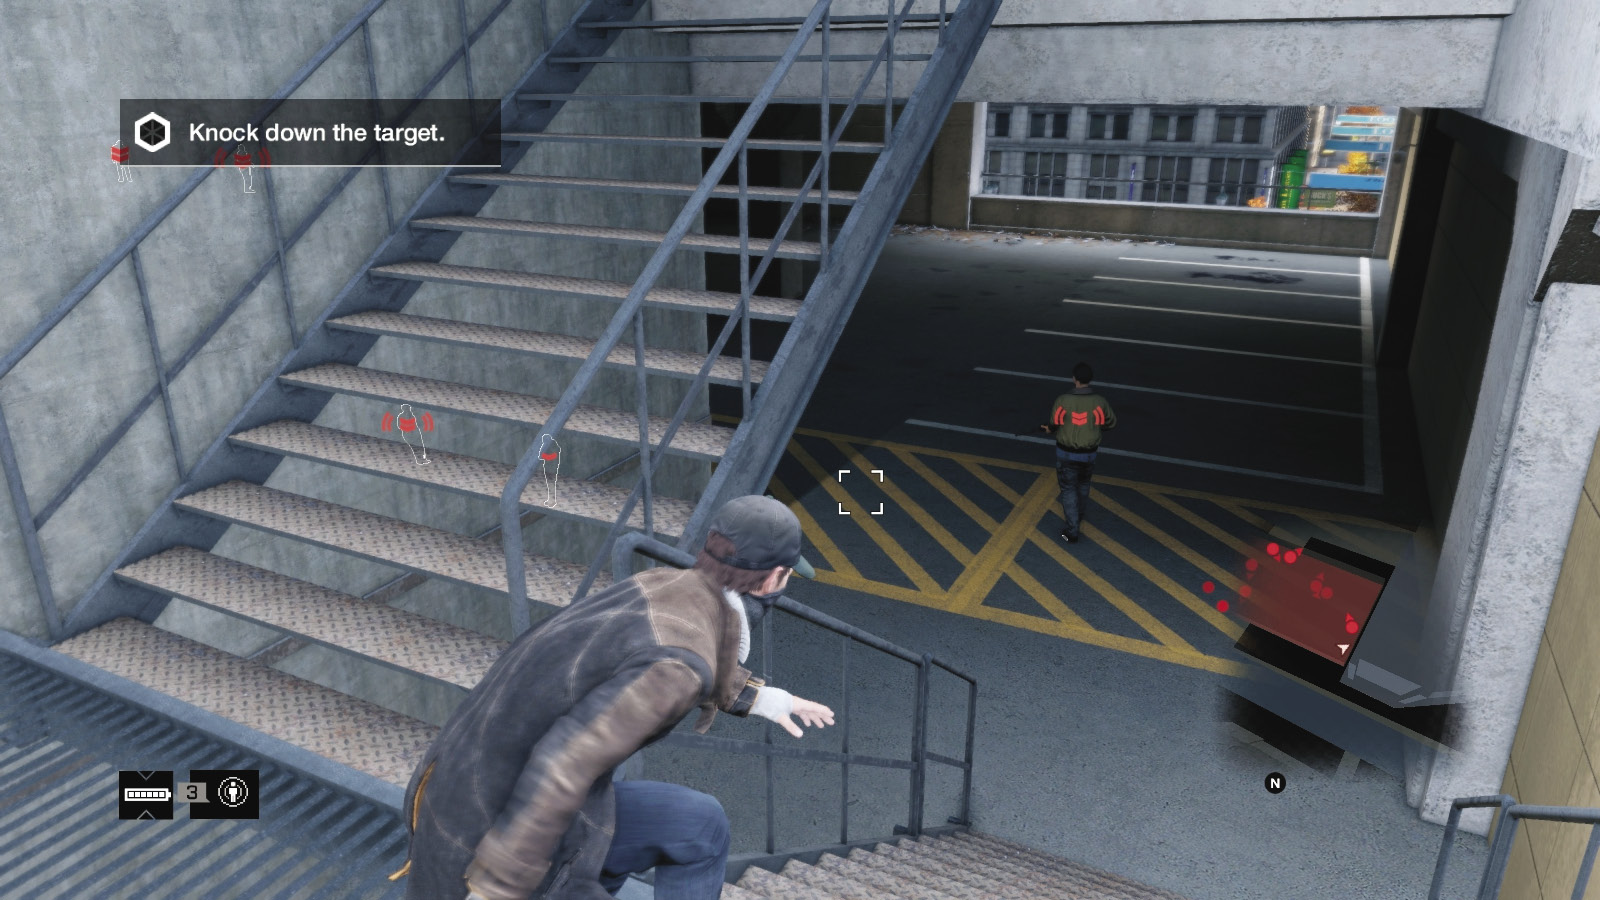
Head across the roof to the stairwell on the northwestern corner, where a lone guard is waiting. Mark him by profiling, then wait for him to move away. Quickly head down the stairs, melee-strike him, and step into cover. You have four foes on this level to melee-strike at this point. You can creep along the cars, use the concrete pillars, or seize the opportunity when you’re near the target to melee-strike him before resorting to gunplay.
 Aggressive // Smart: The Infiltration Gets Fraught
Difficulty: 
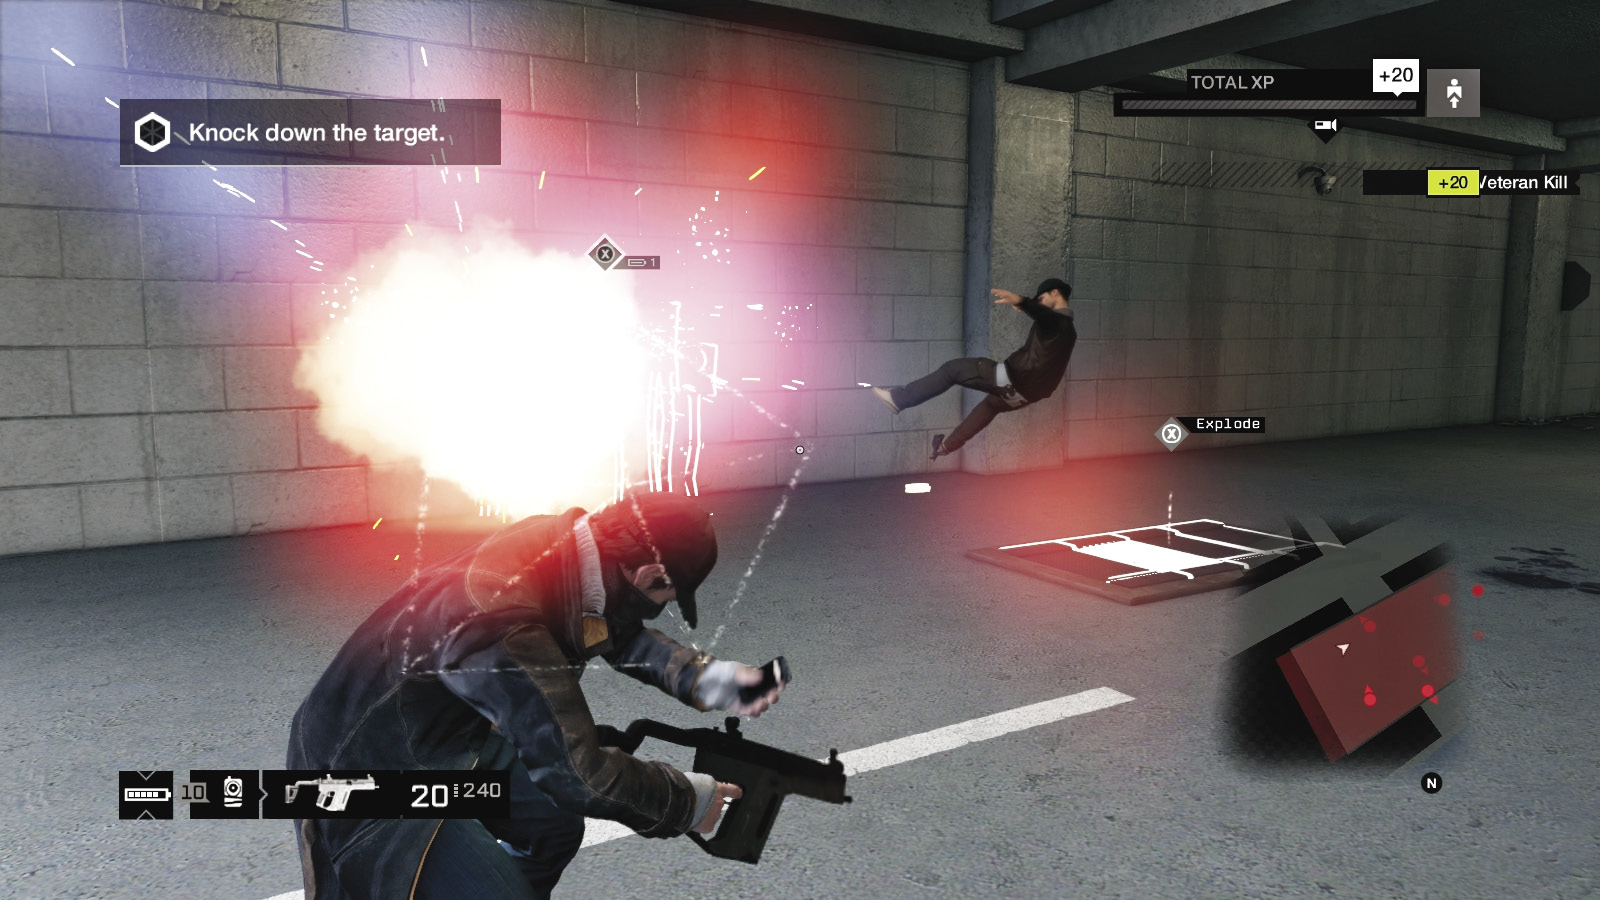
Use the cameras mounted on the parking lot and the guards, and detonate pipes and a propane tank in the corner of the lower-middle floor. However, all this destruction tends to freak out the target, who makes a break for it, and reinforcements are usually called too. It makes sense to try these only if you’re actively coaxing the target to escape by vehicle (so you can stop him at the garage doors).
 Aggressive // Violence: Only One of Them Doesn’t Get Shot
Difficulty: 
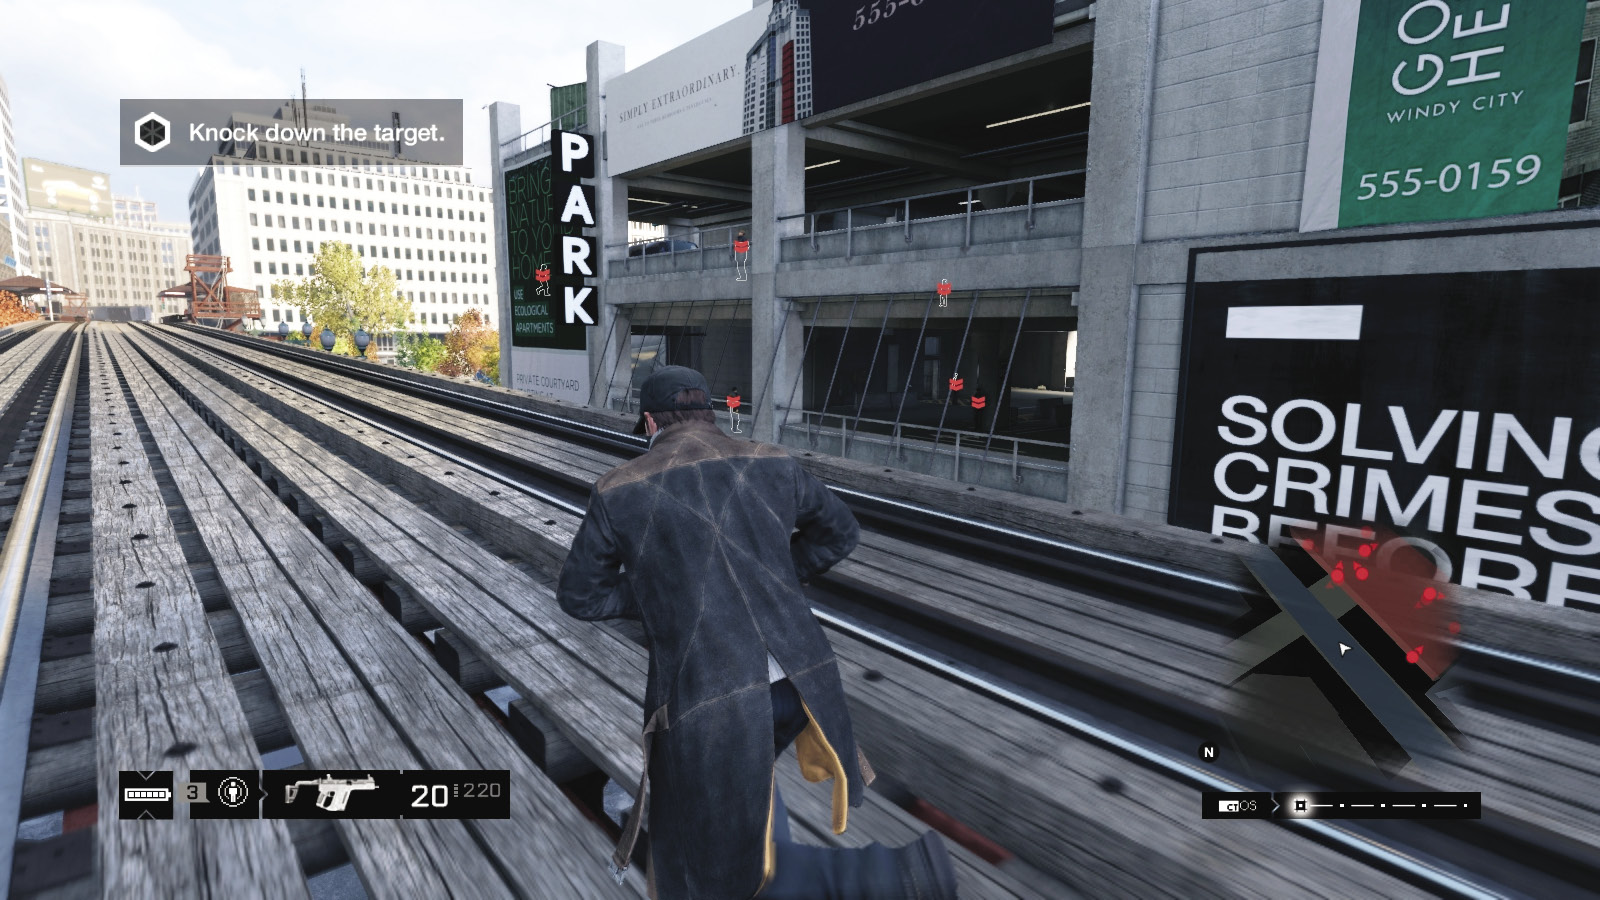
While it’s fine to shoot the enemies throughout this structure, don’t kill the target and don’t expect to waltz through without further reinforcements being called. The usual cover-and-gun plan works, and explosives and projectiles do the job, but being too aggressive (especially if you’re shooting at the escaping target’s vehicle) can result in you killing the target and failing this mission. However, there’s still a cool plan to try:
Dash through the correctional facility courtyard and up the adjacent L-train station steps. Don’t worry about the “mission exit” warning; as long as you’re quick, you can reach the platform, drop onto the tracks, and run east, along the tracks to your target’s location. Shoot near rather than at him, so he freaks out and enters his vehicle. Then drop down to a heavy landing, right near the garage doors, stop his escape, and complete the mission!
 Driving // Offensive: Remembering What You Were Taught
Difficulty: 
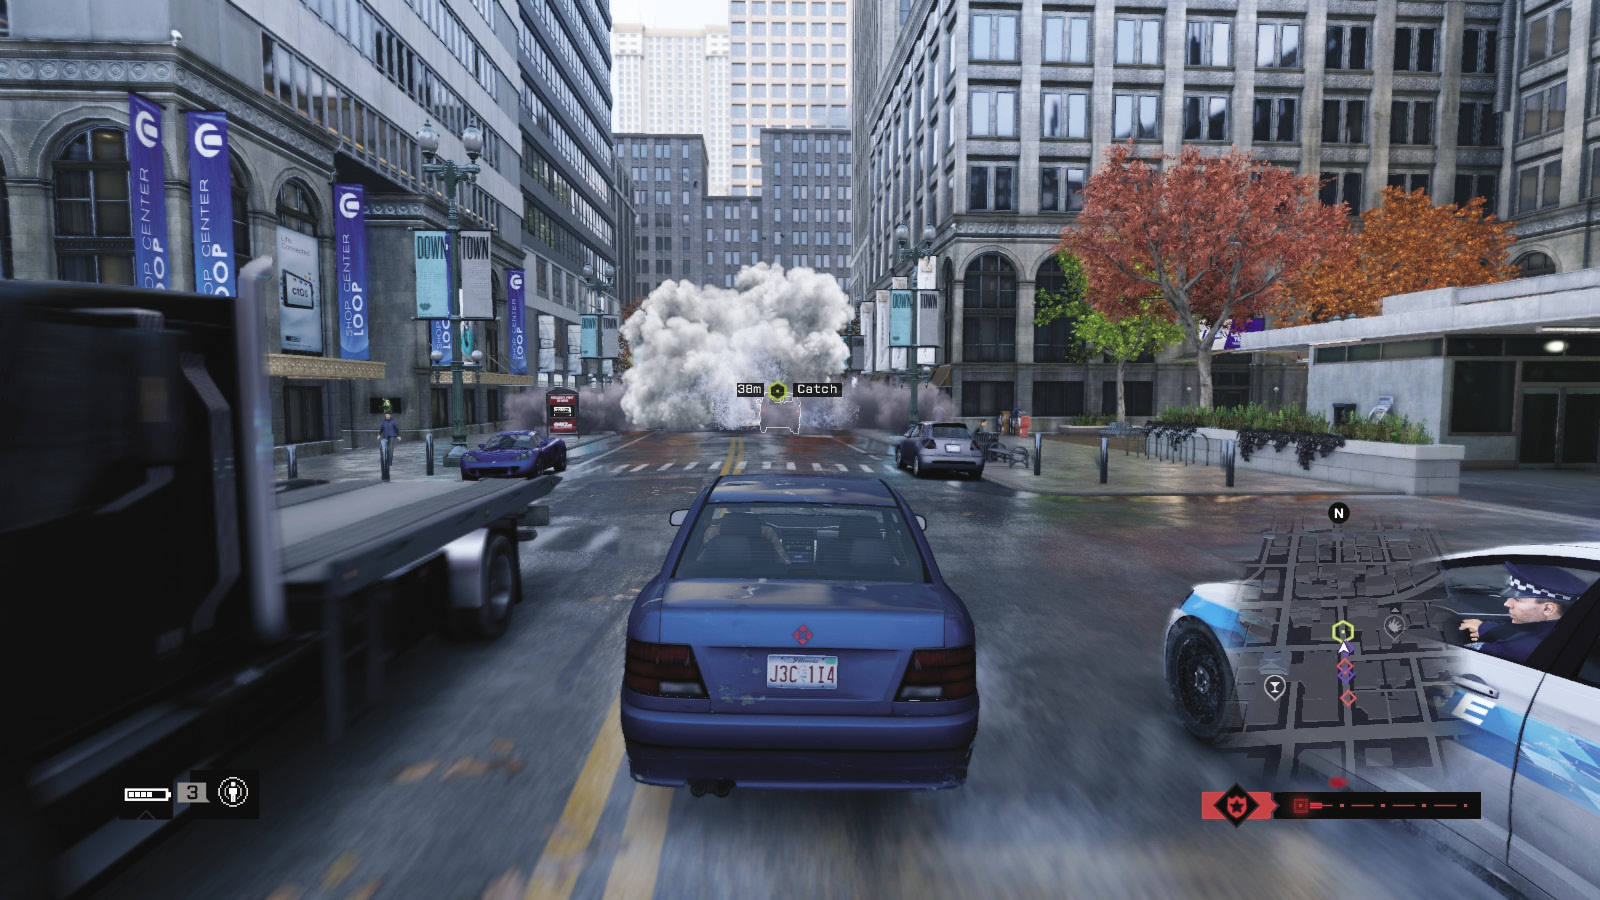
If the foe escapes (usually in his van), have a vehicle close by so you can easily follow him; then employ all the (nonlethal) techniques you’ve learned in your driving chases to stop the van, such as the steam pipe. Don’t accidentally switch to a gun when the foe escapes; rush and pound on him with a melee strike to finish.
_STREET CLEANING
location: Alley, North Loop
Enemy: THE CLUB
NUMBER OF TARGETS: 1 (Veteran) / He May Flee
NUMBER OF ENEMIES: 7 (Gunmen x3, Veteran x3, Marksman x1)
Shot-Callers x 2 (Veterans)
Difficulty: ($2,500 Reward)
REINFORCEMENTS: UP TO Three VEHICLES (Gunmen x 2, Veteran x 4)
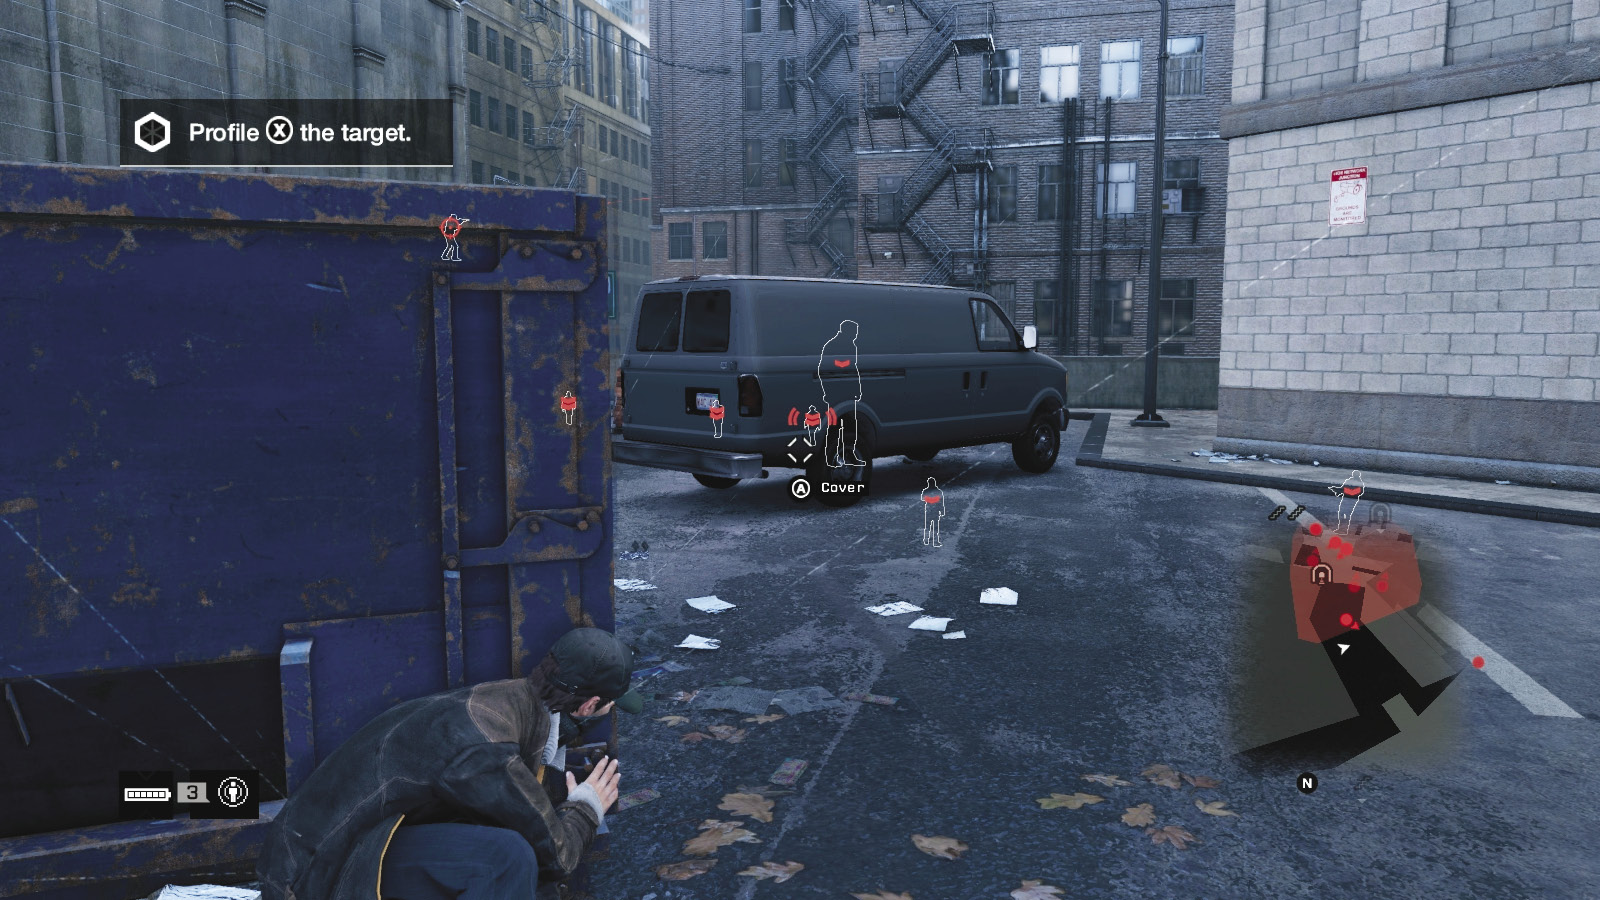
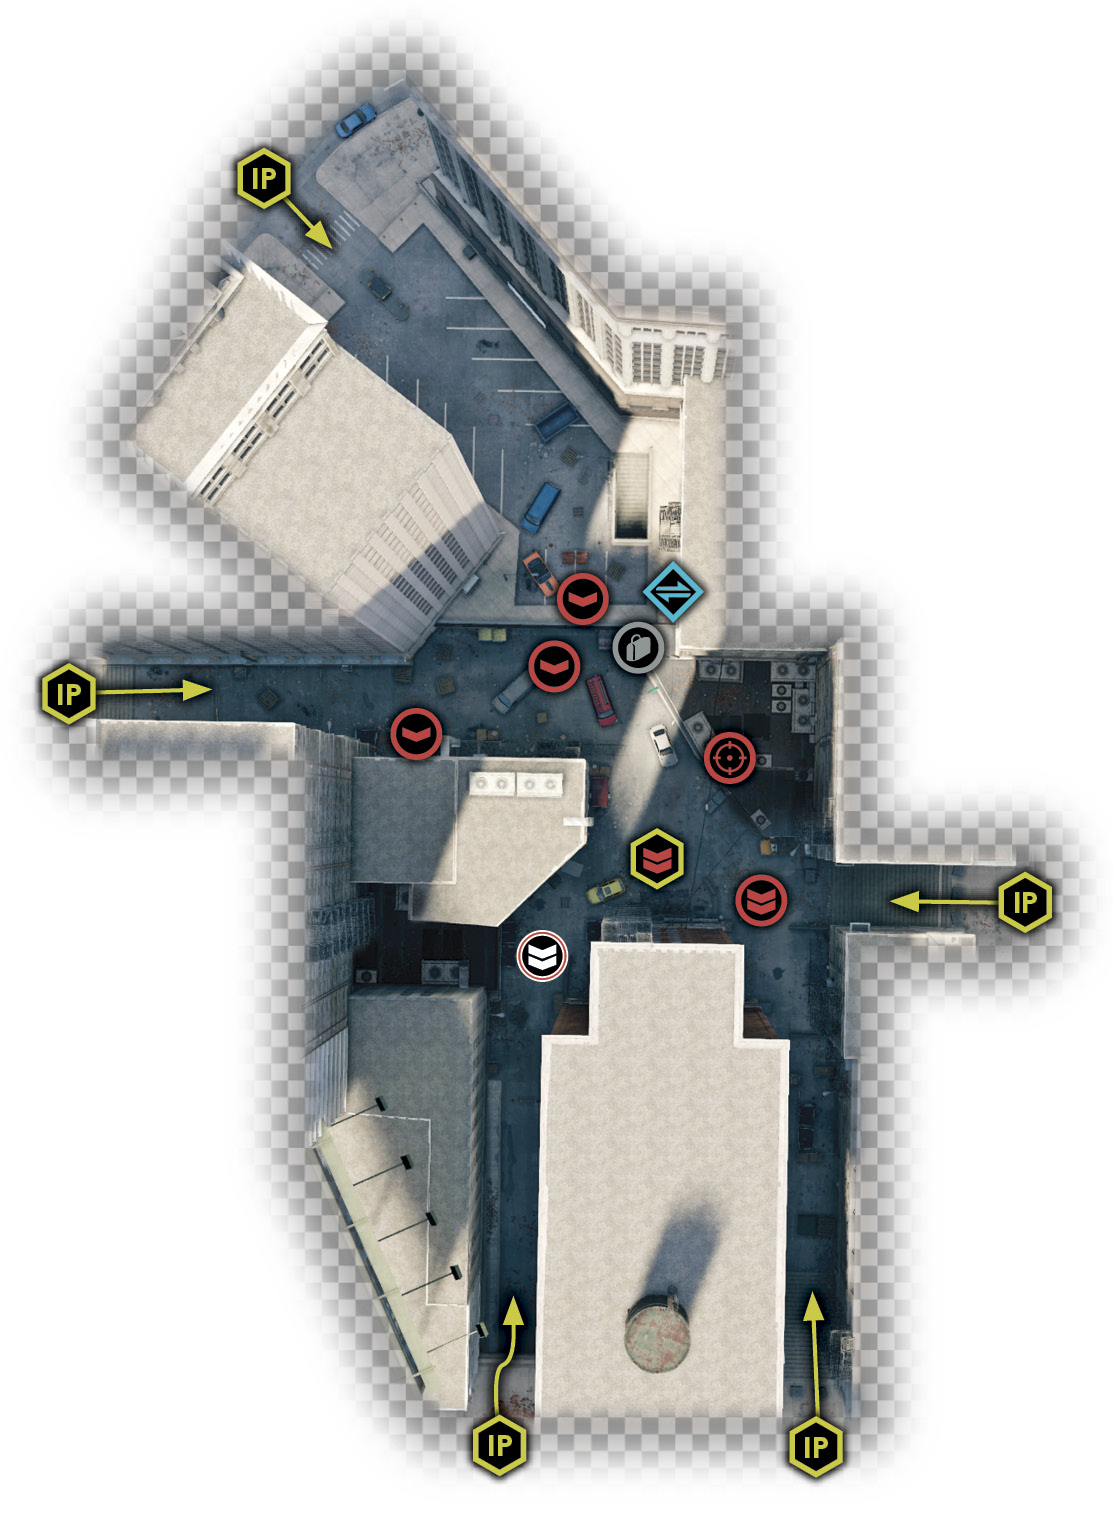
Take your call at the bridge before jogging over the main intersection and checking out the alley area where a group of Club members are up to no good. You are fortunate that there are only a few to worry about, though that sniper might give you a bit of trouble.
Insertion Points
There are technically six insertion points to this alley area, but only four are useful (the other two lead to or from the traffic tunnels, and you can’t enter from here without moving out of the mission zone). All six are noted for your convenience.
East Alley
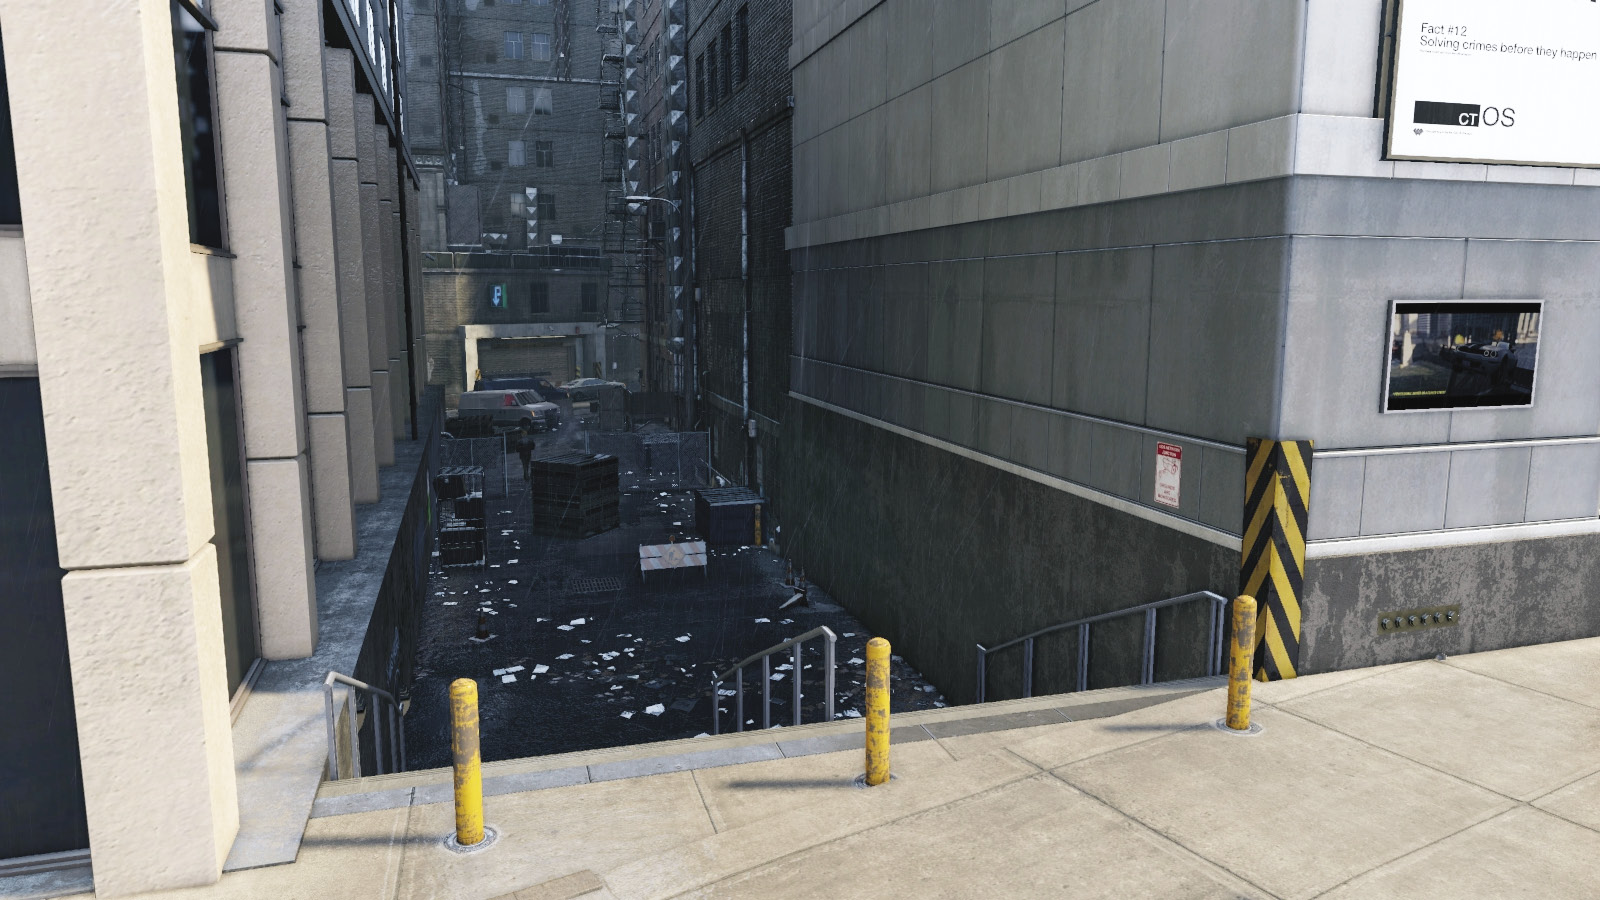
This set of steps and the alley re the closest to your starting point. You can actually strangle the waiting foe by simply walking up to him, as you’re still outside the restricted area when you do. Watch out when you enter, though, as the alley widens and the foe on the north parking lot balcony and the sniper can spot you. Head right (south) and you can sneak around to the target.
North Parking Lot
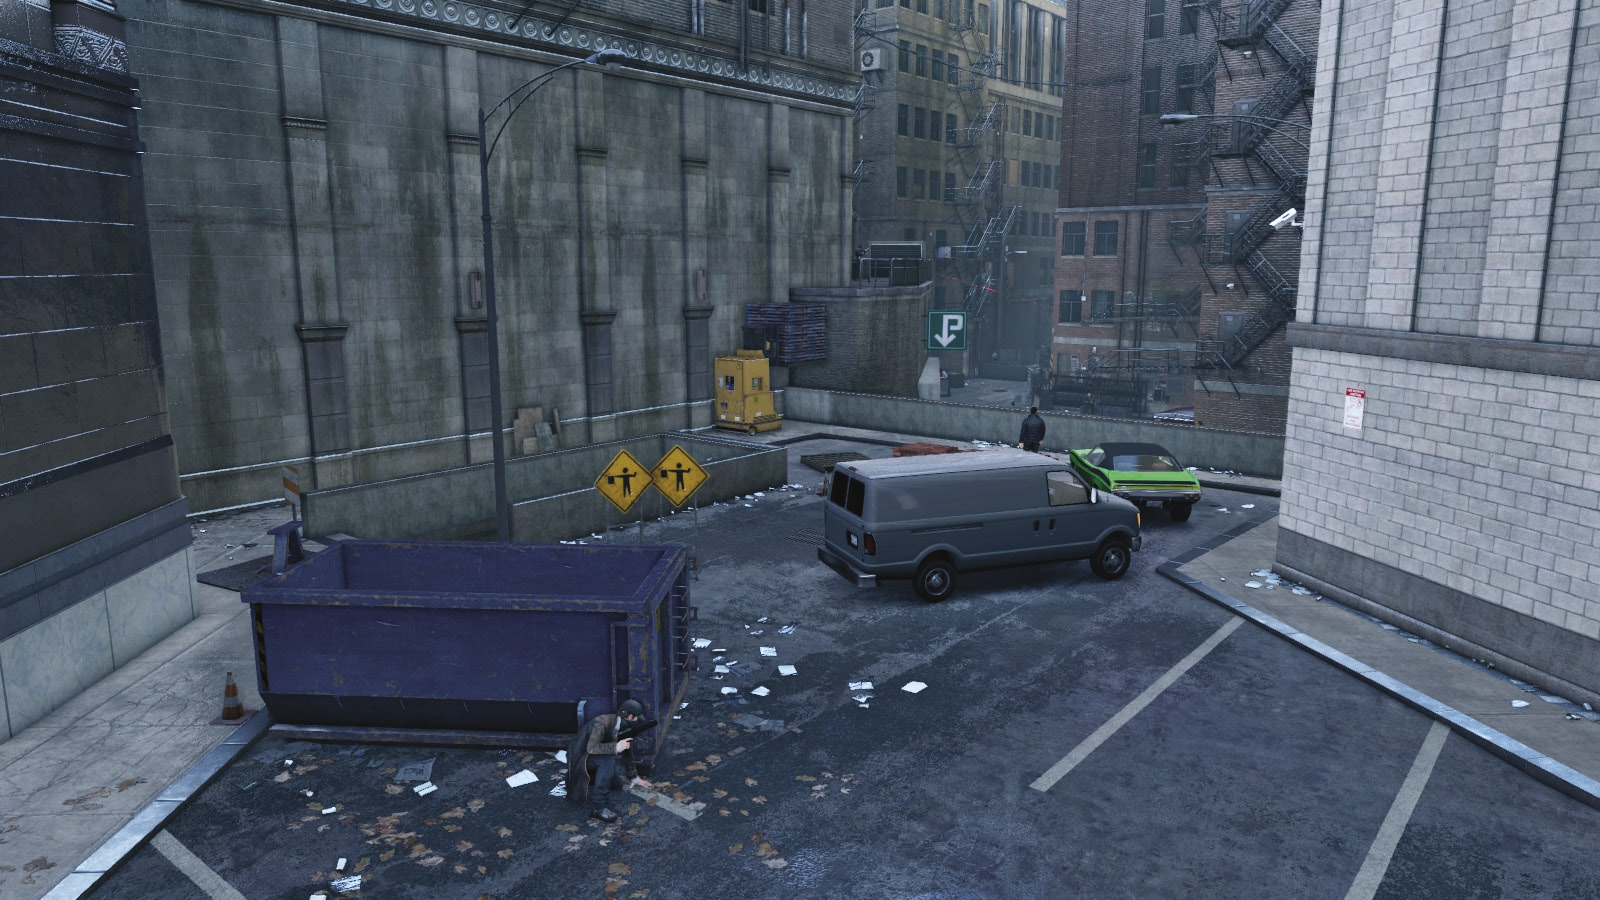
This is arguably the most helpful insertion point, as you can easily see and mark every foe, you have the advantage of height (for grenade tossing), and you can use the forklift to reach the sniper’s camping spot and take him out, freeing you up to stealthily take everyone else down. You can also easily head down the steps to the pipes and garage floor to continue your stealth operations. Recommended.
Northeast Traffic Tunnel Garage
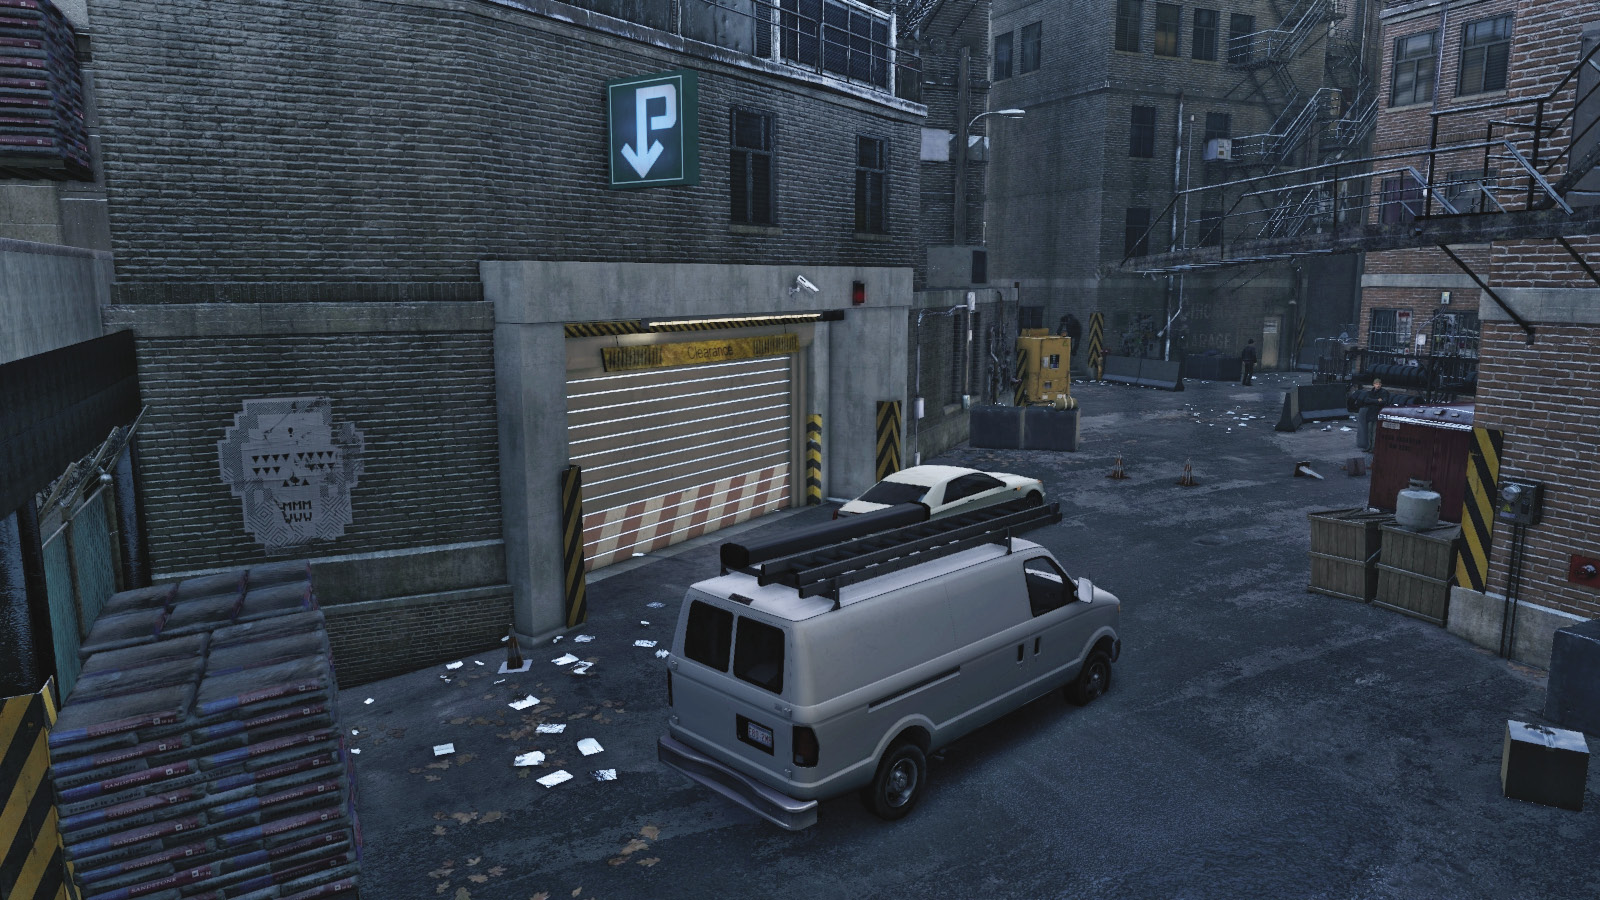
This is never used, as the foe doesn’t escape in this direction, and you can’t drive down to this point and enter from here anyway (and it doesn’t give you any advantages to approach from this direction). A second car is parked here; use it if the target bolts to his vehicle so you can give chase.
West Steps
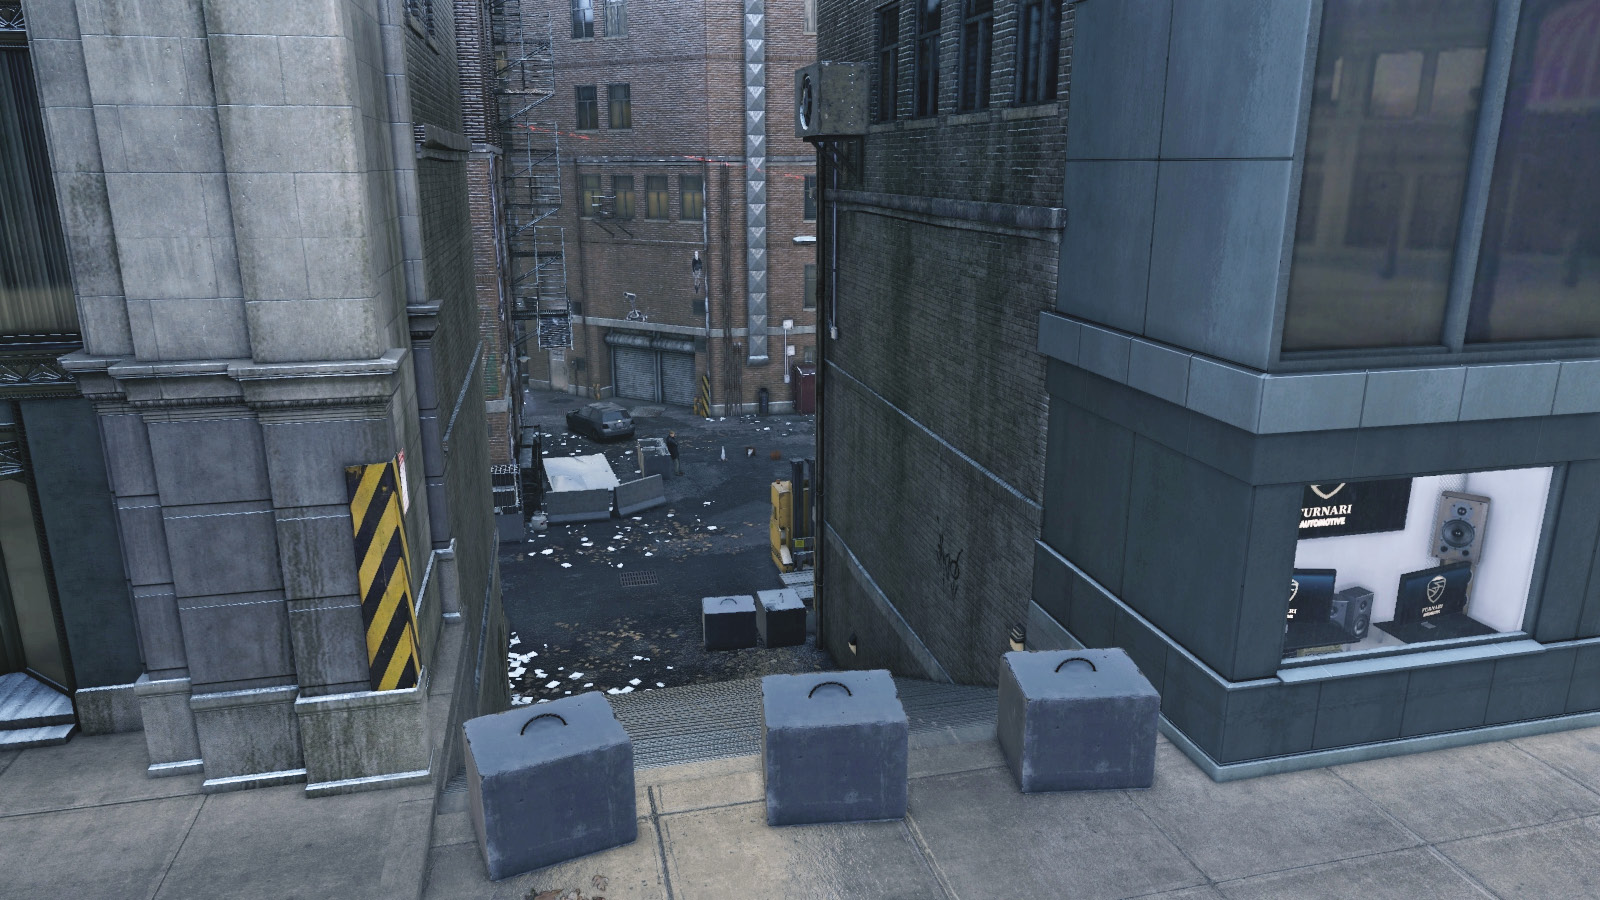
You need to temporarily leave the mission area to reach these steps from the top. Normally that would be a problem, but if you care only about swiftly taking down the target, you can easily reach him from here before using guns on his henchmen afterward. Also recommended.
South Alley
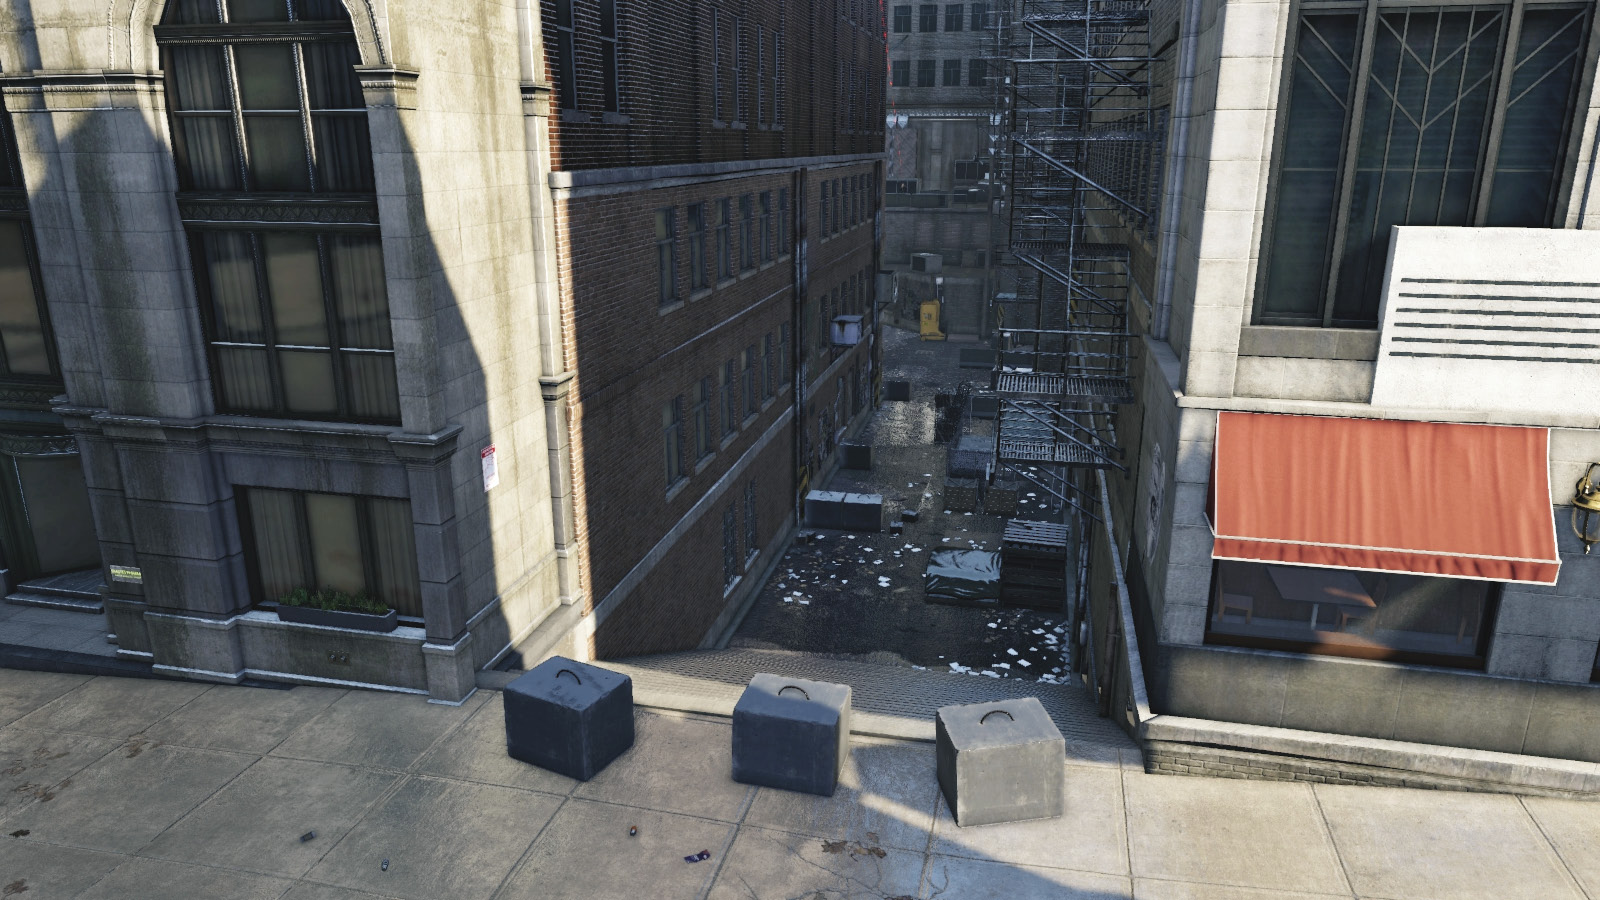
This is an easily navigable area to insert yourself into, dropping the guard near the bottom of the steps. However, the sniper on the roof ledge opposite (north) of this location hamstrings you, making it difficult to sneak in from here.
South Traffic Tunnel Ramp
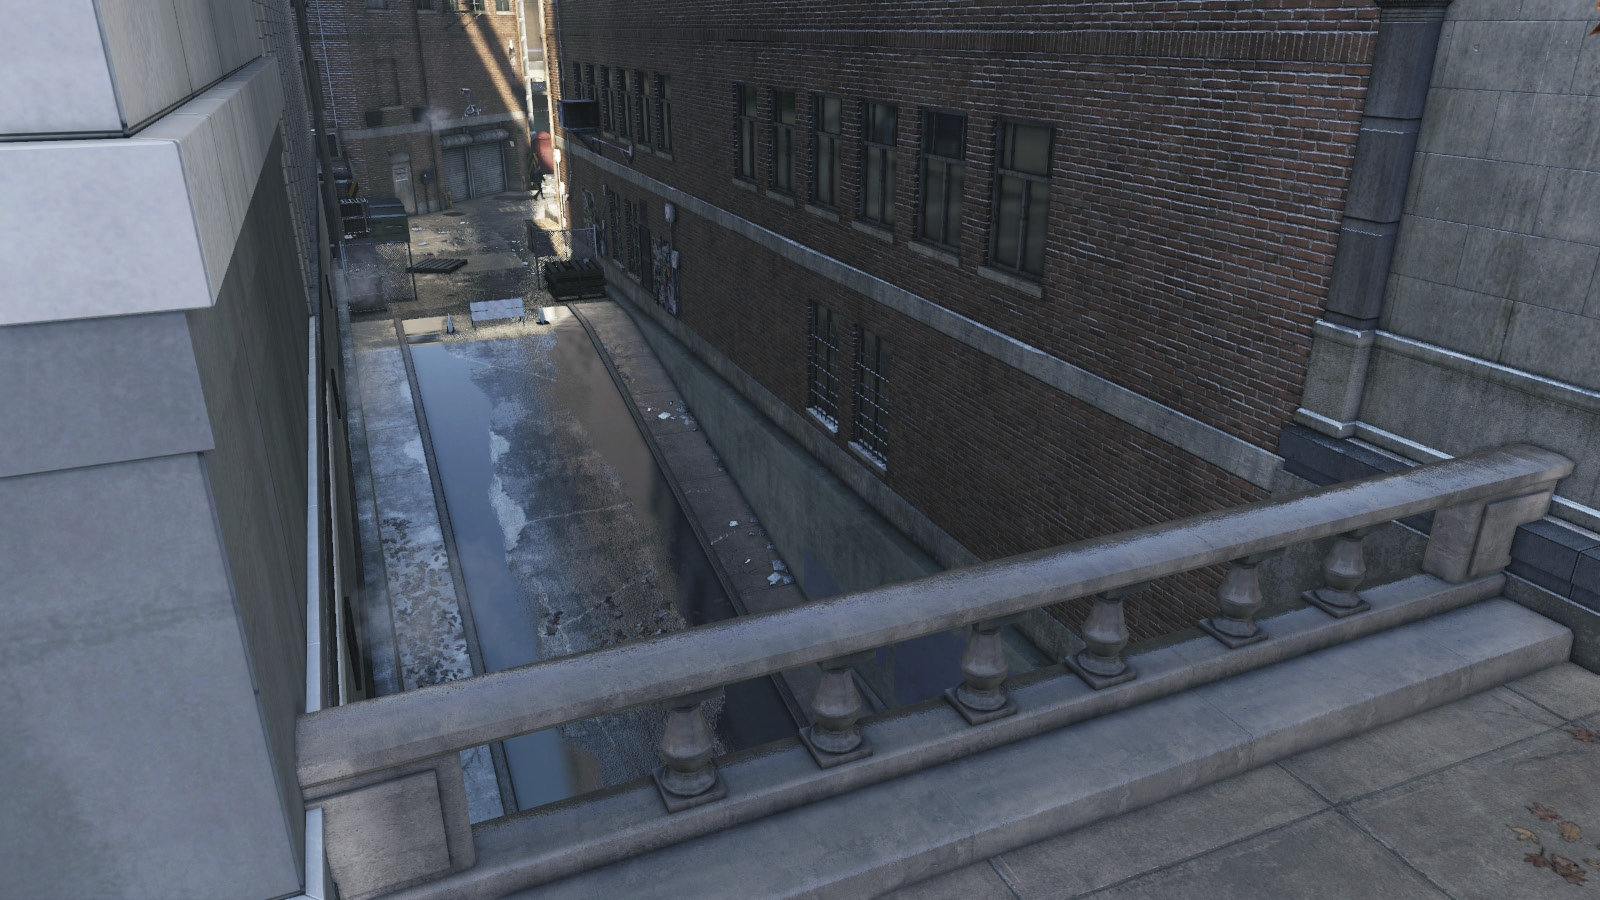
Learn where this is, as the target drives at some speed down here if he becomes aware of your actions and doesn’t want to fight. There’s an L-shaped alley linking back to the east alley area, too, which is good if you’re avoiding foes trying to find you or wanting another route to your target.
Progression Plans
As long as you neutralize the sniper before he spots you and understand the target’s predilection for running to his car to escape, this is the most straightforward of the Gang Hideout missions. It is reasonably easy to take down all enemies no matter the direction you enter from. Some of the safer routes are detailed here:
 Aggressive // Stealth: Club Takedowns in an Alley
 Difficulty:
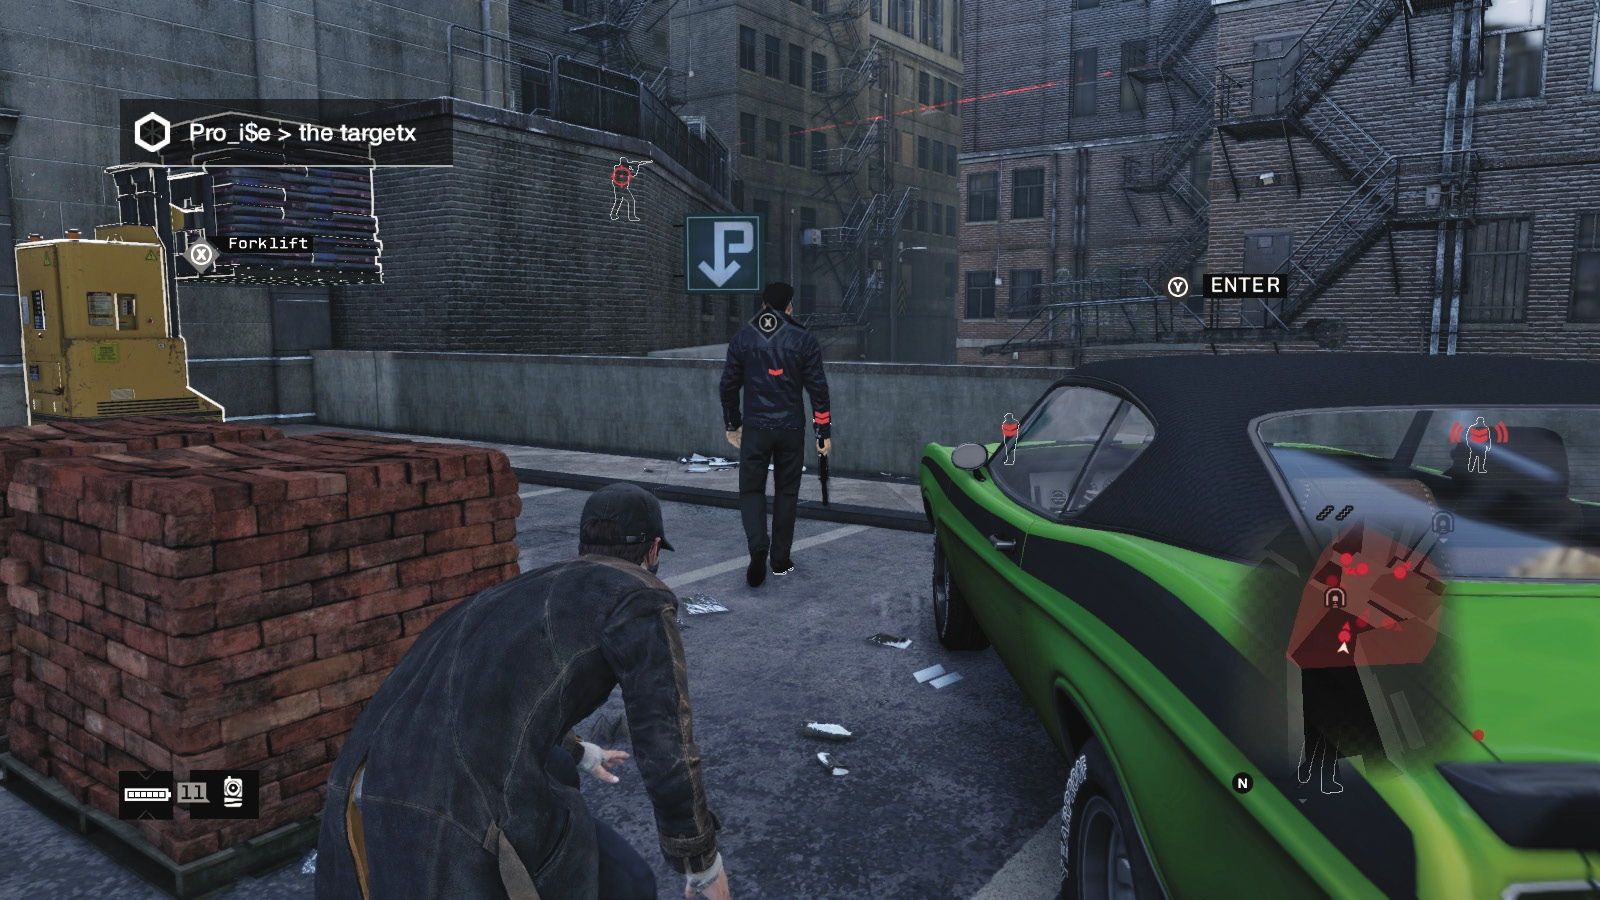
Dash around to the parking lot with the hut and a single foe between a Dumpster and a van. Easily take him out, then hack into the camera above you. Cycle through the other cameras here, marking the remaining six foes. These are dramatically easier to bring down after removing the sniper.
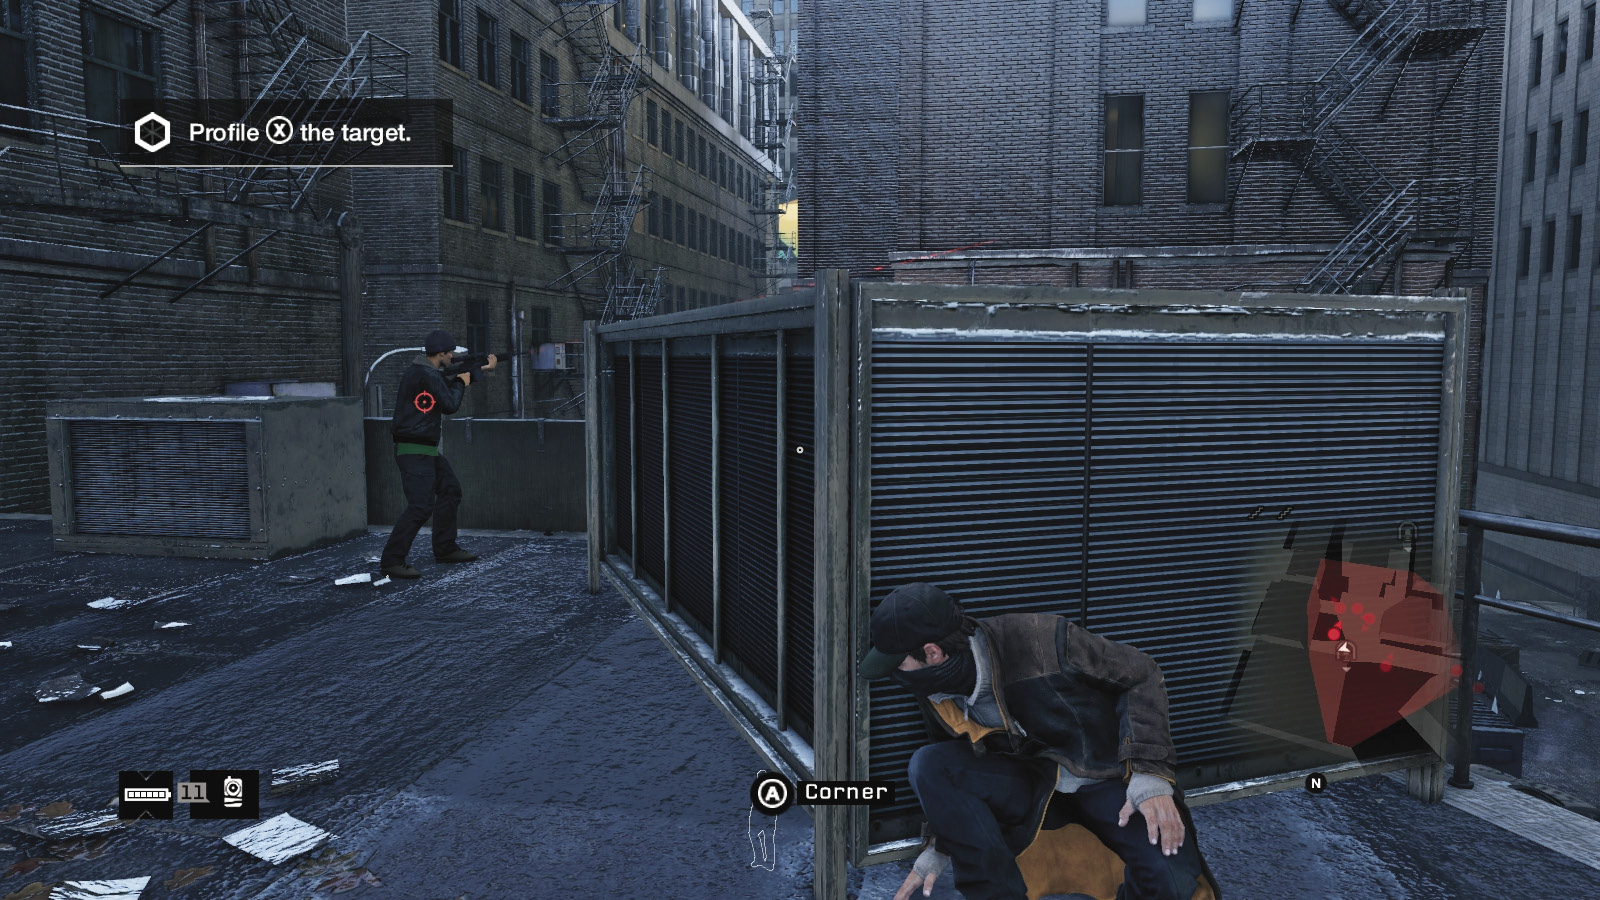
Lower the pallet of drywall on the forklift ahead and left of you, then use it to climb onto the high perch where the sniper is waiting (usually with his back to you). Explode a junction box to the left, or better yet (if stealth is important), strangle him and remove the biggest threat to your infiltration.
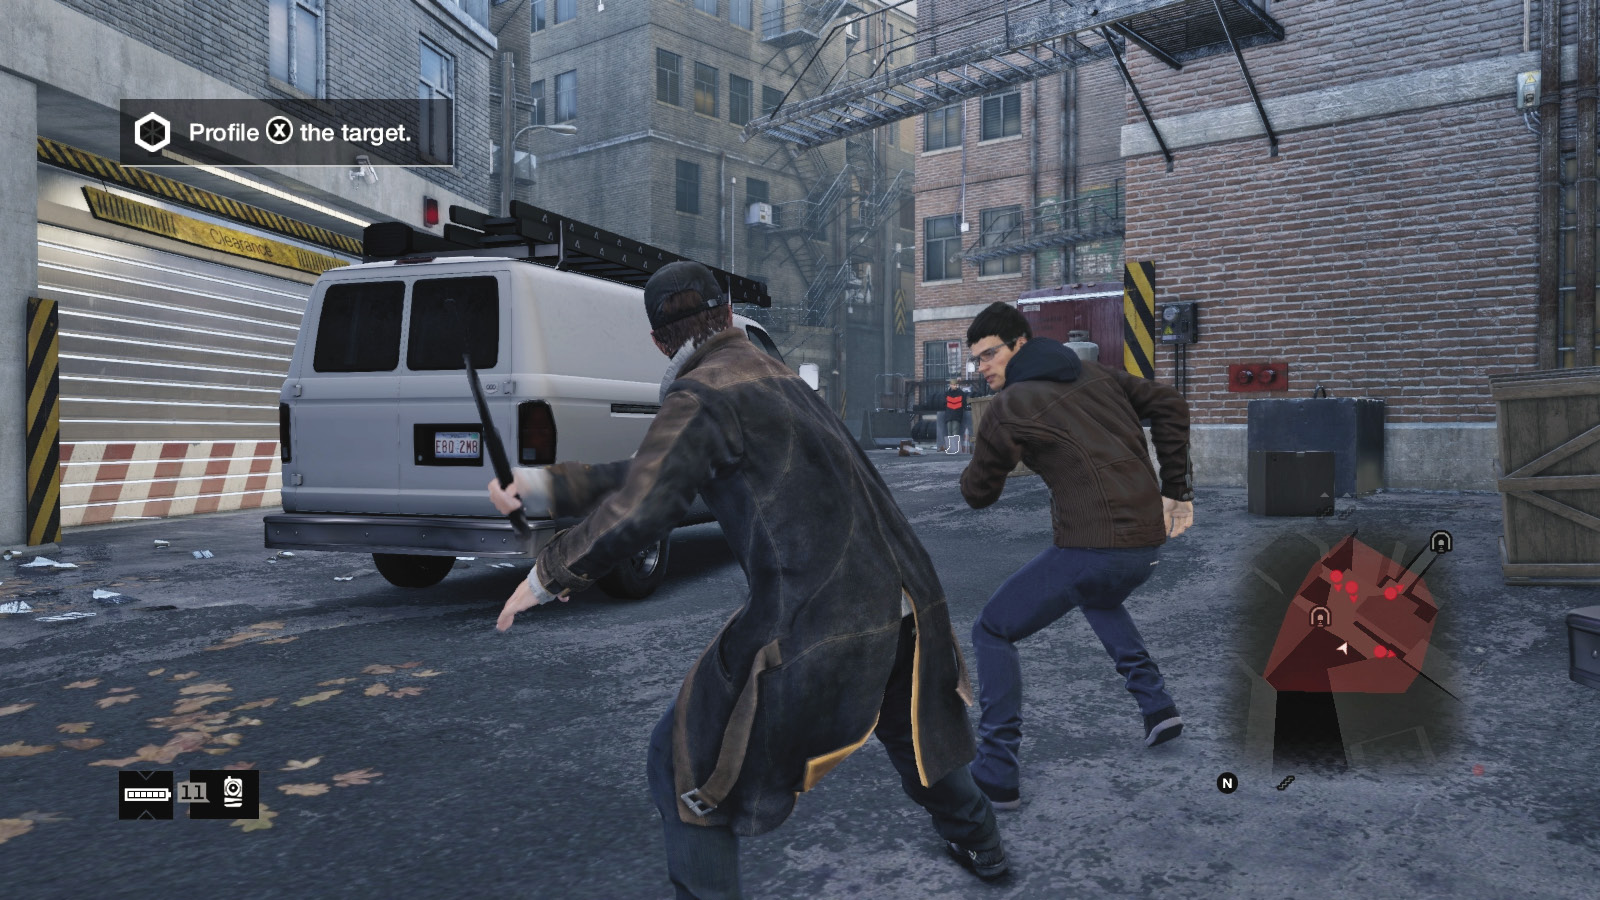
Backtrack to the parking lot, and drop down the hole in the stairwell to the covered garage. Sneak out, bash a nearby foe between the vans, then head out and tackle the enemy in the east alley. Your foes are usually alerted by this time and set off to find you. Hide behind a fence in the L-shaped alley or behind the vans or pallets, and drop both the remaining foes. You can now easily approach and beat down the target, standing by the concrete barriers near his vehicle.
 Aggressive // Stealth: Target Strike; Don’t Dillydally
 Difficulty:
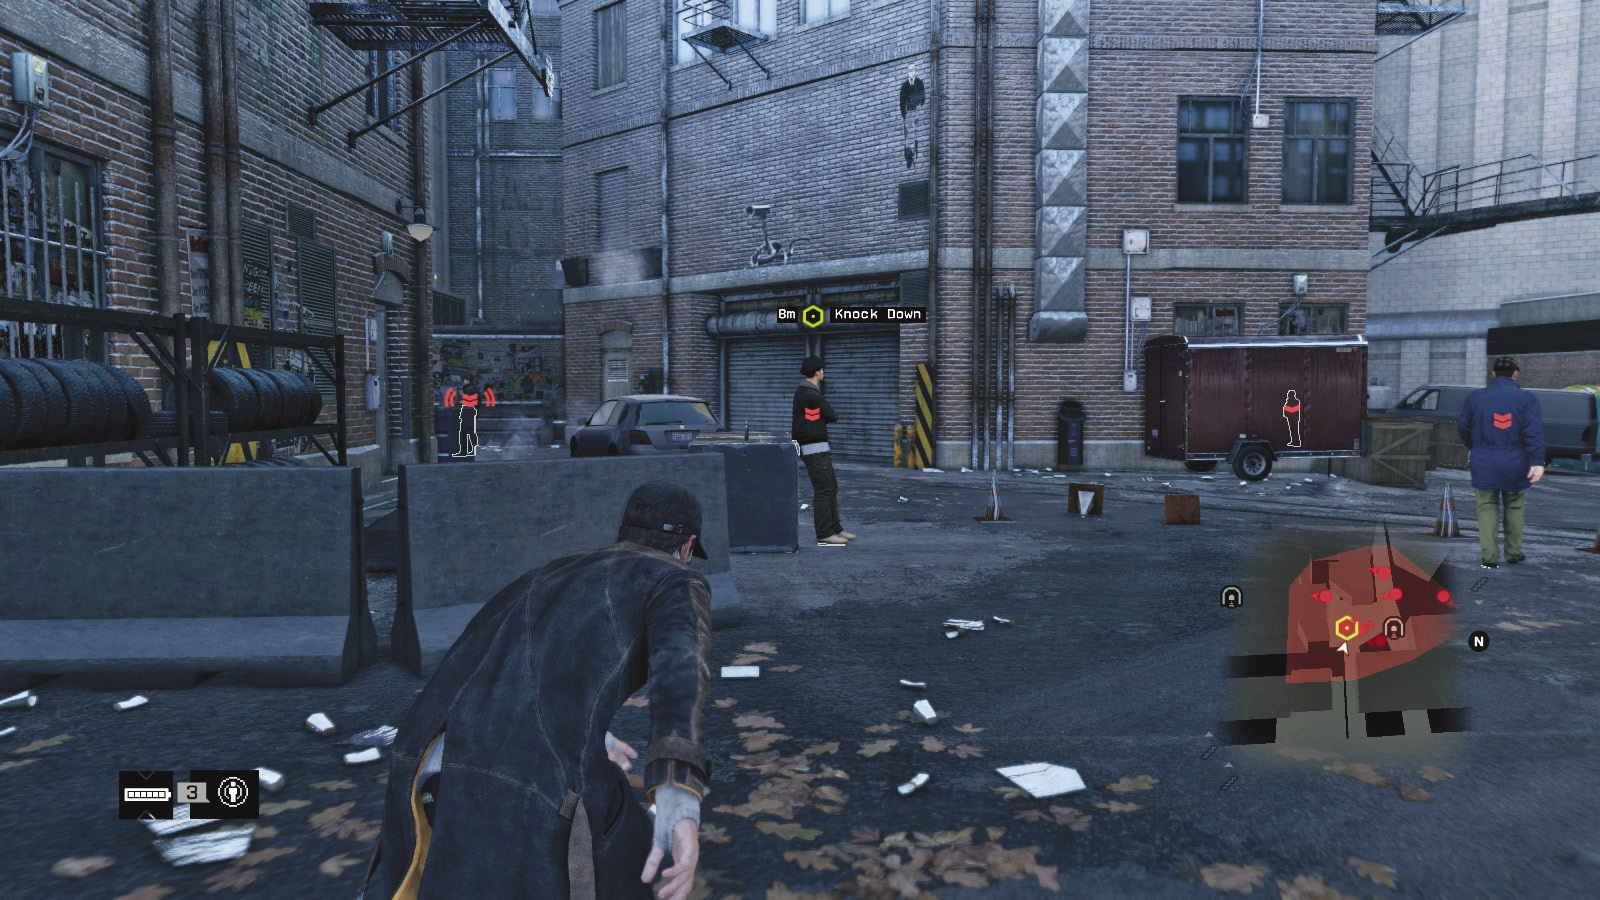
In this Gang Hideout mission, you can remove the target first and flee or fire afterward: Choose the west steps and jog down to the concrete blocks near the forklift to hide behind. Then jog out, bash the target, and leave or prepare for more violent combat.
 Aggressive // Smart: Deal with These Explosions, Pally
Difficulty: 
If the sniper is a nightmare to deal with and you don’t want to sneak up on him, use the cameras and access the junction box. Blow it up and send him flying. The ctOS box on the parking lot level plunges this area into darkness, which helps during nighttime assaults too. Otherwise, there are forklifts for attracting and another explosion you can attempt in the covered garage and south alley if foes wander in there.
 Aggressive // Violence: Keeping a Head Count
Difficulty: 
Your foe will flee if you bring a gun to bear, so cripple his vehicle with an IED or grenades, or remove him as a threat first. Then you can entertain yourself from the sniper’s perch, dropping grenades from the parking lot balcony and using the L-shaped side alley to sneak back and forth with lures to confuse your enemies.
 Driving // Offensive: A Vehicle Chase for a Finale
 Difficulty:
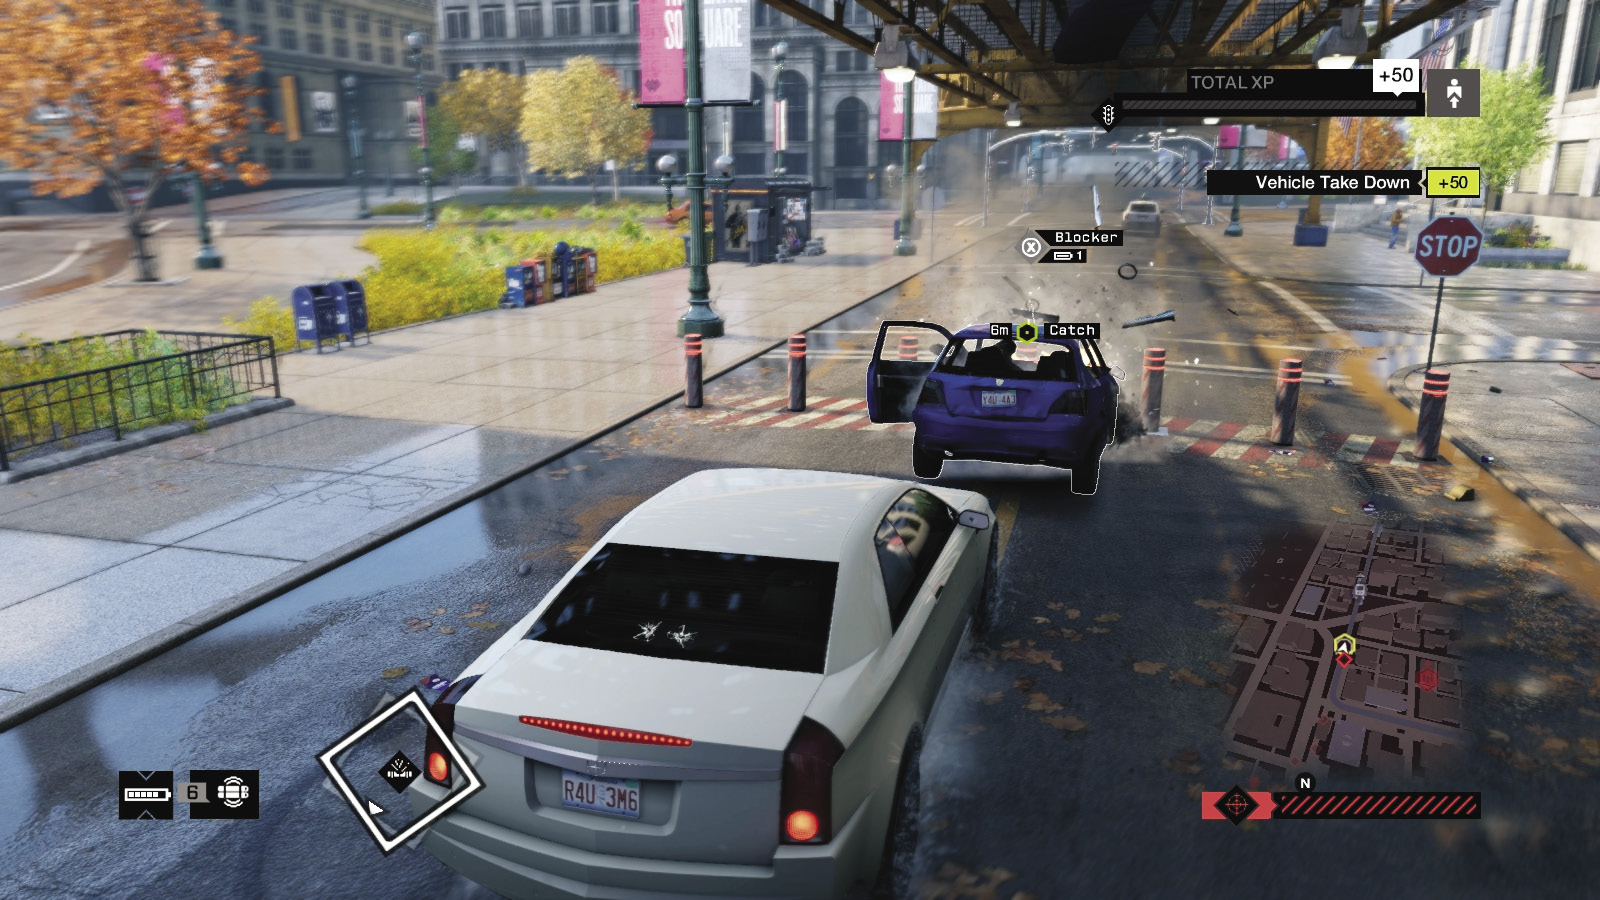
If the foe gets spooked and rushes to his vehicle, find the adjacent car near the garage door and follow him south. Head down a ramp into the traffic tunnel and up into the street under the L-train tracks. A blocker is immediately available to stop this pursuit. Otherwise, it’s a quick dash around town, waiting for a steam pipe to explode or traffic lights to slow your foe so you can ram him.
_TWO FOR ONE
location: 36 WESTERN SHOPPING COURTYARD (SOUTH ROOFS)
Enemy: THE CLUB
NUMBER OF TARGETS: 2 (Veterans) / DO NOT FLEE
NUMBER OF ENEMIES: 10 (Veteran x9, Marksman x1)
Shot-Callers x2 (Veteran, Marksman)
Difficulty: ($2,500 Reward)
REINFORCEMENTS: UP TO FOUR VEHICLES (Gunmen x4, Veteran x4)
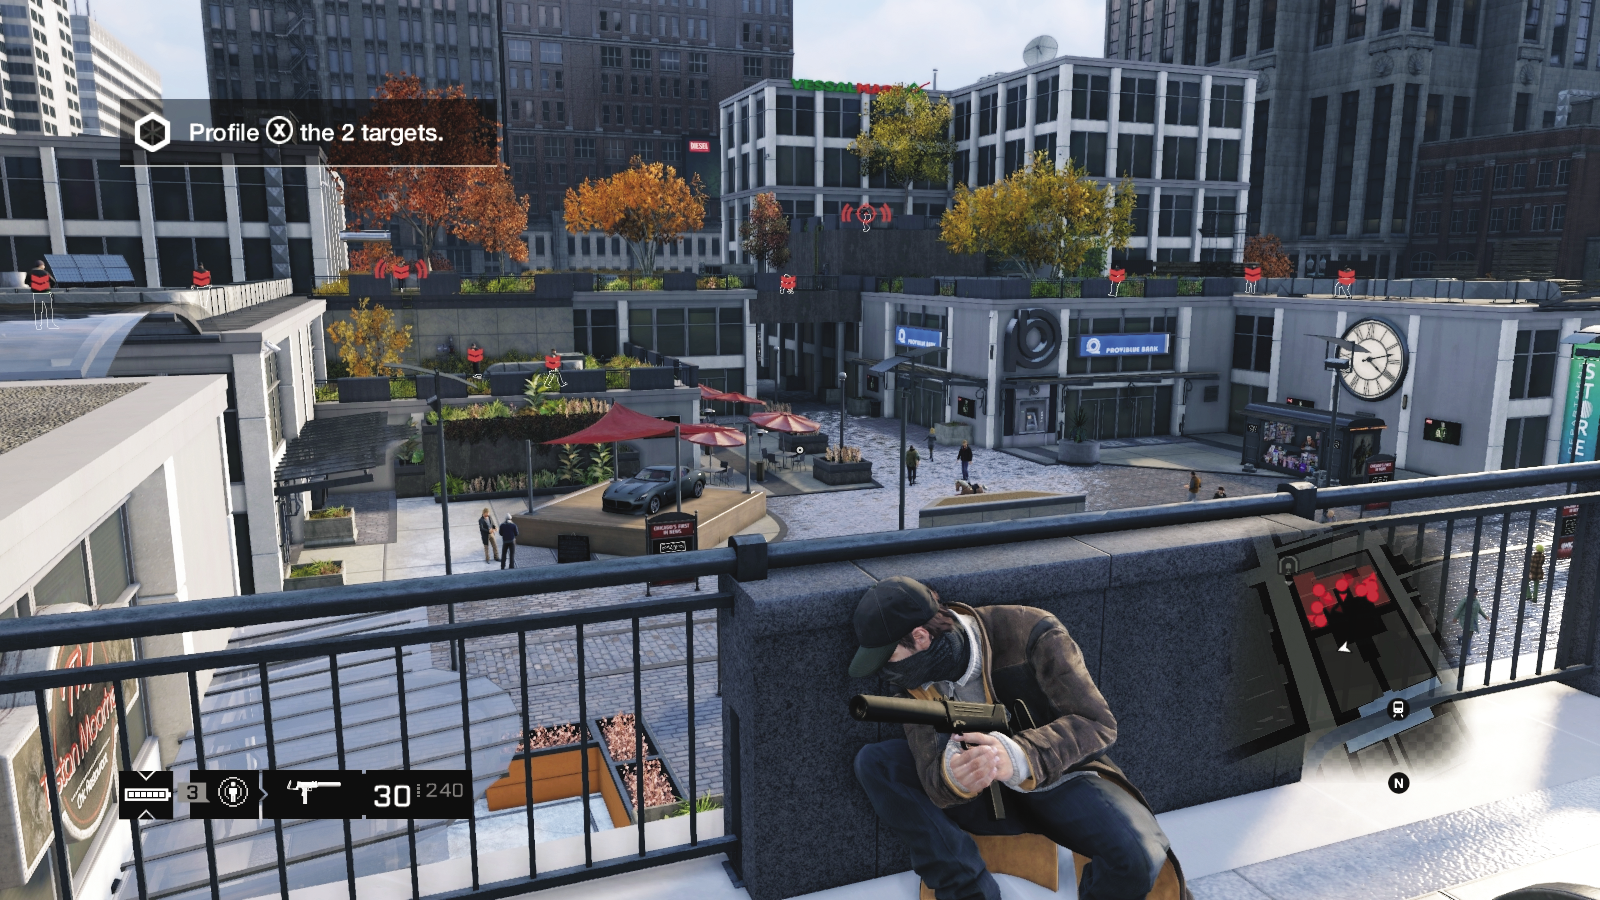
Start your mission close to the western L-train station on “the Island” in the western part of the Loop. Find an adjacent open-air shopping plaza known as the “36,” with the enemies atop the southern rooftop area (flat structures of various heights). Begin your infiltration by choosing one of the many insertion points to head in from.
Insertion Points
Though the enemy is dug in on the rooftops, they are extremely visible. There are many possible insertion points, but some access areas are vastly more helpful than others. It’s also helpful to figure out which of these might become an escape point if your infiltration gets too tough to handle!
Rail Platform (North)
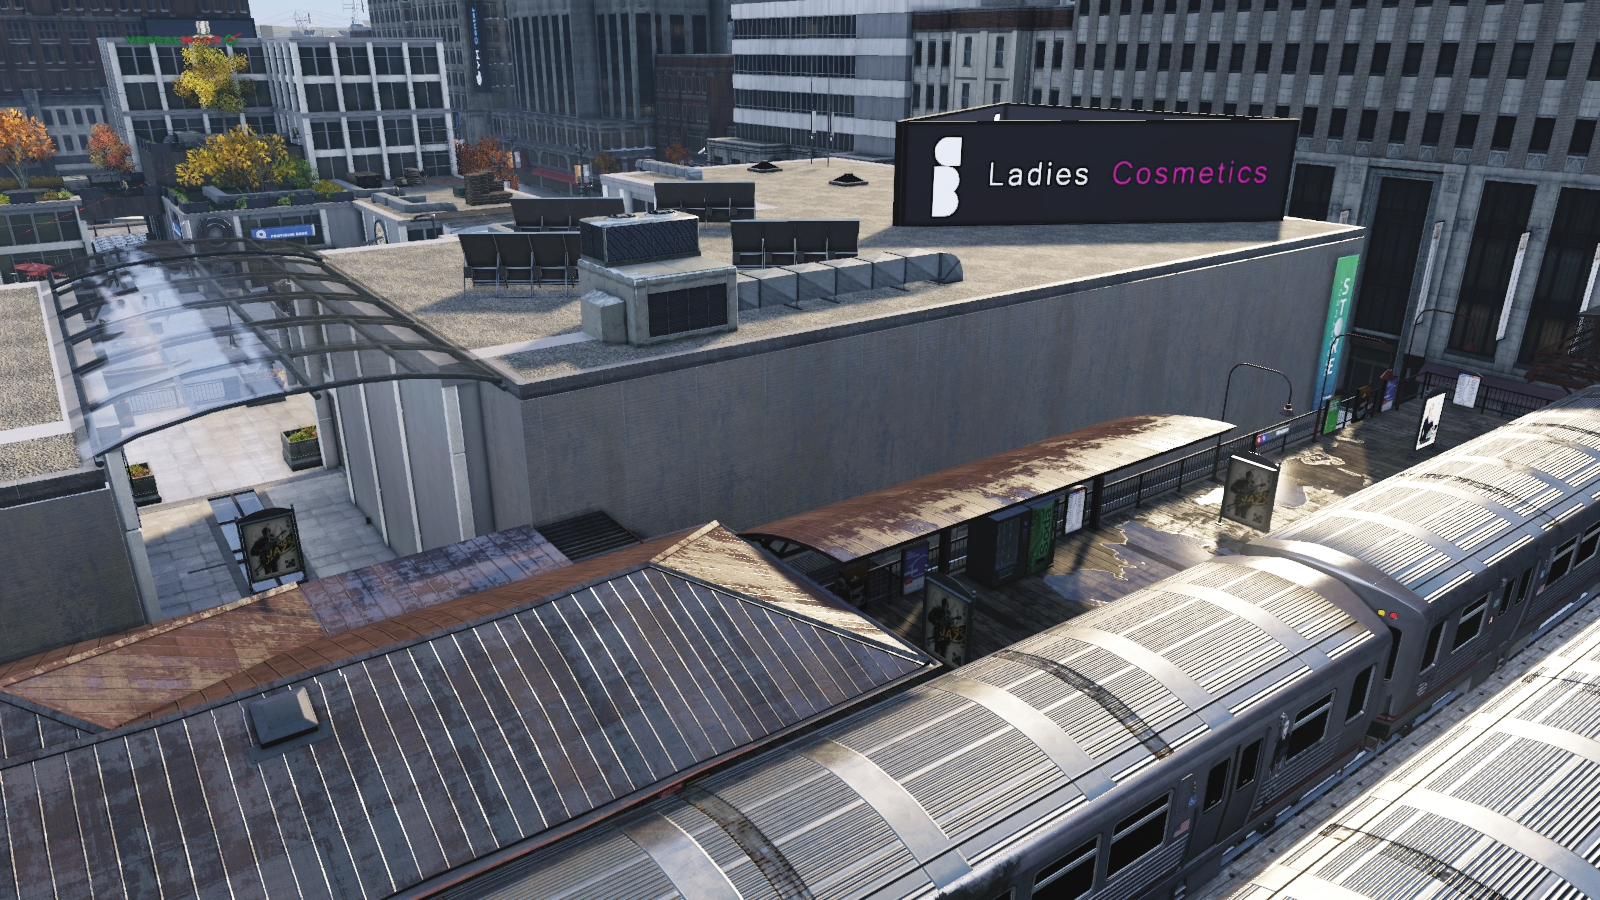
If you climb the steps near the start and head north over the L-train platform tracks (watching for trains!), you can vault over the wall and land on the upper-level cafe area, across from all the enemies. Reach them by crossing the glass roofs on either side, mark foes, and access cameras. This is an excellent position for reconnoitering.
Construction Lift (West)
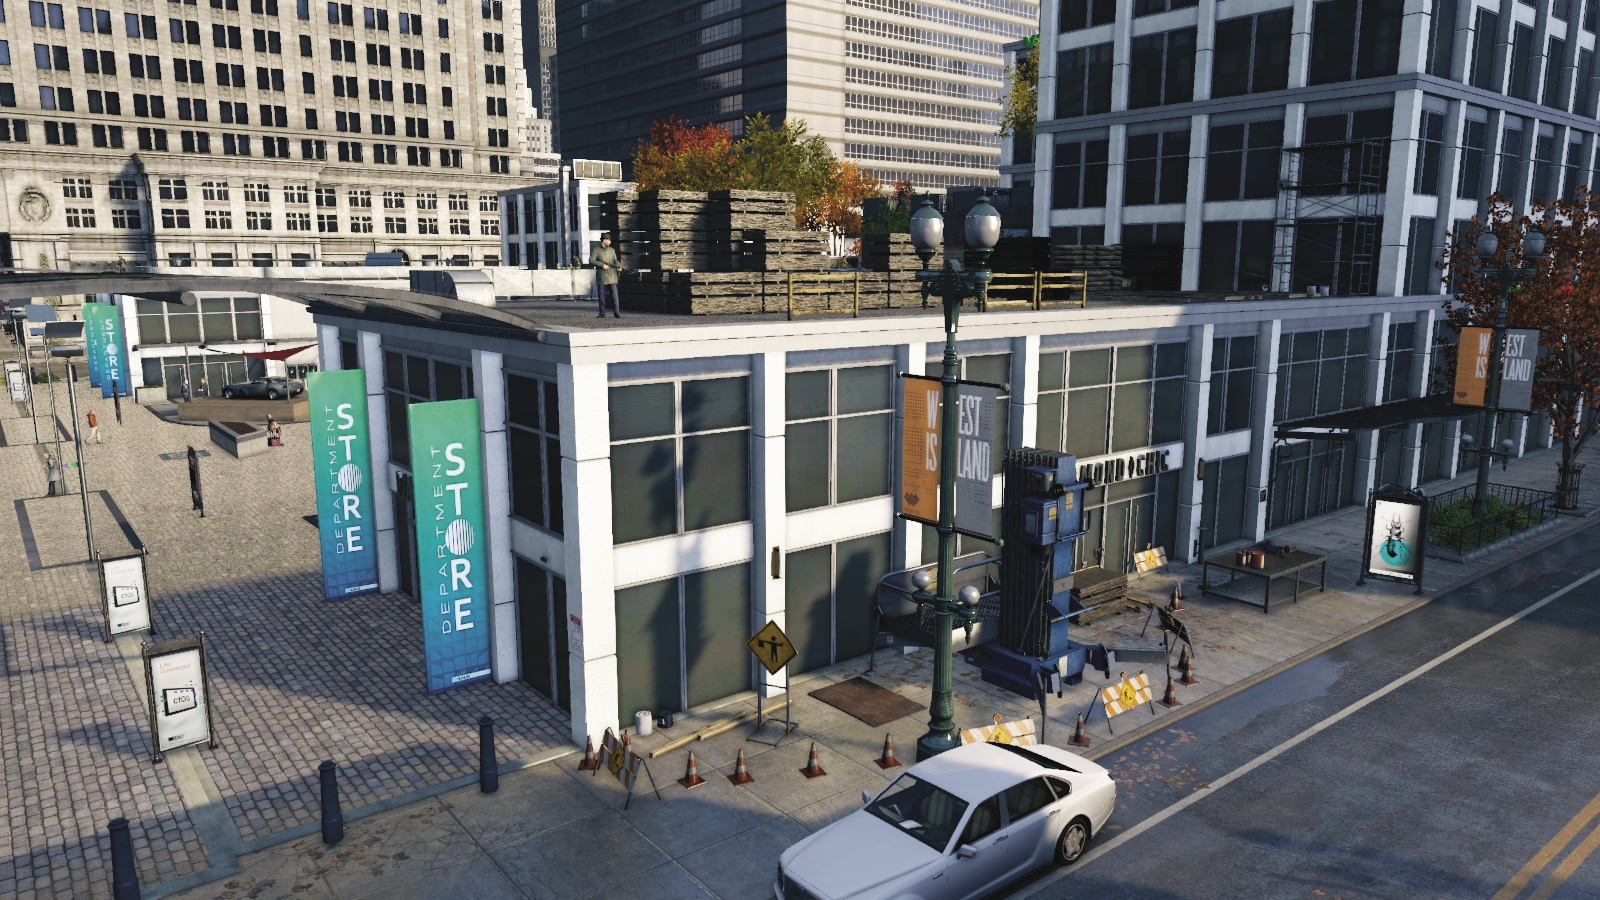
Head to the plaza’s western side, outside the perimeter. Activate the construction lift and ride to the roof where your first three opponents (including the first target) are. Even if you don’t use this route, find the lift in case you need to drop onto it during a swift exit. Place a vehicle here to use if you need to escape reinforcements arriving by car.
36 Signage (East)
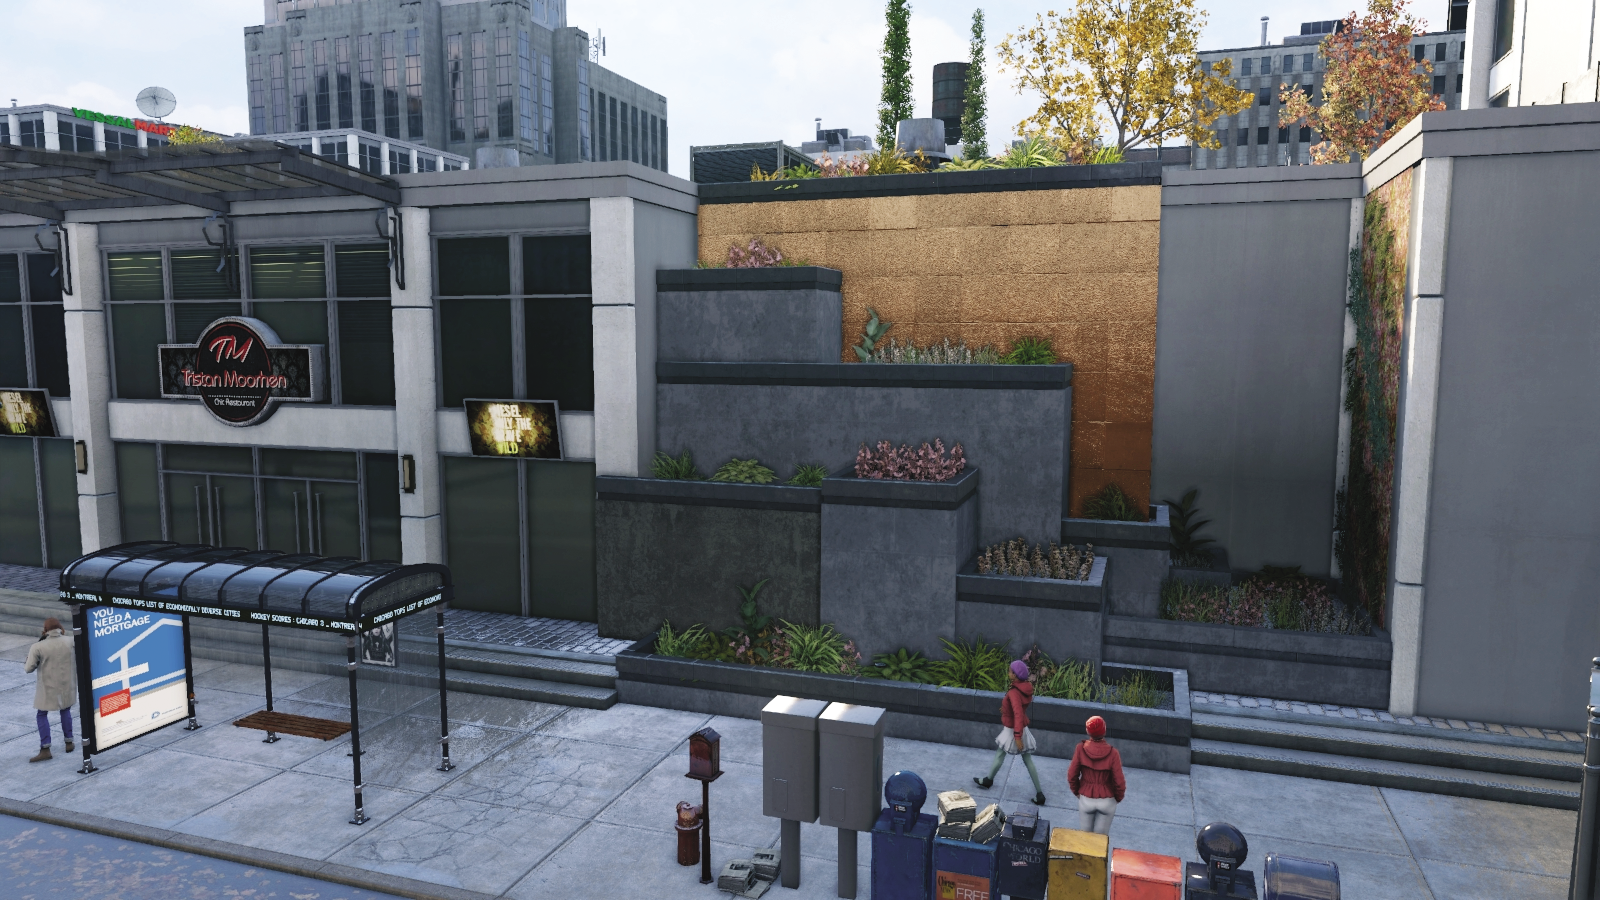
On the opposite side of the plaza perimeter to the lift is a series of stepped planters near the “36” sign. Climb up these for another excellent method of reaching the foes on this side of the rooftops (near a solar panel you can maneuver). If you’re removing the enemy in a clockwise direction, this is the place to start.
Main Stairs (North)
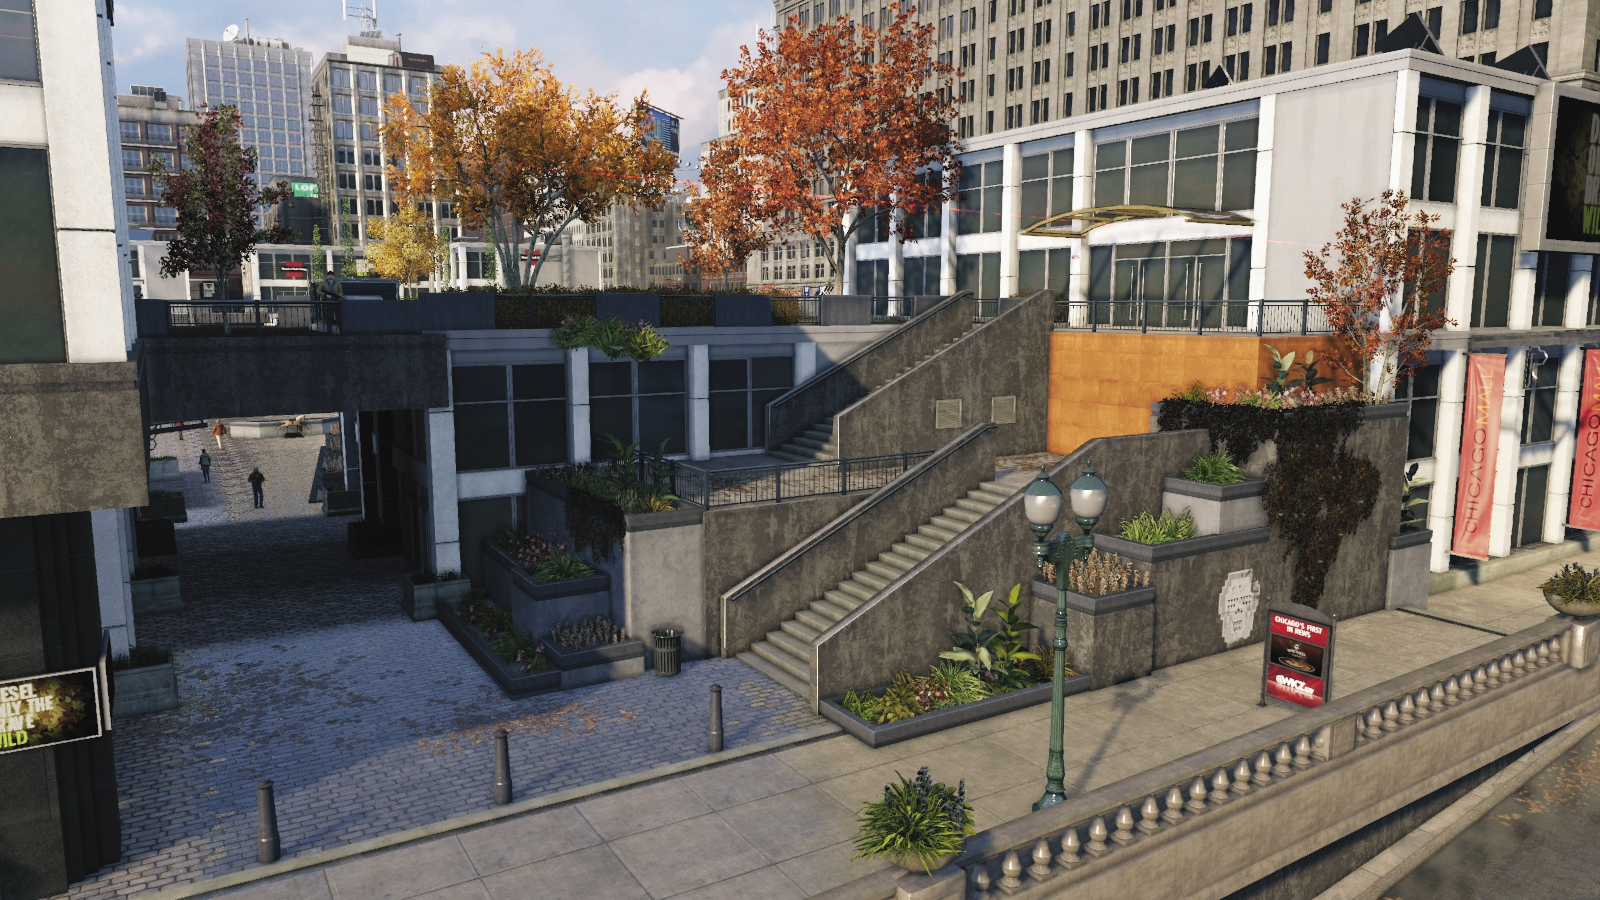
Or, you can creep up to the roof area from these easily accessed steps, which brings you out into the middle of the rooftops. This isn’t ideal, as there’s a sniper who can easily spot you (unless you activate the protector) and you’re caught between both sides of foes, meaning you’re more easily spotted. This makes a good escape location, though.
Plaza Courtyard (Center)
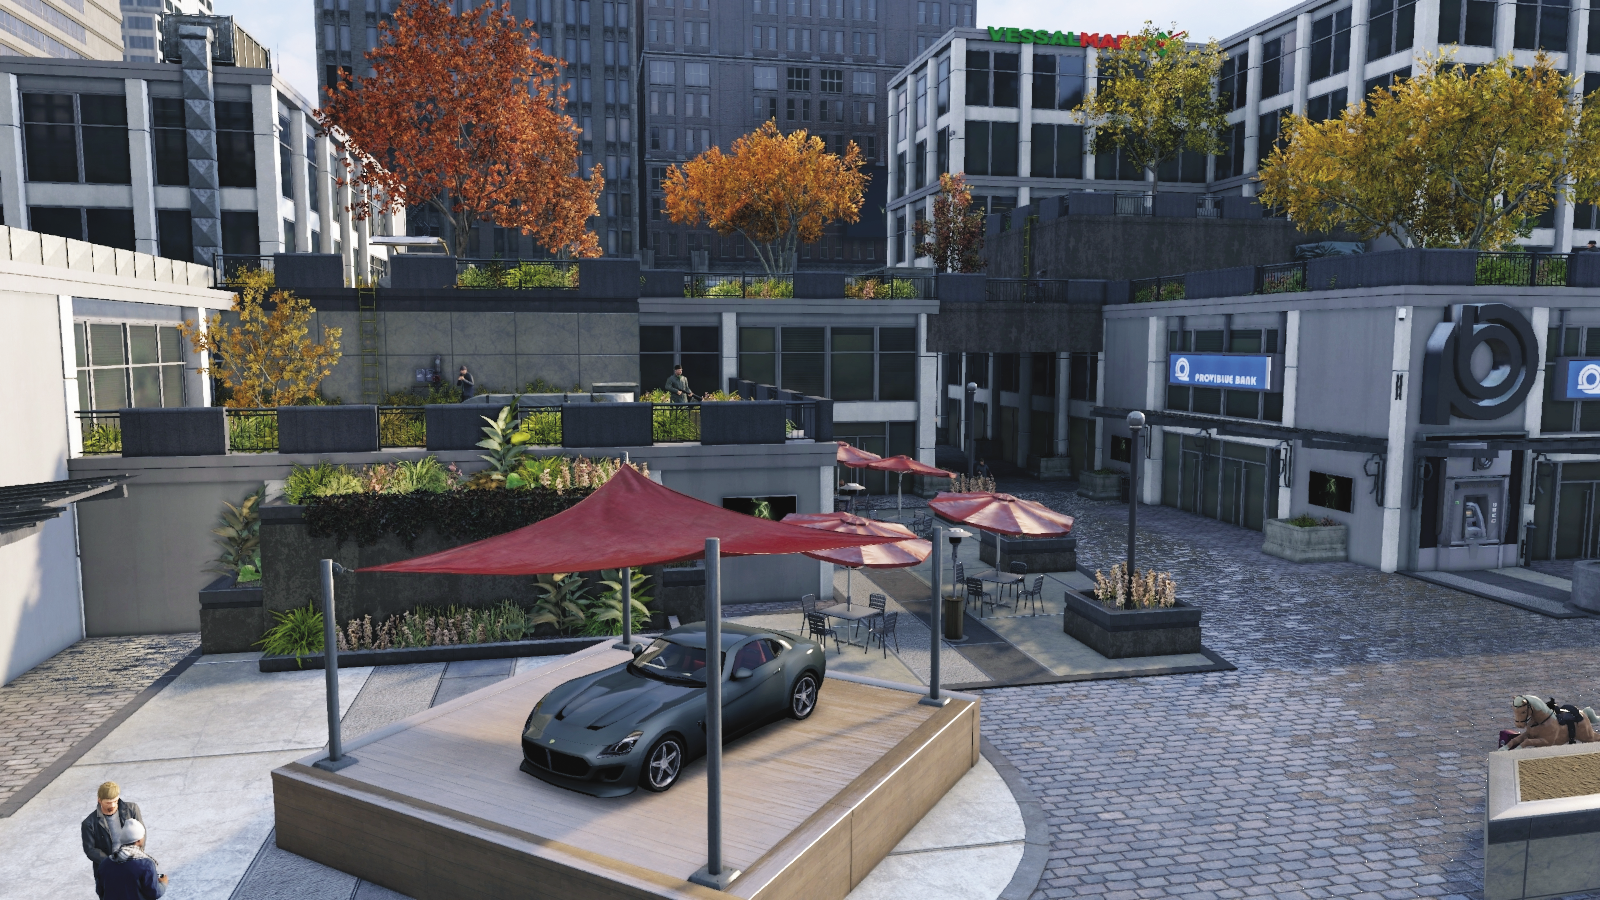
You can also access the roofs from the northwestern corner by climbing the planter to the lowest roof where one of the targets is stationed. This isn’t a particularly wise decision, as the enemy has the height advantage, you’re easily spotted, and foes are on both sides of you, meaning you’re outflanked. It’s only really necessary to be on the ground when marking foes or locating cameras to help find your enemies.
Progression Plans
With two targets and a nasty sniper atop the highest roof, stealth is really the only option here. But there are multiple methods of reaching both of the targets with minimal risk and some entertaining methods to dispose of everyone else:
 Aggressive // Stealth: Sneaking Across the Rooftops
 Difficulty:
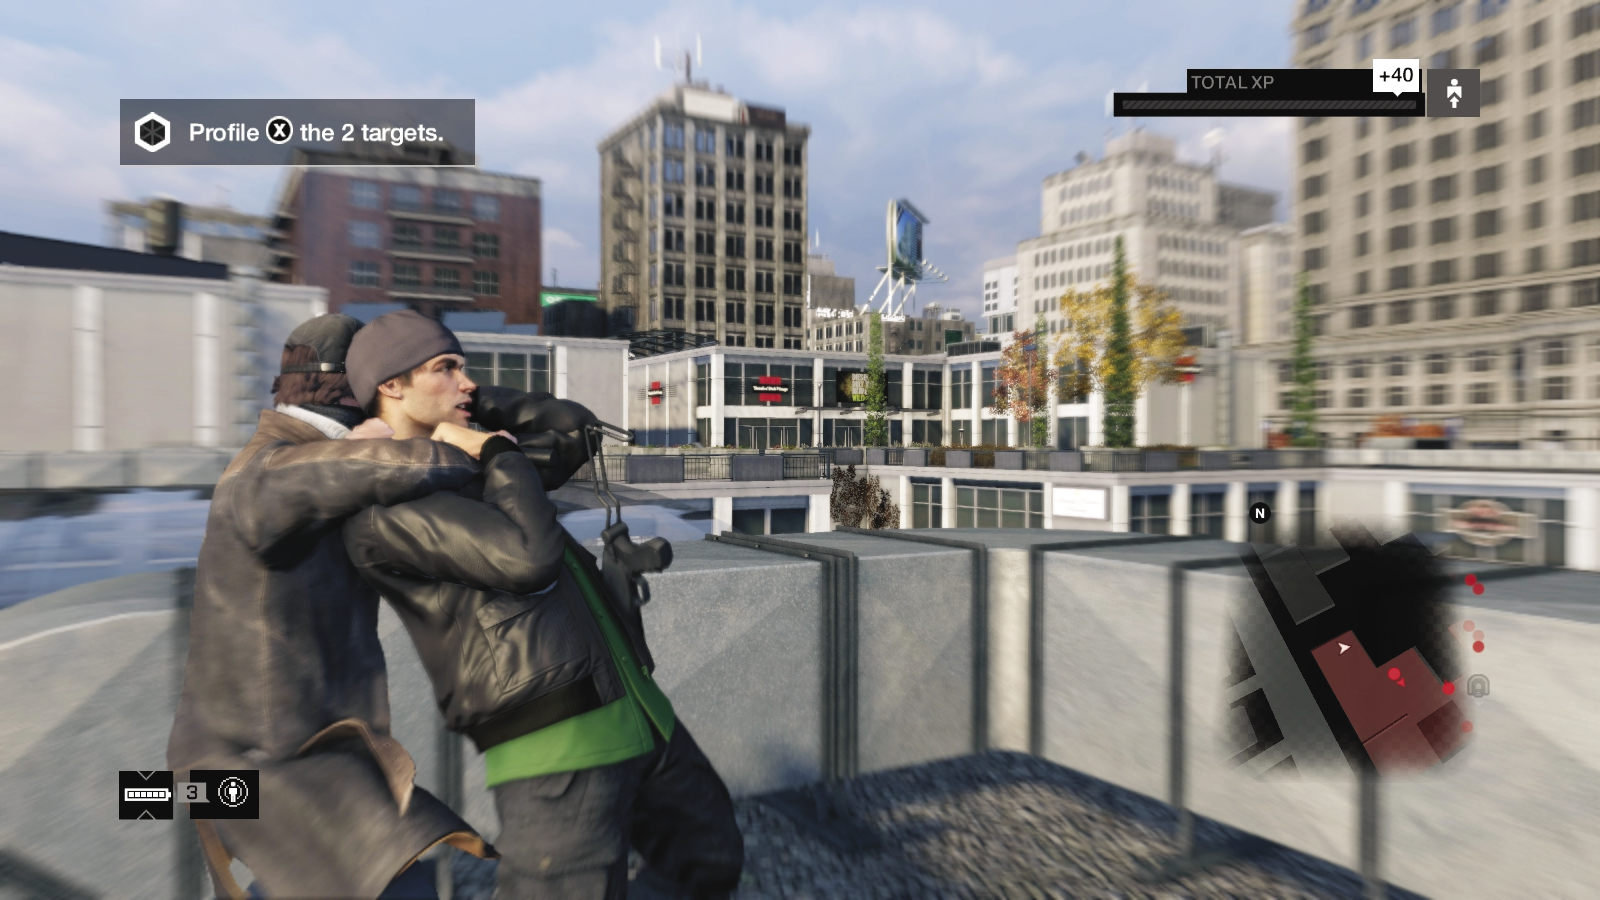
Start by the construction lift, entering via the lift or from the L-train platform. Melee strikes are mandatory if you want to complete this without reinforcements. Tackle the foe in the corner near the stacks of construction materials, then creep back behind the large wooden board stacks and bash the foe by the AC ductwork.
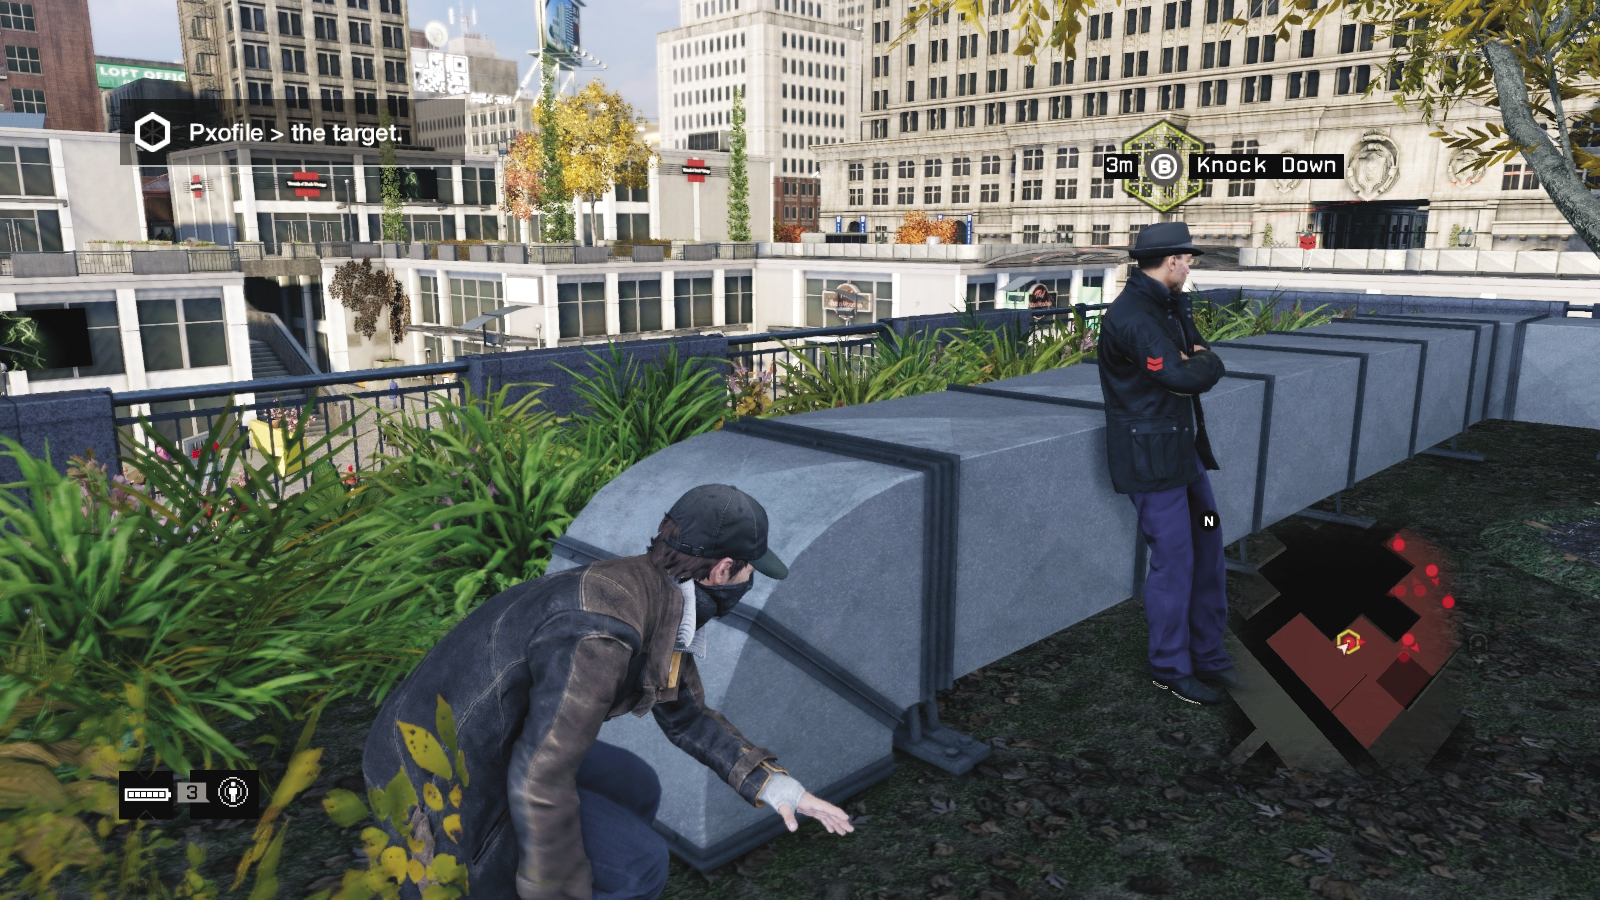
You can then leap over the ductwork to the foe leaning on a second AC duct and bring him down; that’s your first target already removed. Then creep right to the covered pallets and use them to access the highest rooftop, sneak up, and remove the sniper up here.
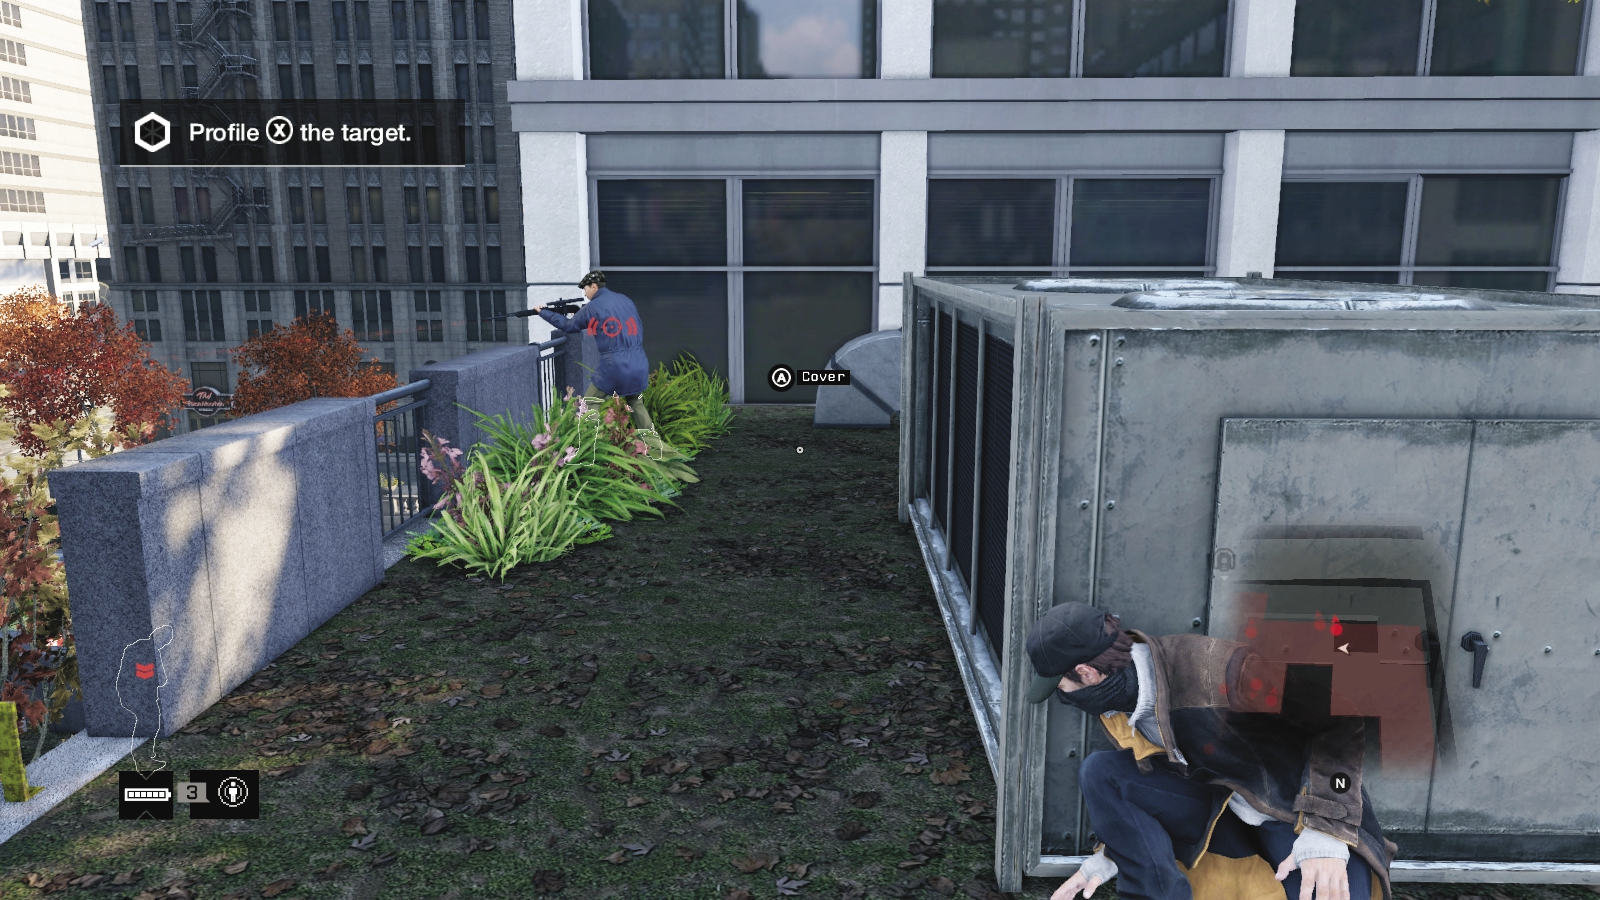
Face north and drop down by the ladder. Bring down the patrolling enemy near more ductwork on the near side of this long connecting roof with the tree cluster in the middle. Creep past the tree to hide behind more ductwork near the protector, but far enough away from the foes near the solar panel. Then bring down another patrolling enemy.
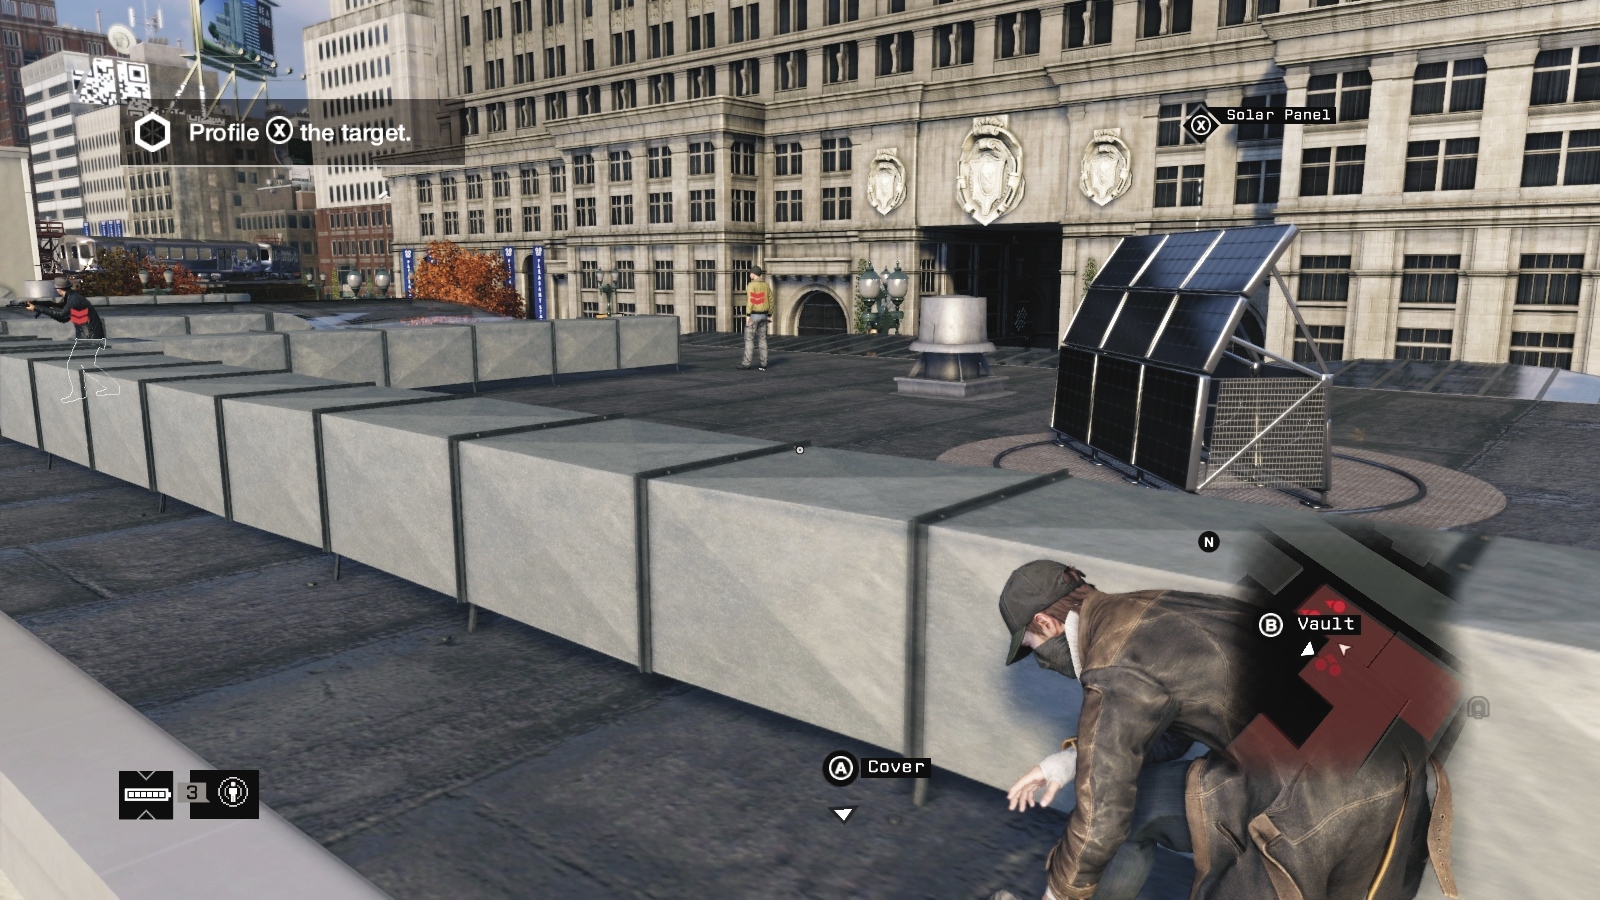
This leaves only four additional foes: Quickly drop into cover and approach the enemies on the rooftop with the solar panel. When one moves to the side nearest you, head over and bash him. Then dash to the solar panel, use it as cover, before quickly maneuvering over and neutralizing the other foe to the northeast.
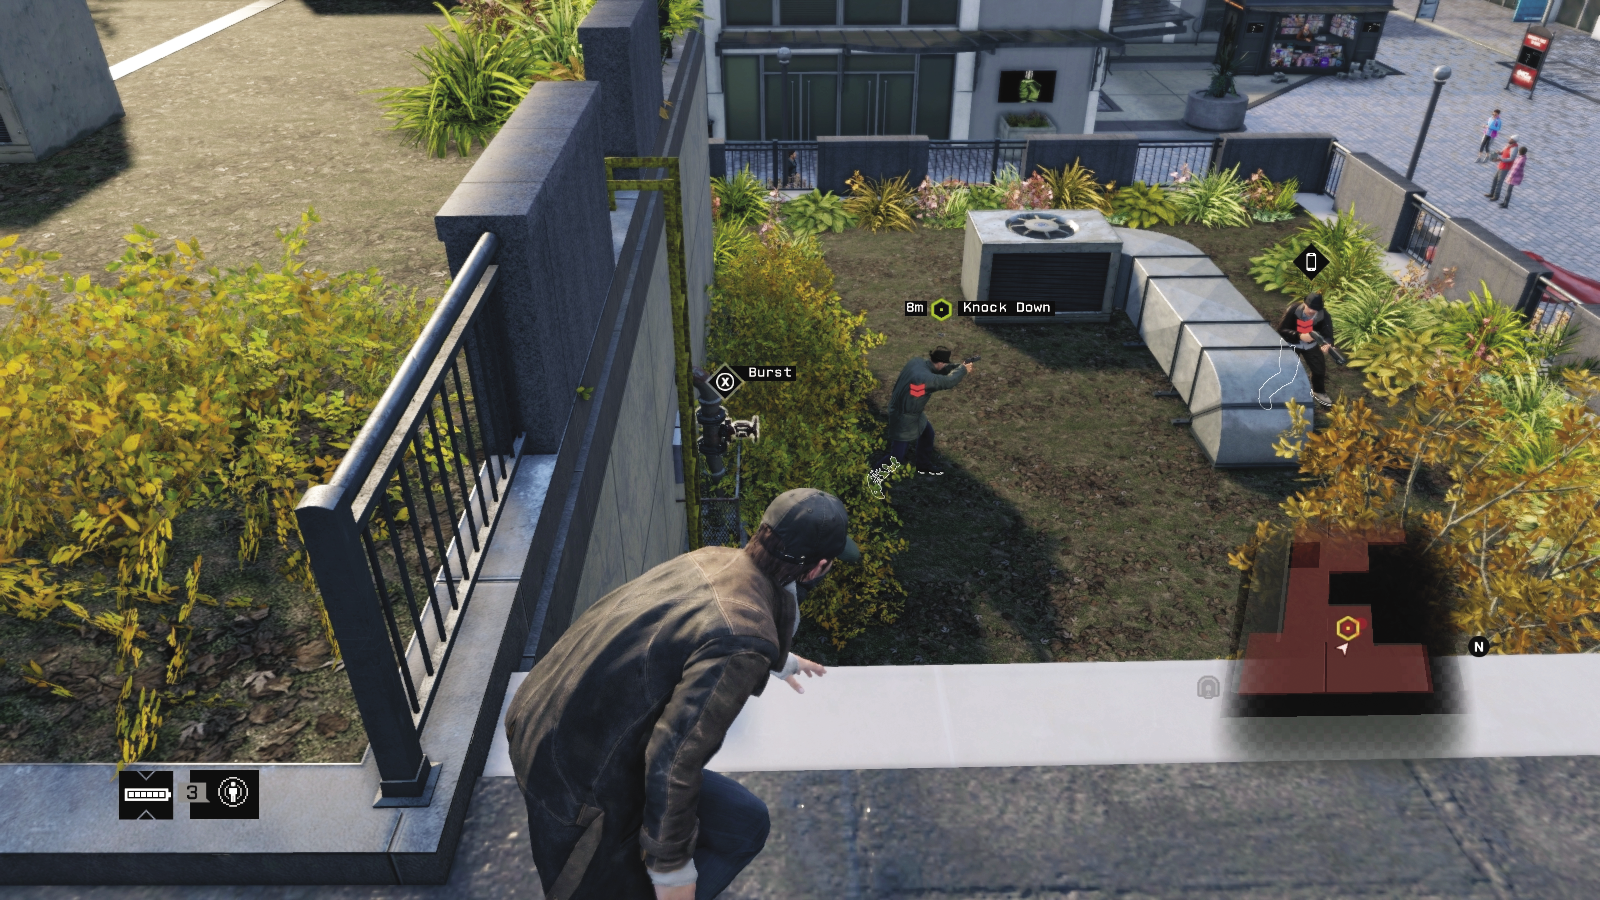
Now for the other target; retrace your steps to the area above the low roof where your two remaining foes are. Leap down and take out the target. Burst the steam pipe first, or shoot the guard with the target in the head first as alternatives to shrugging off fire as you bring the enemies down in quick succession.
 Aggressive // Stealth: Another Possible Clandestine Op
 Difficulty:
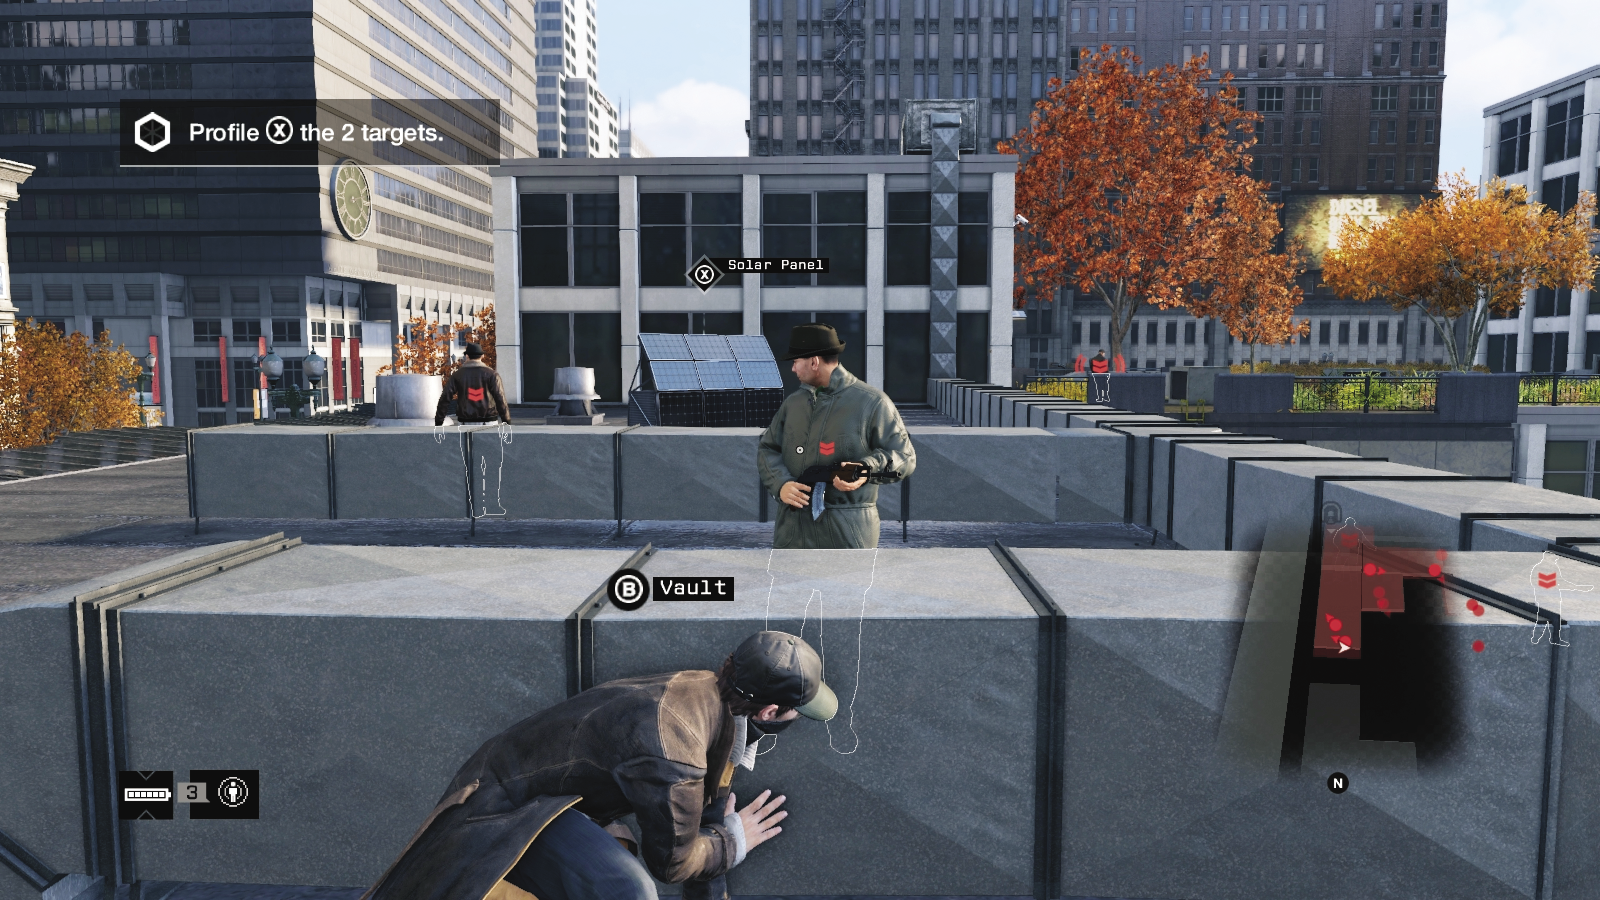
An alternative to the first plan is to execute stealth tactics, but approach from the northeast, up the stepped planters by the “36” sign, then onto the roof with the solar panel. Tackle foes clockwise but keep the target and single foe on the low rooftop for last. The only problem is how much more difficult this route is; the sniper can more easily spot you, as can the targets near the construction lift. But it’s almost as effective a maneuver.
 Aggressive // Violence: Setting Up a Sniper Drop
 Difficulty:
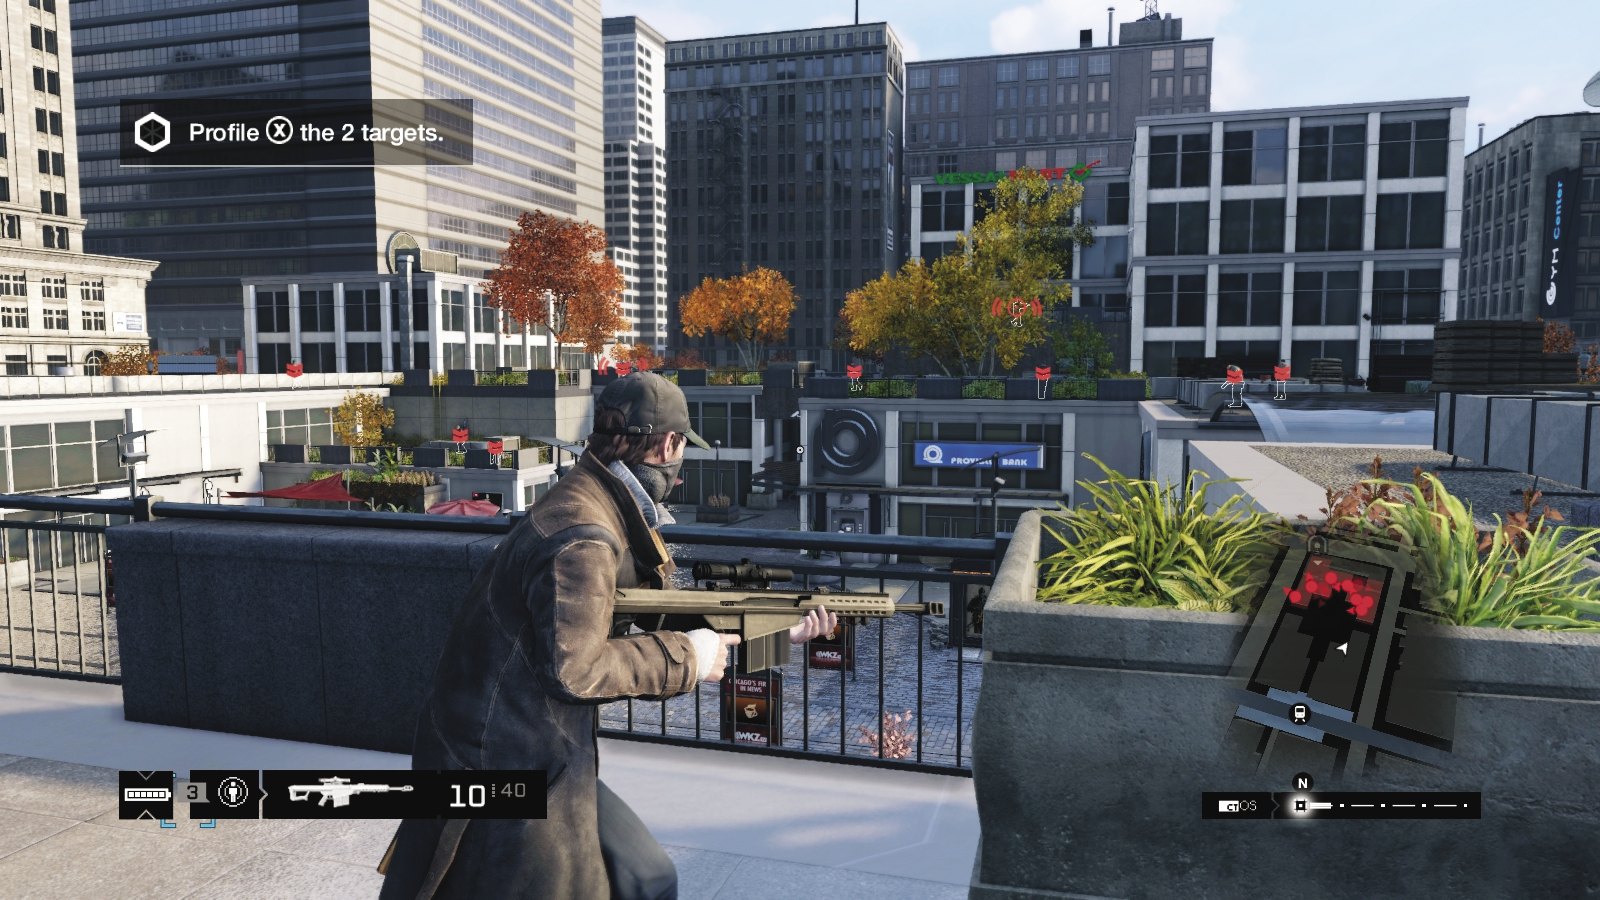
If you want to replace your baton work with a shiny gun and a bad attitude, it’s possible to go in with guns blazing, providing you’re extremely careful you don’t aim at either of the two targets; you must take these out with melee strikes. Dashing from cover to cover waving a shotgun or assault rifle isn’t really a tactic, so try the following instead:
Set up a sniping position at the opposite end of the rooftops, near the L-train station, focusing on the sniper opposite first. Quickly bring him down, then start tagging any Shot-Callers (mark your foes first so you can see this). Once everyone else is downed, walk in and strike down the two targets, which shouldn’t be hard since you removed their henchmen.
_THE LOW ROAD
location: Pipe Excavation, under freeway, north mad mile
Enemy: THE CLUB
NUMBER OF TARGETS: 1 (Veteran) / HE May Flee
NUMBER OF ENEMIES: 10 (Veteran x1, Elite x9)
Shot-Callers x4 (Elites)
Difficulty: ($10,000 Reward)
REINFORCEMENTS: UP TO TWO VEHICLES (Gunmen x2, Veteran x2)
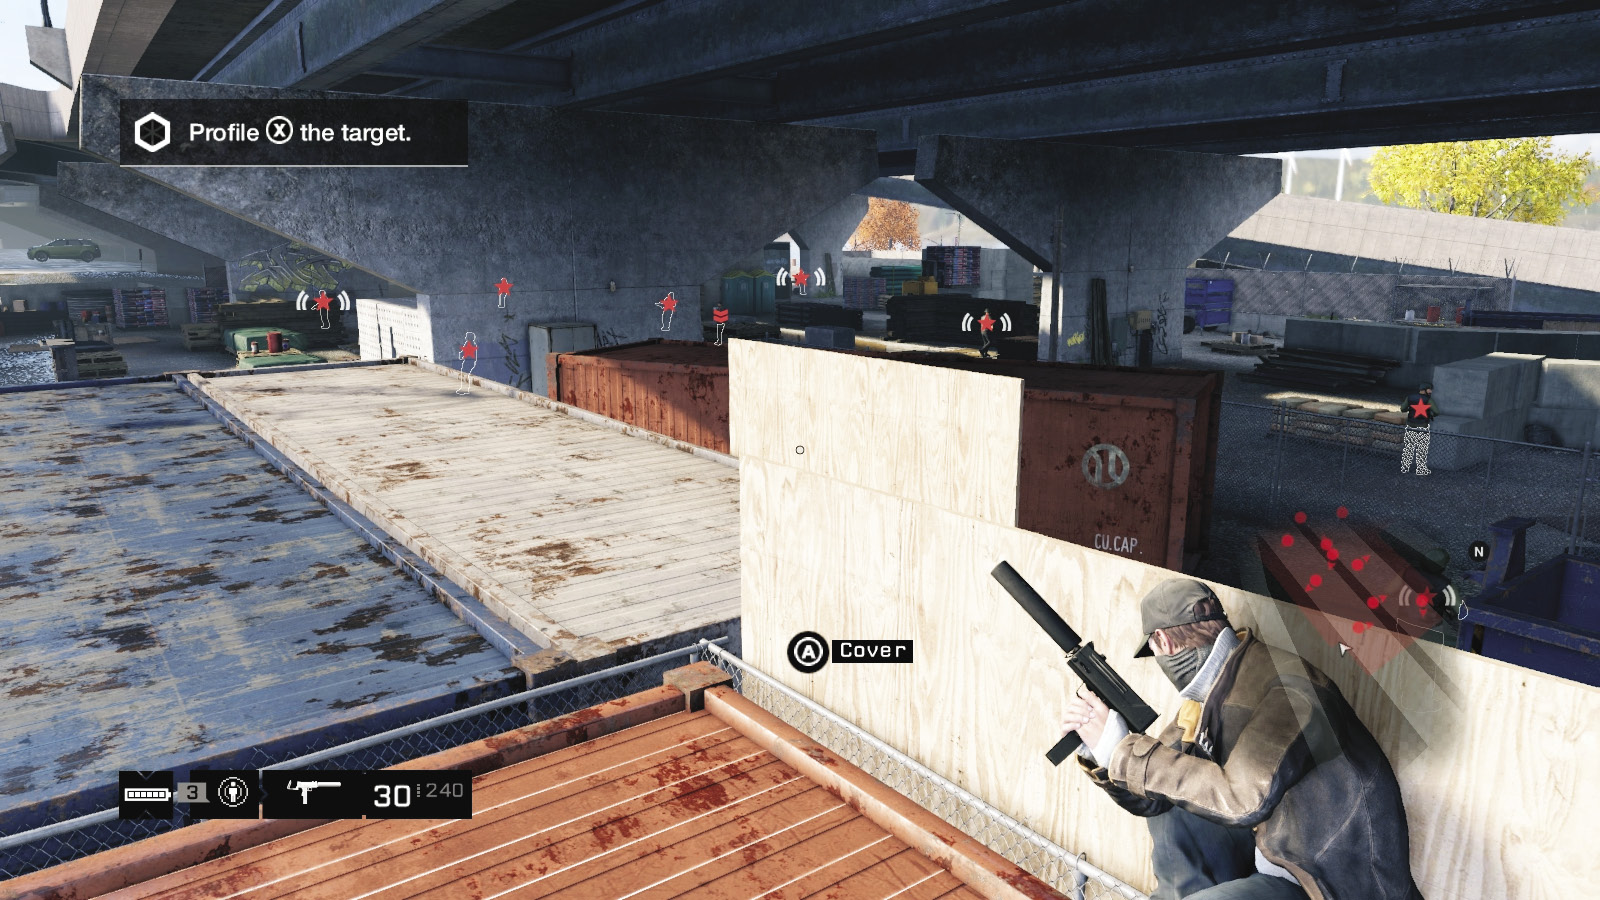
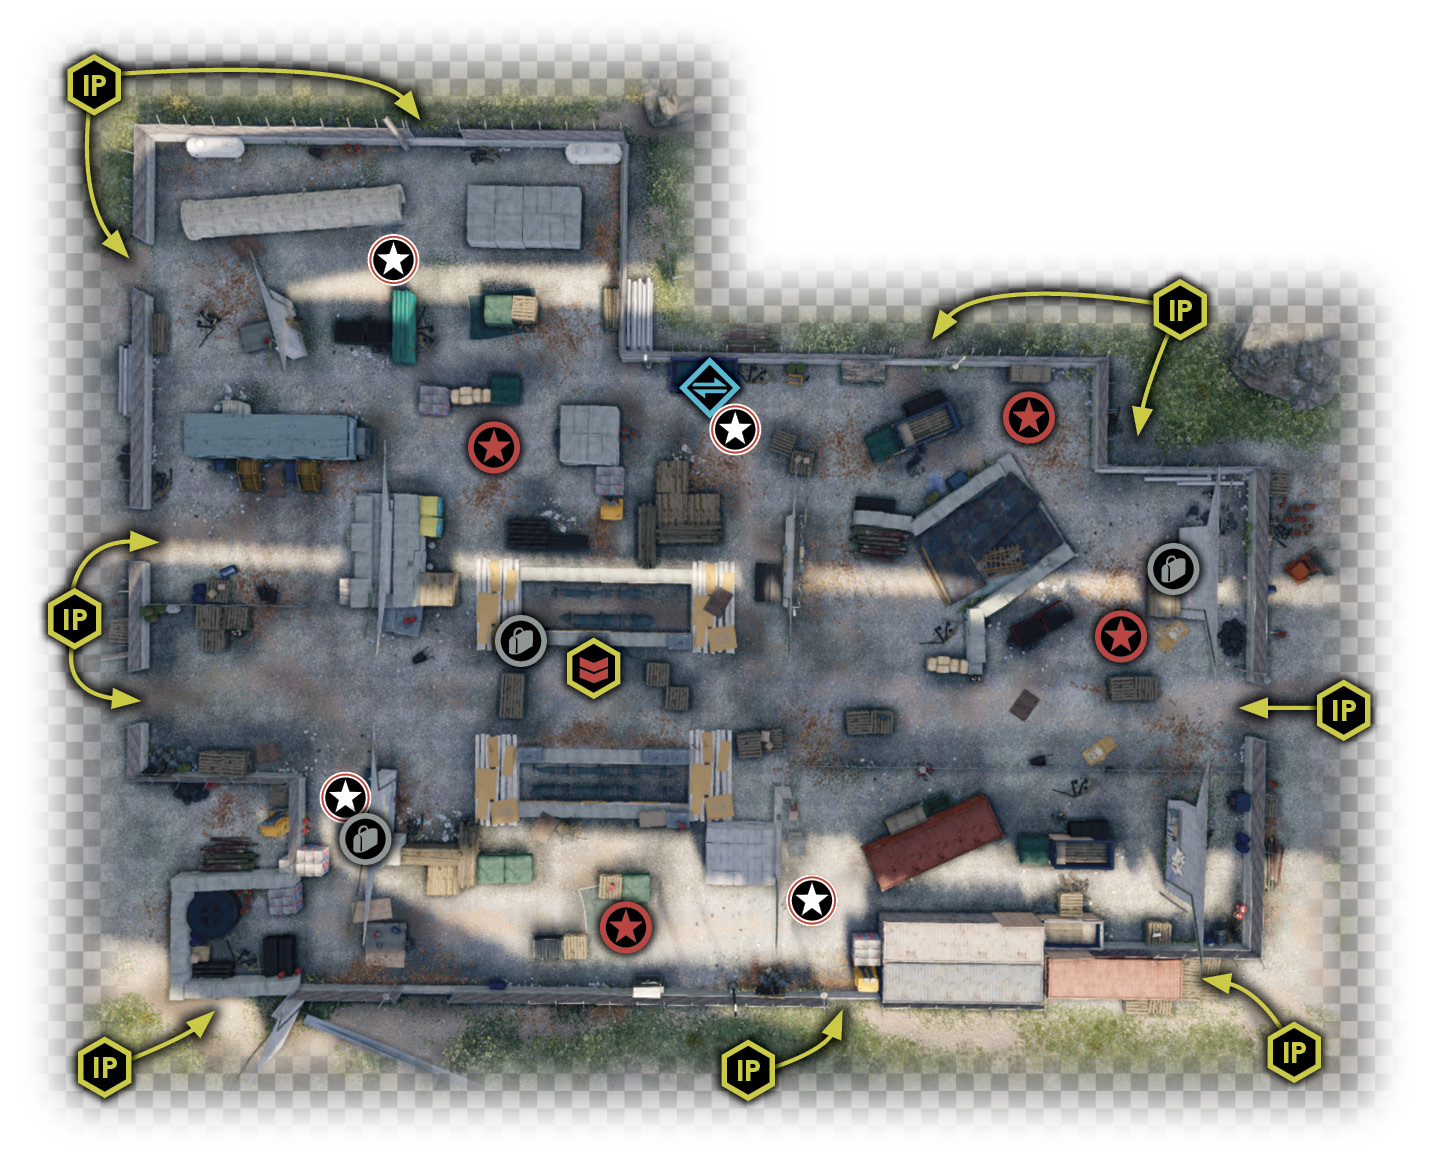
You start this mission close to the L-train tracks and a pedestrian precinct, but the action takes place a couple of blocks away, past the major freeway on-ramp. The actual restricted area is beneath the freeway bridge—a construction site filled with equipment and debris.
Insertion Points
The area is “unsecured,” as there’s a well-defined perimeter fence you can’t climb over, but numerous openings that allow access easily, mostly without being spotted. Remember these locations throughout your infiltration, in case you need to leave in a hurry.
Southeast Container Steps
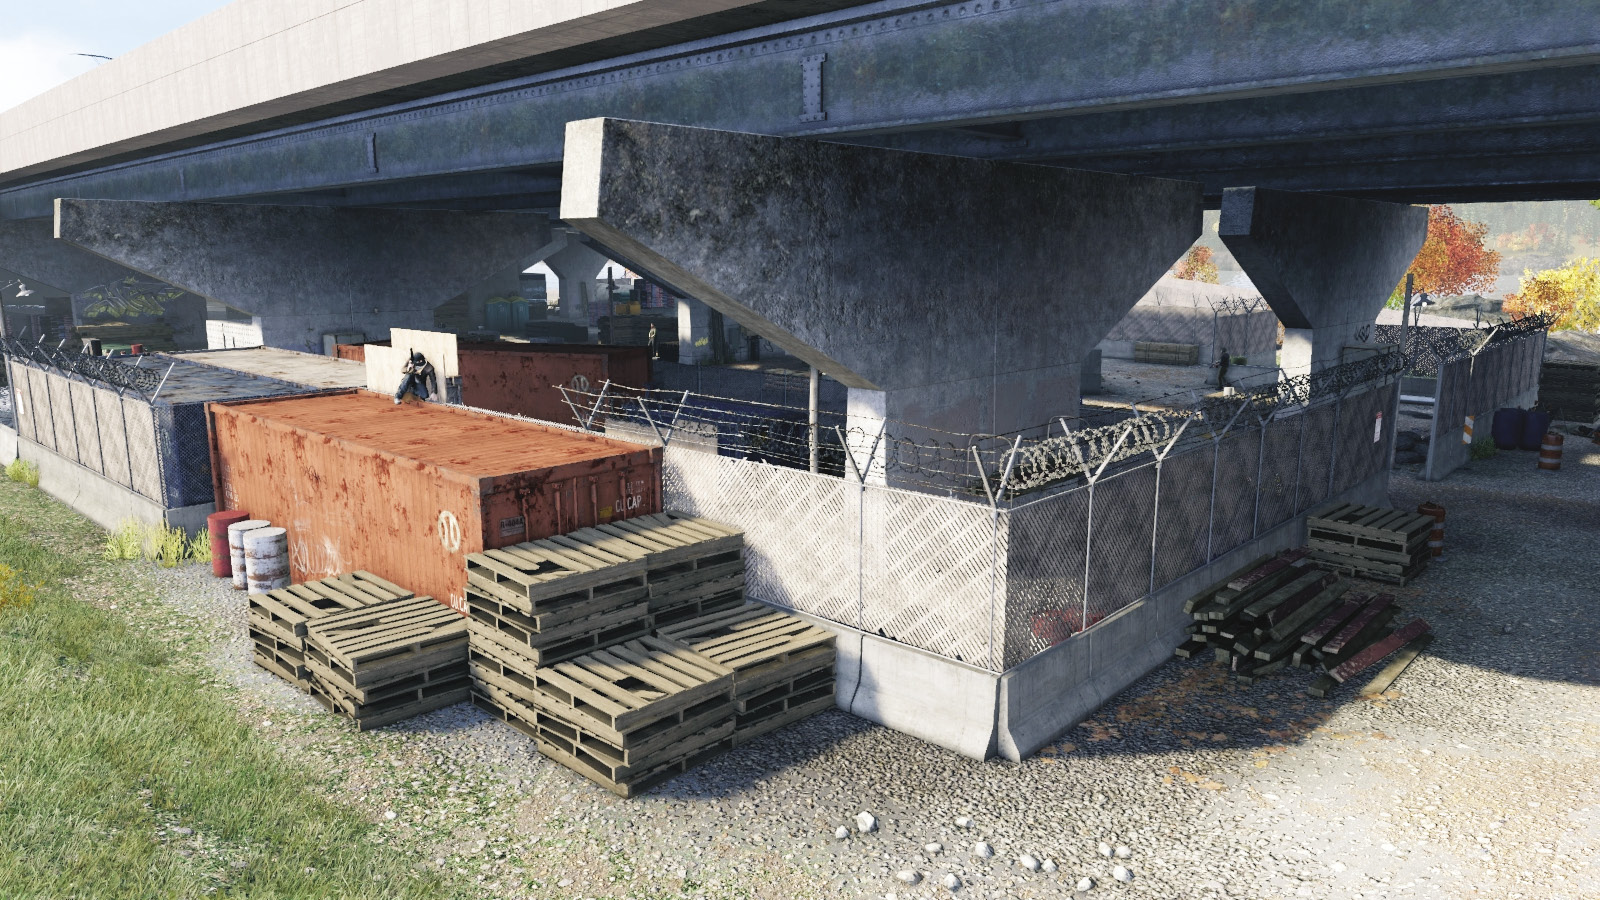
Use the pallets to get onto the red container, which then allows you to drop down into one corner of the restricted area. There’s a foe patrolling the open red container in here and a diagonal route directly to the target. Or head north and assault the foes there if you’re trying to bring down everyone else first.
East Entrance
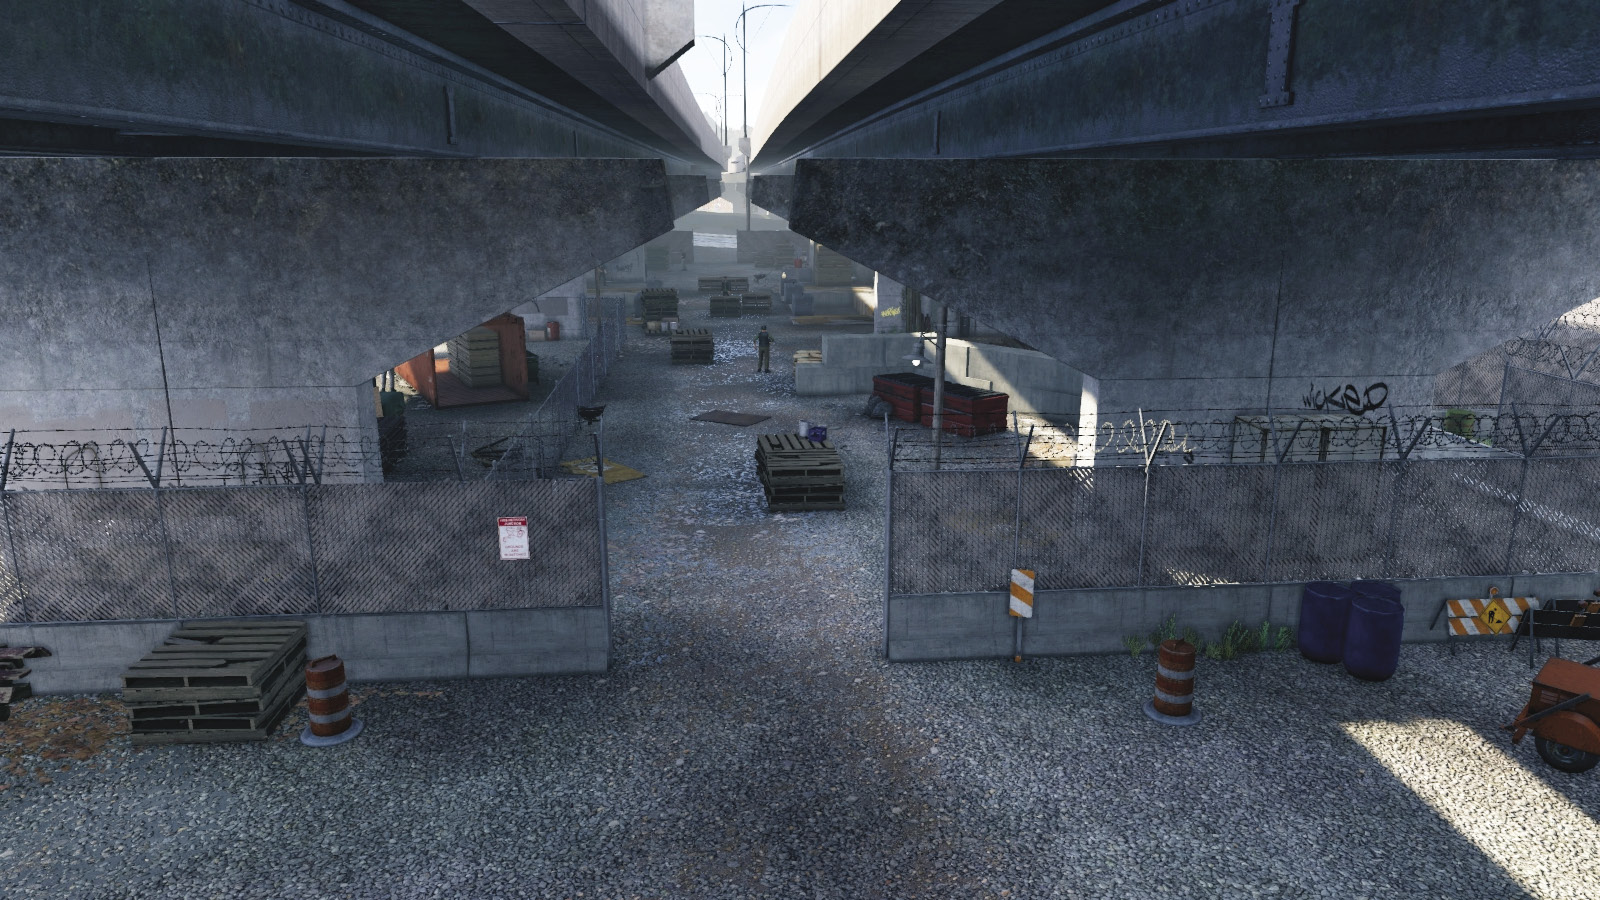
As there are three foes close to this entrance, sneaking in here is a little tricky; use this during a stealth infiltration once most of the area is secure. You have a good view of the interior, though, and can choose whether to skirt around to the south (red container) or north (concrete blocks).
Northeast Fence Gaps
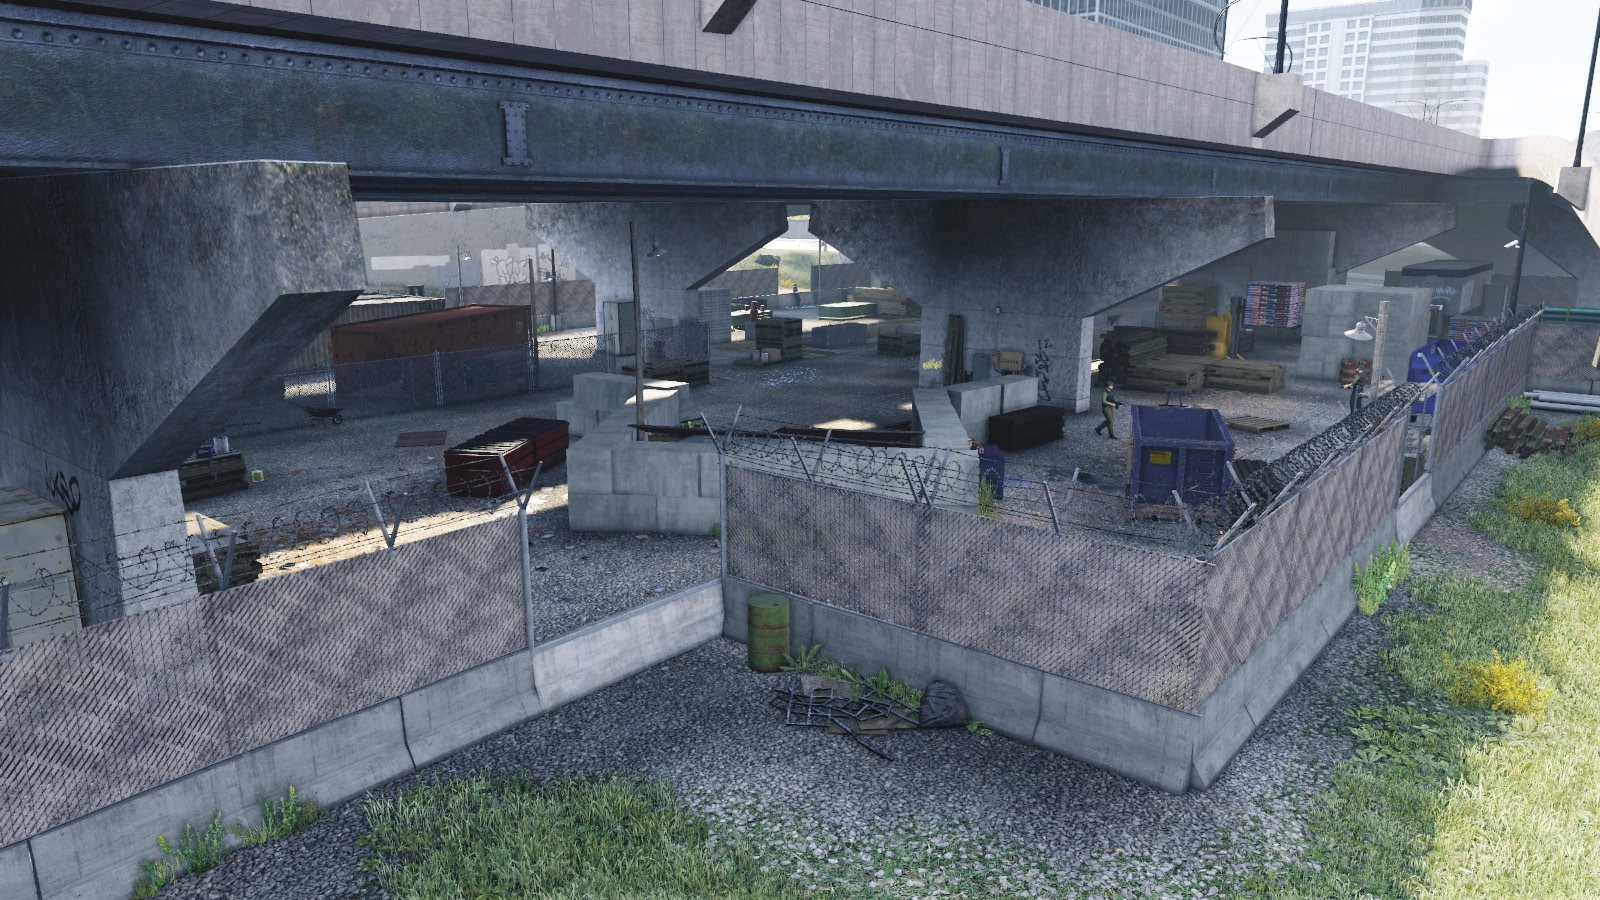
Close to the low concrete block wall and ramp and a blue Dumpster are two gaps in the fence. These are reasonably useful for hopping in, melee-striking a foe, and then either continuing the infiltration or leaving. There’s also a scissor lift by the north fence, but this is for attracting foes, not standing on (unless you want everyone to know where you are and start dropping grenades). Note the two junction boxes on the freeway support for blasting (or distracting) foes.
Northwest Fence Gaps
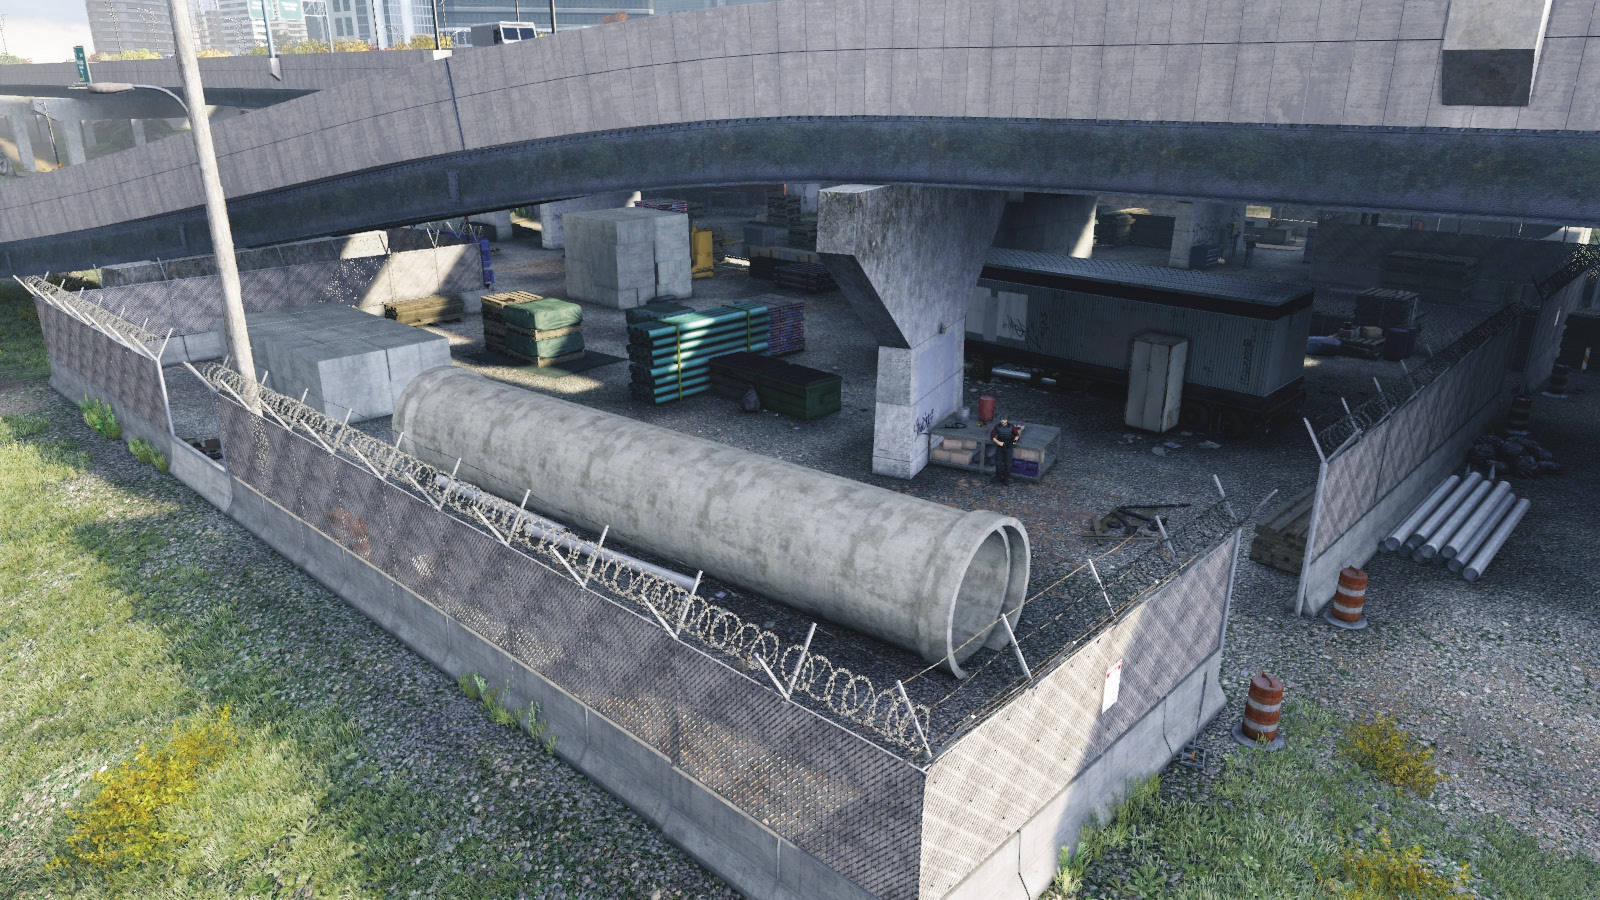
Between the giant concrete pipe in this area are two more fence gaps. If you snuck around here from the starting point, you’ll find it a little easier infiltrating, and there are numerous cover spots as well as a hut to skulk near.
West Entrance and Fence Gap
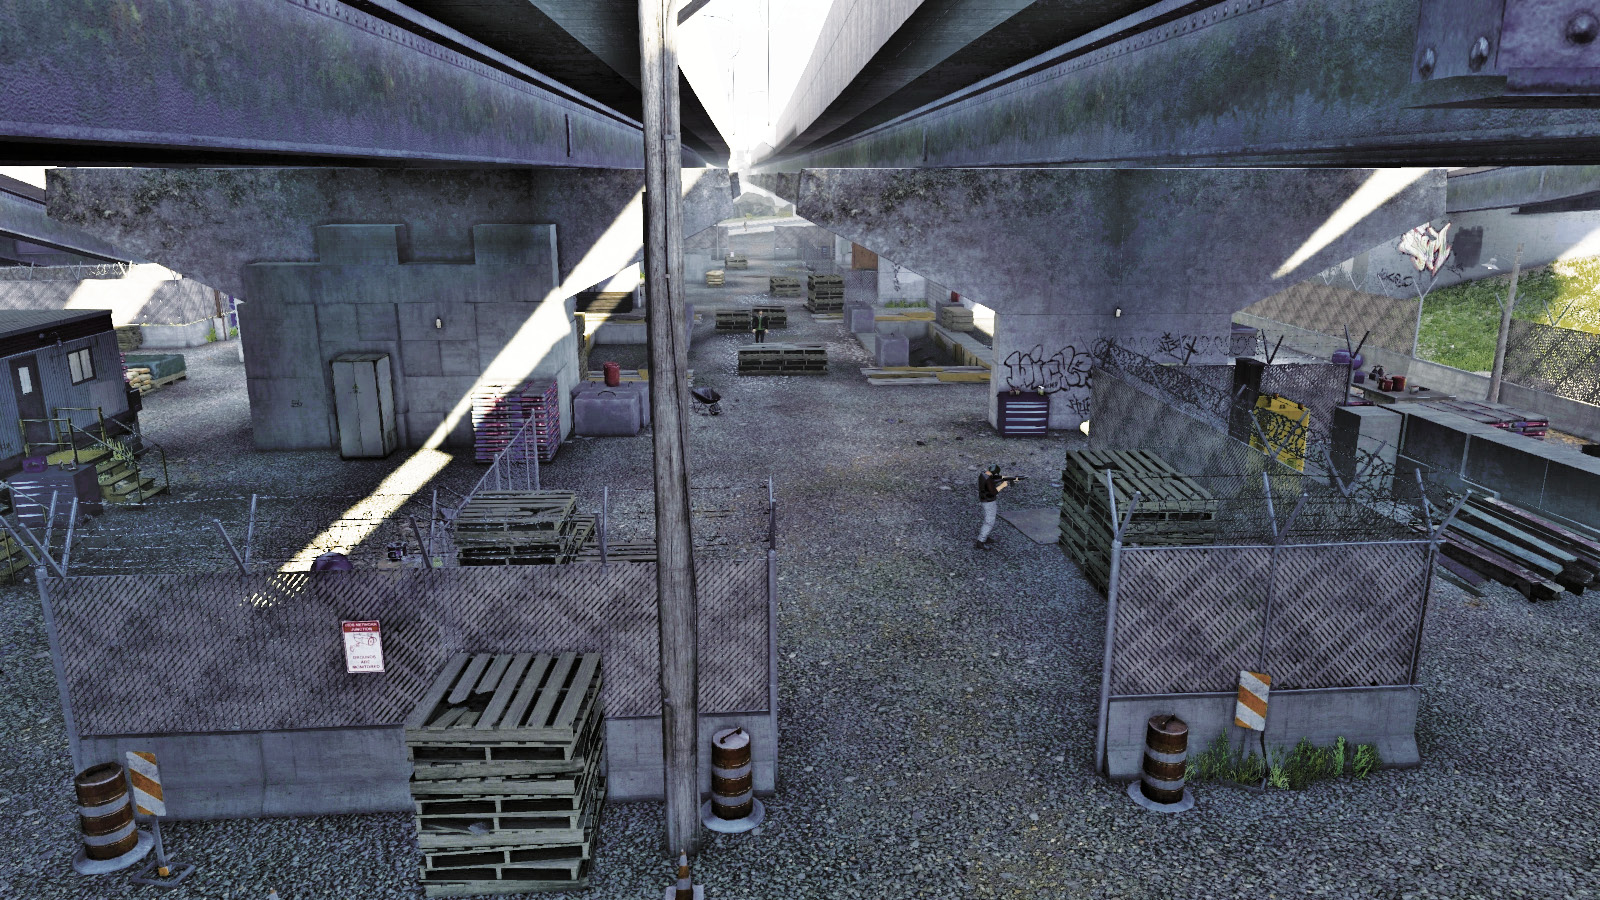
This is directly opposite the east entrance and offers a great view of the target standing in the middle of the area, but the lack of cover makes moving in here a problem (unless you do something crazy like drive a car in here). Sneak across when foes aren’t watching and prepare to be discovered.
Southwest Blocks and Fence Gap
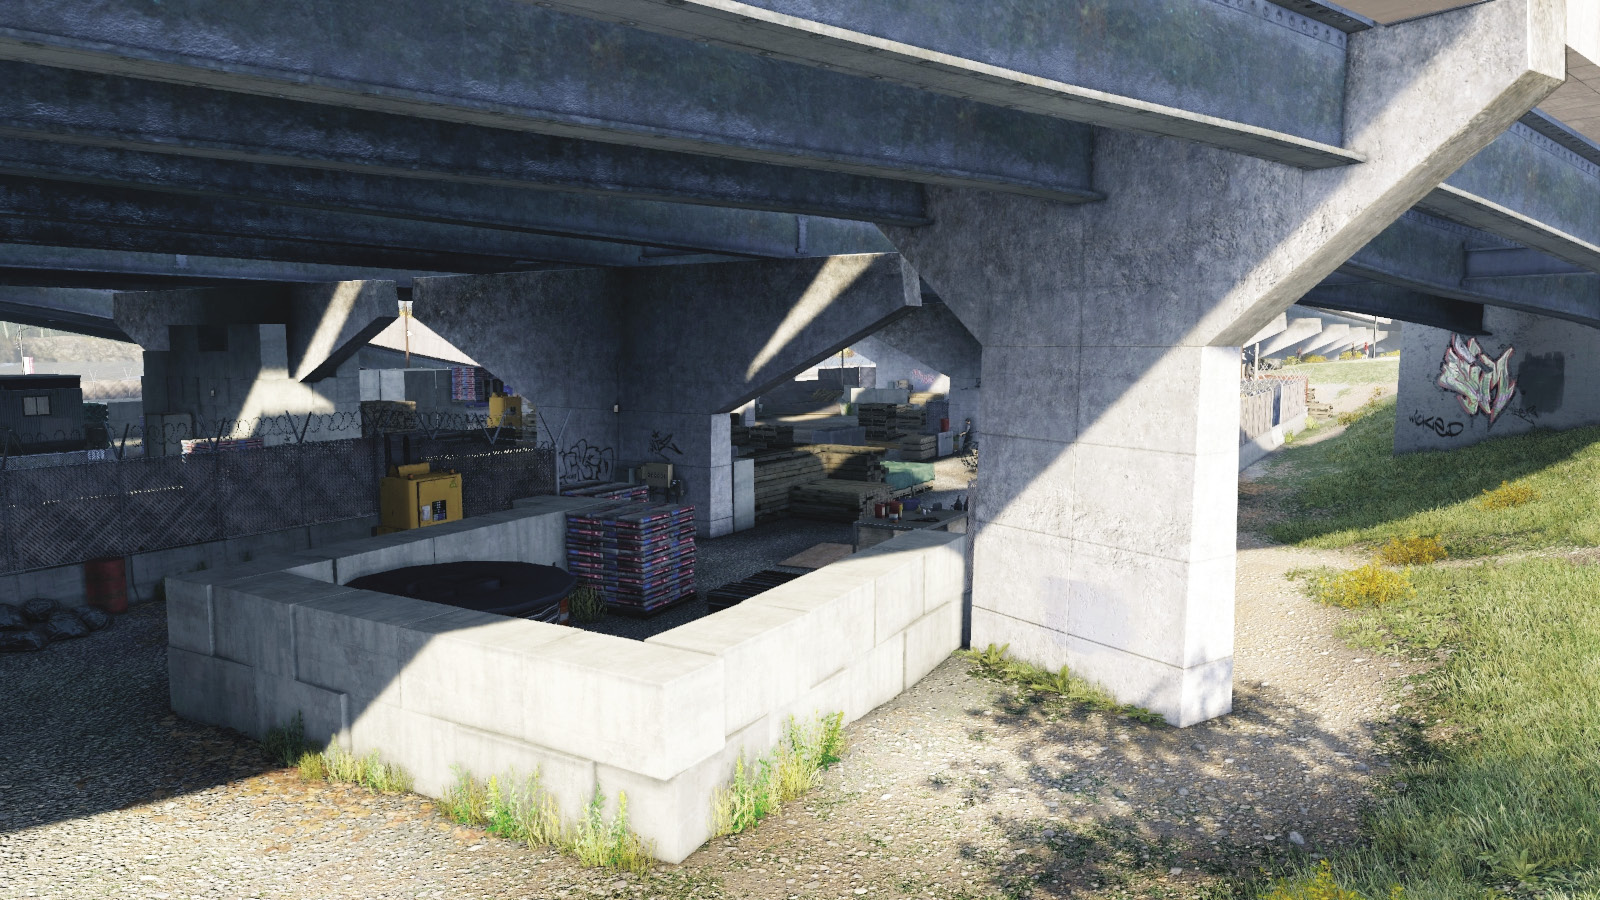
A couple of guards are mooching around here, which is surprisingly easy to infiltrate; the blocks cover a much wider area. However, you can be spotted climbing over here. The nearby ctOS box (south fence), junction box (freeway support), and forklift are all accessible from this point if you need a distraction.
South Fence Gap
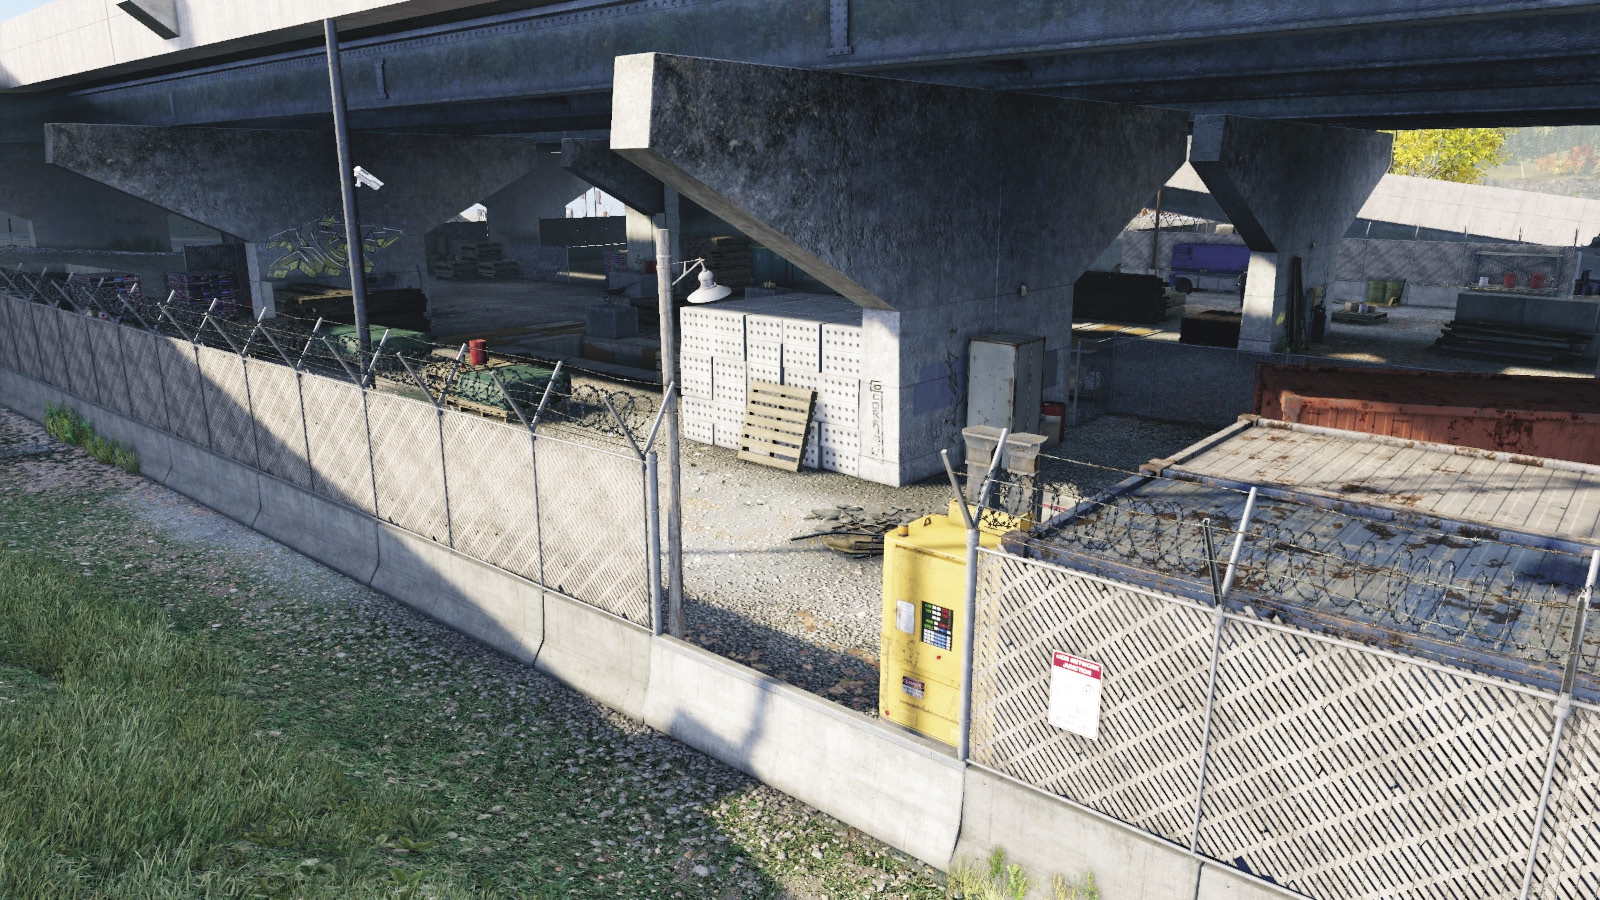
This small gap is actually extremely handy, as it’s the best route to take if you want to remove the target without tackling any other foe. There’s a ctOS box and forklift here to coax or damage enemies, and you have good flexibility in your routes once you’re here.
Construction Site Interior
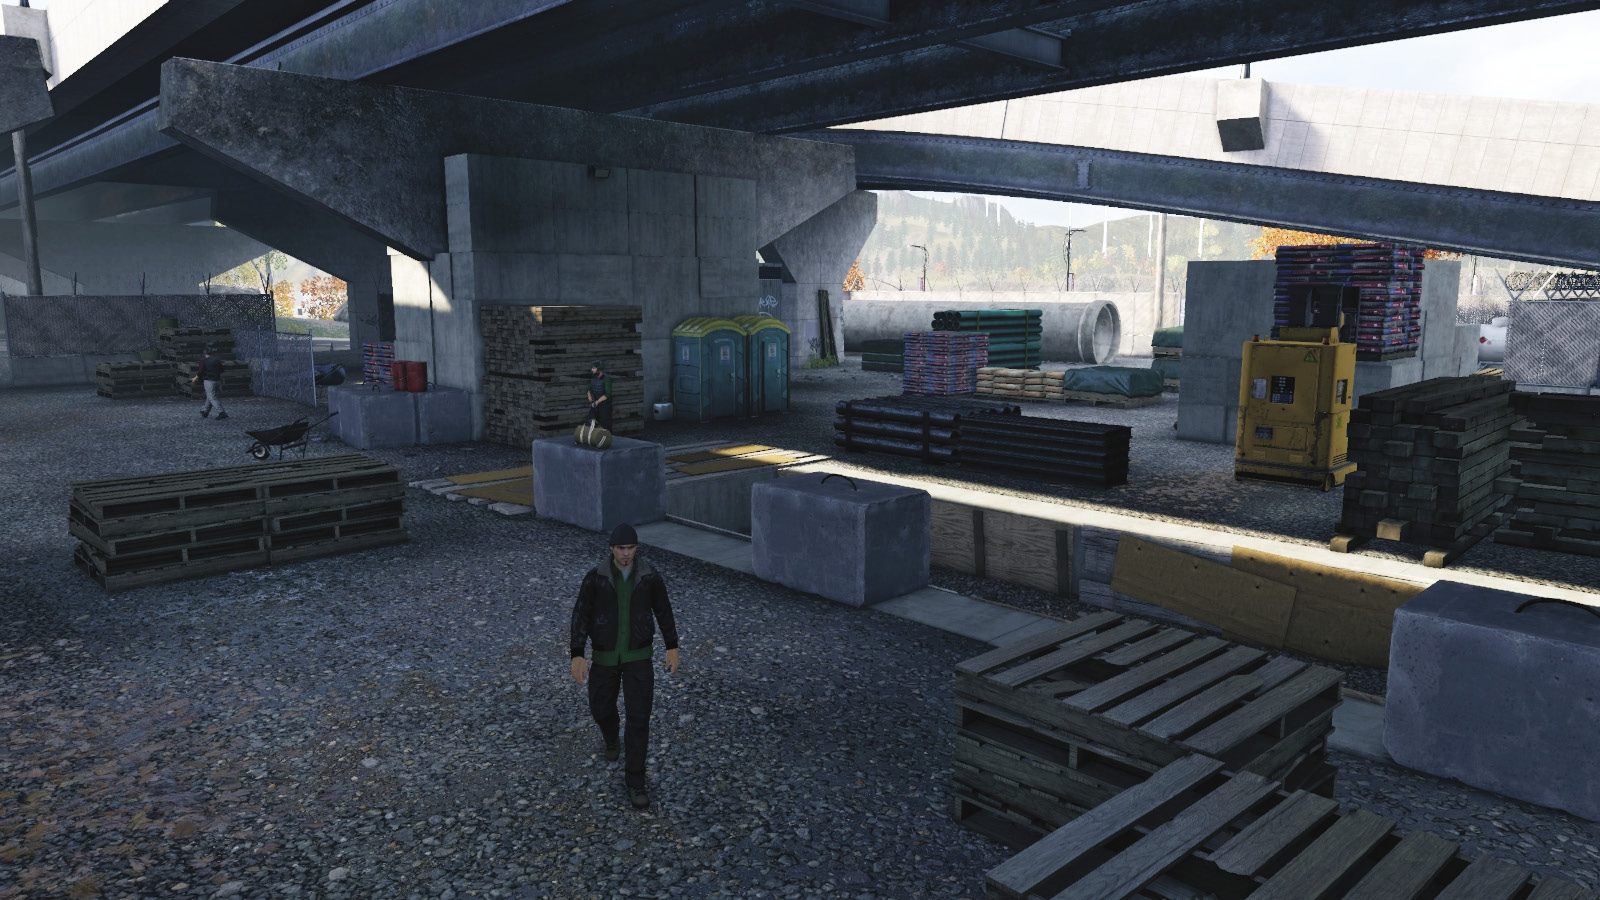
This is a roughly rectangular restricted area, except for the northwest area, which bulges out slightly and features foes everywhere, with your target standing close to two large pipe trenches in the middle. Try not to drop down here while chasing, as you stumble. It’s usually wise to keep to the cover opportunities around the perimeter too.
Progression Plans
Your target is well guarded, and foes spot you when you’re strangling one of their own. This makes a purely stealth takedown difficult, but not impossible. However, you can circumvent this problem....
 Aggressive // Stealth: Target Under the Freeway
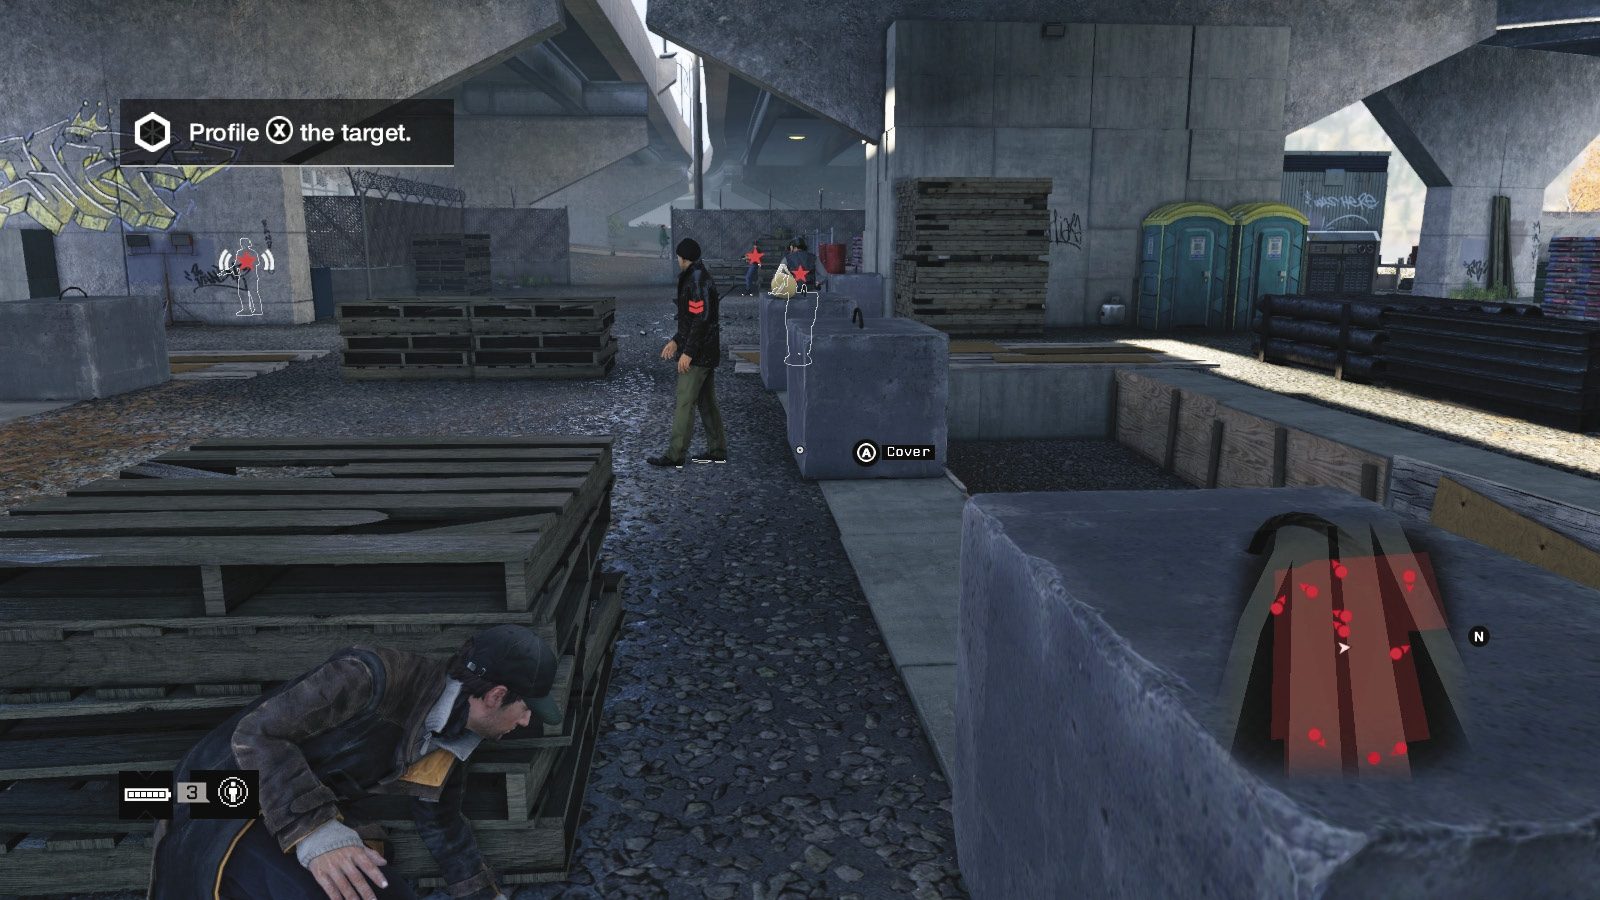
 Difficulty:
If the maze of debris and the alert guards are too much like hard work, why not simply stroll in, throttle your target, and leave without the Club figuring out anything’s amiss? Enter via the south gap, creep to the left of the concrete block stack, and over to the target in the middle of the restricted area. Drop him, and leave the way you came. Simple, and effective.
 Aggressive // Stealth: A More Convoluted Way to Flay
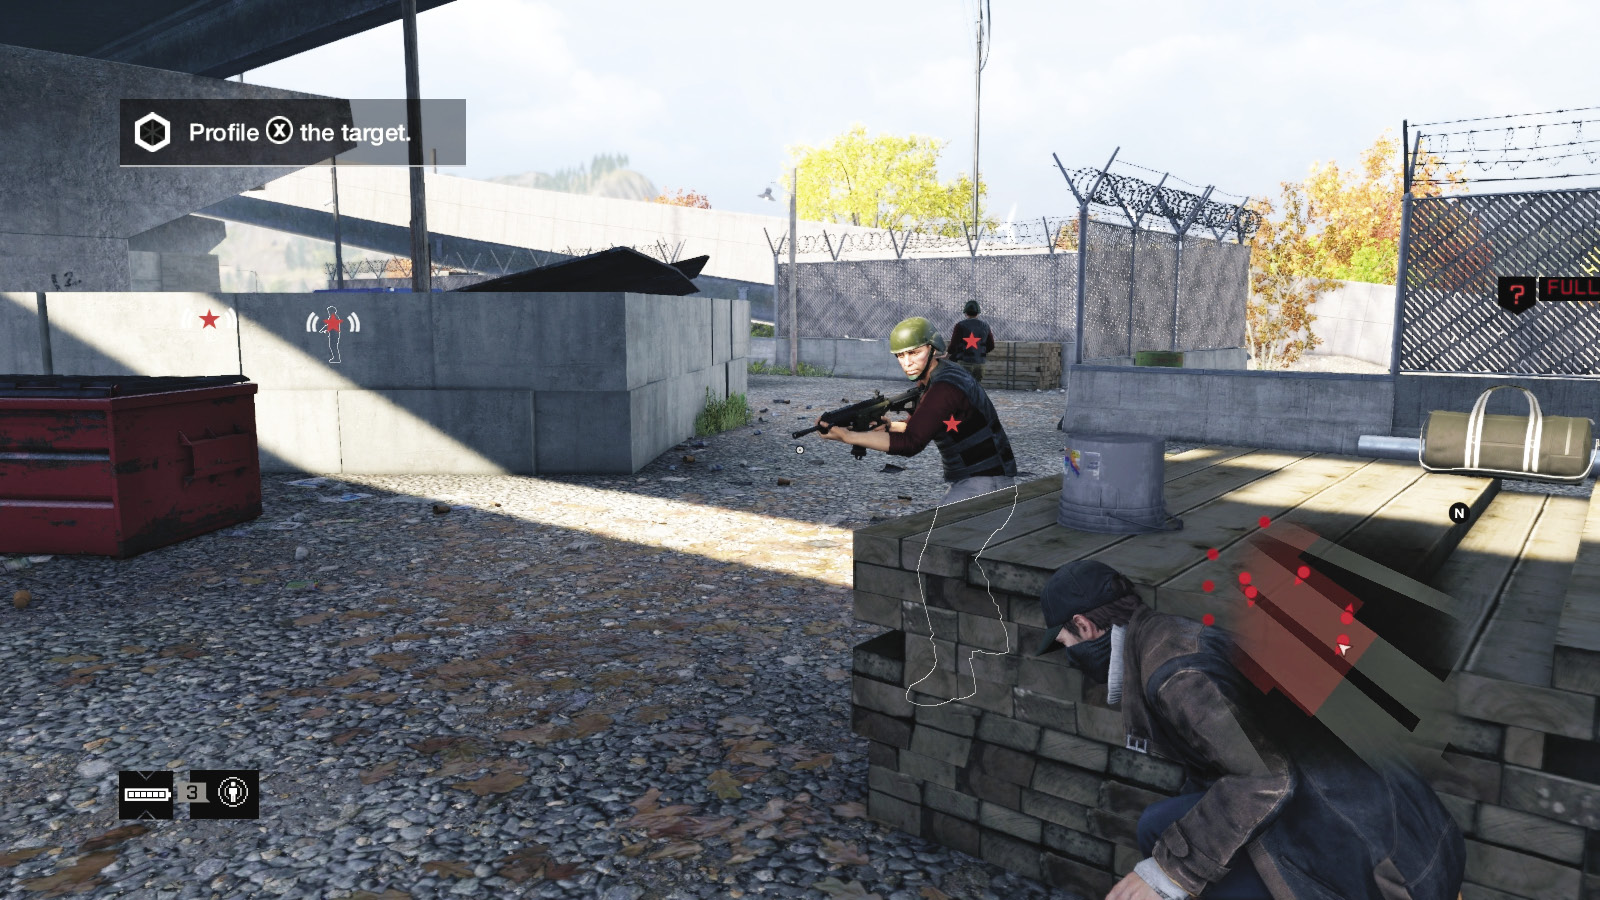
 Difficulty:
If you enjoy stealth takedowns for everyone, begin at the perimeter, dart in to grab one foe at a time, then move out of the area and around to a different insertion point. Gradually whittle down the foes until only the ones in the middle are left. You can begin from any insertion point, but here is one route:
Enter via the east entrance, pounce on the foe to the south, near the open red container on the other side of the mesh fence. Then take down the enemy leaning on the wood stack, then get the guard patrolling the fence to the northeast.
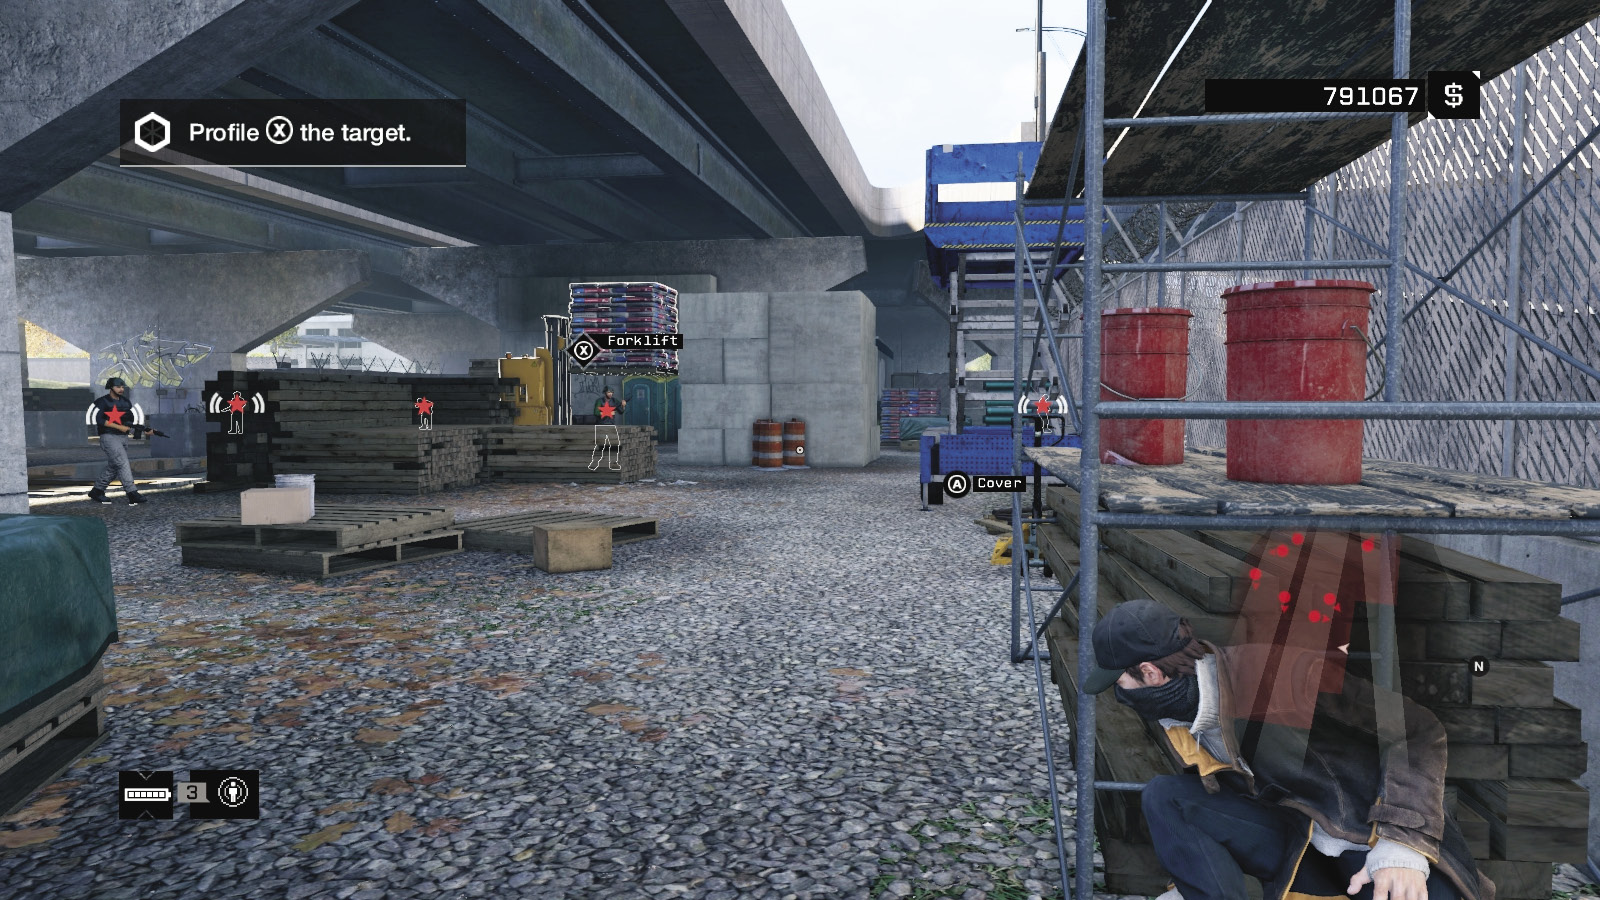
Continue from east to west, alerting foes using the scissor lift before following one and removing him. Tackle another by the big pipe to the northwest, then move south, past the hut to the drywall near the west entrance. Wait for a foe to mosey over and grab him.
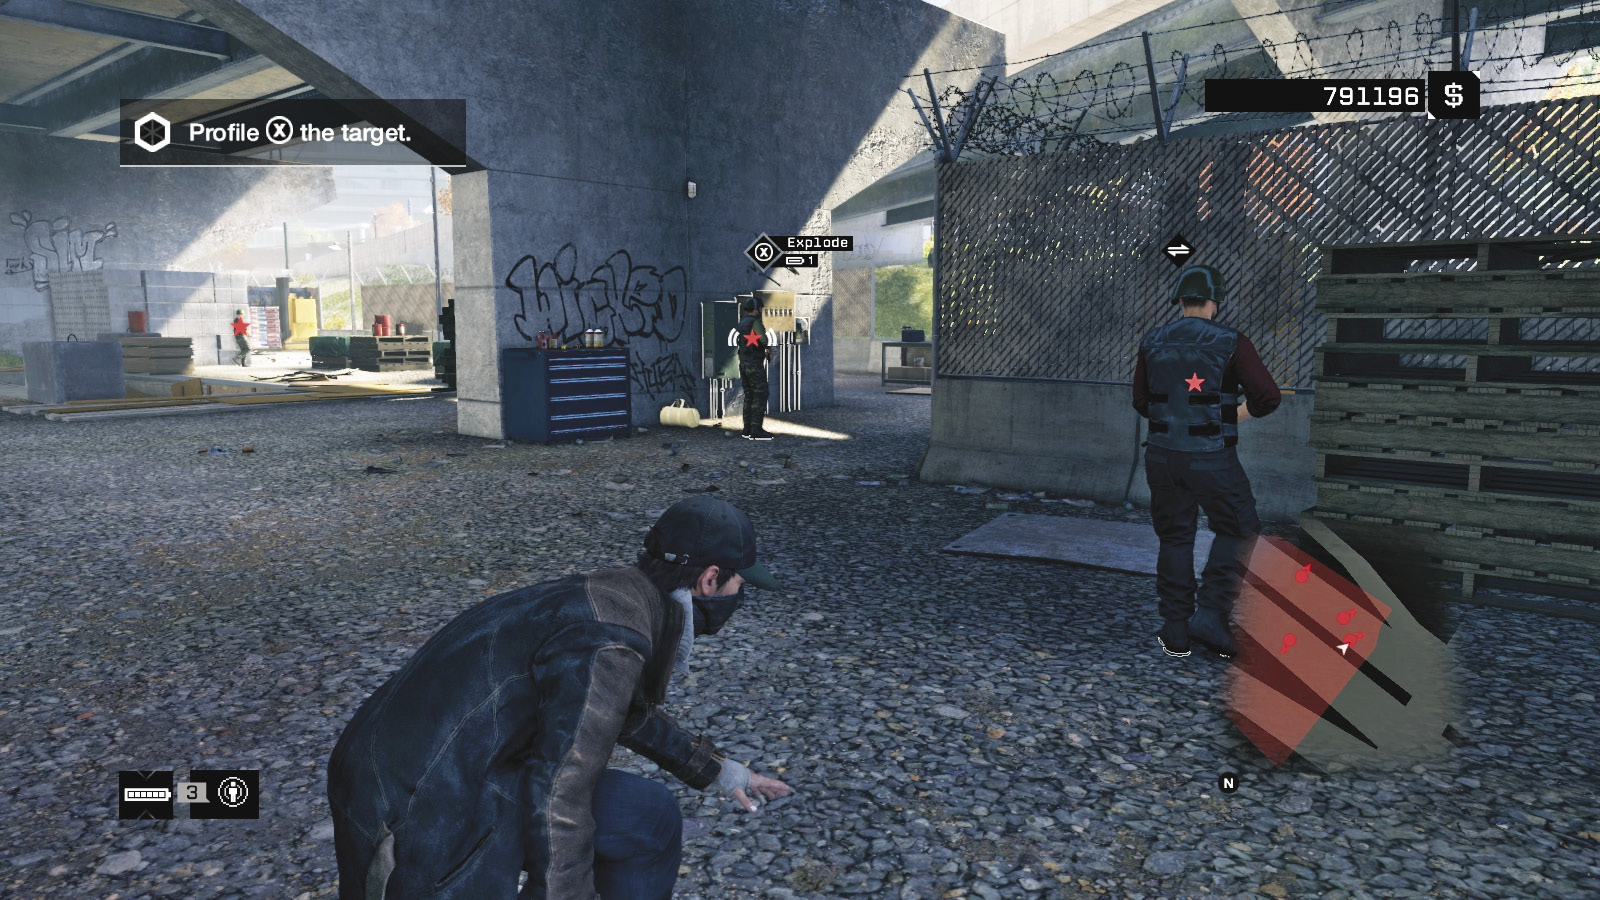
There are four more enemies left (including the target), so exit and move to the southwest blocks, jump in, and grab the foe by the fence, the one near the junction box, and the last foe patrolling close to your target. The target falls next.
 Aggressive // Violence: Guns Loaded, into the Fray
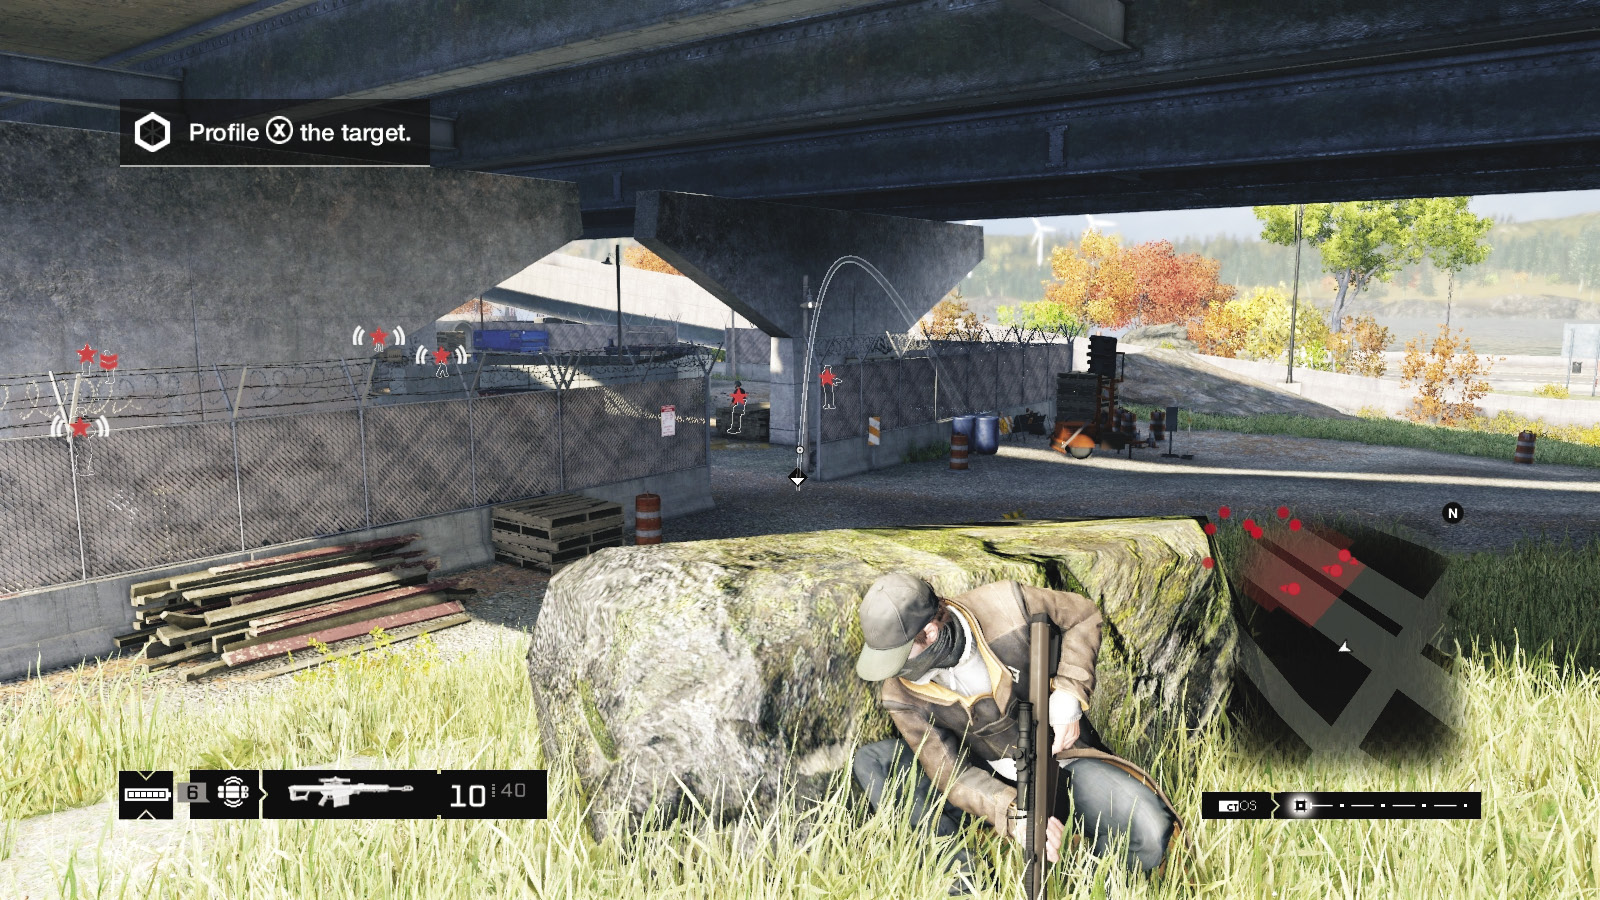
Difficulty: 
This construction site is a playground for lures of all types, as well as your shotgun; step out to bag a foe before heading back into cover. If you’re trying out a sniper rifle, the grassy hill southeast of the area is a good place to camp. Though you can move along the on-ramp, you’re easily spotted (but you can lob in grenades).
There are junction boxes and ctOS boxes to explode (the latter of which plunges the area into darkness during nighttime infiltrations); do this only during gun battles or the target freaks out and runs and foes become alerted, spotting you more easily.
 Driving // Offensive: When Your Target Just Won’t Stay
Difficulty: 
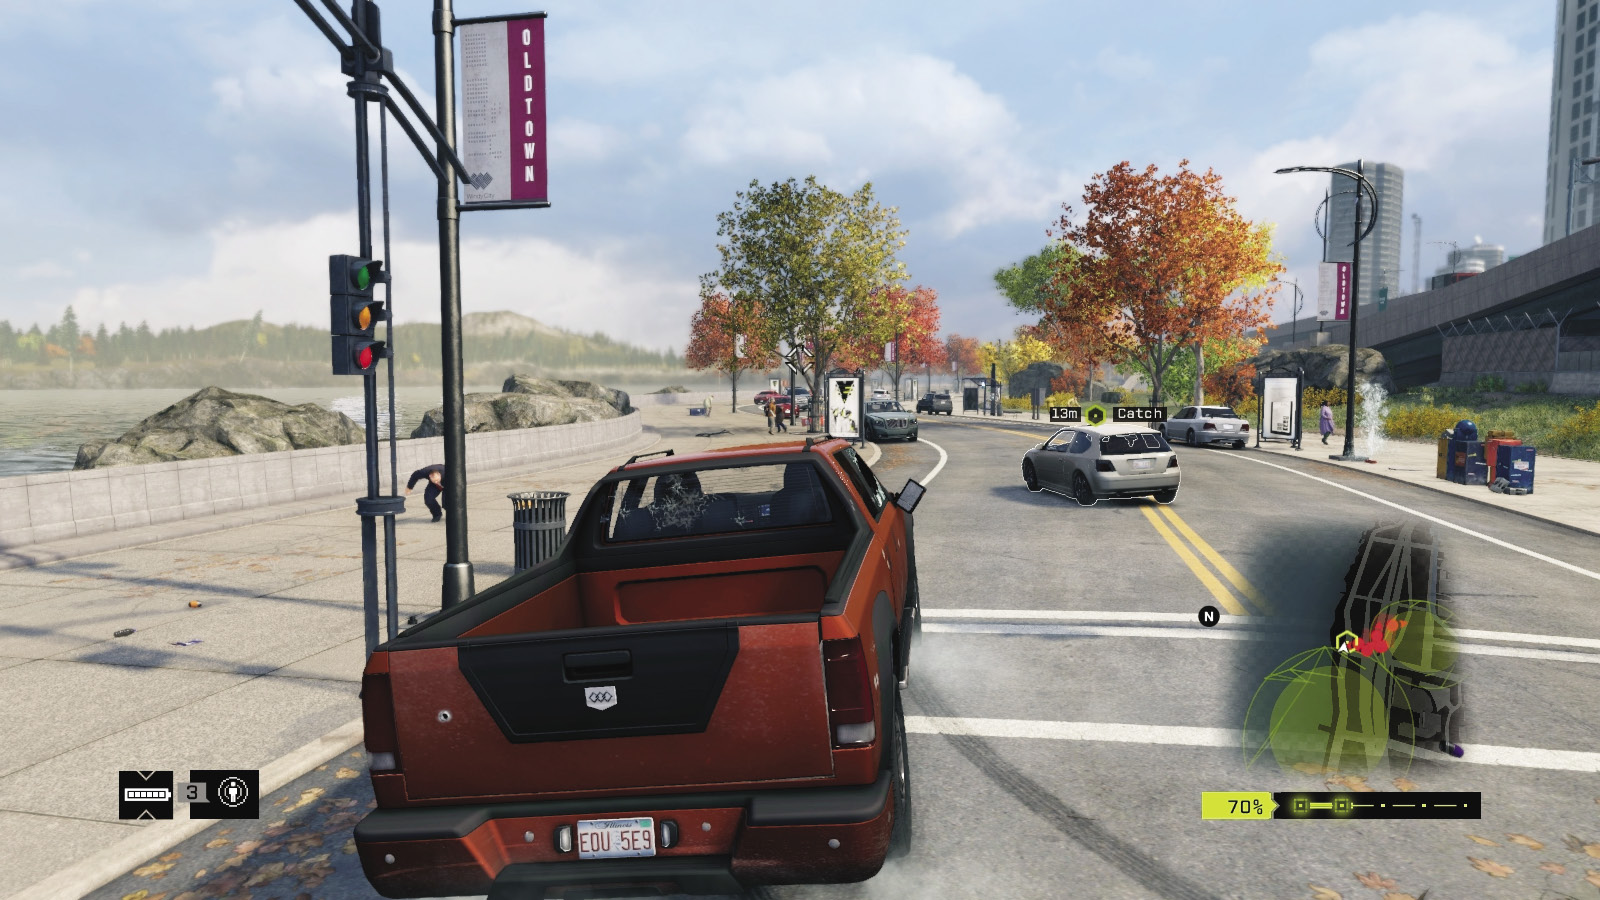
Have you thought about starting enough explosions and gunfire so the target flees toward his vehicle on the road to the northwest, but waiting for him by the giant concrete pipe and stopping him before he gets to his car? Or hemming in the car with a large vehicle to slow him down? No? Then give chase instead, following the target car until you see a blocker and steam pipe; these easily stop the foe in his tracks.
_THE TOWER
location: Parking Tower, South Mad Mile
Enemy: THE CLUB
NUMBER OF TARGETS: 1 (Veteran) / He May Flee
NUMBER OF ENEMIES: 10 (Gunman x4, Veteran x1, Elite x5)
Shot-Callers x3 (Gunman, Elites)
Difficulty: ($2,500 REWARD)
REINFORCEMENTS: UP TO Four Foes (Gunmen x4) from below
Begin your mission at the base of some steps about a block north of the twin parking lot structures; the more southern one is your insertion point. Dash there, and look for the ground-level entrance or the construction lift to gain access.
Insertion Points
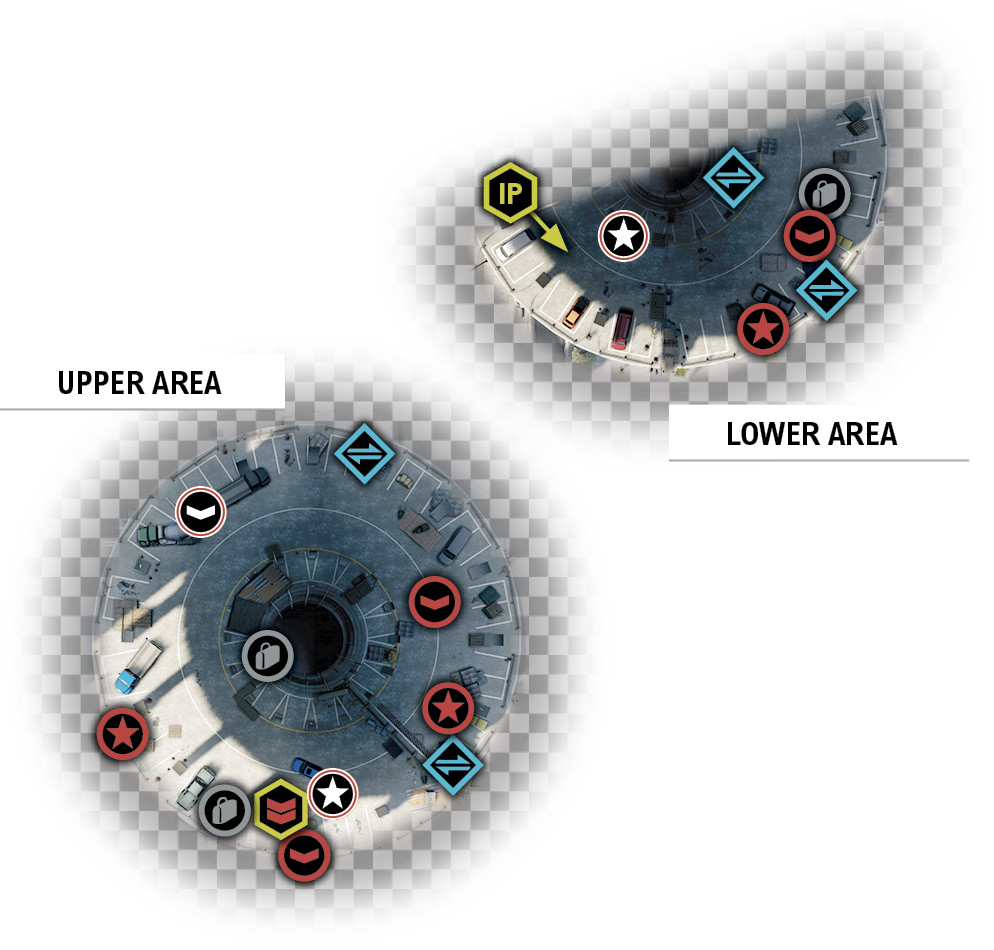
The target is on the fifth story of this spiraling tower parking lot. The construction lift moves you up to the second story, and the actual infiltration starts around the third story. You run counterclockwise up this long parking lot path.
Construction Lift (Outside)
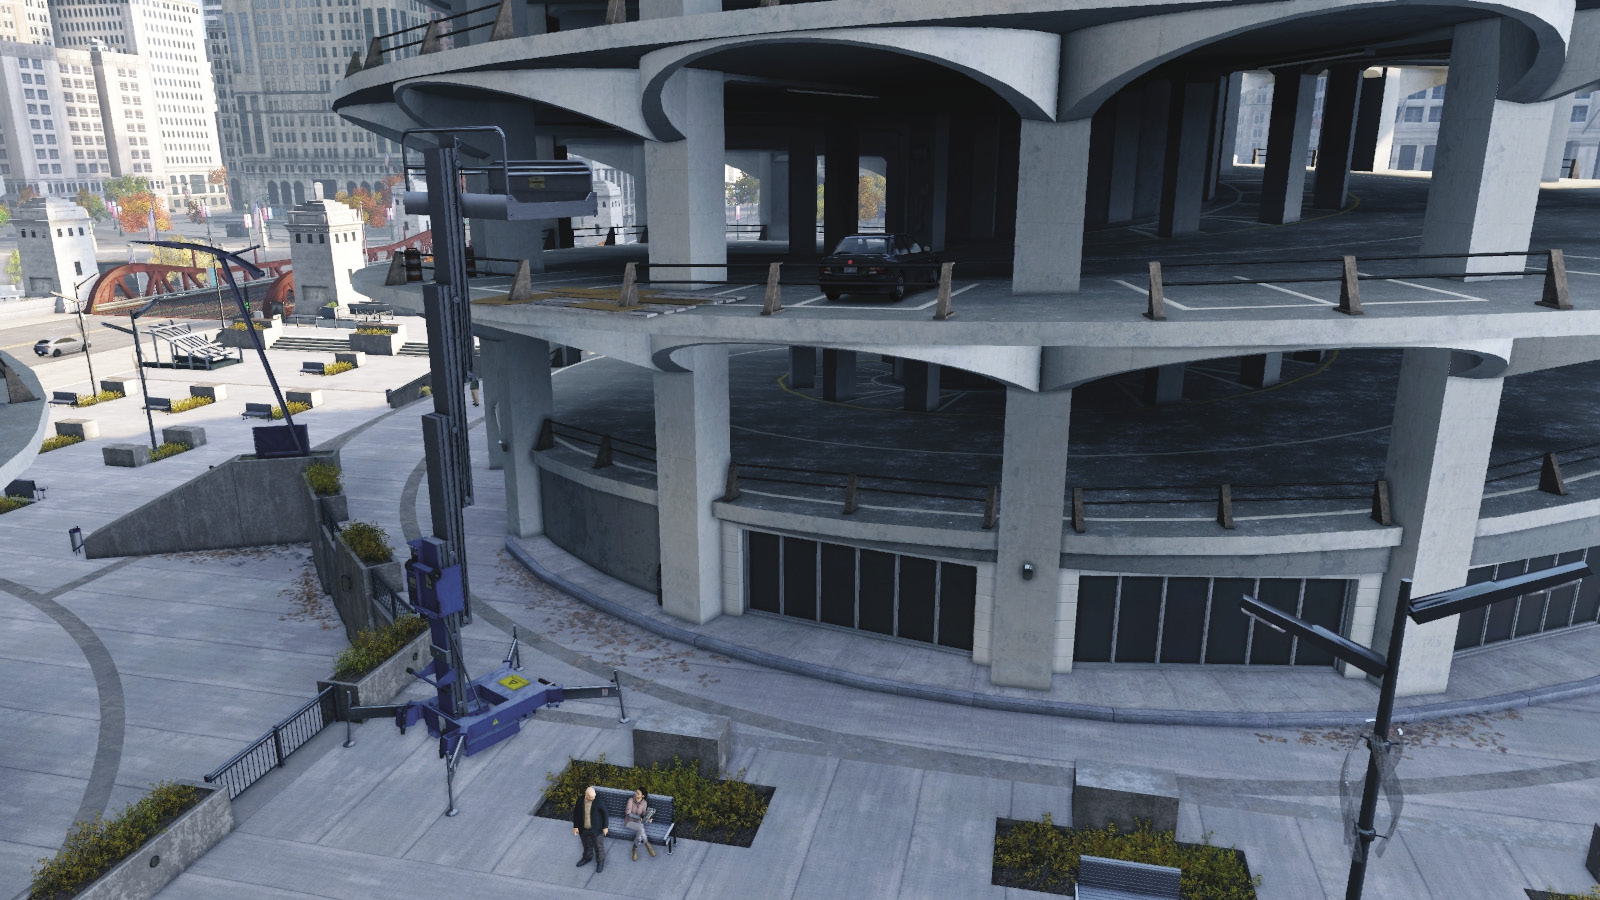
Use the newsstand as an anchor point, and jog left to the construction lift. Activate it to rise up two stories and enter the structure at the highest possible point. If the combat is going terribly, keep the lift location in mind, and vault over the outer parking railing to land here; you’ll almost certainly miss or die, but it’s there if you want an (admittedly terrible) escape drop!
Ground Floor
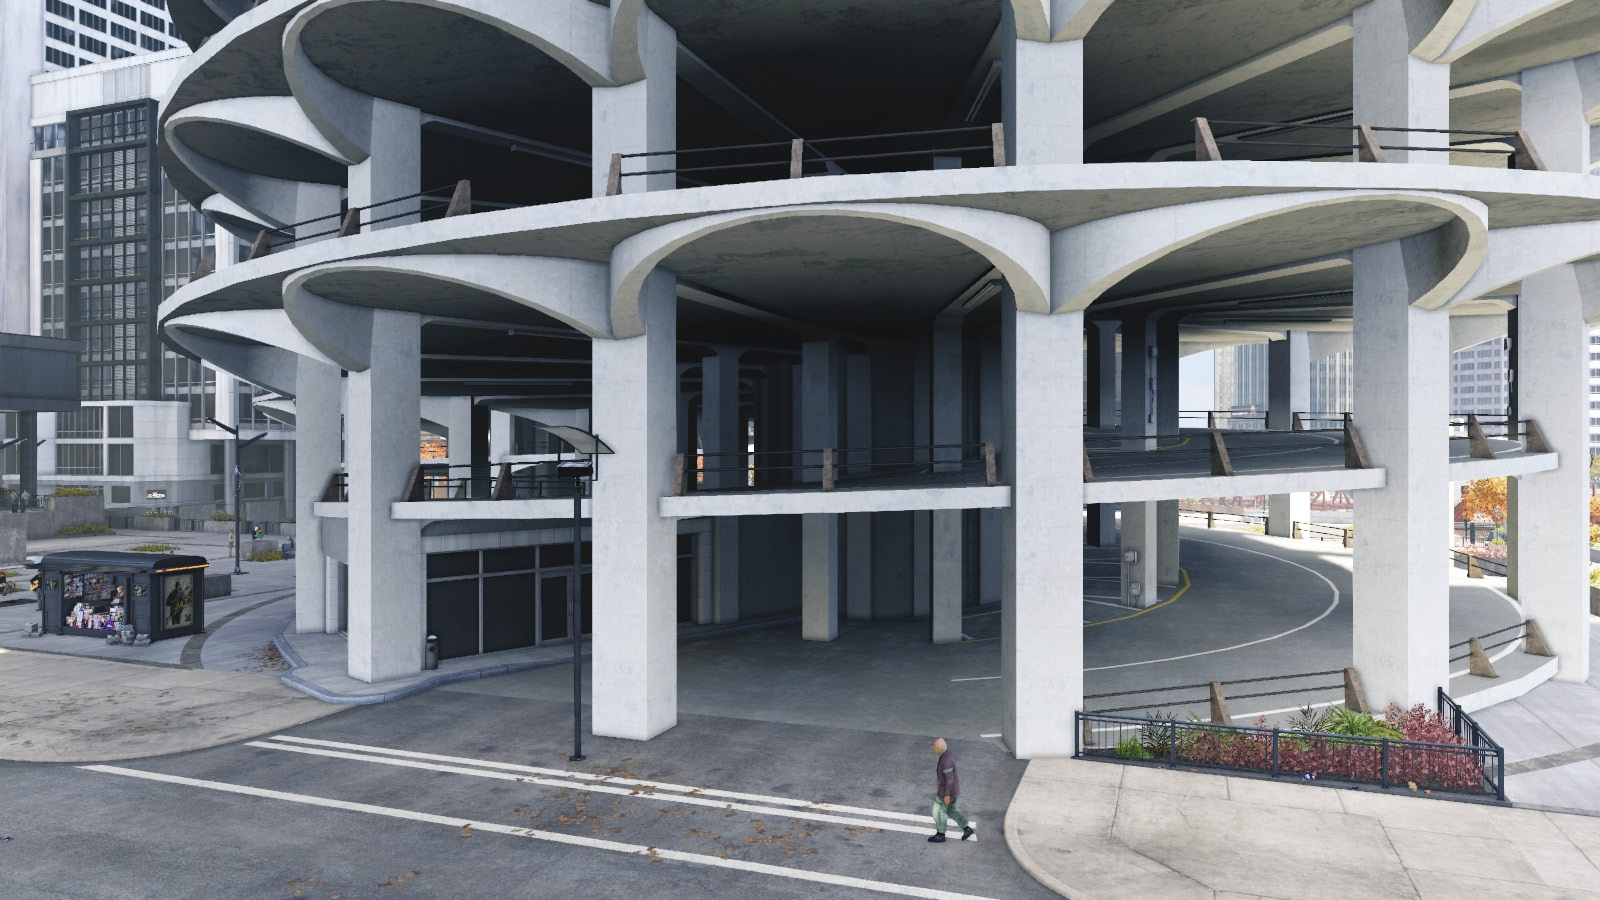
Run to the right of the newsstand to reach the ground-level entrance. Your target drives out from here if you manage to let him escape in his van. Drive a couple of vehicles and block this entrance to slow him down. This is a long slog to the third floor and the start of the infiltration, so you consider using a vehicle (such as a bike) to get there.
Third Floor
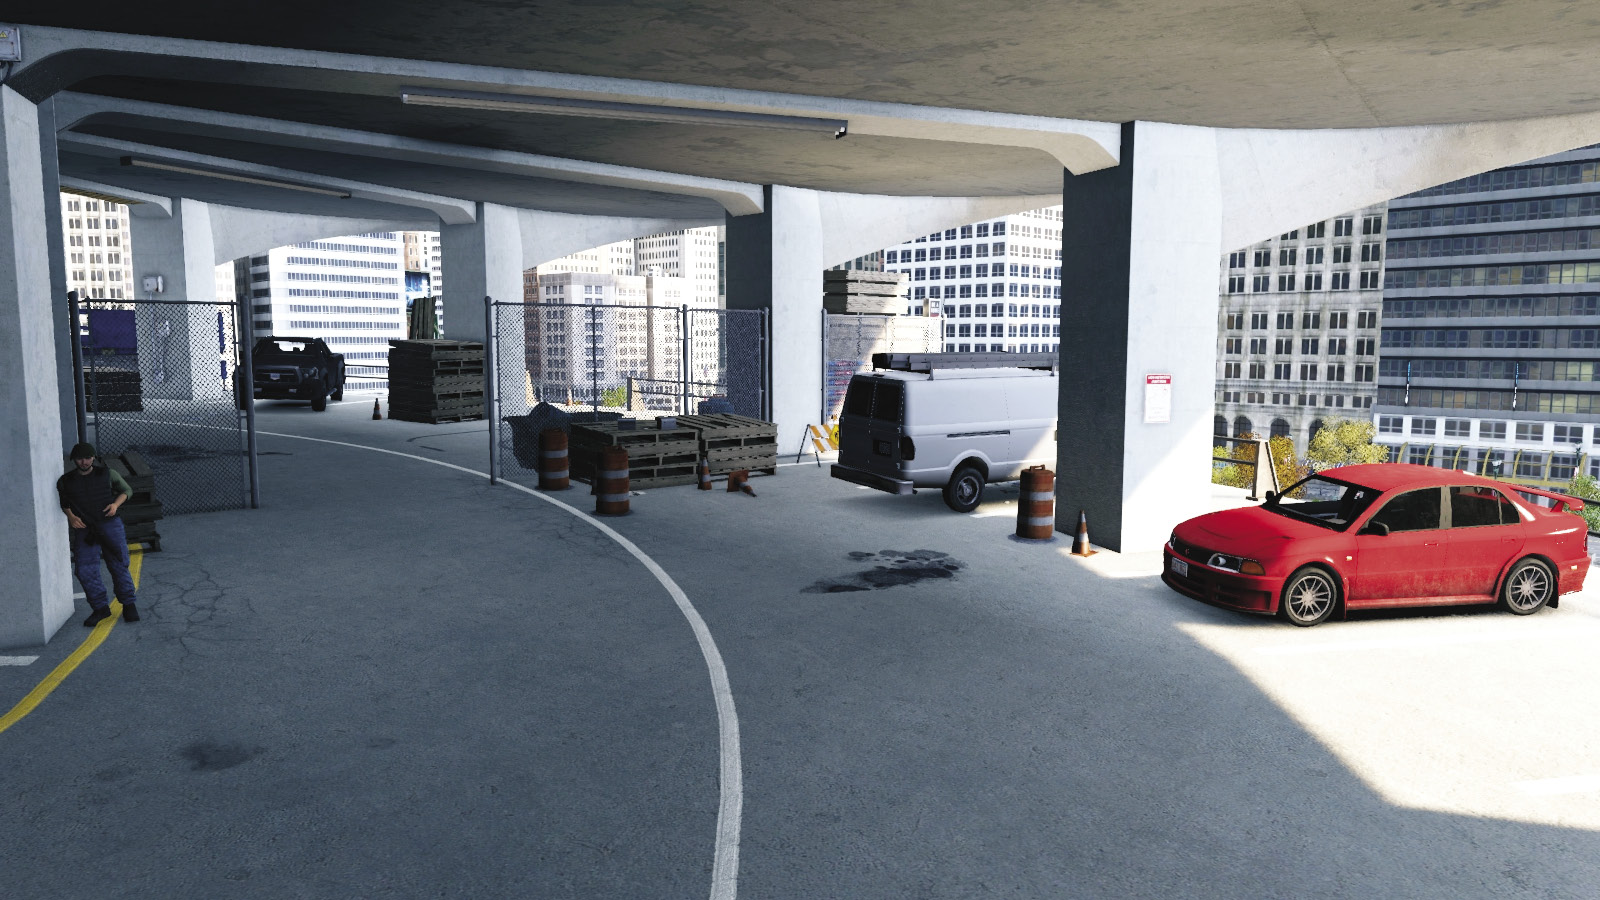
This initial 180-degree “curve” has four foes, a mesh wall, pallets to hide behind, and vehicles. Use the cameras to mark foes (except for one peering over the outer edge near the parked truck). There’s a forklift to attract foes and a scissor lift if you want a shortcut up to where the target is. After that, expect drywall and pallet stacks on either side of the curved road.
Fourth Floor
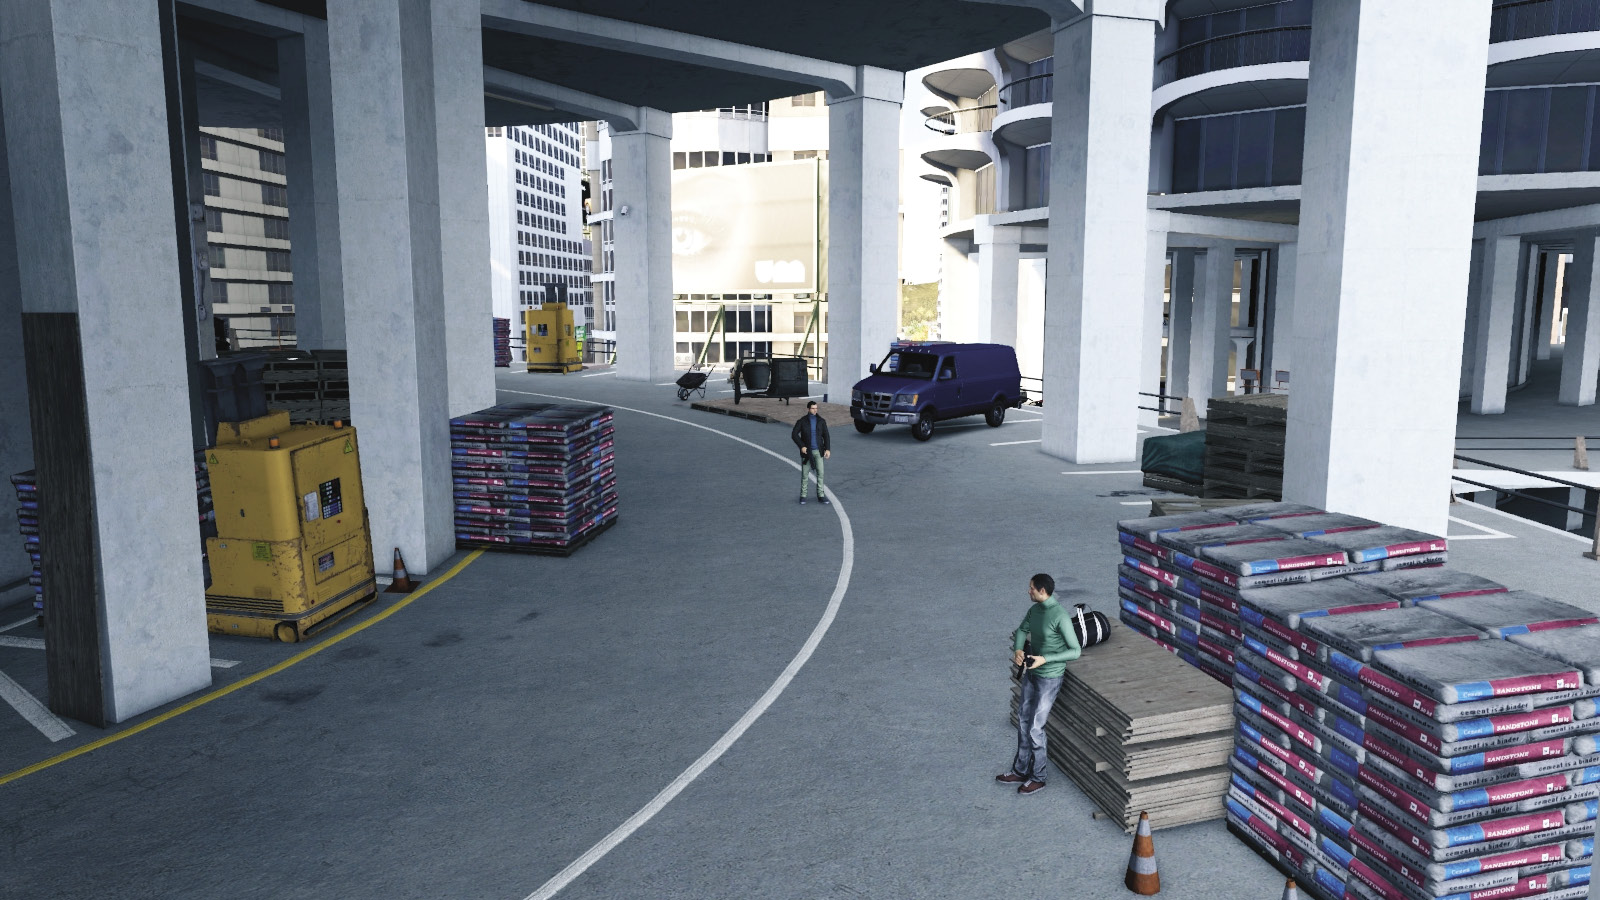
This 180-degree curve has a regulator (steam pipe) in the inner wall, some heavy vehicles, a forklift, and some scaffolding in the inner wall area to climb and hide in, if the infiltration turns violent.
Fifth Floor (Target)
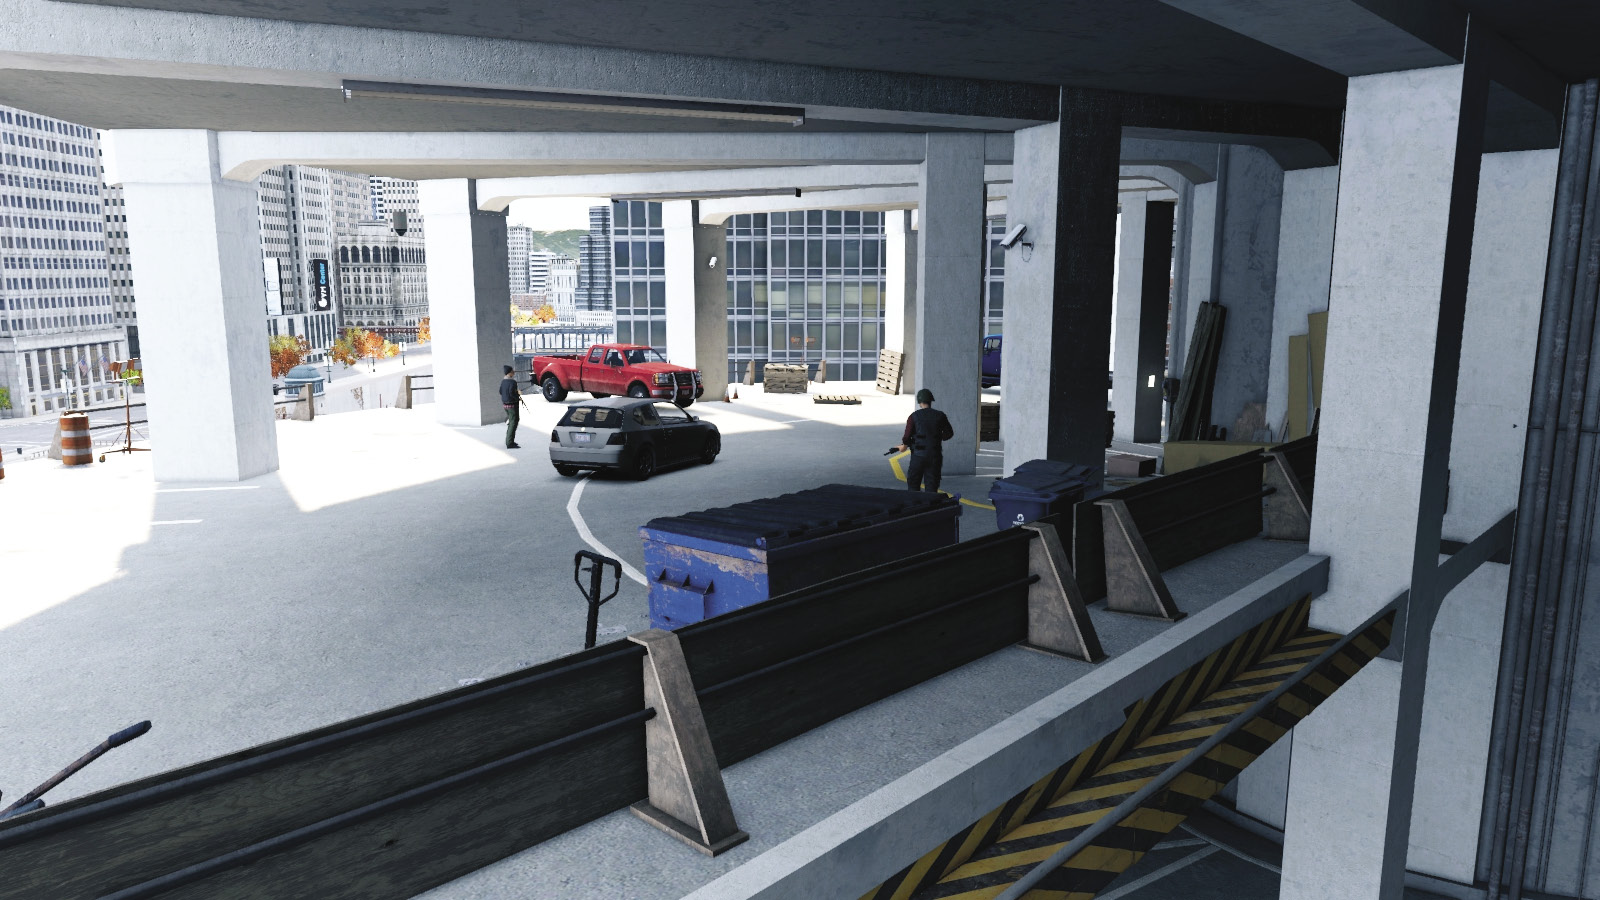
The target is with two or three guards, and there’s a parked van he escapes in, as well as a truck parked slightly farther down the hill (which you need to use to give chase). The edge of the fifth floor behind the target allows access down to the scissor lift and third floor (below). There’s a regulator and junction box to explode too.
Progression Plans
You might think about trying to snipe or inspect the tower from an adjacent building, but all are out of your mission area; the only way is in and up. There are really only three plans to try: stealthy, a shortcut using the scissor lift, or gun-based mayhem that results in the target escaping by van.
 Aggressive // Stealth: Tower of Terror
 Difficulty:
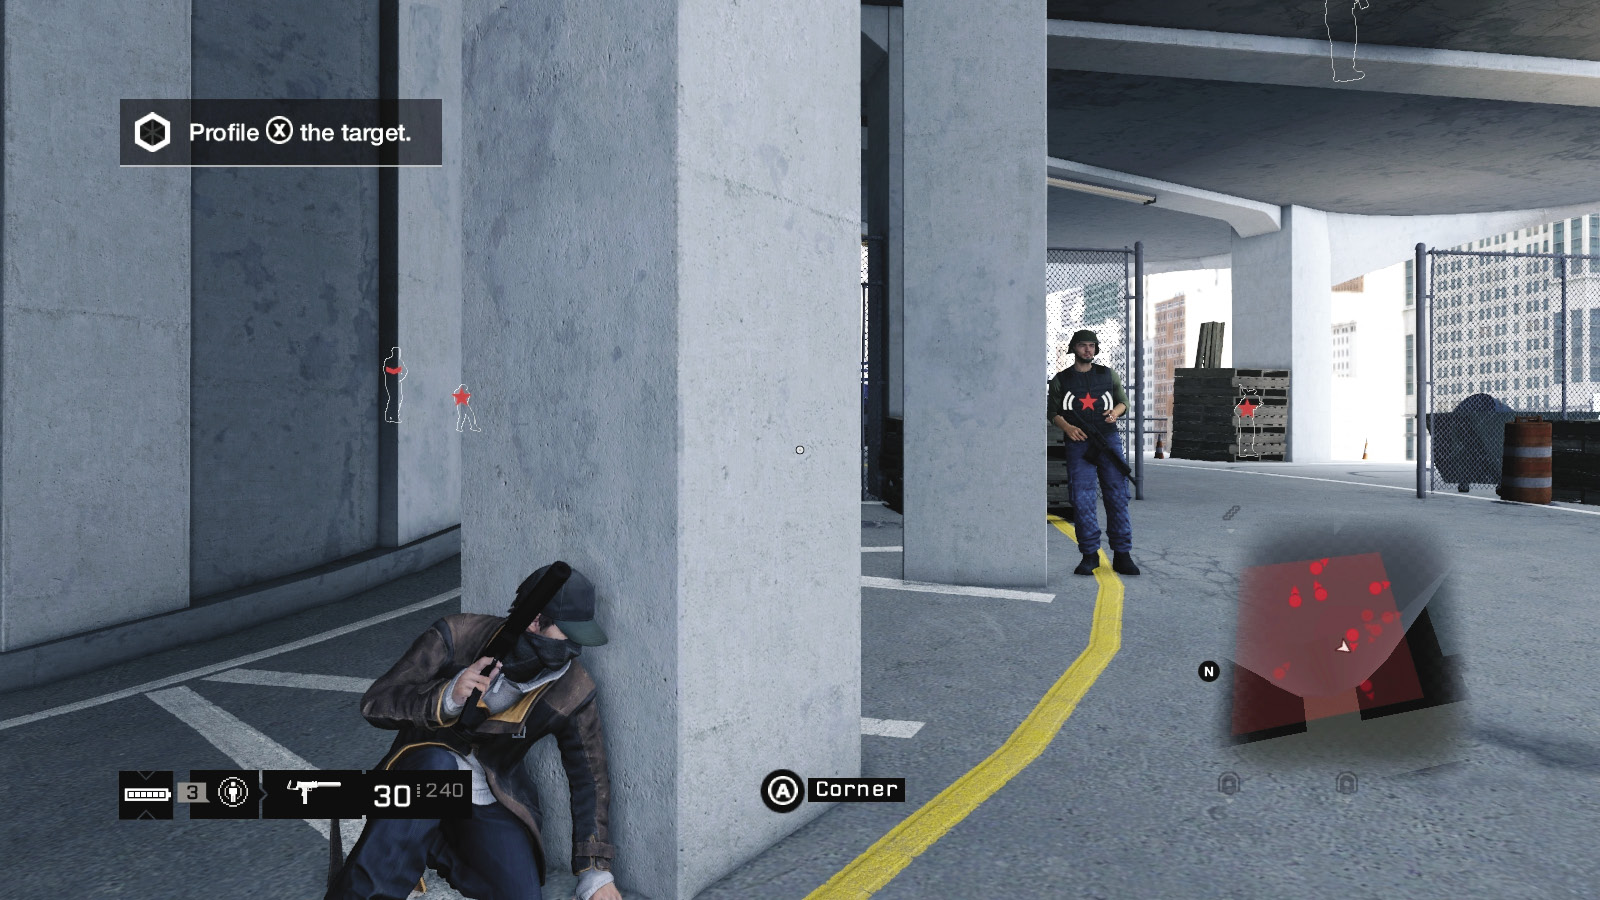
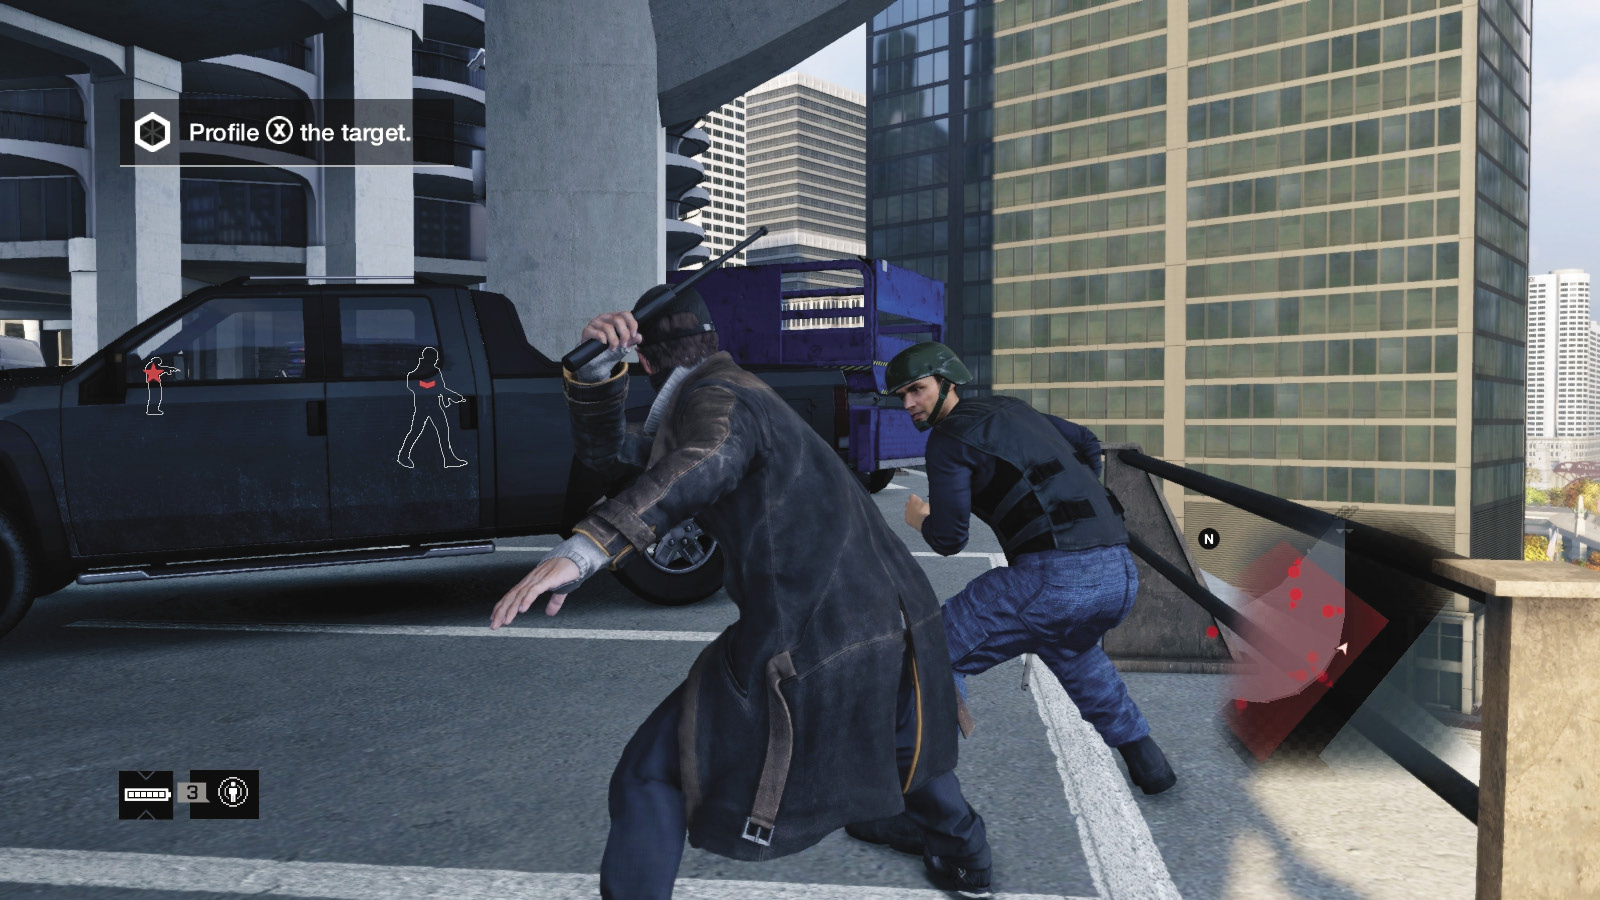
As soon as you reach the edge of the restricted area, step left to the inner wall and approach the first guard leaning against a pillar in front of the fence. Drop him, then use the cameras to mark every foe in the building, except for the one you can’t see; he’s through the fence, on the balcony edge. Tackle him next.
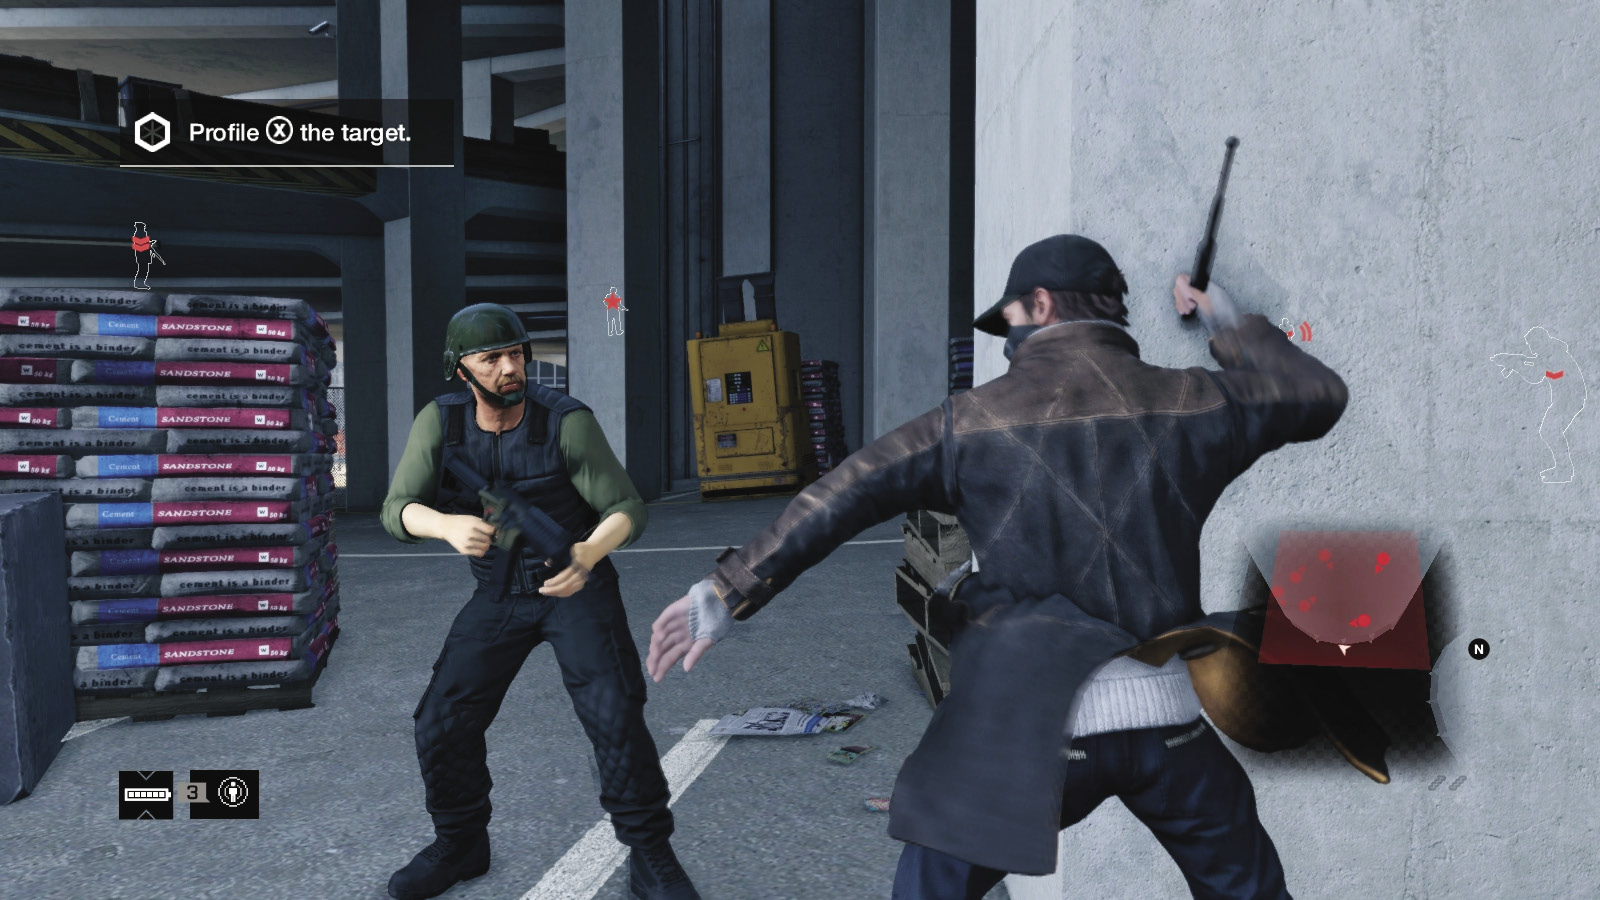
The next three foes are close together, so time the takedowns when they aren’t looking at each other. Wait for the nearest foe to come close to the scissor lift, then step out and strangle him. Keep on the outer edge, behind the Porta-Potties and concrete blocks. Wait for the next foe and jump out to throttle him. Then work the forklift at the inner wall so the third foe becomes transfixed; head behind and remove him.
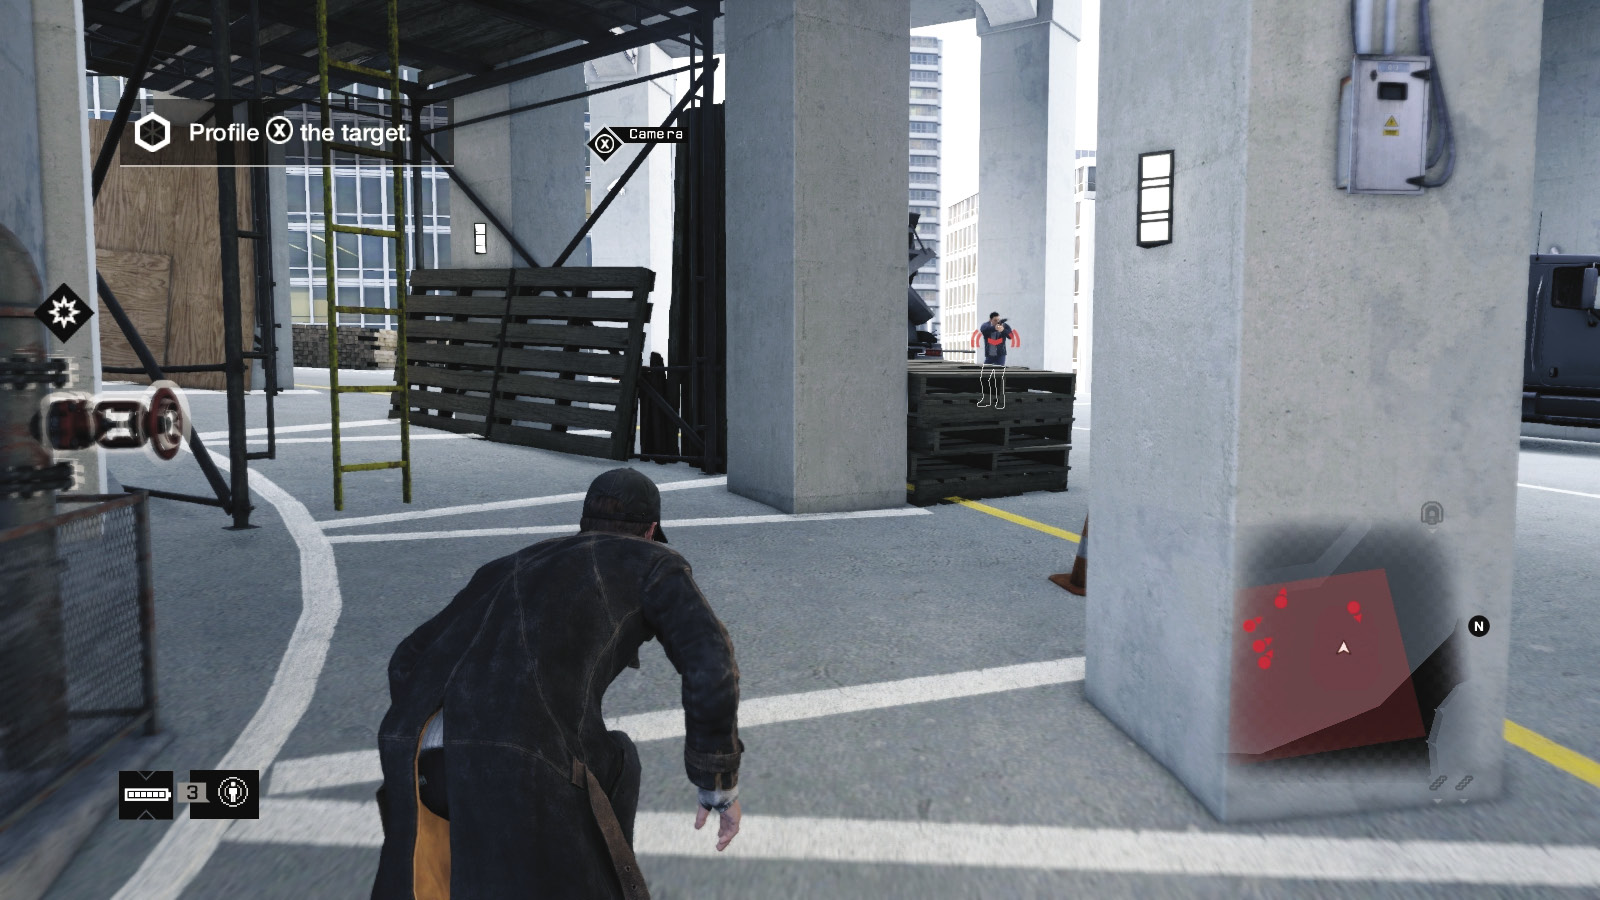
Foes should be alerted and may head down the curved road, so follow them and remove two of them now. You can lurk near the ladder and scaffold hidey-hole so you can drop down and deliver a baton strike, but it’s usually better to stay on the outside cover, as it’s easier to hide than if you’re huddled behind a pillar on the inner circle with nowhere to go. At this point, you’re usually seen, or the foes have moved from their original patrol patterns.
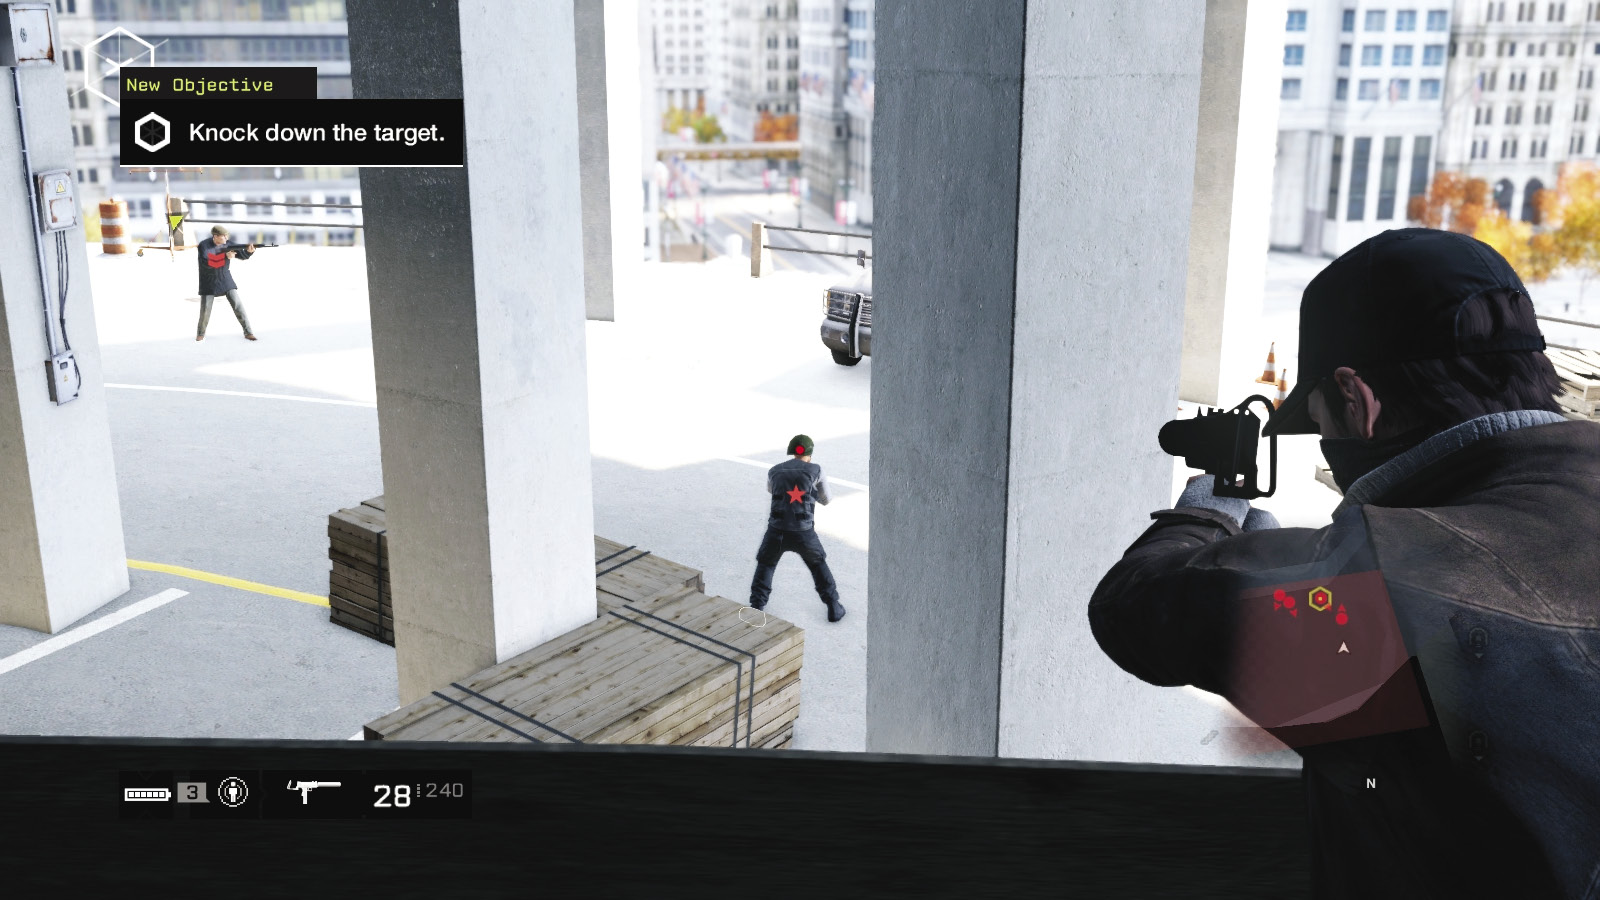
You’re now extremely close to the target, who may have an assault rifle. Don’t match his weapons; keep your baton primed and rush him, but only after his henchmen fall; you don’t want to be cut down by bullets as you bring the target down.
 Aggressive // Stealth: Scissor Lift Takedown; Even Rarer
 Difficulty:
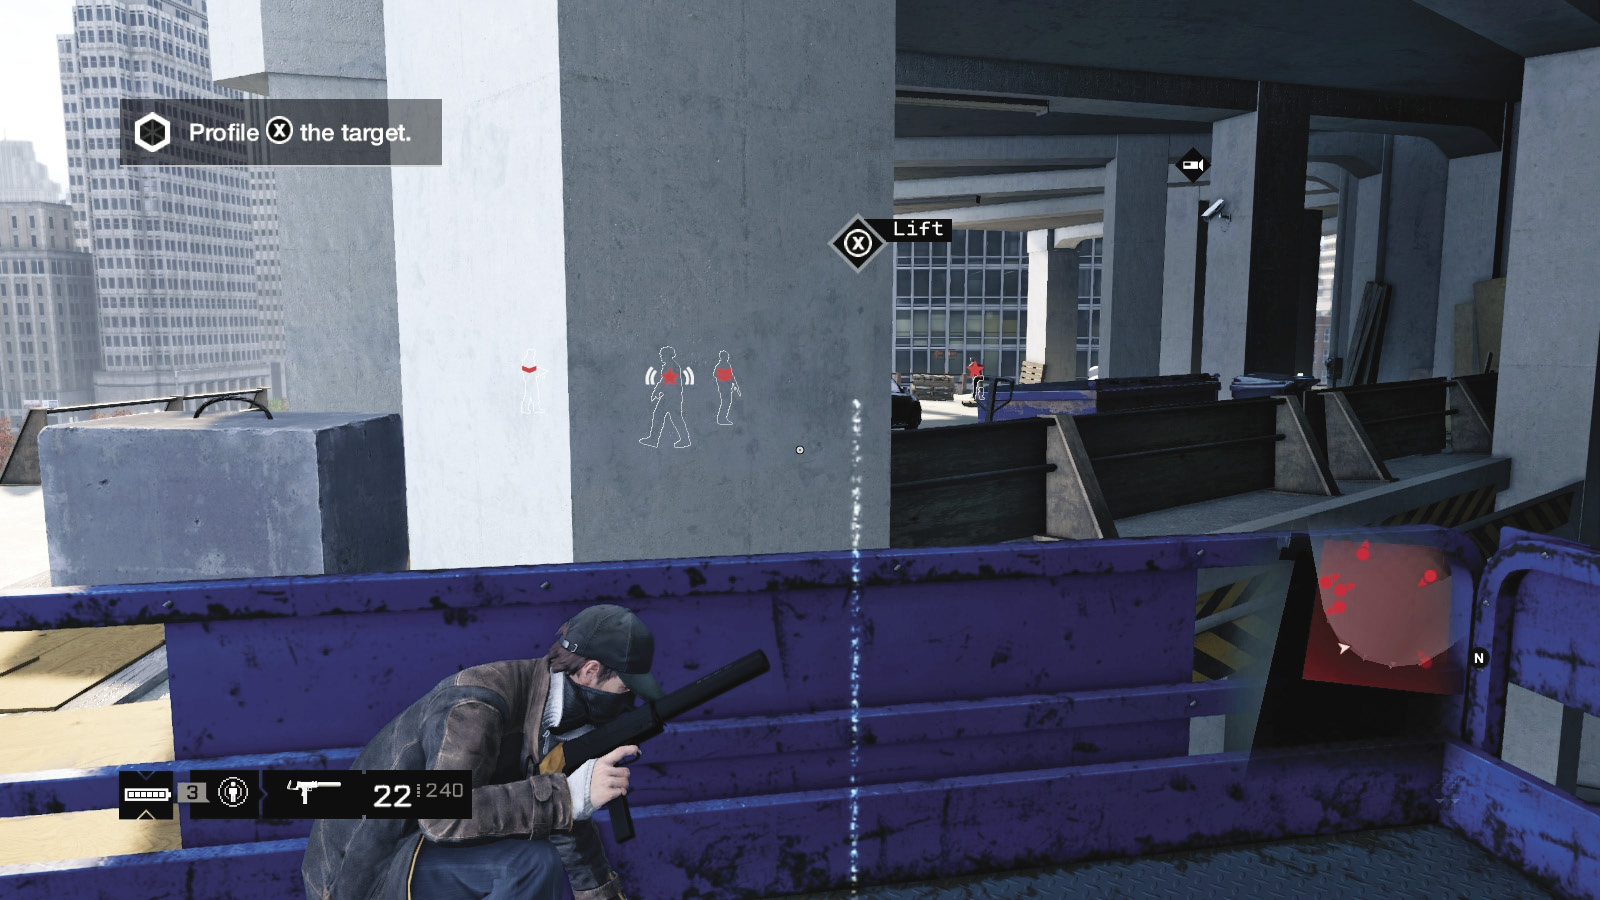
The scissor lift doesn’t attract foes if none are near, so remove the single enemy looking over the railing and then the patrolling enemy nearby. Ride the lift up to the target, step off behind the pillar and concrete block, and easily spot your target. Even if the two guards know you’re coming, you can quickly shoot them before manhandling the target. Retrace your steps, engage in a gun battle, or use a vehicle to flee.
 Aggressive // Violence: Using Guns After Error
 Difficulty:
With the threat of violence looming, the foe takes off. Always check where your nearest vehicle is so you can jump in and follow him (or take him down using the scissor lift route first). Then you’re free to mow down enemies using your favored firearms. The scaffold on the fourth floor is reasonable to use during a firefight, but it’s usually better to take the scissor lift to the top and work your way down and clockwise (with the height advantage), dropping to cover as you go.
 Driving // Offensive: An Excellent Preparer
 Difficulty:
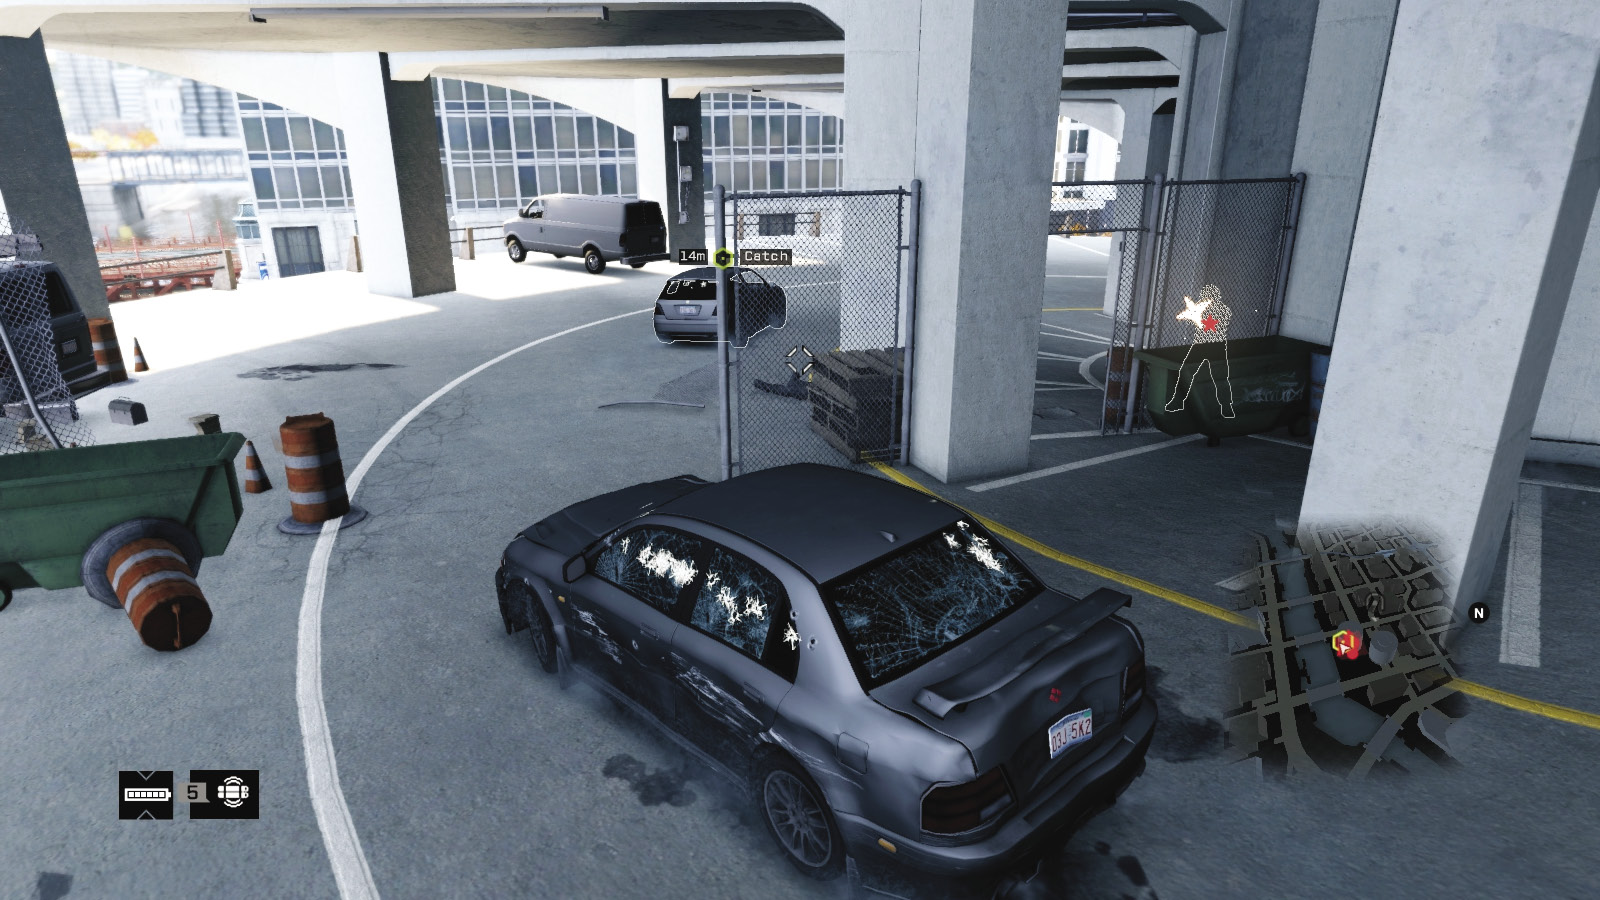
You know the enemy is going to try fleeing, so drop an IED (or launch a grenade) from the balcony on the fifth floor where the target was. As the target drives down a floor, you can stop the vehicle with a well-aimed punt or lob and hope the explosion doesn’t kill him.
You can also try driving up the curved road using one of the many parked vehicles, hitting foes and blocking the escaping target as you go. This is dangerous, but the blockade can hinder your target.
Or, if the foe passes your trap, make sure you’re driving the nearby truck in hot pursuit! He leaves the tower (did you block the exit with another vehicle?), and you need to follow him in the dizzying descent before employing traffic lights and steam pipes to ruin his day (and his van).
MISSION REWARDS (PER MISSION)$2,500, $5,000, OR $10,000 ACQUIRED SKILL POINT ACQUIRED +1 |
MISSION REWARDS (UNLOCKS)COMPLETE 1 GANG HIDEOUT: AK-47 (WEAPON) COMPLETE 5 GANG HIDEOUTS: RAPID RELOAD (SKILL) COMPLETE 10 GANG HIDEOUTS: SPEC OPS SMG-11 (WEAPON) COMPLETE 15 GANG HIDEOUTS: BASEST BASE (ACHIEVEMENT) |