
Watch Dogs Guide ADVANCED TRAINING
/ _MELEE STRIKES, WEAPONS, AND VEHICLES
This section covers all the offensive capabilities you possess, from your trusty baton to the exceptionally entertaining grenade launcher to every firearm. We also detail the vehicles you utilize.
// MELEE STRIKES
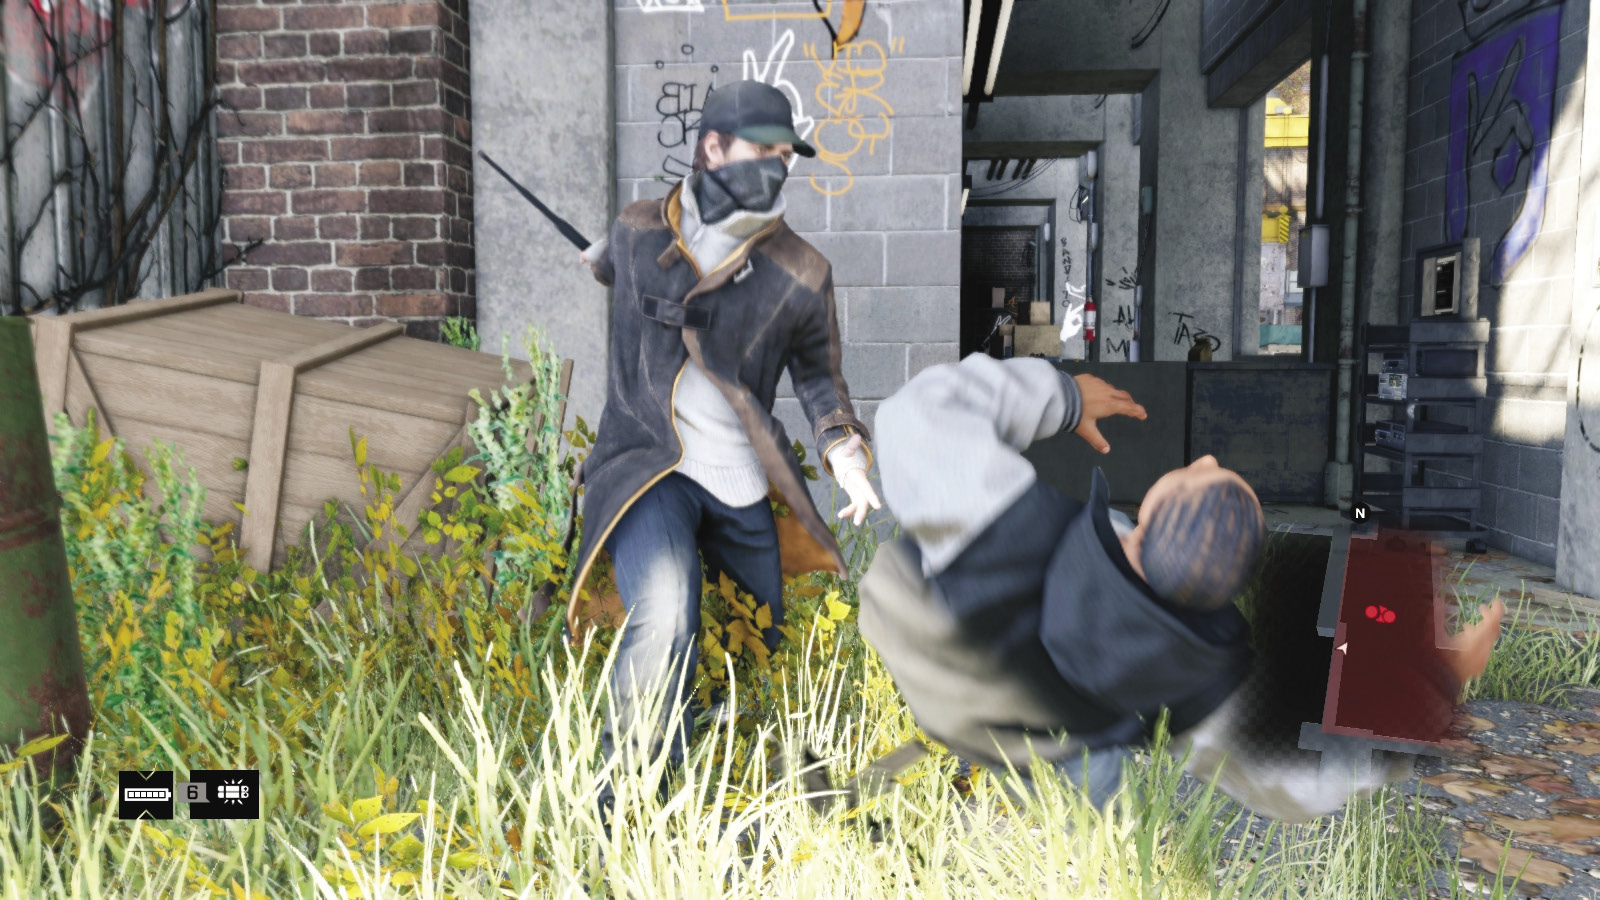
No guns? No problem; one of the safest, quietest, and most proficient ways of taking down an enemy is a melee strike. Simply move to melee range, tap the Melee button and Aiden quickly dispatches the foe with a takedown animation. Depending on where you approach from (behind, in front, to the side), the takedown could involve a strangle, throttle, baton smack, or other incapacitation. But there are several ways to tackle a foe with just your baton:
// MELEE STRIKES /// Dashing In
Simply rush your opponent from any direction and grab them. Even if you’re quick, your foe still may raise the alert but not fire off a shot, allowing you to stay stealthy rather than switch to a gun battle. This is often the best way to remove a foe even if you’re engaged in a battle, as it saves ammo and you can remove a threat if reloading is taking too long.
// MELEE STRIKES /// Stepping Out
This works in the same way as a dash, except you’re in cover. An icon appears over the foe’s head when you’re in range, or you can detach yourself from the scenery first. This is even more clandestine, as you’re out of cover only for a second, providing you duck back into cover afterward.
// MELEE STRIKES /// Vaulting Over
If the obstacle you’re using as cover or running at is below thigh height, you’re likely to vault over it. If a foe is standing on the other side, you can knock him over with a quick (and automatic) kick. This way you don’t need to maneuver around an obstacle and can more immediately silence a foe. Low cover shouldn’t stop you from tackling a foe who believes he’s safe behind an obstacle.
// MELEE STRIKES /// Dropping In
Like some kind of heavy-booted assassin, you can peer down from a roof or other high platform, and either drop or vault off and land on the foe’s head, knocking them unconscious if you land with accuracy. Often overlooked, this is most helpful if you need to reach a different area and can’t take out a patrolling foe by any other means.
// MELEE STRIKES /// Melee Executions
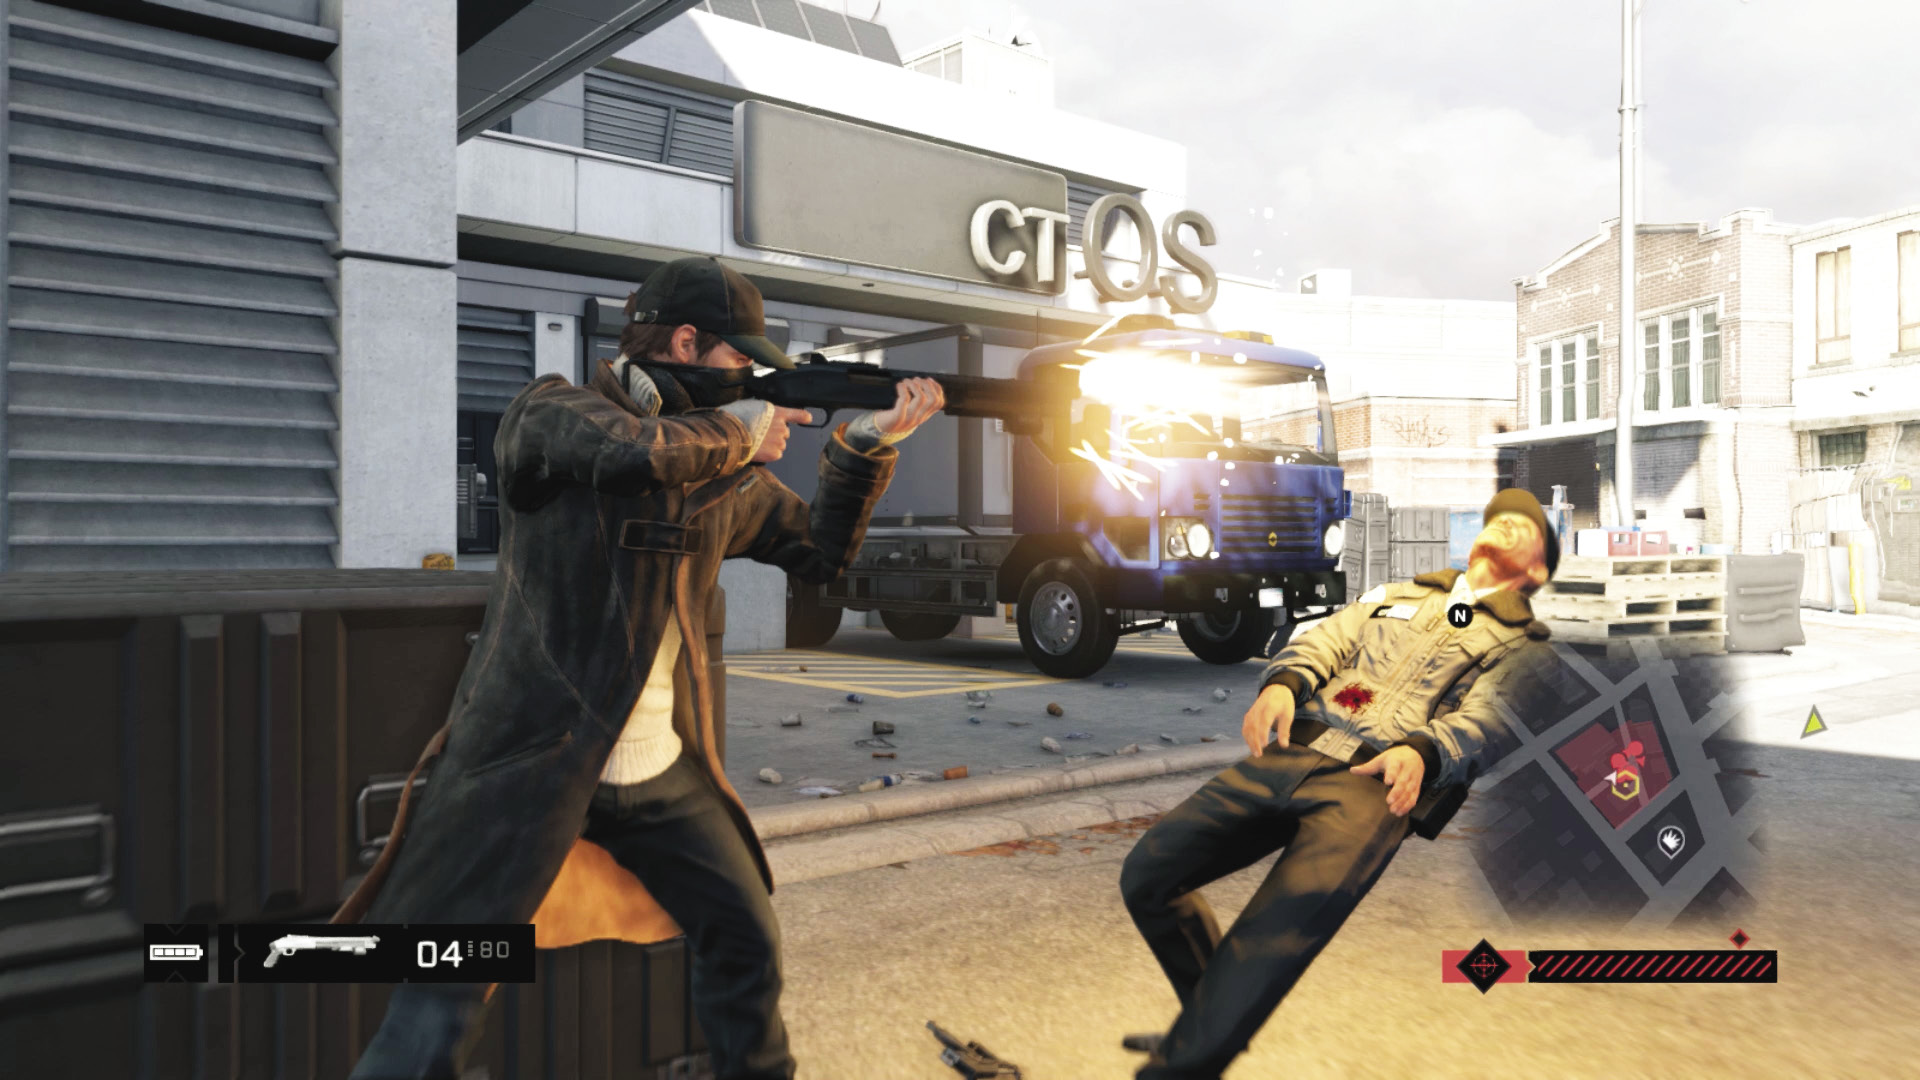
If you’re fighting faction enemies (not the police) and carrying a weapon, you can step up and execute the foe instead of melee-striking them. You take your chosen weapon (providing it fires bullets or shells; grenade launchers can’t be used), and blast the enemy at close range in a visceral and spectacular takedown. Have you attempted one with every type of weapon and from every direction?
You can use this during gun battles instead of aiming at nearby enemies in locations you want to reach (and probably use as cover).
When fighting the police, you use melee strikes, but you can auto-swap between baton and gun.
Expect your foes to periodically counter you; simply try the takedown again until you achieve it.
If you use Spec-Ops weaponry, these takedowns are almost as silent and offer an alternative to melee strikes for the stealthy operative.
// MELEE STRIKES /// Enforcer Takedowns
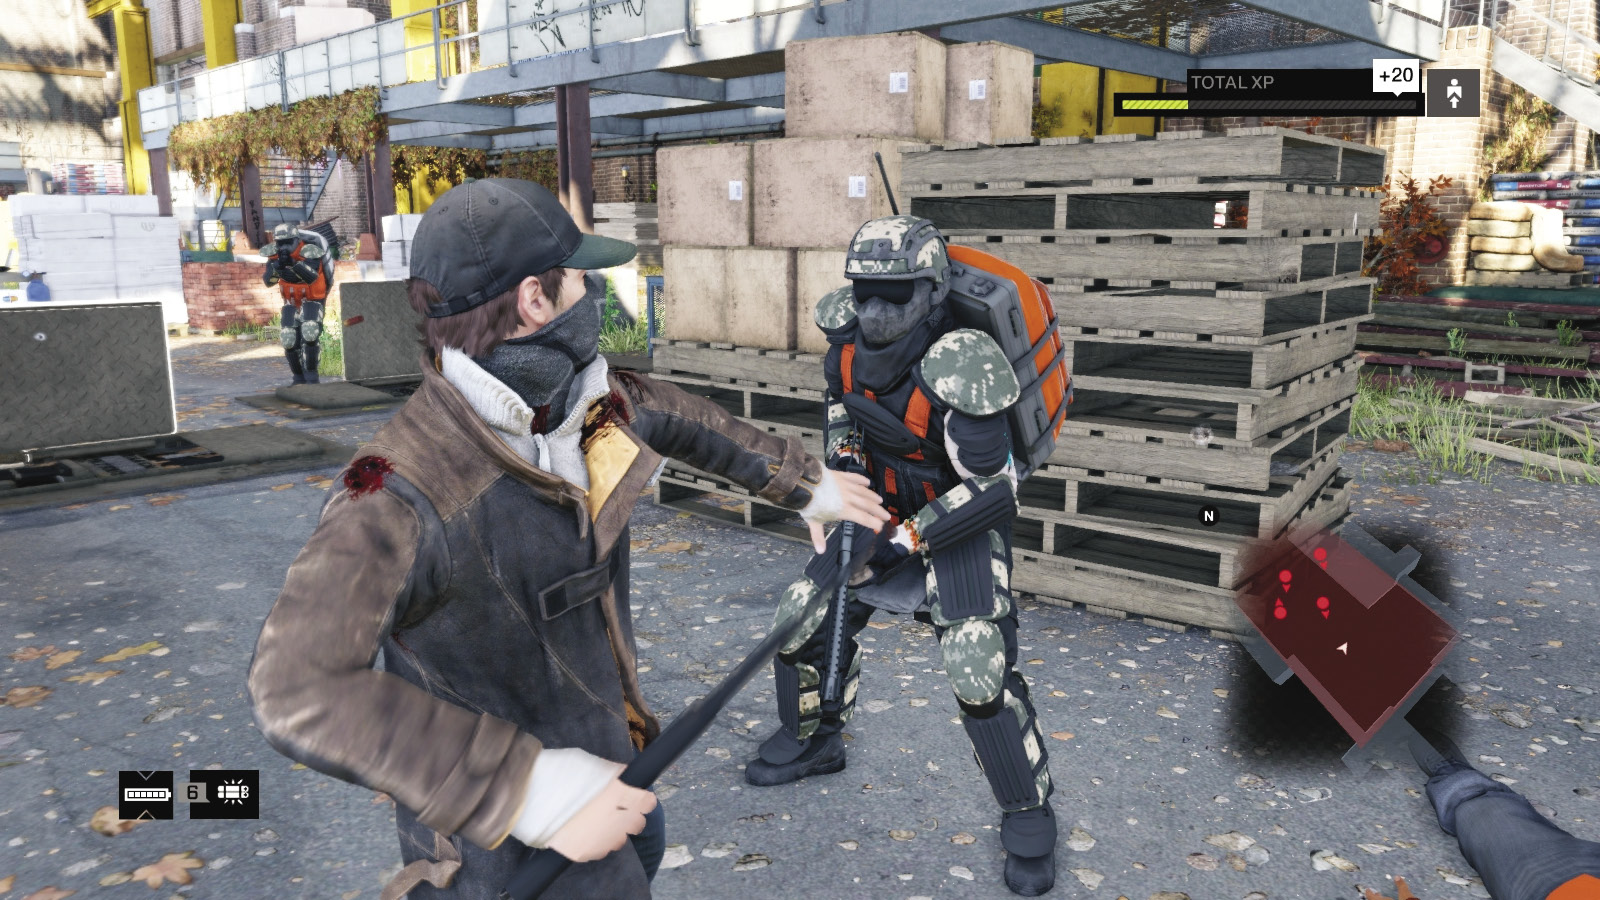
The most difficult type of enemy to neutralize is the heavily armored Enforcer. Though it’s better to tackle this beast using grenades, explosive scenery, or high-powered weaponry (and a couple of vehicle hit-and-runs would help), if you’ve unlocked the Enforcer Combat Take Down skill, you can batter him to death. Don’t try grabbing an Enforcer without this skill—he’ll cut you to ribbons in seconds!
/ WEAPONS
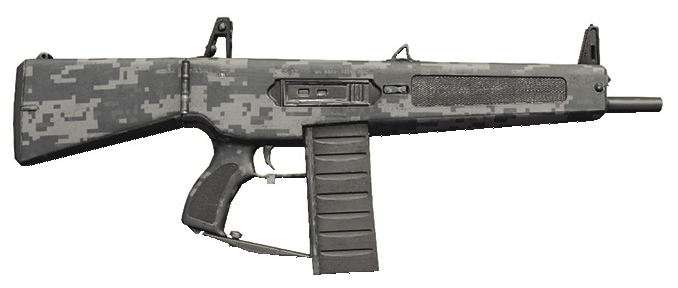
There are 44 firearms of various lengths in nine different categories, from small pistols to outlandish sniper rifles. Learning how to use all of them, and what their specific statistics are helps you navigate Chicago with a better sense of protection:
// WEAPONS /// Locating Weapons
Weapons are collected in many ways. You begin with your trusty P-9mm pistol, but you should soon graduate to more potent firearms, taken from the following locations:
//// Dispatched Enemies
Any time you defeat a foe, he drops his weapon. You can pick it up if you haven’t acquired it before. Usually, ammunition is picked up as well, which is most helpful during protracted firefights (and means you don’t have to buy as much ammunition between missions). The main missions, Gang Hideouts side missions, and Investigations are the best for obtaining new weaponry in this manner.
//// During Missions
Study the maps throughout this guide, as certain missions introduce new weapons, specifically designed for the mission in question. The advantage of picking up, say, the AC-AR rifle from T-Bone’s junkyard during Act III is that the gun is great for subsequent battles and is free, and you avoid a sizable purchase at a gun shop.
//// Gun Shops
At any time, you can visit one of the six fine hunting establishments (one gun shop per district), and check out the firearms for sale there. You can also buy ammunition for your weapon types and “refill” ammunition for one single price instead of picking through the bullets and checking them against your emptied guns.
//// Items of Interest
There are a variety of bags (satchels, bowling bags, paper bags) scattered randomly throughout Chicago. There are also bags that you can find during your missions, while infiltrating a restricted area. Access these bags, and there’s a (random) chance you could uncover a weapon.
//// Progression Rewards
It’s worth checking your Progression Tree branches for each of the tasks to do across the city; some (such as the QR Codes Investigation) unlock special “Signature” and “Spec-Ops” weapons (such as the gold version of the M1 SMG, called the “Gangster”), if you complete a task within this branch.
//// Exclusivity
Some of the more lavish or entertaining weapons are in the “Exclusive” category. These are only available in special packs (usually accessed during the game’s preorder or via Uplay. This only applies to Exclusive weapons.
// WEAPONS /// Equipping Weapons
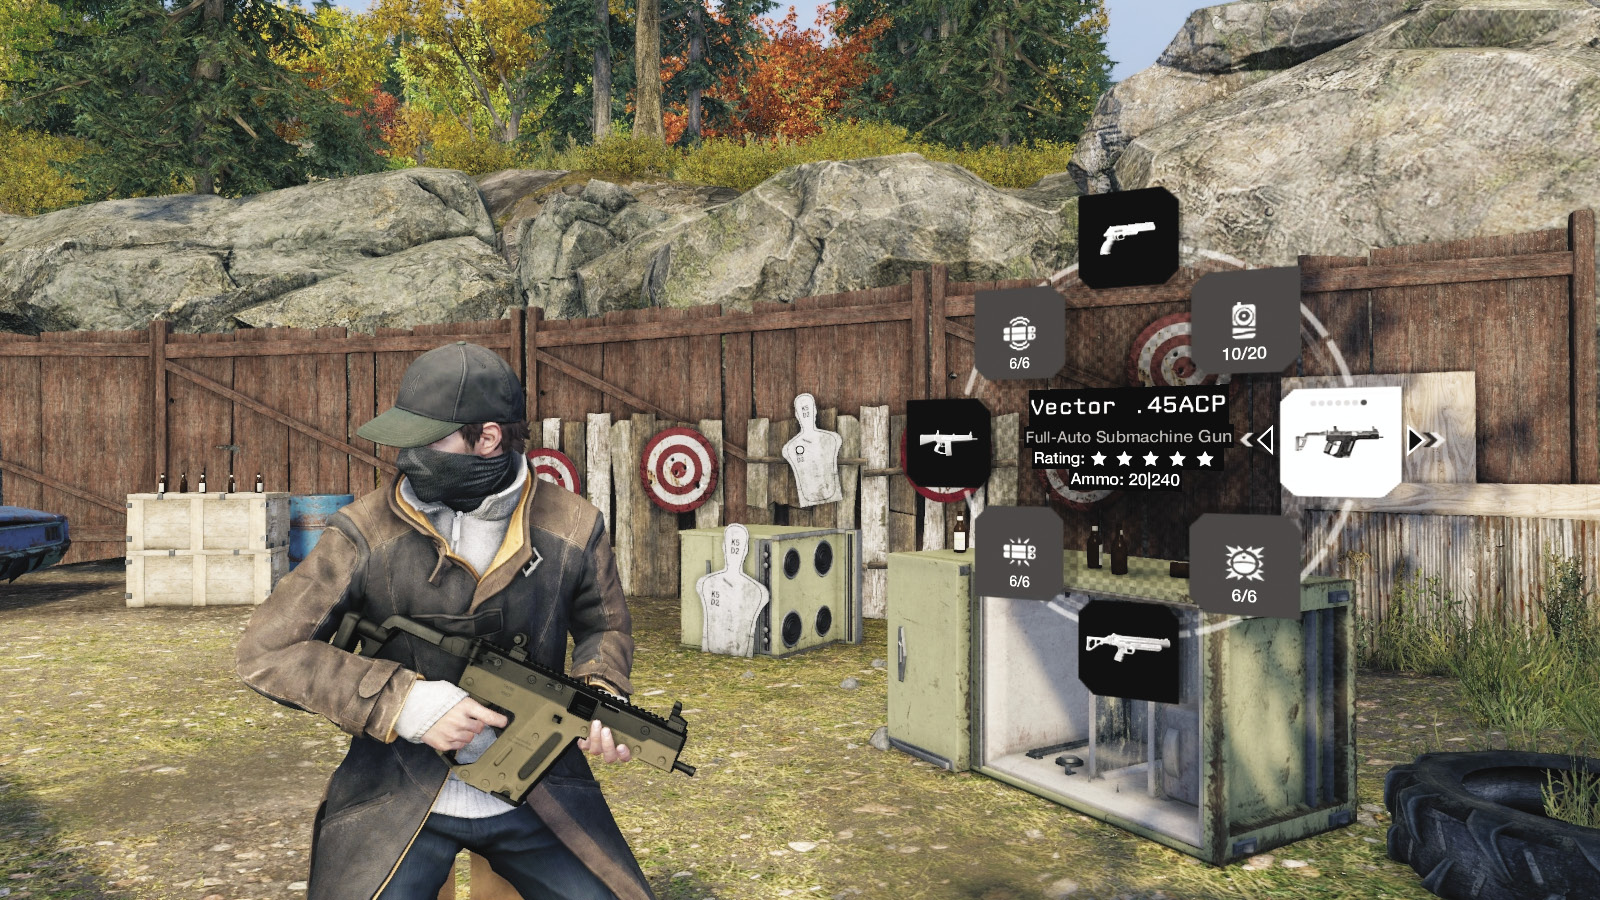
You equip weapons automatically when you find and pick new ones up, or buy them from a vendor. Once you unlock a weapon, it becomes available from the Weapon Wheel. If you have more than one type of weapon, access the Weapon Wheel to cycle through your available guns.
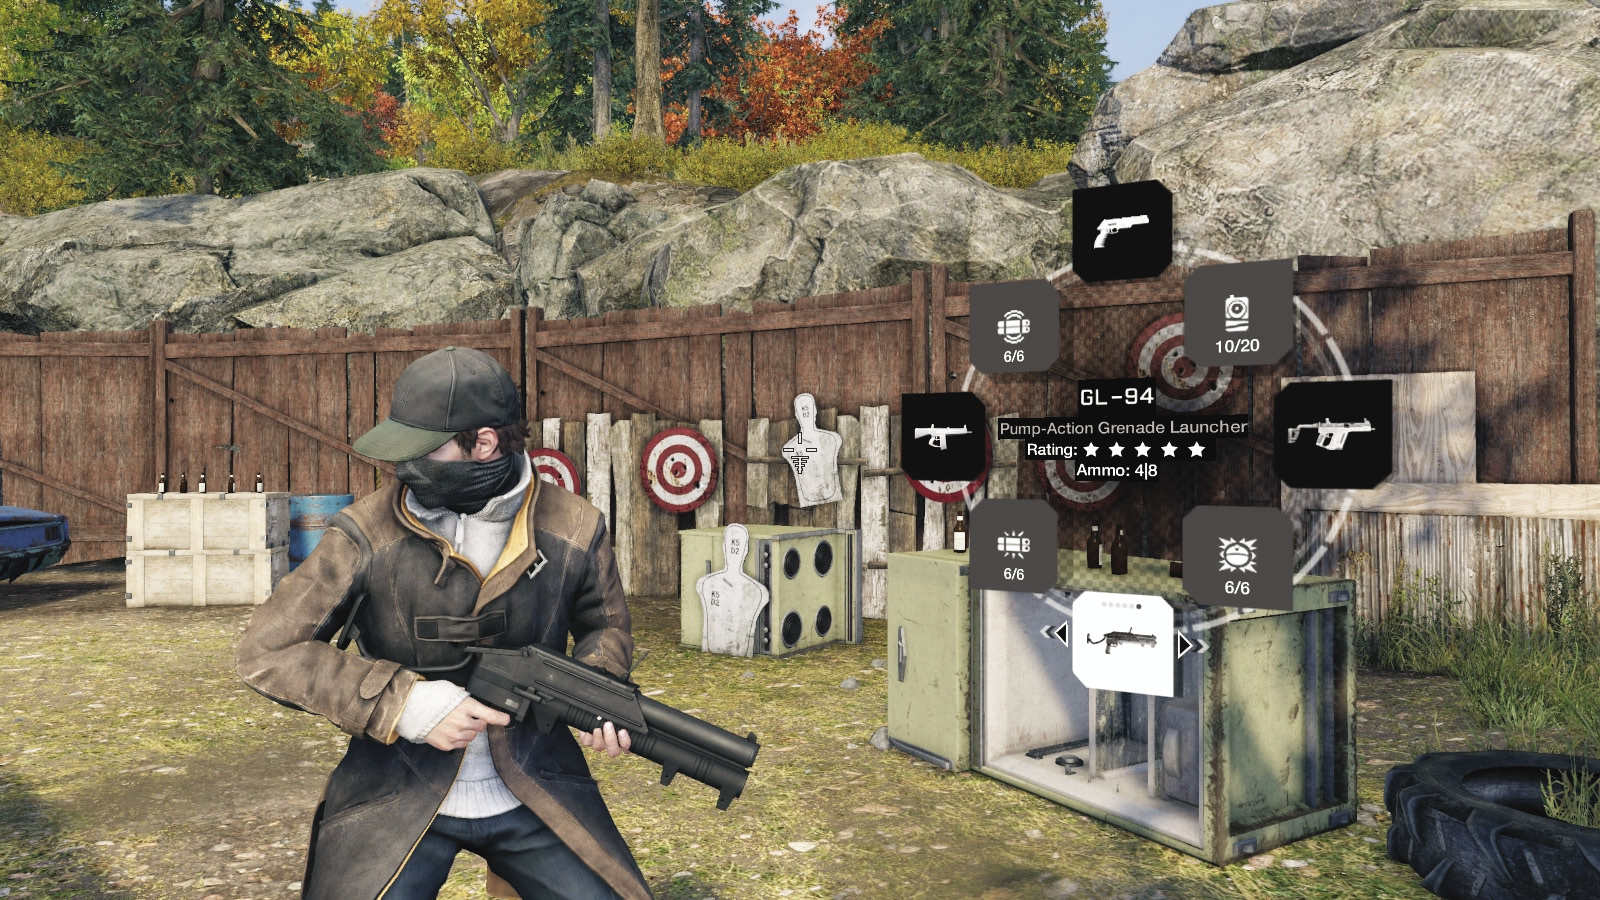
You carry four types of weapons: one in your support (upper) slot, one in your primary (right) slot, one in your secondary (left) slot, and one in your specialty (bottom) slot. Check the weapon table to see the type of weapon, and look in the appropriate slot to find it.
// WEAPONS /// Using Weapons
Aiden holds a weapon in his right hand until it comes time to fire. With a gun in hand, citizens may notice and call the cops. So it’s best to keep weapons holstered until you’re in a restricted area (or you want to coax the police out).
/// Using Weapons //// Aiming, Headshots, and Cover
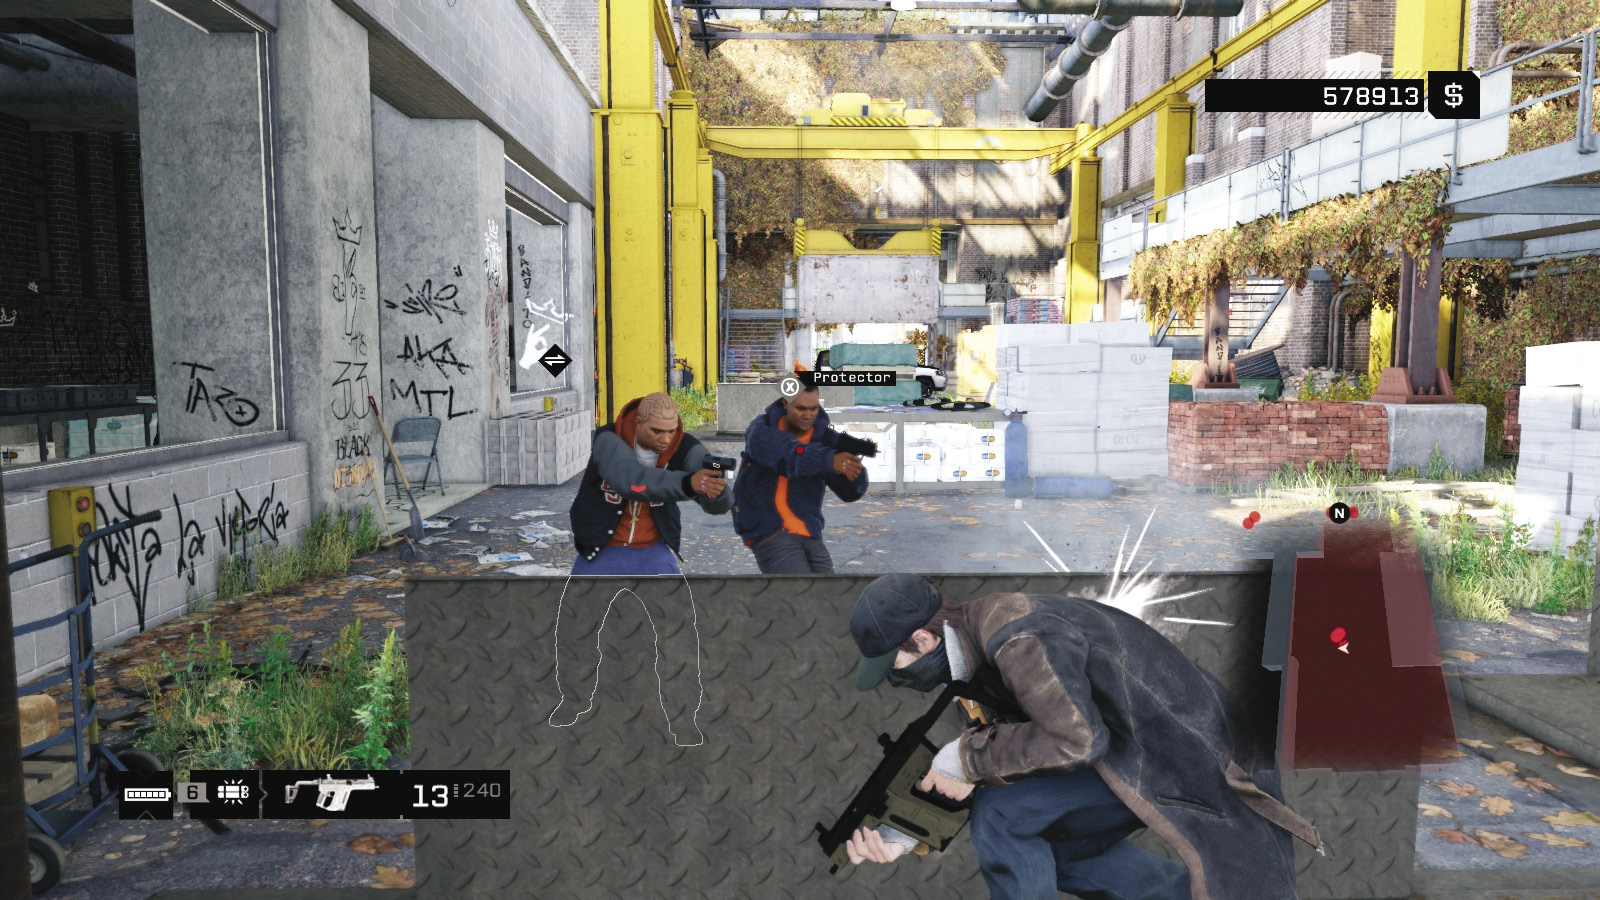
Once your gun is raised and ready to fire at a target, sprinting is no longer viable. Your reticle turns red when a human target is lined up; there are red streaks out from a white reticle if the target is at long range and will be more difficult to hit.
Aim at a target’s head to ensure you’re striking with maximum damage, and the enemy won’t survive. Armored enemies are especially tough (some can survive an entire clip into their torsos), but shooting one in the head is usually an instant kill. When combat goes crazy, use your Focus to help line up your headshots.
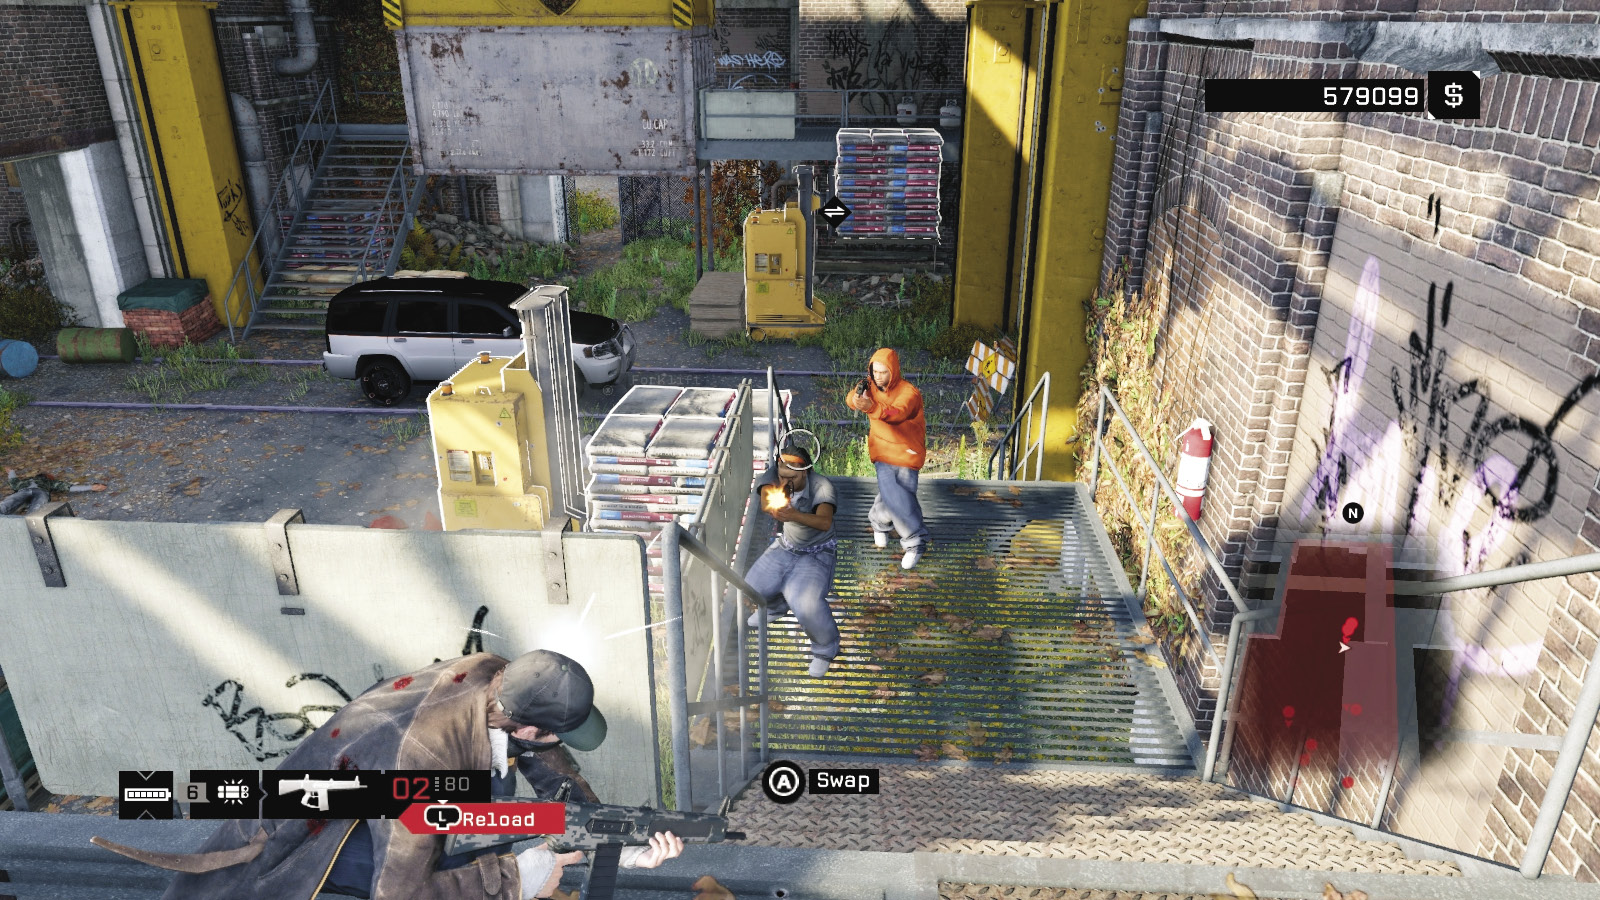
You can fire from cover. If you’re behind a piece of cover that obstructs your aim, quickly shuffle to a new cover point. Here’s how firing from cover should be done, if you want to minimize bullet expenditure:
Use the camera thumbstick to move to line up a target’s head while you’re still in cover. When you’re ready to fire, aim to bring the weapon (and yourself) out of cover slightly, and fire just as you fully aim; this essentially fires the round off at the earliest possible point while still being accurate. Then release and duck back into cover.
// WEAPONS /// Weapon Types
Learn the main advantages and uses of each major weapon type before employing them in the combat zone. Then, simply cross-reference the statistics pages to come, and compare the various elements of each weapon (either within a type or across all types) to determine which one you want to pick.
//// Pistols
These are compact weapons that fire one bullet at a time and offer flexibility across most missions. A favorite of those who prefer stealth over slaughter, they offer the same distance of fire as most other nonscoped weapons, good accuracy, and can easily be brought up and fired at a target. Useful if the number of foes you’re facing isn’t large, you can surreptitiously set up a headshot and drop back into cover. Pistols are less effective if chaos reigns and you’re surrounded by enemies; it’s then time to pick some more robust firepower options.
//// Assault Rifles
These offer devastating power at longer ranges than SMGs, though in general they don’t fire quite as quickly. Some assault rifles, such as the AK-47 and ACR, punch through light cover (like glass and wooden or light metal fences), making it more difficult for enemies to hide and widening the options you have for taking enemies down. In general, assault rifles are the most well rounded of your available weaponry and should be employed in most situations.
//// Shotguns
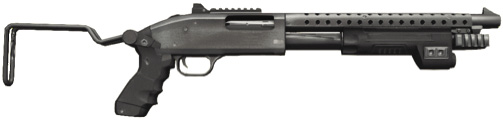
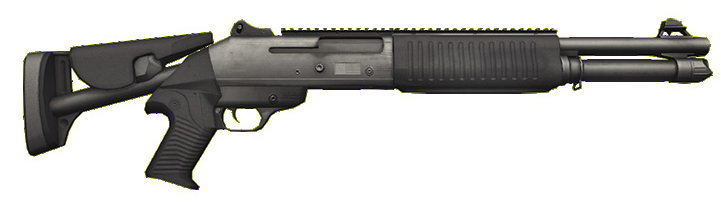
These close-assault weapons don’t have the range of other weaponry, but they are devastating at close range, before the shells used reach their maximum range limits. Use them to step out and demolish a foe who’s within spitting distance of you, and return to cover. These aren’t able to blast multiple foes at once (unless one is standing behind another) with a horizontal rake of fire, but they can easily drop a single foe with minimal aiming; just shoot in the general direction and let the pellet spread do the rest! Also use shotguns for close assaults on vehicles (there’s even a skill that helps to this effect); blast doors, hoods, and trunk lids and easily reach occupants inside as you lay waste to their cars. Just be wary of lengthy reload times for this weapon; swap to another gun instead of reloading if the situation is critically dangerous.
//// Submachine Guns
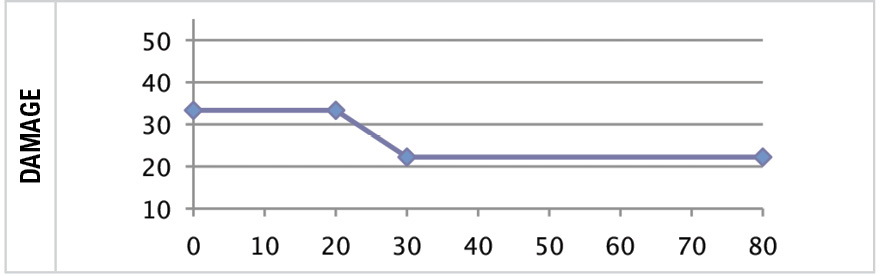
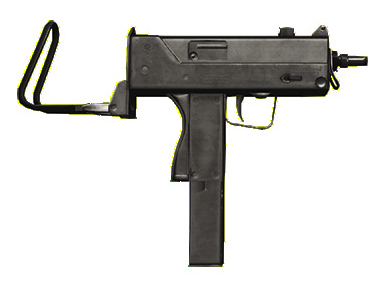
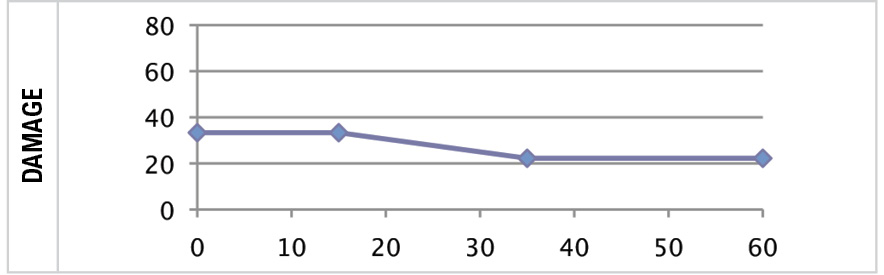
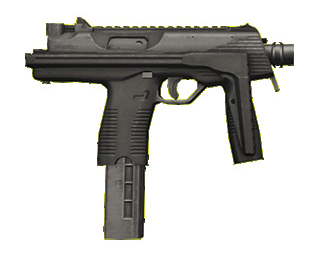
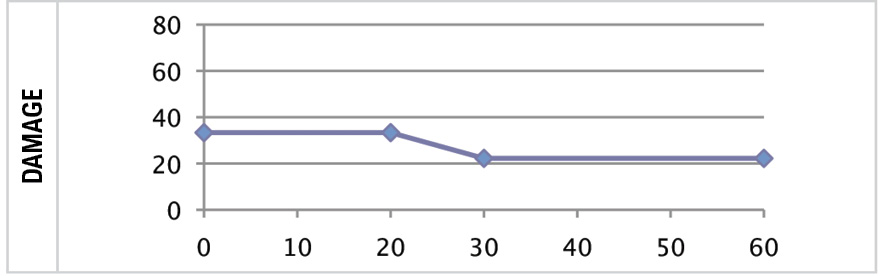
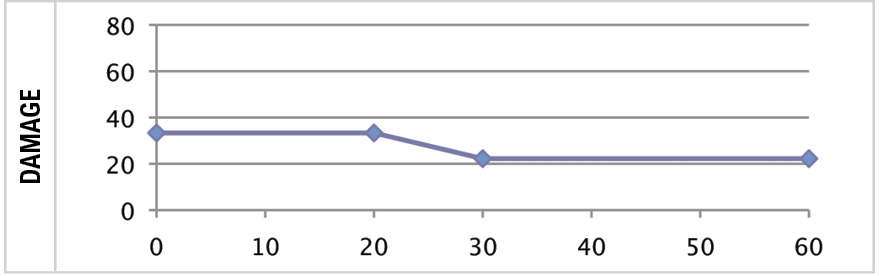
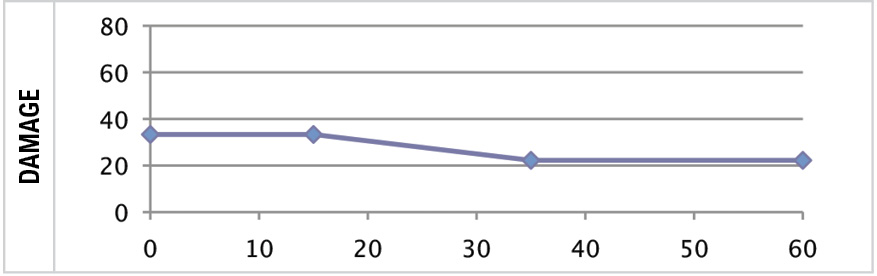
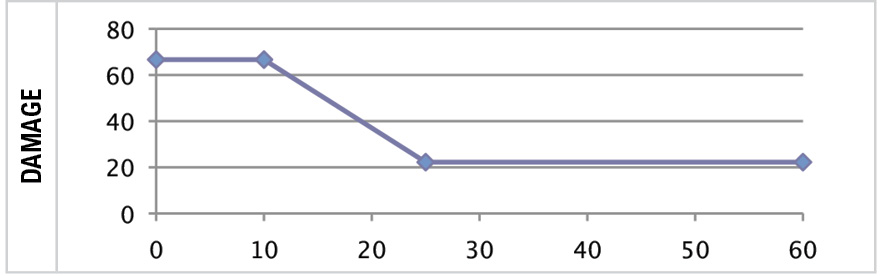
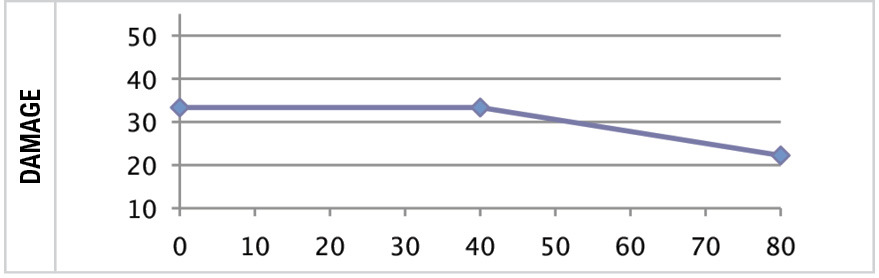
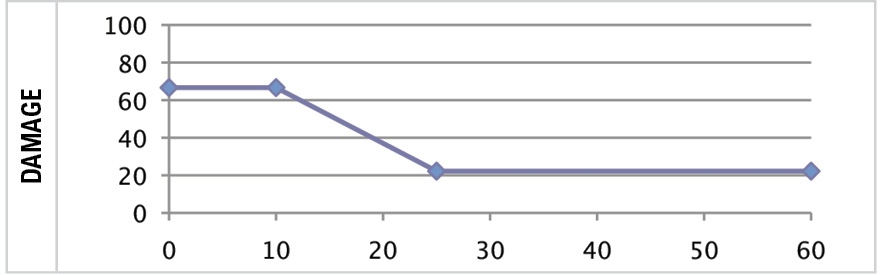
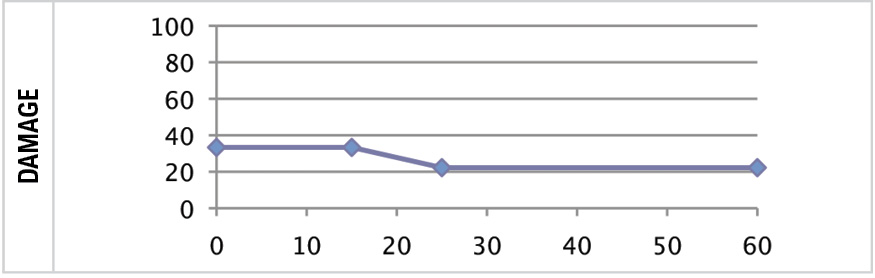
While assault rifles are better for longer ranged firefights, submachine guns are excellent for cutting down multiple foes at closer ranges, though they tend to rattle through ammunition clips a little faster. Inspect the Damage on the charts to come, and you can see a significant drop-off in damage caused at around 15 to 20 meters for a submachine gun, compared to around 20 to 30 meters for an assault rifle. More compact SMGs fit into your secondary slot, though, which effectively allows you to carry two rapid-fire weapons instead of a pistol. When enemies are close by, and a situation is about to turn violent, bring out an SMG.
//// Sniper Rifles
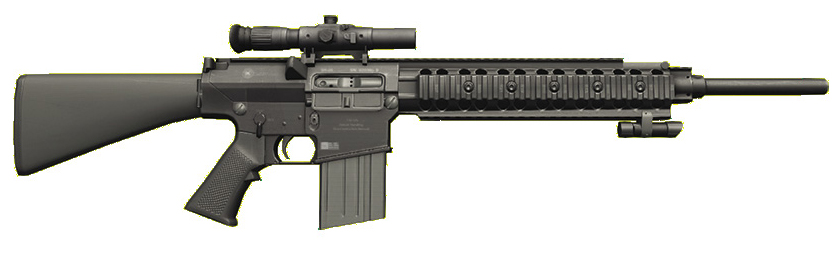
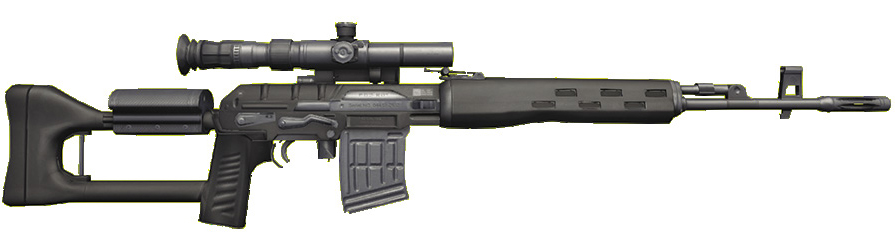
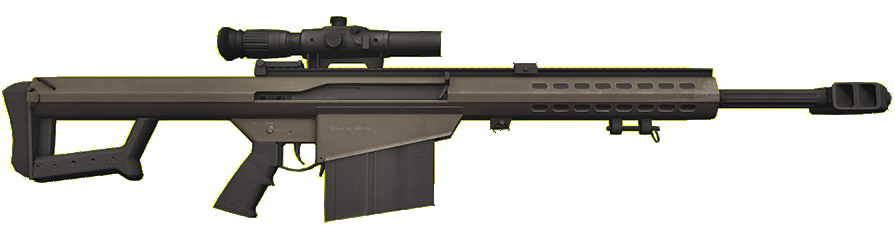
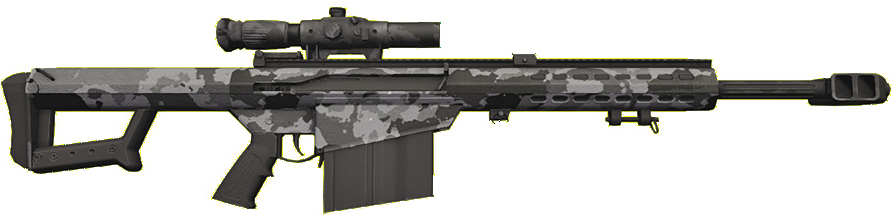
Sniper rifles are built for extreme-range takedowns. They have the longest range of any weapon type (one and a half times the range of a shotgun), and they are extremely accurate at any distance, as this M107 takedown demonstrates. There are some downsides, though; you look through a scope and are therefore more susceptible to flanking attacks. You need to be in a safe place (ideally high up, such as a water tower, platform, or roof) or far enough away that it will take a while for foes to reach you. Use these rifles to drop a high-value target, such as the driver or mission-critical faction member in a Convoy mission. Add in Focus, and this helps remove the slight wobble and shaking inherent in this scoped weapon.
//// Grenade Launchers
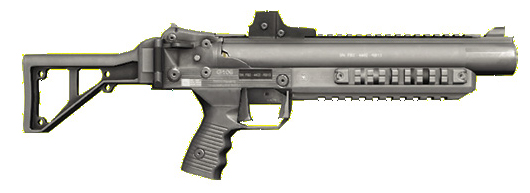
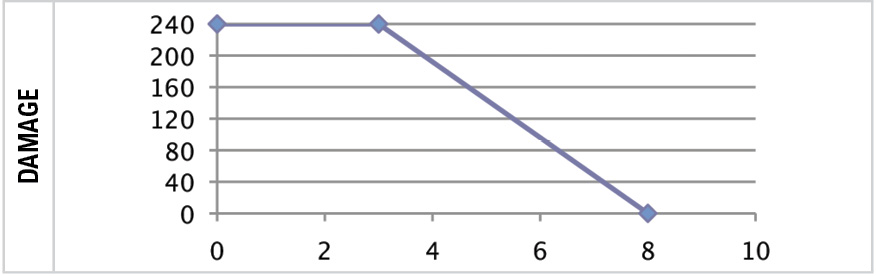
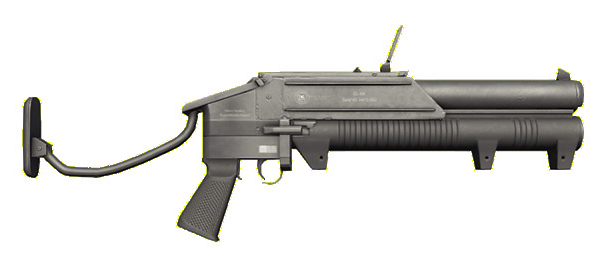
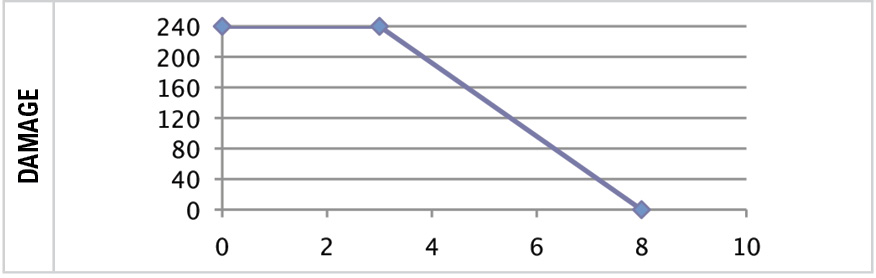
If there’s something sizable that you want to remove, bring out the grenade launcher; these short-range cannons are absolutely deadly within eight meters, but useless at longer ranges. Think of these are grenade-punting machines; instead of lobbing a frag grenade manually, punt a grenade at a group of foes, enemies behind breakable cover, foes close to explosive objects, or enemies just exiting a vehicle. These are exceptional for taking out vehicles if you aim for under the engine or into the engine block. Fire at a foe’s feet so they are blown skyward; anywhere higher and the grenade may overshoot.
//// Signature Weapons
These are special guns you can purchase during the game. Be sure to try them all out.
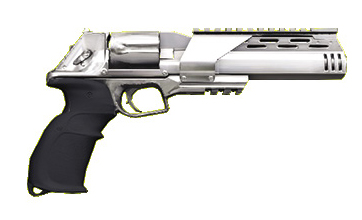
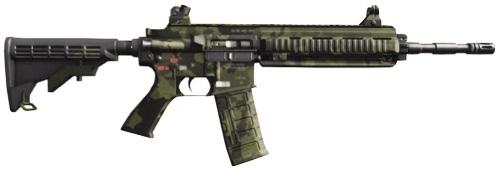
Chrome: Fires in 3-shot bursts and can pierce cover like assault rifles.
Wildfire: Shoots very quickly (as fast as the fastest SMG).
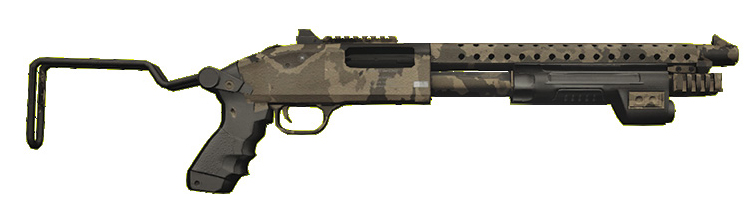
Piledriver: 30 pellets, super wide angle, higher damage, but 3 rounds per clip.
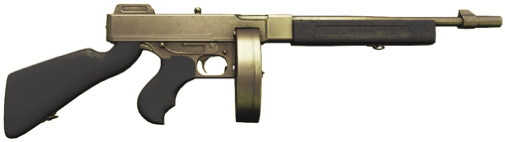
Gangster: Identical to the M1SMG, but this gold variant is available in the base game!
Destroyer: Highest damage of any weapon, and pierces almost anything. Destroys most vehicles in one shot, and can even destroy multiple vehicles if they are lined up (like in a convoy). When you use this weapon, you will understand its name!//// Spec-Ops Weapons
//// Spec-Ops Weapons
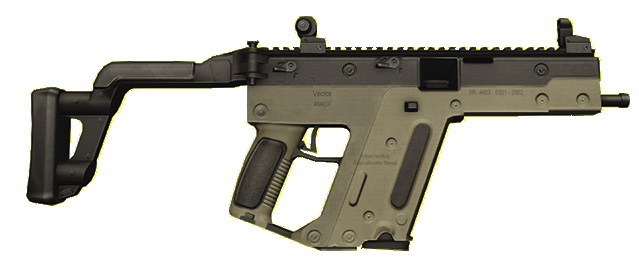
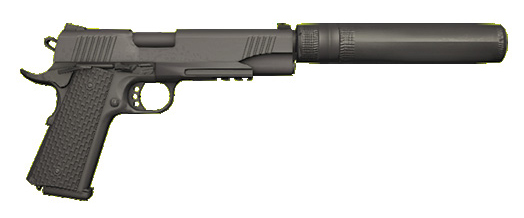
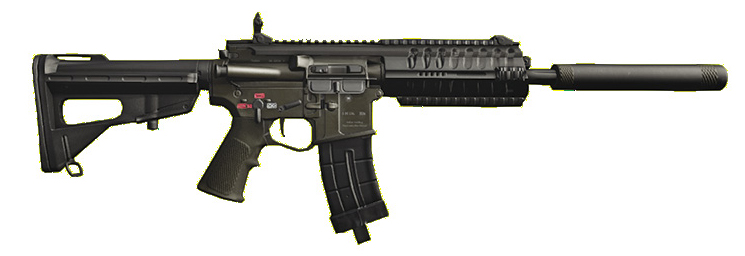
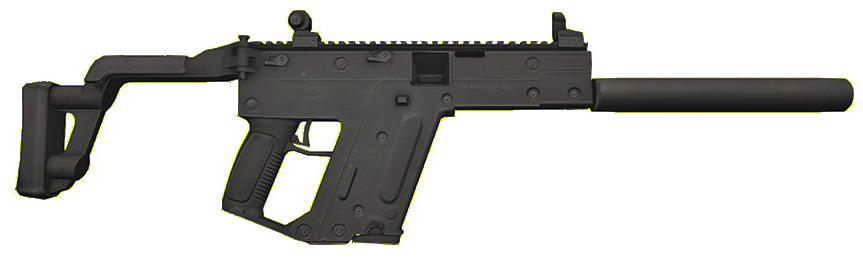
Spec-Ops weapons, such as the SO Vector 45ACP, have similar statistics to their non Spec-Op counterparts, but with one important addition: silencers! This means that takedowns are quieter, allowing you to mix up stealth and violent plans during infiltrations without alerting the entire crew of foes you’re facing. Only takedowns that are either very close or fully visible will alert the enemies, making these extremely handy if you care about subtle infiltration.
//// Exclusive Weapons
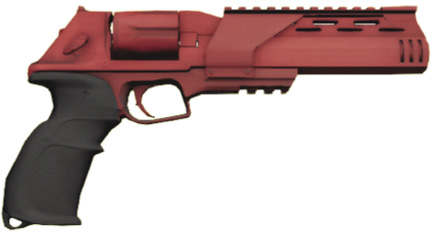
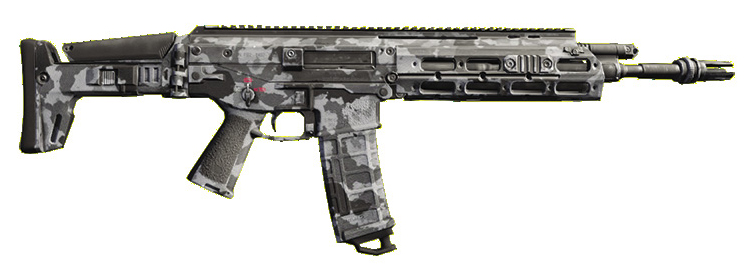
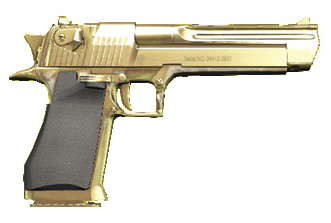
This selection of weapons are only available to players who have unlocked them via a code, usually given as part of a preorder bonus, downloadable content, or Uplay reward. All the weapons have exceptional abilities; for example, the biometric rifle is an impressive combat rifle cloned to your specific grip. The Gold D50 is a garish hand cannon with thoroughly satisfying one-shot takedown potential. And the Auto-6 is pretty red, dropping foes in three-shot bursts with no problem.
// WEAPONS /// Ammunition
 Obviously, each weapon requires a number of bullets, shells, clips, or grenades to function as ammunition; otherwise you’ll be firing no more than harsh words and wielding an occasional baton against the enemy. The following ammunition types are available; find it in the same manner as weapons. The following are the costs at a gun shop:
| Ammunition Type | Cost | Max Ammo | Available from Gun Shop?* |
|---|---|---|---|
| Refill Ammo |
Varies |
Varies |
Yes |
| Pistol Bullets |
$5 for 30 |
360 |
Yes |
| Shotgun Shells |
$20 for 10 |
120 |
Yes |
| SMG Bullets |
$5 for 30 |
360 |
Yes |
| Assault Rifle Bullets |
$15 for 30 |
360 |
Yes |
| Sniper Bullets |
$40 for 10 |
80 |
Yes |
| Launcher Grenades |
$200 for 2 |
8 |
Yes |
* Some weapons only become available once you encounter them in a mission.
/// Weapons Statistics Table
The following table gives absolute specifics on every firearm available to you. In order to figure out which weapon gives you the best “bang for the buck,” simply compare the stats between each of them and choose the one you’re happiest with. Of course, practice makes perfect, too, so experiment with the weapons under a variety of trying conditions. Here’s what the following statistics mean:
Effectiveness: An at-a-glance rating of how impressive the weapon is in trained hands.
Cost: The cost to purchase the weapon.
Available from Gun Shop?: Whether you can purchase this at a gun shop or obtain it by other means.
Tier:A number from one to five, based on when the weapon becomes accessible in the game.
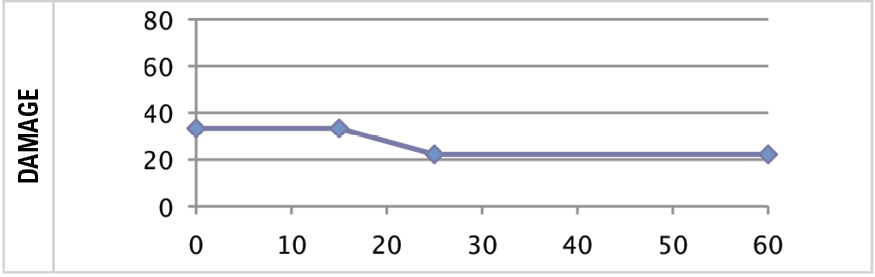
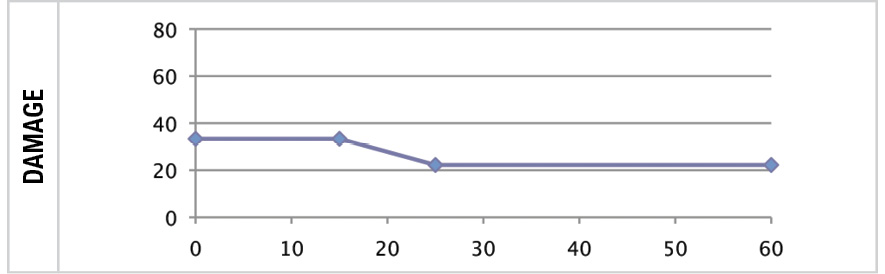
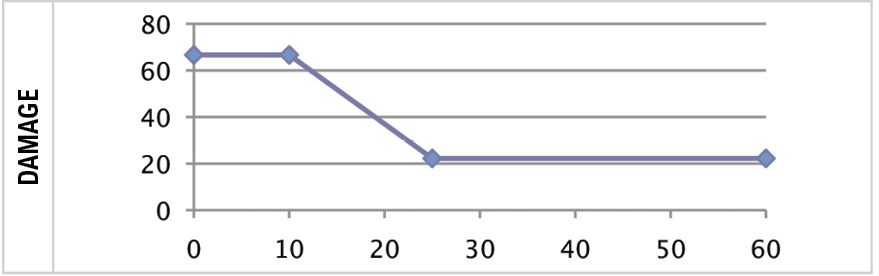
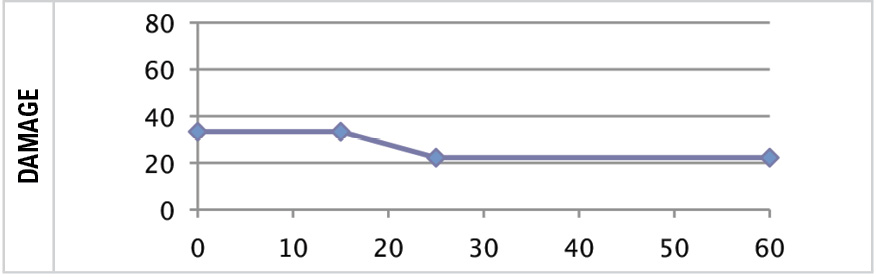
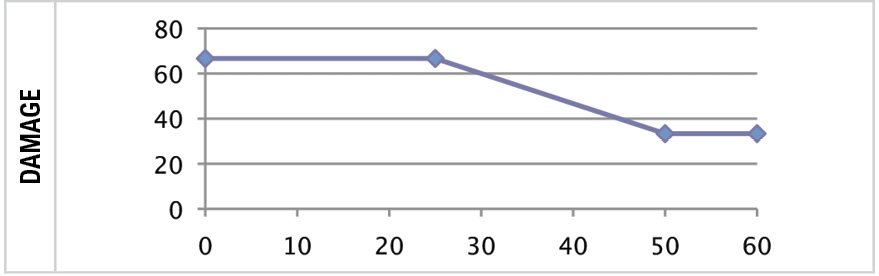
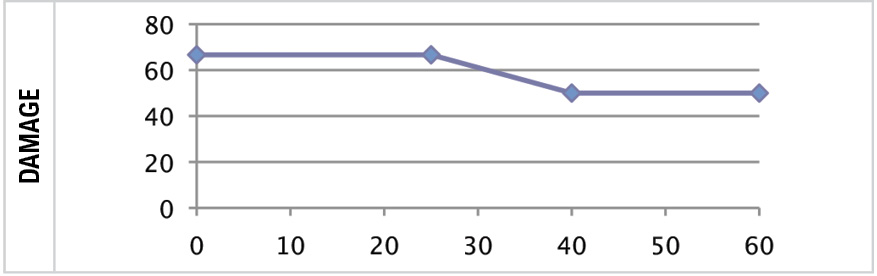
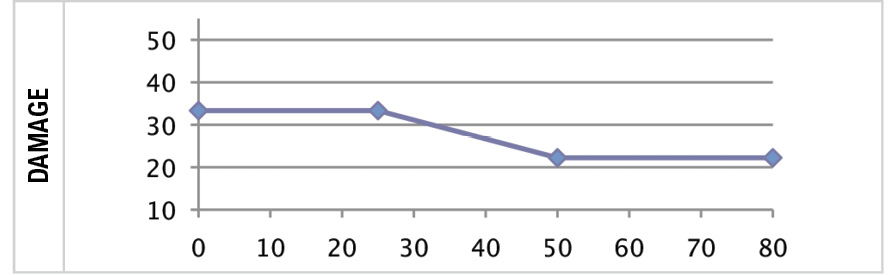
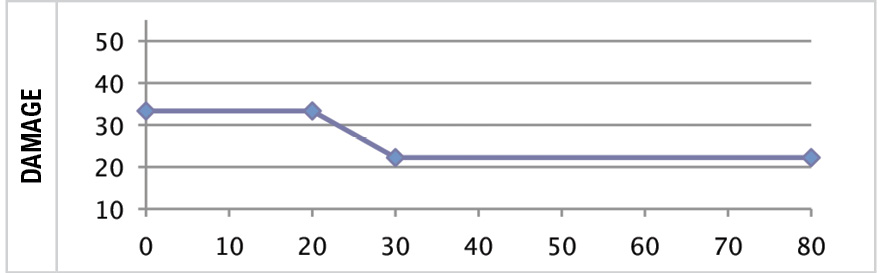
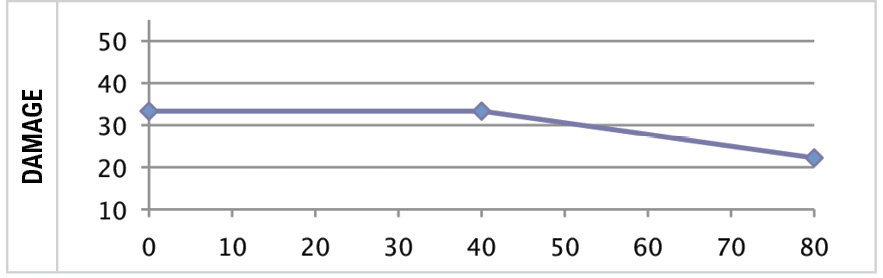
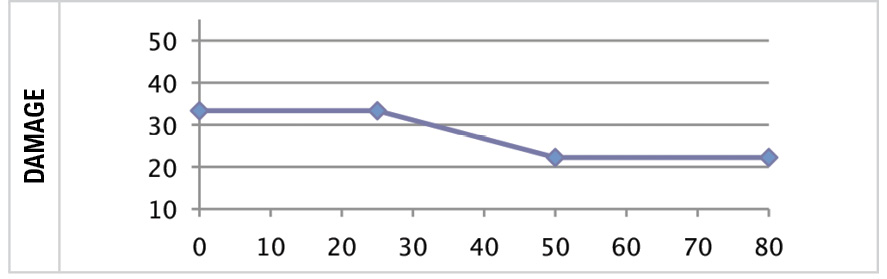
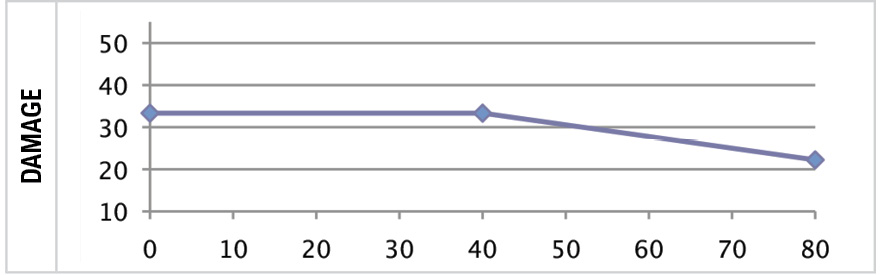
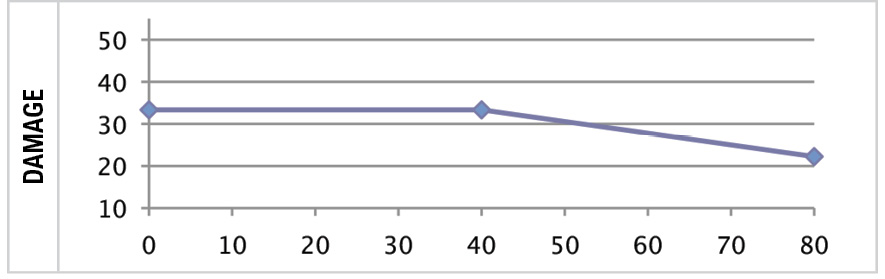
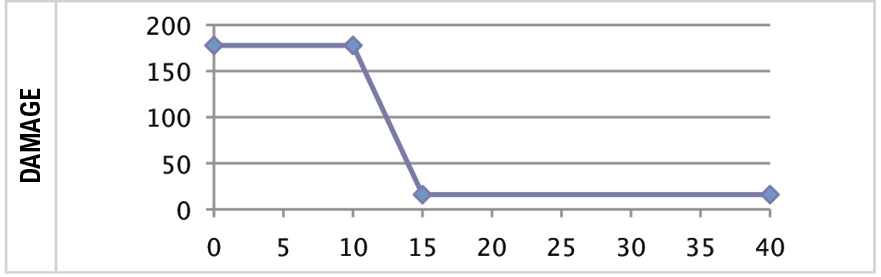
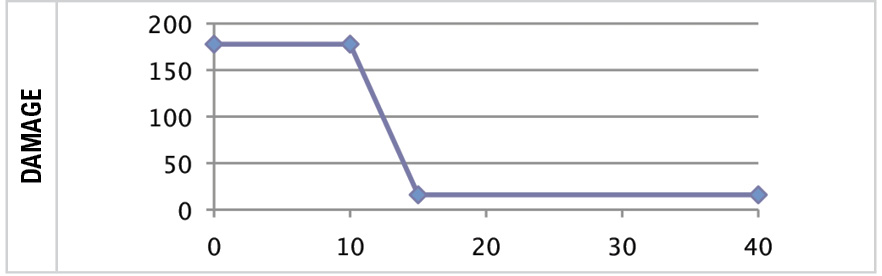
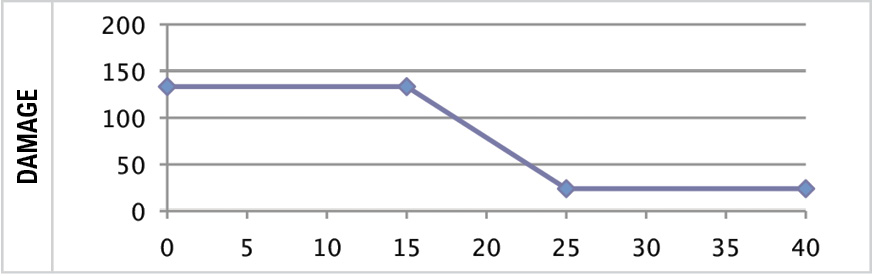
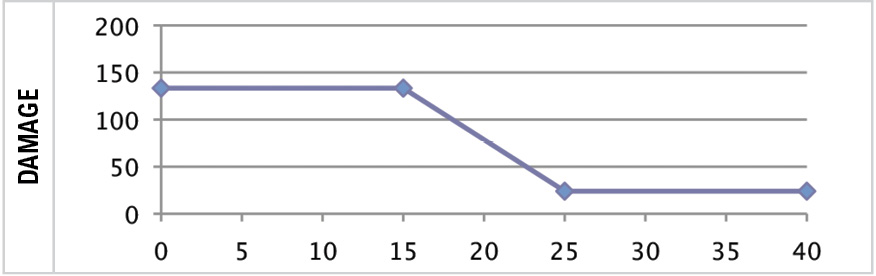
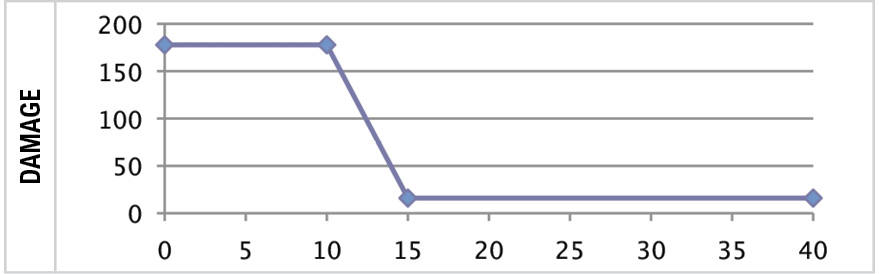
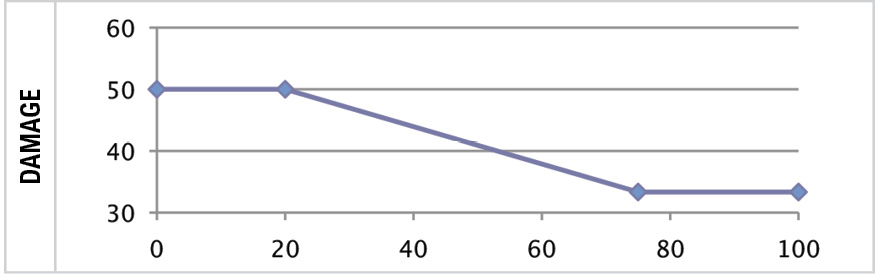
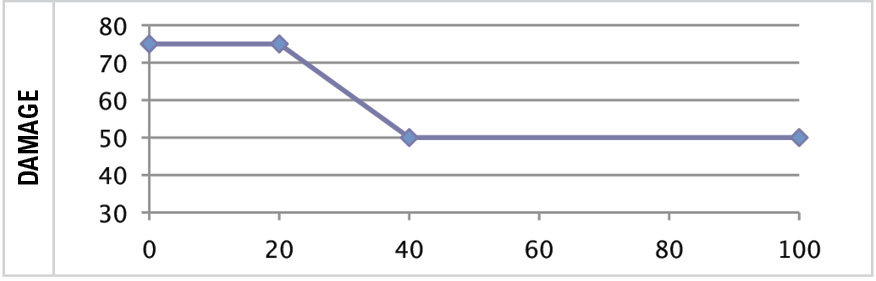
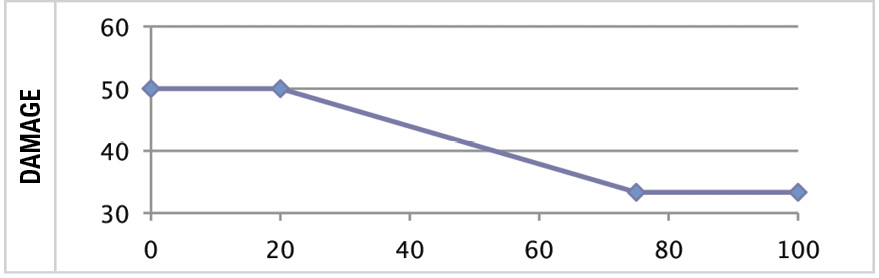
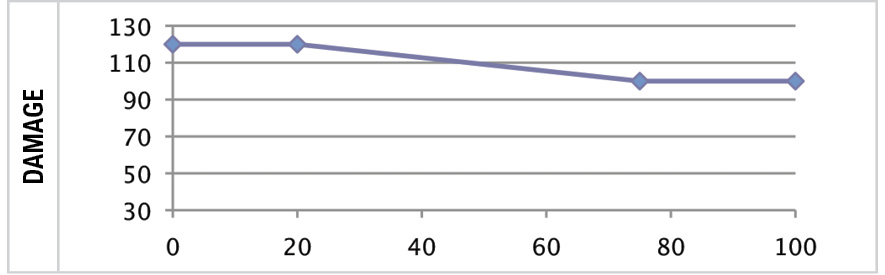
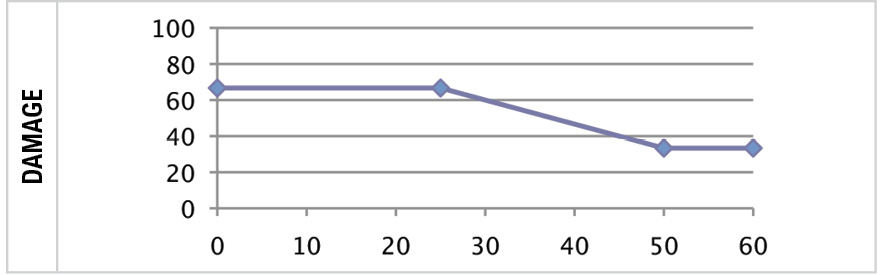
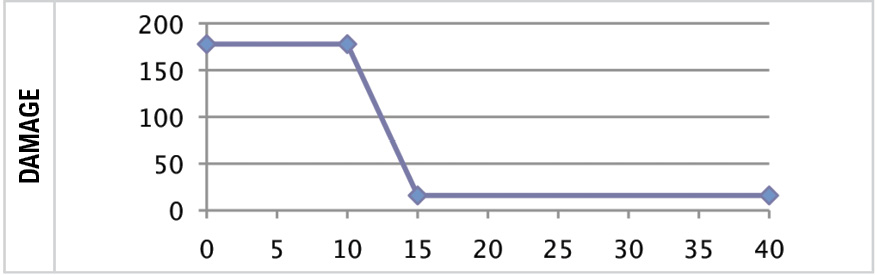
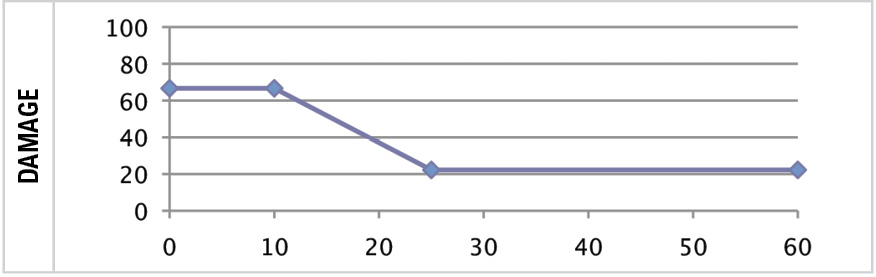
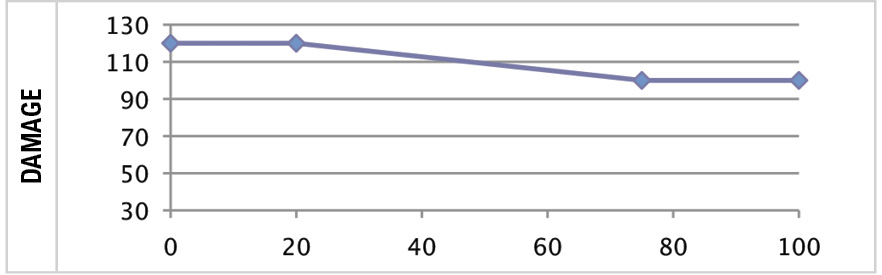
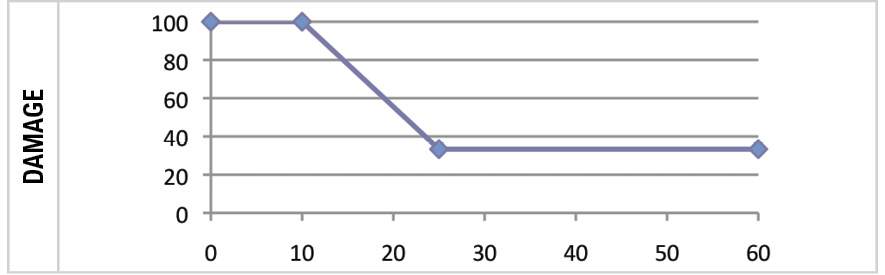
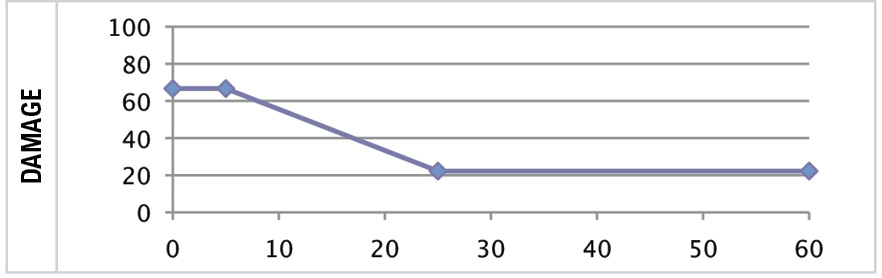
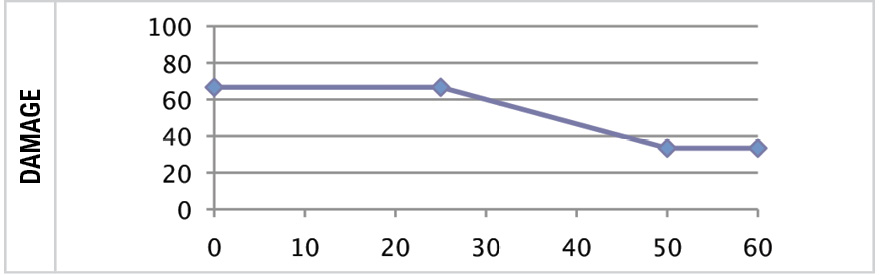
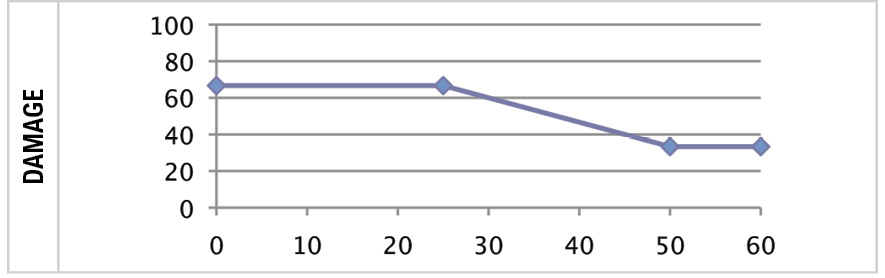
Damage:How much damage (HP) the weapon inflicts over distance (meters).
Weapon Slot Used:Whether this fits into the support, primary, secondary, or specialty weapon slot of your Weapon Wheel.
Firing Type:How the weapon fires, from the following criteria:
- Semiauto:the weapon requires manual trigger pulling for each bullet or burst.
- Auto:Constant trigger pressing results in continuous fire.
- 3-shot Burst:Each trigger pull results in three rounds expended.
- Pump:Some shotguns need to be pumped between blasts.
- Bolt:Some sniper rifles needs to be reloaded between shots.
- Single Shot:One grenade launcher fires a single shot, before a lengthy reload.
- High ROF: Ammunition expenditure is extremely fast, and frequent reloading is required.
- Piercing: This can pass through one foe and hit a second, or hit a foe through their cover, if the trajectory allows it.
Rate of Fire:How quickly you can fire a bullet or round of this weapon, in rounds per minute. This changes during Focus time.
Magazine:How big the clip, chamber, or bullet reservoir is; the maximum it can hold before reloading.
Max Ammo:How many of the ammunition type can be carried at once.
Vehicle Dmg Modifier:The damage (in HP) the weapon inflicts into foes inside vehicles, multiplied by the modifier. So an M107 fired at a vehicle 20 meters away would inflict 60 HP (120HP x 0.5).
Muzzle Velocity:The speed at which the ammunition leaves the gun’s muzzle, in meters per second. The higher the number, the faster the ammunition travels.
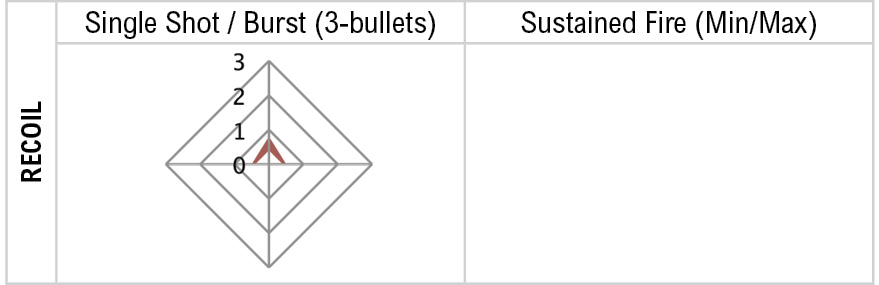
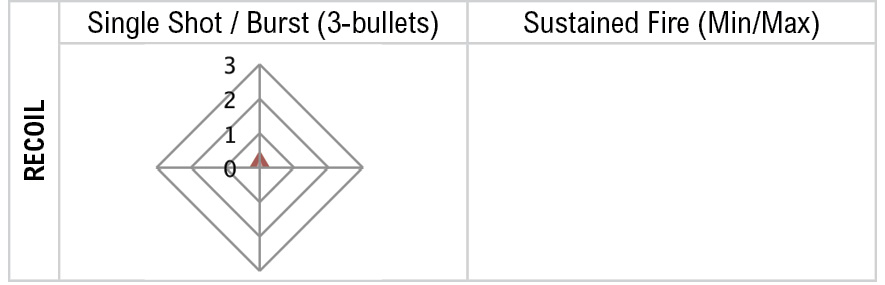
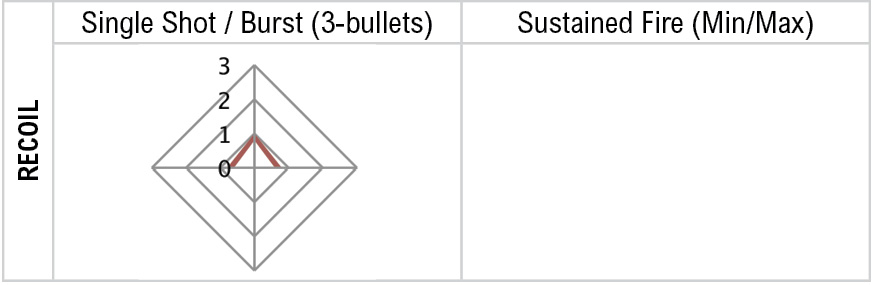
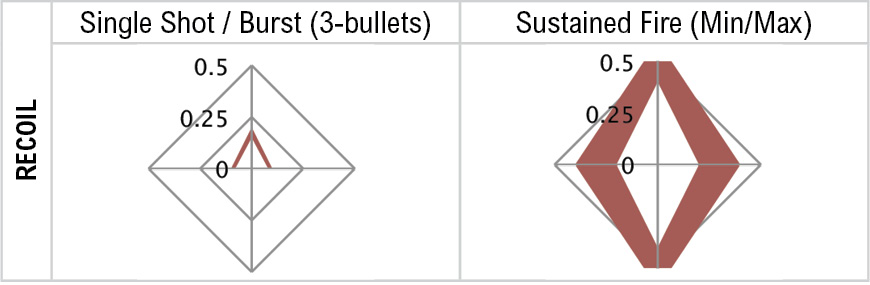
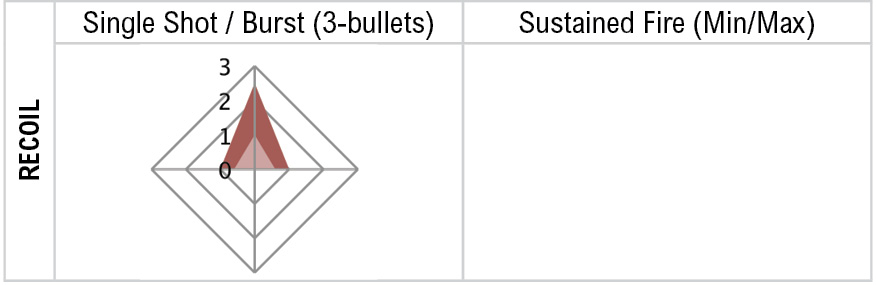
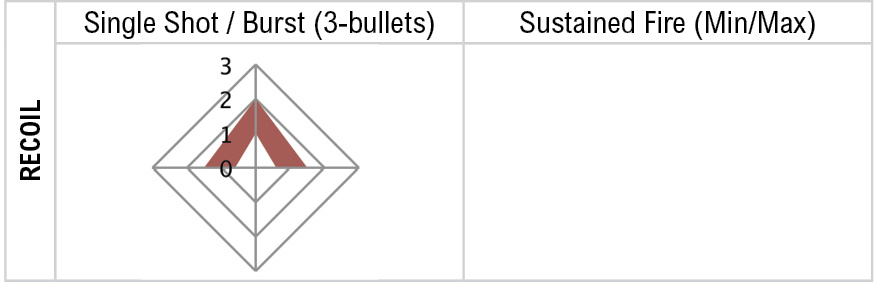
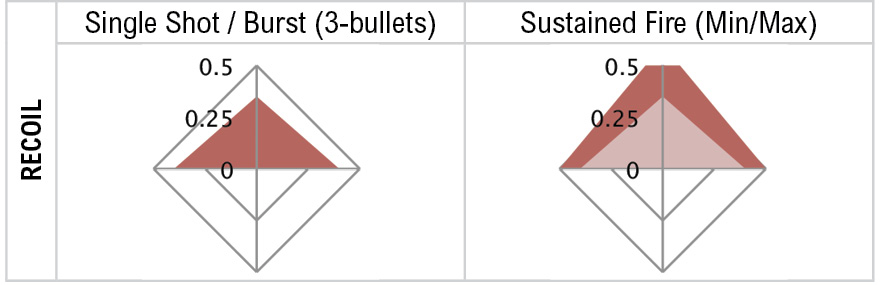
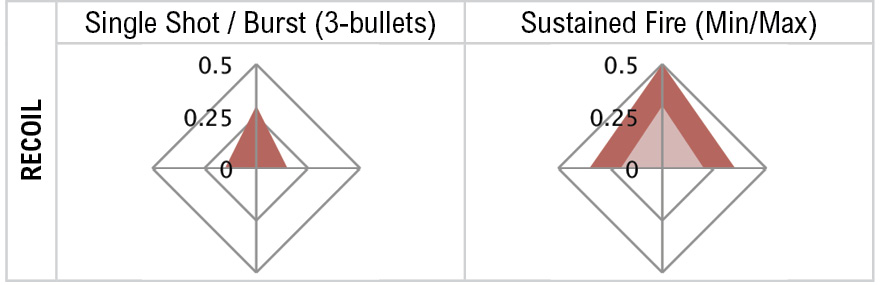
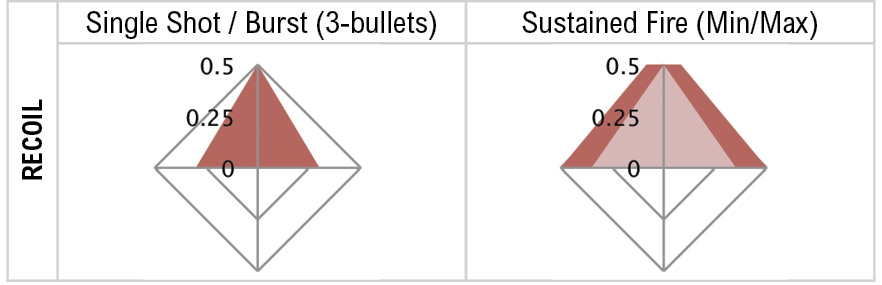
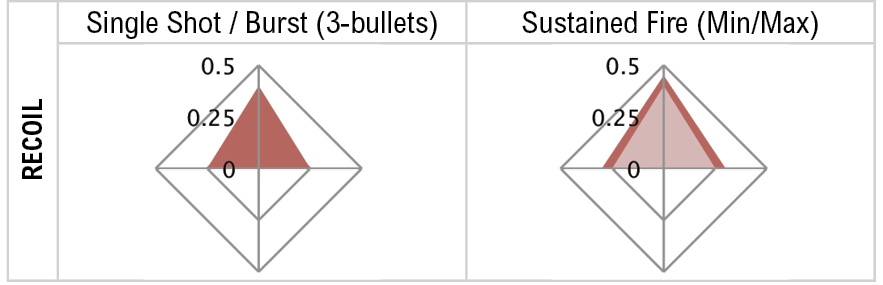
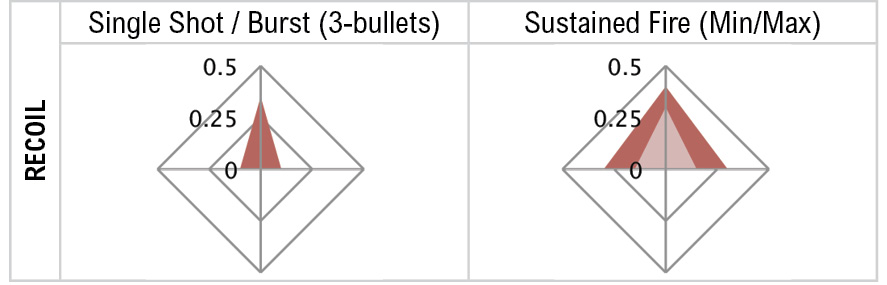
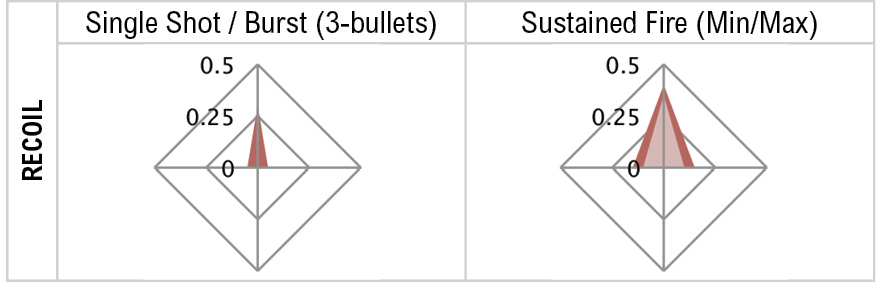
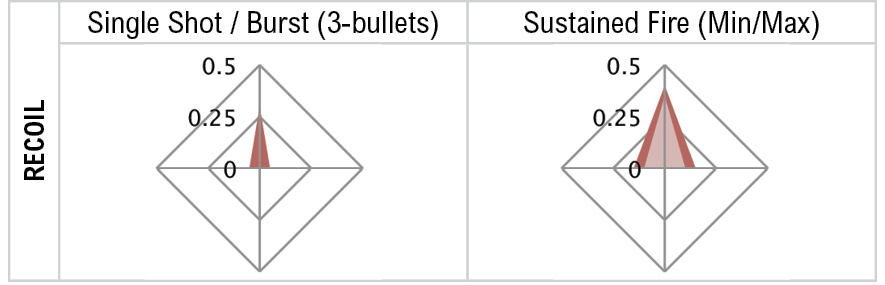
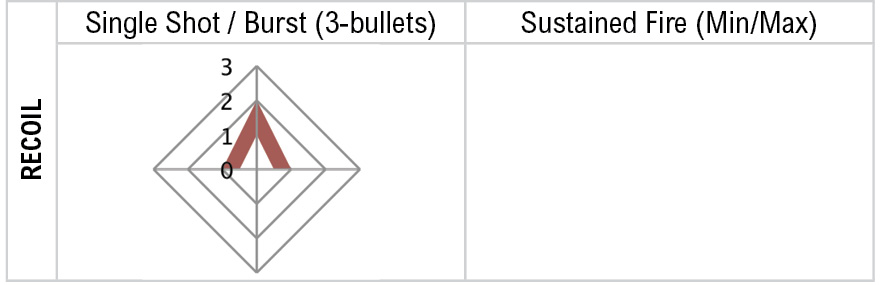
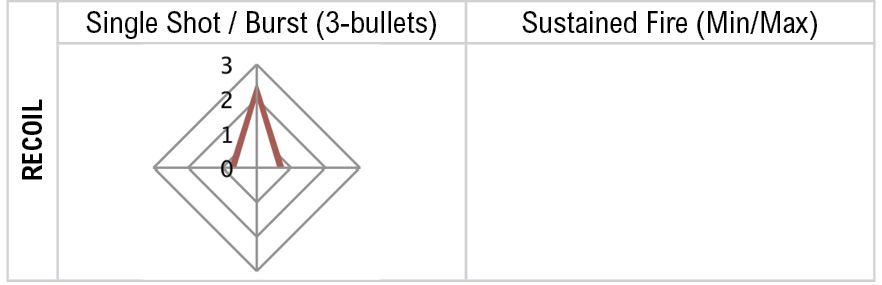
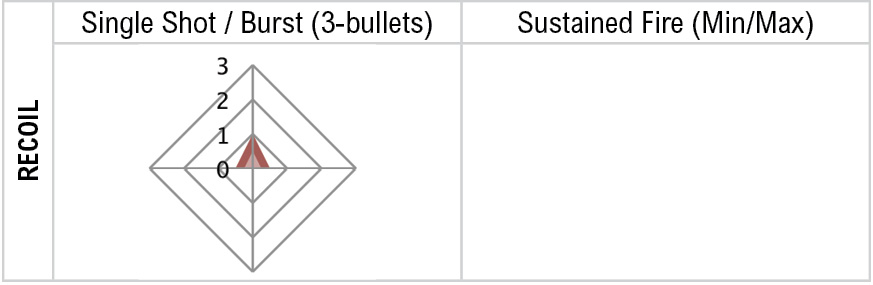
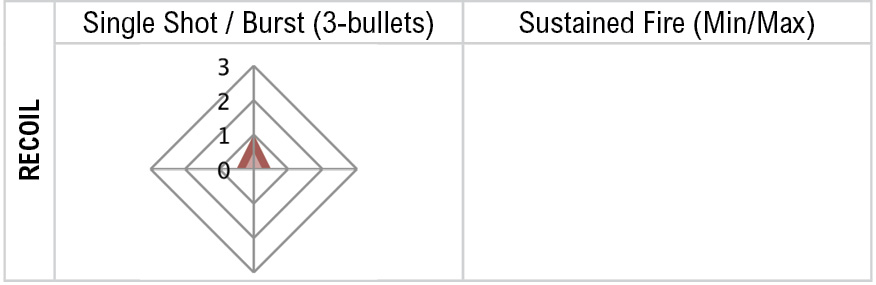
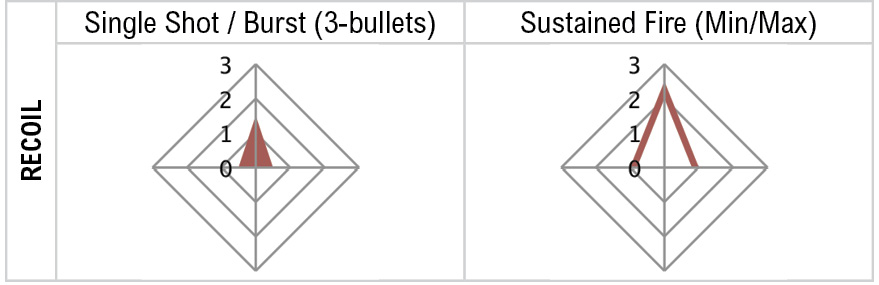
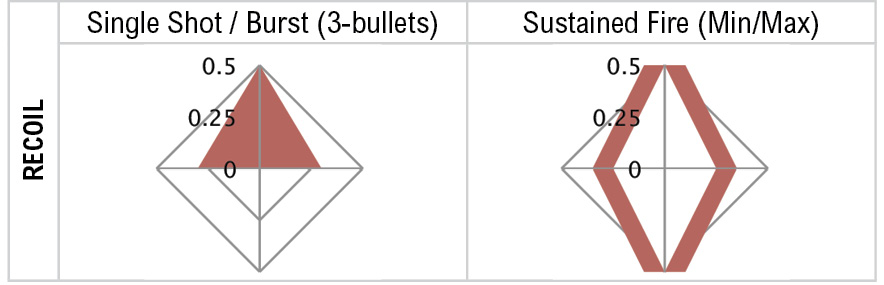
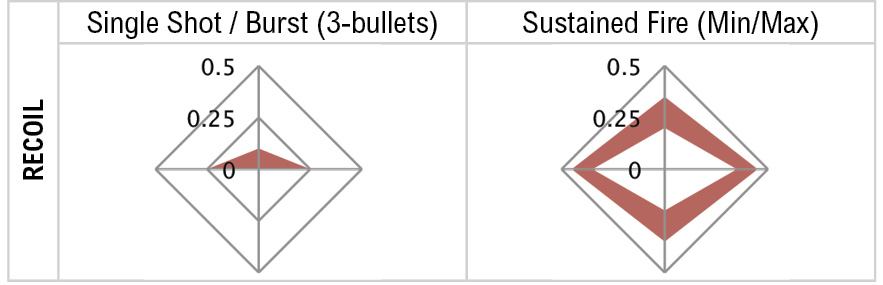
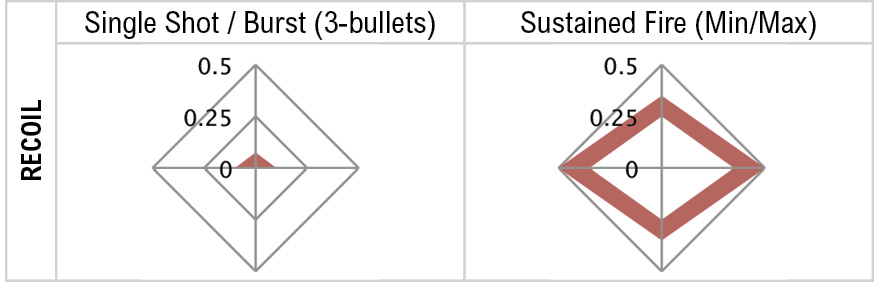
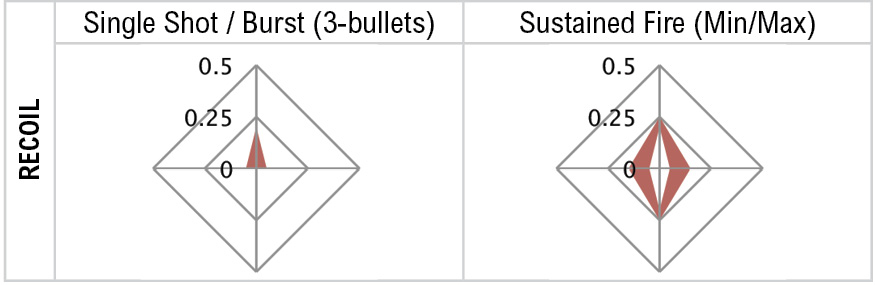
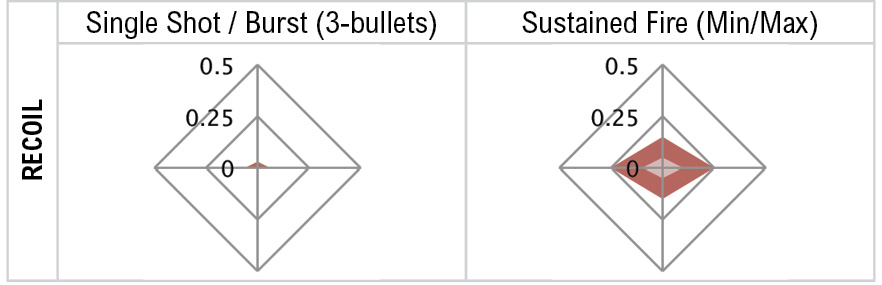
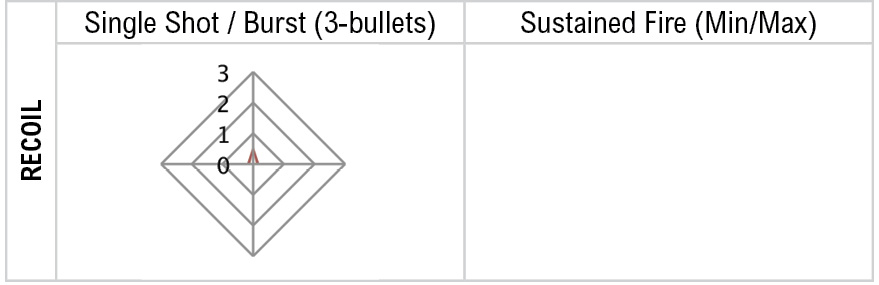
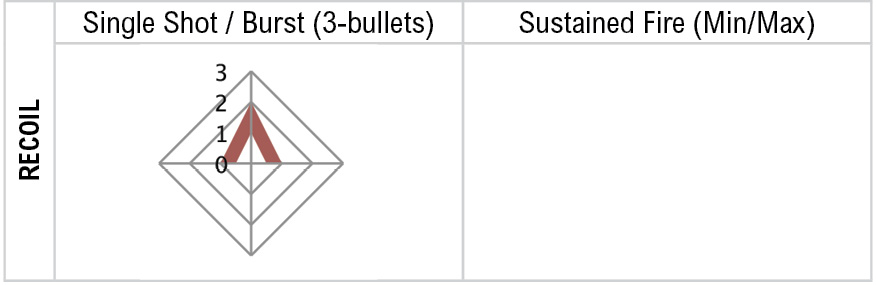
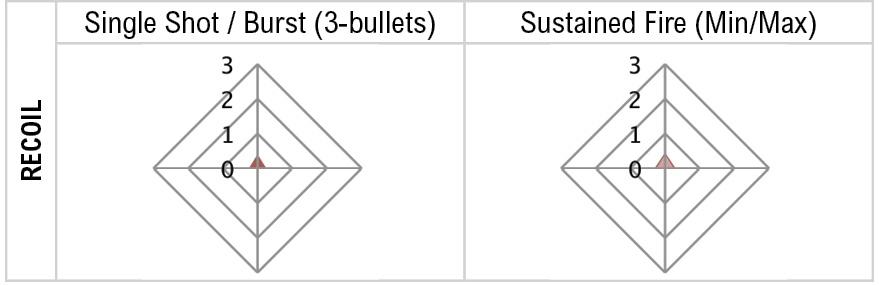
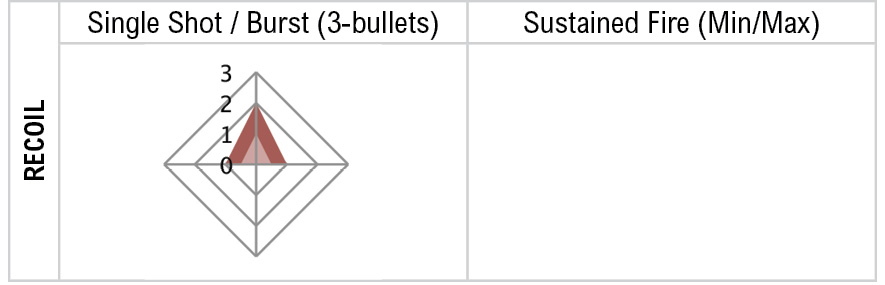
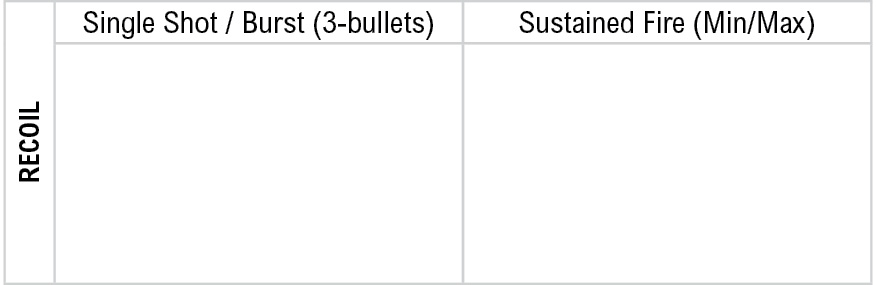
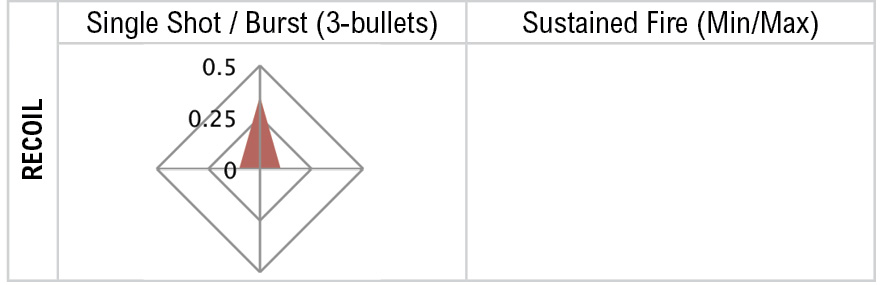
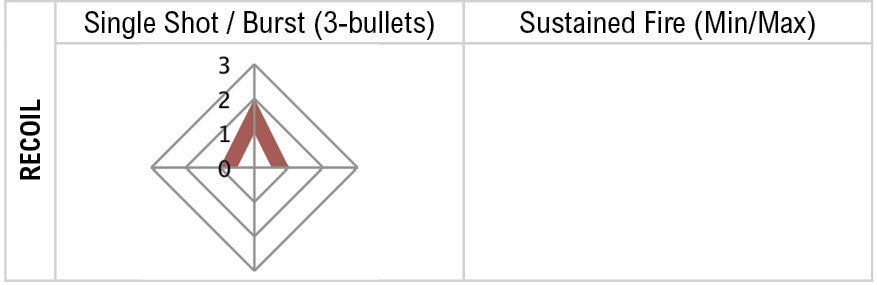
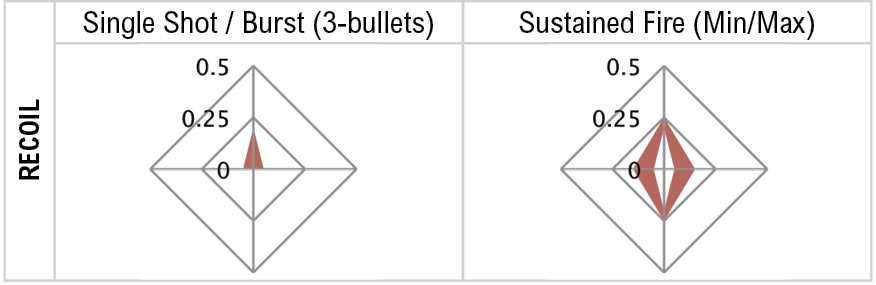
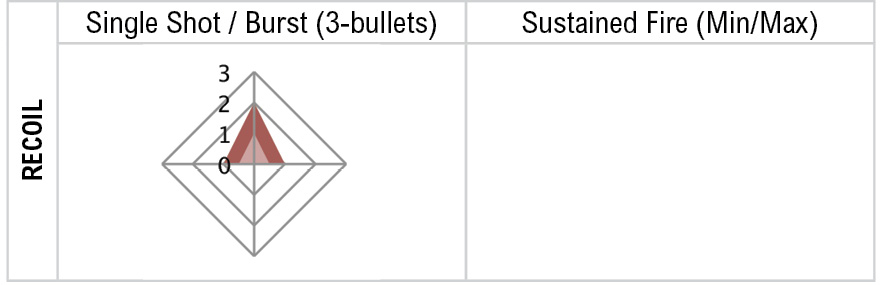
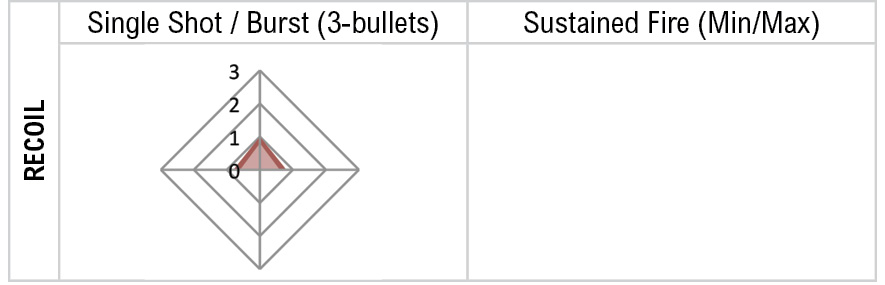
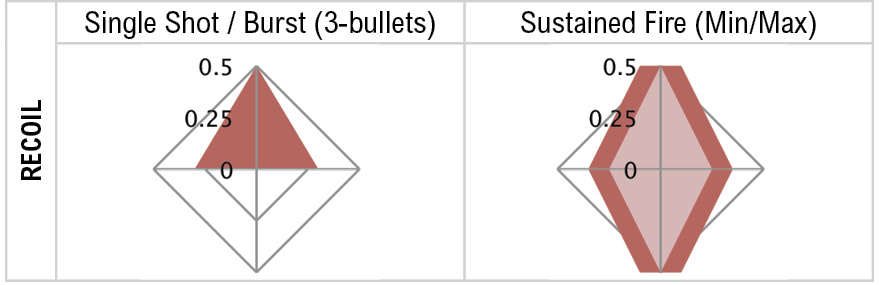
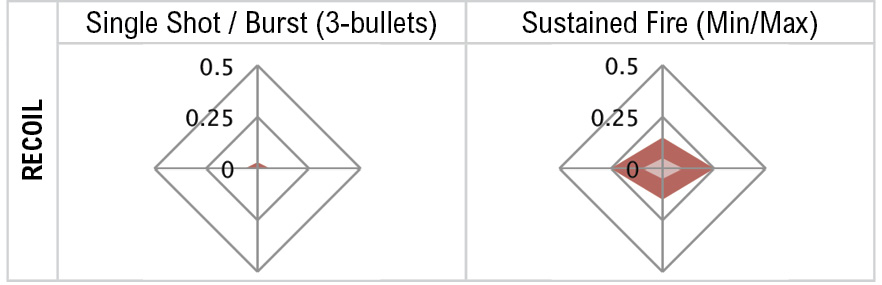
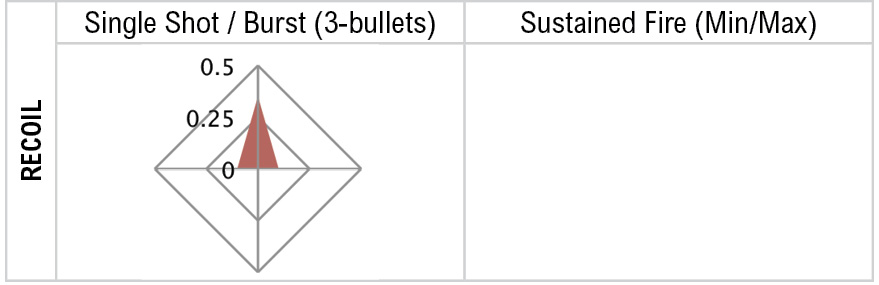
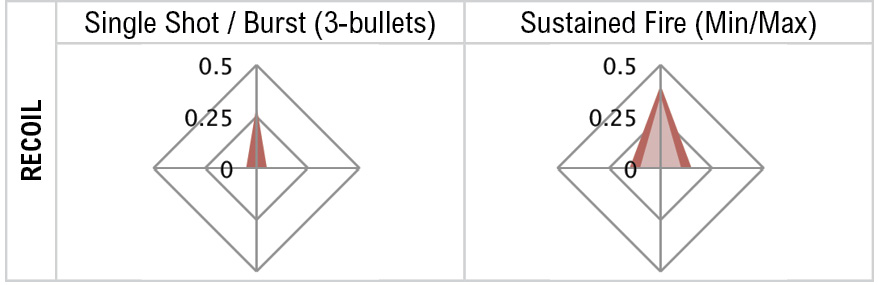
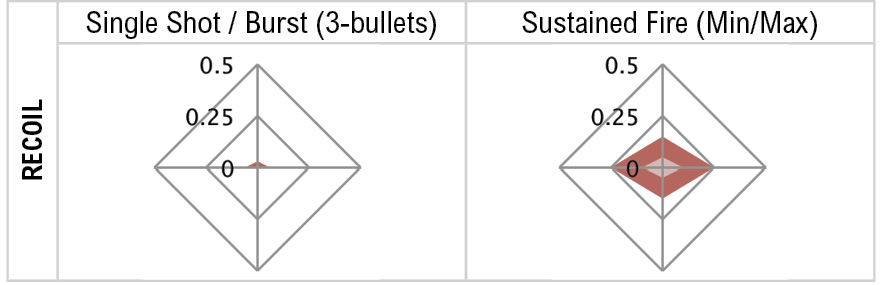
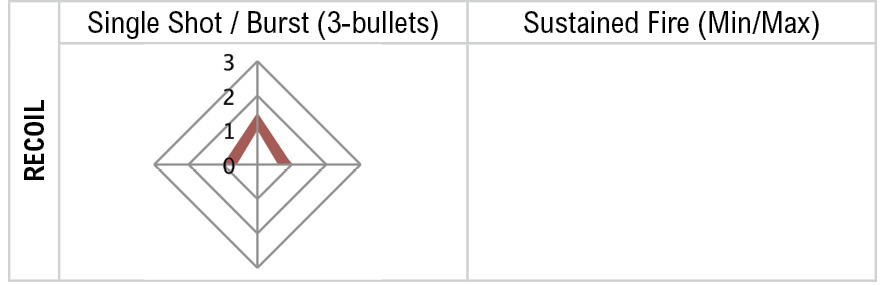
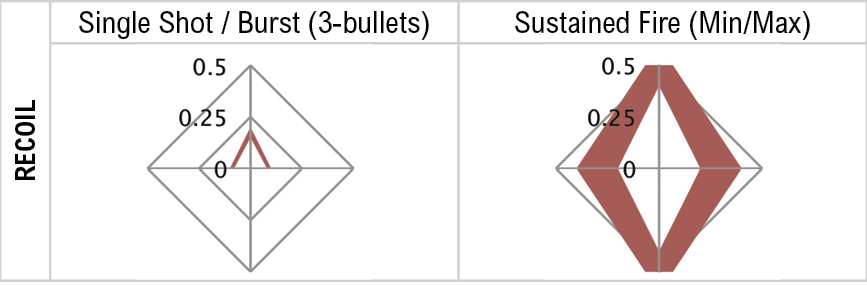
Recoil:Some weapons have a recoil. This diamond shows the spread if bursts or sustained fire is used. The numbers in the diamond are in meters.
Pierce Strength:There are three ratings for weapons, depending on how far they pass through objects:
- 9–5:This will pierce chain-link fences and glass, but nothing else.
- 15–5:This will pierce most fragile surfaces, including plastics and thin metal.
- 100–5:This will pierce anything.
Number of Pellets:Certain weapons (like shotguns) create a multitude of pellets instead of a single impact wound. This is how many impacts an enemy should expect to receive.
Pellet Spread:This is how well the pellets stay clustered together when hitting a foe. The larger the number, the more spread out the pellets are, meaning some might miss their target, especially at range.
Precision Range:How far you can fire the weapon before it becomes inaccurate.
Shoot Spread:How far apart the bullets stray from where you aim, after precision range is reached.
Headshot Multiplier:What the damage is multiplied by if shot at a human in Multiplayer modes. Single-player enemies receive an automatic x5 multiplier.
Upper Body Multiplier 40m:What the damage is multiplied by at 40 meters range (if anything).
//// Pistols
P-9mm
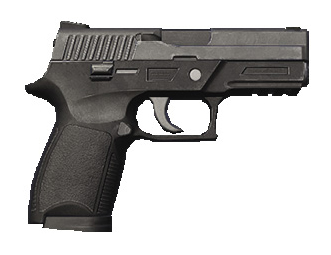
$250
Effectiveness: 
Available from Gunshop?*: Yes, Cash Run: Minigames Reward
| Tier | Weapon Slot Used | Firing Type | Rate of Fire |
|---|---|---|---|
|
1 |
Support (Top) |
Semi-Auto |
240 |
| Magazine | Max Ammo | Vehicle Dmg Modifier | Muzzle Velocity (m/s) |
|---|---|---|---|
|
17 |
360 |
0.05 |
375 |
| Pierce Strength | Number of Pellets | Pellet Spread |
|---|---|---|
|
N/A |
N/A |
N/A |
| Precision Range | Shoot Spread | Headshot Multiplier | Upper Body Multiplier 40m |
|---|---|---|---|
|
30m |
5° |
2 |
1 |
PX4
Initial Weapon
Effectiveness: 
Available from Gunshop?*: Yes
| Tier | Weapon Slot Used | Firing Type | Rate of Fire |
|---|---|---|---|
|
2 |
Support (Top) |
Semi-Auto |
240 |
| Magazine | Max Ammo | Vehicle Dmg Modifier | Muzzle Velocity (m/s) |
|---|---|---|---|
|
10 |
360 |
0.05 |
360 |
| Pierce Strength | Number of Pellets | Pellet Spread |
|---|---|---|
|
N/A |
N/A |
N/A |
| Precision Range | Shoot Spread | Headshot Multiplier | Upper Body Multiplier 40m |
|---|---|---|---|
|
30m |
5° |
2 |
1 |
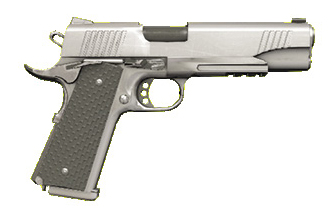
1911
$3,750
Effectiveness: 
Available from Gunshop?*: Yes
| Tier | Weapon Slot Used | Firing Type | Rate of Fire |
|---|---|---|---|
|
3 |
Support (Top) |
Semi-Auto |
240 |
| Magazine | Max Ammo | Vehicle Dmg Modifier | Muzzle Velocity (m/s) |
|---|---|---|---|
|
10 |
360 |
0.05 |
381 |
| Pierce Strength | Number of Pellets | Pellet Spread |
|---|---|---|
|
N/A |
N/A |
N/A |
| Precision Range | Shoot Spread | Headshot Multiplier | Upper Body Multiplier 40m |
|---|---|---|---|
|
30m |
5° |
2 |
1 |
MP-412
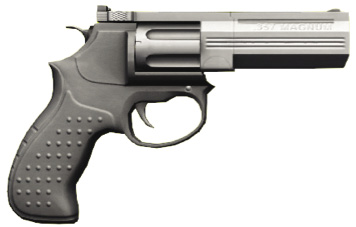
SPECIAL
Effectiveness: 
Available from Gunshop?*: No, Available as Acquired Content (Exclusive Pack Reward)
| Tier | Weapon Slot Used | Firing Type | Rate of Fire |
|---|---|---|---|
|
3 |
Support (Top) |
Semi-Auto |
200 |
| Magazine | Max Ammo | Vehicle Dmg Modifier | Muzzle Velocity (m/s) |
|---|---|---|---|
|
6 |
360 |
0.05 |
271 |
| Pierce Strength | Number of Pellets | Pellet Spread |
|---|---|---|
|
N/A |
N/A |
N/A |
| Precision Range | Shoot Spread | Headshot Multiplier | Upper Body Multiplier 40m |
|---|---|---|---|
|
30m |
5° |
2 |
1 |
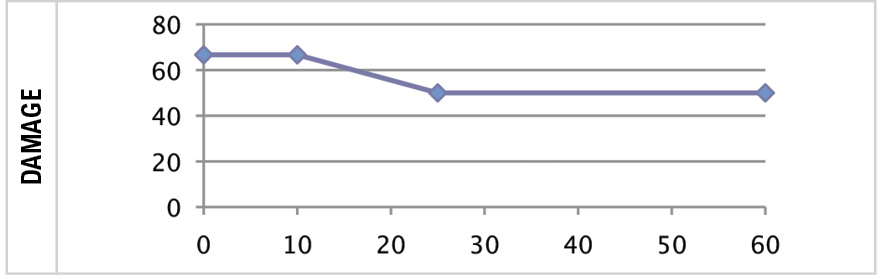
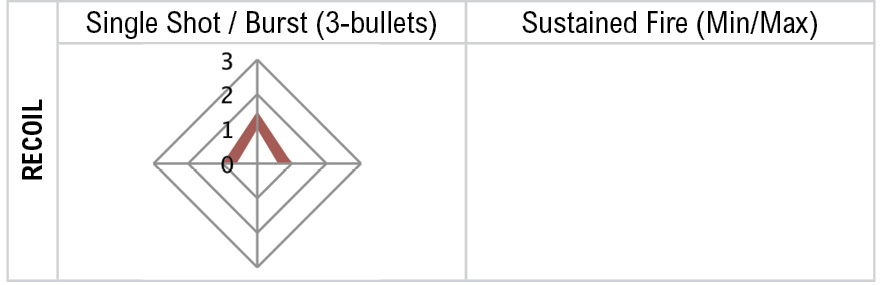
R-33
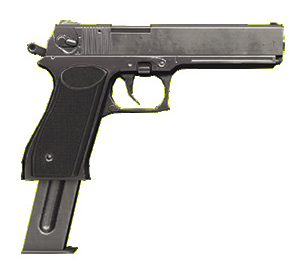
$7,500
Effectiveness: 
Available from Gunshop?*: Yes
| Tier | Weapon Slot Used | Firing Type | Rate of Fire |
|---|---|---|---|
|
3 |
Support (Top) |
Full-Auto |
800 |
| Magazine | Max Ammo | Vehicle Dmg Modifier | Muzzle Velocity (m/s) |
|---|---|---|---|
|
27 |
360 |
0.05 |
375 |
| Pierce Strength | Number of Pellets | Pellet Spread |
|---|---|---|
|
N/A |
N/A |
N/A |
| Precision Range | Shoot Spread | Headshot Multiplier | Upper Body Multiplier 40m |
|---|---|---|---|
|
30m |
5° |
2 |
1 |
D50
$15,000
Effectiveness: 
Available from Gunshop?*: Yes
| Tier | Weapon Slot Used | Firing Type | Rate of Fire |
|---|---|---|---|
|
4 |
Support (Top) |
Semi-Auto |
200 |
| Magazine | Max Ammo | Vehicle Dmg Modifier | Muzzle Velocity (m/s) |
|---|---|---|---|
|
8 |
360 |
0.05 |
500 |
| Pierce Strength | Number of Pellets | Pellet Spread |
|---|---|---|
|
N/A |
N/A |
N/A |
| Precision Range | Shoot Spread | Headshot Multiplier | Upper Body Multiplier 40m |
|---|---|---|---|
|
30m |
5° |
2 |
1 |
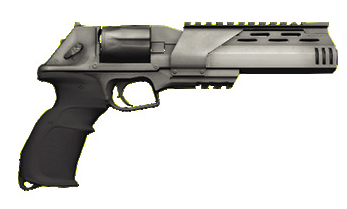
M8-M
$15,000
Effectiveness: 
Available from Gunshop?*: Yes
| Tier | Weapon Slot Used | Firing Type | Rate of Fire |
|---|---|---|---|
|
5 |
Support (Top) |
Semi-Auto |
200 |
| Magazine | Max Ammo | Vehicle Dmg Modifier | Muzzle Velocity (m/s) |
|---|---|---|---|
|
6 |
360 |
0.05 |
550 |
| Pierce Strength | Number of Pellets | Pellet Spread |
|---|---|---|
|
N/A |
N/A |
N/A |
| Precision Range | Shoot Spread | Headshot Multiplier | Upper Body Multiplier 40m |
|---|---|---|---|
|
30m |
5° |
2 |
1 |
//// Assault Rifles
OCP-11
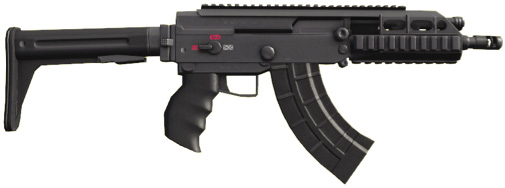
$600
Effectiveness: 
Available from Gunshop?*: Yes, Online Hacking: Online Contracts Reward
| Tier | Weapon Slot Used | Firing Type | Rate of Fire |
|---|---|---|---|
|
1 |
Primary (Right) |
Full-Auto |
600 |
| Magazine | Max Ammo | Vehicle Dmg Modifier | Muzzle Velocity (m/s) |
|---|---|---|---|
|
40 |
360 |
0.05 |
714 |
| Pierce Strength | Number of Pellets | Pellet Spread |
|---|---|---|
|
Moderate |
N/A |
N/A |
| Precision Range | Shoot Spread | Headshot Multiplier | Upper Body Multiplier 40m |
|---|---|---|---|
|
50m |
2,5° |
2 |
1 |
416
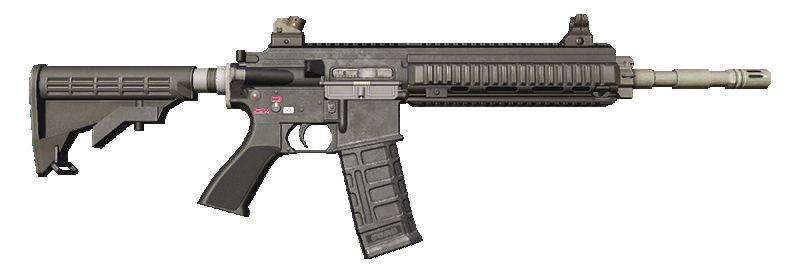
$1200
Effectiveness: 
Available from Gunshop?*: Yes
| Tier | Weapon Slot Used | Firing Type | Rate of Fire |
|---|---|---|---|
|
2 |
Primary (Right) |
Full-Auto |
750 |
| Magazine | Max Ammo | Vehicle Dmg Modifier | Muzzle Velocity (m/s) |
|---|---|---|---|
|
30 |
360 |
0.05 |
884 |
| Pierce Strength | Number of Pellets | Pellet Spread |
|---|---|---|
|
N/A |
N/A |
N/A |
| Precision Range | Shoot Spread | Headshot Multiplier | Upper Body Multiplier 40m |
|---|---|---|---|
|
50m |
2,5° |
2 |
1 |
AK47
$7,500
Effectiveness: 
Available from Gunshop?*: Yes
| Tier | Weapon Slot Used | Firing Type | Rate of Fire |
|---|---|---|---|
|
3 |
Primary (Right) |
Full-Auto |
600 |
| Magazine | Max Ammo | Vehicle Dmg Modifier | Muzzle Velocity (m/s) |
|---|---|---|---|
|
30 |
360 |
0.05 |
715 |
| Pierce Strength | Number of Pellets | Pellet Spread |
|---|---|---|
|
Moderate |
N/A |
N/A |
| Precision Range | Shoot Spread | Headshot Multiplier | Upper Body Multiplier 40m |
|---|---|---|---|
|
50m |
2,5° |
2 |
1 |
417
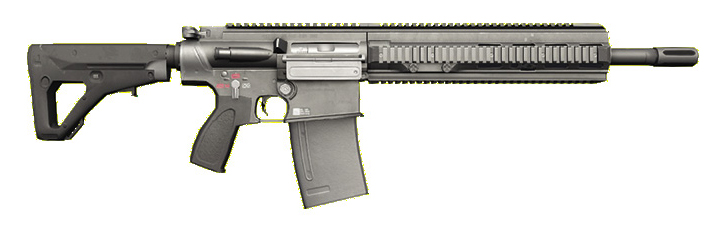
$7,500
Effectiveness: 
Available from Gunshop?*: Yes, Gang Hideouts: Side Mission Reward
| Tier | Weapon Slot Used | Firing Type | Rate of Fire |
|---|---|---|---|
|
3 |
Primary (Right) |
Burst |
750 |
| Magazine | Max Ammo | Vehicle Dmg Modifier | Muzzle Velocity (m/s) |
|---|---|---|---|
|
20 |
360 |
0.05 |
789 |
| Pierce Strength | Number of Pellets | Pellet Spread |
|---|---|---|
|
Moderate |
N/A |
N/A |
| Precision Range | Shoot Spread | Headshot Multiplier | Upper Body Multiplier 40m |
|---|---|---|---|
|
50m |
2,5° |
2 |
1 |
Goblin
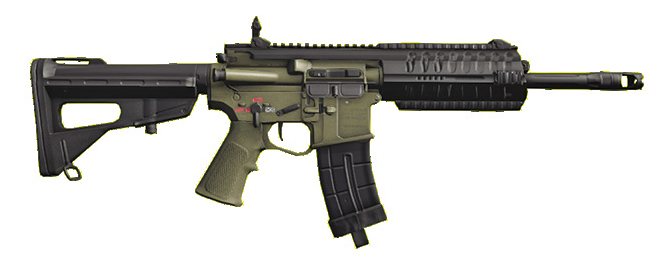
$15,000
Effectiveness: 
Available from Gunshop?*: Yes
| Tier | Weapon Slot Used | Firing Type | Rate of Fire |
|---|---|---|---|
|
4 |
Primary (Right) |
Burst |
750 |
| Magazine | Max Ammo | Vehicle Dmg Modifier | Muzzle Velocity (m/s) |
|---|---|---|---|
|
30 |
360 |
0.05 |
884 |
| Pierce Strength | Number of Pellets | Pellet Spread |
|---|---|---|
|
Moderate |
N/A |
N/A |
| Precision Range | Shoot Spread | Headshot Multiplier | Upper Body Multiplier 40m |
|---|---|---|---|
|
50m |
2,5° |
2 |
1 |
ACR
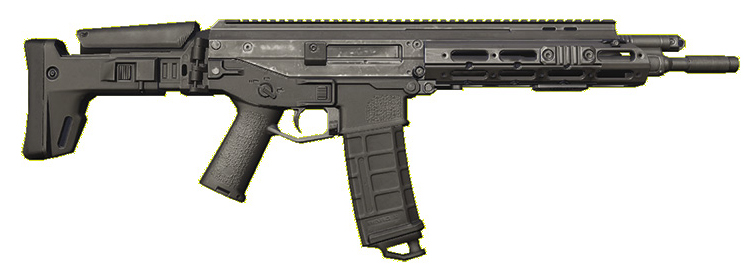
$30,000
Effectiveness: 
Available from Gunshop?*: Yes
| Tier | Weapon Slot Used | Firing Type | Rate of Fire |
|---|---|---|---|
|
5 |
Primary (Right) |
Full-Auto |
400 |
| Magazine | Max Ammo | Vehicle Dmg Modifier | Muzzle Velocity (m/s) |
|---|---|---|---|
|
30 |
360 |
0.05 |
920 |
| Pierce Strength | Number of Pellets | Pellet Spread |
|---|---|---|
|
Moderate |
N/A |
N/A |
| Precision Range | Shoot Spread | Headshot Multiplier | Upper Body Multiplier 40m |
|---|---|---|---|
|
50m |
2,5° |
2 |
1 |
U100
SPECIAL
Effectiveness: 
Available from Gunshop?*: No, Dropped By Some Enforcers.
| Tier | Weapon Slot Used | Firing Type | Rate of Fire |
|---|---|---|---|
|
5 |
Primary (Right) |
Full-Auto |
600 |
| Magazine | Max Ammo | Vehicle Dmg Modifier | Muzzle Velocity (m/s) |
|---|---|---|---|
|
75 |
360 |
0.05 |
970 |
| Pierce Strength | Number of Pellets | Pellet Spread |
|---|---|---|
|
Moderate |
N/A |
N/A |
| Precision Range | Shoot Spread | Headshot Multiplier | Upper Body Multiplier 40m |
|---|---|---|---|
|
50m |
2,5° |
2 |
1 |
//// Shotguns
SG-90
$1,000
Effectiveness: 
Available from Gunshop?*: Yes, Online Tailing: Online Contracts Reward
| Tier | Weapon Slot Used | Firing Type | Rate of Fire |
|---|---|---|---|
|
2 |
Secondary (Left) |
Pump |
100 |
| Magazine | Max Ammo | Vehicle Dmg Modifier | Muzzle Velocity (m/s) |
|---|---|---|---|
|
8 |
120 |
0.05 |
403 |
| Pierce Strength | Number of Pellets | Pellet Spread |
|---|---|---|
|
N/A |
8 |
4 |
| Precision Range | Shoot Spread | Headshot Multiplier | Upper Body Multiplier 40m |
|---|---|---|---|
|
20m |
5° |
2 |
1 |
D12
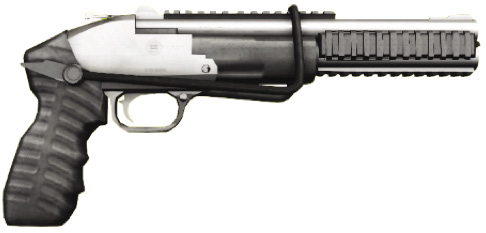
$500
Effectiveness: 
Available from Gunshop?*: Yes, Audio Logs: Collectibles Reward
| Tier | Weapon Slot Used | Firing Type | Rate of Fire |
|---|---|---|---|
|
1 |
Support (Top) |
Semi-Auto |
150 |
| Magazine | Max Ammo | Vehicle Dmg Modifier | Muzzle Velocity (m/s) |
|---|---|---|---|
|
2 |
120 |
0.05 |
150 |
| Pierce Strength | Number of Pellets | Pellet Spread |
|---|---|---|
|
N/A |
8 |
5 |
| Precision Range | Shoot Spread | Headshot Multiplier | Upper Body Multiplier 40m |
|---|---|---|---|
|
20m |
5° |
2 |
1 |
RSG-12
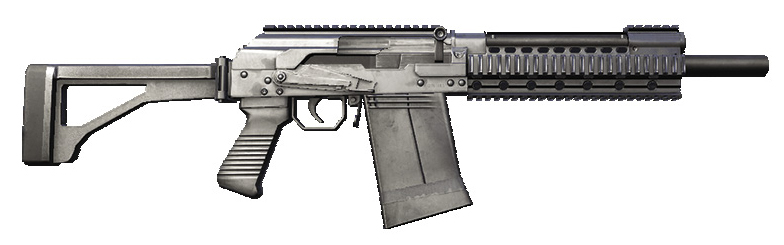
$6,250
Effectiveness: 
Available from Gunshop?*: Yes
| Tier | Weapon Slot Used | Firing Type | Rate of Fire |
|---|---|---|---|
|
3 |
Secondary (Left) |
Semi-Auto |
460 |
| Magazine | Max Ammo | Vehicle Dmg Modifier | Muzzle Velocity (m/s) |
|---|---|---|---|
|
12 |
120 |
0.05 |
300 |
| Pierce Strength | Number of Pellets | Pellet Spread |
|---|---|---|
|
N/A |
6 |
3 |
| Precision Range | Shoot Spread | Headshot Multiplier | Upper Body Multiplier 40m |
|---|---|---|---|
|
20m |
5° |
2 |
1 |
M1014
$12,500
Effectiveness: 
Available from Gunshop?*: Yes
| Tier | Weapon Slot Used | Firing Type | Rate of Fire |
|---|---|---|---|
|
3 |
Secondary (Left) |
Semi-Auto |
220 |
| Magazine | Max Ammo | Vehicle Dmg Modifier | Muzzle Velocity (m/s) |
|---|---|---|---|
|
10 |
120 |
0.05 |
365 |
| Pierce Strength | Number of Pellets | Pellet Spread |
|---|---|---|
|
N/A |
6 |
2.5 |
| Precision Range | Shoot Spread | Headshot Multiplier | Upper Body Multiplier 40m |
|---|---|---|---|
|
20m |
5° |
2 |
1 |
ACS-12
$40,000
Effectiveness: 
Available from Gunshop?*: Yes
| Tier | Weapon Slot Used | Firing Type | Rate of Fire |
|---|---|---|---|
|
5 |
Secondary (Left) |
Full-Auto |
400 |
| Magazine | Max Ammo | Vehicle Dmg Modifier | Muzzle Velocity (m/s) |
|---|---|---|---|
|
12 |
120 |
0.05 |
350 |
| Pierce Strength | Number of Pellets | Pellet Spread |
|---|---|---|
|
N/A |
8 |
3 |
| Precision Range | Shoot Spread | Headshot Multiplier | Upper Body Multiplier 40m |
|---|---|---|---|
|
20m |
5° |
2 |
1 |
//// Submachine Guns
SMG11
$400
Effectiveness: 
Available from Gunshop?*: Yes, ctOS Towers: Collectibles Reward
| Tier | Weapon Slot Used | Firing Type | Rate of Fire |
|---|---|---|---|
|
1 |
Support (Top) |
Full-Auto |
900 |
| Magazine | Max Ammo | Vehicle Dmg Modifier | Muzzle Velocity (m/s) |
|---|---|---|---|
|
30 |
360 |
0.05 |
300 |
| Pierce Strength | Number of Pellets | Pellet Spread |
|---|---|---|
|
N/A |
N/A |
150 |
| Precision Range | Shoot Spread | Headshot Multiplier | Upper Body Multiplier 40m |
|---|---|---|---|
|
30m |
5° |
2 |
1 |
M-9mm
$800
Effectiveness: 
Available from Gunshop?*: Yes, Online Hacking: Online Contracts Reward
| Tier | Weapon Slot Used | Firing Type | Rate of Fire |
|---|---|---|---|
|
2 |
Support (Top) |
Burst |
600 |
| Magazine | Max Ammo | Vehicle Dmg Modifier | Muzzle Velocity (m/s) |
|---|---|---|---|
|
30 |
360 |
0.05 |
400 |
| Pierce Strength | Number of Pellets | Pellet Spread |
|---|---|---|
|
N/A |
N/A |
150 |
| Precision Range | Shoot Spread | Headshot Multiplier | Upper Body Multiplier 40m |
|---|---|---|---|
|
30m |
5° |
2 |
1 |
R-2000
$5,000
Effectiveness: 
Available from Gunshop?*: Yes
| Tier | Weapon Slot Used | Firing Type | Rate of Fire |
|---|---|---|---|
|
3 |
Support (Top) |
Full-Auto |
600 |
| Magazine | Max Ammo | Vehicle Dmg Modifier | Muzzle Velocity (m/s) |
|---|---|---|---|
|
20 |
360 |
0.05 |
400 |
| Pierce Strength | Number of Pellets | Pellet Spread |
|---|---|---|
|
N/A |
N/A |
500 |
| Precision Range | Shoot Spread | Headshot Multiplier | Upper Body Multiplier 40m |
|---|---|---|---|
|
30m |
5° |
2 |
1 |
MP5
$15,000
Effectiveness: 
Available from Gunshop?*: Yes
| Tier | Weapon Slot Used | Firing Type | Rate of Fire |
|---|---|---|---|
|
4 |
Primary (Right) |
Full-Auto |
800 |
| Magazine | Max Ammo | Vehicle Dmg Modifier | Muzzle Velocity (m/s) |
|---|---|---|---|
|
30 |
360 |
0.05 |
400 |
| Pierce Strength | Number of Pellets | Pellet Spread |
|---|---|---|
|
N/A |
N/A |
500 |
| Precision Range | Shoot Spread | Headshot Multiplier | Upper Body Multiplier 40m |
|---|---|---|---|
|
30m |
5° |
2 |
1 |
Vector .45ACP
$30,000
Effectiveness: 
Available from Gunshop?*: Yes
| Tier | Weapon Slot Used | Firing Type | Rate of Fire |
|---|---|---|---|
|
5 |
Primary (Right) |
Full-Auto |
900 |
| Magazine | Max Ammo | Vehicle Dmg Modifier | Muzzle Velocity (m/s) |
|---|---|---|---|
|
20 |
360 |
0.05 |
267 |
| Pierce Strength | Number of Pellets | Pellet Spread |
|---|---|---|
|
N/A |
N/A |
500 |
| Precision Range | Shoot Spread | Headshot Multiplier | Upper Body Multiplier 40m |
|---|---|---|---|
|
30m |
5° |
2 |
1 |
//// Sniper Rifles
SR25
$4,000
Effectiveness: 
Available from Gunshop?*: Yes
| Tier | Weapon Slot Used | Firing Type | Rate of Fire |
|---|---|---|---|
|
2 |
Special (Bottom) |
Semi-Auto |
200 |
| Magazine | Max Ammo | Vehicle Dmg Modifier | Muzzle Velocity (m/s) |
|---|---|---|---|
|
8 |
80 |
0.05 |
784 |
| Pierce Strength | Number of Pellets | Pellet Spread |
|---|---|---|
|
Moderate |
6 |
5 |
| Precision Range | Shoot Spread | Headshot Multiplier | Upper Body Multiplier 40m |
|---|---|---|---|
|
150m |
0° |
50 |
1 |
SVD
$8,750
Effectiveness: 
Available from Gunshop?*: Yes
| Tier | Weapon Slot Used | Firing Type | Rate of Fire |
|---|---|---|---|
|
3 |
Special (Bottom) |
Semi-Auto |
100 |
| Magazine | Max Ammo | Vehicle Dmg Modifier | Muzzle Velocity (m/s) |
|---|---|---|---|
|
6 |
80 |
0.05 |
830 |
| Pierce Strength | Number of Pellets | Pellet Spread |
|---|---|---|
|
Moderate |
6 |
5 |
| Precision Range | Shoot Spread | Headshot Multiplier | Upper Body Multiplier 40m |
|---|---|---|---|
|
150m |
0° |
50 |
2 |
AC-AR
$17,500
Effectiveness: 
Available from Gunshop?*: Yes
| Tier | Weapon Slot Used | Firing Type | Rate of Fire |
|---|---|---|---|
|
4 |
Special (Bottom) |
Burst |
600 |
| Magazine | Max Ammo | Vehicle Dmg Modifier | Muzzle Velocity (m/s) |
|---|---|---|---|
|
20 |
80 |
0.05 |
777 |
| Pierce Strength | Number of Pellets | Pellet Spread |
|---|---|---|
|
Moderate |
6 |
5 |
| Precision Range | Shoot Spread | Headshot Multiplier | Upper Body Multiplier 40m |
|---|---|---|---|
|
150m |
0° |
50 |
1 |
M107
$45,000
Effectiveness: 
Available from Gunshop?*: Yes
| Tier | Weapon Slot Used | Firing Type | Rate of Fire |
|---|---|---|---|
|
5 |
Special (Bottom) |
Semi-Auto |
100 |
| Magazine | Max Ammo | Vehicle Dmg Modifier | Muzzle Velocity (m/s) |
|---|---|---|---|
|
10 |
80 |
0.5 |
853 |
| Pierce Strength | Number of Pellets | Pellet Spread |
|---|---|---|
|
Moderate |
6 |
5 |
| Precision Range | Shoot Spread | Headshot Multiplier | Upper Body Multiplier 40m |
|---|---|---|---|
|
150m |
0° |
50 |
2 |
//// Grenade Launchers
G-106
$4,000
Effectiveness: 
Available from Gunshop?*: Yes
| Tier | Weapon Slot Used | Firing Type | Rate of Fire |
|---|---|---|---|
|
3 |
Special (Bottom) |
Single Shot |
N/A |
| Magazine | Max Ammo | Vehicle Dmg Modifier | Muzzle Velocity (m/s) |
|---|---|---|---|
|
1 |
8 |
1 |
N/A |
| Pierce Strength | Number of Pellets | Pellet Spread |
|---|---|---|
|
N/A |
N/A |
N/A |
| Precision Range | Shoot Spread | Headshot Multiplier | Upper Body Multiplier 40m |
|---|---|---|---|
|
30m |
5° |
1 |
1 |
GL-94
$45,500
Effectiveness: 
Available from Gunshop?*: Yes
| Tier | Weapon Slot Used | Firing Type | Rate of Fire |
|---|---|---|---|
|
5 |
Special (Bottom) |
Pump |
100 |
| Magazine | Max Ammo | Vehicle Dmg Modifier | Muzzle Velocity (m/s) |
|---|---|---|---|
|
8 |
8 |
1 |
N/A |
| Pierce Strength | Number of Pellets | Pellet Spread |
|---|---|---|
|
N/A |
N/A |
N/A |
| Precision Range | Shoot Spread | Headshot Multiplier | Upper Body Multiplier 40m |
|---|---|---|---|
|
30m |
5° |
1 |
1 |
//// Signature Weapons
Chrome
SPECIAL
Effectiveness: 
Available from Gunshop?*: No, Crimes Detected: Side Mission Reward
| Tier | Weapon Slot Used | Firing Type | Rate of Fire |
|---|---|---|---|
|
5 |
Secondary |
Burst |
480 |
| Magazine | Max Ammo | Vehicle Dmg Modifier | Muzzle Velocity (m/s) |
|---|---|---|---|
|
6 |
360 |
0.05 |
550 |
| Pierce Strength | Number of Pellets | Pellet Spread |
|---|---|---|
|
Moderate |
N/A |
250 |
| Precision Range | Shoot Spread | Headshot Multiplier | Upper Body Multiplier 40m |
|---|---|---|---|
|
30m |
5° |
2 |
1 |
Wildfire
SPECIAL
Effectiveness: 
Available from Gunshop?*: No, Missing Persons: Investigation Reward
| Tier | Weapon Slot Used | Firing Type | Rate of Fire |
|---|---|---|---|
|
5 |
Primary |
Full-Auto |
900 |
| Magazine | Max Ammo | Vehicle Dmg Modifier | Muzzle Velocity (m/s) |
|---|---|---|---|
|
30 |
360 |
0.05 |
7500 |
| Pierce Strength | Number of Pellets | Pellet Spread |
|---|---|---|
|
N/A |
N/A |
500 |
| Precision Range | Shoot Spread | Headshot Multiplier | Upper Body Multiplier 40m |
|---|---|---|---|
|
50m |
2,5° |
2 |
1 |
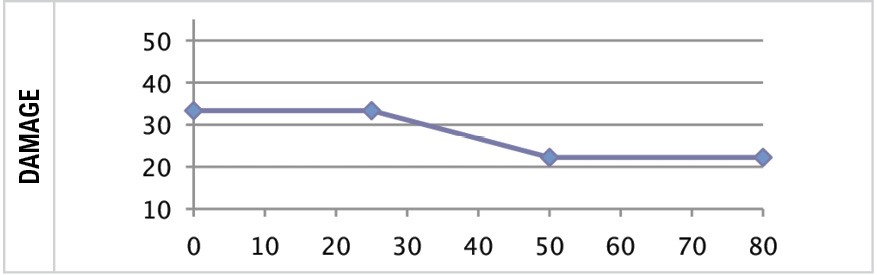
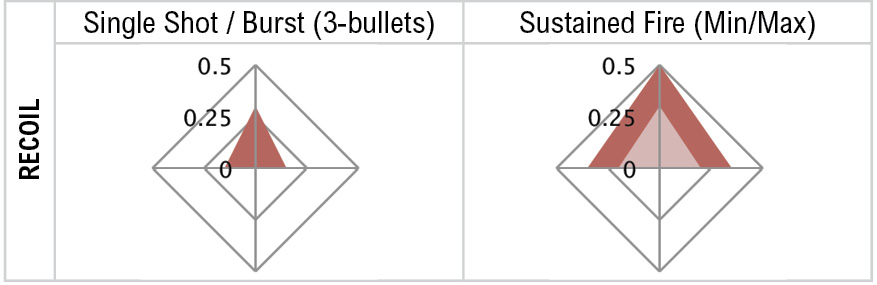
Piledriver
SPECIAL
Effectiveness: 
Available from Gunshop?*: No, Drinking Minigames Reward
| Tier | Weapon Slot Used | Firing Type | Rate of Fire |
|---|---|---|---|
|
5 |
Primary |
Pump |
100 |
| Magazine | Max Ammo | Vehicle Dmg Modifier | Muzzle Velocity (m/s) |
|---|---|---|---|
|
8 |
120 |
0.05 |
403 |
| Pierce Strength | Number of Pellets | Pellet Spread |
|---|---|---|
|
N/A |
20 |
75 |
| Precision Range | Shoot Spread | Headshot Multiplier | Upper Body Multiplier 40m |
|---|---|---|---|
|
20m |
5° |
2 |
1 |
Gangster
Effectiveness: 
Available from Gunshop?*: No, QR Codes: Investigation Reward
| Tier | Weapon Slot Used | Firing Type | Rate of Fire |
|---|---|---|---|
|
5 |
Primary |
Full-Auto |
800 |
| Magazine | Max Ammo | Vehicle Dmg Modifier | Muzzle Velocity (m/s) |
|---|---|---|---|
|
50 |
360 |
0.05 |
267 |
| Pierce Strength | Number of Pellets | Pellet Spread |
|---|---|---|
|
N/A |
N/A |
500 |
| Precision Range | Shoot Spread | Headshot Multiplier | Upper Body Multiplier 40m |
|---|---|---|---|
|
30m |
5° |
2 |
1 |
Destroyer
SPEciAL
Effectiveness: 
Available from Gunshop?*: No, Criminal Convoy: Side Mission Reward
| Tier | Weapon Slot Used | Firing Type | Rate of Fire |
|---|---|---|---|
|
5 |
Special |
Semi-Auto |
75 |
| Magazine | Max Ammo | Vehicle Dmg Modifier | Muzzle Velocity (m/s) |
|---|---|---|---|
|
2 |
80 |
0.5 |
853 |
| Pierce Strength | Number of Pellets | Pellet Spread |
|---|---|---|
|
Extreme |
6 |
5 |
| Precision Range | Shoot Spread | Headshot Multiplier | Upper Body Multiplier 40m |
|---|---|---|---|
|
150m |
0° |
50 |
2 |
//// Spec-Ops Weapons
Spec Ops 1911
$5,000
Effectiveness: 
Available from Gunshop?*: Yes
| Tier | Weapon Slot Used | Firing Type | Rate of Fire |
|---|---|---|---|
|
3 |
Secondary |
Semi-Auto |
600 |
| Magazine | Max Ammo | Vehicle Dmg Modifier | Muzzle Velocity (m/s) |
|---|---|---|---|
|
10 |
360 |
0.05 |
381 |
| Pierce Strength | Number of Pellets | Pellet Spread |
|---|---|---|
|
N/A |
N/A |
250 |
| Precision Range | Shoot Spread | Headshot Multiplier | Upper Body Multiplier 40m |
|---|---|---|---|
|
20m |
5° |
2 |
1 |
Spec Ops Goblin
SPECIAL
Effectiveness: 
Available from Gunshop?*: No, Weapons Trade Investigation Reward
| Tier | Weapon Slot Used | Firing Type | Rate of Fire |
|---|---|---|---|
|
4 |
Primary |
Burst |
750 |
| Magazine | Max Ammo | Vehicle Dmg Modifier | Muzzle Velocity (m/s) |
|---|---|---|---|
|
30 |
360 |
0.05 |
884 |
| Pierce Strength | Number of Pellets | Pellet Spread |
|---|---|---|
|
N/A |
N/A |
500 |
| Precision Range | Shoot Spread | Headshot Multiplier | Upper Body Multiplier 40m |
|---|---|---|---|
|
30m |
2,5° |
2 |
1 |
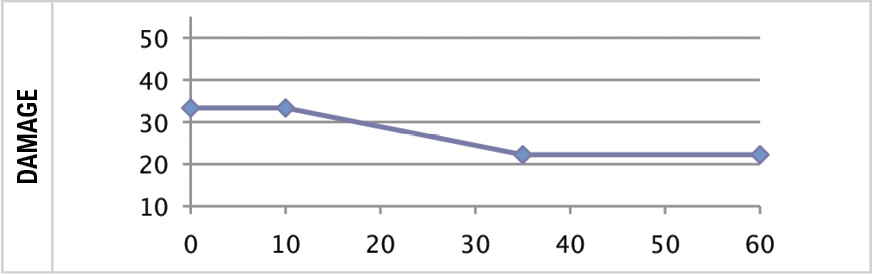
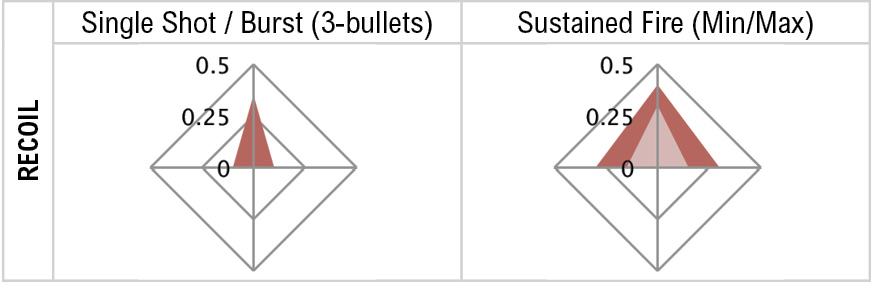
Spec Ops SMG11
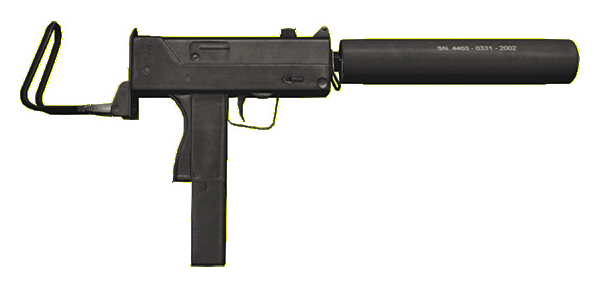
$22,000
Effectiveness: 
Available from Gunshop?*: Yes, Also Gang Hideouts: Side Mission Reward
| Tier | Weapon Slot Used | Firing Type | Rate of Fire |
|---|---|---|---|
|
2 |
Secondary |
Full-Auto |
900 |
| Magazine | Max Ammo | Vehicle Dmg Modifier | Muzzle Velocity (m/s) |
|---|---|---|---|
|
30 |
360 |
0.05 |
300 |
| Pierce Strength | Number of Pellets | Pellet Spread |
|---|---|---|
|
N/A |
N/A |
150 |
| Precision Range | Shoot Spread | Headshot Multiplier | Upper Body Multiplier 40m |
|---|---|---|---|
|
20m |
5° |
2 |
1 |
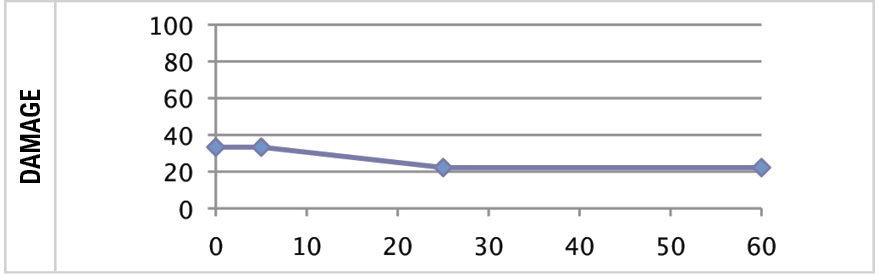
SO Vector 45ACP
SPECIAL
Effectiveness: 
Available from Gunshop?*: No, Online Tailing: Online Contracts Reward
| Tier | Weapon Slot Used | Firing Type | Rate of Fire |
|---|---|---|---|
|
5 |
Primary |
Full-Auto |
900 |
| Magazine | Max Ammo | Vehicle Dmg Modifier | Muzzle Velocity (m/s) |
|---|---|---|---|
|
20 |
360 |
0.05 |
267 |
| Pierce Strength | Number of Pellets | Pellet Spread |
|---|---|---|
|
N/A |
N/A |
500 |
| Precision Range | Shoot Spread | Headshot Multiplier | Upper Body Multiplier 40m |
|---|---|---|---|
|
20m |
5° |
2 |
1 |
//// Exclusive Weapons
Auto-6
SPECIAL
Effectiveness: 
Available from Gunshop?*: No. Only as part of Cyberpunk Pack
| Tier | Weapon Slot Used | Firing Type | Rate of Fire |
|---|---|---|---|
|
3 |
Secondary |
Burst |
480 |
| Magazine | Max Ammo | Vehicle Dmg Modifier | Muzzle Velocity (m/s) |
|---|---|---|---|
|
6 |
360 |
0.05 |
550 |
| Pierce Strength | Number of Pellets | Pellet Spread |
|---|---|---|
|
N/A |
N/A |
250 |
| Precision Range | Shoot Spread | Headshot Multiplier | Upper Body Multiplier 40m |
|---|---|---|---|
|
30m |
5° |
2 |
1 |
Biometric Rifle
SPECIAL
Effectiveness: 
Available from Gunshop?*: No. Only as part of Signature Shot Pack
| Tier | Weapon Slot Used | Firing Type | Rate of Fire |
|---|---|---|---|
|
3 |
Primary |
Full-Auto |
500 |
| Magazine | Max Ammo | Vehicle Dmg Modifier | Muzzle Velocity (m/s) |
|---|---|---|---|
|
30 |
360 |
0.05 |
920 |
| Pierce Strength | Number of Pellets | Pellet Spread |
|---|---|---|
|
Moderate |
N/A |
500 |
| Precision Range | Shoot Spread | Headshot Multiplier | Upper Body Multiplier 40m |
|---|---|---|---|
|
50m |
2,5° |
2 |
1 |
M1SMG
SPECIAL
Effectiveness: 
Available from Gunshop?*: No. Only as part of Untouchables Pack
| Tier | Weapon Slot Used | Firing Type | Rate of Fire |
|---|---|---|---|
|
3 |
Primary |
Full-Auto |
800 |
| Magazine | Max Ammo | Vehicle Dmg Modifier | Muzzle Velocity (m/s) |
|---|---|---|---|
|
50 |
360 |
0.05 |
267 |
| Pierce Strength | Number of Pellets | Pellet Spread |
|---|---|---|
|
N/A |
N/A |
500 |
| Precision Range | Shoot Spread | Headshot Multiplier | Upper Body Multiplier 40m |
|---|---|---|---|
|
30m |
5° |
2 |
1 |
Gold D50
SPECIAL
Effectiveness: 
Available from Gunshop?*: No. Only as Acquired Content (Uplay Reward)
| Tier | Weapon Slot Used | Firing Type | Rate of Fire |
|---|---|---|---|
|
3 |
Secondary |
Semi-Auto |
300 |
| Magazine | Max Ammo | Vehicle Dmg Modifier | Muzzle Velocity (m/s) |
|---|---|---|---|
|
8 |
360 |
0.05 |
500 |
| Pierce Strength | Number of Pellets | Pellet Spread |
|---|---|---|
|
N/A |
N/A |
250 |
| Precision Range | Shoot Spread | Headshot Multiplier | Upper Body Multiplier 40m |
|---|---|---|---|
|
30m |
5° |
2 |
1 |
R33b
SPECIAL
Effectiveness: 
Available from Gunshop?*: No. Only as Acquired Content (PSN Pre-order Reward)
| Tier | Weapon Slot Used | Firing Type | Rate of Fire |
|---|---|---|---|
|
2 |
Secondary |
Burst |
800 |
| Magazine | Max Ammo | Vehicle Dmg Modifier | Muzzle Velocity (m/s) |
|---|---|---|---|
|
27 |
360 |
0.05 |
375 |
| Pierce Strength | Number of Pellets | Pellet Spread |
|---|---|---|
|
N/A |
N/A |
N/A |
| Precision Range | Shoot Spread | Headshot Multiplier | Upper Body Multiplier 40m |
|---|---|---|---|
|
30m |
5° |
2 |
1 |
// WEAPONS /// Weapon Combinations
You can equip any weapon at any time using your Weapon Wheel. However, we found some complementary weapon combinations that are effective in a firefight. Test out some of our favorite combinations! We kept the fourth slot optional, so equip any weapon you like!
| Secondary | Primary | Special | Notes | |
|---|---|---|---|---|
|
Combination 1 |
D12 |
ACR |
GL94 |
This gives you stopping power at short range with the D12, good long-range accuracy with the ACR, and a powerful area-of-effect attack with the GL94 launcher. |
|
Combination 2 |
D50 |
Vector .45ACP |
M107 |
The Vector is an awesome room-clearer, but its clip dries up quickly. When this happens, switching to the D50 is a good backup, as it is a powerful weapon at short to medium range (try it with the Pistol Expert skill!). To complement this, the M107 is the best at hitting things at long range and can also destroy vehicles. |
|
Combination 3 |
R33 |
ATSG-12 |
AC-AR |
The R33 is an all-around useful auto-pistol, the ATSG-12 is a fast and powerful shotgun that can clear out rooms of enemies in moments, and the AC-AR is a versatile long-range rifle that shoots in bursts. |
|
Combination 4 |
R2000 |
M1014 |
SVD |
The R2000 has good burst fire and is a fine backup to a powerful shotgun like the M1014. The SVD is there for when precision shots are needed. |
|
Combination 5 |
Spec-Ops 1911 |
417 |
G106 |
The perfect loadout for a precision shooter. The 1911 makes stealth tasks easier, and the 417 deals great damage at range while conserving ammo, since it shoots in bursts, and is a good replacement for a sniper rifle. The G106 is a good area-of-effect weapon, capable of clearing out enemies at short to medium range. |
|
Combination 6 |
M8M |
MP5 |
G106 |
The M8M is good at picking off targets at medium to long range (and is especially good once the Pistol Expert skill is unlocked), while the MP5 will waste anyone at short to medium range with its superior rate of fire and decent damage. The G106 complements these two weapons with its efficient area-of-effect blast. |
|
Combination 7 |
Chrome |
Piledriver |
Destroyer |
This combo of powerful unlockable unique weapons allows you to get away with pretty much anything. The Chrome shoots in bursts and is powerful even against armored enemies, the Piledriver has very wide pellet spread and is great against groups of enemies, while the Destroyer is good at destroying vehicles, whether it’s a fleeing Convoy target or an annoying chopper that you have trouble losing during a chase. |
/// Weapons Damage Table
Now that you have a good working knowledge of every weapon available to you, consult the following table for more statistics! These show (in Hit Points), the number of shots it takes to defeat each type of enemy you encounter in the game (by rank), as well as the average time to defeat them (in seconds).
Shots/Time to Kill Reference
Pistols
| Shots to Kill | Time to Kill | ||||||||||||||
|---|---|---|---|---|---|---|---|---|---|---|---|---|---|---|---|
| Guns | Range | HP | PvE | PvP | Rate of Fire | PvE | PvP | ||||||||
|
Grunt |
Enforcer |
Elite |
Veteran |
Marksman |
Player |
Grunt |
Enforcer |
Elite |
Veteran |
Marksman |
Player |
||||
|
66.66 |
3000 |
400 |
66.66 |
66.66 |
100 |
66.66 |
3000 |
400 |
66.66 |
66.66 |
100 |
||||
| Damage at Range | Shots / Pellets to Kill | Seconds to Kill | |||||||||||||
|
P9mm |
15 |
33.34 |
2 |
90 |
12 |
2 |
2 |
3 |
0.25 |
0.50 |
22.50 |
3.00 |
0.50 |
0.50 |
0.75 |
|
25 |
22.23 |
3 |
135 |
18 |
3 |
3 |
5 |
0.75 |
33.75 |
4.50 |
0.75 |
0.75 |
1.25 |
||
|
Px4 |
15 |
33.34 |
2 |
90 |
12 |
2 |
2 |
3 |
0.25 |
0.50 |
22.50 |
3.00 |
0.50 |
0.50 |
0.75 |
|
25 |
22.23 |
3 |
135 |
18 |
3 |
3 |
5 |
0.75 |
33.75 |
4.50 |
0.75 |
0.75 |
1.25 |
||
|
1911 |
10 |
66.67 |
1 |
45 |
6 |
1 |
1 |
2 |
0.25 |
0.25 |
11.25 |
1.50 |
0.25 |
0.25 |
0.50 |
|
25 |
22.23 |
3 |
135 |
18 |
3 |
3 |
5 |
0.75 |
33.75 |
4.50 |
0.75 |
0.75 |
1.25 |
||
|
R33 |
15 |
33.34 |
2 |
90 |
12 |
2 |
2 |
3 |
0.075 |
0.15 |
6.75 |
0.90 |
0.15 |
0.15 |
0.23 |
|
25 |
22.23 |
3 |
135 |
18 |
3 |
3 |
5 |
0.23 |
10.13 |
1.35 |
0.23 |
0.23 |
0.38 |
||
|
MP412 |
15 |
33.34 |
2 |
90 |
12 |
2 |
2 |
3 |
0.3 |
0.60 |
27.00 |
3.60 |
0.60 |
0.60 |
0.90 |
|
40 |
22.23 |
3 |
135 |
18 |
3 |
3 |
5 |
0.90 |
40.50 |
5.40 |
0.90 |
0.90 |
1.50 |
||
|
D50 |
25 |
66.67 |
1 |
45 |
6 |
1 |
1 |
2 |
0.3 |
0.30 |
13.50 |
1.80 |
0.30 |
0.30 |
0.60 |
|
50 |
33.34 |
2 |
90 |
12 |
2 |
2 |
3 |
0.60 |
27.00 |
3.60 |
0.60 |
0.60 |
0.90 |
||
|
M8M |
25 |
66.67 |
1 |
45 |
6 |
1 |
1 |
2 |
0.3 |
0.30 |
13.50 |
1.80 |
0.30 |
0.30 |
0.60 |
|
50 |
33.34 |
2 |
90 |
12 |
2 |
2 |
3 |
0.60 |
27.00 |
3.60 |
0.60 |
0.60 |
0.90 |
||
Assualt Rifles
| Shots to Kill | Time to Kill | ||||||||||||||
|---|---|---|---|---|---|---|---|---|---|---|---|---|---|---|---|
| Guns | Range | HP | PvE | PvP | Rate of Fire | PvE | PvP | ||||||||
|
Grunt |
Enforcer |
Elite |
Veteran |
Marksman |
Player |
Grunt |
Enforcer |
Elite |
Veteran |
Marksman |
Player |
||||
|
66.66 |
3000 |
400 |
66.66 |
66.66 |
100 |
66.66 |
3000 |
400 |
66.66 |
66.66 |
100 |
||||
| Damage at Range | Shots / Pellets to Kill | Seconds to Kill | |||||||||||||
|
OCP11 |
20 |
33.34 |
2 |
90 |
12 |
2 |
2 |
3 |
0.1 |
0.20 |
9.00 |
1.20 |
0.20 |
0.20 |
0.30 |
|
30 |
22.23 |
3 |
135 |
18 |
3 |
3 |
5 |
0.30 |
13.50 |
1.80 |
0.30 |
0.30 |
0.50 |
||
|
416 |
25 |
33.34 |
2 |
90 |
12 |
2 |
2 |
3 |
0.08 |
0.16 |
7.20 |
0.96 |
0.16 |
0.16 |
0.24 |
|
50 |
22.23 |
3 |
135 |
18 |
3 |
3 |
5 |
0.24 |
10.80 |
1.44 |
0.24 |
0.24 |
0.40 |
||
|
AK47 |
20 |
33.34 |
2 |
90 |
12 |
2 |
2 |
3 |
0.1 |
0.20 |
9.00 |
1.20 |
0.20 |
0.20 |
0.30 |
|
30 |
22.23 |
3 |
135 |
18 |
3 |
3 |
5 |
0.30 |
13.50 |
1.80 |
0.30 |
0.30 |
0.50 |
||
|
417 |
40 |
33.34 |
2 |
90 |
12 |
2 |
2 |
3 |
0.08 |
0.16 |
7.20 |
0.96 |
0.16 |
0.16 |
0.24 |
|
80 |
22.23 |
3 |
135 |
18 |
3 |
3 |
5 |
0.24 |
10.80 |
1.44 |
0.24 |
0.24 |
0.40 |
||
|
Goblin |
25 |
33.34 |
2 |
90 |
12 |
2 |
2 |
3 |
0.08 |
0.16 |
7.20 |
0.96 |
0.16 |
0.16 |
0.24 |
|
50 |
22.23 |
3 |
135 |
18 |
3 |
3 |
5 |
0.24 |
10.80 |
1.44 |
0.24 |
0.24 |
0.40 |
||
|
ACR |
40 |
33.34 |
2 |
90 |
12 |
2 |
2 |
3 |
0.15 |
0.30 |
13.50 |
1.80 |
0.30 |
0.30 |
0.45 |
|
80 |
22.23 |
3 |
135 |
18 |
3 |
3 |
5 |
0.45 |
20.25 |
2.70 |
0.45 |
0.45 |
0.75 |
||
|
U100 |
40 |
33.34 |
2 |
90 |
12 |
2 |
2 |
3 |
0.1 |
0.20 |
9.00 |
1.20 |
0.20 |
0.20 |
0.30 |
|
80 |
22.23 |
3 |
135 |
18 |
3 |
3 |
5 |
0.30 |
13.50 |
1.80 |
0.30 |
0.30 |
0.50 |
||
Shotguns
| Shots to Kill | ||||||||
|---|---|---|---|---|---|---|---|---|
| Guns | Range | HP | PvE | PvP | ||||
|
Grunt |
Enforcer |
Elite |
Veteran |
Marksman |
Player |
|||
|
66.66 |
3000 |
400 |
66.66 |
66.66 |
100 |
|||
| Damage at Range | Shots / Pellets to Kill | |||||||
|
SG-90 |
10 |
177.84 |
1 |
17 |
3 |
1 |
1 |
1 |
|
15 |
16 |
5 |
188 |
25 |
5 |
5 |
7 |
|
|
D12 |
10 |
177.84 |
1 |
17 |
3 |
1 |
1 |
1 |
|
15 |
16 |
5 |
188 |
25 |
5 |
5 |
7 |
|
|
M1014 |
15 |
133.38 |
1 |
23 |
3 |
1 |
1 |
1 |
|
25 |
24 |
3 |
125 |
17 |
3 |
3 |
5 |
|
|
RSG-12 |
15 |
133.38 |
1 |
23 |
3 |
1 |
1 |
1 |
|
25 |
24 |
3 |
125 |
17 |
3 |
3 |
5 |
|
|
ACS-12 |
10 |
177.84 |
1 |
17 |
3 |
1 |
1 |
1 |
|
15 |
16 |
5 |
188 |
25 |
5 |
5 |
7 |
|
Submachine Guns
| Shots to Kill | Time to Kill | ||||||||||||||
|---|---|---|---|---|---|---|---|---|---|---|---|---|---|---|---|
| Guns | Range | HP | PvE | PvP | Rate of Fire | PvE | PvP | ||||||||
|
Grunt |
Enforcer |
Elite |
Veteran |
Marksman |
Player |
Grunt |
Enforcer |
Elite |
Veteran |
Marksman |
Player |
||||
|
66.66 |
3000 |
400 |
66.66 |
66.66 |
100 |
66.66 |
3000 |
400 |
66.66 |
66.66 |
100 |
||||
| Damage at Range | Shots / Pellets to Kill | Seconds to Kill | |||||||||||||
|
SMG-11 |
15 |
33.34 |
2 |
90 |
12 |
2 |
2 |
3 |
0.067 |
0.13 |
6.03 |
0.80 |
0.13 |
0.13 |
0.20 |
|
35 |
22.23 |
3 |
135 |
18 |
3 |
3 |
5 |
0.20 |
9.05 |
1.21 |
0.20 |
0.20 |
0.34 |
||
|
MP9mm |
20 |
33.34 |
2 |
90 |
12 |
2 |
2 |
3 |
0.1 |
0.20 |
9.00 |
1.20 |
0.20 |
0.20 |
0.30 |
|
30 |
22.23 |
3 |
135 |
18 |
3 |
3 |
5 |
0.30 |
13.50 |
1.80 |
0.30 |
0.30 |
0.50 |
||
|
R2000 |
20 |
33.34 |
2 |
90 |
12 |
2 |
2 |
3 |
0.1 |
0.20 |
9.00 |
1.20 |
0.20 |
0.20 |
0.30 |
|
30 |
22.23 |
3 |
135 |
18 |
3 |
3 |
5 |
0.30 |
13.50 |
1.80 |
0.30 |
0.30 |
0.50 |
||
|
MP5 |
15 |
33.34 |
2 |
90 |
12 |
2 |
2 |
3 |
0.075 |
0.15 |
6.75 |
0.90 |
0.15 |
0.15 |
0.23 |
|
35 |
22.23 |
3 |
135 |
18 |
3 |
3 |
5 |
0.23 |
10.13 |
1.35 |
0.23 |
0.23 |
0.38 |
||
|
Vector 45ACP |
10 |
66.67 |
1 |
45 |
6 |
1 |
1 |
2 |
0.067 |
0.07 |
3.02 |
0.40 |
0.07 |
0.07 |
0.13 |
|
25 |
22.23 |
3 |
135 |
18 |
3 |
3 |
5 |
0.20 |
9.05 |
1.21 |
0.20 |
0.20 |
0.34 |
||
|
M1SMG |
10 |
66.67 |
1 |
45 |
6 |
1 |
1 |
2 |
0.075 |
0.08 |
3.38 |
0.45 |
0.08 |
0.08 |
0.15 |
|
25 |
22.23 |
3 |
135 |
18 |
3 |
3 |
5 |
0.23 |
10.13 |
1.35 |
0.23 |
0.23 |
0.38 |
||
Sniper Rifles
| Shots to Kill | Time to Kill | ||||||||||||||
|---|---|---|---|---|---|---|---|---|---|---|---|---|---|---|---|
| Guns | Range | HP | PvE | PvP | Rate of Fire | PvE | PvP | ||||||||
|
Grunt |
Enforcer |
Elite |
Veteran |
Marksman |
Player |
Grunt |
Enforcer |
Elite |
Veteran |
Marksman |
Player |
||||
|
66.66 |
3000 |
400 |
66.66 |
66.66 |
100 |
66.66 |
3000 |
400 |
66.66 |
66.66 |
100 |
||||
| Damage at Range | Shots / Pellets to Kill | Seconds to Kill | |||||||||||||
|
SR-25 |
20 |
50 |
2 |
60 |
8 |
2 |
2 |
2 |
0.3 |
0.60 |
18.00 |
2.40 |
0.60 |
0.60 |
0.60 |
|
75 |
33.34 |
2 |
90 |
12 |
2 |
2 |
3 |
0.60 |
27.00 |
3.60 |
0.60 |
0.60 |
0.90 |
||
|
SVD |
20 |
75 |
1 |
40 |
6 |
1 |
1 |
2 |
0.6 |
0.60 |
24.00 |
3.60 |
0.60 |
0.60 |
1.20 |
|
40 |
50 |
2 |
60 |
8 |
2 |
2 |
2 |
1.20 |
36.00 |
4.80 |
1.20 |
1.20 |
1.20 |
||
|
AC-AR |
20 |
50 |
2 |
60 |
8 |
2 |
2 |
2 |
0.1 |
0.20 |
6.00 |
0.80 |
0.20 |
0.20 |
0.20 |
|
75 |
33.34 |
2 |
90 |
12 |
2 |
2 |
3 |
0.20 |
9.00 |
1.20 |
0.20 |
0.20 |
0.30 |
||
|
M107 |
20 |
120 |
1 |
25 |
4 |
1 |
1 |
1 |
0.6 |
0.60 |
15.00 |
2.40 |
0.60 |
0.60 |
0.60 |
|
75 |
100 |
1 |
30 |
4 |
1 |
1 |
1 |
0.60 |
18.00 |
2.40 |
0.60 |
0.60 |
0.60 |
||
/ _VEHICLES
If getting around town as a pedestrian isn’t quite your speed, it’s worth commandeering or even ordering one of the large number of vehicles available to you. Many are significantly better at one type of activity than others. But all are covered in the following section.
// Vehicle Appropriation
There are 64 road vehicles available to you (7 heavy vehicles, 5 motorcycles, 11 muscle cars, 11 performance vehicles, 7 sports cars, 4 trucks, and 19 budget vehicles), 4 types of police vehicles (which aren’t available on your Car on Demand App), and 3 types of boat. There are also Faction and other variants only available on the streets of Chicago.
// Car on Demand App
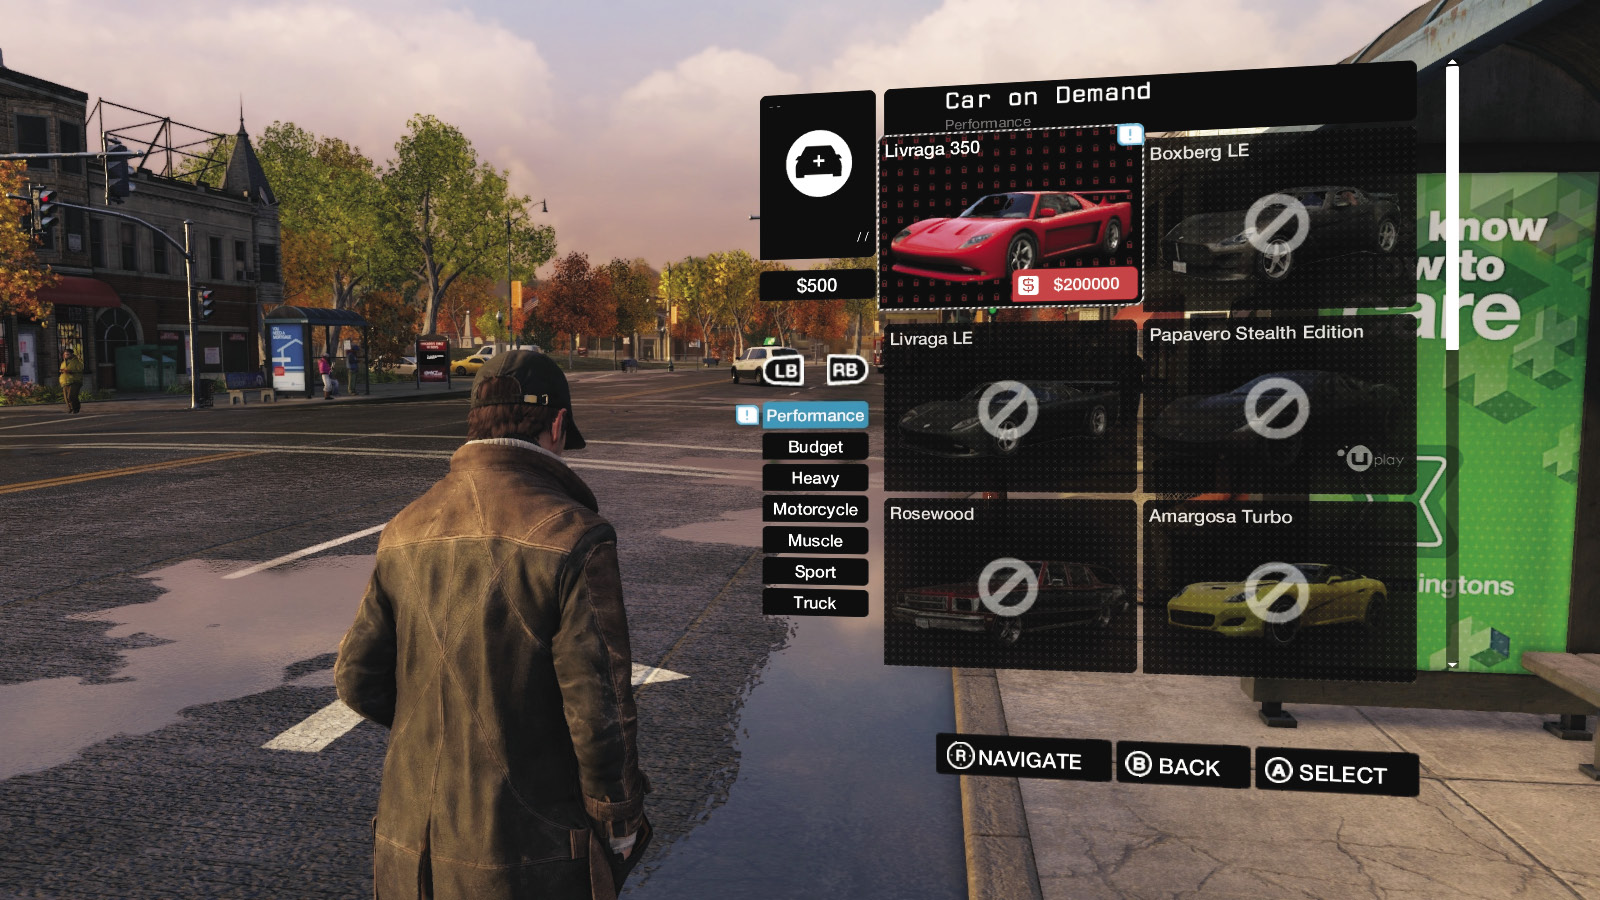
Bring up your smartphone tile app menu and select the Car on Demand App; this fantastic tool enables you to call a vehicle to your location between missions (but not during them; new cars will not be driven to the middle of a firefight). This allows you to choose from a list of vehicle types and summon any unlocked vehicle to a nearby location, usually for a small fee. Why? So you have your preferred vehicle to drive or ride on prior to a mission start, giving you the advantage of a vehicle you’re comfortable in, or one tailored to a specific action. But how do you unlock vehicles in the first place?
// Vehicle Appropriation /// Unlocking a Vehicle
You don’t want to spend your time just driving around in a Bogen 200 (though this is a surprisingly agile vehicle), so unlocking vehicles should be a top priority, until you find a car or bike that performs to your satisfaction. Here’s how you can unlock vehicles:
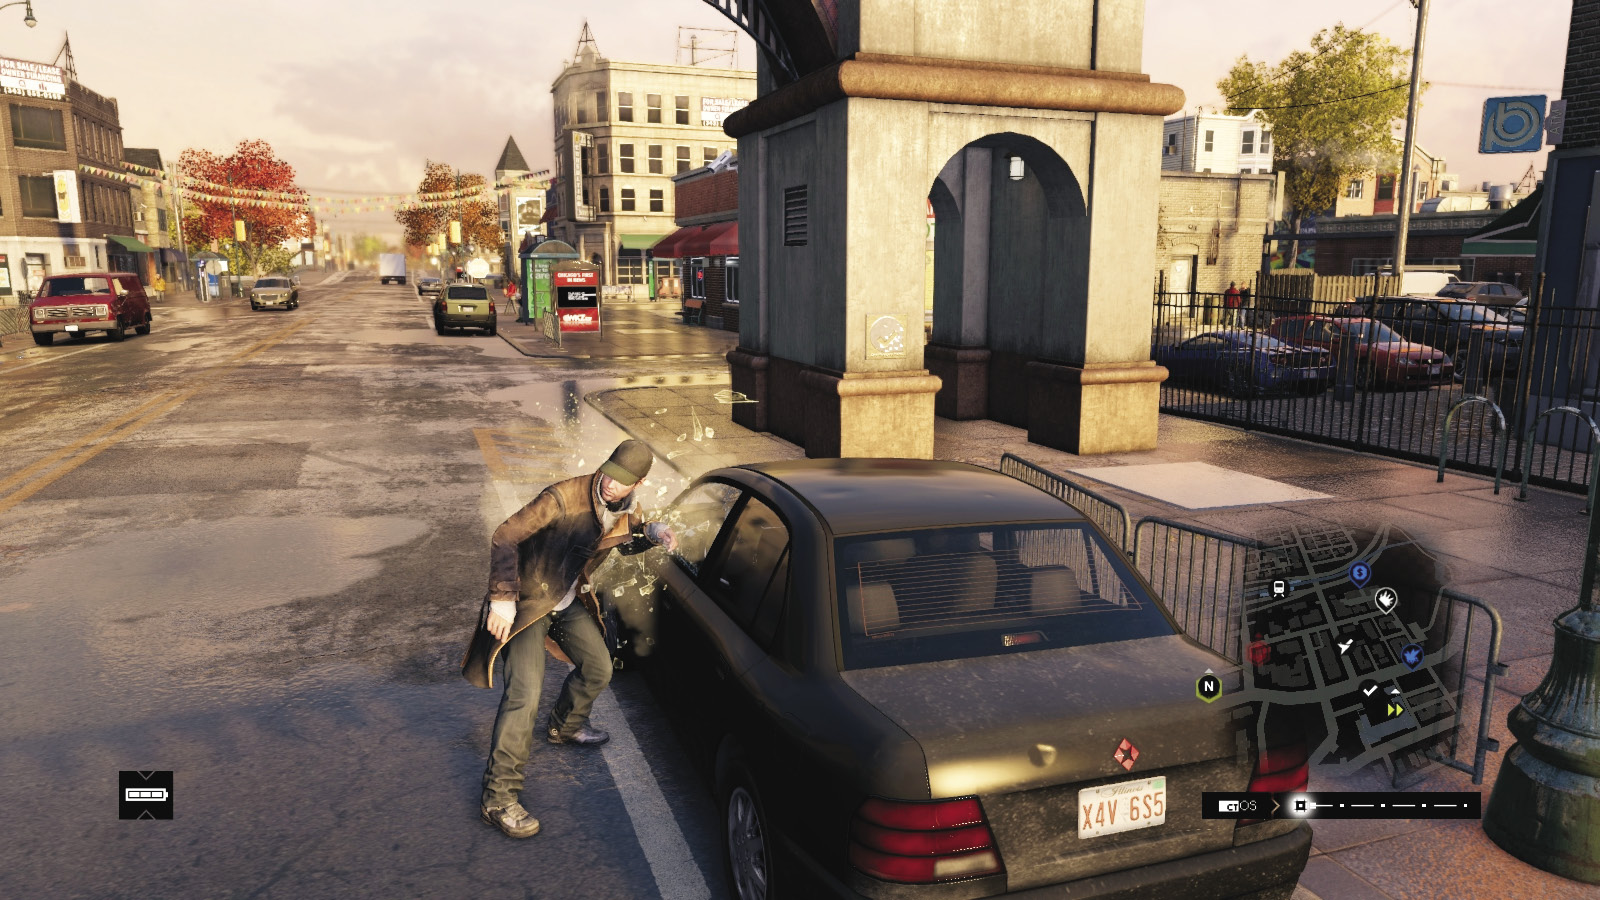
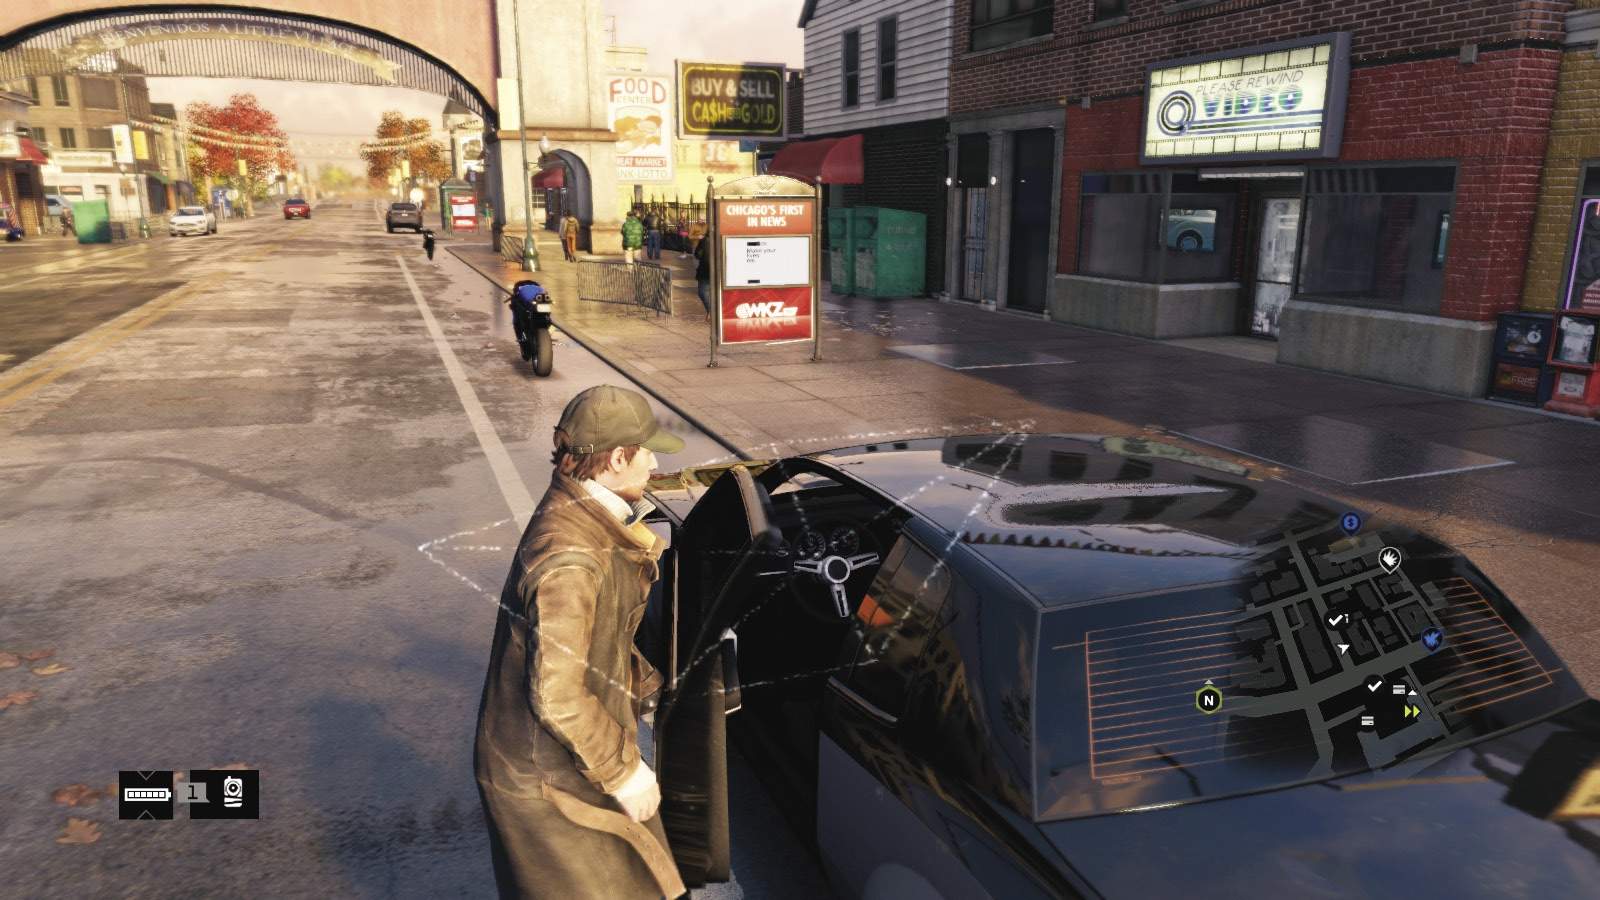
Hot-wiring: Before you have the Car Unlock skill, any vehicle you want to drive that you find on the streets needs to be unlocked with a swift elbow to the window and a manual unlock. This usually results in a citizen calling the police and is dangerously slow if enemies are engaging you at the same time.
Hack Unlocking: Once you have the Car Unlock skill, you simply highlight the vehicle you want to drive, hack it, and the alarm and locks are automatically disengaged. This is the method you’ll unlock most vehicles with. With hot-wiring or Hack Unlocking, you then add this vehicle to your Car on Demand App and usually find a small amount of cash or other valuables (which you should bring to a pawnshop) in the glove compartment.
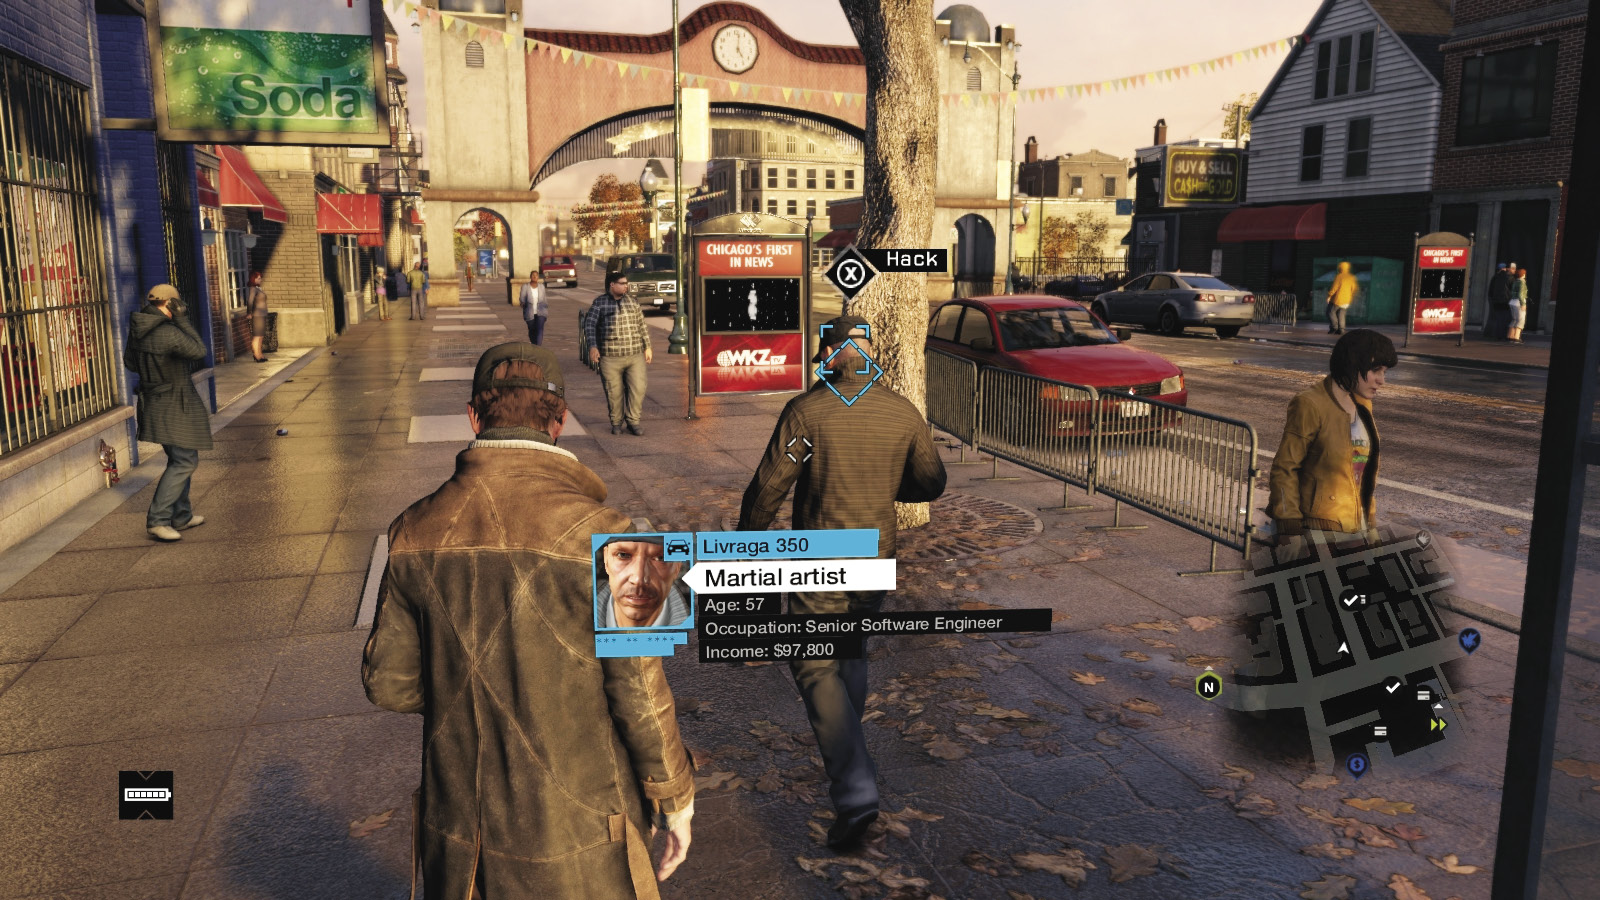
Hacking Civilians: When you’re wandering around town, be sure to hack any citizens you can, as there’s a chance one of them owns a vehicle you haven’t unlocked yet. With the Profiler Optimization skill, these citizens are highlighted with a blue cursor. Hack them, and you might receive a new vehicle unlock; you can now access the vehicle mentioned onscreen after the hack, from your Car on Demand App.
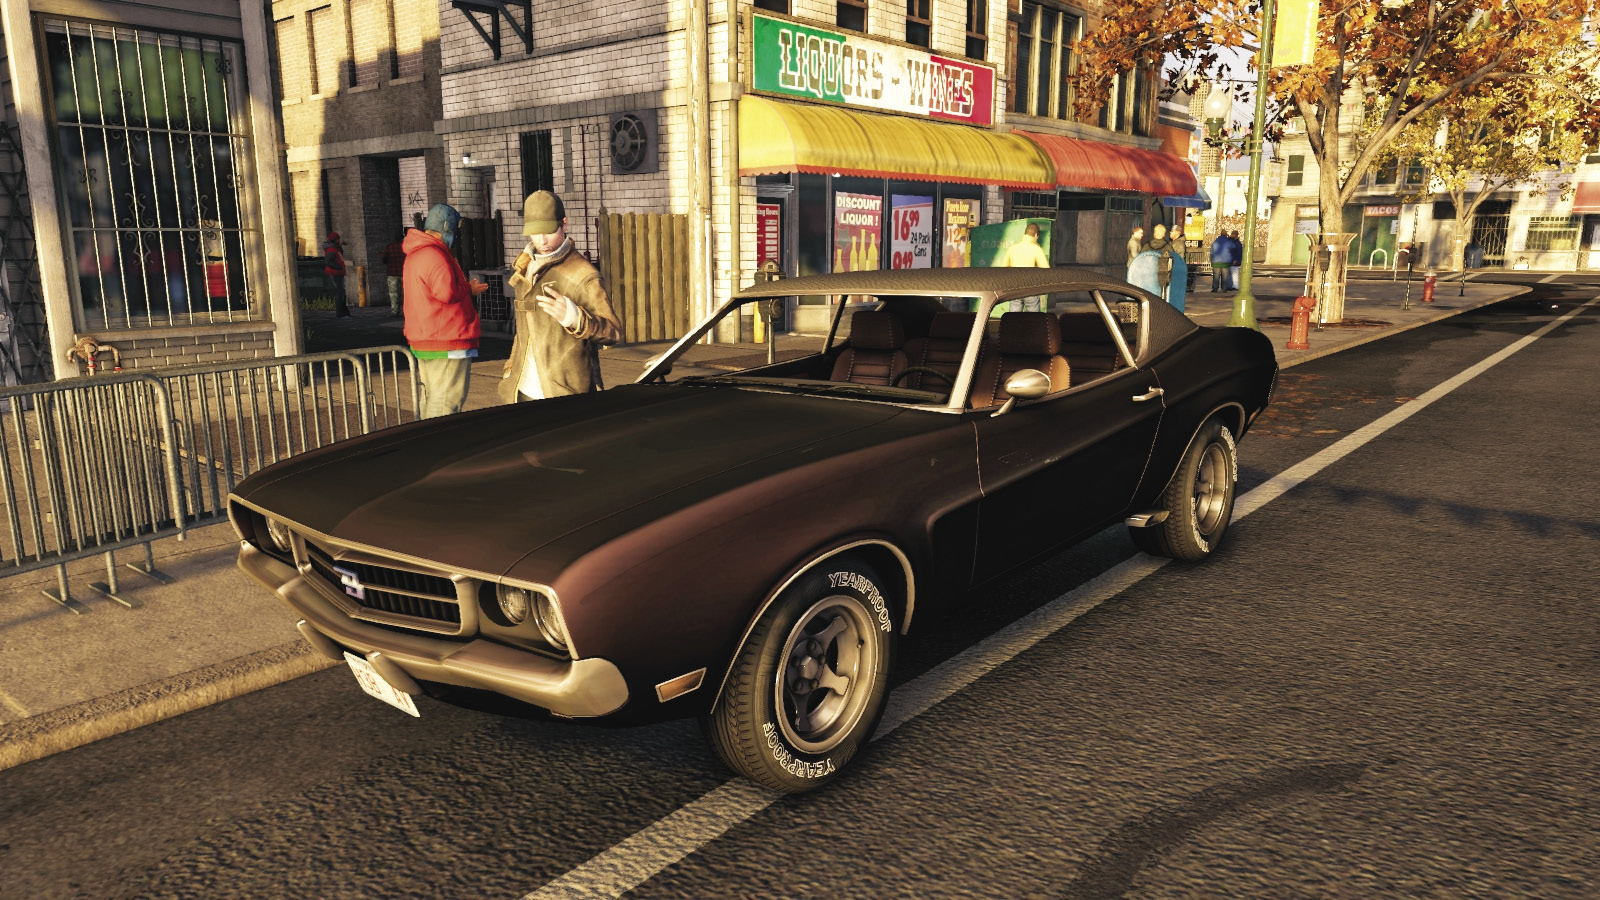
Progression Activities: Consult the Progression Tree for all your activities, and cycle through the information, as some vehicles can only be unlocked (in the App) if you complete a particular mission. For example, the Vespid LE can be unlocked normally, but costs cash to summon the first time you want it. However, once you discover seven Burner Phones during this Investigation, you can summon it for free. So quickly take the Progression Tree for a spin, look for the vehicles you want to own, and finish their associated mission. Or pay up a single, sometimes exorbitant, fee.
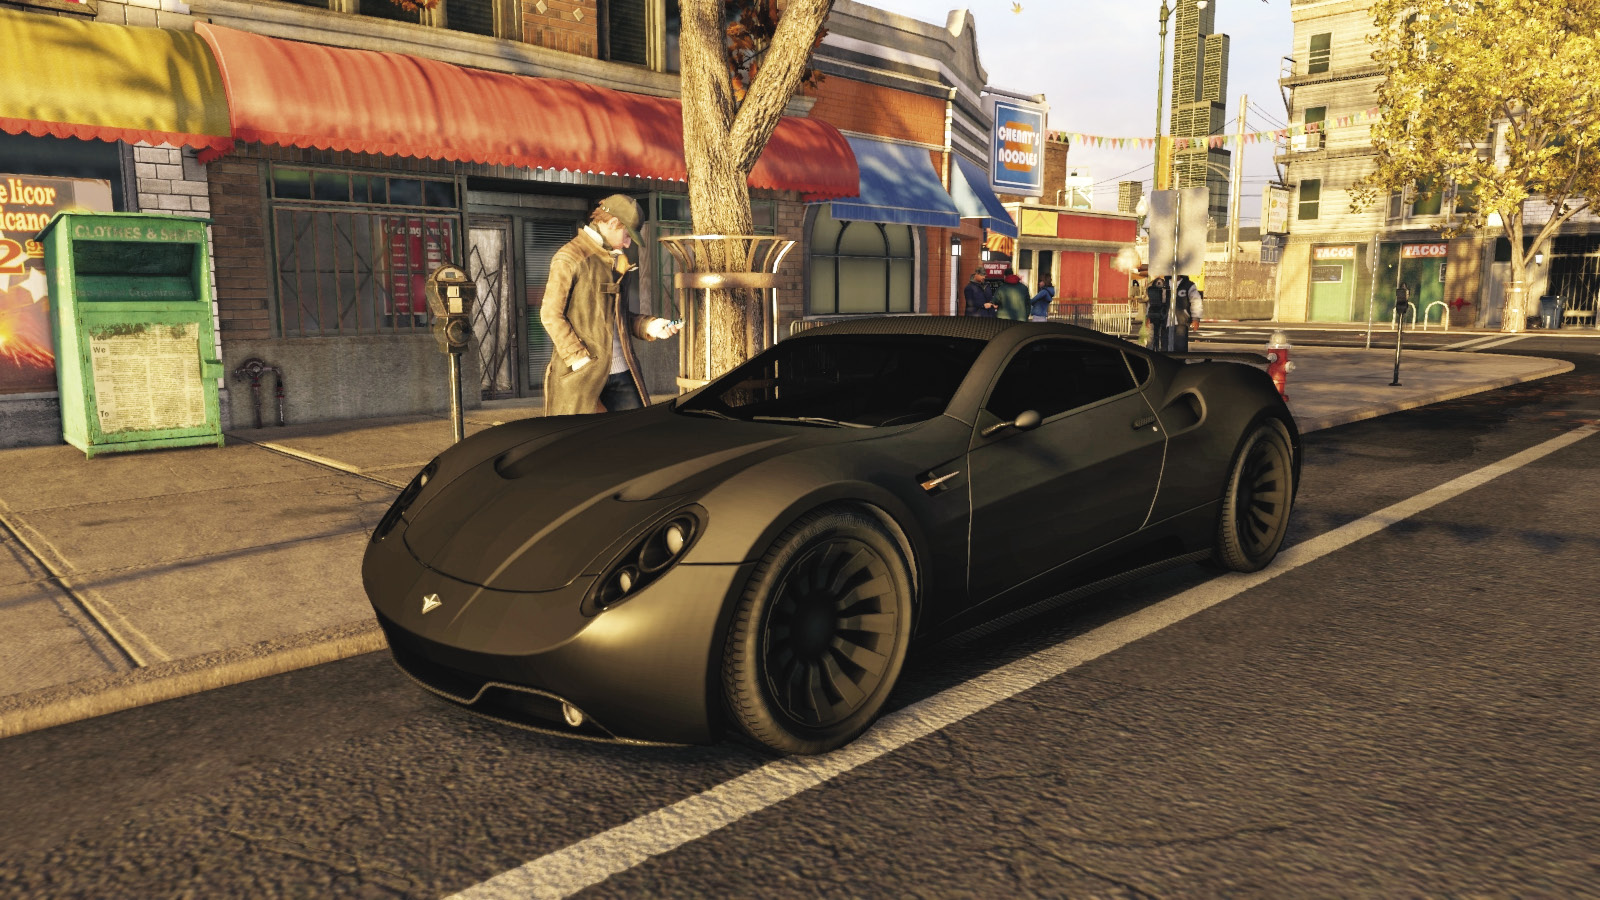
Exclusive Vehicles: Certain vehicles, such as the Papavero Stealth Edition, are only unlocked as a pack bonus for preordering the game, ordering from a certain retailer, completing a mission available as a preorder bonus, or unlocking via Uplay. This only applies to a few vehicles, and this Papavero Stealth Edition is the only one with any specific advancements not available to other vehicles (its stealth capacity reduces the rate of enemy detection during escapes).
// VEHICLES /// Vehicle Types
Before you kick some tires and inspect all the specific vehicles, it’s worth learning the main differences between vehicle types.
//// Budget
When escaping the police or chasing the Club around Chicago, don’t expect rampant success at the wheel of these machines: They have poor toughness (a real problem during a jostling) and appalling acceleration (meaning you can’t get away or reach a fleeing target as easily). But the subcompact vehicles like the Bogen 200 and the Lithium SP are narrow enough to be rather pleasing to weave through traffic in. Plus, the vans and the Relegater are good for parking and climbing onto the roof of when looking for a way into a restricted area or they can act as movable cover.
//// Sports Car
Thoroughly recommended: Compact enough to work well in tight turns and around slower traffic and with enough oomph to reach a fleeing suspect or escape the police, these sports cars are utilized often by the discerning driver-for-hire. These cars have impressive acceleration coupled with spectacular handling and a top speed that’s more than adequate for most situations. Try out the Zusume R, which is a great all-rounder, or the infamous Luciano, the cream of the crop. However, these vehicles don’t do well with repeated battering, so be ready to change vehicles if you plan to ram and chase foes or survive a mass of police swarming after you.
//// Heavy-Duty
Large and bulky vehicles are terrible when you need to move nimbly around narrow streets or off-road climbs where they can get stuck easily. But if you have enough space, and you’re seeking to ambush the enemy or ram one off the road, these can be extremely handy—as long as you know which one to pick. The toughest of all the vehicles, these trucks can take a huge amount of punishment and can break through barricades and strike into enemy cars with ease. The handling is surprisingly adequate, too, as is the top speed in most cases. Only the acceleration (with the exception of the ambulance) is subpar. But if you need to run over or smash something, pick one of these monsters, like the fire truck.
//// Off-Road
The four off-road trucks offered here are excellent choices, and not just when you’re driving around the hills of Pawnee; they provide average or above ratings in all four driving categories, with particularly adept acceleration and handling. This is helpful, as they are quite bulky to maneuver, and you need the precision steering to swerve through narrow gaps. Don’t expect lithe bike or sports car–like handling, though. Where these vehicles really shine is their off-road capabilities; they don’t lose traction, so you can take them on any dirt trails they can fit down, or on the grass and railroad tracks, or through industrial gravel yards of the Wards and Brandon Docks, without fear of losing control. Get yourself a Tributary 1500 and try out the more wild of rides.
//// Muscle
Your first experience with muscle cars might be the 571 or Vespid models, which have rather tail-happy handling. Though they can be difficult to steer into a tight alley and require extra concentration when you’re going flat-out, they have exceptional top speed and acceleration; just watch out when you try to corner or handbrake. Practice your turns to avoid spinning out. Outside of heavy vehicles, these have a good toughness and are great to use in car combat tasks.
//// Motorcycle
Motorbikes are a thoroughly recommended mode of transportation, unless any kind of ramming is involved. They have incredible acceleration, meaning you should use them to reach locations as quickly as possible. Their small size means they can squeeze through gaps (such as raised bollards) that no other vehicle can manage. Move between traffic with ease. Take ramps and pitch the vehicle down slightly so both wheels land to minimize damage. Amaze yourself at the handling and top speed of the Sayonara bikes. And when you’re in Pawnee, use the Kuruhawa, as it has off-road capabilities.
//// Performance
These have enough top speed and acceleration to pin your head back in your seat; they are the best at long, straight highway driving. Performance vehicles have the very best ranking for these two statistics and have higher-than-average handling in most cases. The only time these vehicles suffer is their toughness, which isn’t good at all, making these the vehicle to chase a foe, but not one to take on a bunch of foes in vehicles. Though these vehicles have arguably better stats than sports vehicles, they are more expensive to purchase in your App, so you may wish to steal them instead, or use sports vehicles. Certain performance vehicles are also quite tail-happy and are sometimes wider than sports cars, making them a little trickier to control at the very limits of speed and handling. The Rosewood has the highest statistics of any vehicle, so it’s well worth obtaining just to try out.
//// Police
The police have five vehicles, but only four are accessible (you can’t pilot the helicopter): the ubiquitous patrol car, which offers reasonable acceleration, a good degree of handling, and a slightly faster Interceptor variant; the rebadged Polar (SUV) in white and blue; and the SWAT team SUV. Obviously, these vehicles won’t be available on your App, so you only get the chance to drive them when you steal them during a felony, when your Heat level is sufficiently high, and when you’re likely to be in danger. You’re more easily spotted driving a stolen cop car too!
//// Boats
There are three boats you can pilot on the water. Two of them are extremely good at maneuvering you from land mass to land mass, and the third is the water taxi, which is a slightly laborious process (though this vessel is extremely tough). The speedboat is wide and fast, while the patrol boat is slower but narrower. However, either of the latter craft are more than adequate for any water-based activities you have planned, and they certainly beat swimming!
/// Vehicles Statistics Table
The following table details the maneuverability of every vehicle you can drive, ride, or pilot. Here’s what everything means:
Car on Demand Price:The cash you need to pay to order this vehicle, once you unlock it.
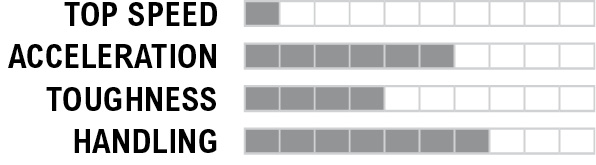
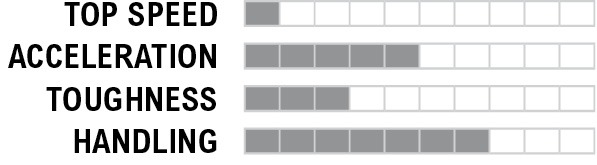
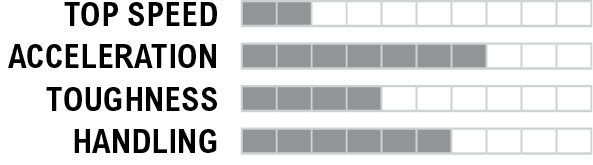
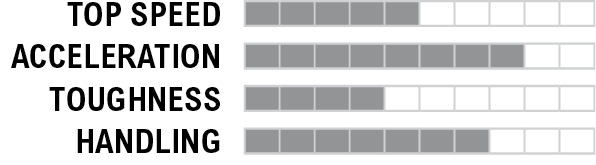
Top Speed:How fast the vehicle will travel after acceleration. The higher, the faster.
Acceleration:How quickly the vehicle increases in speed. The higher, the quicker.
Toughness:How much damage the vehicle can take from ramming or enemy fire. The higher, the tougher.
Handling:How adept and nimble the vehicle is at turning, skidding, and remaining on all wheels. The higher, the better.
Off-road:Whether this vehicle is capable off-road. If it isn’t, expect to spin your wheels and lose control more often.
//// Budget
Bogen 200
Price: Free

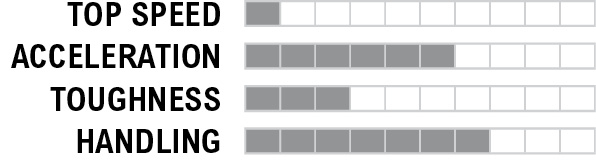
Cavale
Price: Free

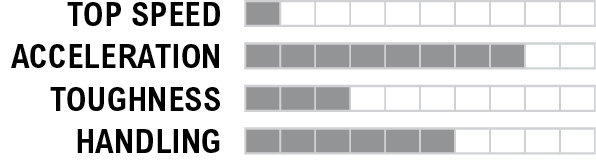
Cavale Taxi
Price: Only available in Chicago

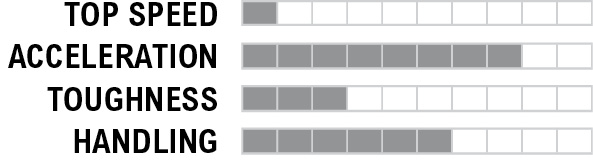
Crosscountry Series
Price: Free

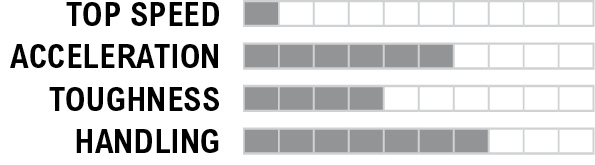
Crosscountry Taxi
Price: Only available in Chicago

Fasto
Price: Free

Kigan AWD
Price: Free

Koln 500S
Price: Free

Koln 500S Club Variant
Price: Faction Vehicle

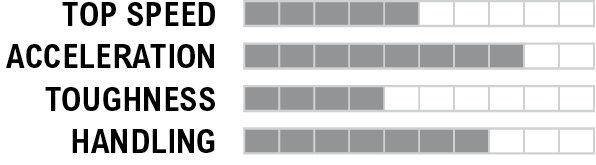
Landrock Van 1500
Price: Free

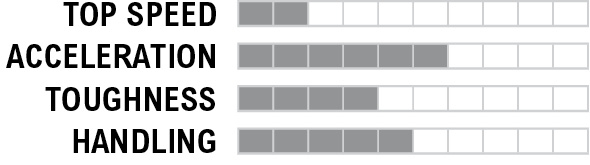
Landrock Van 1500 Workman
Price: Only available in Chicago

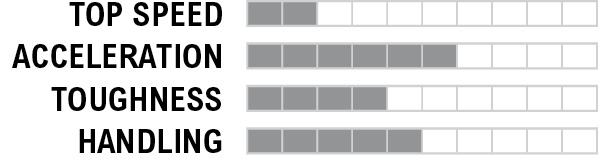
Landrock Van 1500 Camper
Price: Only available in Chicago

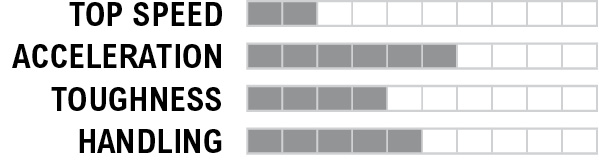
Landrock Van 1500 Taco Truck
Price: Only available in Chicago

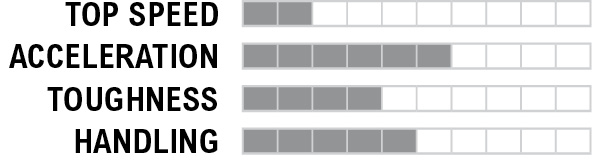
Landrock Van 2500
Price: Free

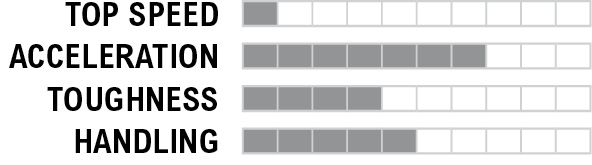
Landrock Van 2500 ctOS
Price: Only available in Chicago

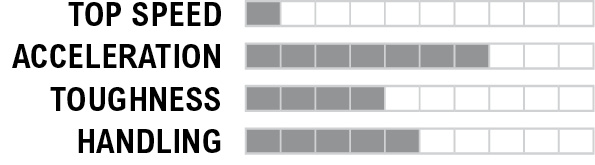
Landrock Van 2500 Workman
Price: Only available in Chicago

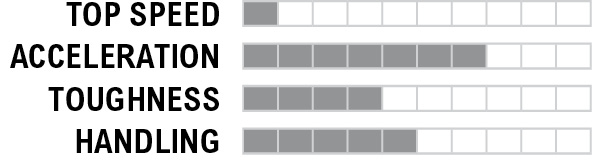
Landrock Van 2500 WKZTV
Price: Only available in Chicago

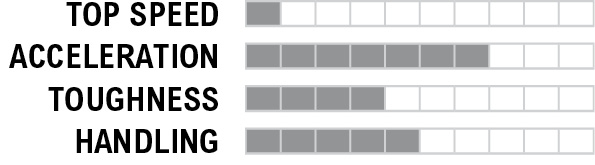
Leo
Price: Free

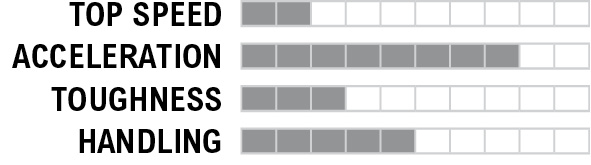
Lithium SP
Price: Free

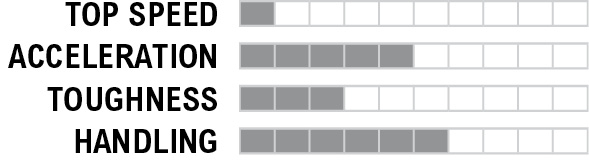
Philandra
Price: Free

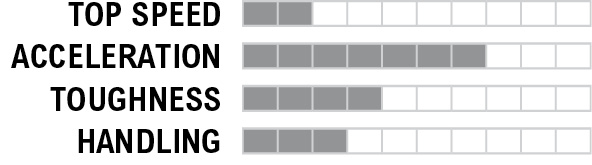
Relegate V6
Price: Free

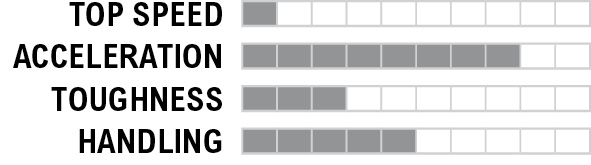
Relegater
Price: free

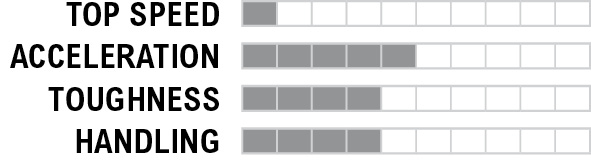
Relegater Ice Cream
Price: Only available in Chicago

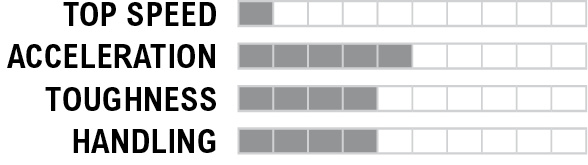
Sculptor 2.5R
Price: Free

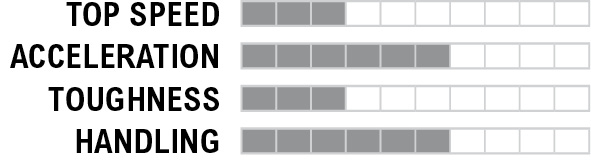
Sumitzu Auto 1.6
Price: Free

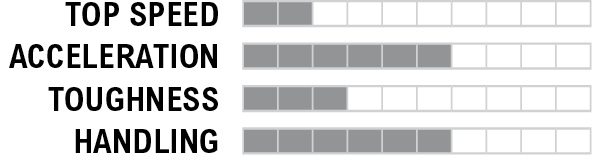
Talos
Price: Free

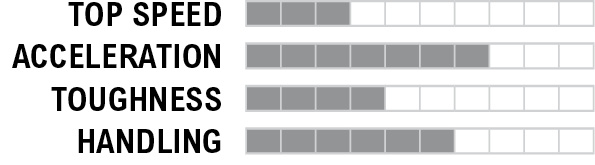
Talos Club Variant
Price: Faction Vehicle

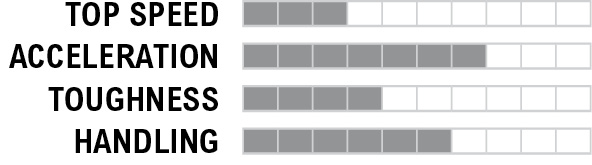
Vessel
Price: Free

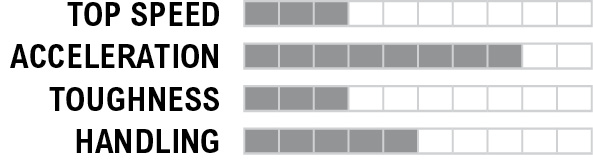
Vessel Viceroy Variant
Price: Faction Vehicle

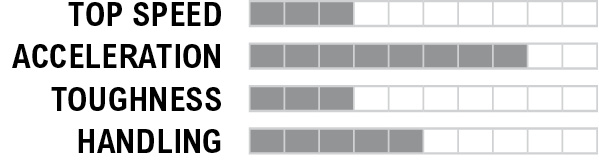
Vessel Taxi
Price: Only available in Chicago

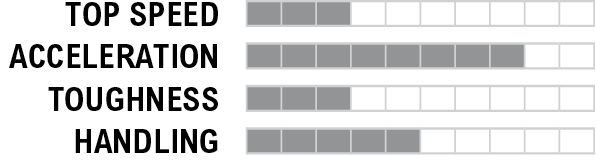
Woodie
Price: Free

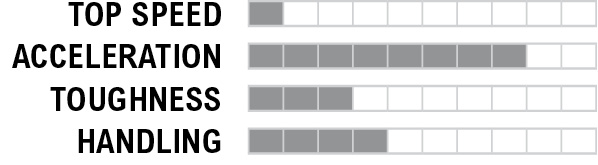
Zusume
Price: free

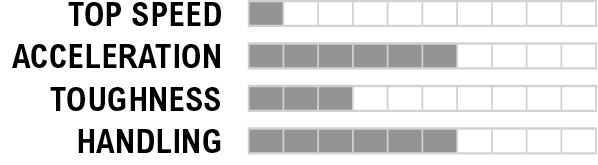
//// Heavy
Flatbed Truck
Price: free

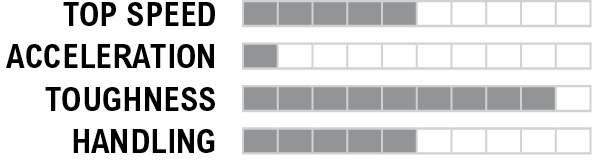
Flatbed Box Truck
Price: Only available in Chicago

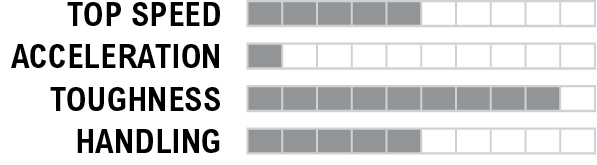
Flatbed Dump Truck
Price: Only available in Chicago

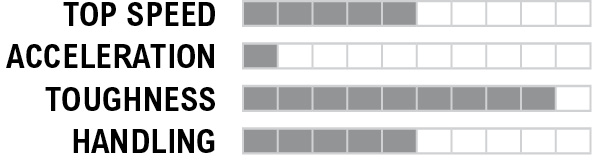
Flatbed Fuel Tanker Truck
Price: Only available in Chicago

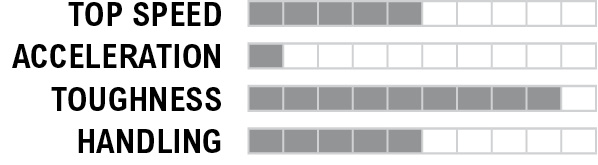
Garbage Truck
Price: Free

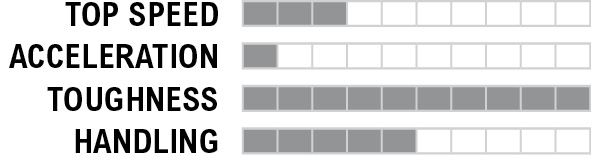
WKZ-TV Truck (Box Truck)
Price: $500

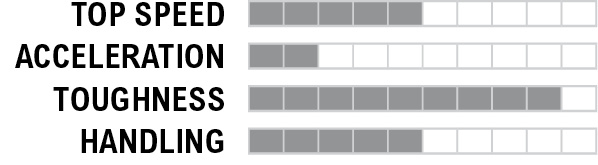
Box Truck
Price: Only available in Chicago

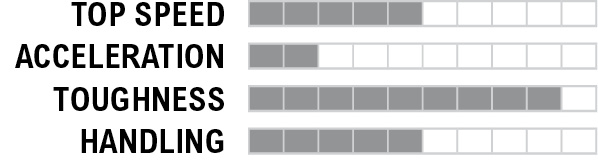
Cement Truck
Price: $1,000

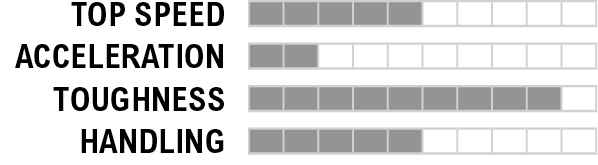
Ambulance
Price: $2,000

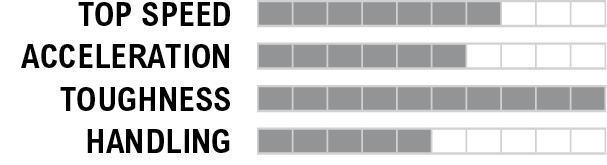
FireTruck
Price: $2,000

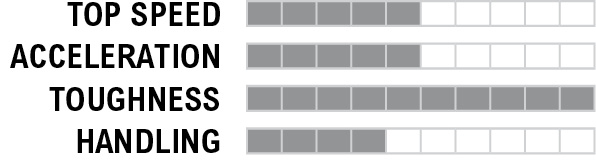
Convoy
Price: $3,000

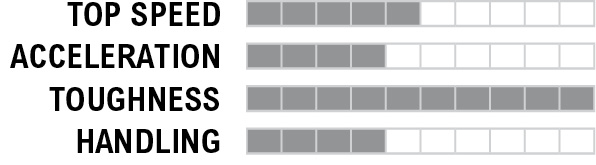
Convoy (Bank Truck)
Price: Only available in Chicago
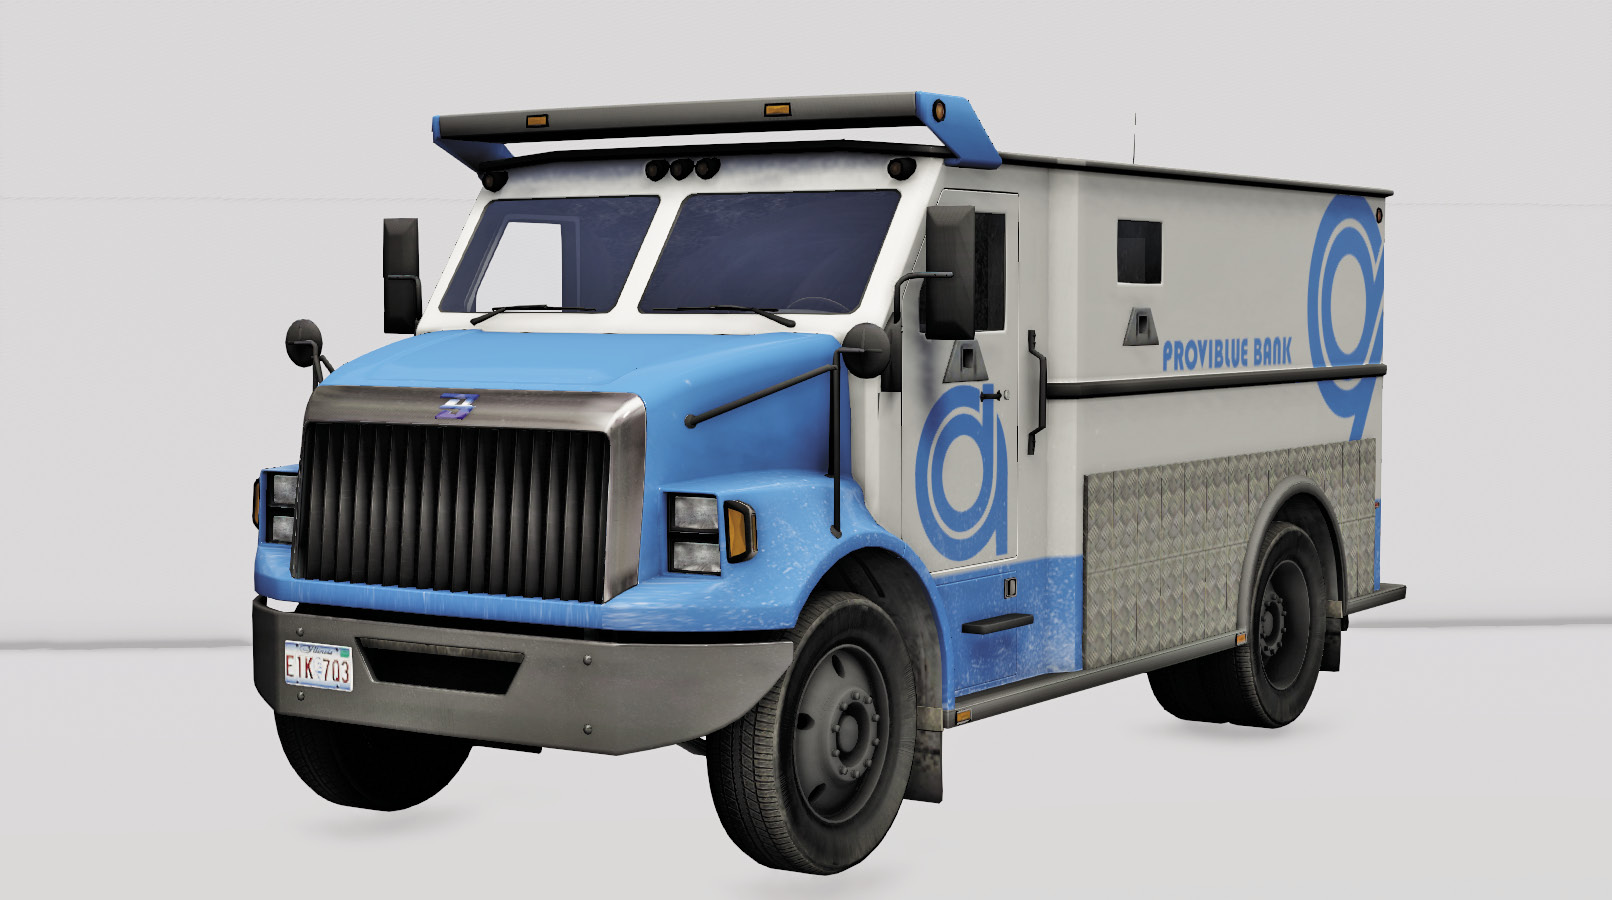
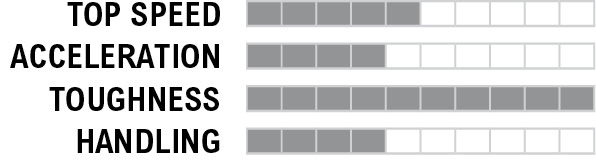
//// Motorcycle
Kodachi
Price: Free

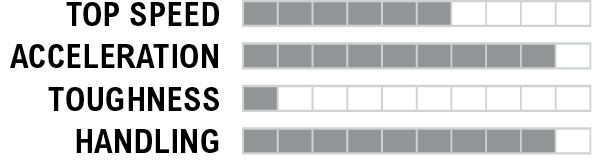
Sayonara LE
Price: PROGRESSION REWARD
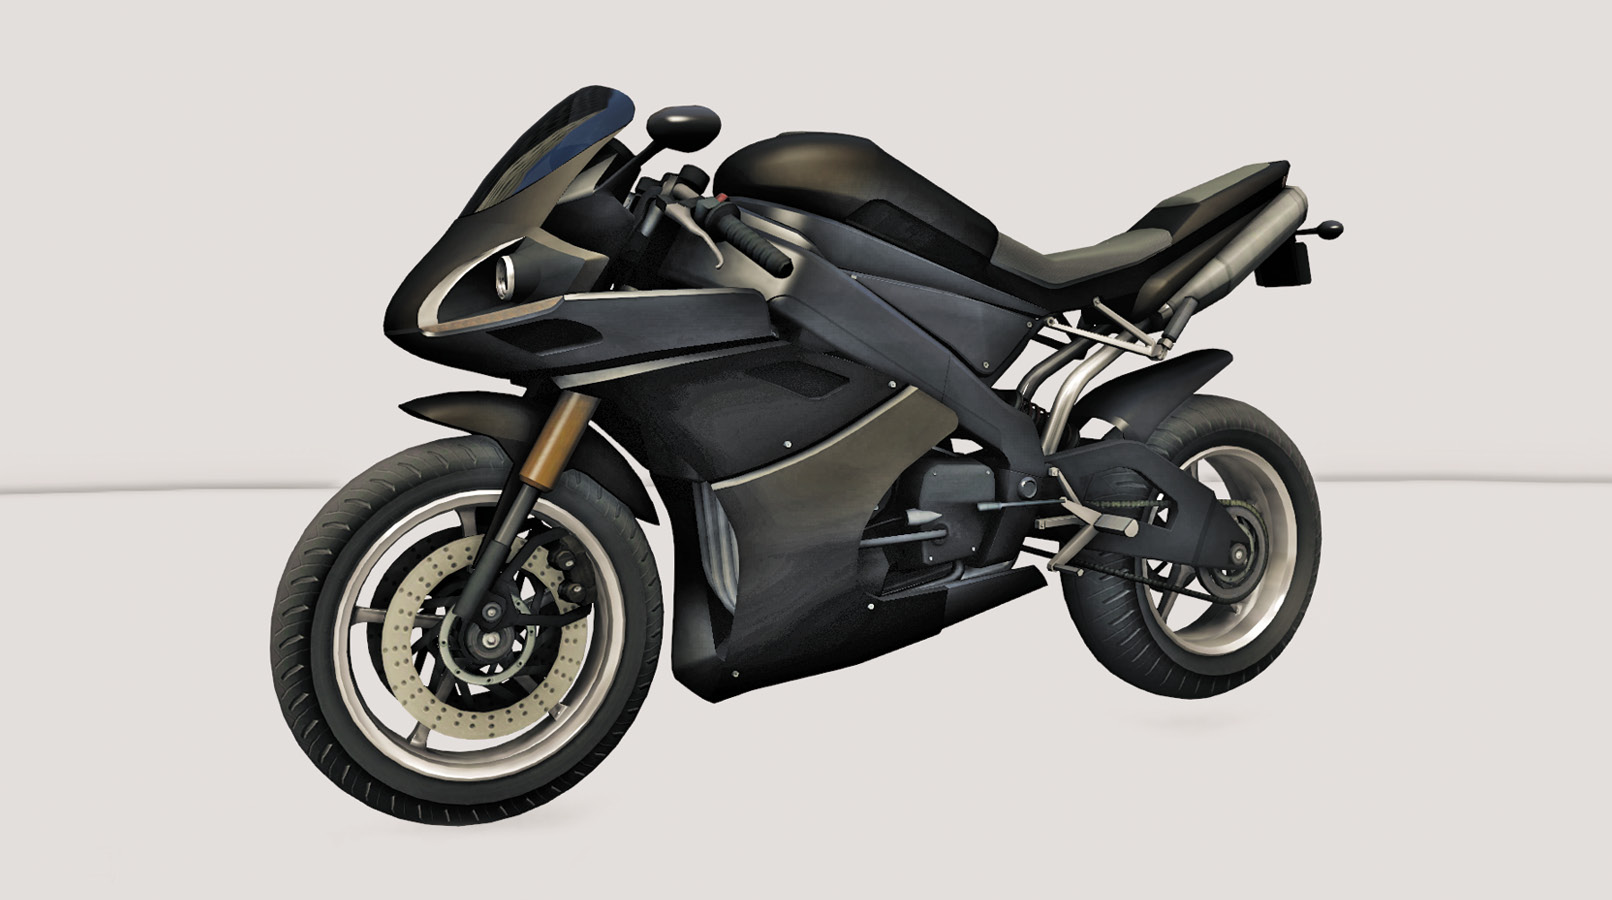
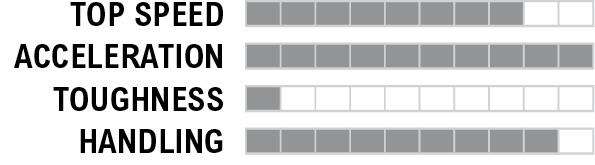
Kuruhawa Motorsport 450
Price: $2,000

Special: Offroad
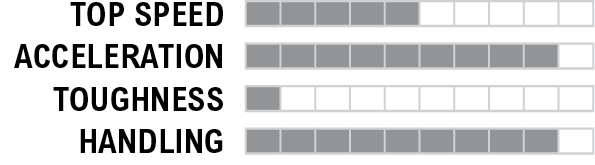
Chopper
Price: $5,000

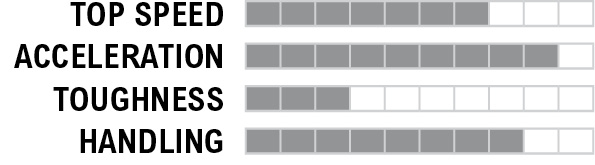
Sayonara
Price: $10,000

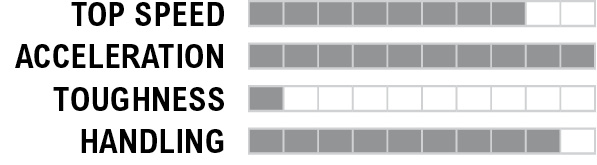
//// Muscle
571
Price: Free

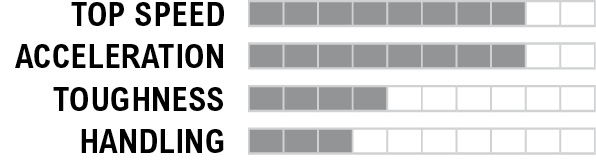
571 Militia Variant
Price: Faction Vehicle

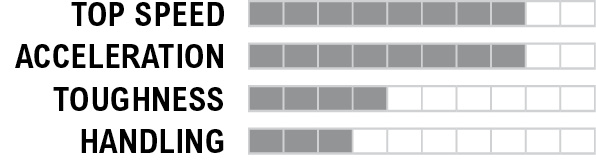
Adamant S-Series
Price: Free

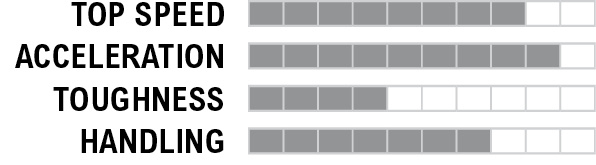
Gambino
Price: PROGRESSION REWARD

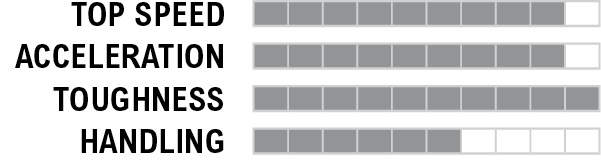
Magnate LE
Price: PROGRESSION REWARD
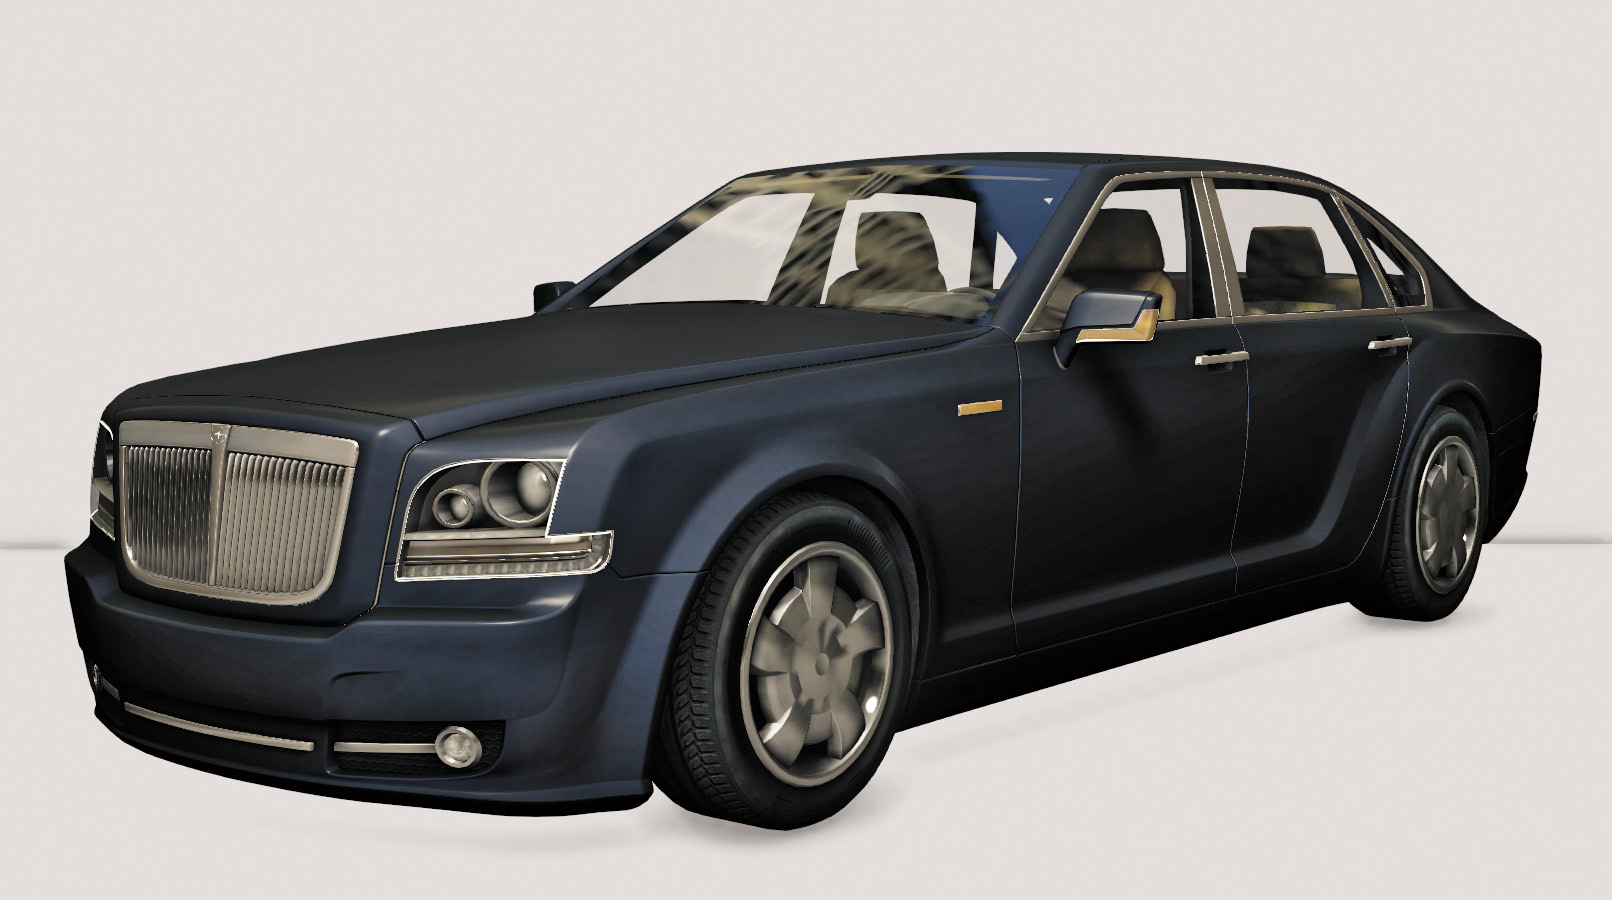
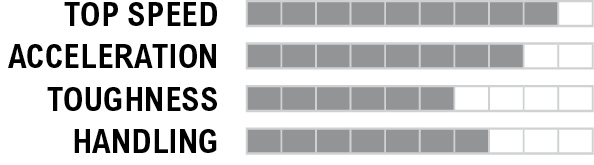
Vespid LE
Price: PROGRESSION REWARD
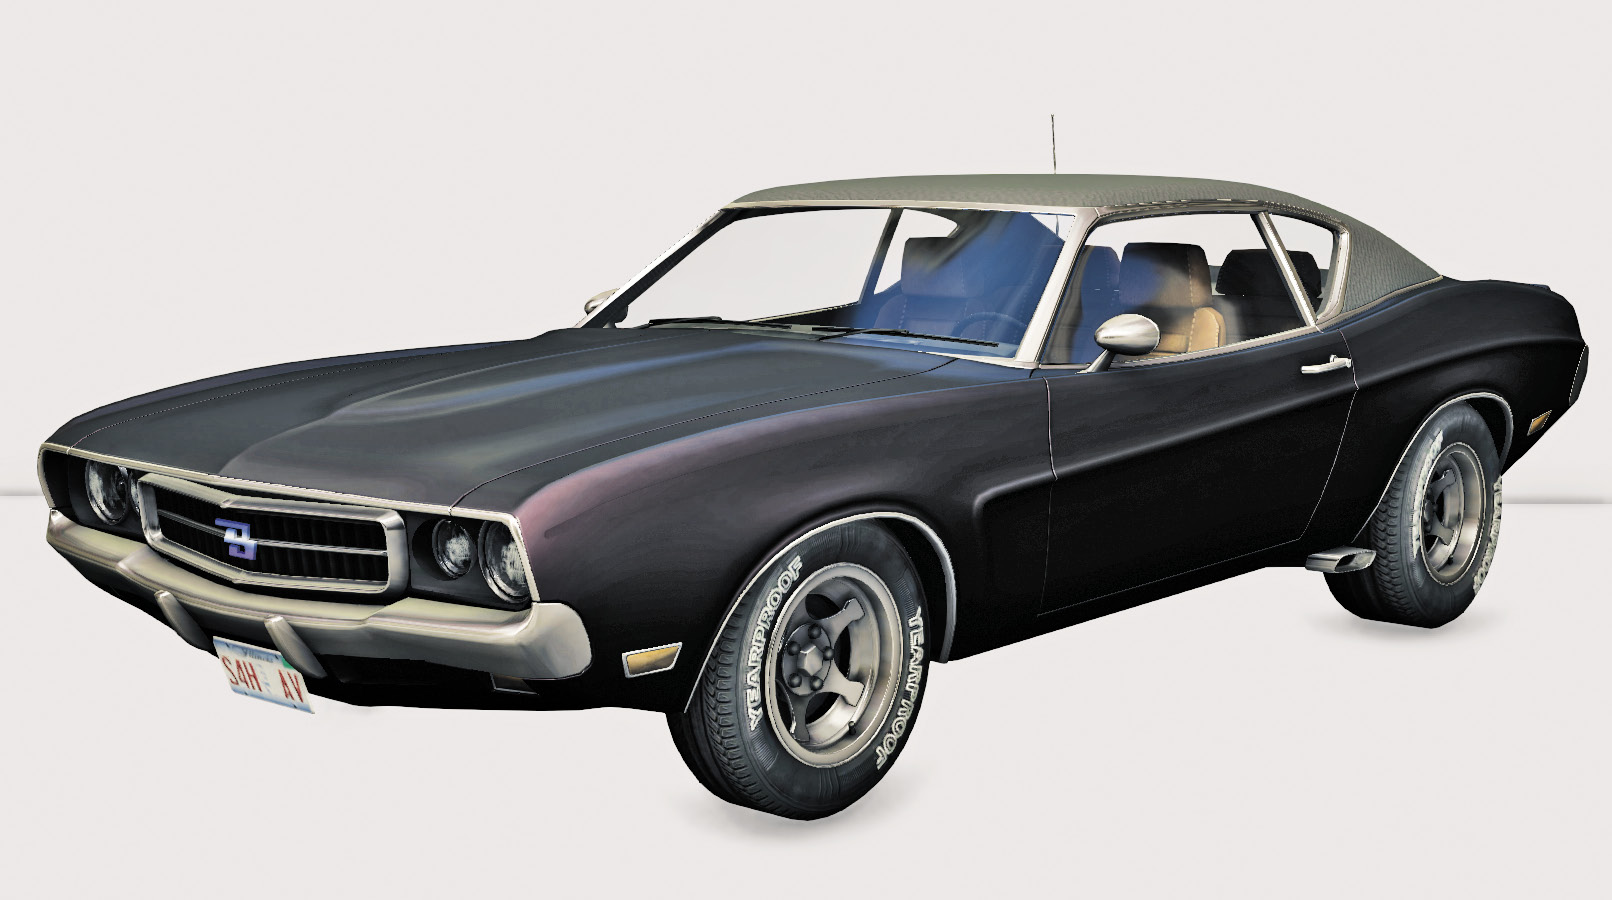
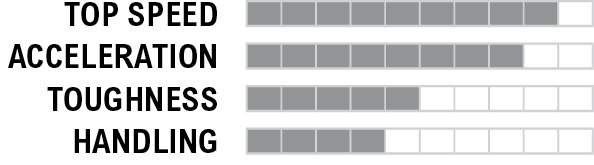
3.9T
Price: $5,000

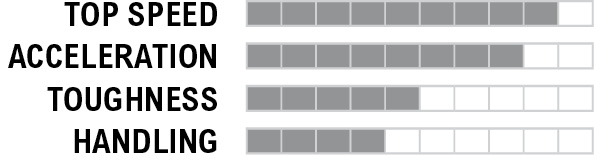
3.9T Viceroy Vatiant
Price: Faction Vehicle

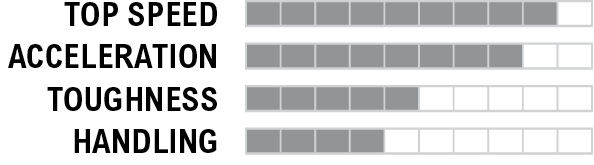
Haikal R
Price: $15,000

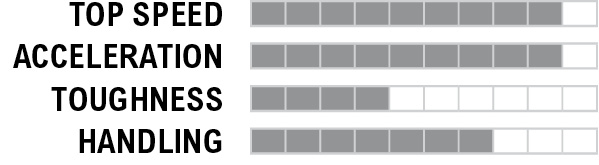
Vespid HMI
Price: $15,000

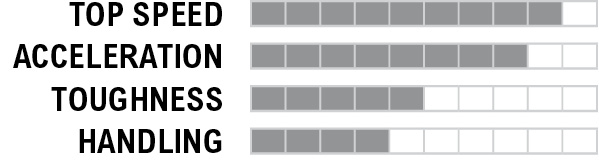
Magnate
Price: 25,000

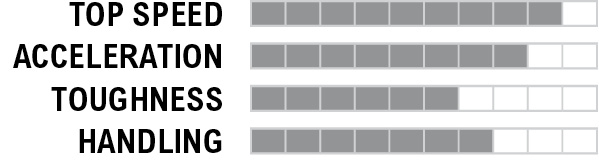
Sonarus LX
Price: $25,000

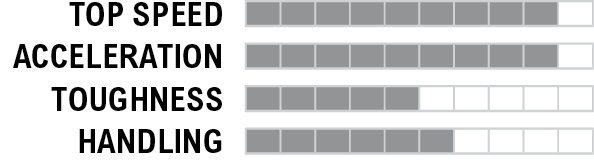
Vespid 5.2
Price: $25,000

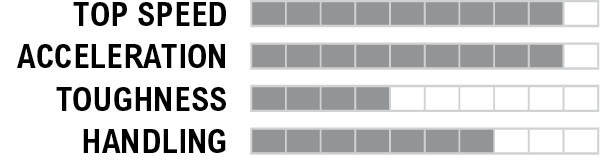
//// Performance
Boxberg LE
Price: PROGRESSION REWARD
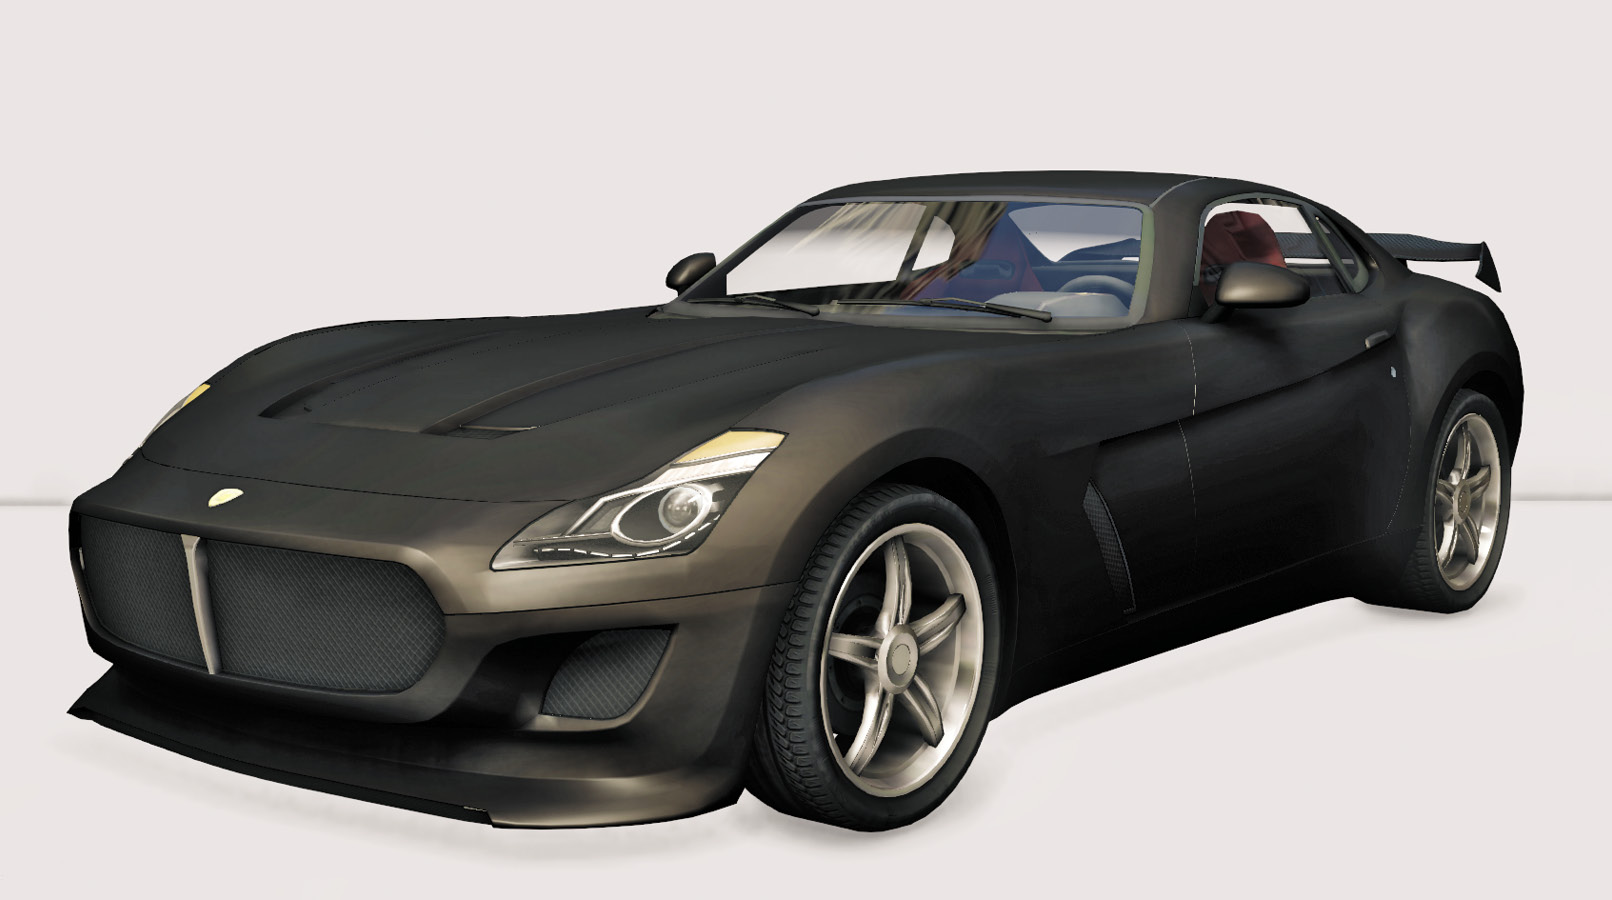
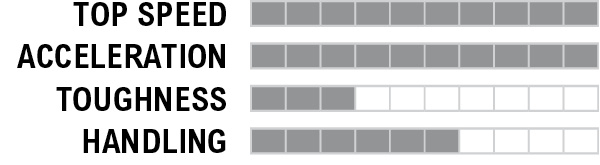
Livraga LE
Price: PROGRESSION REWARD
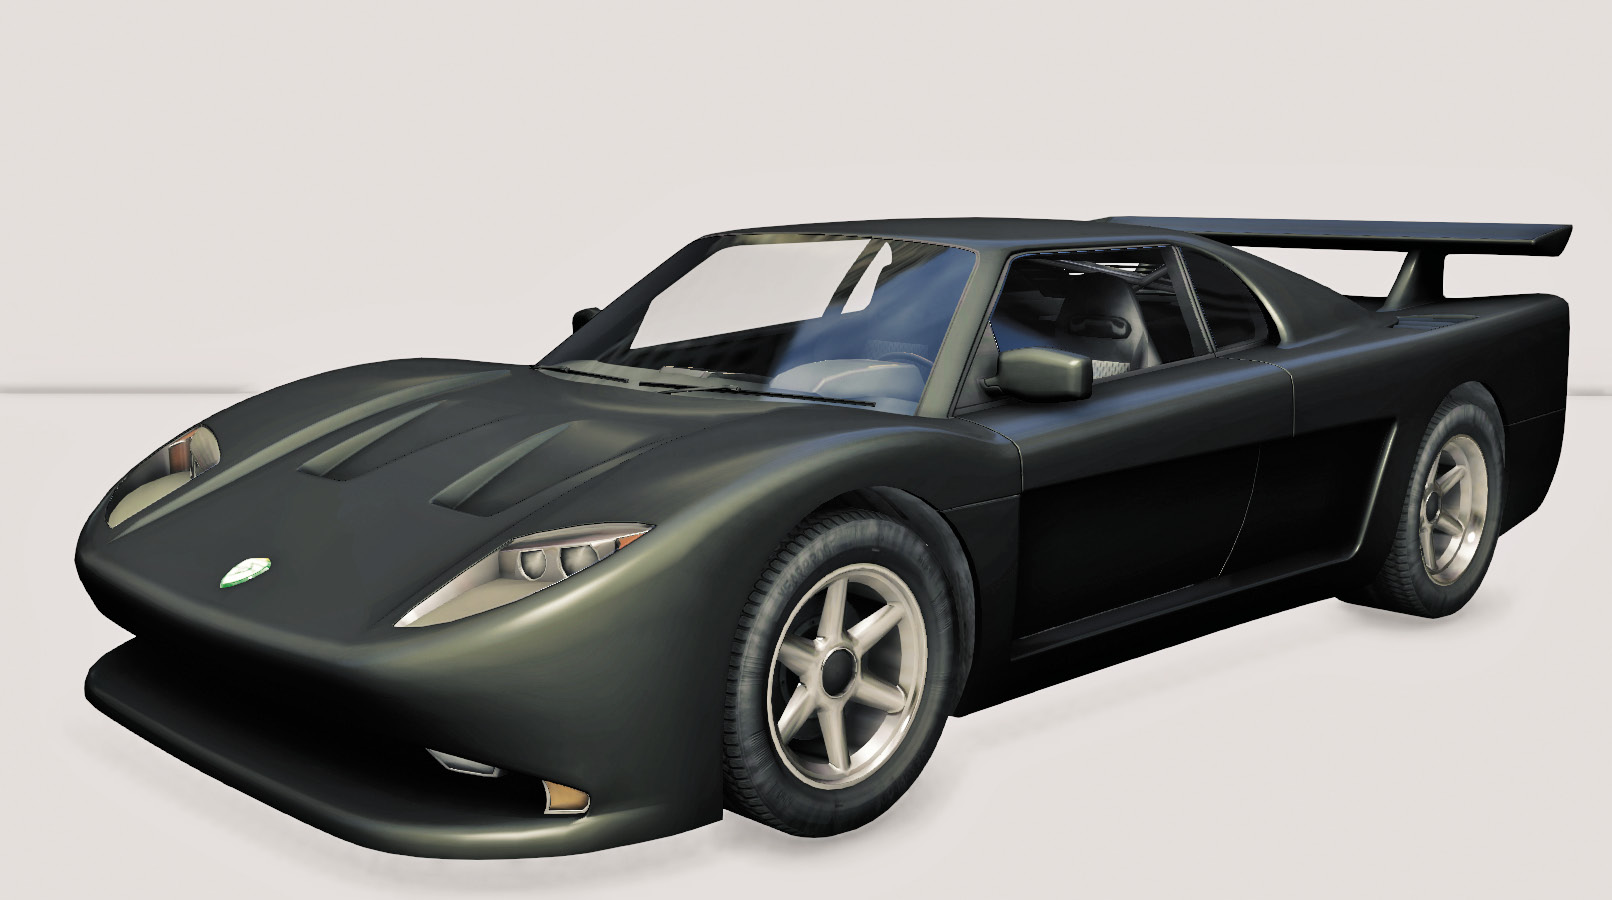
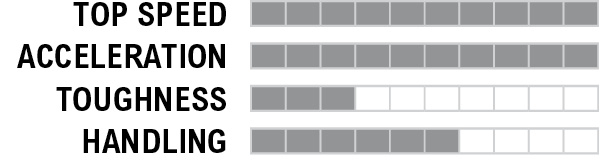
Papavero Stealth Edition
Price: SPECIAL REWARD

Special: stealth
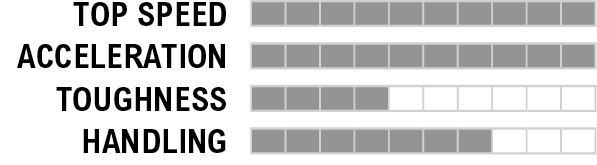
* This car has stealth capacity; reduces the enemy rate of detection vs the player
Rosewood
Price: PROGRESSION REWARD

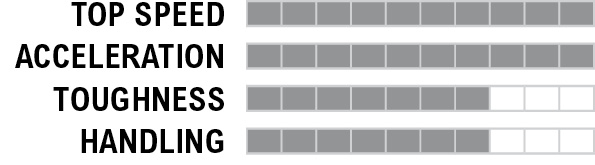
Amargosa Turbo
Price: $8,000

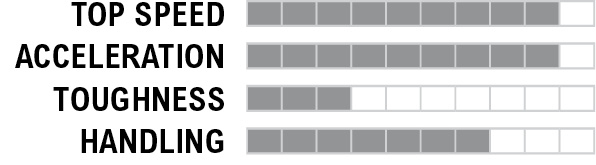
336-TT
Price: $20,000

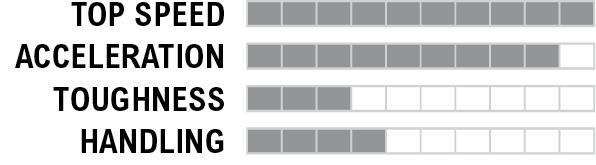
550S
Price: $20,000

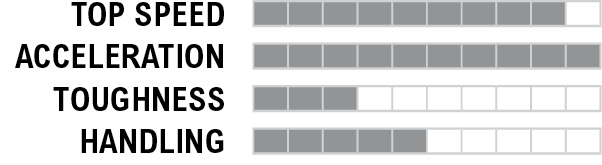
Boxberg R1
Price: $20,000
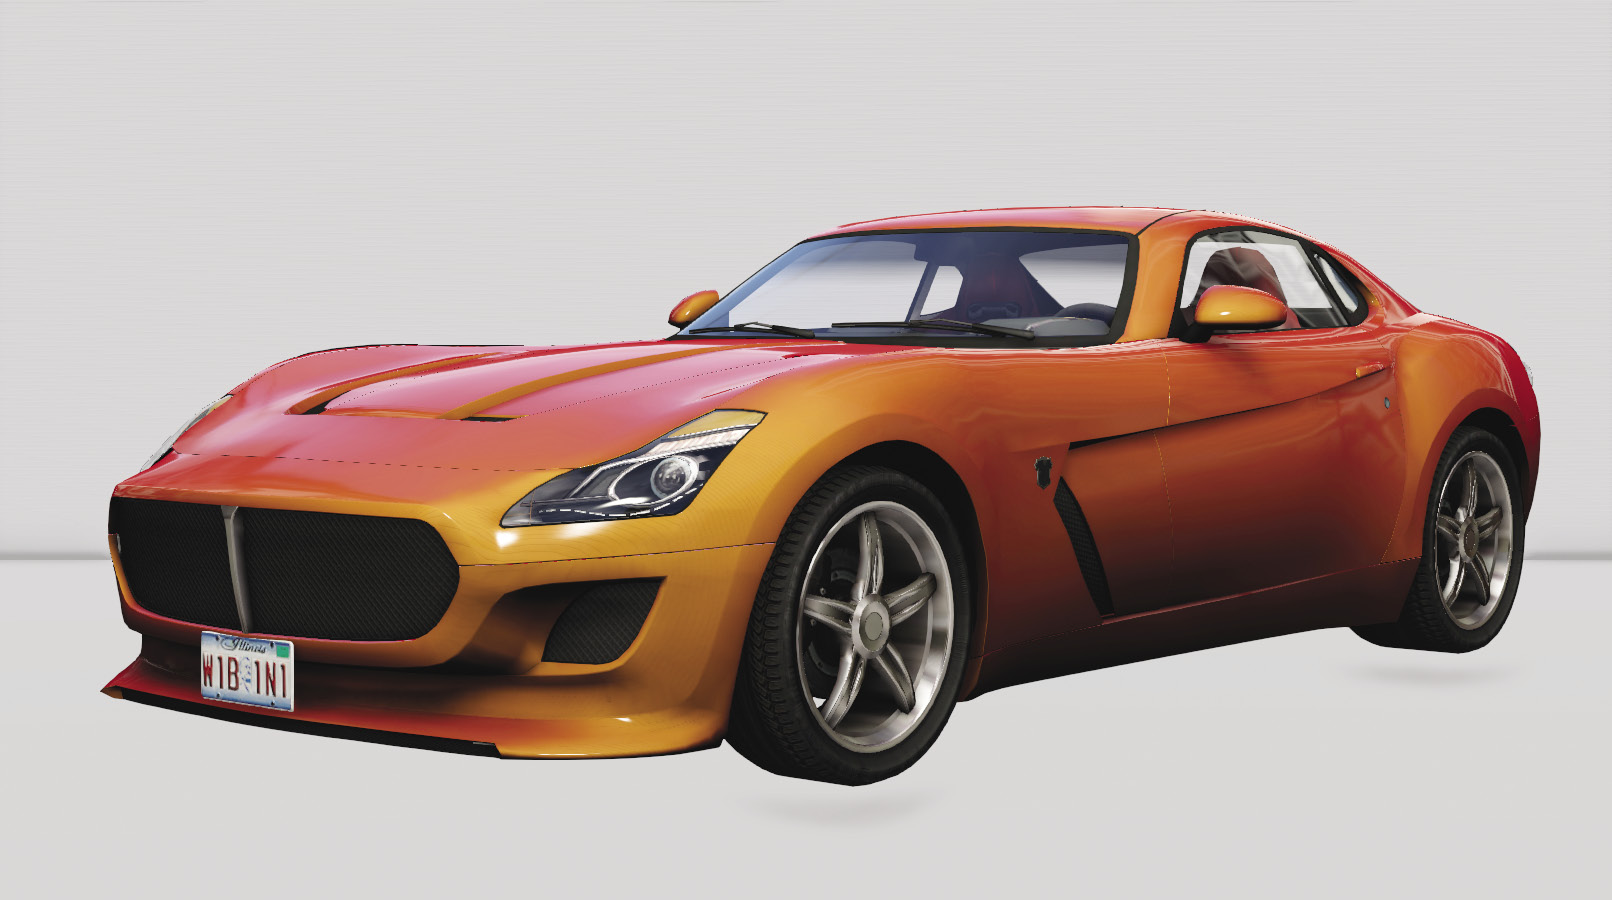
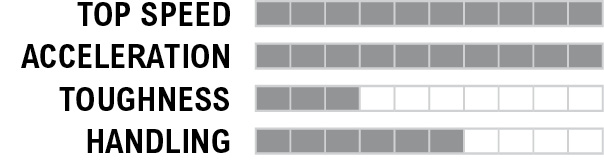
Papavero
Price: $50,000

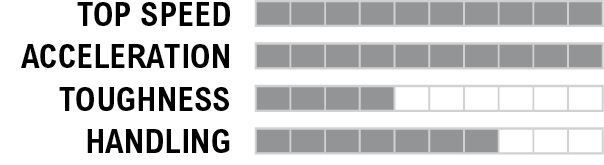
Scafati GT
Price: $50,000

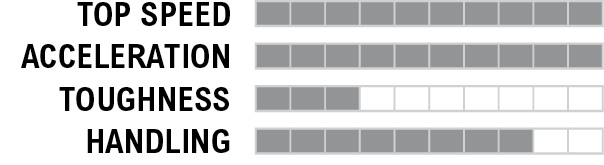
Livraga 350
Price: $200,000

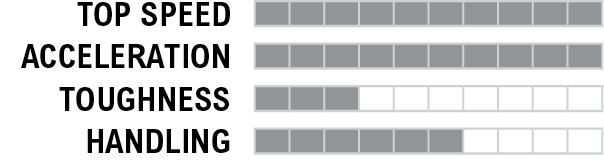
//// Sport
Core-T
Price: Free

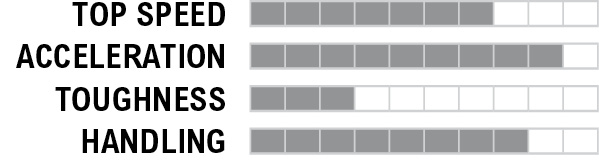
Kirscher
Price: Free

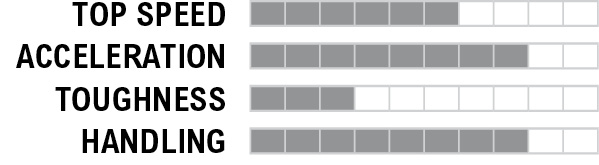
Luciano
Price: PROGRESSION REWARD

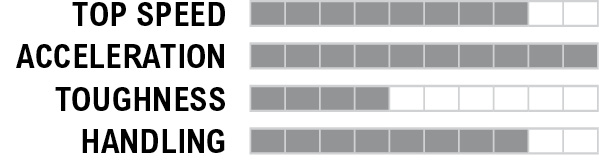
Rotor
Price: $2,000

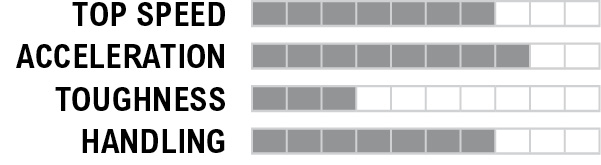
Zusume R
Price: $10,000

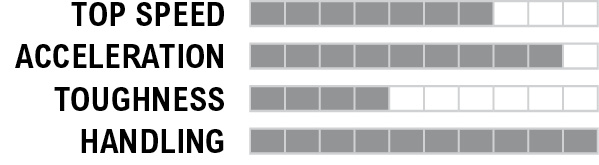
Carrozza
Price: $15,000

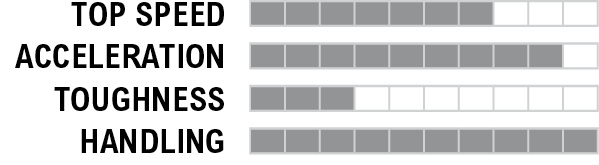
Sunrim
Price: $15,000

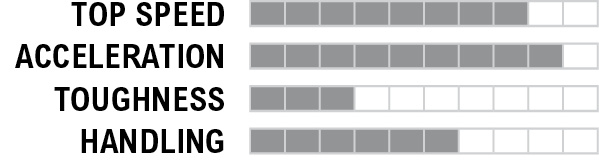
//// Truck
Steadfast 3000
Price: Free

Special: Offroad
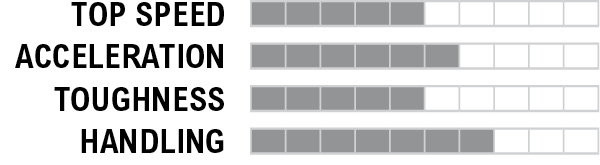
Steadfast 3000 Camper
Price: Only available in Chicago

Special: Offroad
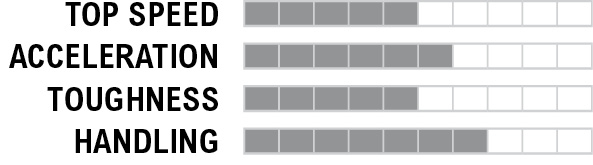
Steadfast 3000 Militia Variant
Price: Faction Vehicle

Special: Offroad
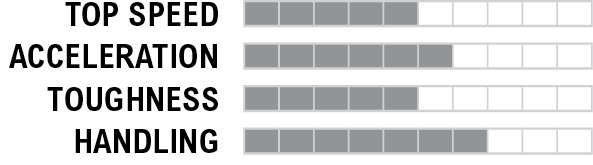
Tributary 3500
Price: $1,000

Special: Offroad
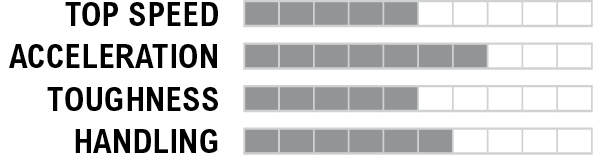
Polar
Price: $3,000

Special: Offroad
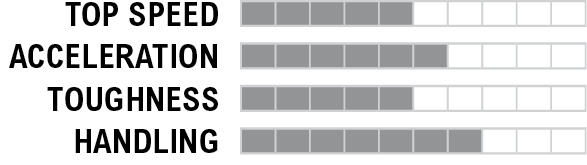
Polar Viceroy Variant
Price: Faction Vehicle

Special: Offroad
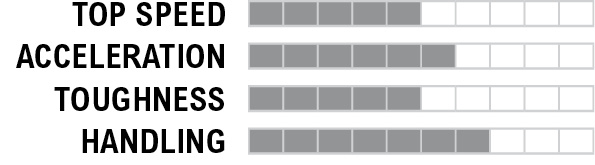
Tributary 1500
Price: $5,000

Special: Offroad
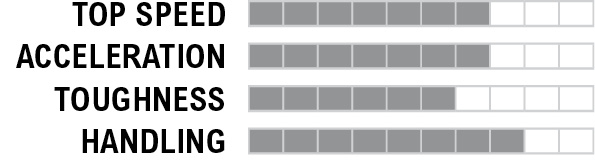
//// Boats
Speed Boat
Price: ONLY AVAILABLE IN CHICAGO

Special: WATER ONLY
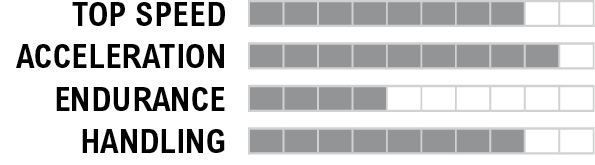
Fishing Boat
Price: ONLY AVAILABLE IN CHICAGO
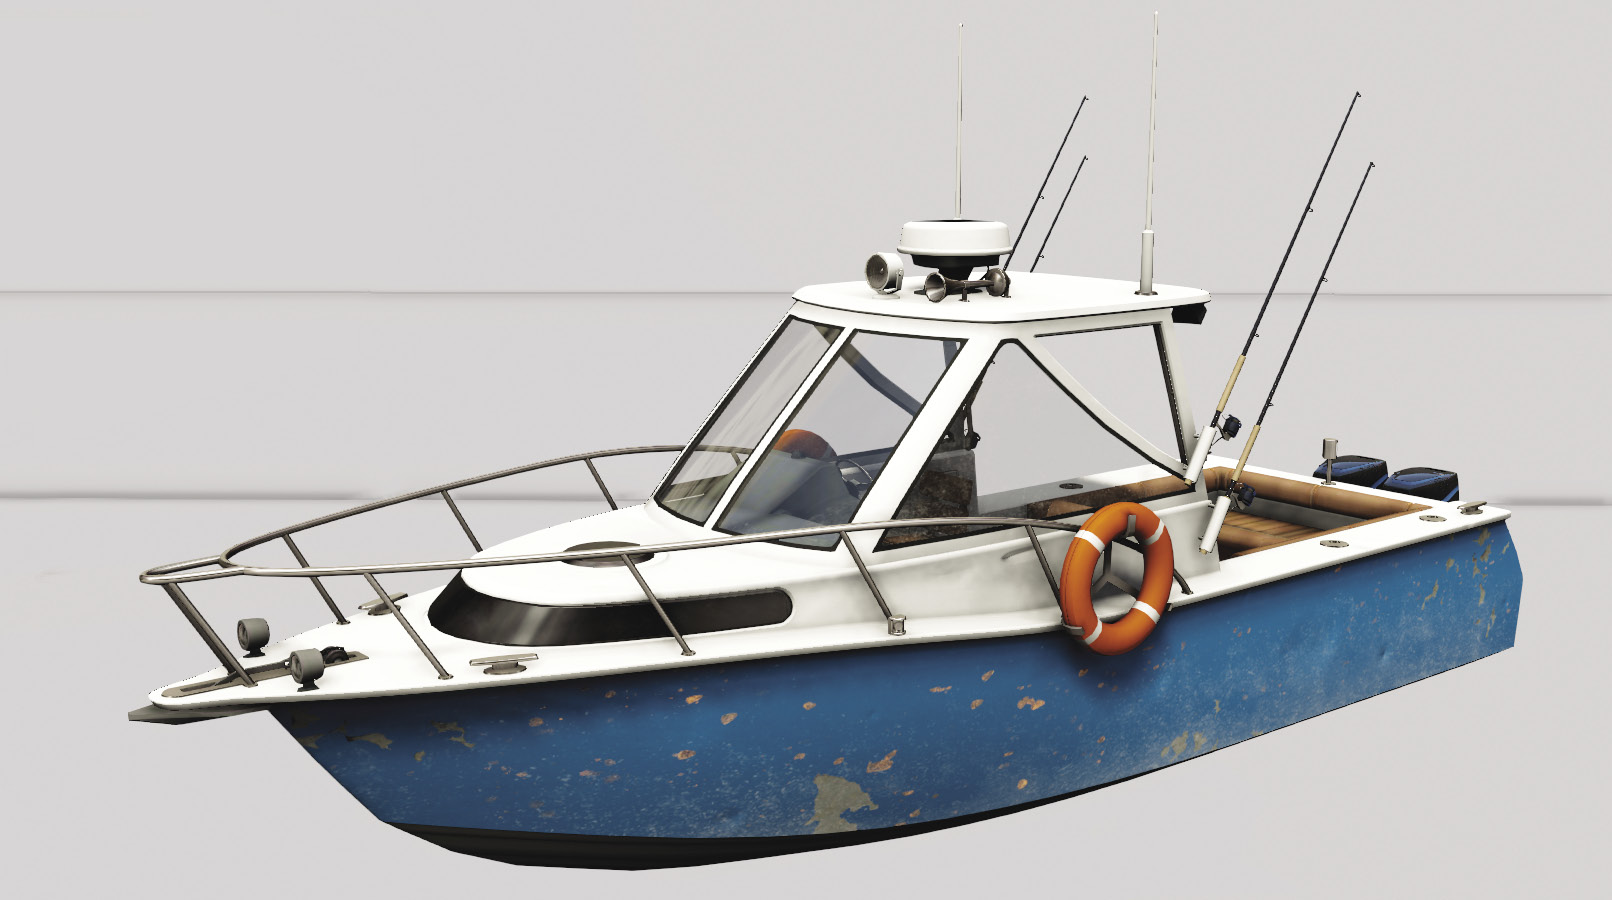
Special: WATER ONLY
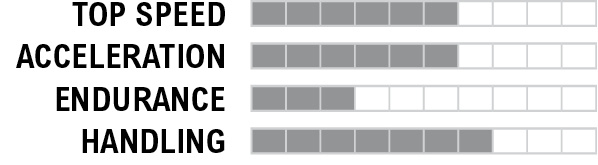
Water Taxi
Price: ONLY AVAILABLE IN CHICAGO
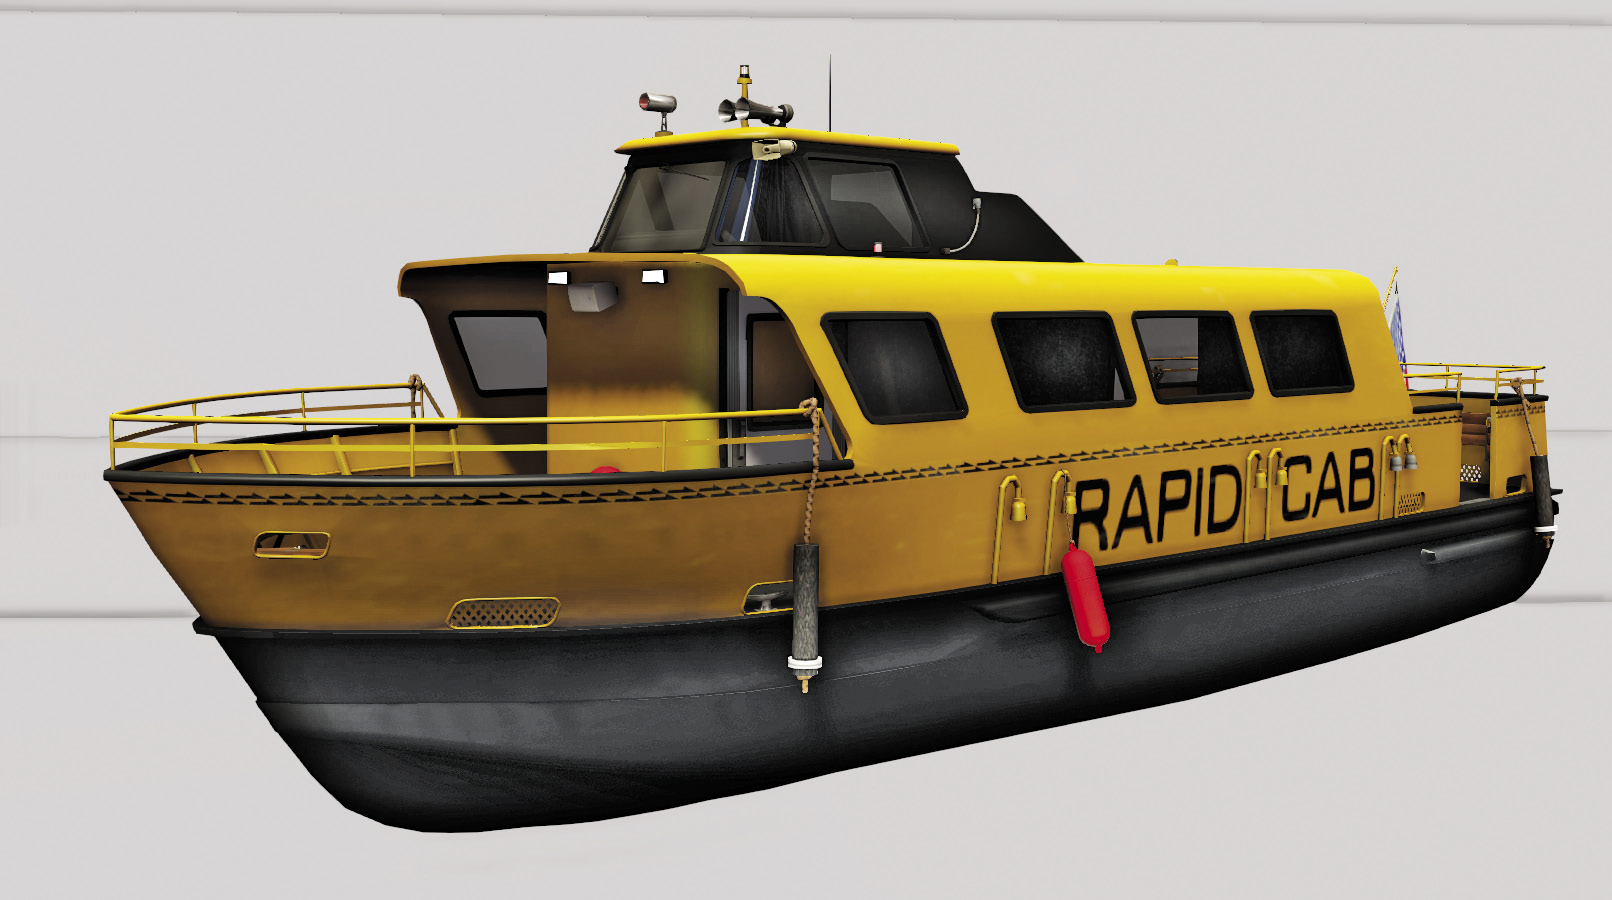
Special: WATER ONLY
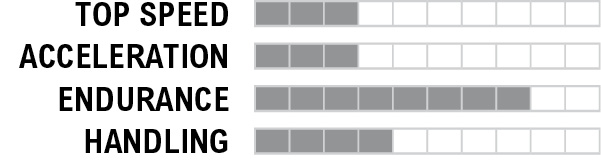
//// Police
Patrol Car (Cavale)*
Price: Only available in Chicago

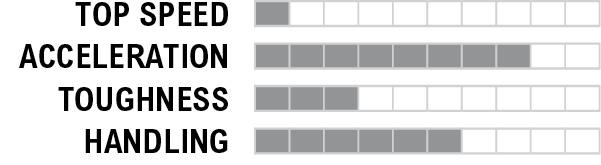
Patrol Car (Vessel)*
Price: Only available in Chicago

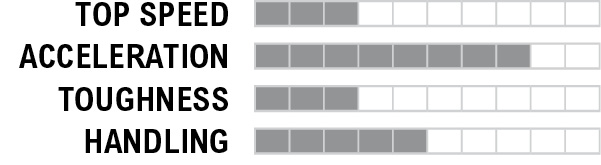
Police Interceptor (Sonarus LX)*
Price: Only available during Police Chase

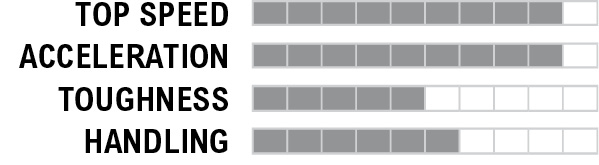
SUV (Polar)*
Price: Only available during Police Chase

Special: Offroad
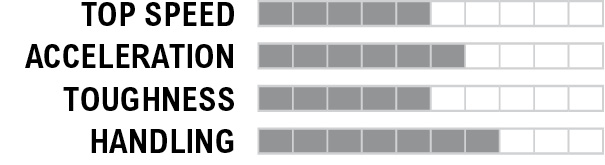
SWAT SUV (Polar)*
Price: Only available during Police Chase

Special: Offroad
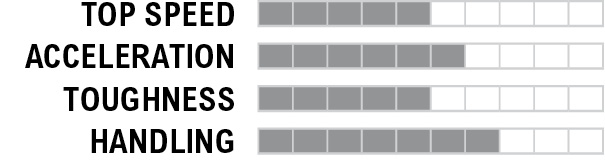
Police Helicopter
Price: Not available
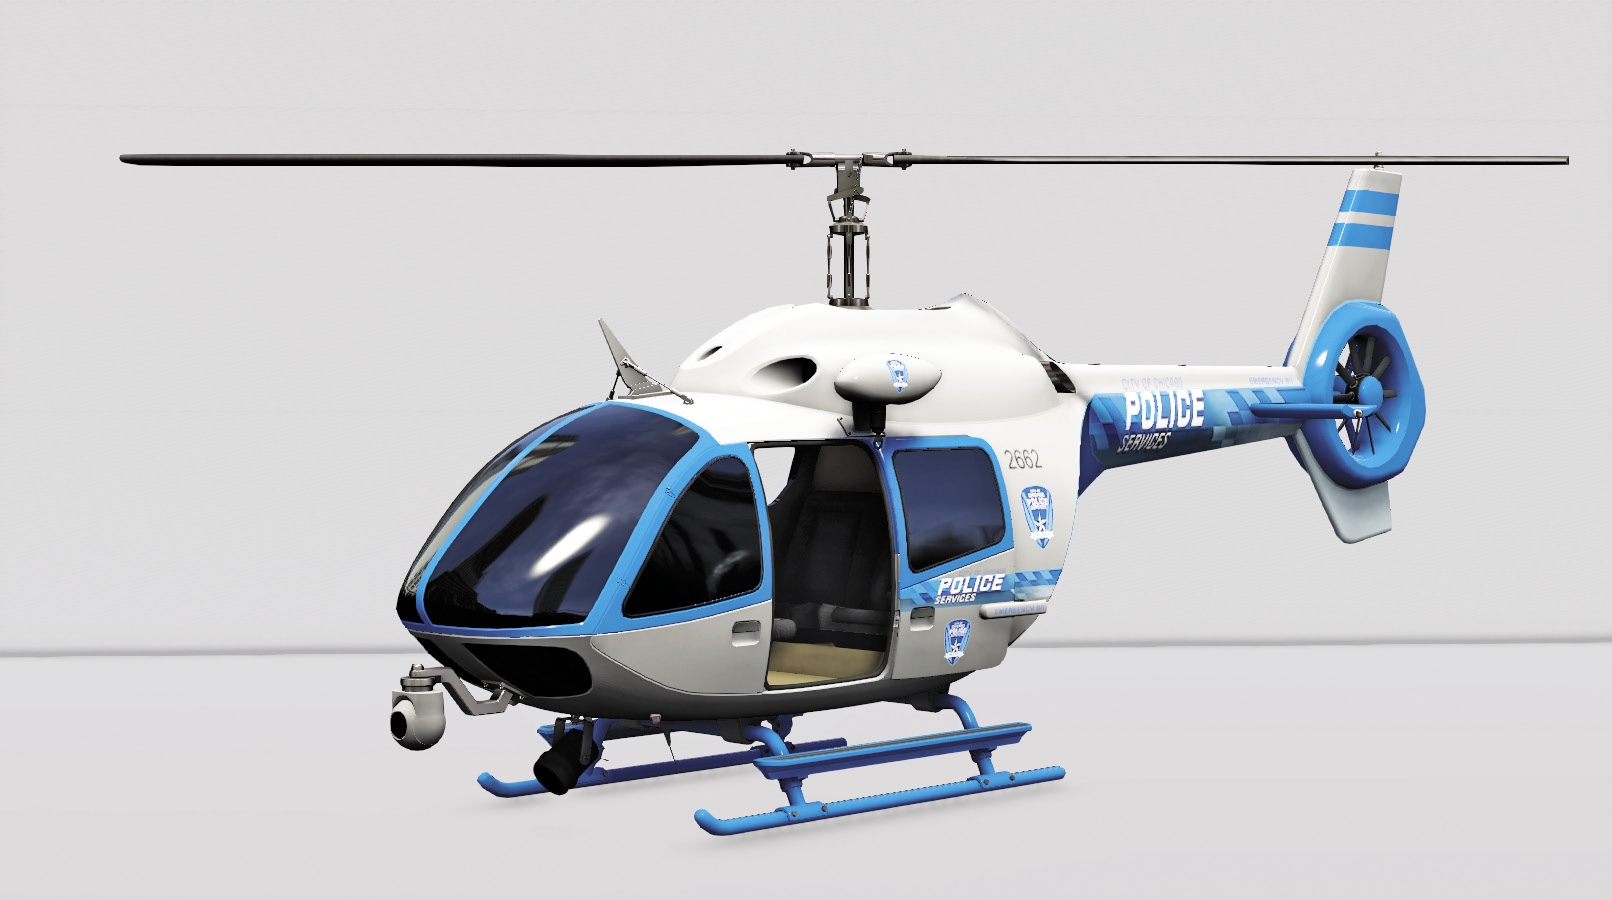
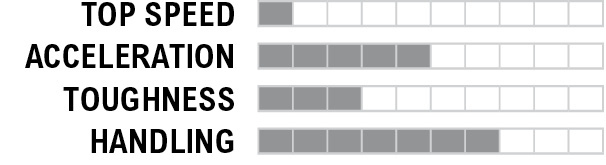
*Police vehicles have these statistics when you hijack and use them. They have numerous and different statistics — not available — when driven by the police
// TOP TEN VEHICLES
The sheer number of vehicles may make it difficult to choose. Drive at least the following vehicles during your adventure. Particular attention (and kudos) has been given to vehicles that are easily and cheaply available. These may not be your top ten, and your opinion may vary, but this provides a good starting point for vehicle acquisition:
//// 10 / Rotor
Strengths: Cheap, compact for narrow navigating, good top speed, acceleration, and handling.
Weaknesses: Not tough at all.
//// 09 / Steadfast 3000
Strengths: The quintessential off-road vehicle. Free to summon. Reasonably tough with good handling. Can go off-road without handling problems.
Weaknesses: Top speed isn’t great.
//// 08 / Tributary 1500
Strengths: Statistically the best Truck available. Good to great stats in all four categories. Very tough.
Weaknesses: Quite bulky, so pay extra attention when dodging or entering narrow areas.
//// 07 / Ambulance
Strengths: As tough as an armored truck but with better handling. Amazing toughness, great top speed, and good acceleration. Can be climbed on to reach higher areas. Cheap price.
Weaknesses: Handling isn’t precise, bulky.
//// 06 / Sayonara
Strengths: Nothing is more nimble on the roads. Insane acceleration and handling. Great for squeezing through gaps in scenery.
Weaknesses: Terrible toughness. Easy to get knocked off or fall from one.
//// 05 / Luciano
Strengths: The best acceleration, fantastic top speed and handling. Very purple.
Weaknesses: Moderate toughness. Not available until later in the game.
//// 04 / Gambino
//// 03 / Rosewood
Strengths: Maximum top speed and acceleration. Above-average toughness and handling; arguably the best all-round option for any situation.
Weaknesses: Quite long and not supremely nimble. Not available until later in the game.
//// 02 / Zusume R
Strengths: Statistically the best vehicle to use until end-game vehicles are unlocked. Sublime handling and great acceleration.
Weaknesses: Toughness isn’t great. Easy to confuse with the budget model; steal the one with the spoiler!
//// 01 / Papavero Stealth Edition
Strengths: Maximum top speed and acceleration, coupled with great handling. A unique stealth ability reduces detection by enemies!
Weaknesses: Only average toughness. With great power comes great responsibility; easy to crash if you’re irresponsible or less than skilled.