
Watch Dogs Guide INVESTIGATIONS
_WEAPONS TRADE
OBJECTIVES
|
 Reach the Fixer warehouse
 Eliminate the Fixers
 Prepare for enemy reinforcements
 Eliminate the reinforcements
 Prepare for enemy reinforcements
 Eliminate the Fixer bosses
 Eliminate the remaining Fixers
1. CRATE COLLECTING
 Location / Chicago // All Districts
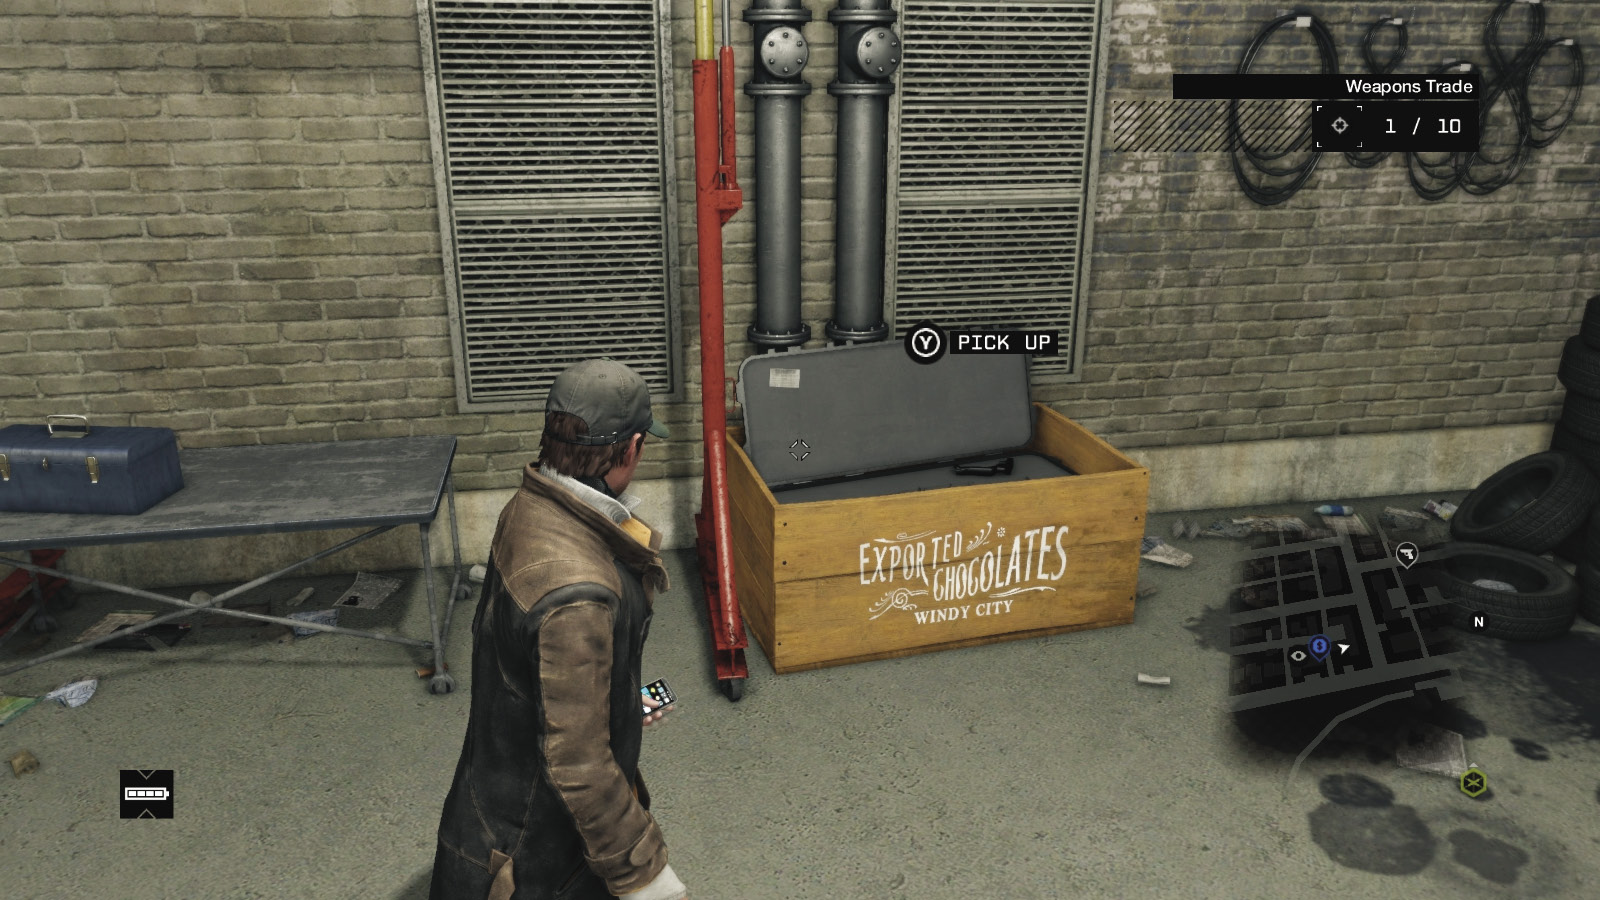
During your time in Chicago, you may come across a large shipping crate brimming with illegal weaponry! These are usually in garages or lockups and require you to hack a door switch, which links to a garage door you can open. Inspect the box, as these are remnants of an illegal weapons trade.
Each of the mysterious crates has crafted tools, and seven garages feature a nearby audio component with a recording to add to your Audio File collection. Scan the crate so the total number of weapons crates increases. There are nine to find. Expect Focus Boost Pills, frag grenades, ctOS scans, Jam Coms, and Blackouts inside crates (one type of item per crate).
Parker Square / Shipping Crates // Illegal Weapon Caches
Weapon Crate 01
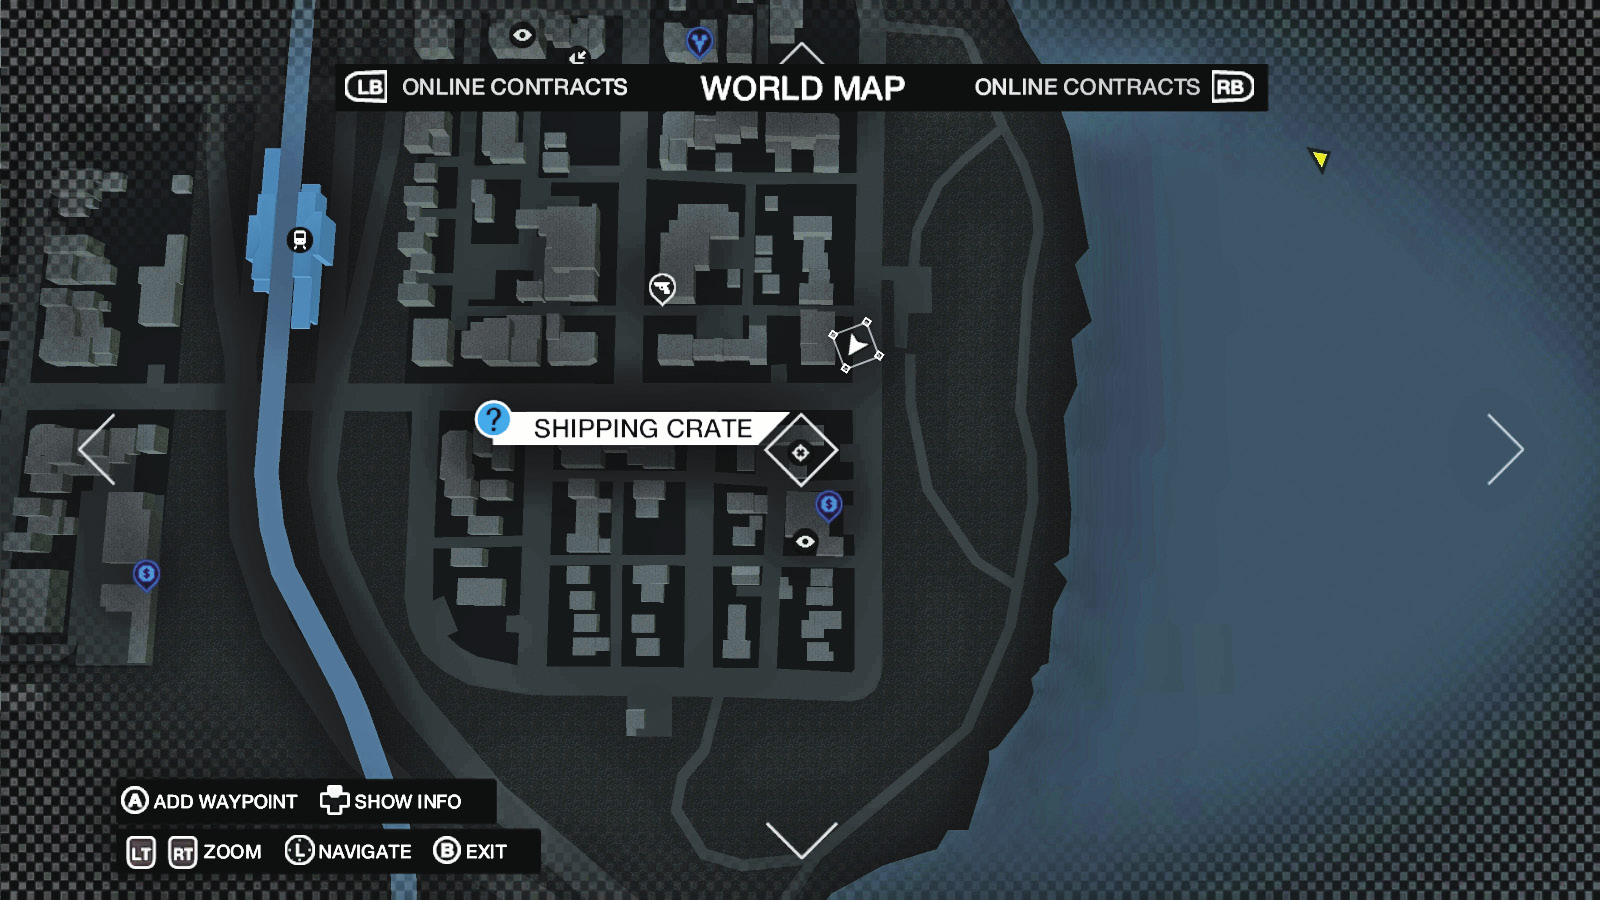
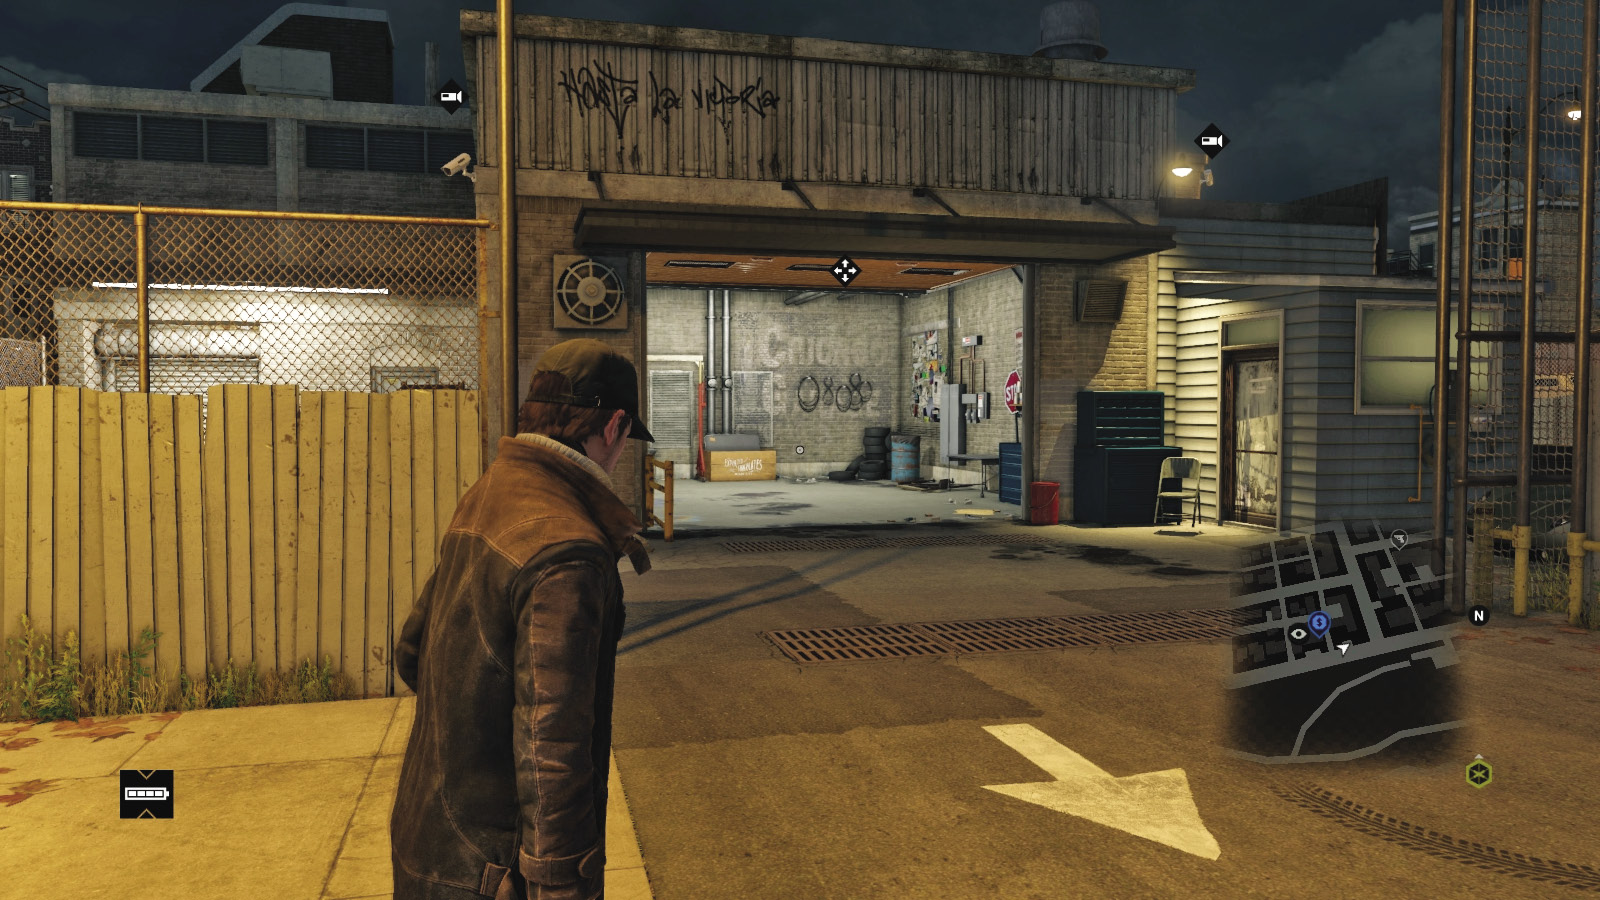
Location / Parker Square // Southeast Corner Garage

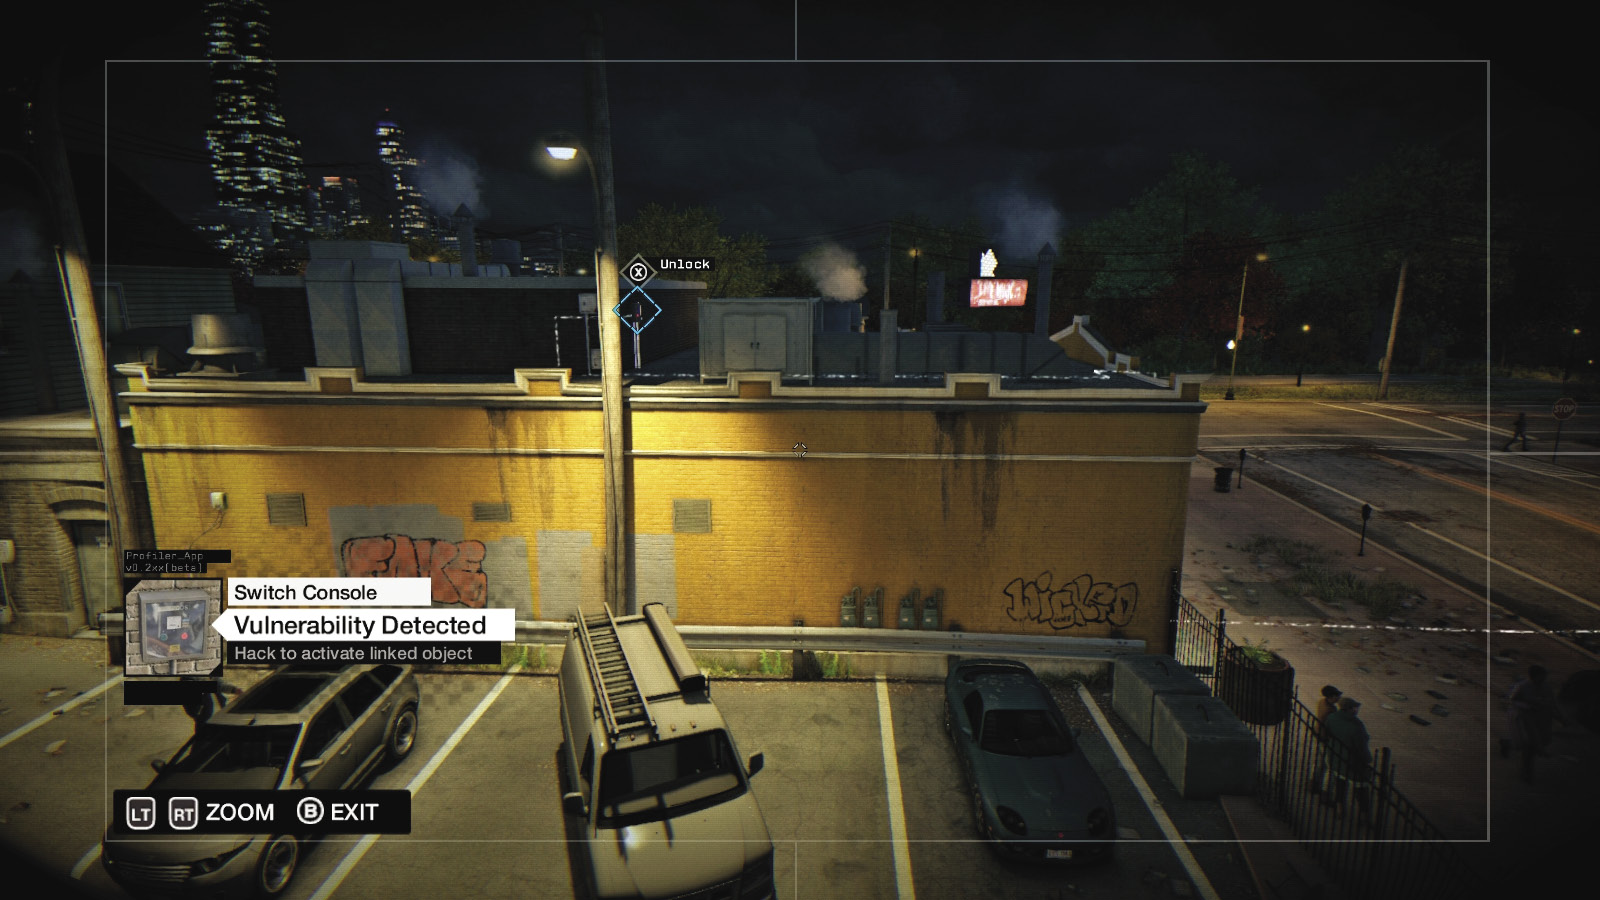
Close to the narrow park area in southeast Parker Square is a garage on the corner of a road. Head to the east side of the premises to the doors. Unlock them by using security cameras, looking for the data flow heading across the road to the north to a switch console atop a low-roofed “live music” yellow building with red awnings. Then open either the door or garage door to access the interior. Scan the crate and Audio Log.
The Wards / Shipping Crates // Illegal Weapon Caches
Weapon Crate 02
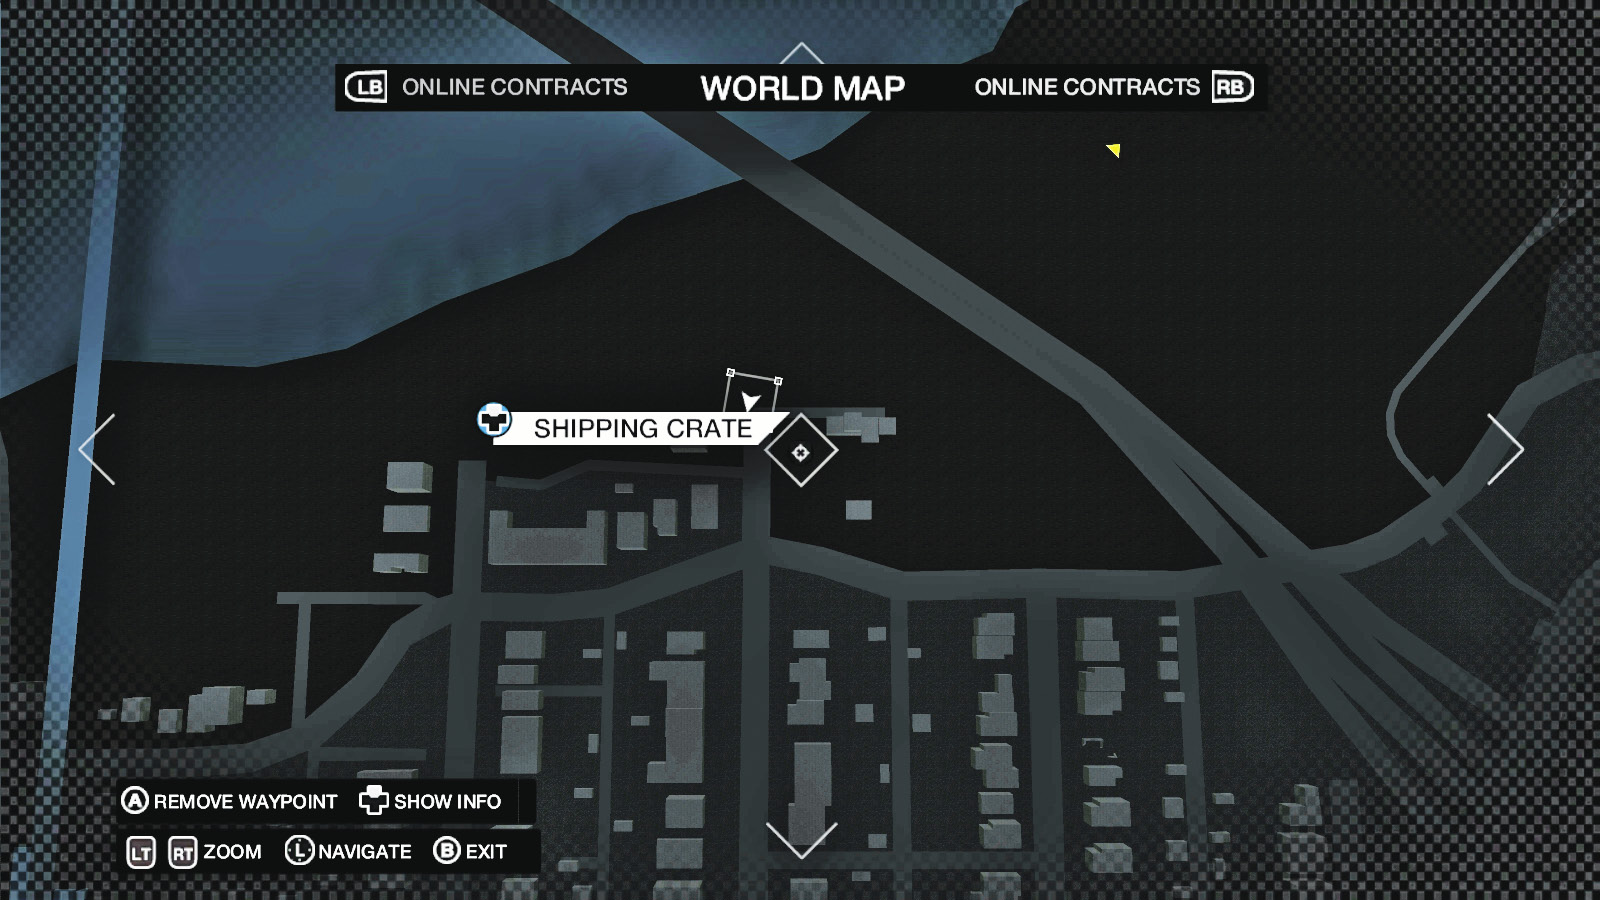
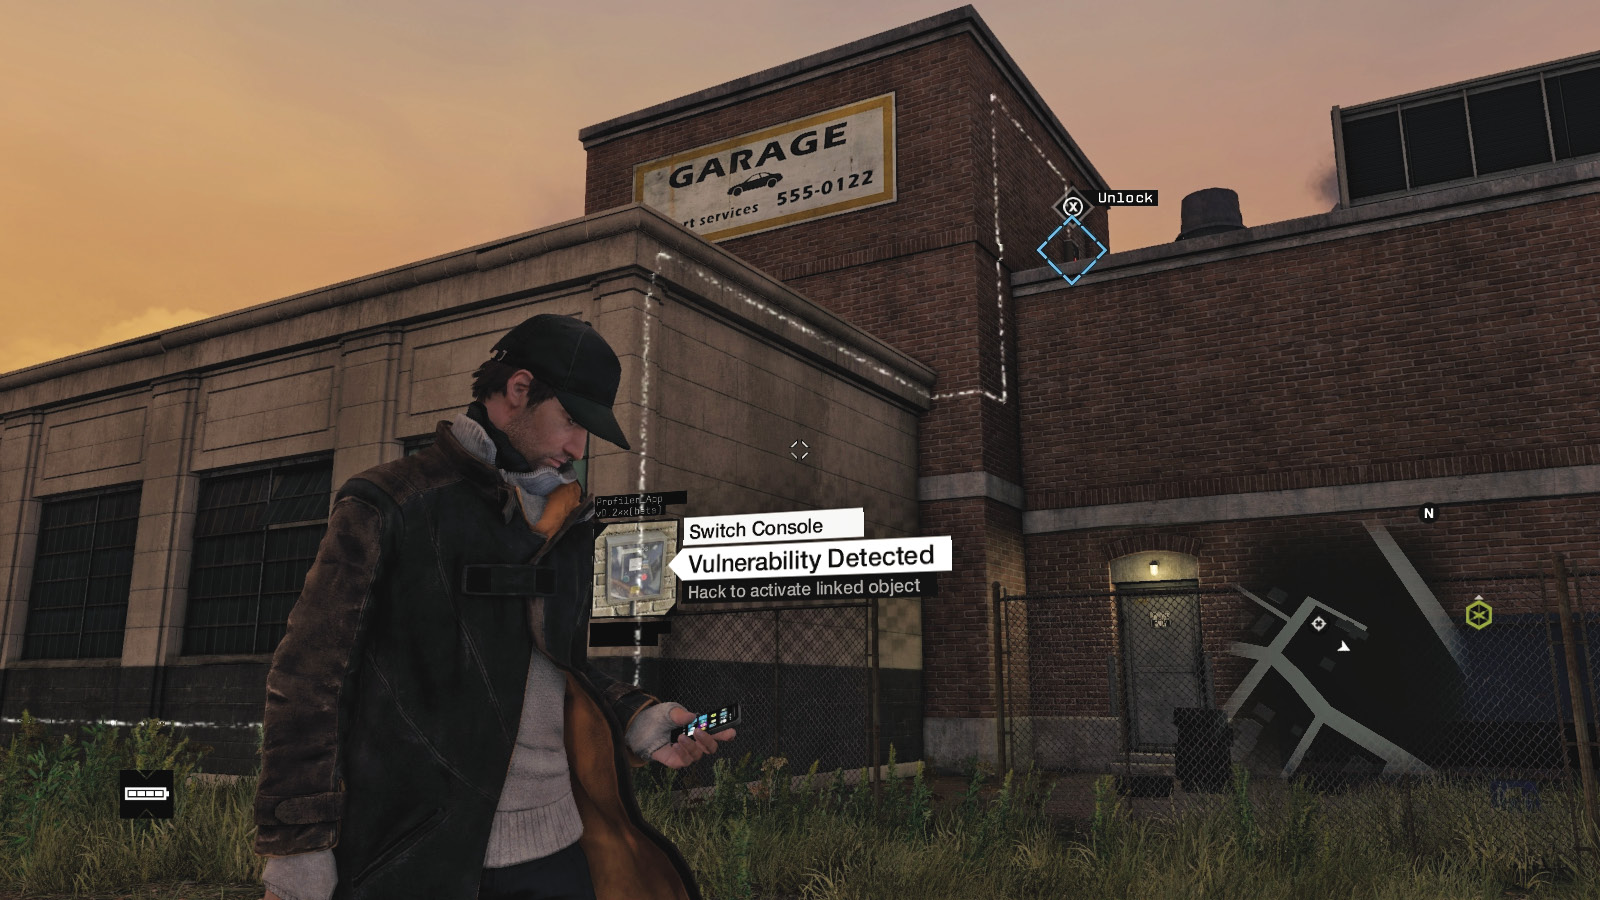
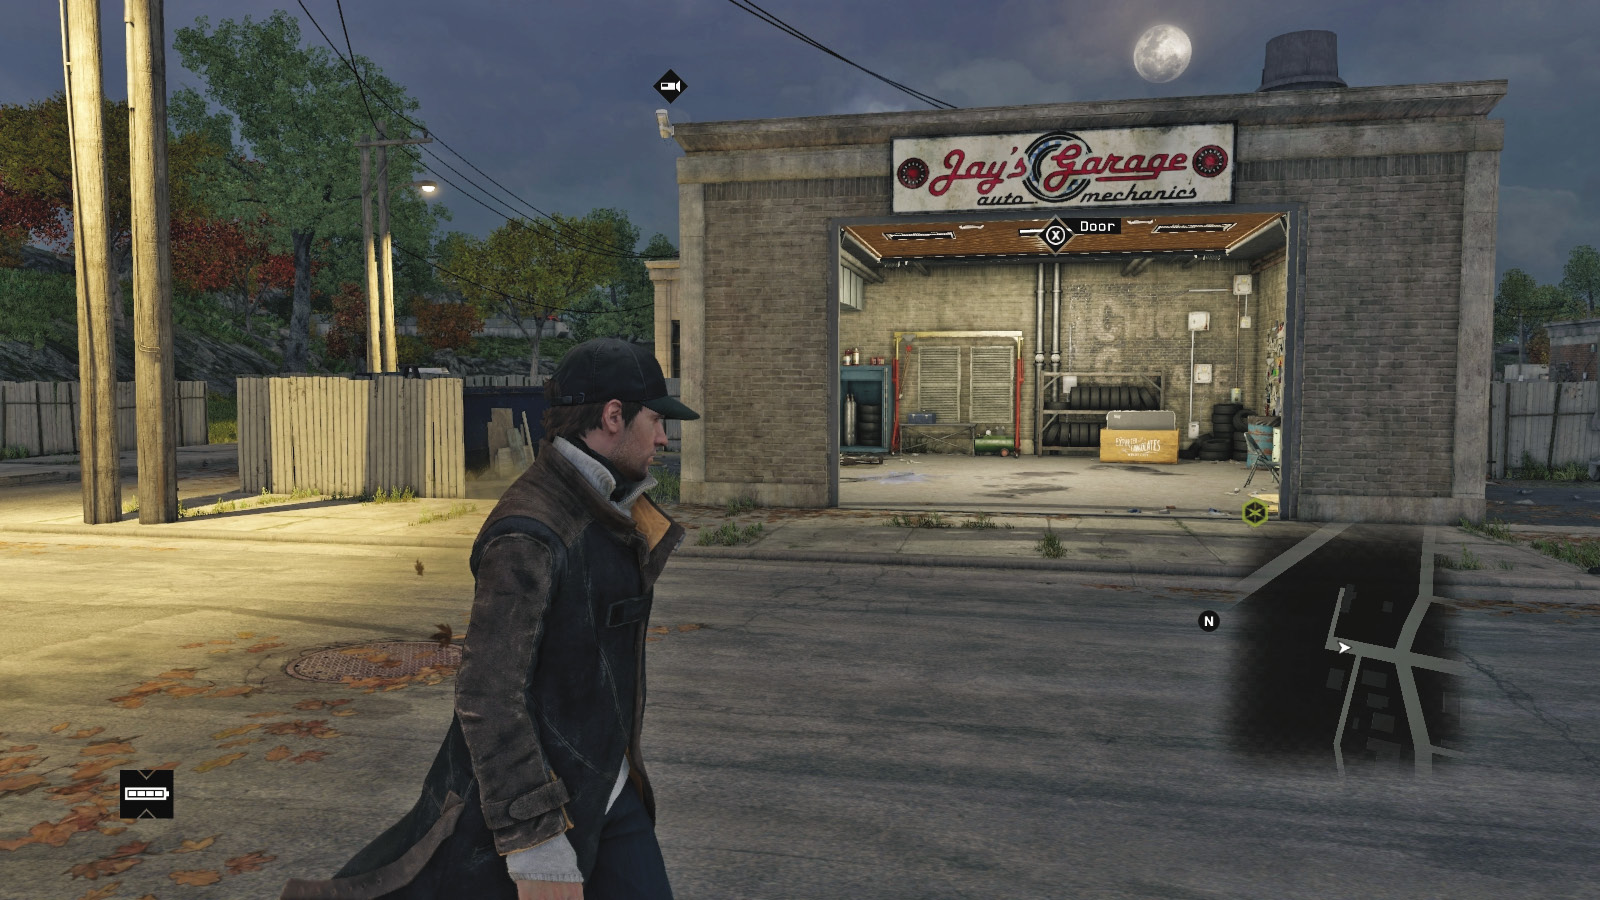
Location / The Wards // Northern Cul-de-Sac Garage

Locate the garage in the northern edge of the Wards, close to the L-train tracks and rail bridge that go over the river into Parker Square. Look for Jay’s Garage at the end of this cul-de-sac, and find the blue door to the rear of the premises. Follow the data flow east, up and around the adjacent brick garage building to a rooftop switch console you can see from the ground. Then open either door and secure the crate and Audio Log.
Brandon Docks / Shipping Crates // Illegal Weapon Caches
Weapon Crate 03
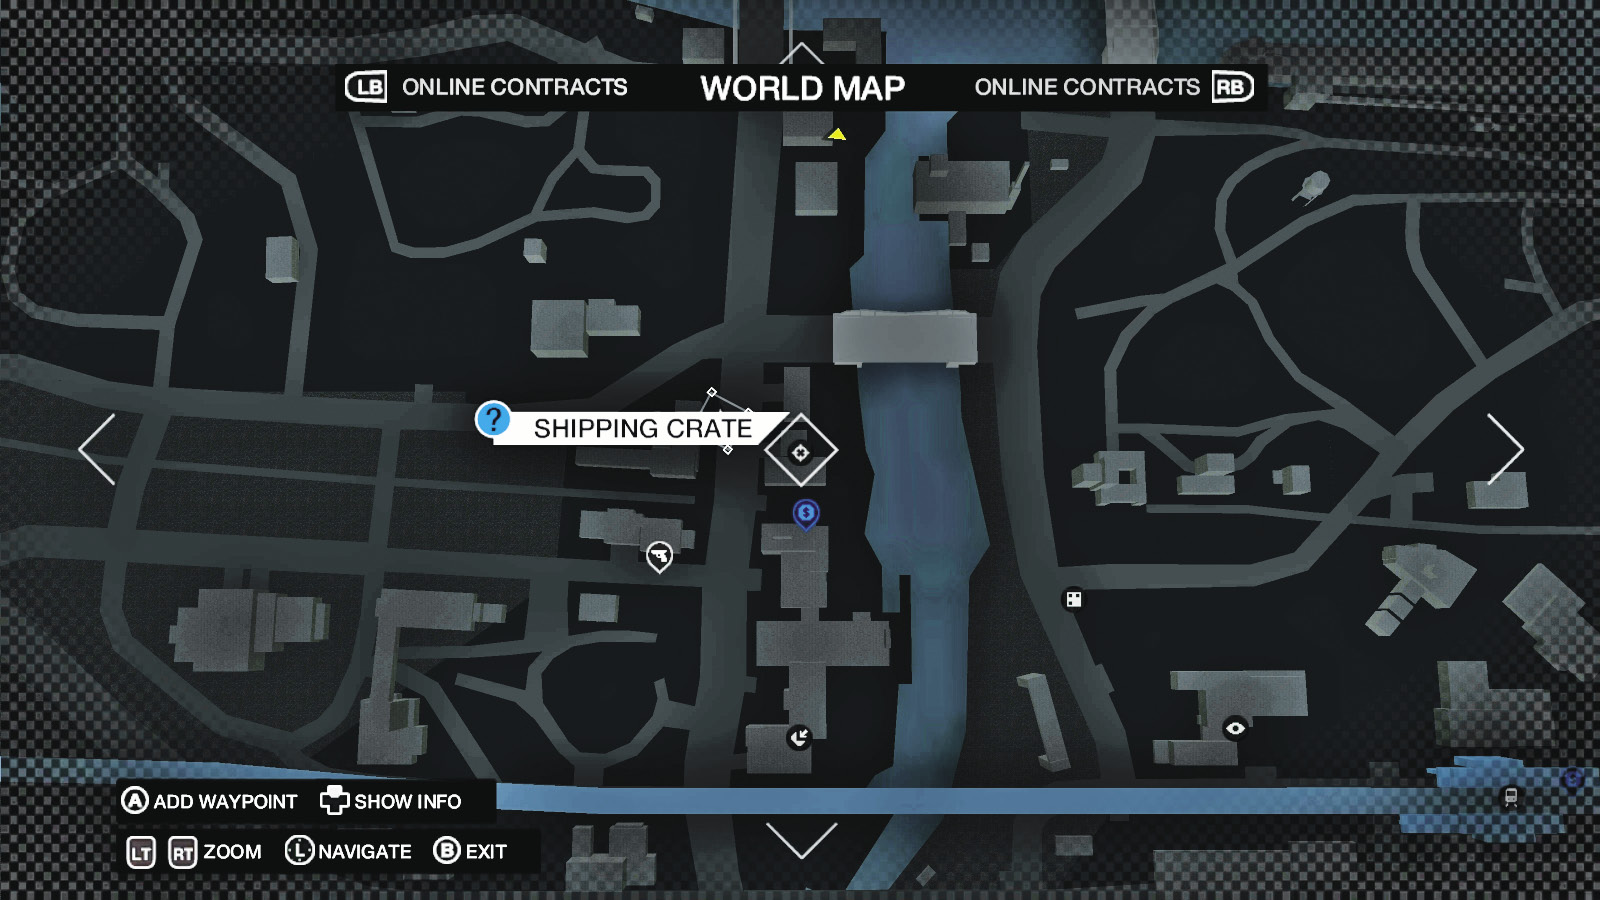
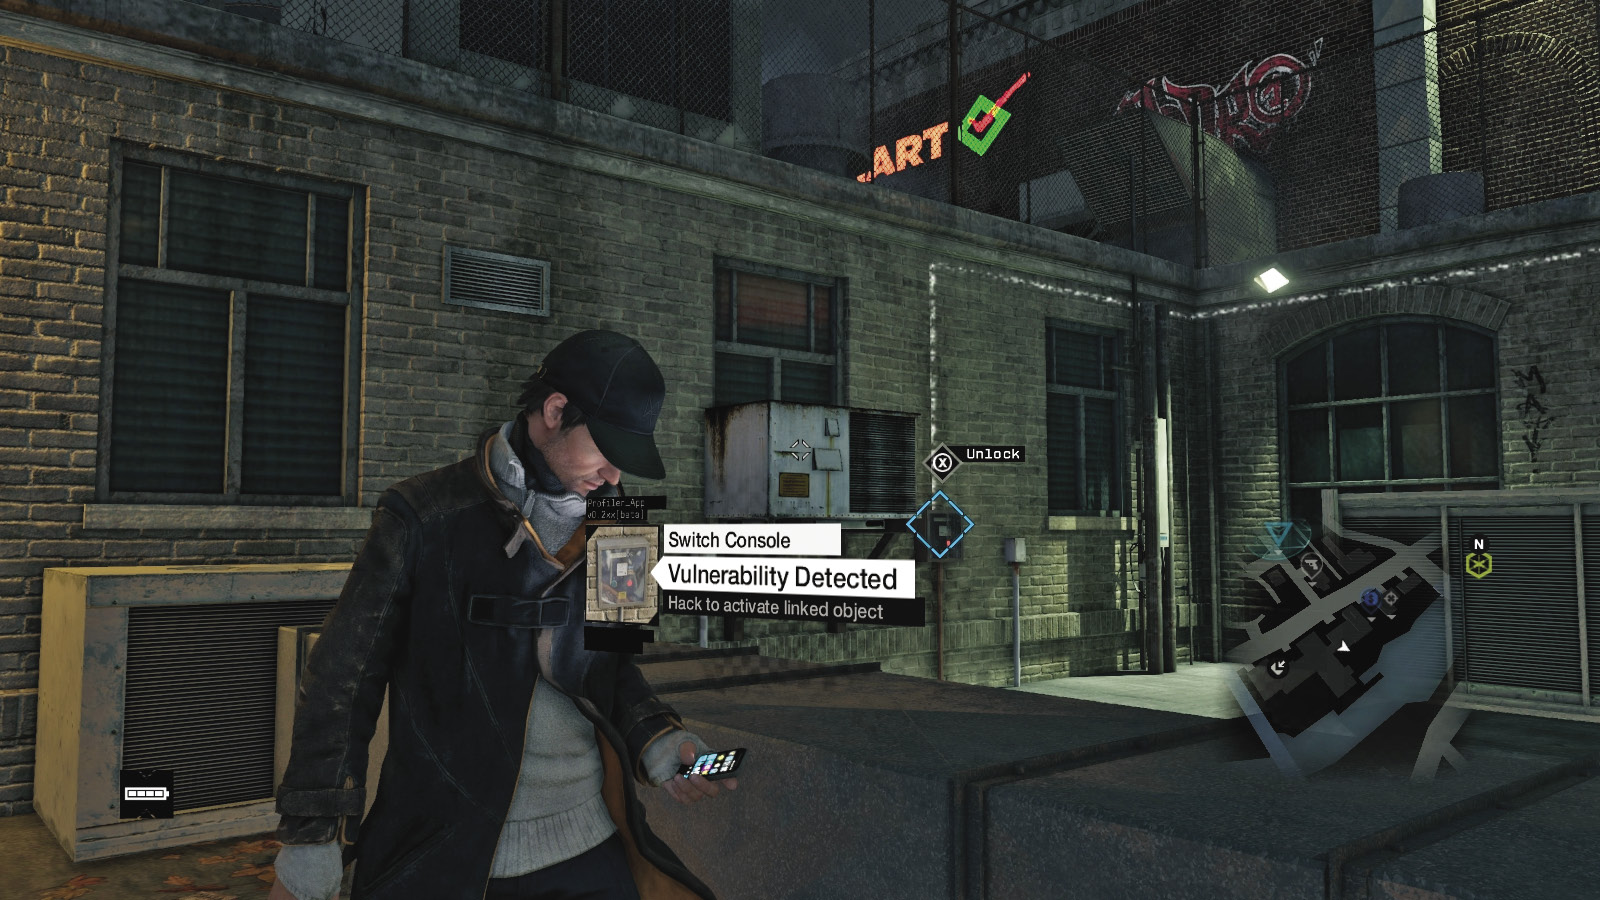
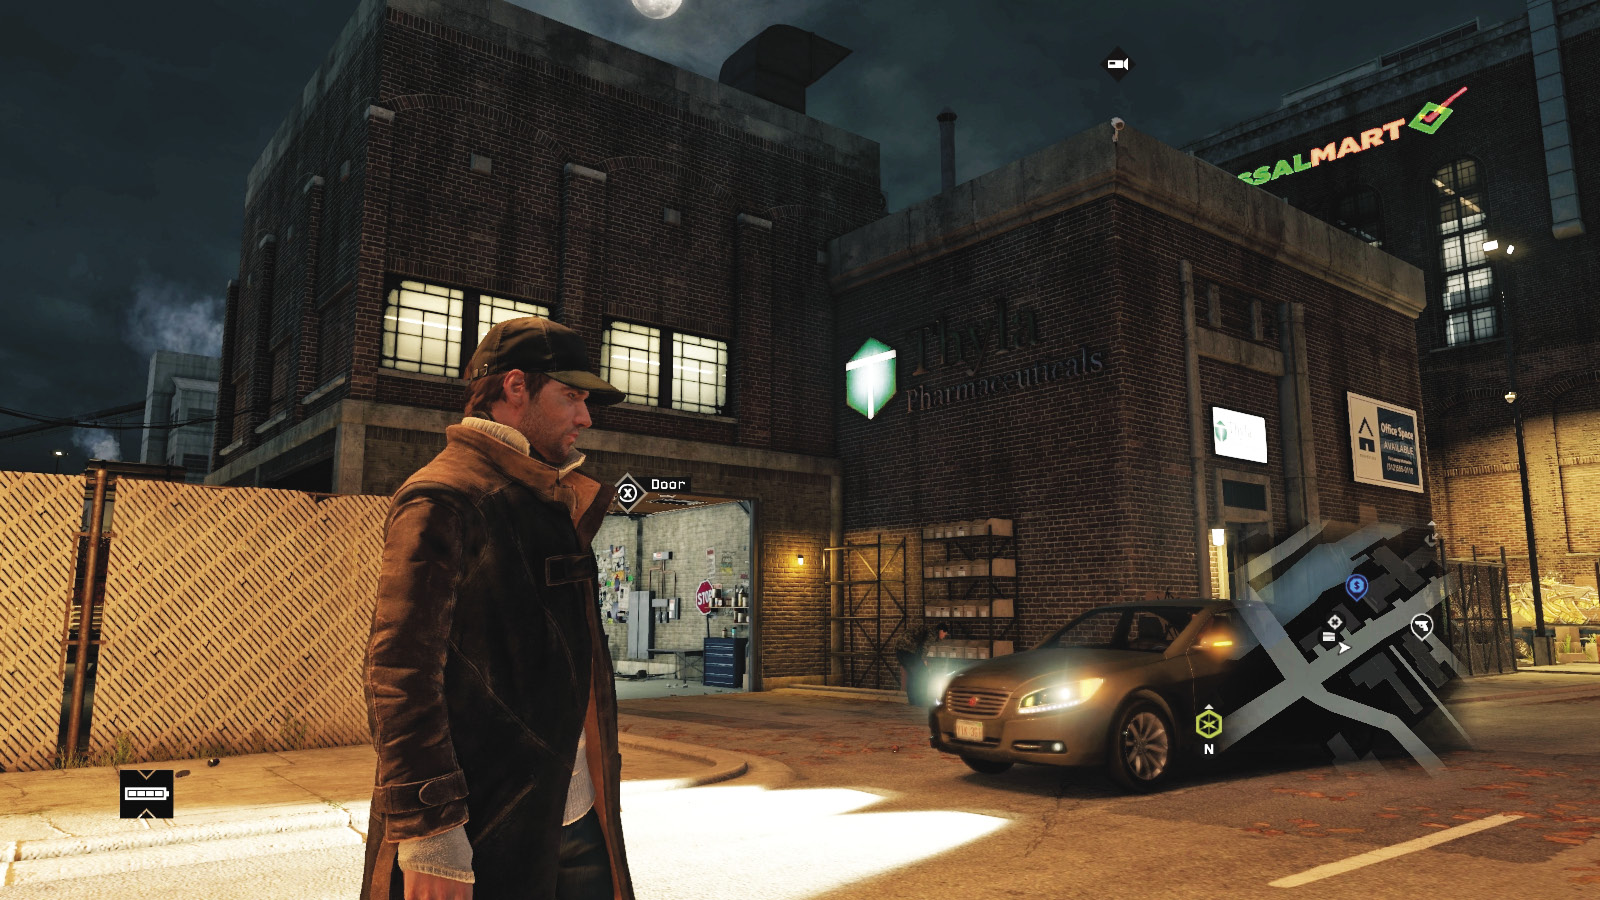
Location / Brandon Docks // Central Riverside “VessalMart” Garage

In the center of the docks, by the river (just south of where it makes a T shape), there’s a Cash Run near a garage attached to a large brick structure—one of many in this industrial area, near a neon “VessalMart” sign. Find the blue door, follow the data flow along the riverside alley behind it, up some metal stairs to an air-duct rooftop and the switch console. Then return to secure the crate and Audio Log.
Weapon Crate 04
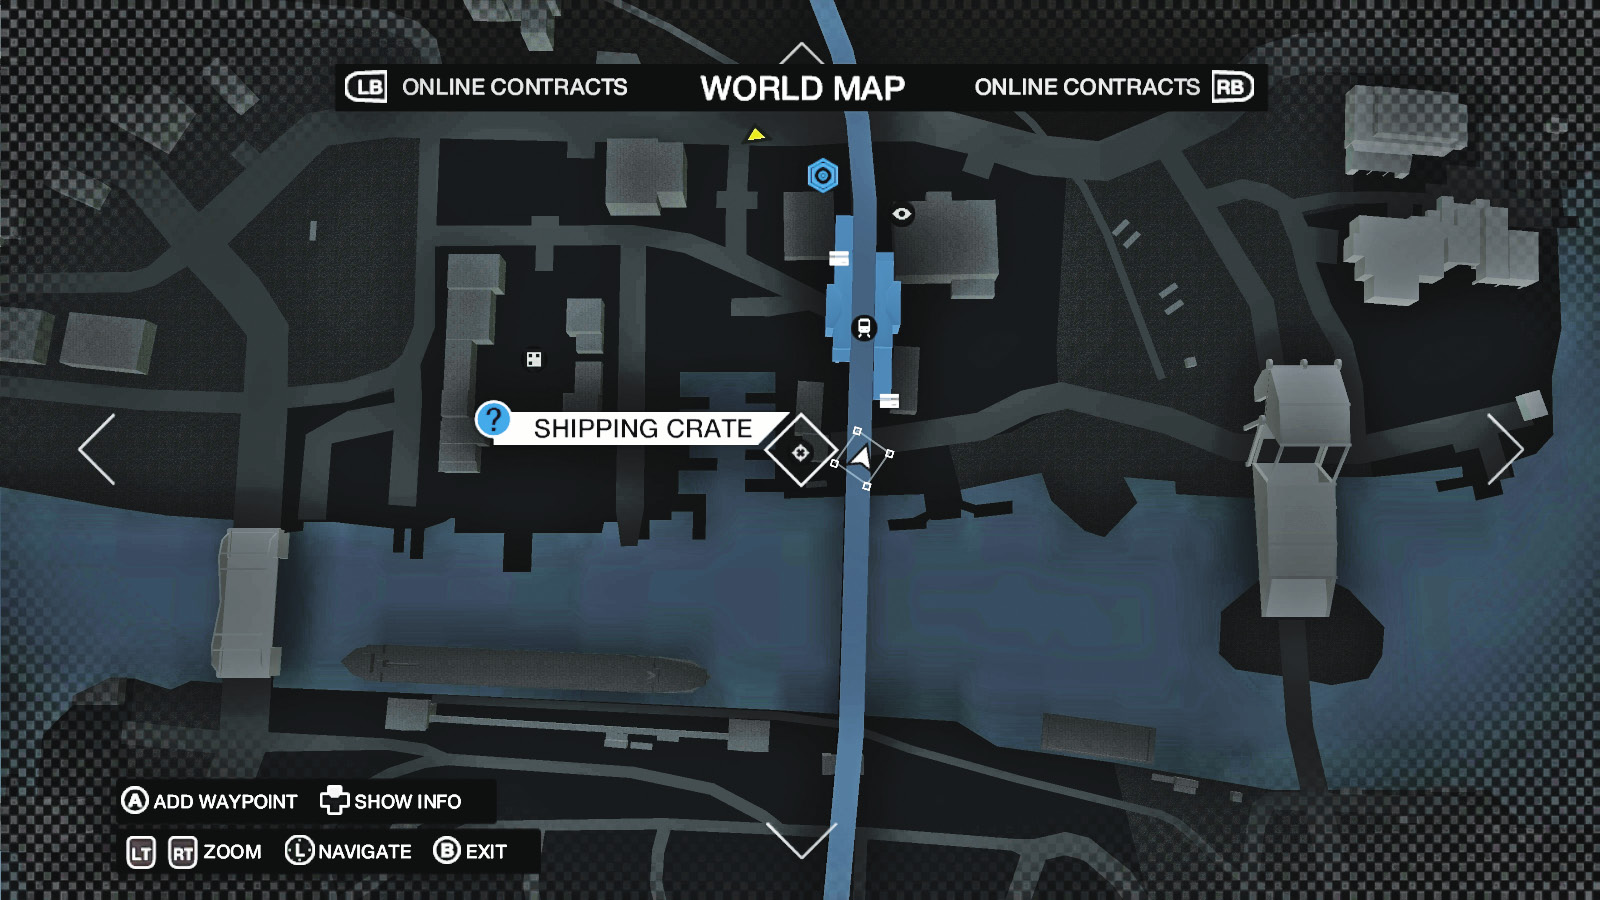
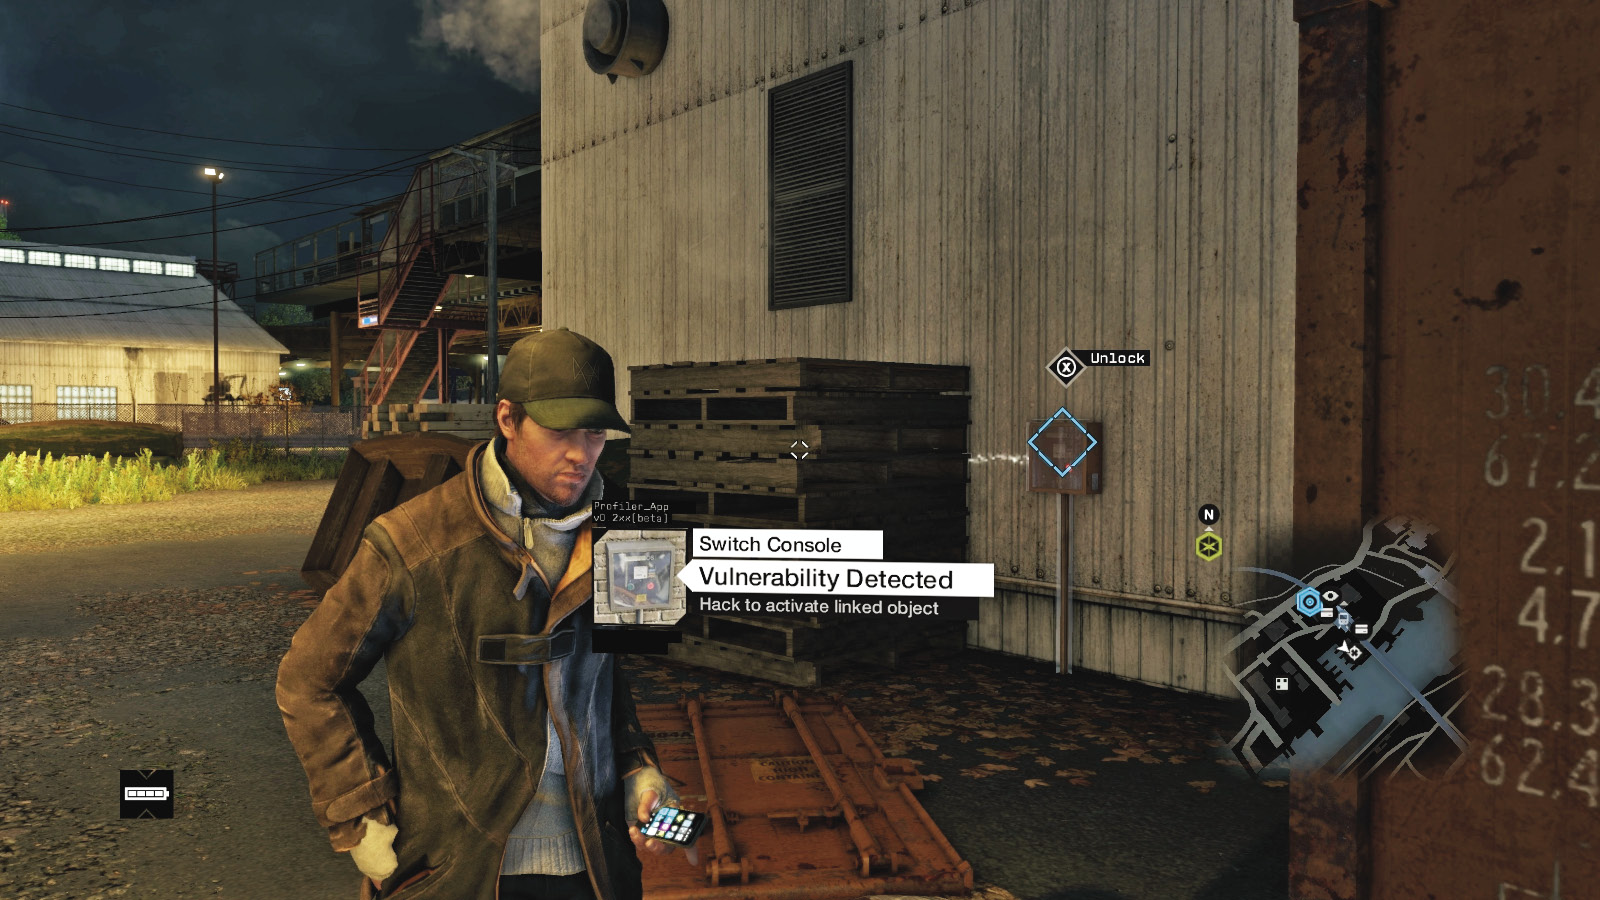
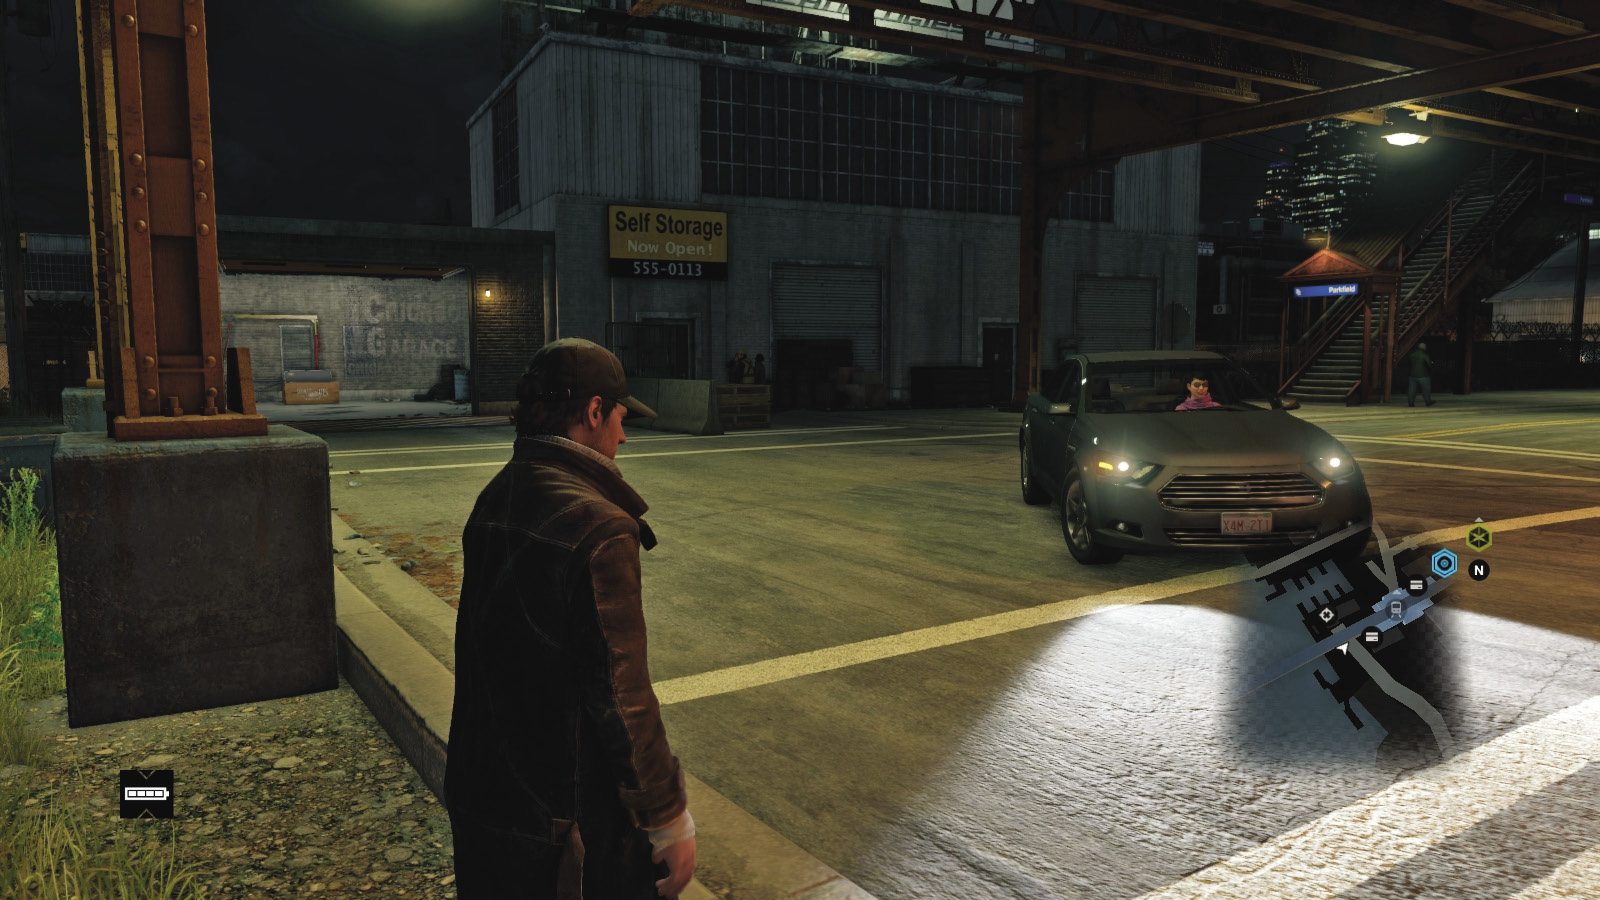
Location / Brandon Docks // Parkfield Station Garage
Look to the northern island of Brandon Docks and the L-train bridge across the river. Just to the south of Parkfield Station, under the L-train tracks, is a garage attached to a self-storage building. Find the blue door and follow the data flow around the back of the storage building. The switch console is located near some stacked pallets and a rusting shipping container. Then journey back to the open garage and claim the crate but no Audio Log.
The Loop / Shipping Crates // Illegal Weapon Caches
Weapon Crate 05
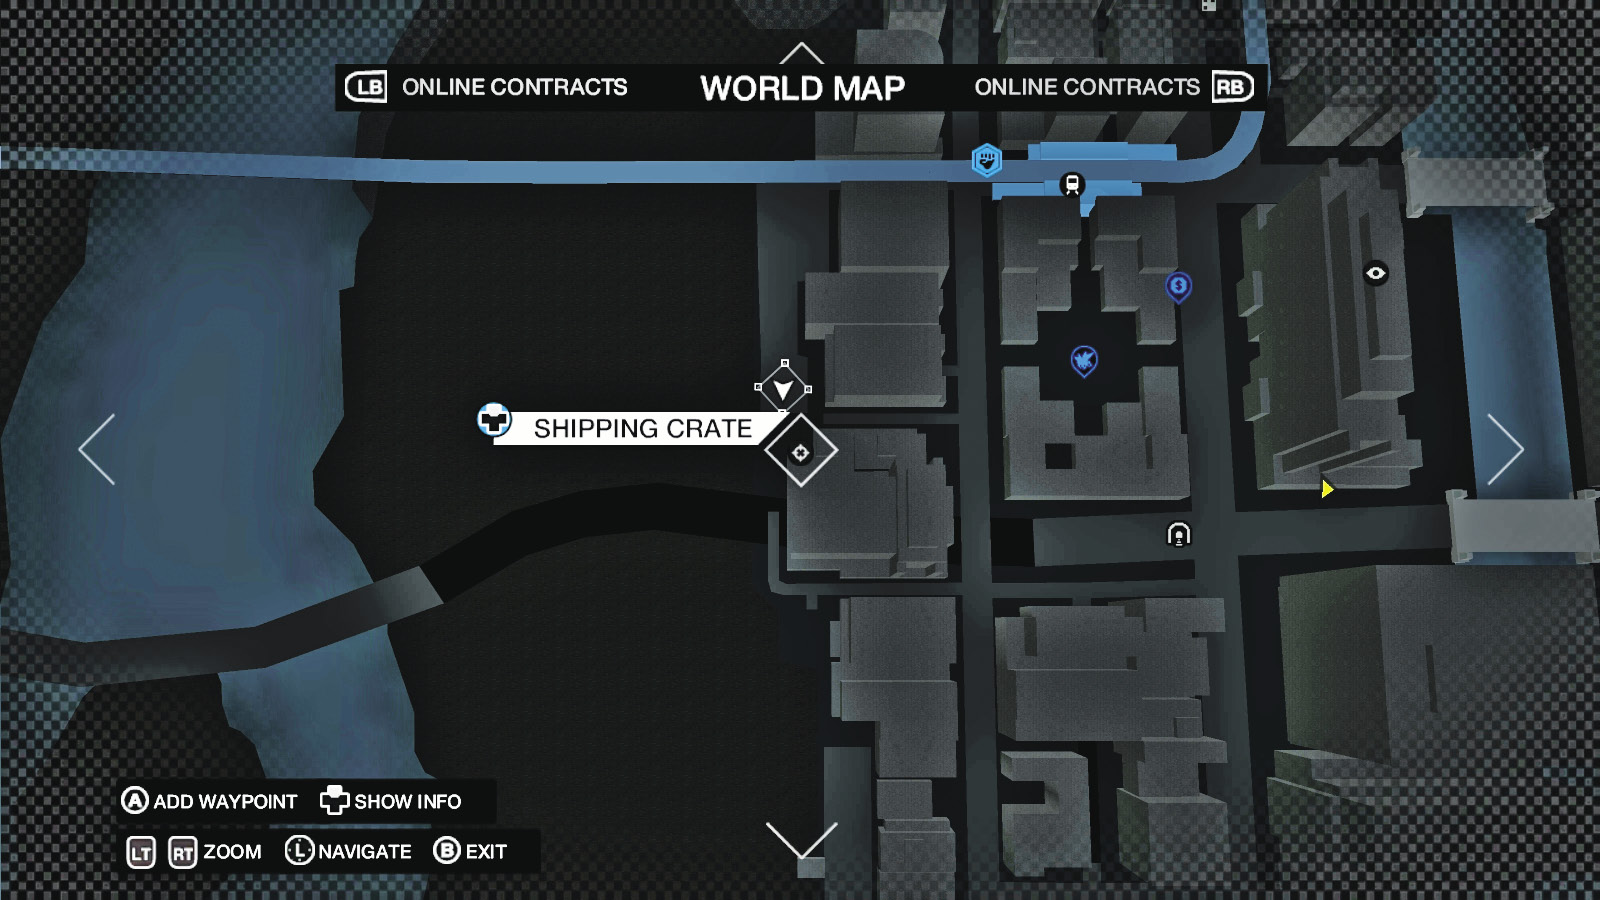
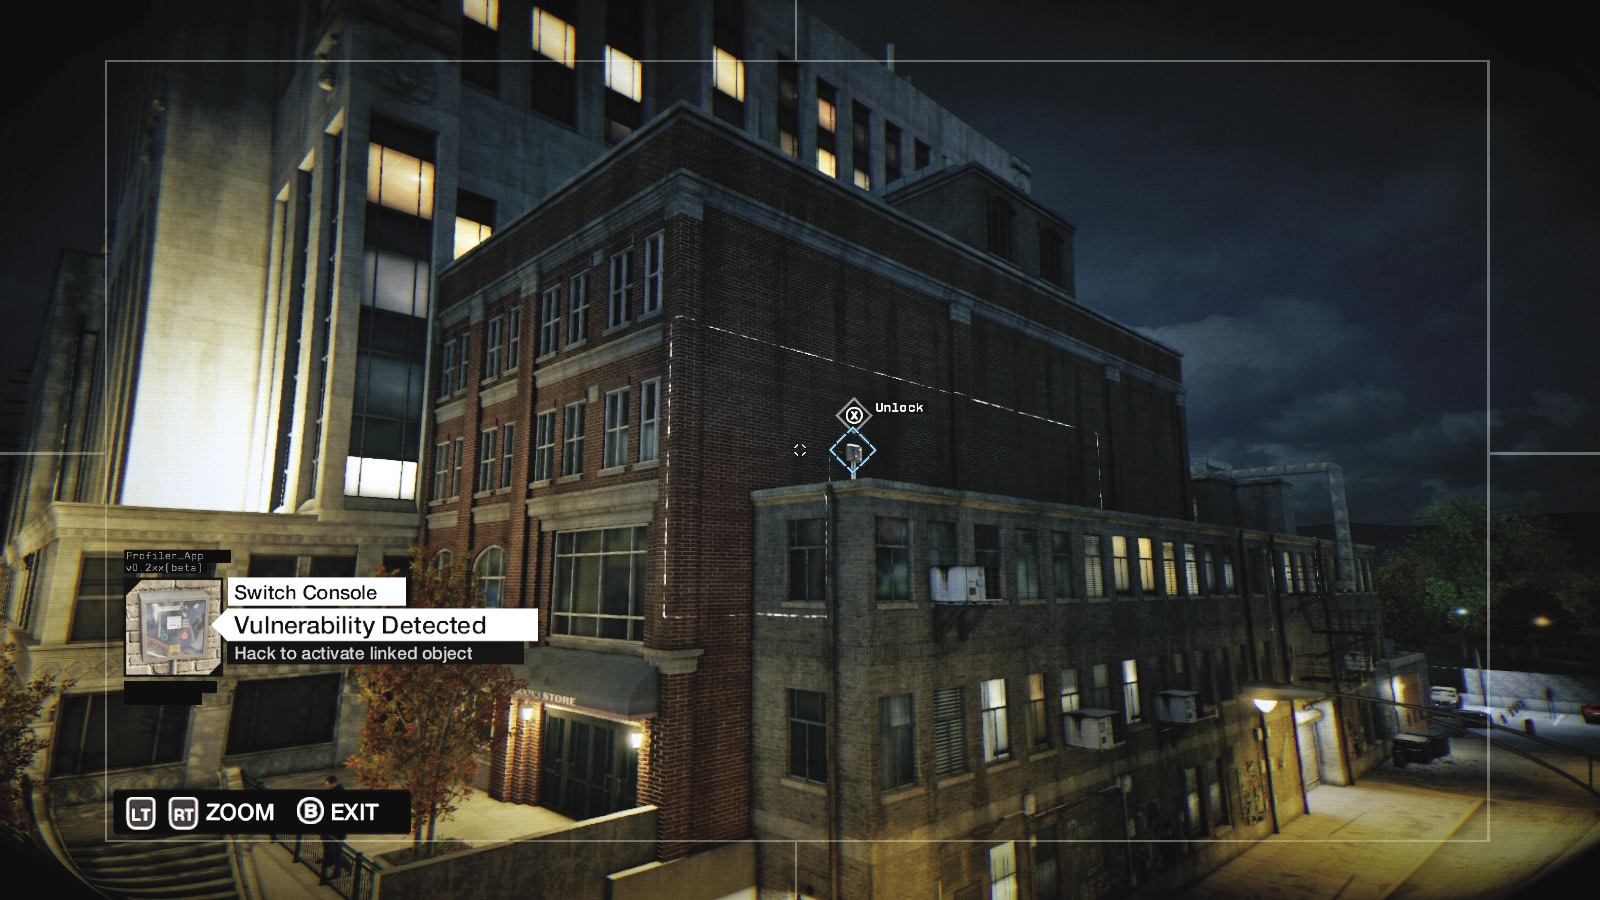
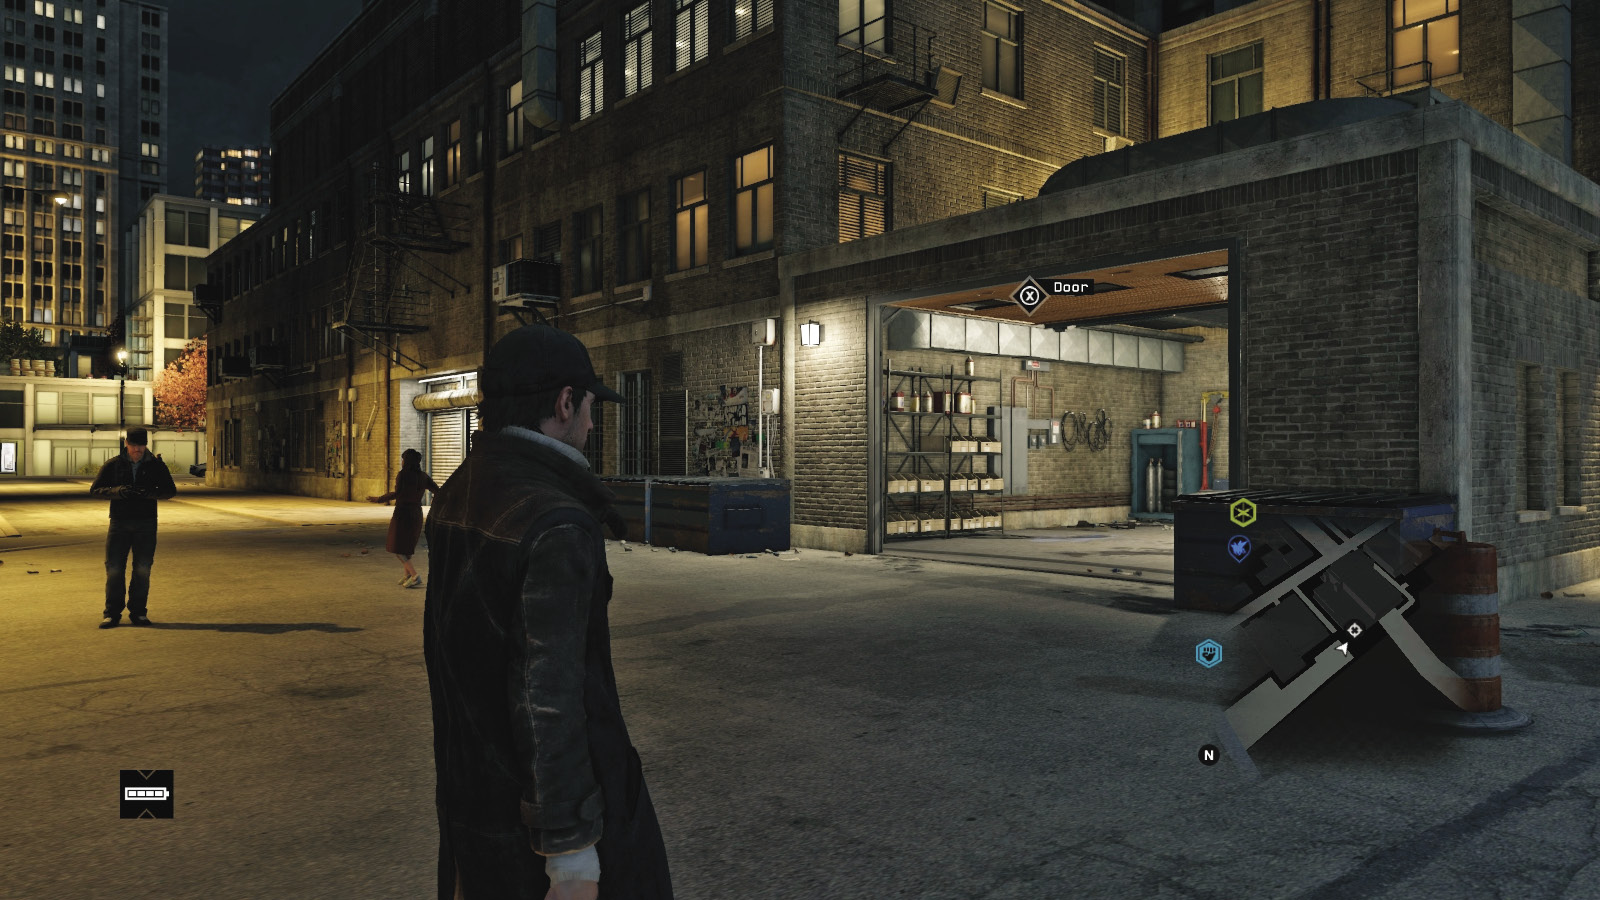
Location / The Loop // Western Unloading Alley Garage

Locate “the Island,” the western mass of land in the Loop, and check the garage in the center, just south of the L-train tracks. Follow the data flow east, to the end of the alley and junction with the road, before using a security camera to peer up and across to the brick warehouse and switch console. Then run back to the garage and open either door, securing the crate and Audio Log inside.
Weapon Crate 06
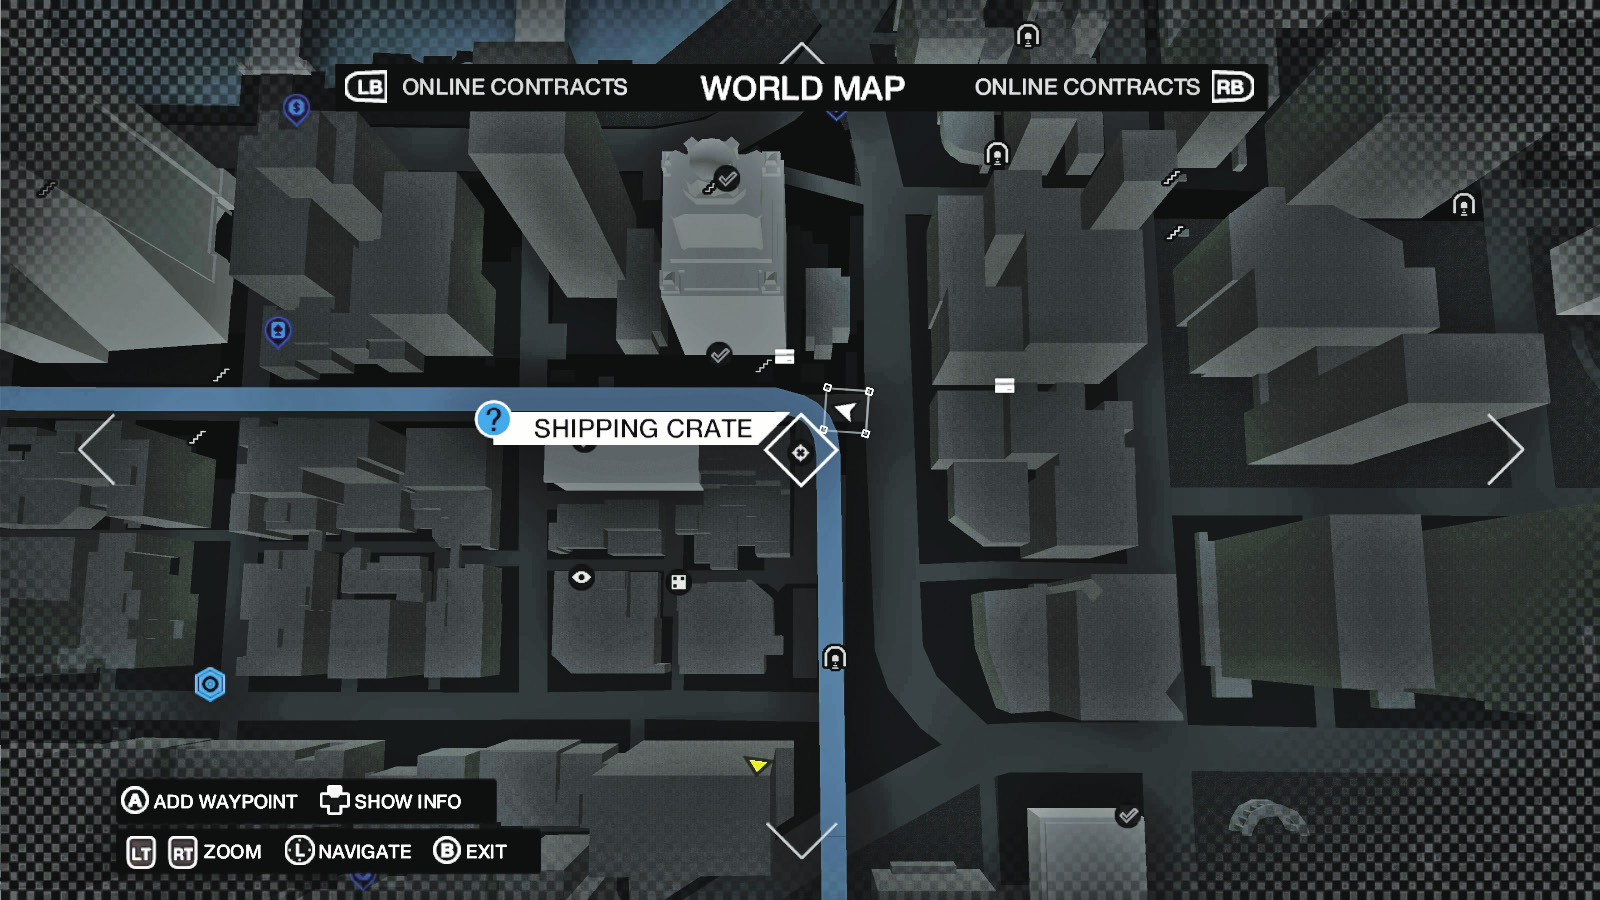
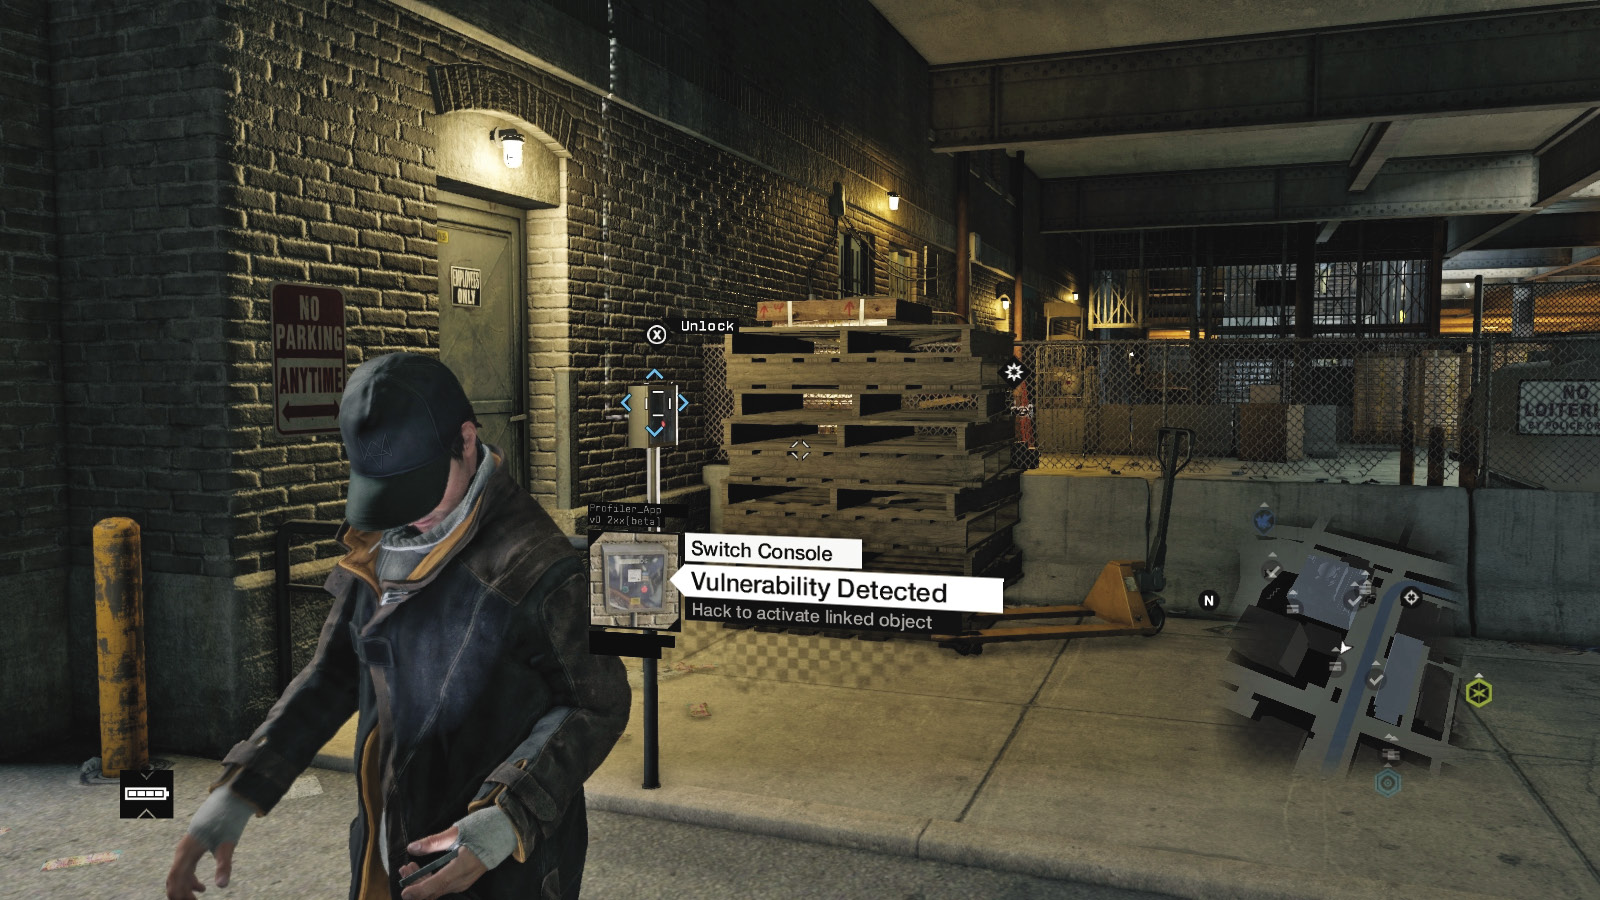
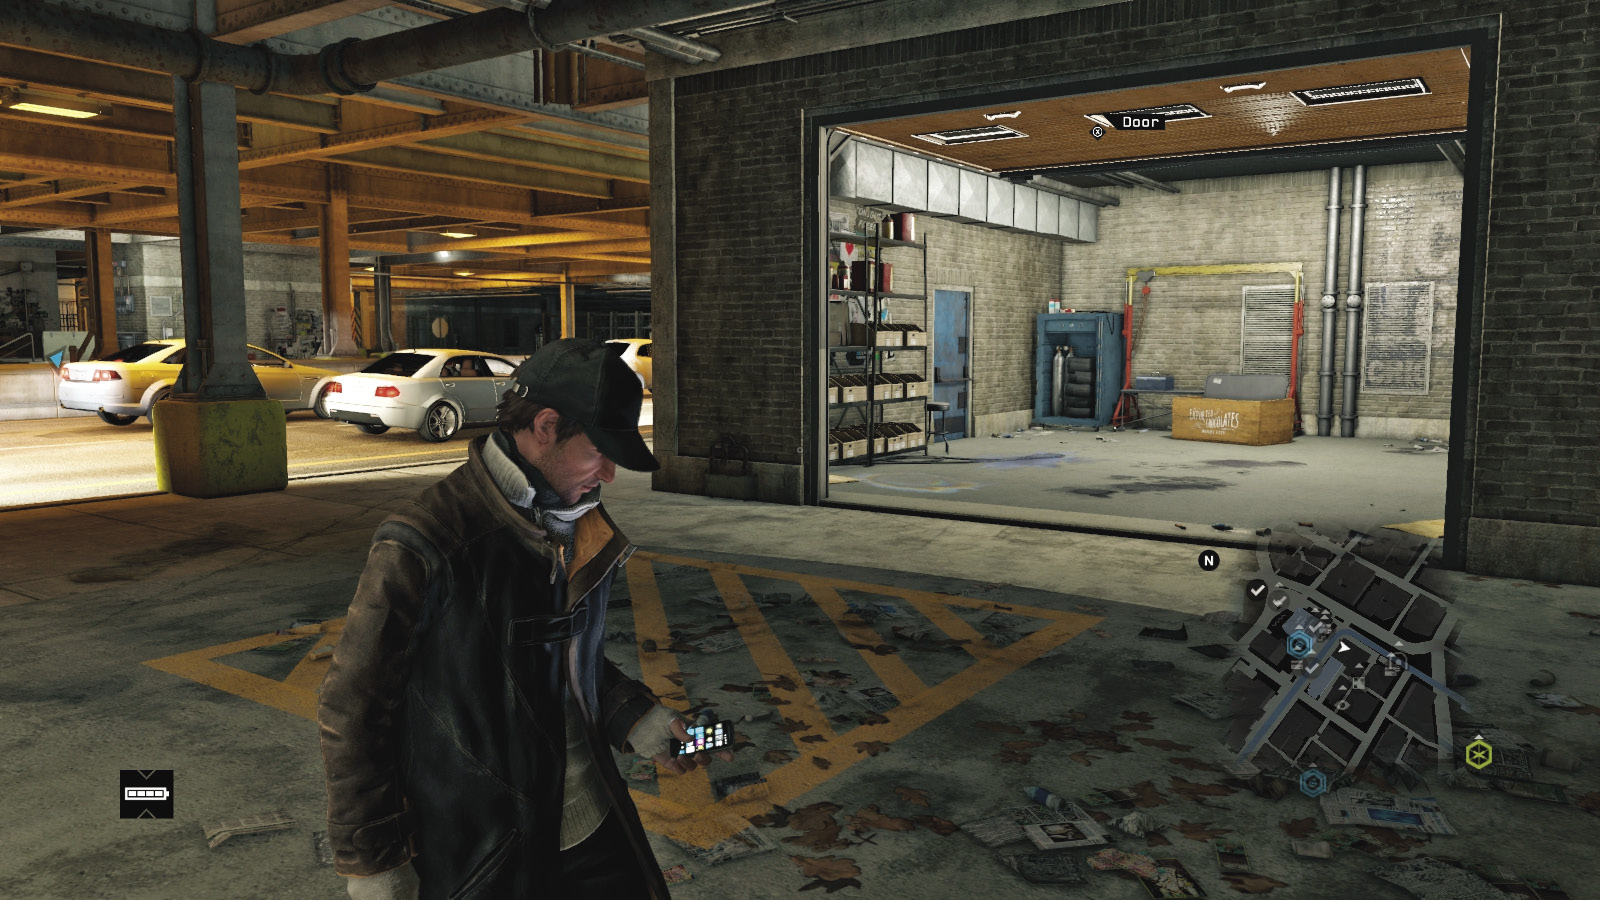
Location / The Loop // North Central Traffic Tunnel Garage

This garage can be difficult to spot. Remember the Loop has several underground traffic tunnels to navigate, which is where this garage is. Head to the northern center of the Loop. Find the blue door near the tunnel and follow the data flow north across the road. Turn left (west), passing the metal stairs and climbing over a metal fence to the switch console behind a pallet stack. Then jog back and secure the crate and Audio Log.
Weapon Crate 07
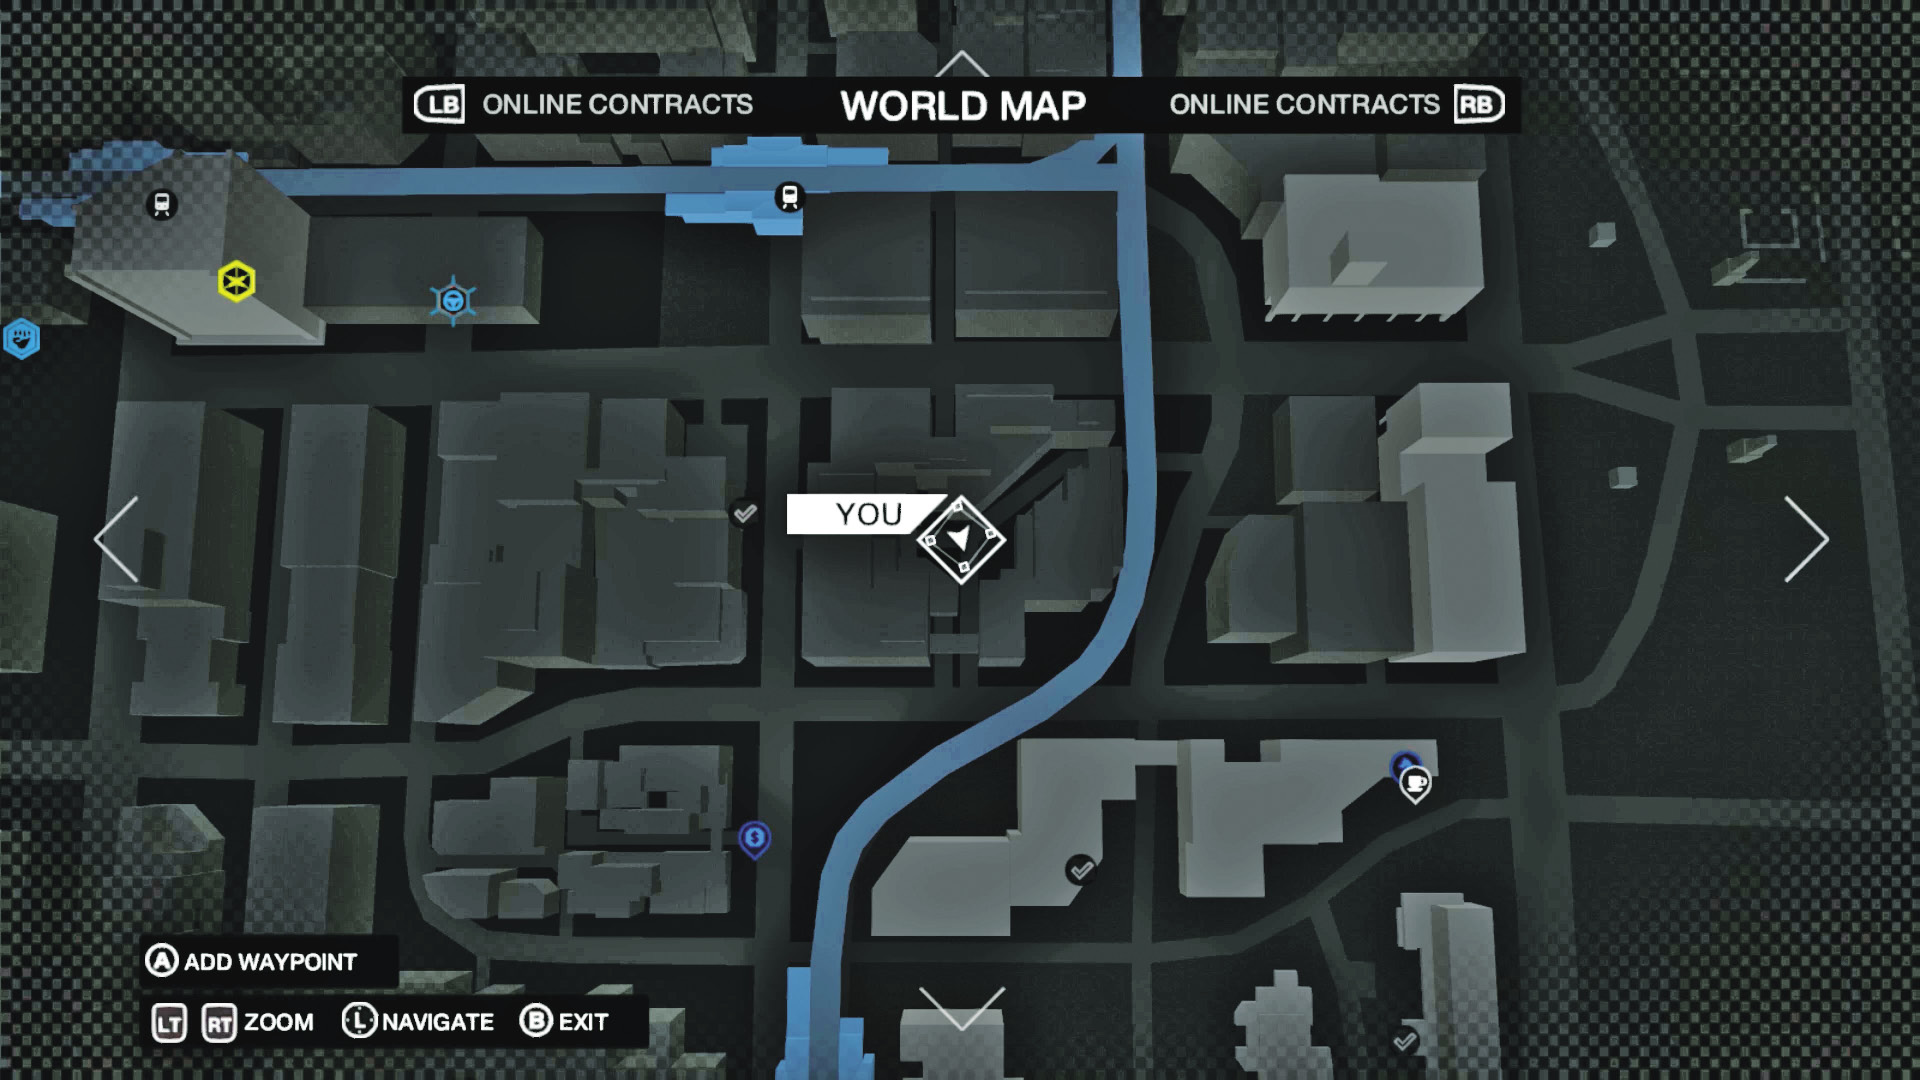
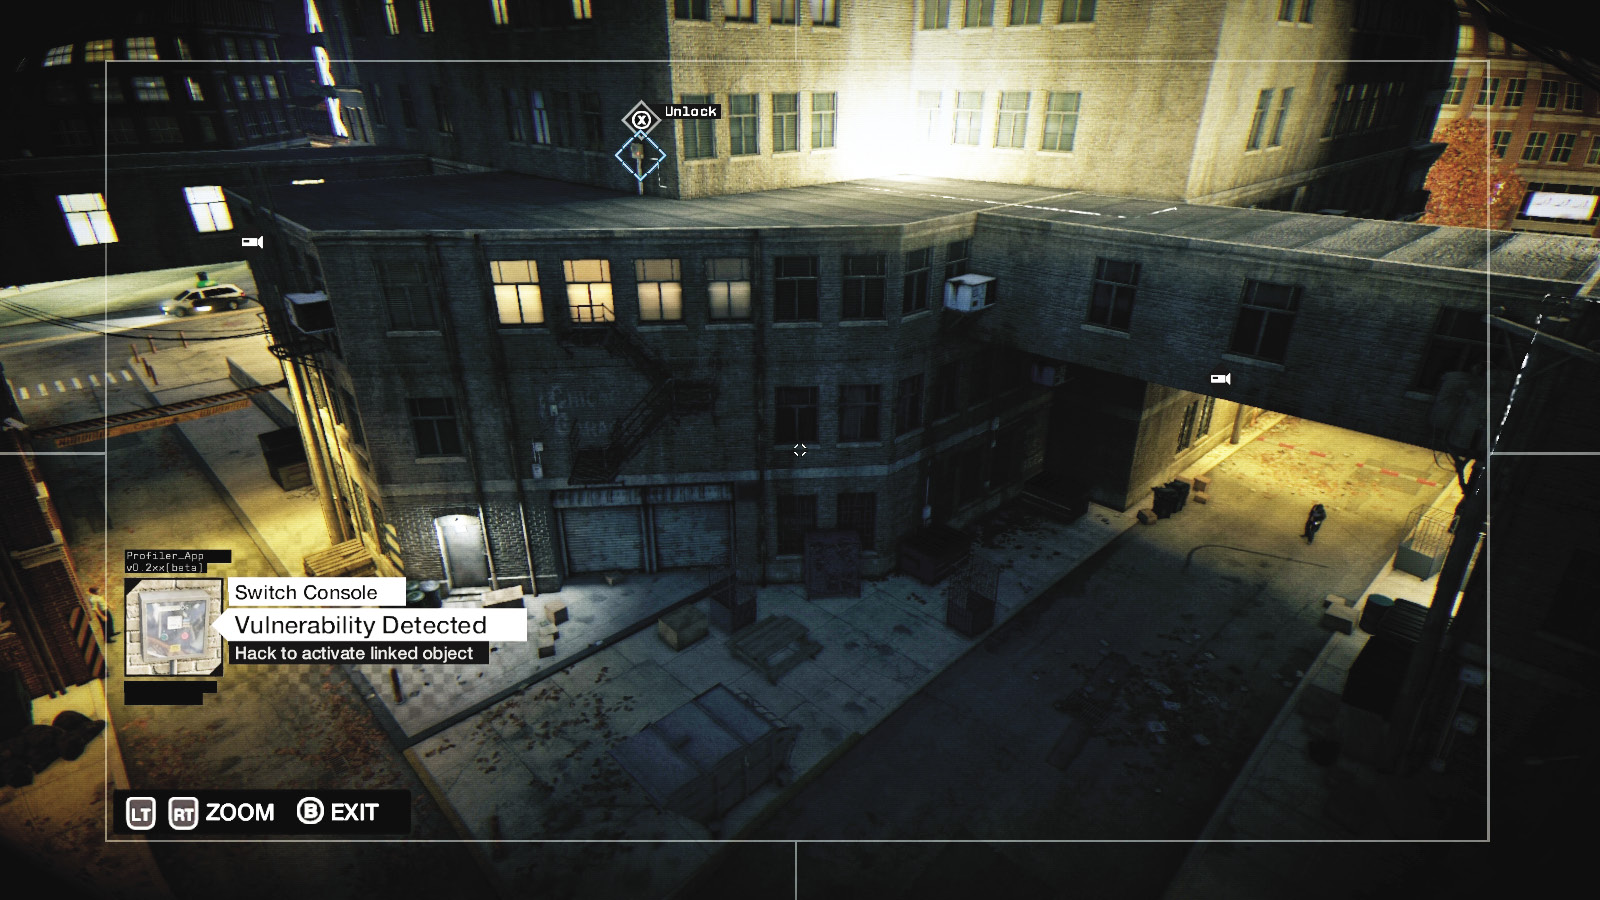
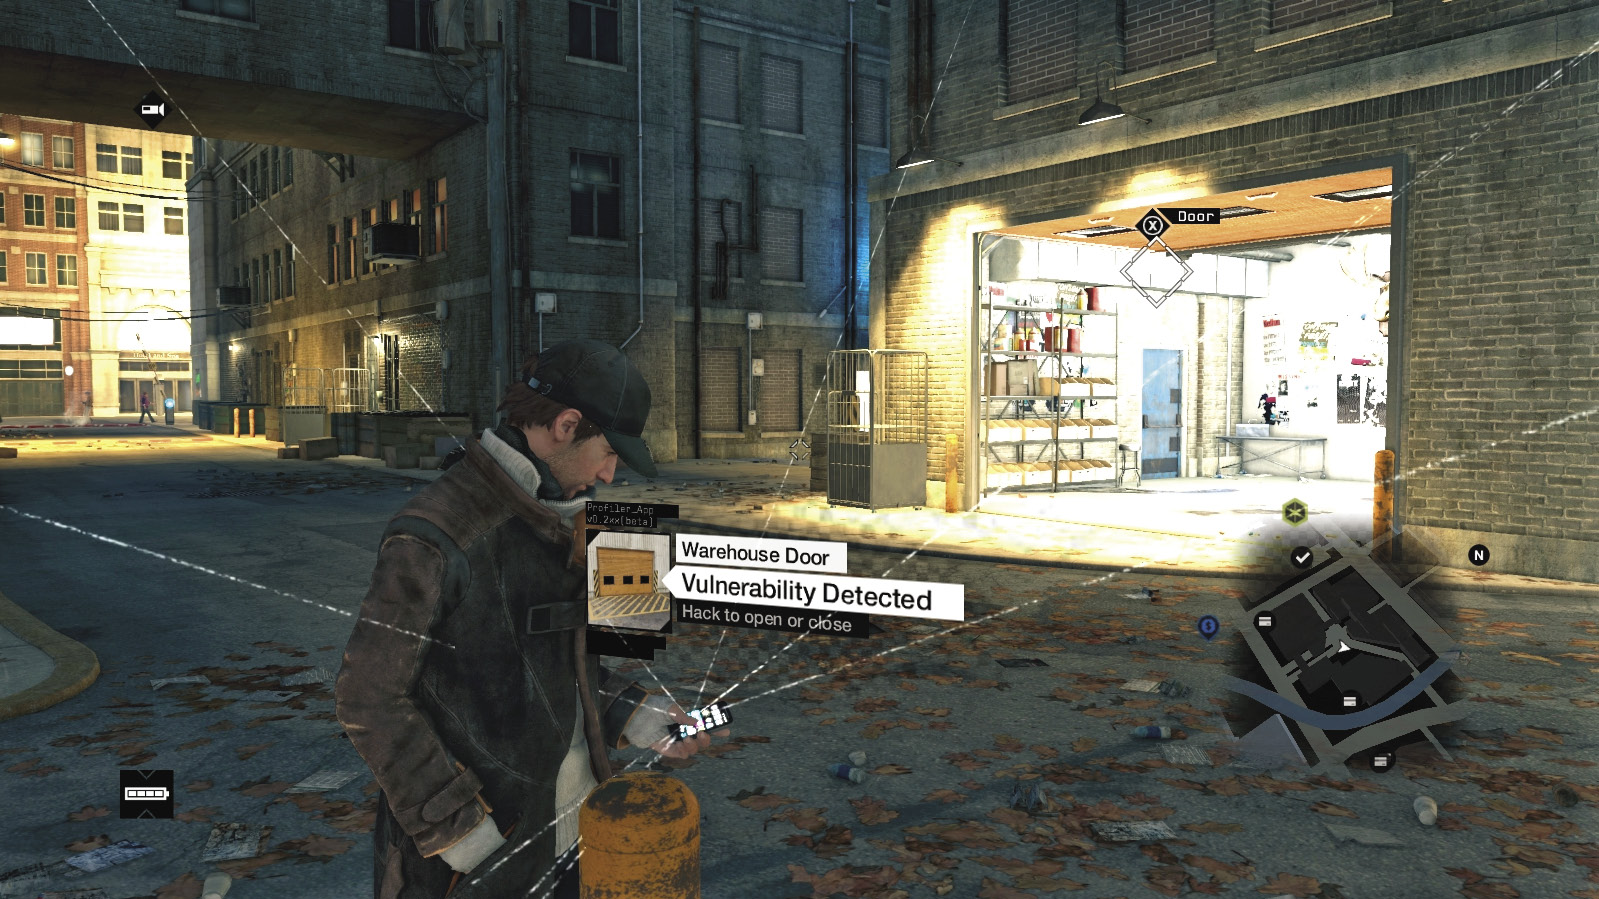
Location / The Loop // Alleyways Southeast of Farris Halstead Library Station

Find the center of the alleyways southeast of Farris Halstead Library train station. Follow the data flow from the blue door as it moves across the underside of a brick connecting bridge and disappears around a high structure on the opposite side of the alley. Move through the cameras to the one above the garage so you can view and unlock the switch console. Then gather the information from the crate and Audio Log.
Mad Mile / Shipping Crates // Illegal Weapon Caches
Weapon Crate 08
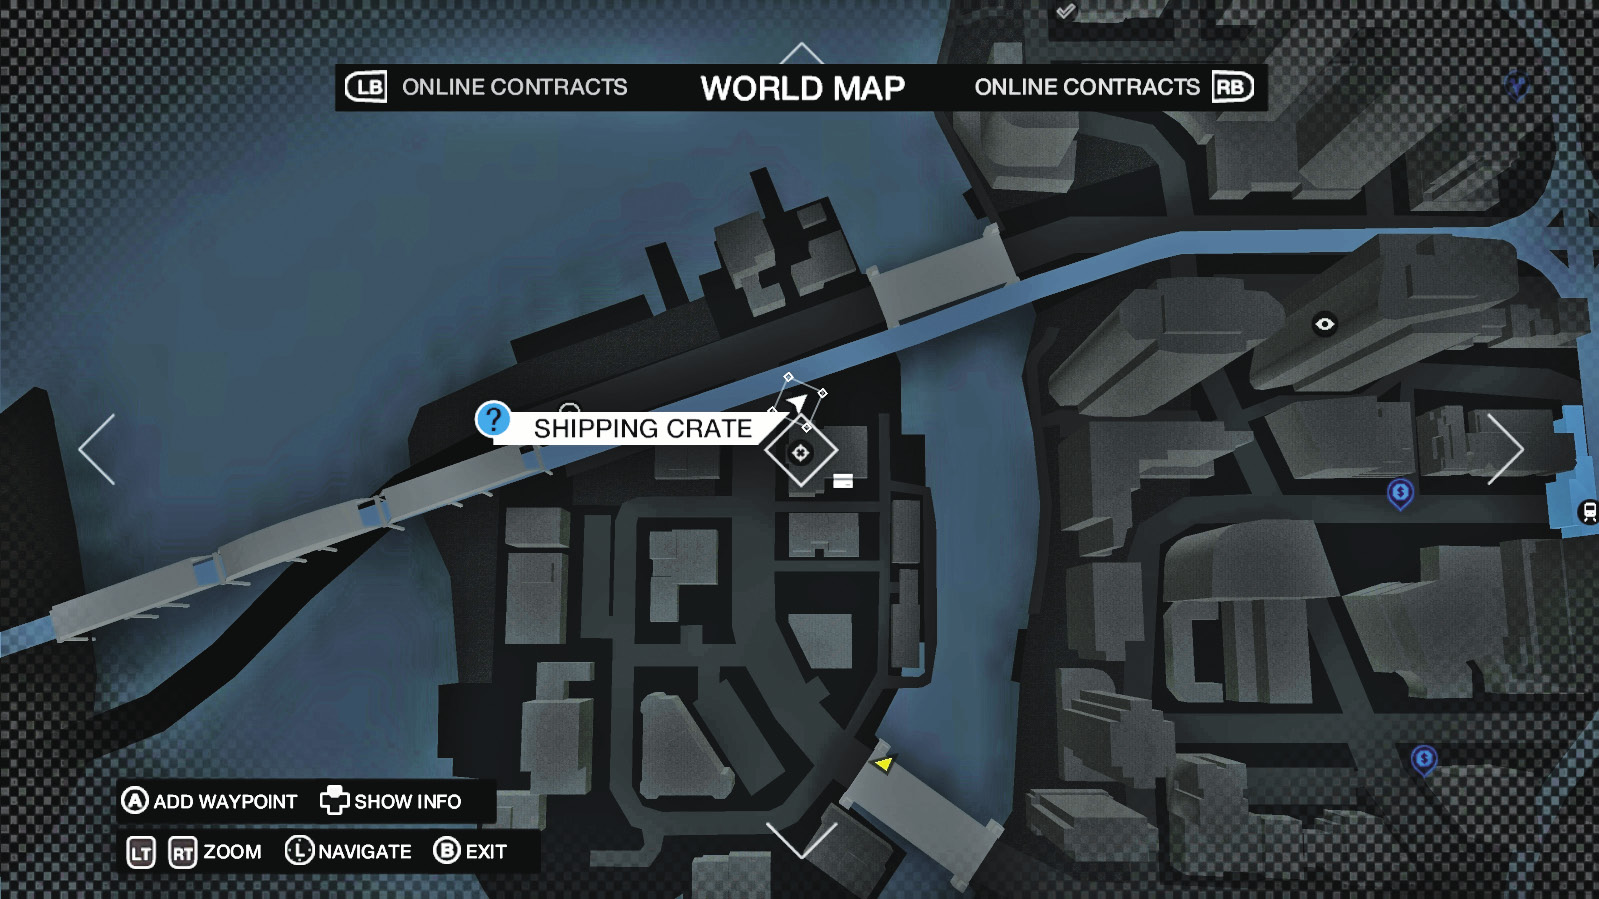
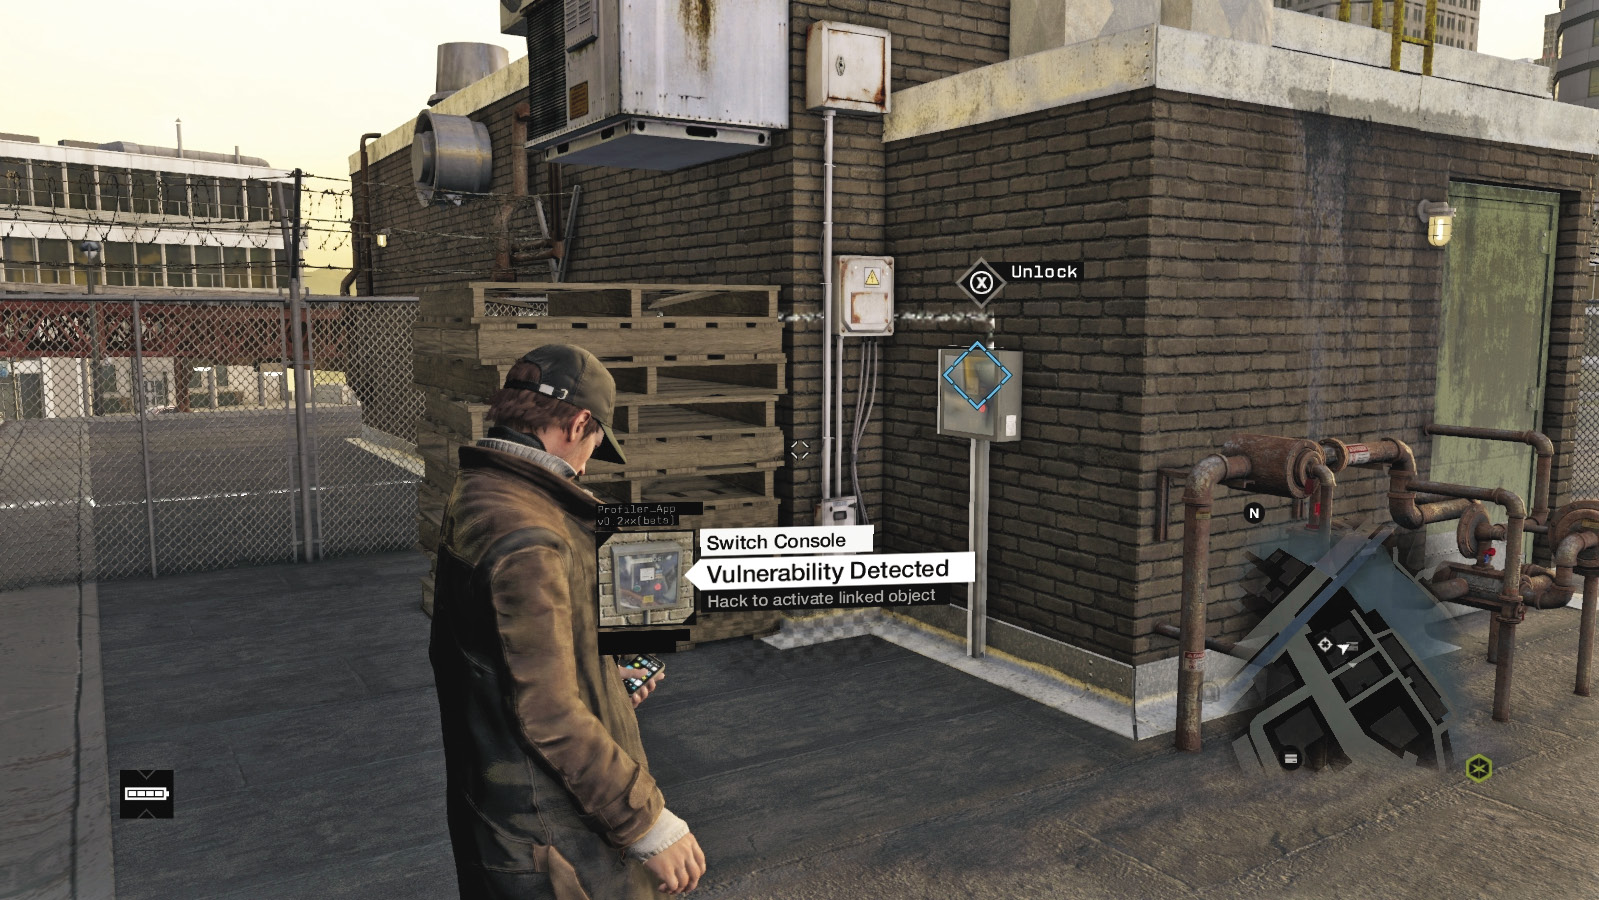
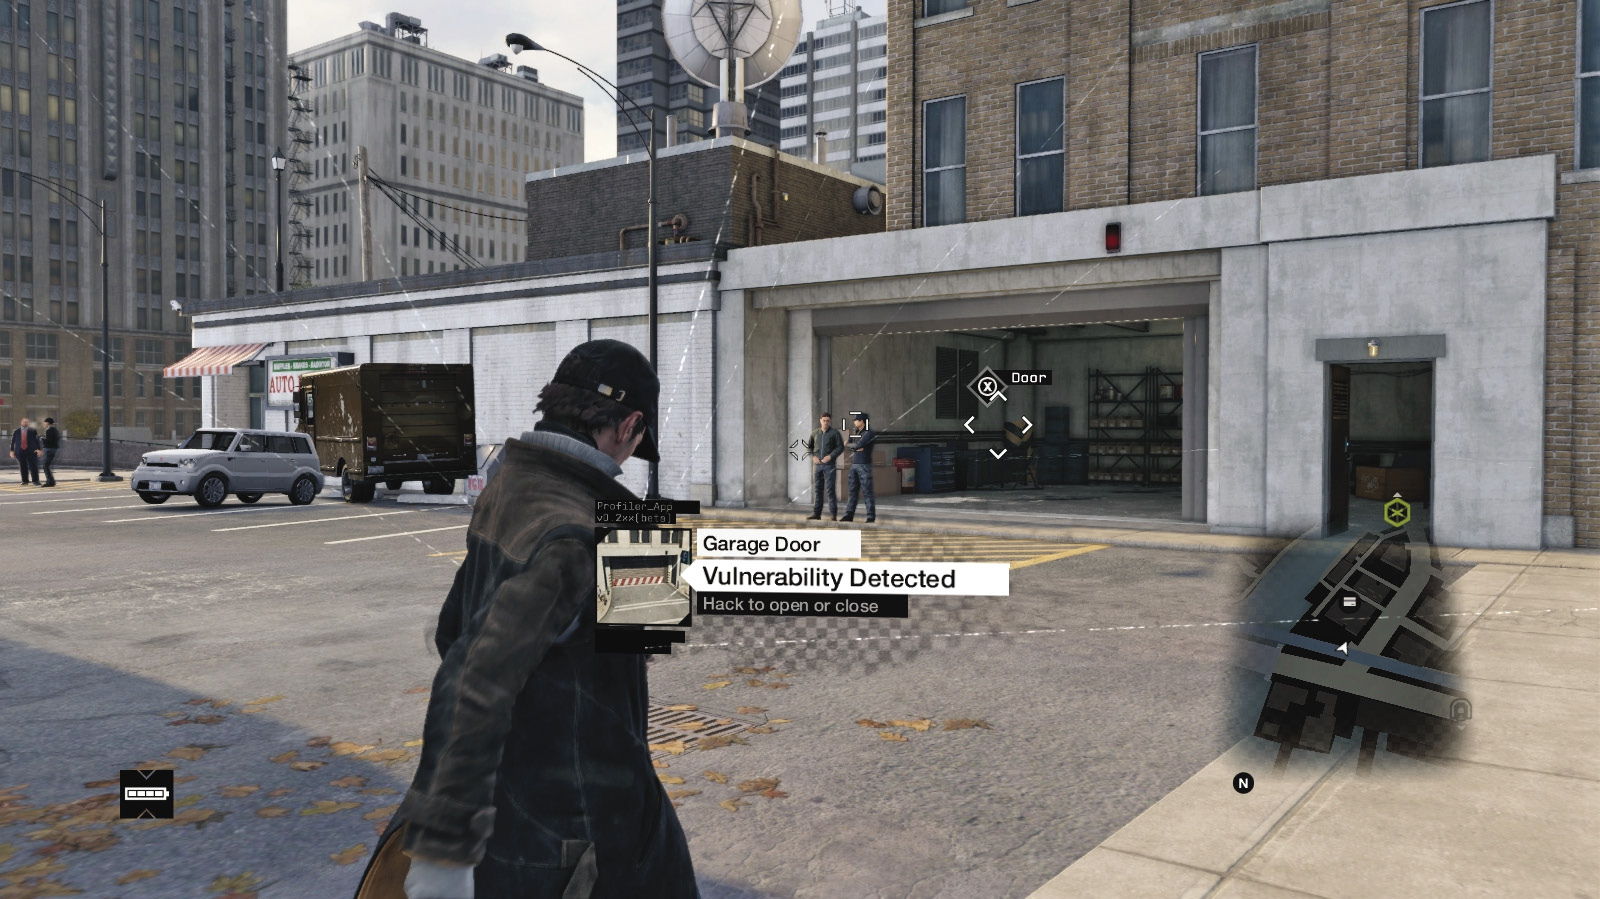
Location / Mad Mile // L-Train Tracks, Southwest Island Garage
Find the island in the southwest corner of Mad Mile and the L-train tracks near the bridge in this island’s northeast corner. The switch console is cunningly hidden for this garage; to reach it, you must clamber onto the garage’s roof. With no stair access, secure a truck and drive it close to the roof, then use it to climb up. Work your way around the satellite dish, climb the sloping brick area, and drop behind the barbed-wire fence.
Weapon Crate 09
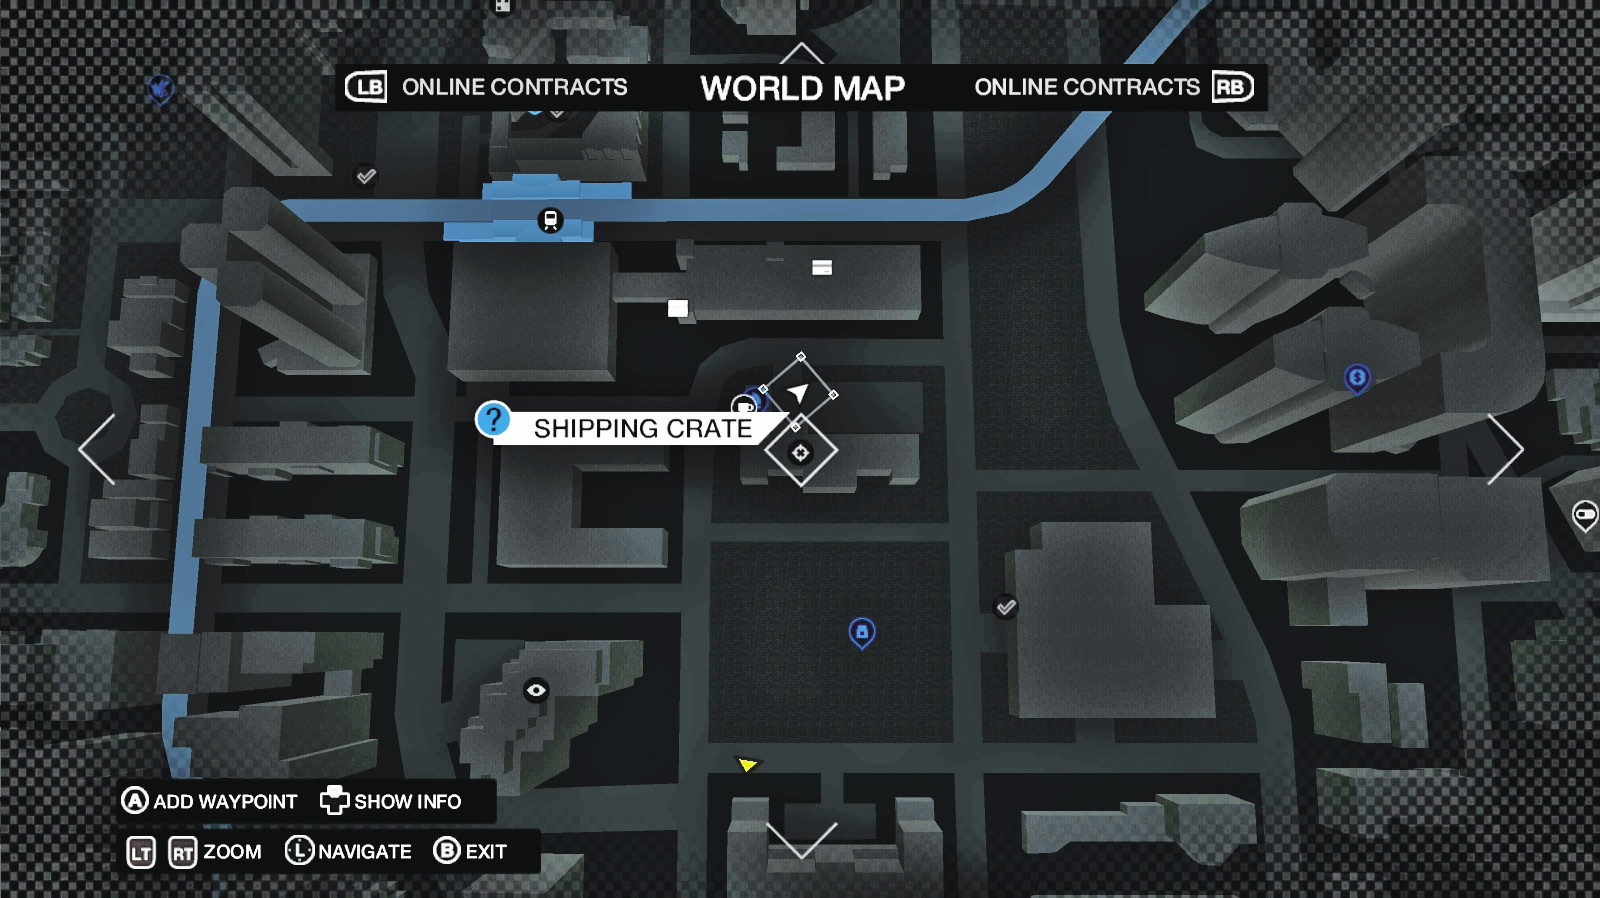
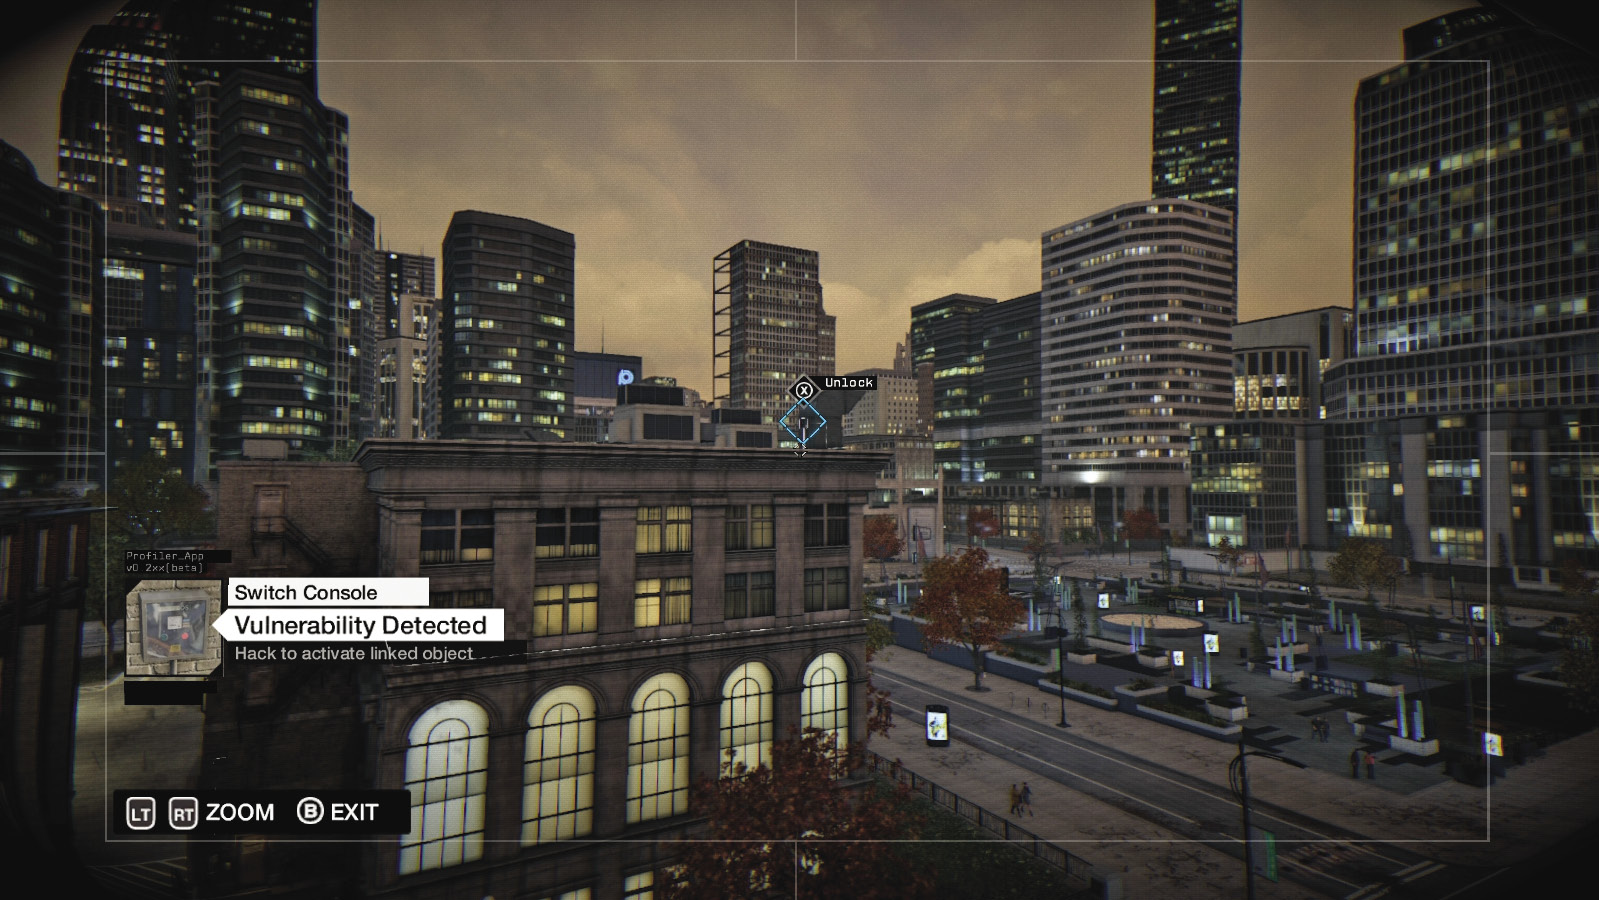
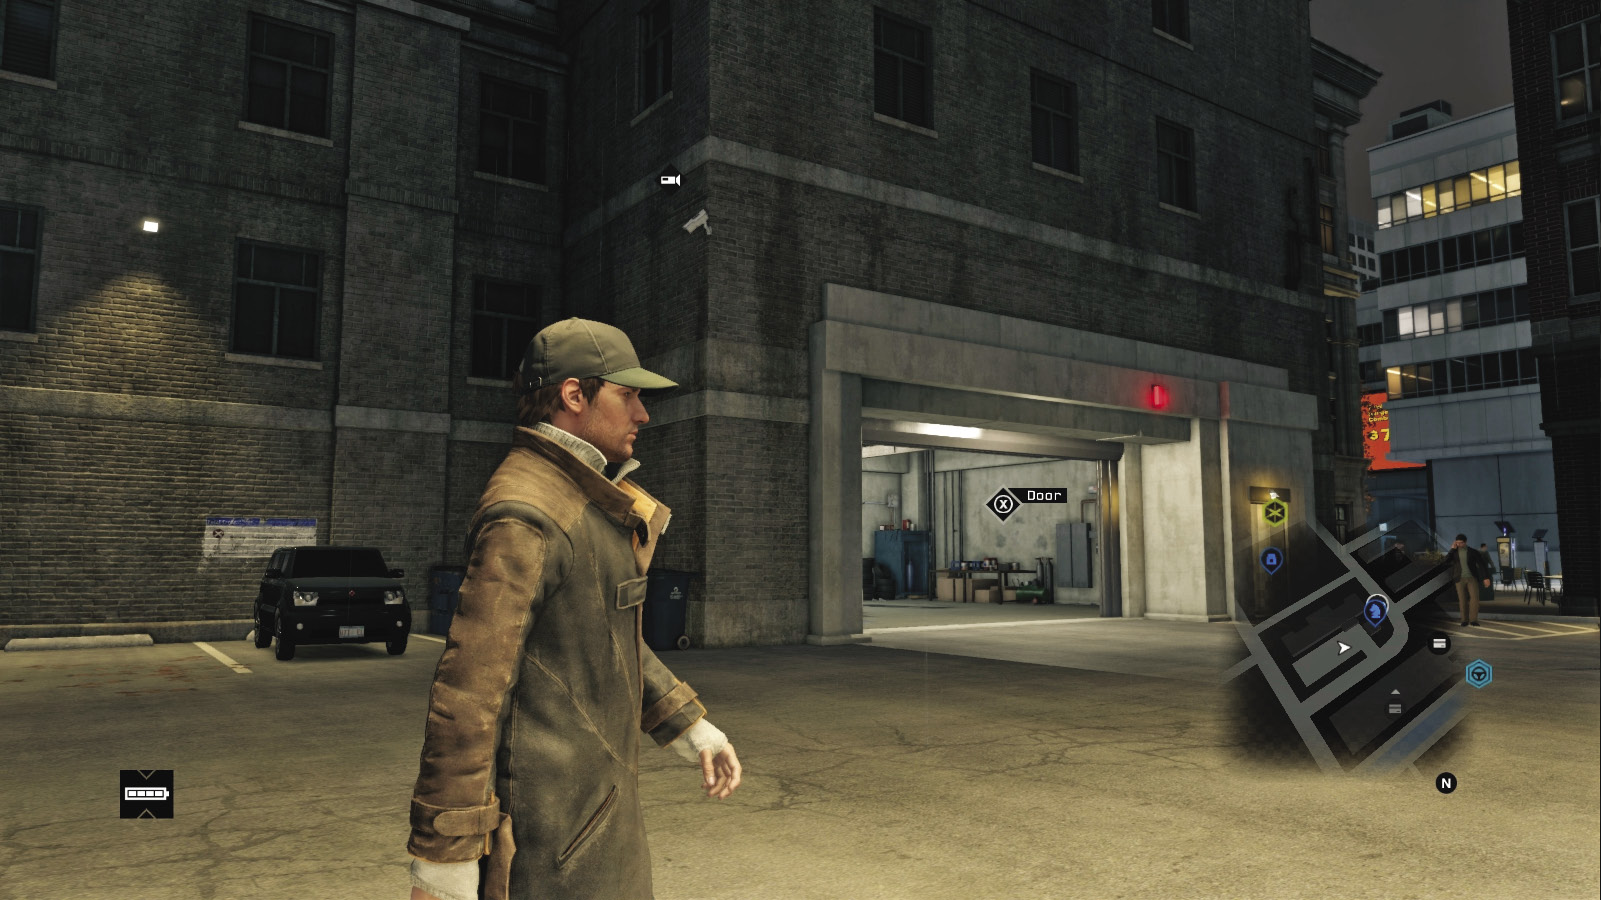
Location / Mad Mile // Northeast Coffee Shop Parking Lot Garage

Find the coffee shop in the north/northeast part of Mad Mile, just north of a shell game. The garage is part of a large brick and stone apartment complex. Stand outside the coffee shop (or follow the data flow around to this street), and locate a security camera on the gray office structure west of the garage. The camera points to a well-hidden switch console on the roof ducts. The garage and its contents are now accessible.
2. WE HIT THE MOTHERLODE
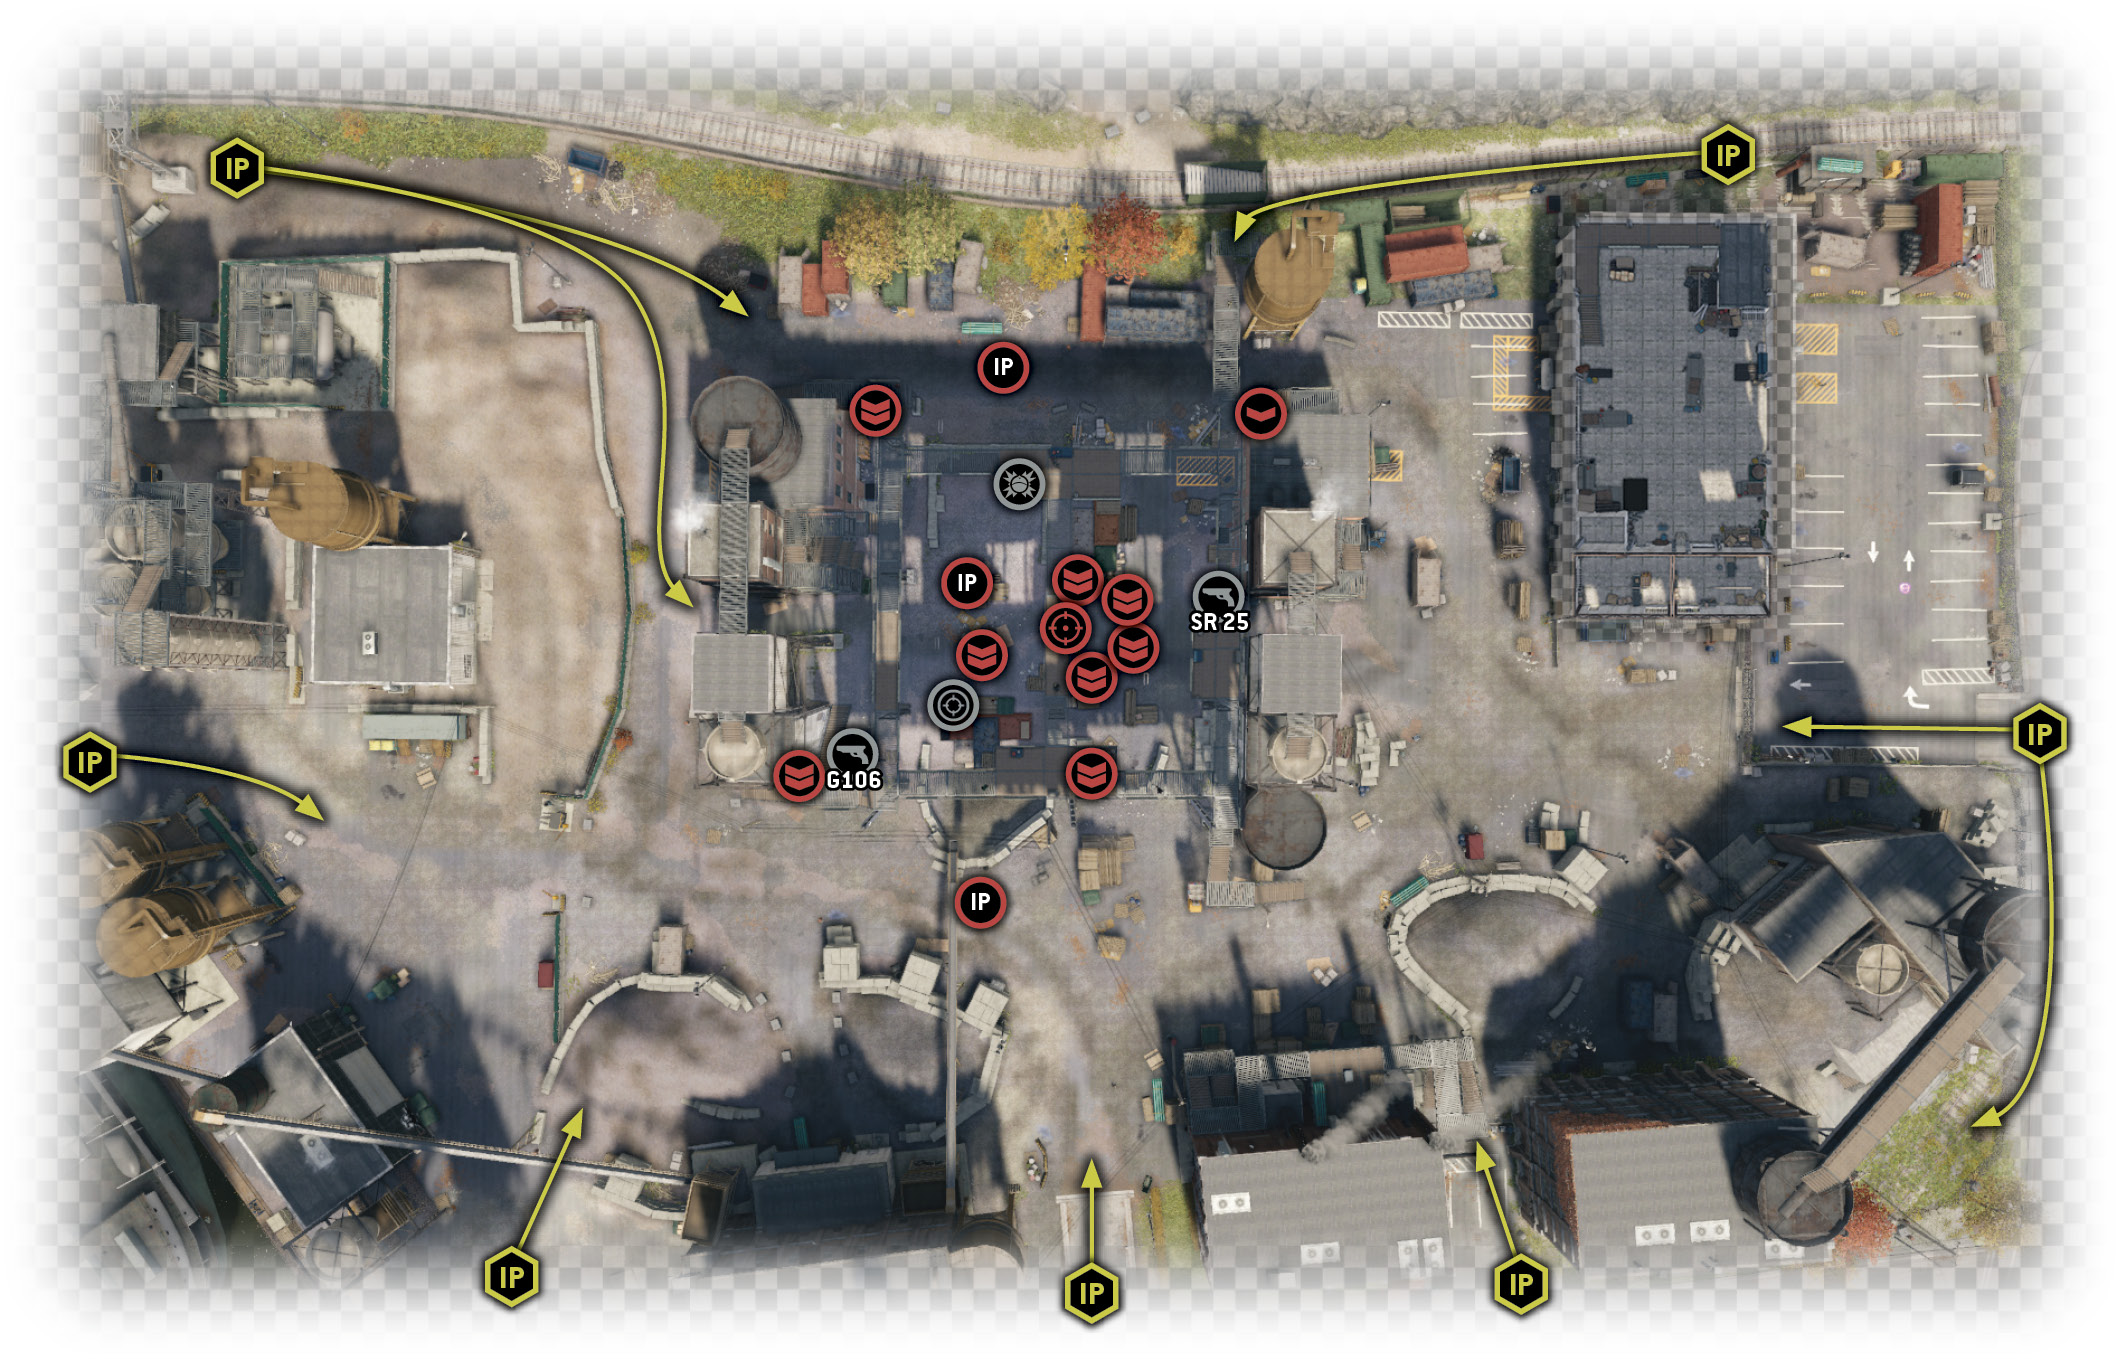
 Location / Brandon Docks // Tidis Corporation Warehouse
|
|
 Reach the Fixer warehouse
 Eliminate the Fixers
 Infiltration
 Lethal Force Likely
 Melee Force Likely
Difficulty: 
Once you discover all caches, wait for a phone call from Tobias, who reckons you’re on to something big. He tells you to meet him at the shop (which is optional, but allows you to stock up for the combat to come). Then head to the Tidis warehouse to begin your infiltration.
Overview
Completion Point: Warehouse exterior, then removal of each wave of foes, then the final three “bosses.”
Dangers (Initial Infiltration): Ten Fixers (Gunman x1, Veteran x8, Marksman x1), armed with shotguns, machine guns, and rifles, and one armed with a sniper rifle. No Shot-Callers.
Reinforcements (Vehicle Wave): Three SUVs: north SUV (Veteran x3, Marksman x1); center SUV (Veteran x1, Elite x2); south SUV (Veteran x2, Elite x1). A total of 10 enemies.
Reinforcements (Boss Wave): Three SUVs: north SUV (Elite x2, Enforcer—boss x1); center SUV (Elite x1, Enforcer x2—one boss); south SUV (Elite x2—one boss); Enforcer x1, Marksman x1). A total of 10 enemies, including three bosses.
Insertion Points
This location is porous, meaning there are no obstacles preventing your infiltration, only the enemies. Before you attempt to take over this facility, learn the lay of the land.
South Side
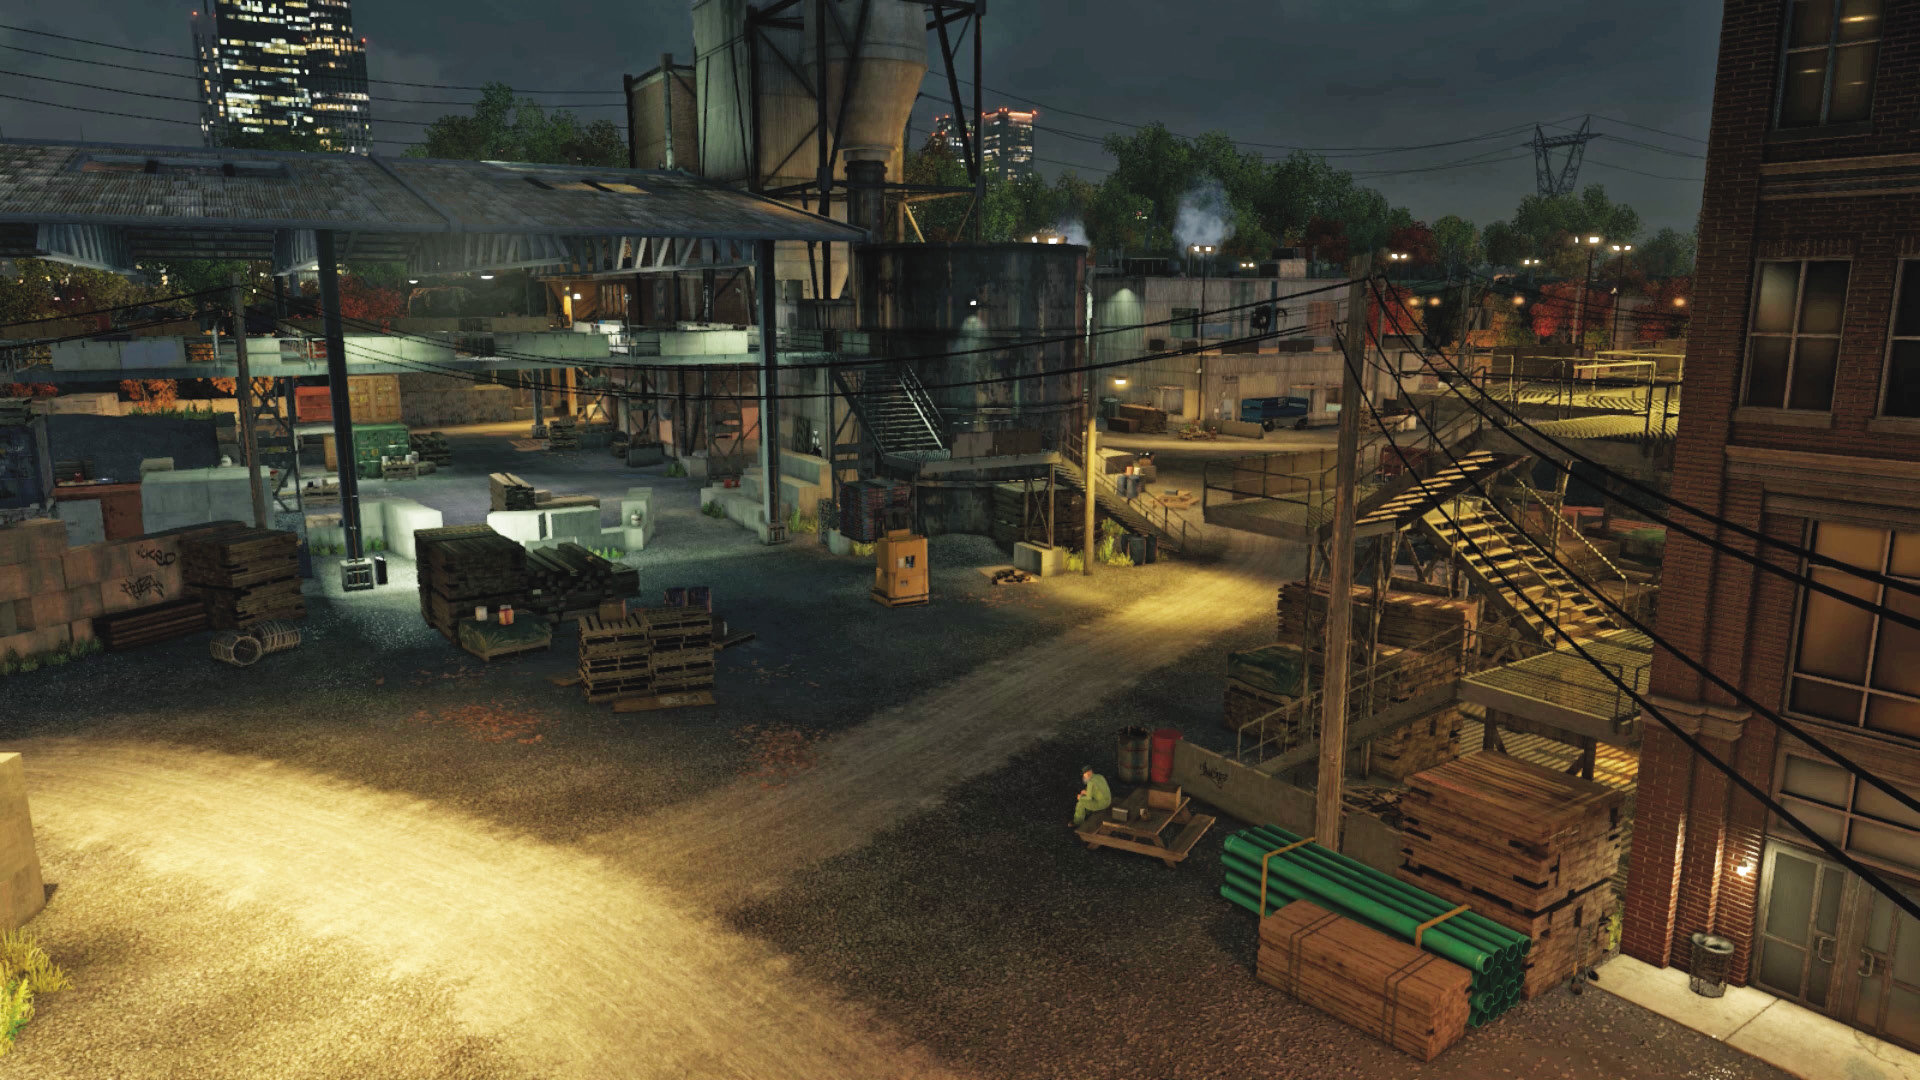
Accessibility Level: 
Exterior Vantage Points: To the southeast is a balcony with excellent views (and steps up from near your starting position), under which is a gravel pile and masses of pallets to hide behind. To the south is a gate and dirt road where the enemy SUV parks in a later incursion. To the southwest are two massive gravel piles and silo chutes; both areas are good to scramble up and use for sniping opportunities.
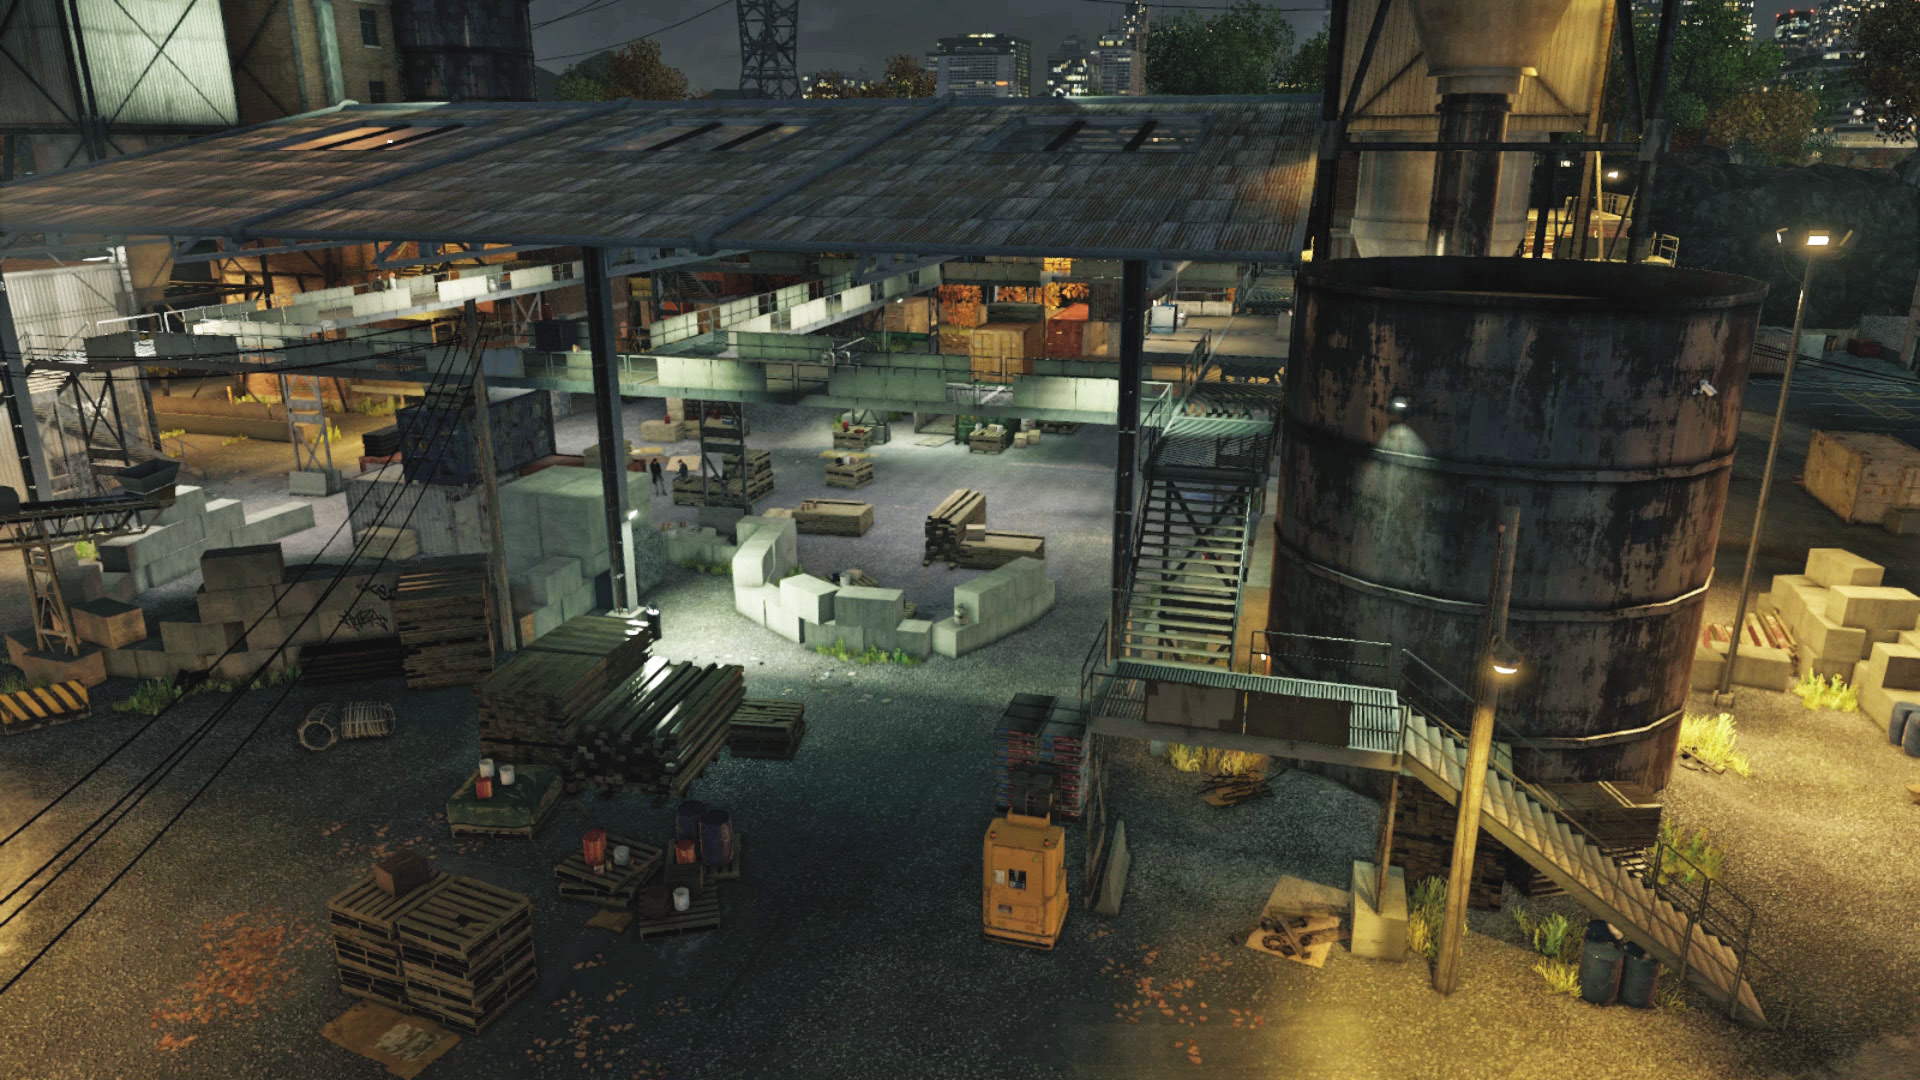
Warehouse Access Points: The grounds into the warehouse are wide open, with numerous concrete blocks and pallets to use as cover. There are metal stairs to the southeast and southwest; watch for patrolling foes up here. You can use the forklift to reach the stairs, but this is more trouble than simply using the steps themselves. The balcony just under the warehouse roof is a fine place for sniping and prowling, as well as dealing with SUV reinforcements from range.
West Side
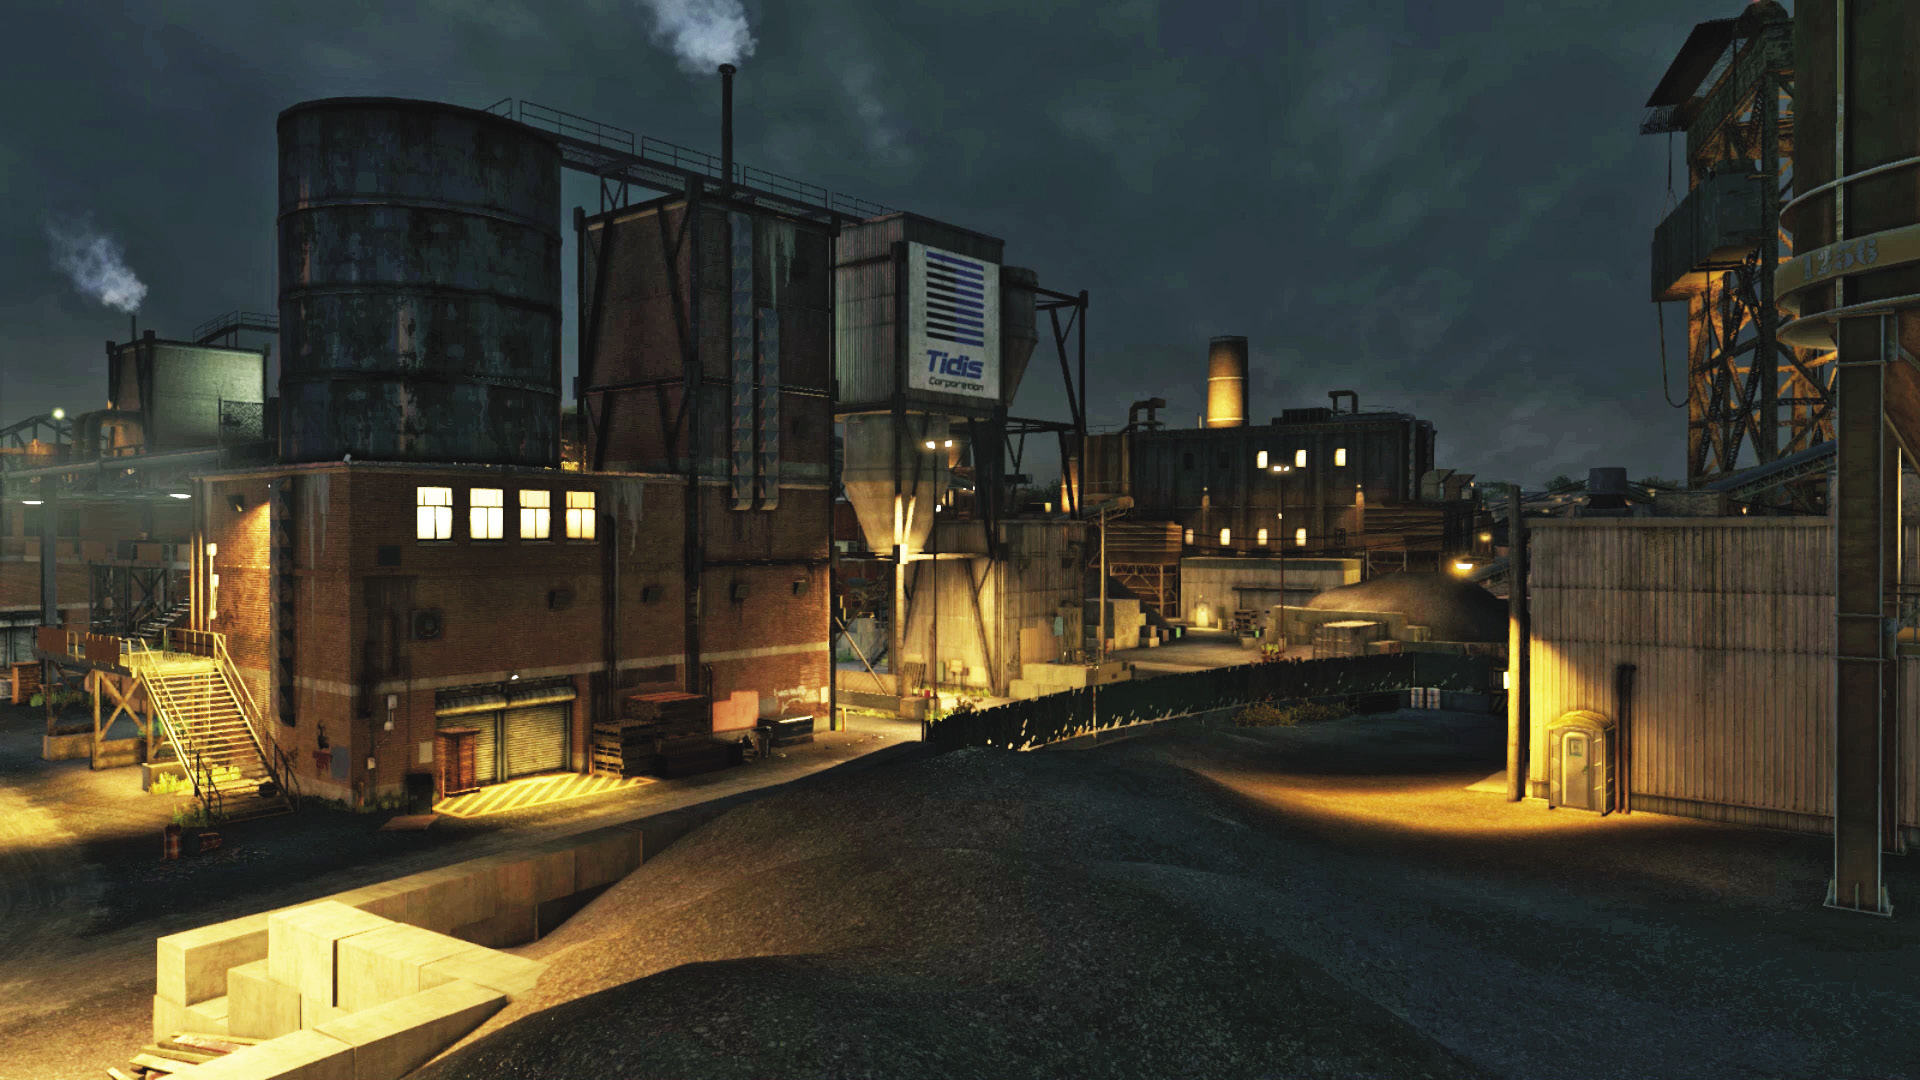
Accessibility Level: 
Exterior Vantage Points: Possibly the largest gravel pile in Chicago greets you on this side of the warehouse; use it as a vantage point if you want to draw foes out from the warehouse. There’s reasonable cover, and the corrugated building is easy to hide behind. Watch the propane tanks to the northeast, though.
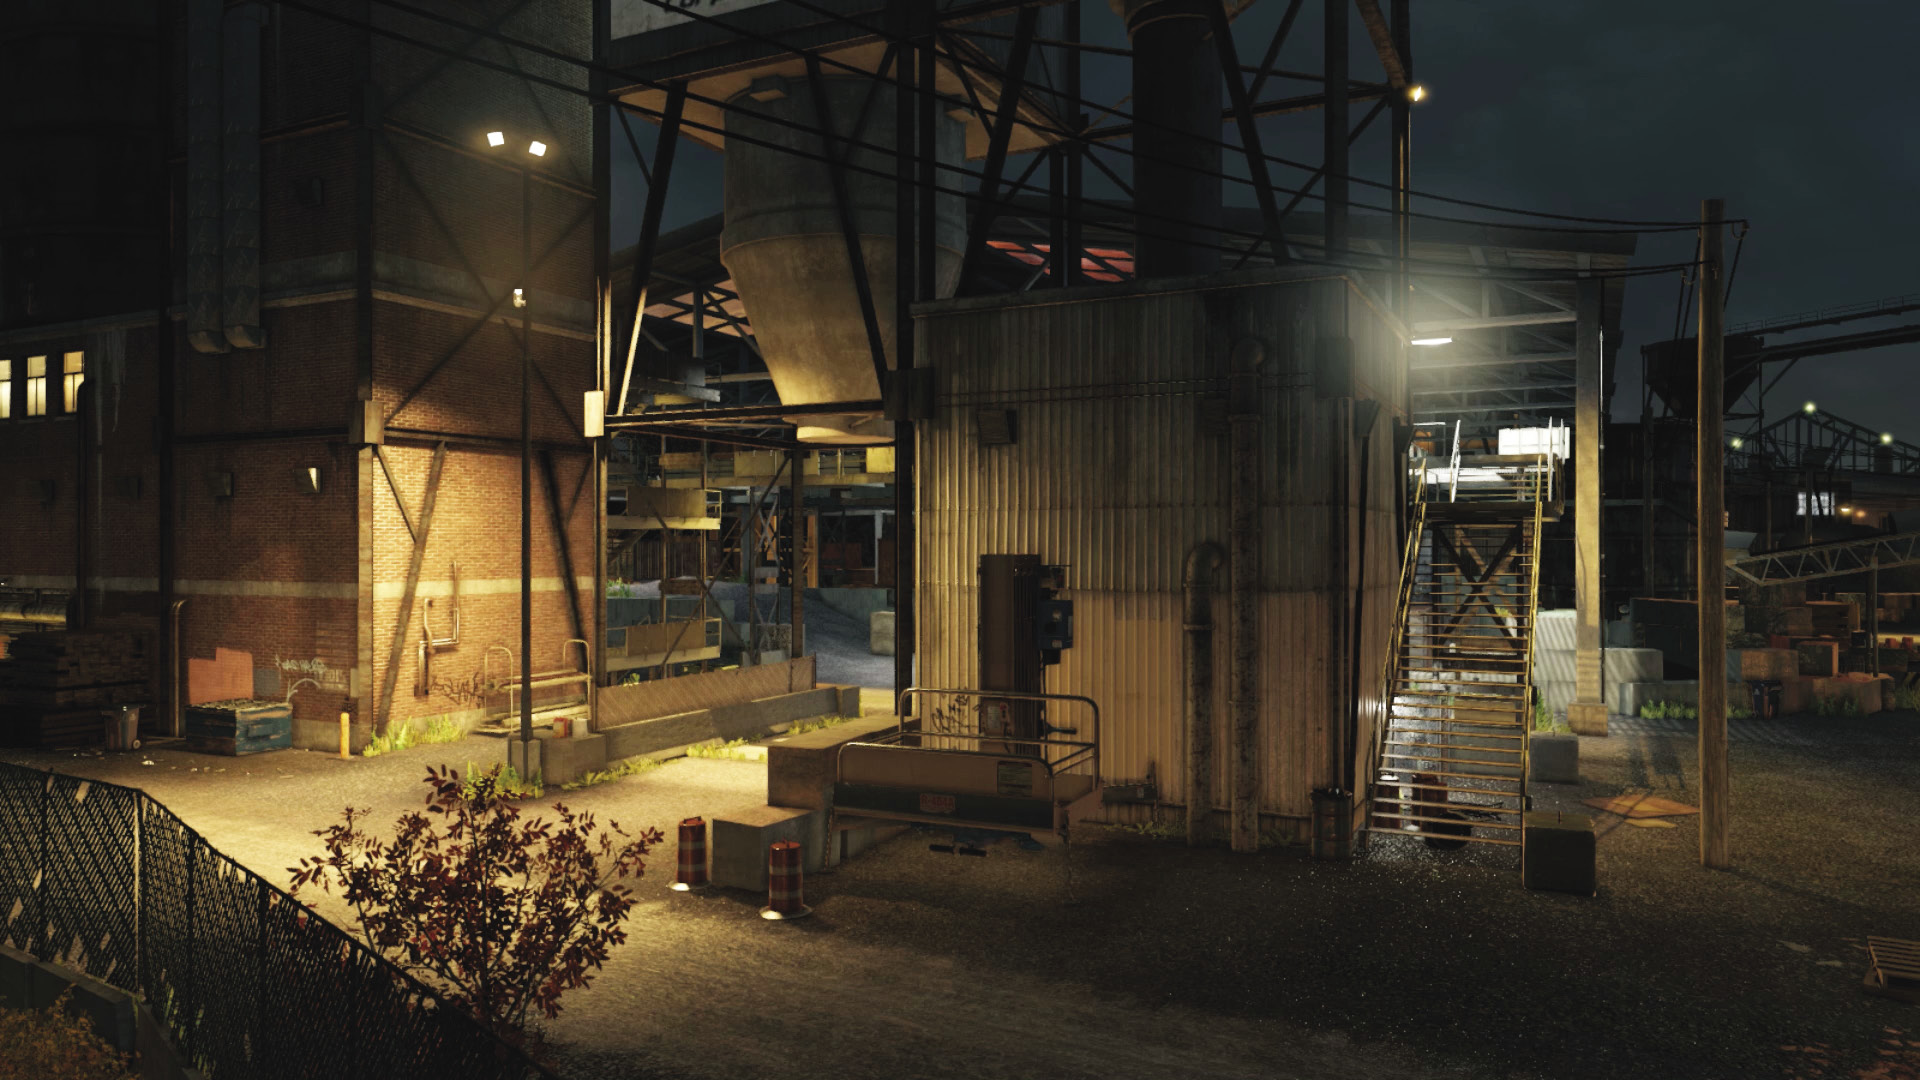
Warehouse Access Points: This place isn’t usually used as a thoroughfare when you’re emptying out the area of foes. An SUV will enter the gap between the two buildings during the boss wave, but otherwise expect little resistance, though enemies like to creep about here to outflank you. There’s a construction lift (which you can strand yourself on, as it doesn’t allow upper access) and balcony stairs at the southwest and northwest corners.
North Side
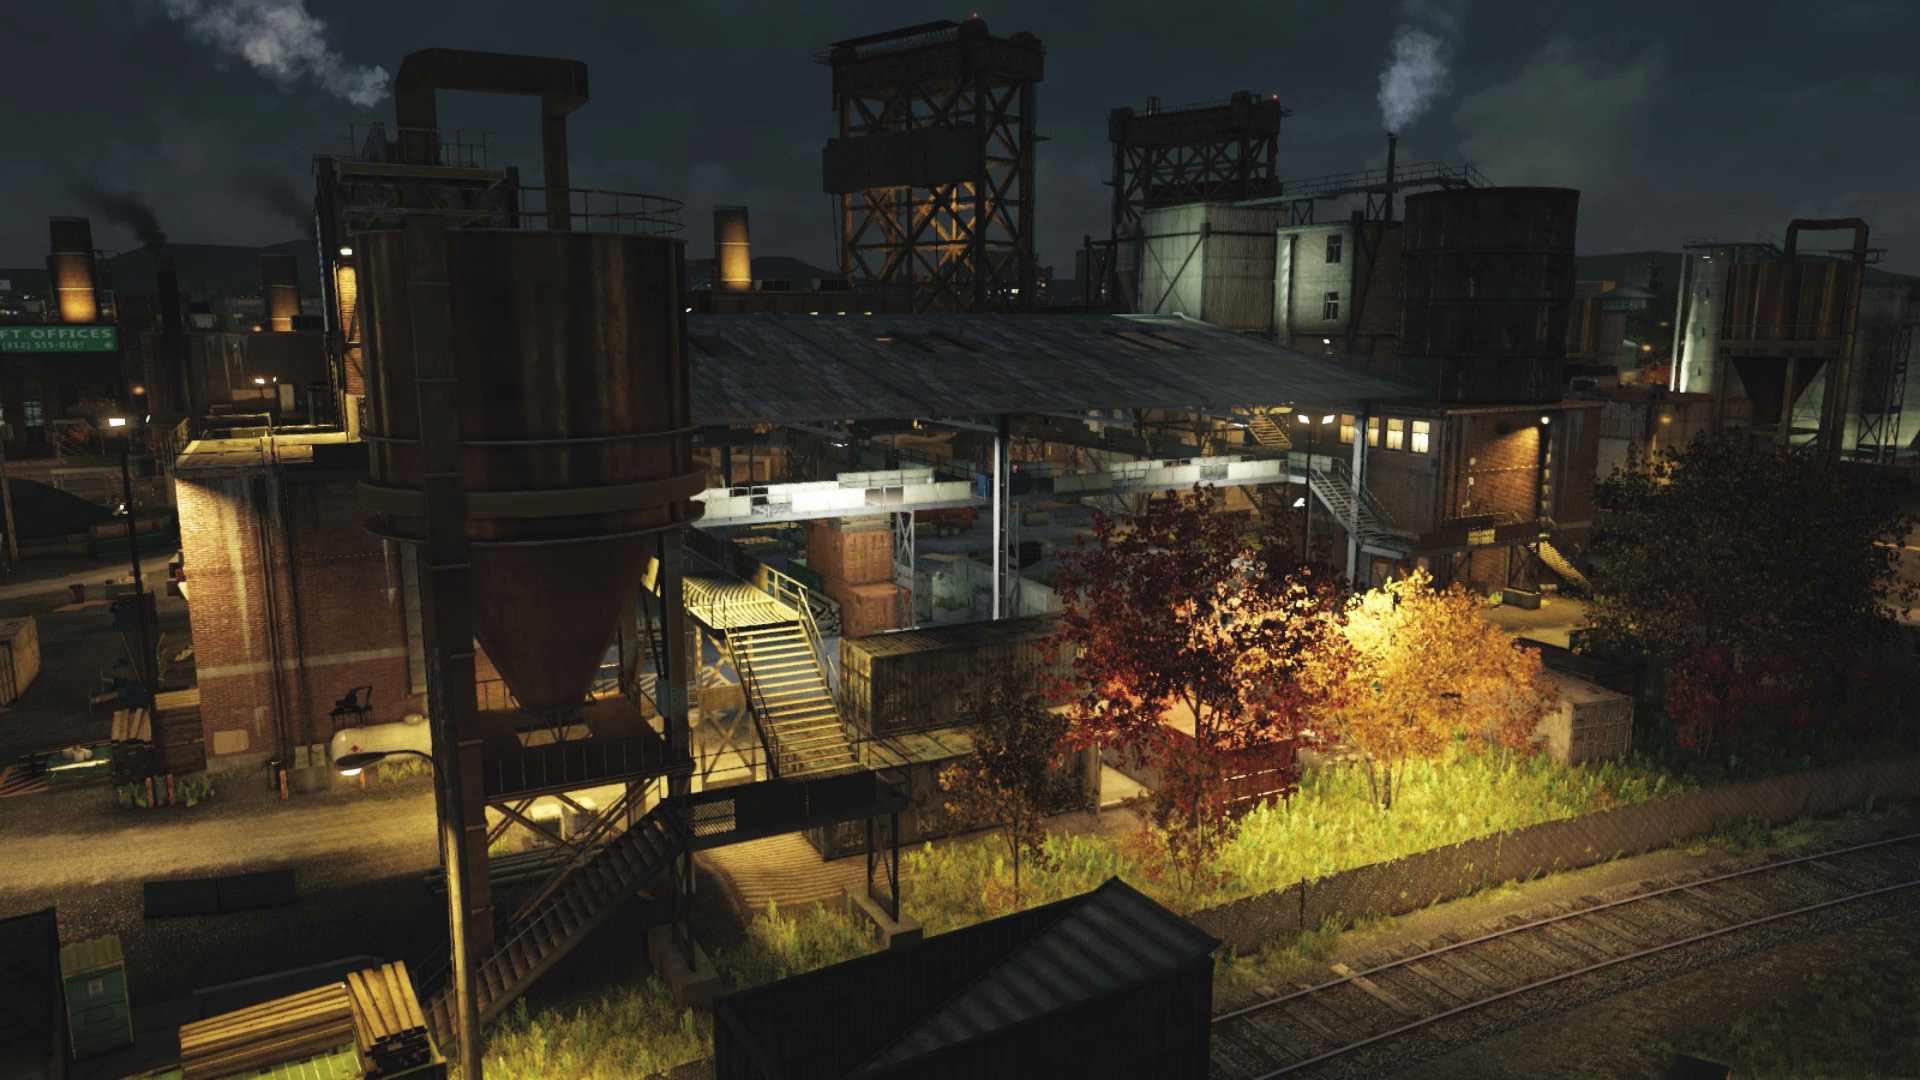
Accessibility Level: 
Exterior Vantage Points: If you’re heading away from the warehouse, there’s a collection of container crates to hide in and maneuver through, a rail track parallel to the warehouse perimeter, and rocks to climb and use as sniping positions. Pay special attention to the northeast corner and the large silo, as there are stairs here and into the warehouse balcony.
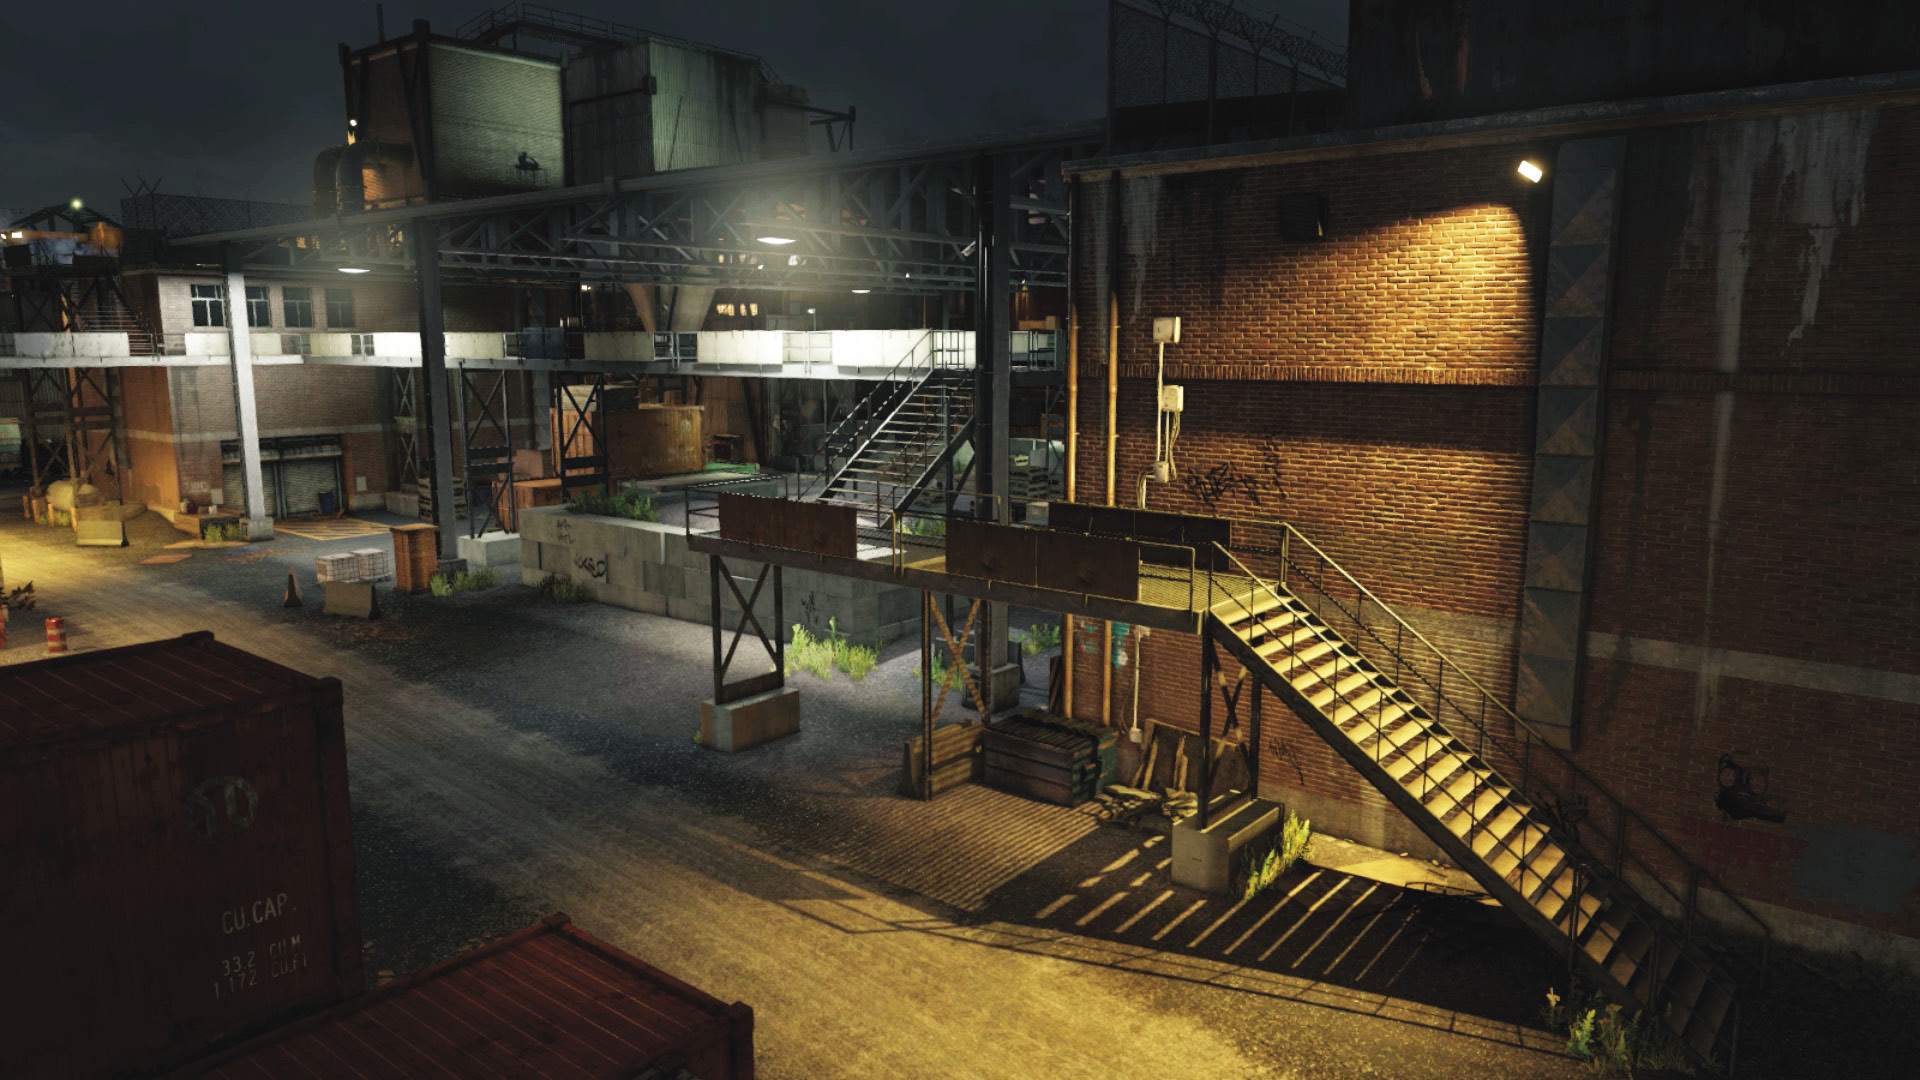
Warehouse Access Points: This area is slightly more dangerous to wander around, as the stairs up to the balcony aren’t accessible in this location. But the balcony is great for dropping projectiles down on the SUVs that show up on the gravel road, and there’s a modicum of ground protection.
East Side
Accessibility Level: 
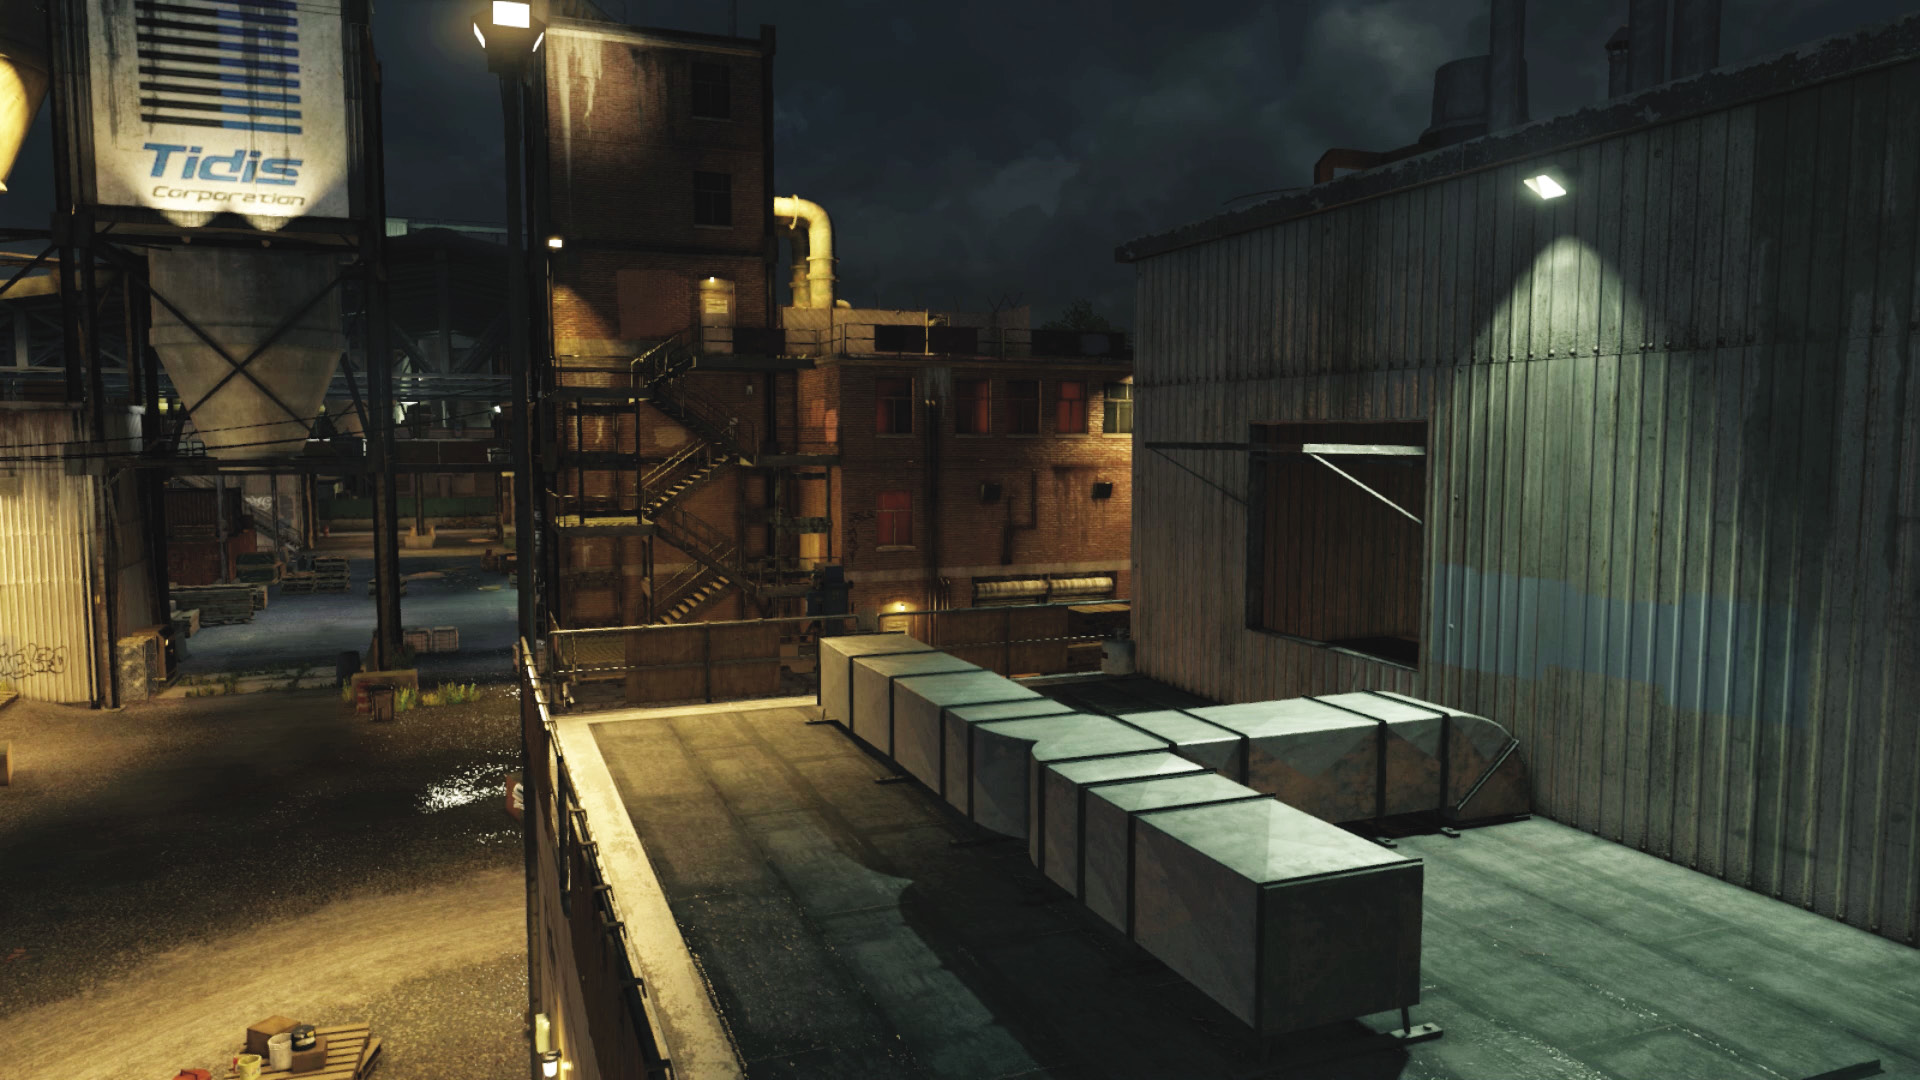
Exterior Vantage Points: The large Tidis warehouse (the light corrugated metal building) has an open door and windows to enter, and you can hide behind them if you’re after longer-ranged takedowns. It also has an interior balcony you can hold up in, with only one set of steps, making you difficult to outflank. Just outside is a propane tank (watch for that exploding if you’re nearby) and the main road into the middle of the warehouse; expect an SUV to drive down here as combat progresses.
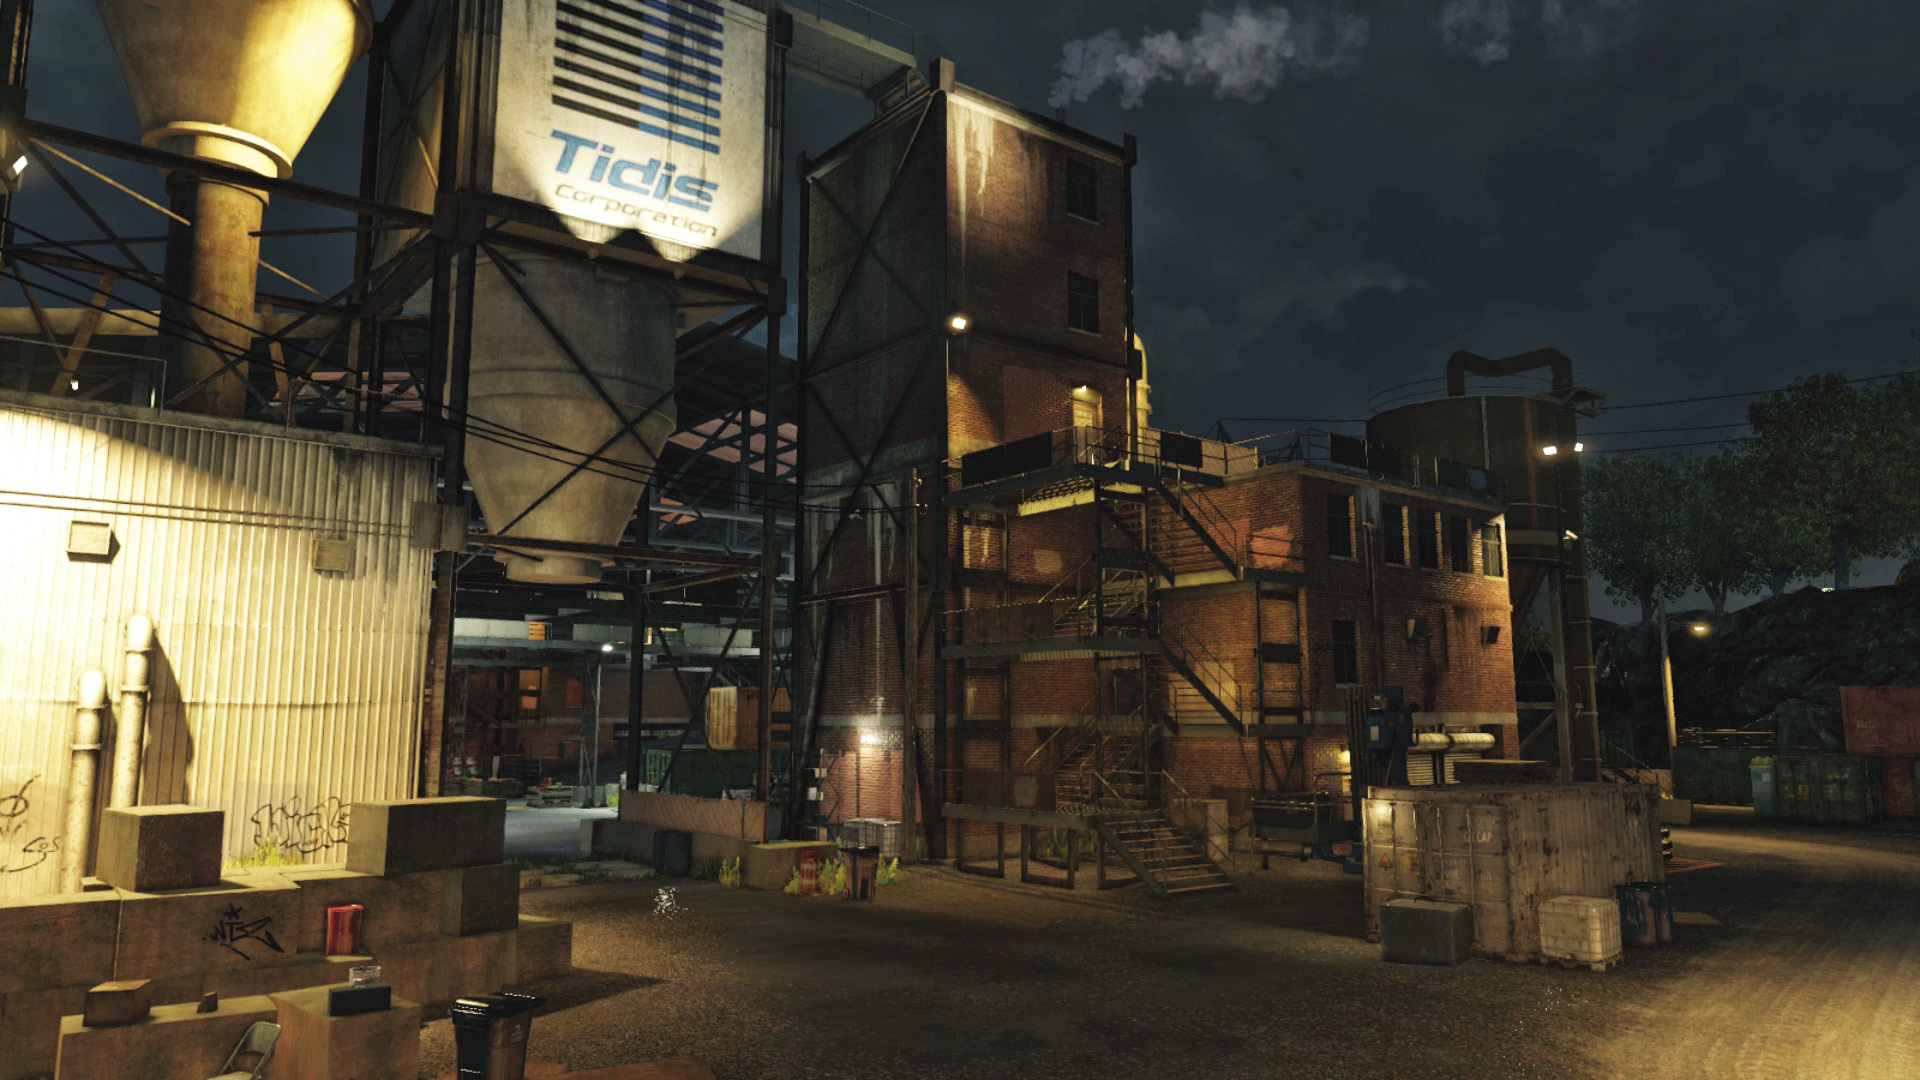
Warehouse Access Points: This is similar to the building’s west side, but with more access points: the balcony steps by the silo to the northeast and a tall set of stairs by the middle driveway entrance and construction lift. These lead to an upper balcony higher than the warehouse roof, where you can access the balcony. The only issue is the time it takes to race up and down the stairs to reach this vantage point.
Warehouse Interior
Accessibility Level: 
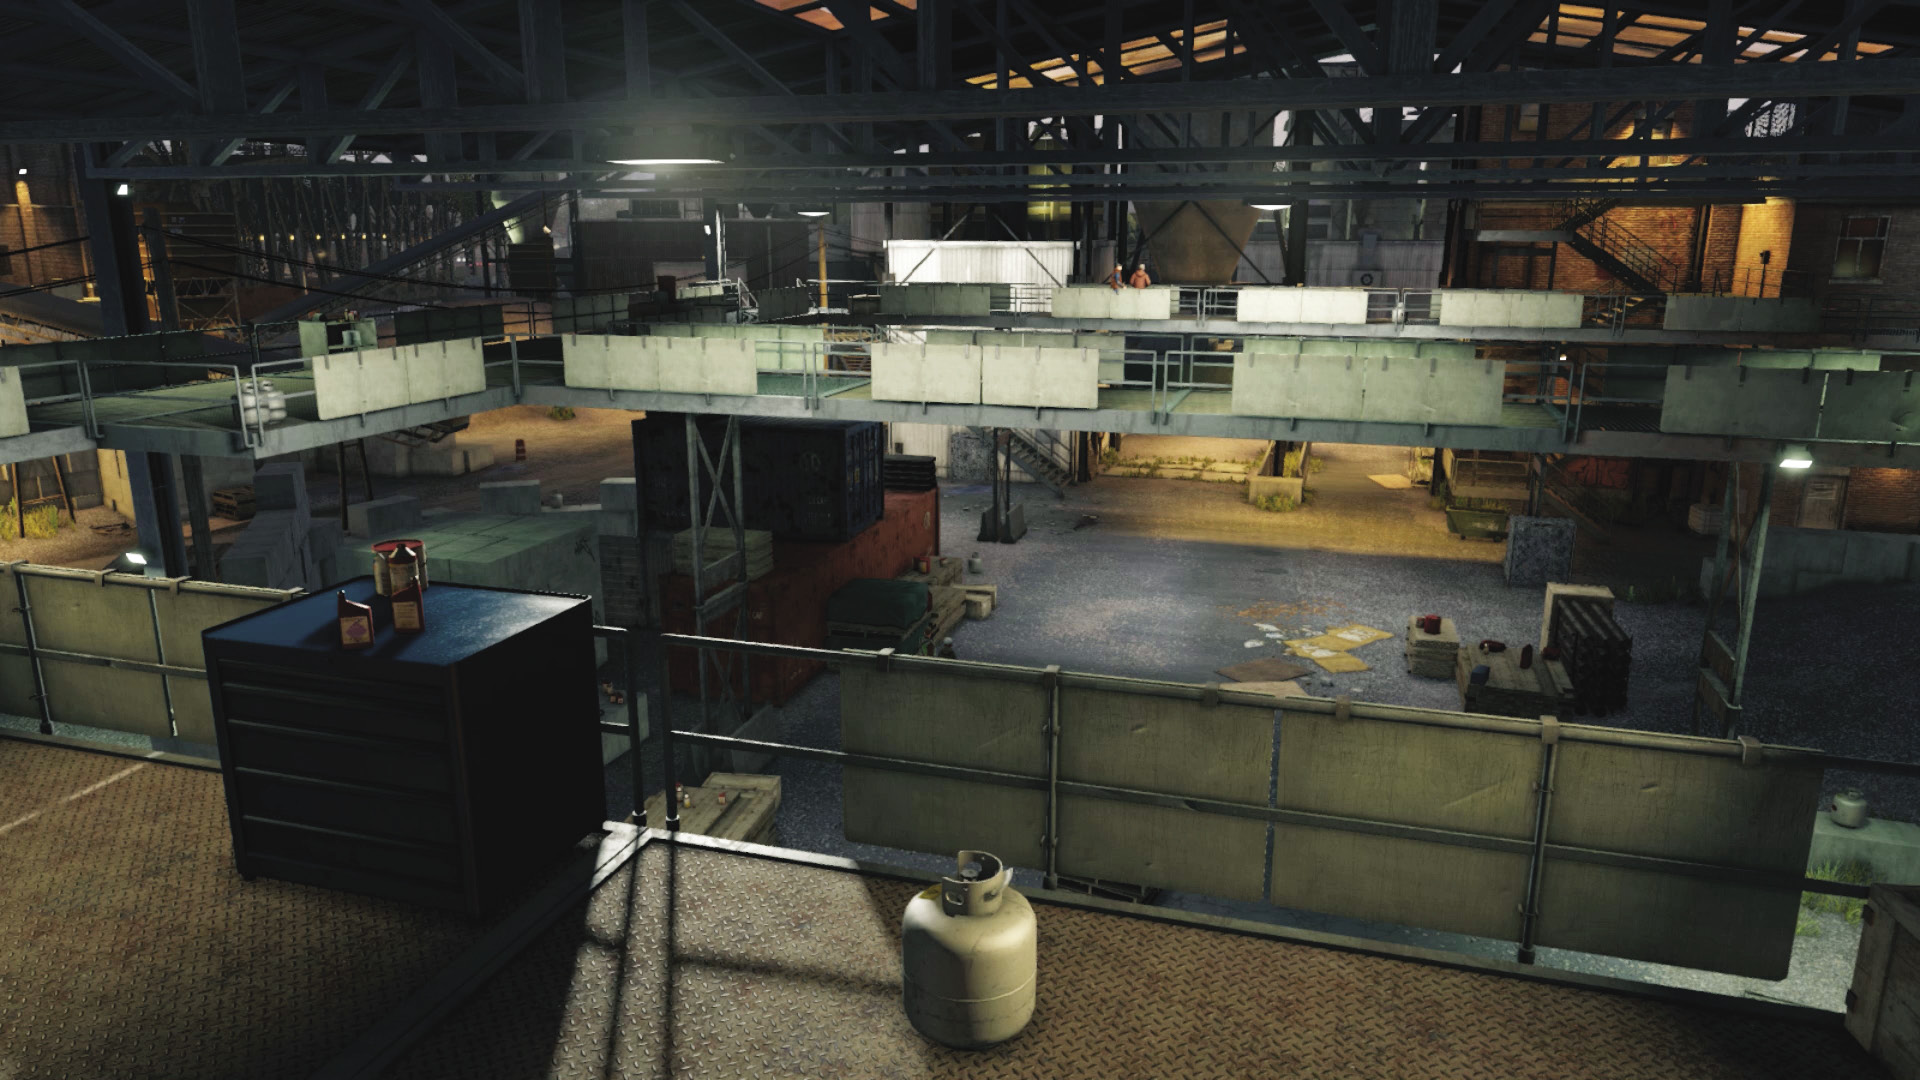
Exterior Vantage Points: The interior is reasonably open and has many hiding spots and canisters or tins to shoot and explode, hindering your foe’s hiding plans. An SUV parks in the middle here in each of the two subsequent waves of foes. Above are three balcony bridges connected to each other. These are especially useful, as there are tables with a grenade launcher, rifles, and grenades scattered about; grab these between waves of foes.
Progression Plans
You have to tackle the foes patrolling here in a dangerous and drawn-out confrontation with three waves of fighting. Here are some plans to try:
General PreplanningStyling and Profiling: There are a few cameras dotted around, but the place is so open and vast, it isn’t worth your time trolling through remote viewings to mark your foes; use a ctOS scan before every wave (three times), or carry your phone and flag individuals. Guard Routes: You can watch the foes on maneuvers, but as takedowns on balconies can be seen from almost anywhere, you’re soon faced with enemies behind cover for most of this battle. Come prepared for this eventuality. Firepower: The name of this mission should tell you that violence is the acceptable way to finish these foes. Your baton and fists of steel aren’t going to cut it. |
 Aggressive // Stealth: Throttling Some SOBs
Difficulty: 
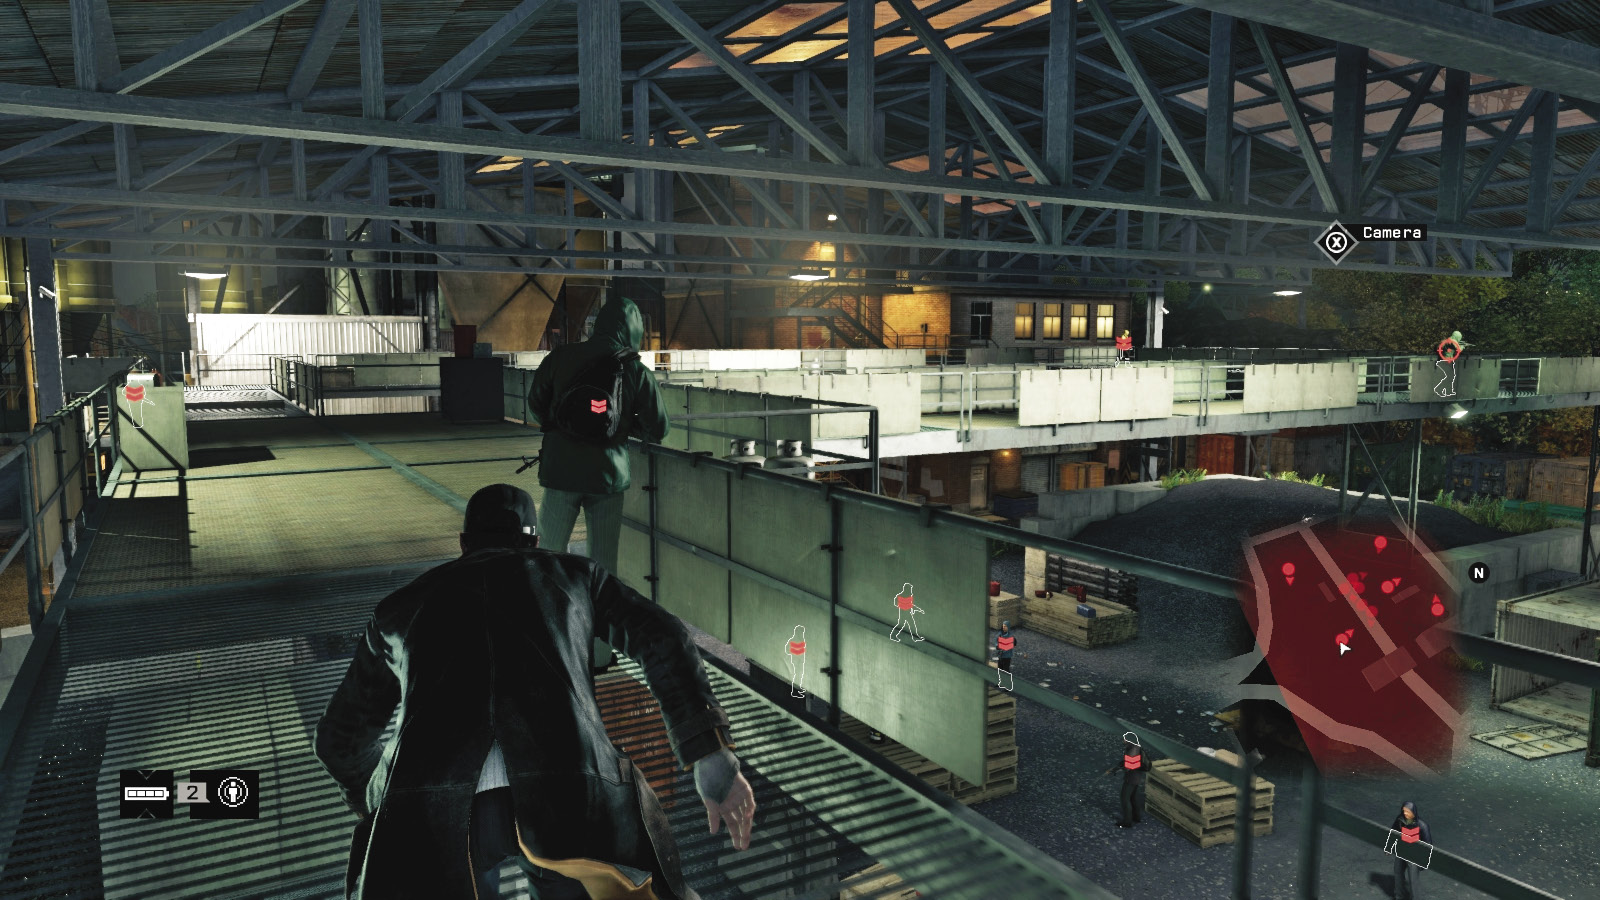
Using just your bare hands is possible for two or three takedowns, but you’re soon spotted unless you take extreme care and have extreme patience, using your smartphone to profile, learning every guard route, and dealing with the enemies on the balcony first. Enter via the stairs to the southeast for your best chance.
 Aggressive // Violence: Tackling Some MIBs
 Difficulty:
You don’t need to try mindless violence to gain the upper hand here (though that works just as well). Instead, equip a machine gun or rapid-firing pistol (a Spec-Ops weapon is even better, as it doesn’t alert foes unless you’re seen shooting), sneak up the southeast stairs, and quickly tag the patrolling foes ahead and right, ahead and left, and the sniper in the middle of this upper area. You may see another foe fleeing down to the ground, but most of the enemies begin in the center of the warehouse.
At this point, continue your prowling massacre by profiling and seeking out foes from behind cover, whittling them down, and intermittently checking the stairs for incoming foes trying to surround you. Continue this carnage until the reinforcements arrive.
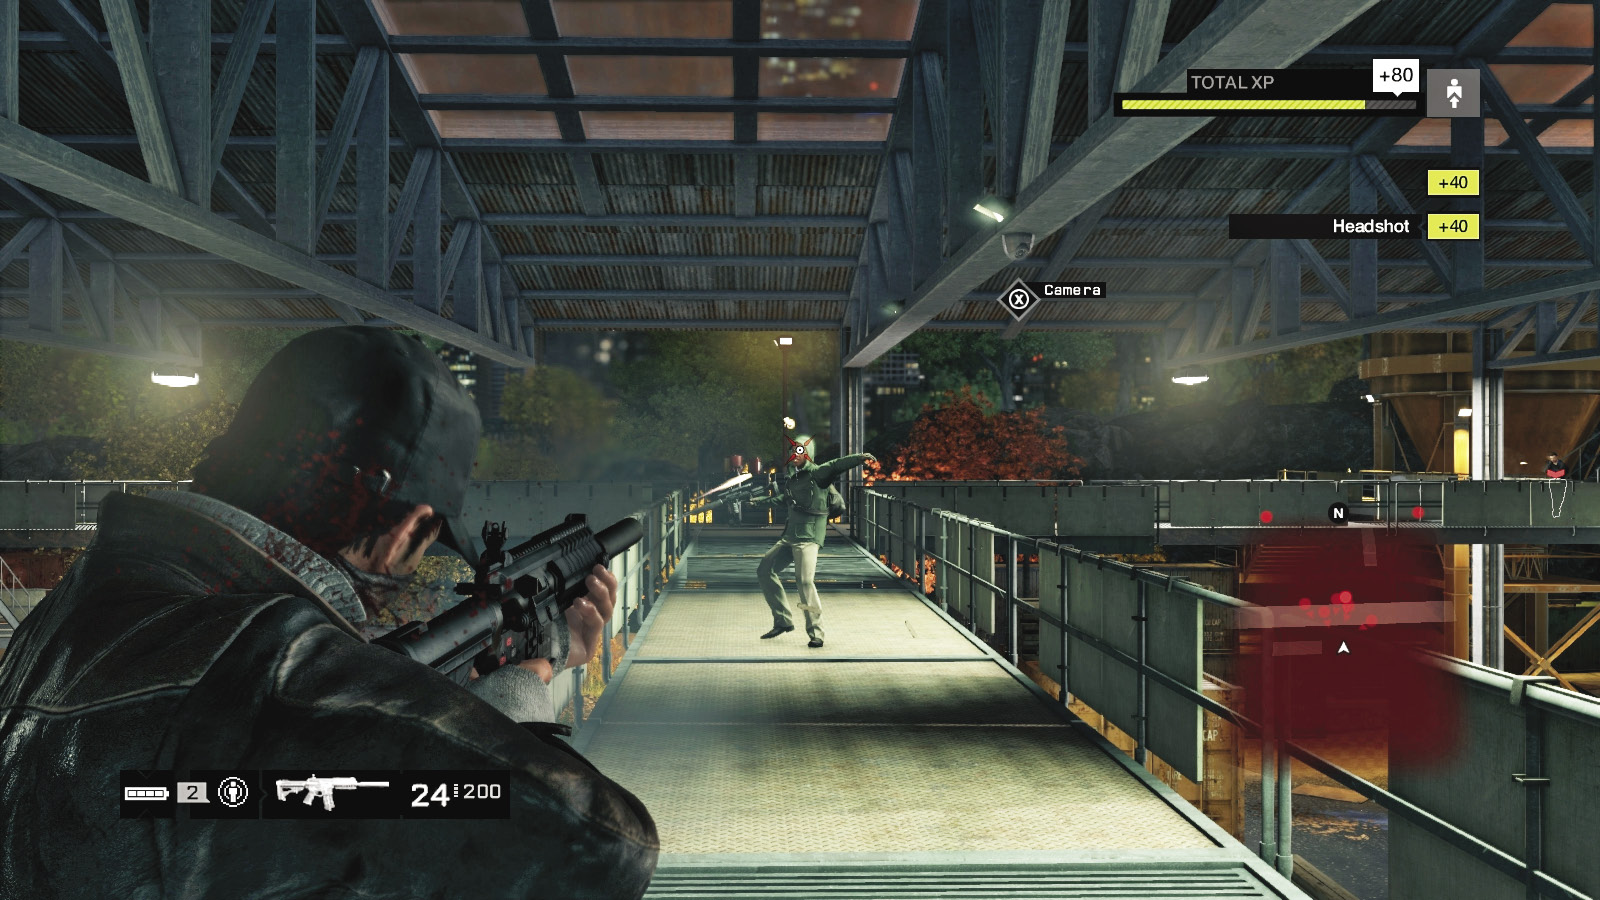
There are a host of other ways to play this out:
Snipe from any of the exterior areas, using a rifle like the AC-AR from the southeast outer balcony. Plug away and advance when the enemies are huddled up behind cover.
Any of the previously mentioned outer areas are good sniping points too.
There are four foes in the center of the warehouse. If you rush in with a well-timed grenade, you can damage most of them and drop the rest with gunfire.
Running along the upper balcony and firing down can be problematic if you’re peering over the railing but can’t aim your weapon, so use corners or fire through the gaps (including the balcony floor) at your foes. Profile them so you can easily see them from the latticed metal.
Rushing the balcony with a shotgun is another option; it’s always best to clear out the top balcony (including the sniper) first and gain the height advantage before removing the enemies below.
Running and gunning along the ground is another option, using the cover and stepping around to grab and shoot enemies you can’t otherwise kill with headshots from a distance.
Most of the hiding places in the warehouse are close to explosive canisters, so aim at them; these can remove wooden pallets entirely and can damage or expose foes.
 Driving // Offensive: WTF?
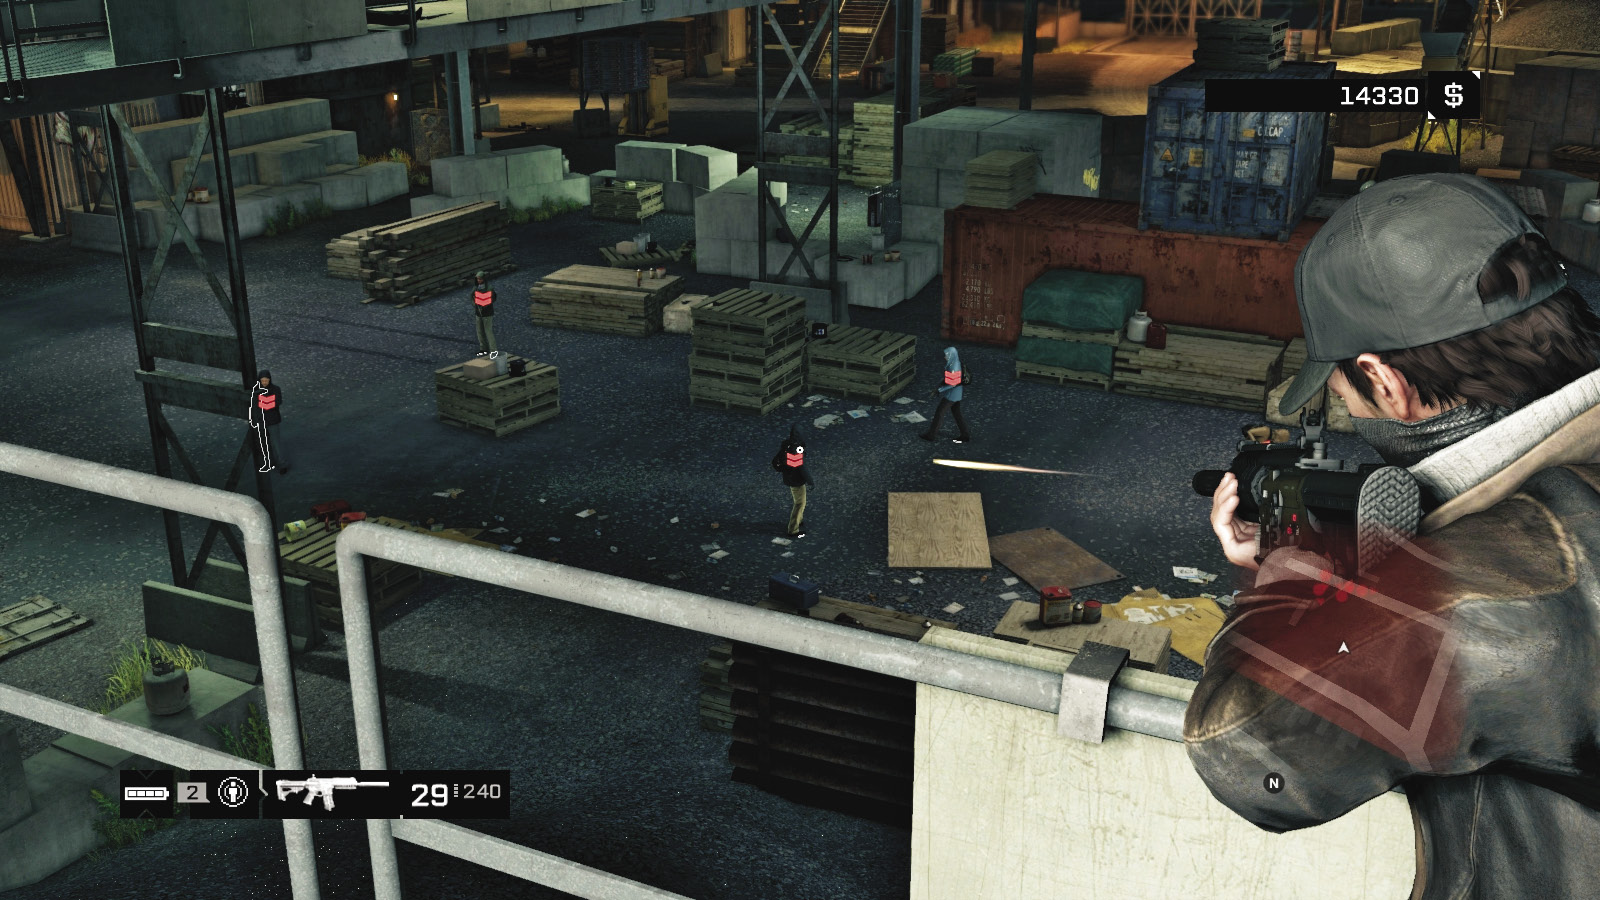
Difficulty: 
You don’t need to approach this warehouse on foot (although it’s preferable to this harebrained scheme); take a larger vehicle and accelerate through the middle of the warehouse, ramming the cluster of foes there and then using it as movable cover. It’s dangerous, difficult, and a lot of fun.
3. LIKE A BOSS
 Location / Brandon Docks // Tidis Corporation Warehouse
|
|
 Prepare for enemy reinforcements
 Eliminate the reinforcements
 Prepare for enemy reinforcements
 Eliminate the Fixer bosses
 Eliminate the remaining Fixers
 Infiltration
 Lethal Force Likely
 Melee Force Likely
Difficulty: 
Once the last foe of the first wave is downed, reinforcements arrive in the form of three SUVs, all approaching from the east entrance and pulling up to the north, center, and south gravel roadways. The north foes arrive about five seconds before the center enemies, who are here five seconds before the south SUV. Four heavily armored foes emerge from each vehicle, and either take up sniping positions close to their vehicle or advance into the warehouse to annihilate you. Spend some time (including parts of the previous objective) preparing some surprises for their arrival!
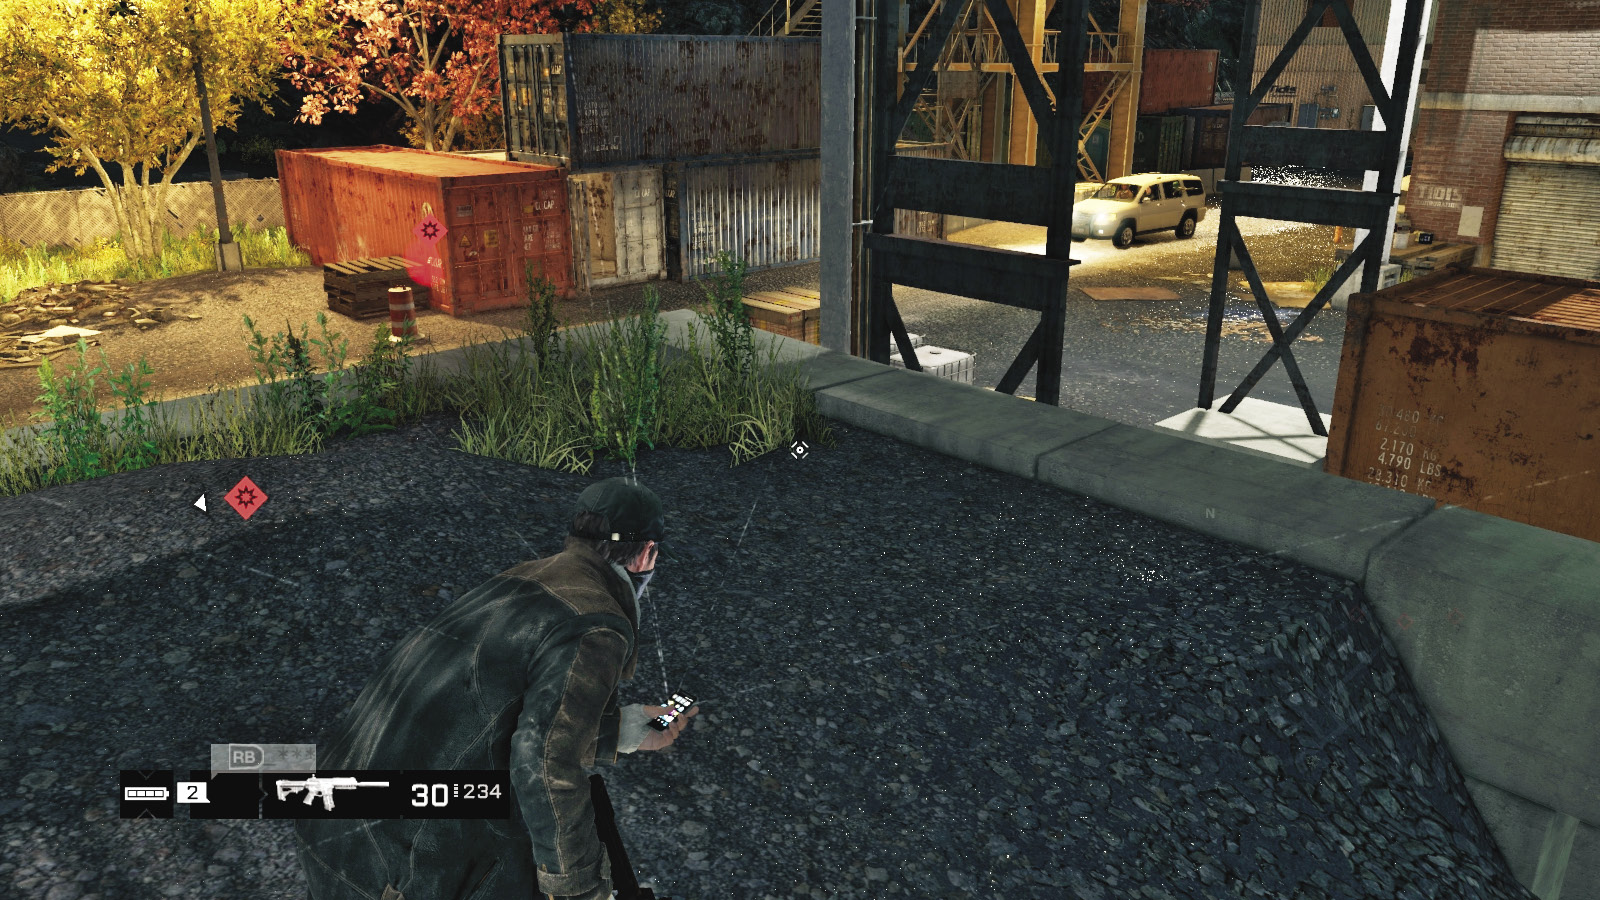
Usually, this can be a fraught battle of attrition, with you rushing to external cover and gradually removing the foes without being completely surrounded. Use all the previously listed tactics, usually remaining on the balcony to gain the height advantage, and continuously move so you aren’t shot from different angles. However, there are much more proficient ways to deal with this incoming army.
 Aggressive // Violence: All the Trappings
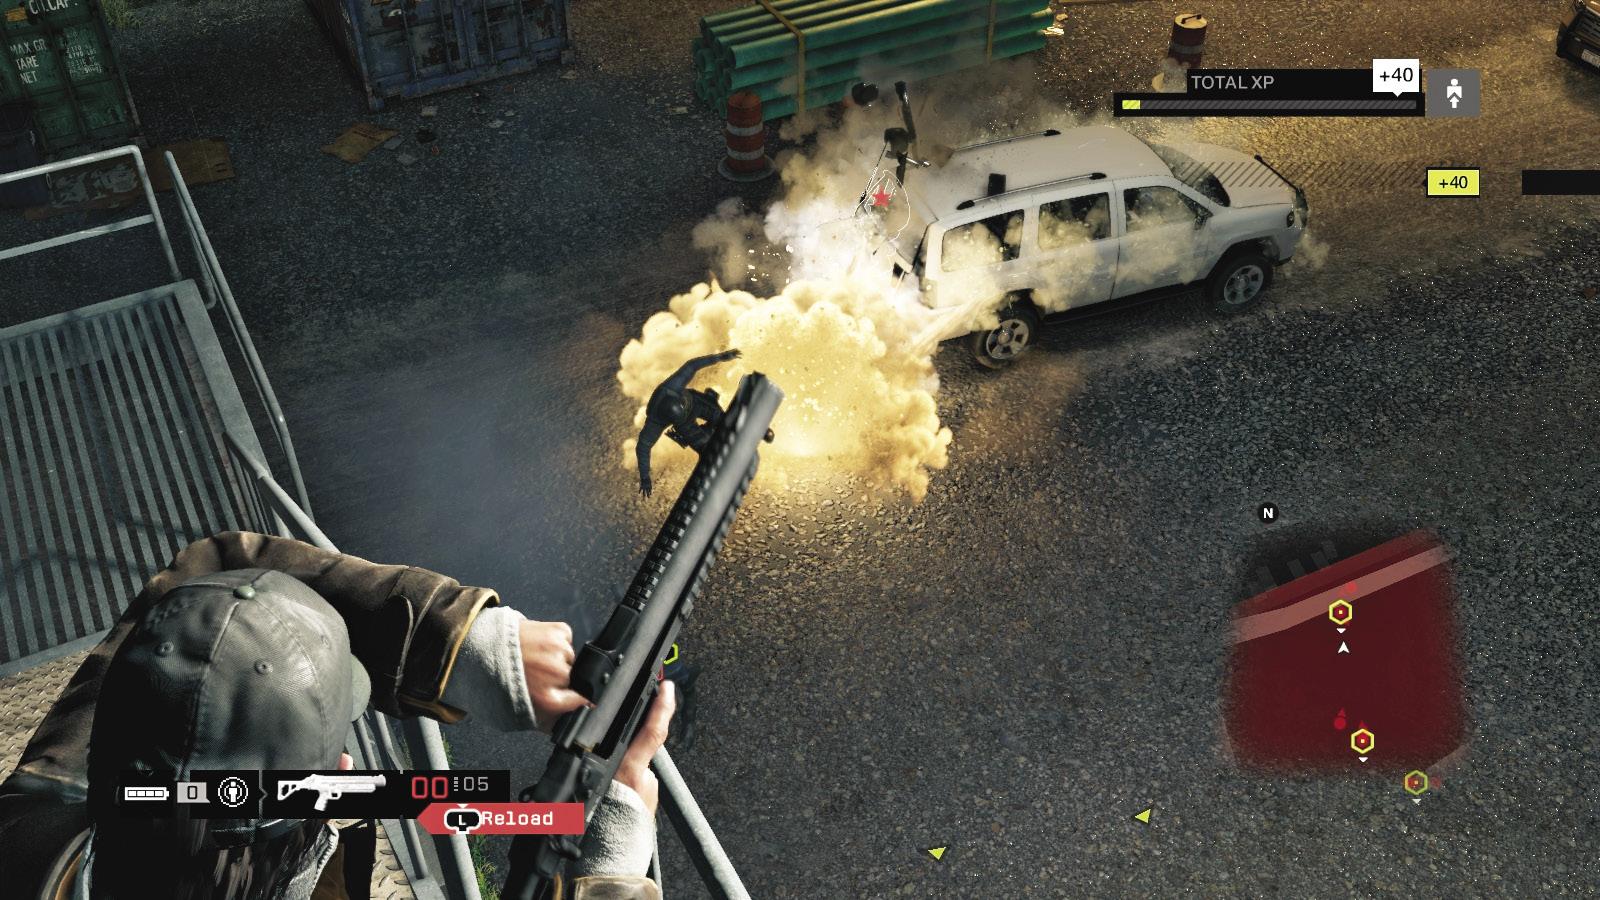
 Difficulty:
Preparation is the key to success here. It might be wise to leave one of the previous wave of enemies alive while you prepare the warehouse for the forthcoming firestorm. Or, lay the following traps as you infiltrate the warehouse, killing the foes already here from the previous wave:
Place IEDs on concrete cover or pallets near to where the enemy vehicles stop.
Place IEDs on the dirt road where the enemy vehicles stop.
Lob IEDs at the vehicles as they stop.
Drive a vehicle and position it close to where the SUV parks, having already primed it with an IED.
Place IEDs at the bottom or top of the balcony stairs, and detonate as foes reach them.
Now begin combat with an added benefit: a series of defenses you can utilize throughout the combat to come. If you’re on the balcony, you have a better chance of coaxing foes into these traps. Then employ any regular violent takedowns previously mentioned.
 Aggressive // Violence: A Present in an Explosive Wrappings
 Difficulty:
This tactic requires you to have a grenade launcher (or grenades, but it’s far more difficult with them) and the ability to accurately punt them over the balcony, where you should be standing, overlooking the north or south vehicles as they arrive. Here’s the plan:
Spot the three SUVs approaching. Punt a grenade so it explodes one of the vehicles, killing all four foes as they emerge. You may need two or three shots to wipe out everyone, as they are heavily armed. But try for a two-grenade takedown, or switch to a rapid-fire ranged weapon to finish the foes as they land from their enforced flight.
Then immediately move peer over balcony at the SUV in the center of the warehouse; foes should already have disembarked, but you should be quick enough to punt a grenade and catch all of them. Repeat the plan at the north SUV. This probably leaves only two or three foes left, which you can easily mop up.
No grenades? Then rake the enemy vehicle with automatic gunfire from high up and lob grenades as the foes disembark. Attempt to destroy all the foes this way.
With foes still alive and away from the vehicle, lob grenades or IEDs down at foes to flush them out, shoot explosive canisters, and finish them with accurate ranged fire.
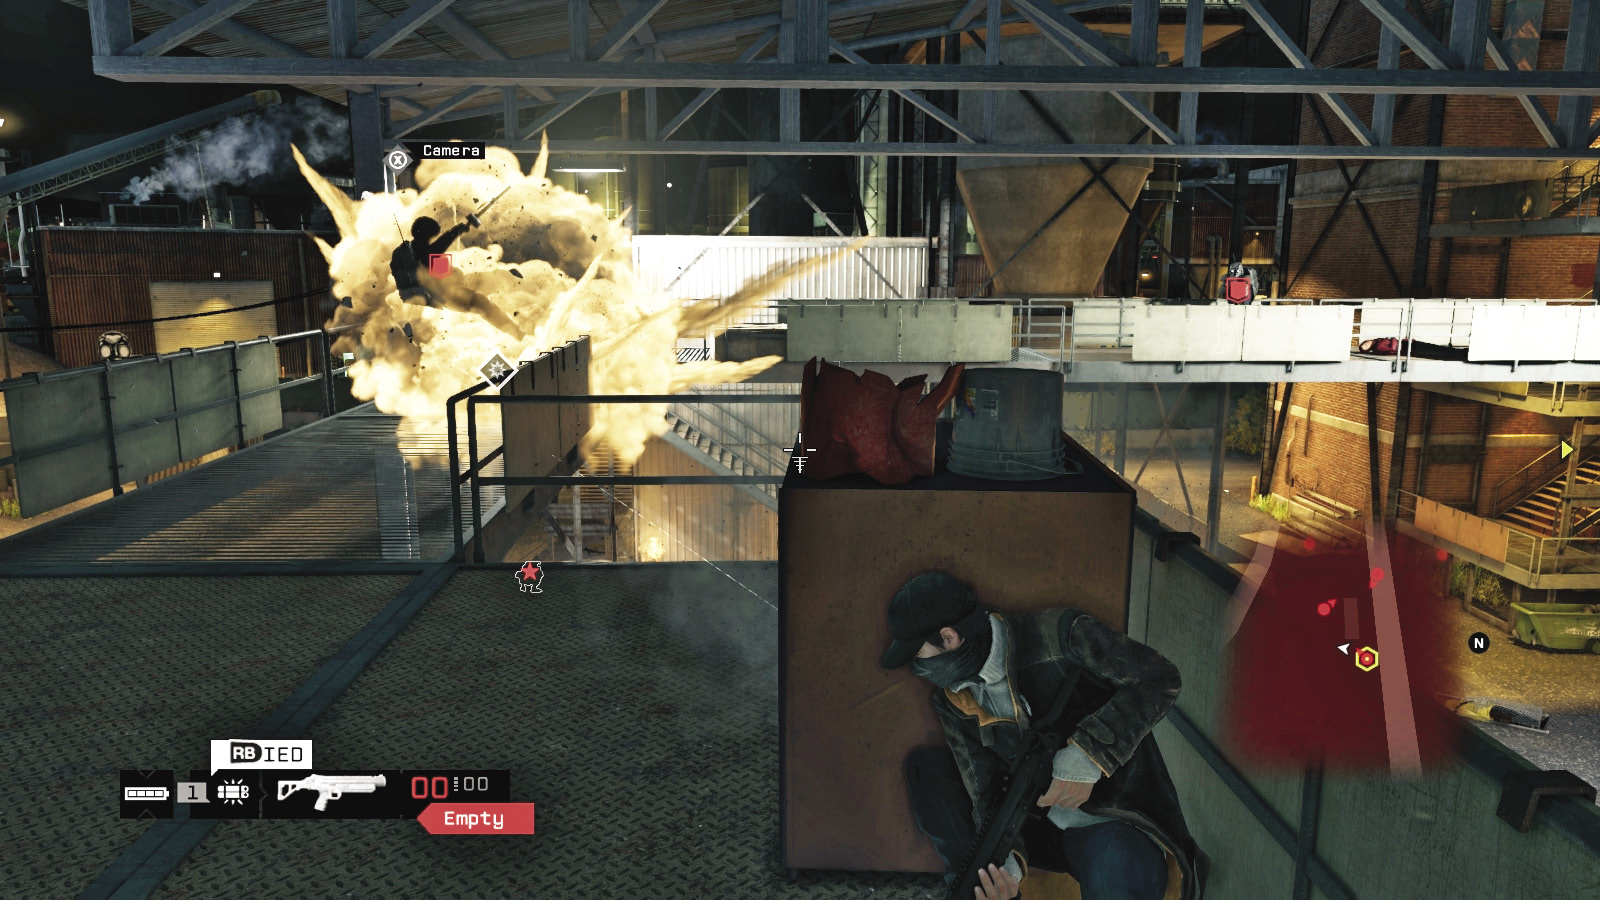
After you remove the three SUVs, a final set of three vehicles arrive. Each carries a boss; there are four Enforcers, guys in full SWAT regalia with a nasty U-100 automatic weapon and full protection except for the head. They can survive countless body rounds and even grenade strikes. Follow the same grenade-heavy plan as before. With Enforcers, there are several tricks to try:
The center SUV carries two Enforcers, so concentrate your explosives on this vehicle first.
Keep a stash of explosives handy for this final round of combat, as you don’t want to waste countless minutes and ammunition whittling down Enforcer health in a deadly game of cat and mouse.
Use the junction boxes and the explosives scattered around the warehouse; make sure each Enforcer feels the heat of these detonations.
Remove the other, less hardy enemies first, so all you’re dealing with is Enforcers.
The Enforcer takedown skill is extremely handy; make sure you have it so you can melee-strike each one to death, if all else fails.
Once everyone is dead except you, Tobias calls in to ask what happened. You tell him, then ask that he lose your number. The mission concludes.
MISSION REWARDS (Investigation)Weapons trade dismantled: Reputation Gain Gained XP (Mission): +1,000 |
MISSION REWARDS (Unlocks)Find nine Weapons Crates: Spec-Ops Goblin (Weapon) Complete Act II // 6: Jury-Rigged, and complete Weapons Trade: Saturday Night Special (Achievement) |