
Watch Dogs Guide MAIN MISSIONS MAIN MISSIONS /// Act I
_BACKSTAGE PASS
OBJECTIVES
|
 Locate guard with the access code
 Hack the guard for the access code
 Use access code to reach the servers
 Leave the area
LOCATIONS // MAP
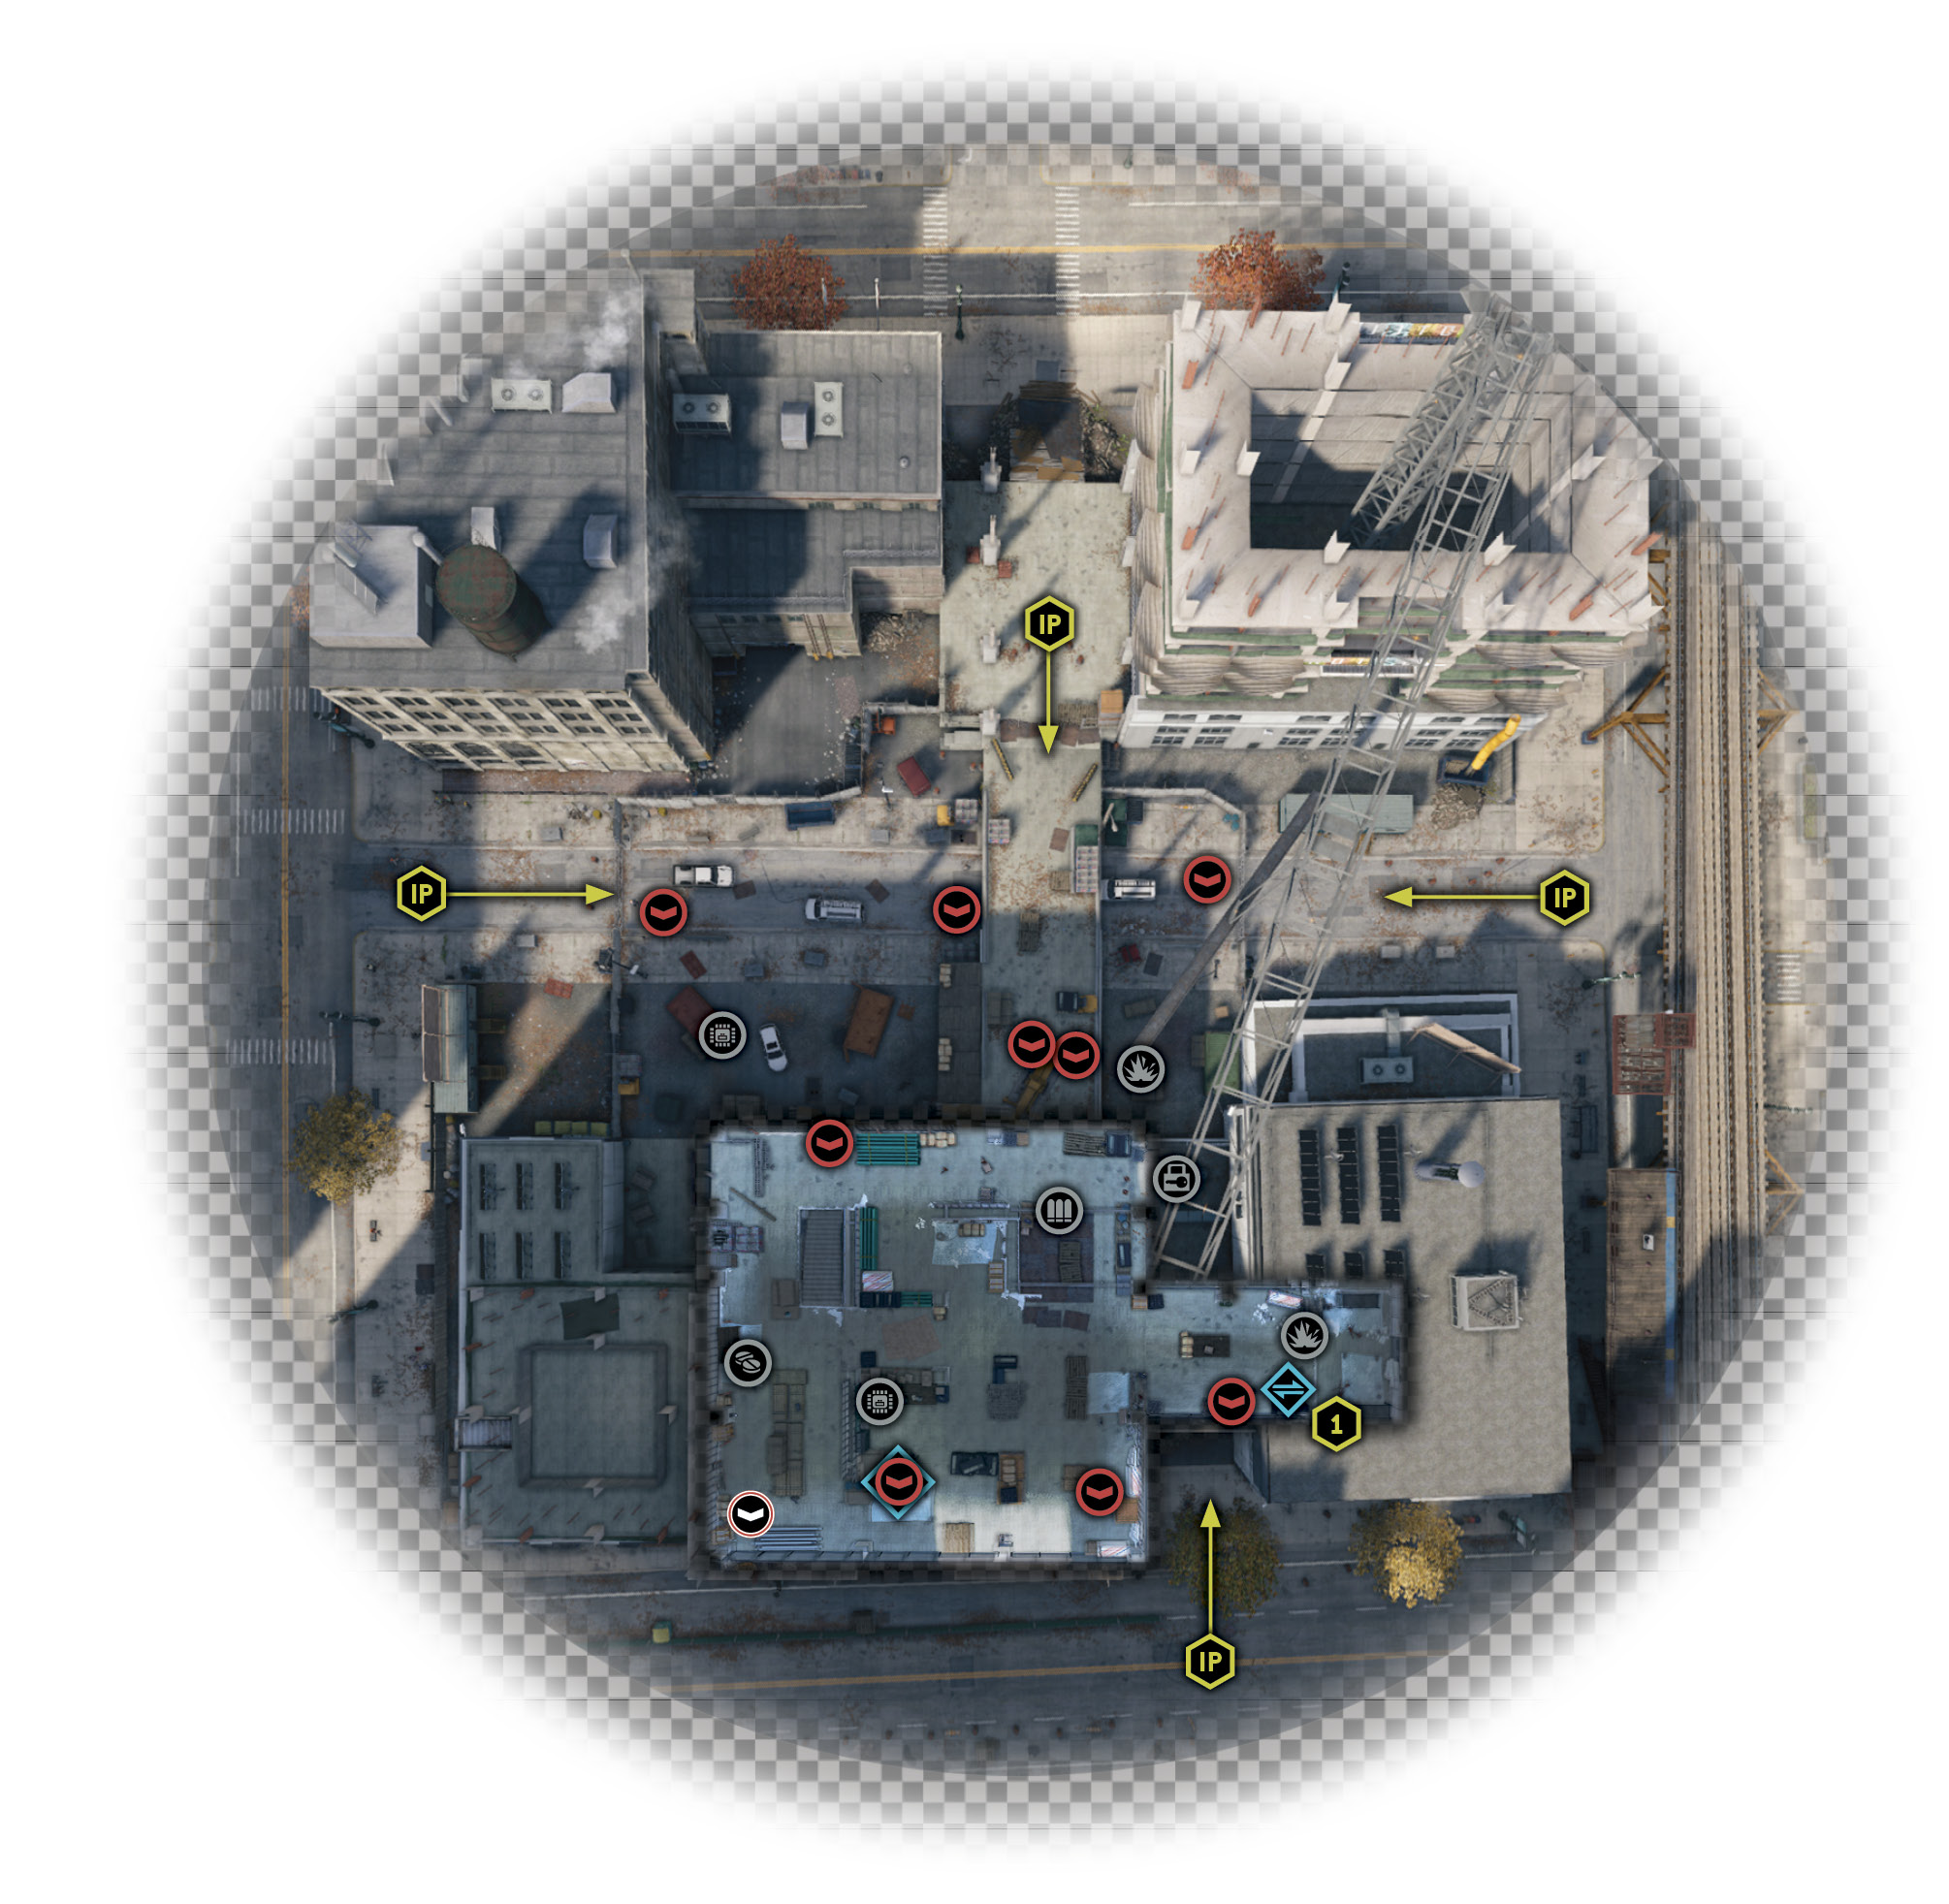
Location / The Loop // ctOS Control Center
3.1 TAKING CONTROL
 Location / The Loop // ctOS Control Center
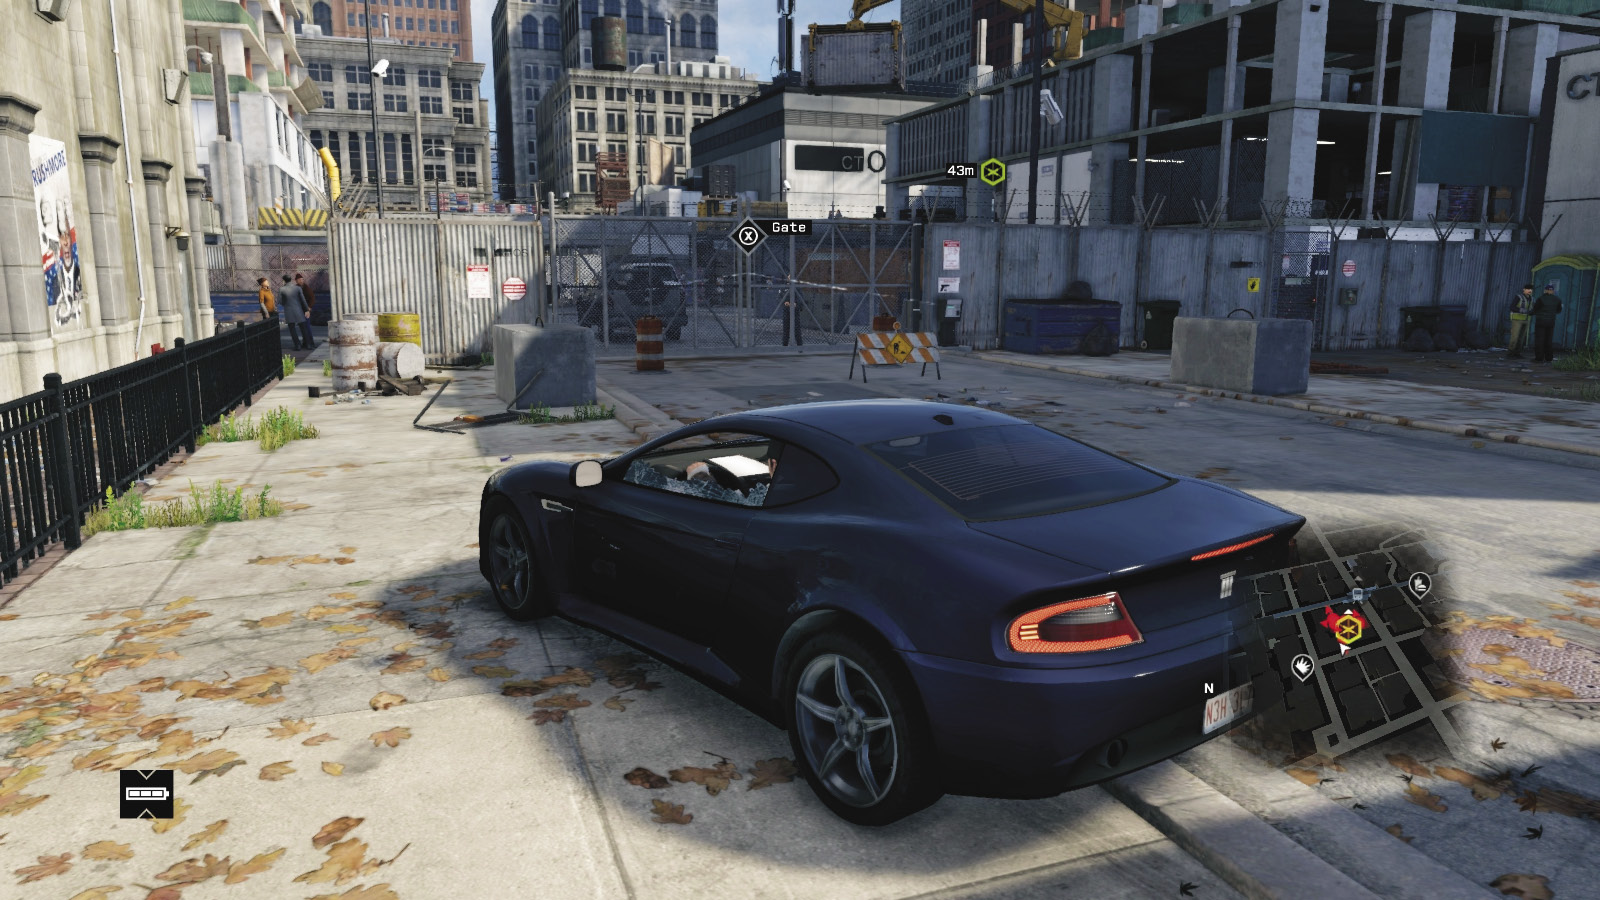
Drive into The Loop and park at one of the insertion points outside the ctOS building that’s currently under construction. Your mission commences when you reach the waypoint indicated on your main map. Your objective updates, as does your conversation with Jordi. He updates you on Maurice, so you can question the murderer sometime soon.
|
|
 Locate guard with the access code
 Data Hack
 Infiltration
 Lethal Force Likely
 Melee Force Likely
Difficulty: 
Overview
Completion Point: The ctOS guard with an access code, standing inside the partially constructed building.
Dangers: Ten ctOS guards (Gunmen x9, Shot-Caller x1), with pistols and machine guns.
Reinforcements: ctOS SUV with one or two guards (Gunmen x2).
Insertion Points
Western Entrance Gate and Door (Facing East)
Accessibility Level: 
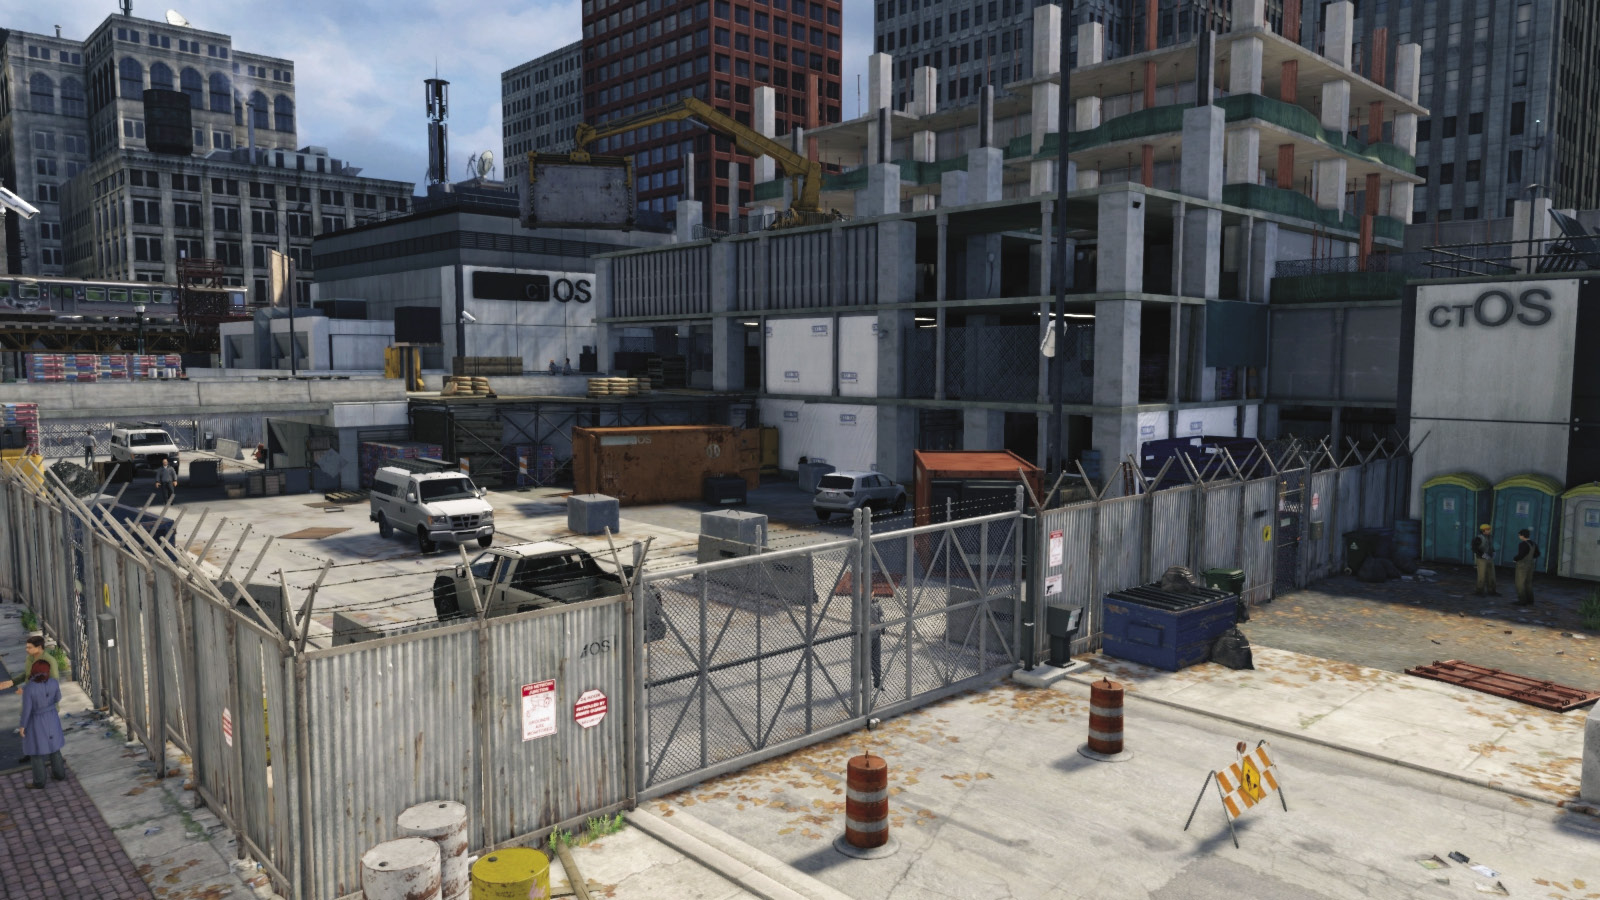
From the street, there’s a gate (which you can hack to open) with a guard and a vehicle behind him. To your right is a mesh door that’s locked. The lock is next to it, so it’s easily hacked, and there’s a second lock on the inside wall near the door, if you’re approaching from another location or need to leave in a hurry. There’s a second mesh door in the fencing around the corner to the left, which is another way to easily enter (unlock at either side, using cameras or your smartphone).
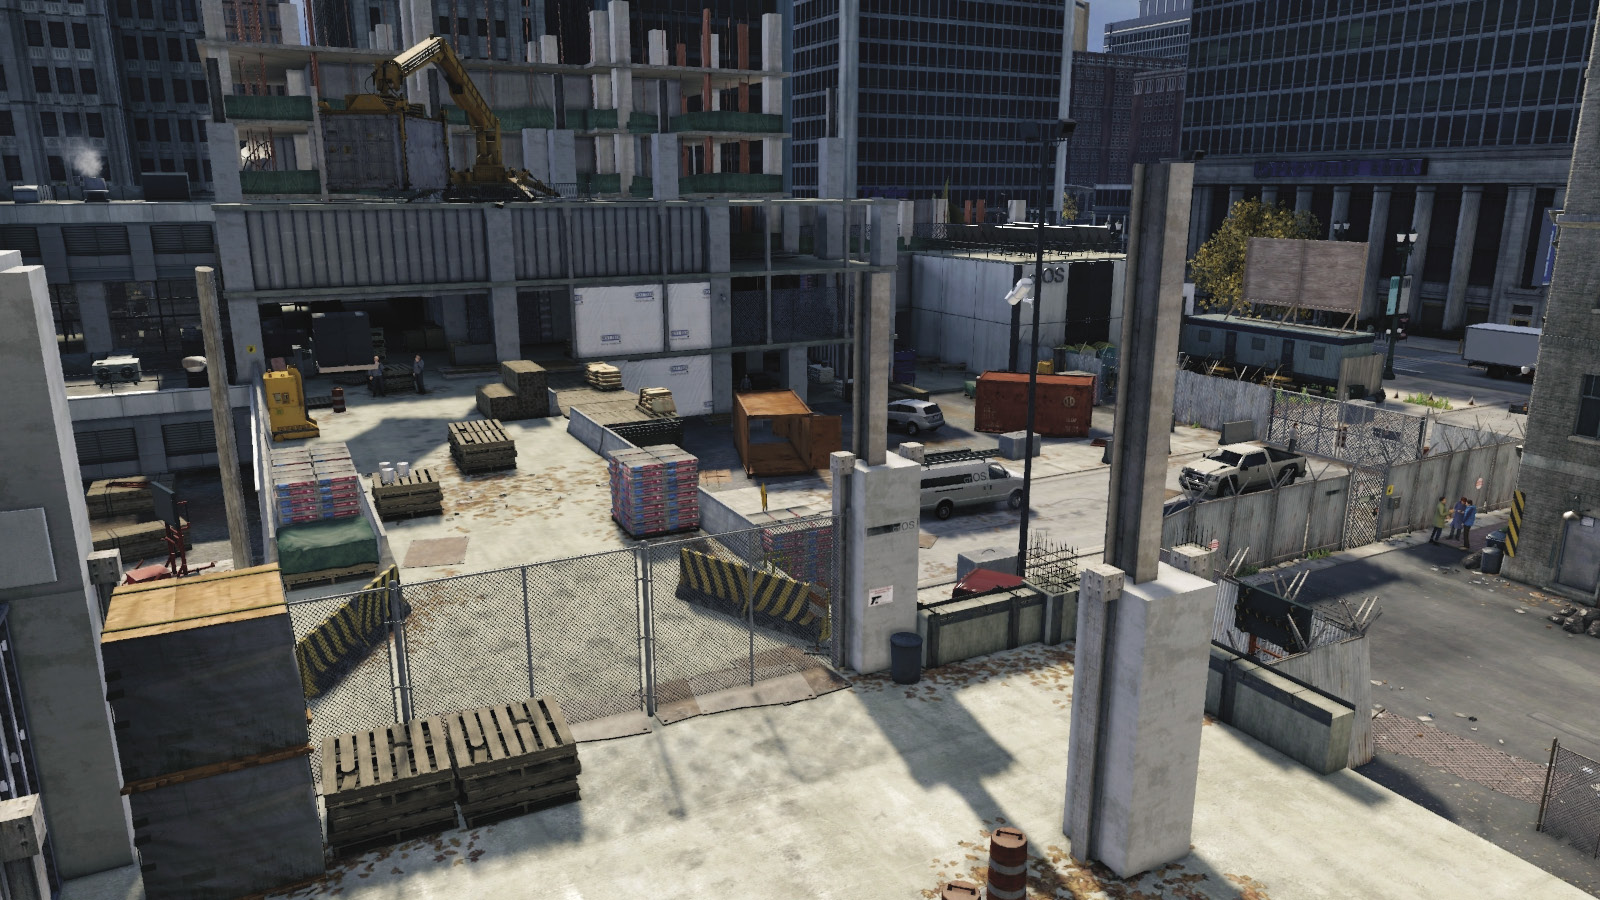
North Bridge Entrance (Facing South)
Accessibility Level: 
The construction ramp up to the mesh fence is a great location for checking out the area, as you can climb on some pallets to gain extra height. This allows you to easily access the cameras, the upper bridge, and either courtyard area (which you can access via the ladder, the pallet on the forklift, or the pallets on a third forklift, below the suspended crane container). You can climb up to this area from the eastern gate, too. This is a fine place to begin an infiltration.
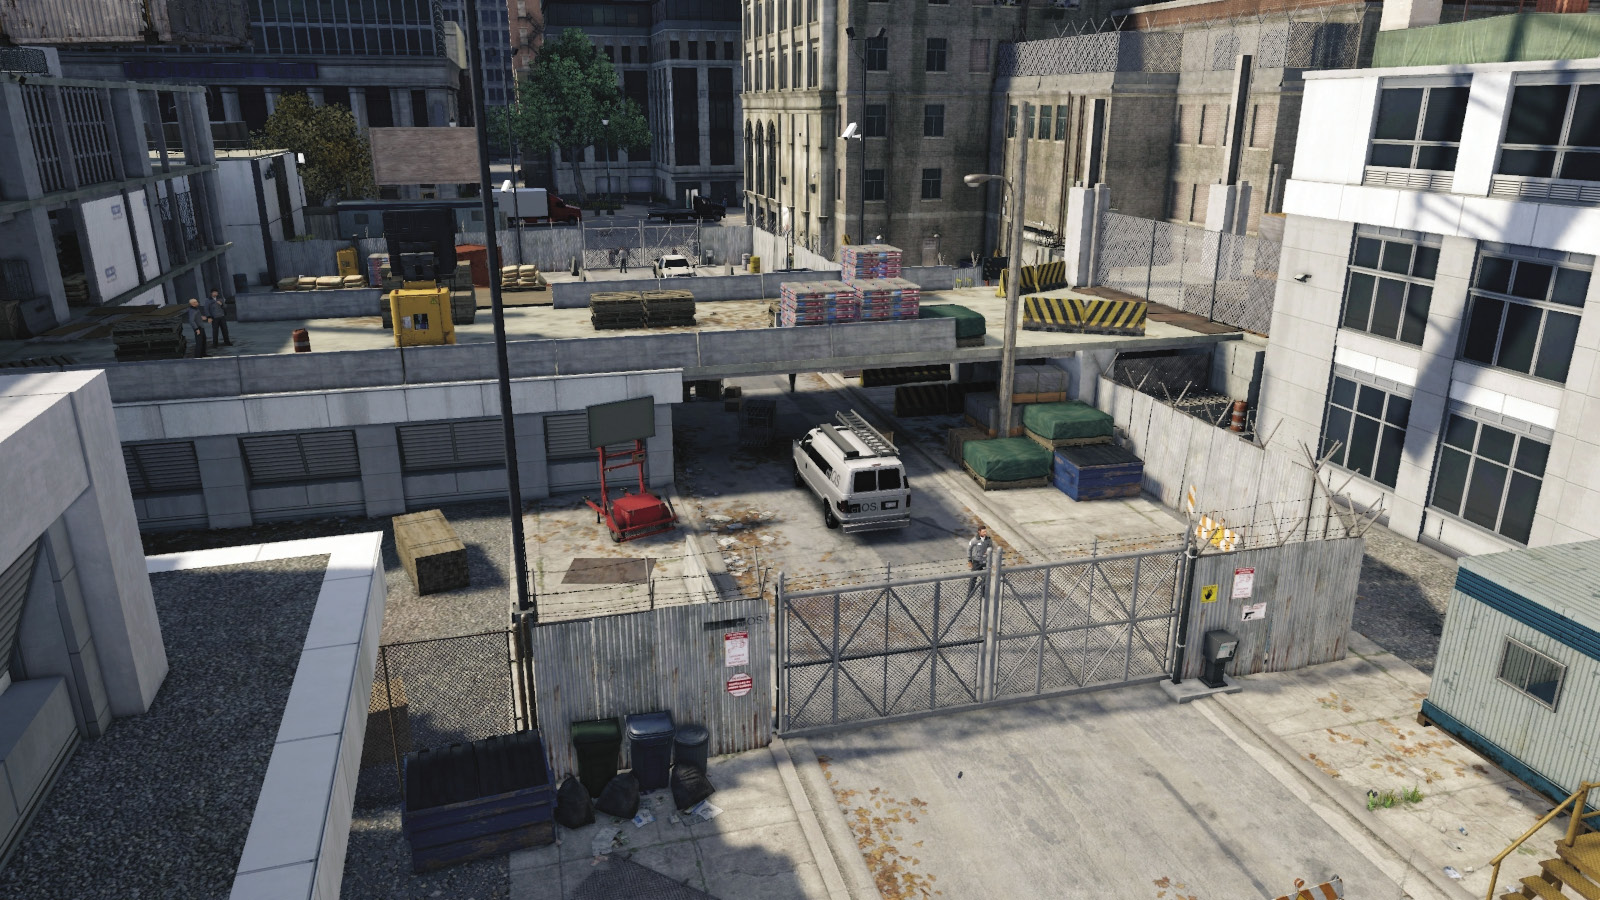
Eastern Entrance Gate (Facing West)
Accessibility Level: 
Open the gates, but watch for the guard standing near his vehicle on the other side. This provides a method of entry, but a better bet is to run around the back of the portable cabin and up the breeze blocks to the North Bridge Entrance. Scramble up the bridge. You gain height over your opponents.
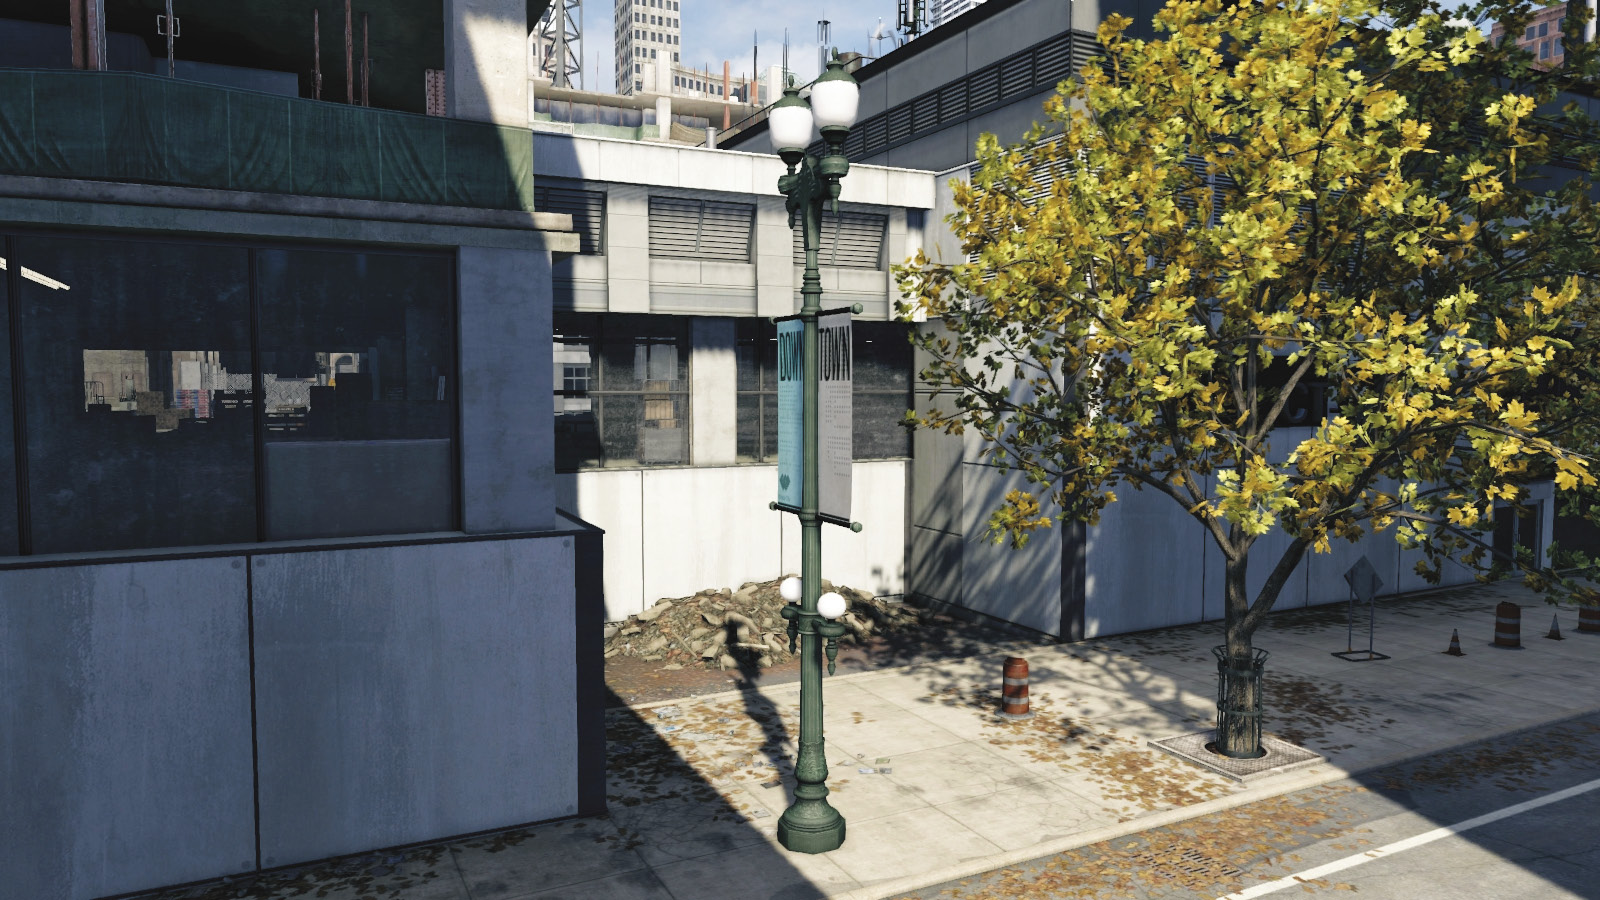
Southern Windows
Accessibility Level: 
Inspect the location from this side of the street; this is the only entry point. Unfortunately, there’s a guard looking out the window at you, and shooting him (and breaking the glass) can alert everyone. However, there are more cunning ways to make this infiltration point work for you: hack into the guard’s camera or move a vehicle to this window to stand atop it so you can shoot the window (using a Spec-Ops weapon to minimize noise) and enter the structure.
Progression Plans
You may now try one, parts of, or any combination of the following methods of navigating this area. Or, you can try any other route you feel is worth taking, as you can climb almost anything in the courtyard.
General PreplanningPresupposition: The following assumes you’ve already learned the elements referenced in all earlier missions, so information isn’t repeated often. Camera Marking: You should access all the security cameras, marking all nine guards, and inspect the interior of the building remotely. Guard Routes: Study the position of all eight guards. Some are stationary. Others patrol a small area. Time your movements so a nearby guard is facing the other way. Be Smart: Your smartphone also shows areas of interaction. Use them, as described below, if the situation calls for it. Reinforcements: One of the ctOS guards is known as a “Shot-Caller,” as he’s able to phone for reinforcements. Check the map to see his location. Be mindful of where he is if you don’t want further fighting (though at this point, the reinforcements he calls are minimal, and usually after you dispatch two or three foes). |
 Passive // Smart: The Camera Never Lies
 Difficulty:
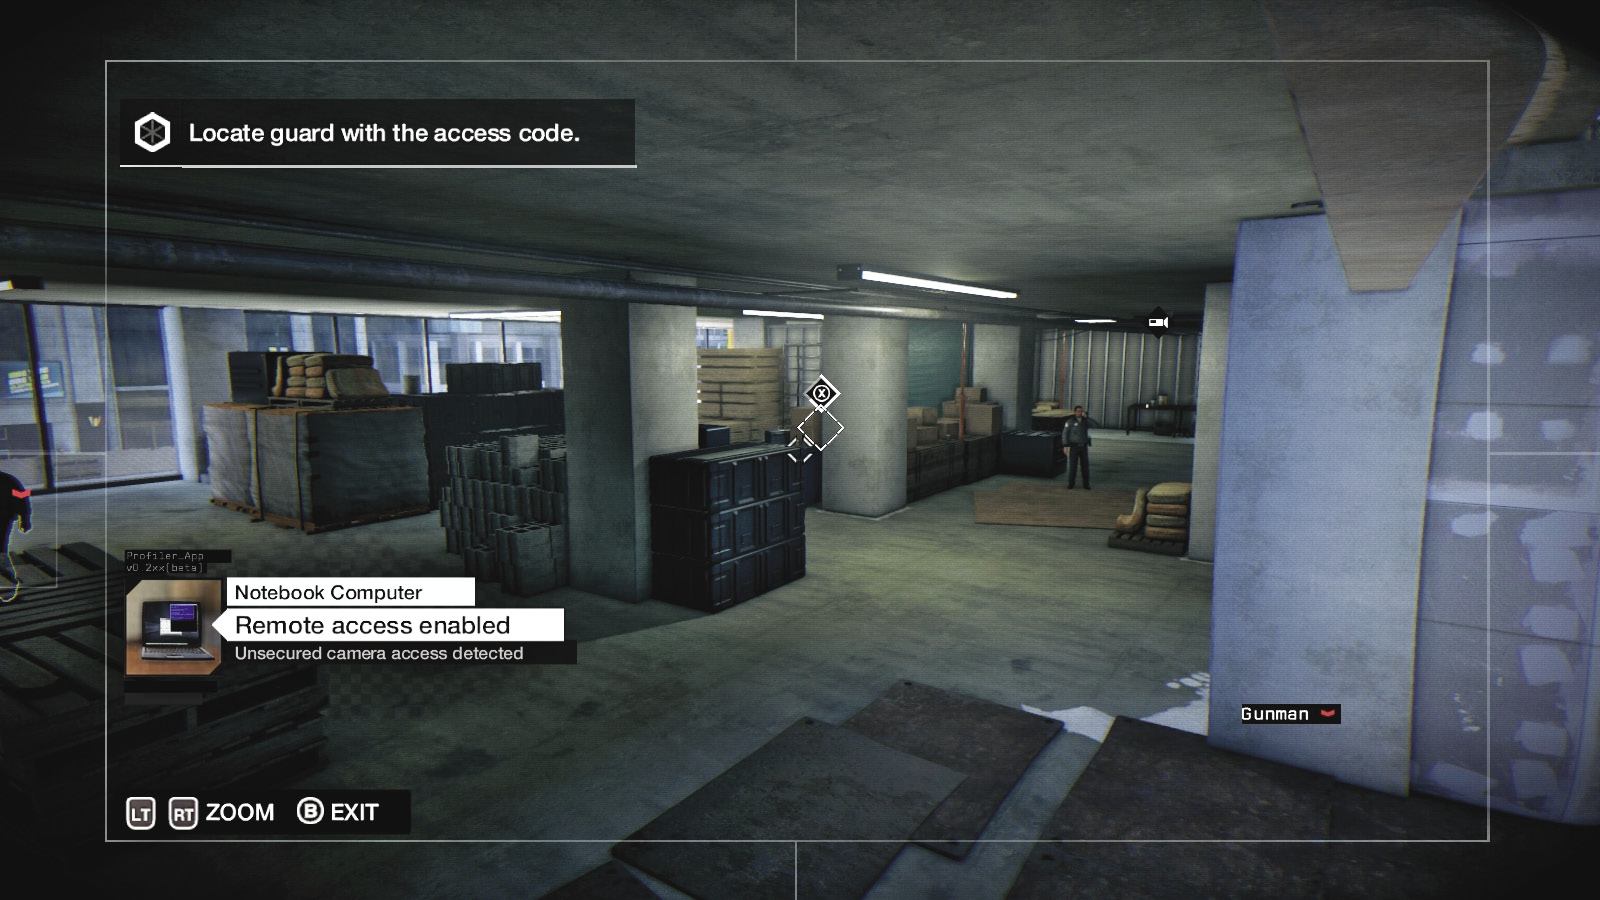
Access any of the cameras inside the perimeter of this construction site. Then move from camera to camera until you’re inside the half-constructed building. Mark all nine guards as you continue your viewing. Now stop when you’re looking out of the camera shown in the screenshot.
You can also access this camera from the windows along the south perimeter wall; hack the camera that appears inside the structure, just left of the standing guard behind the window. Stand under the window near the rubble to find it.
You can also take a large truck (such as a fire engine), park it along the compound’s southern windows, stand atop the roof, peer through the windows, and locate the guard to hack; this is a super simple way to complete this objective!
You can also find the camera close to the east gate, pan it into the building to locate the guard staring out of the south windows, and attract him to the phone to his left. When he moves, hack his camera and pan it right to spot the guard with the access code and hack him. Then pan left, to the intrusion point!

Pan down and check out the laptop on the table; it is pointing directly at the guard with the access code! Simply hack it from here (your next objective), and you retrieve the data and complete both objectives without setting foot inside the premises. However, you may wish to infiltrate to reach the server point, so plan an assault at this time (ignoring half of the enemies if you wish), though it is possible to continue using cameras and stay out of the compound entirely!
 Passive: Don’t Kill Any Guys

Difficulty: 
You can reach the guard with the access code without harming anyone, but it’s tricky and involves using cover constantly and waiting for guards to look away from you. Head across the yard to the southwest corner, to the lower interior entrance. Jump atop the blue lift (but don’t use it), and climb up to avoid the guard at the bottom of the stairs.
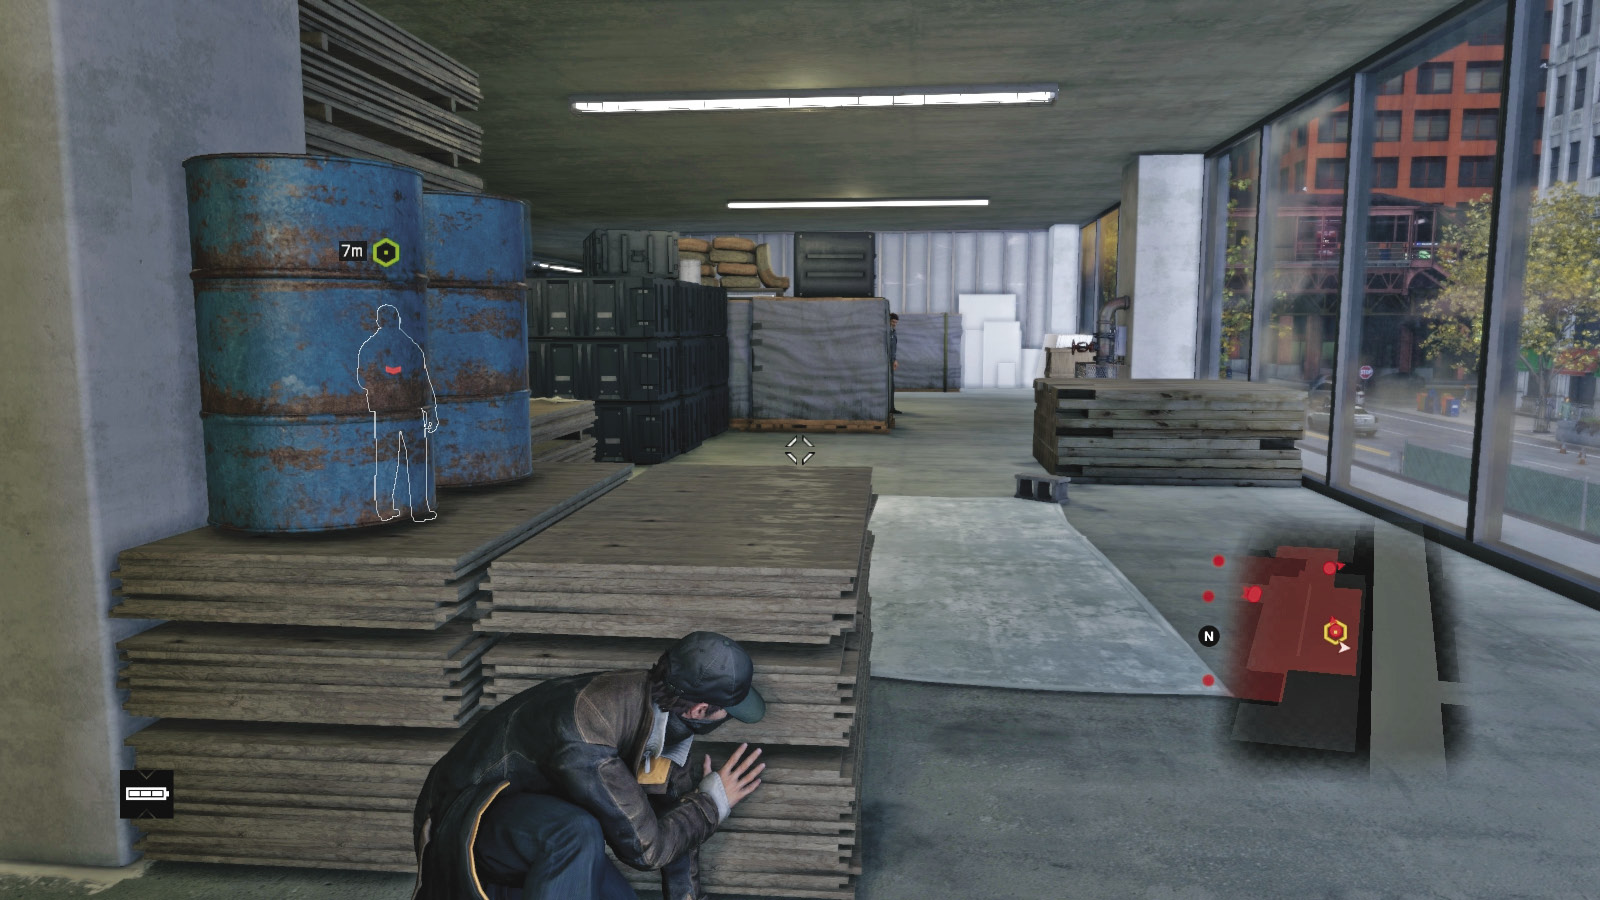
Creep around the drywall to the right, watching for the patrolling guard near the junction box. Head straight to the corner of the building, then turn left so you’re just behind the head guard with the access codes. Hack him without laying a finger on anyone! You can continue this stealth approach to the next objective—the server—but it’s even more tricky!
 Aggressive // Stealth: Melee Strikes to the Thighs

 Difficulty:
Melee strikes remove the guard threats, and they have the added bonus of not alerting any other guards (unless they see you in the act or the corpse you leave behind). The route you take is important. Here are two sample routes to try:
Start in the exterior yard: Tackle the guard at each gate and the one under the bridge. Then enter the stairs at ground level (southeast), bringing down the guards at the bottom and top of the steps. Watch for the guard patrolling the central area during your takedowns. Sneak behind the pallets near the wall of windows and grab the head guard with the access card. You still have three guards left to remove during the next objective.
Start in the yard below: Tackle the guard at each gate, then the guard under the bridge. Climb up and cross the bridge, melee-striking the guard near the forklift. Enter the upper building and watch for two or three guards who can see each other. Take your time with your strikes; start with the guard in the middle, then the one near the window to your left, and finally the head guard in the area with the laptop. You still have two guards left to remove or ignore during the next objective.
 Aggressive // Smart: A Container Drops from the Skies

 Difficulty:
The crane holding the heavy cargo container above the bridge is a prime opportunity for dispatching the two guards standing by the pallets near the forklift. Ignore the forklift, as moving that simply alerts the guard and he moves out of the container impact radius. Instead, hack the crane, dropping the container on the guards’ heads. This has the added bonus of sometimes not alerting the other guards, and the container offers additional cover.
After you nullify all threats, you should also scour the entire location for components; expect three or four randomly placed items, including a system key, chemicals, and ammo.
 Aggressive // Smart: Other Disruptions Are Wise

 Difficulty:
As you profile and infiltrate, you should notice around half of the guards on the premises have a shortfall you can take advantage of. These are randomly assigned, so you can’t used them every time in the same location. But you can:
 Distract(one battery segment): Hack the cell phone with an abusive text message (generated randomly), which causes the guard to peer into his phone, oblivious to your movements in any direction around him for about five seconds. Use this to sneak past or perform a melee takedown without needing to be behind a foe.
 Explode(two battery segments): Hack the grenade the guard was carrying, which throws him into a panic for between five and ten seconds. Sometimes he blows up. Sometimes he finds the grenade and throws it away but is caught in the blast. And sometimes he throws the grenade away and remains unharmed. However, during this time, you have ample opportunities to bring the foe down with ranged weapons, or sneak past the hullabaloo, as other guards are attracted and go from a passive to a guarded stance and start searching you out.
 Aggressive // Violence: A Bullet Between the Eyes
Difficulty: 
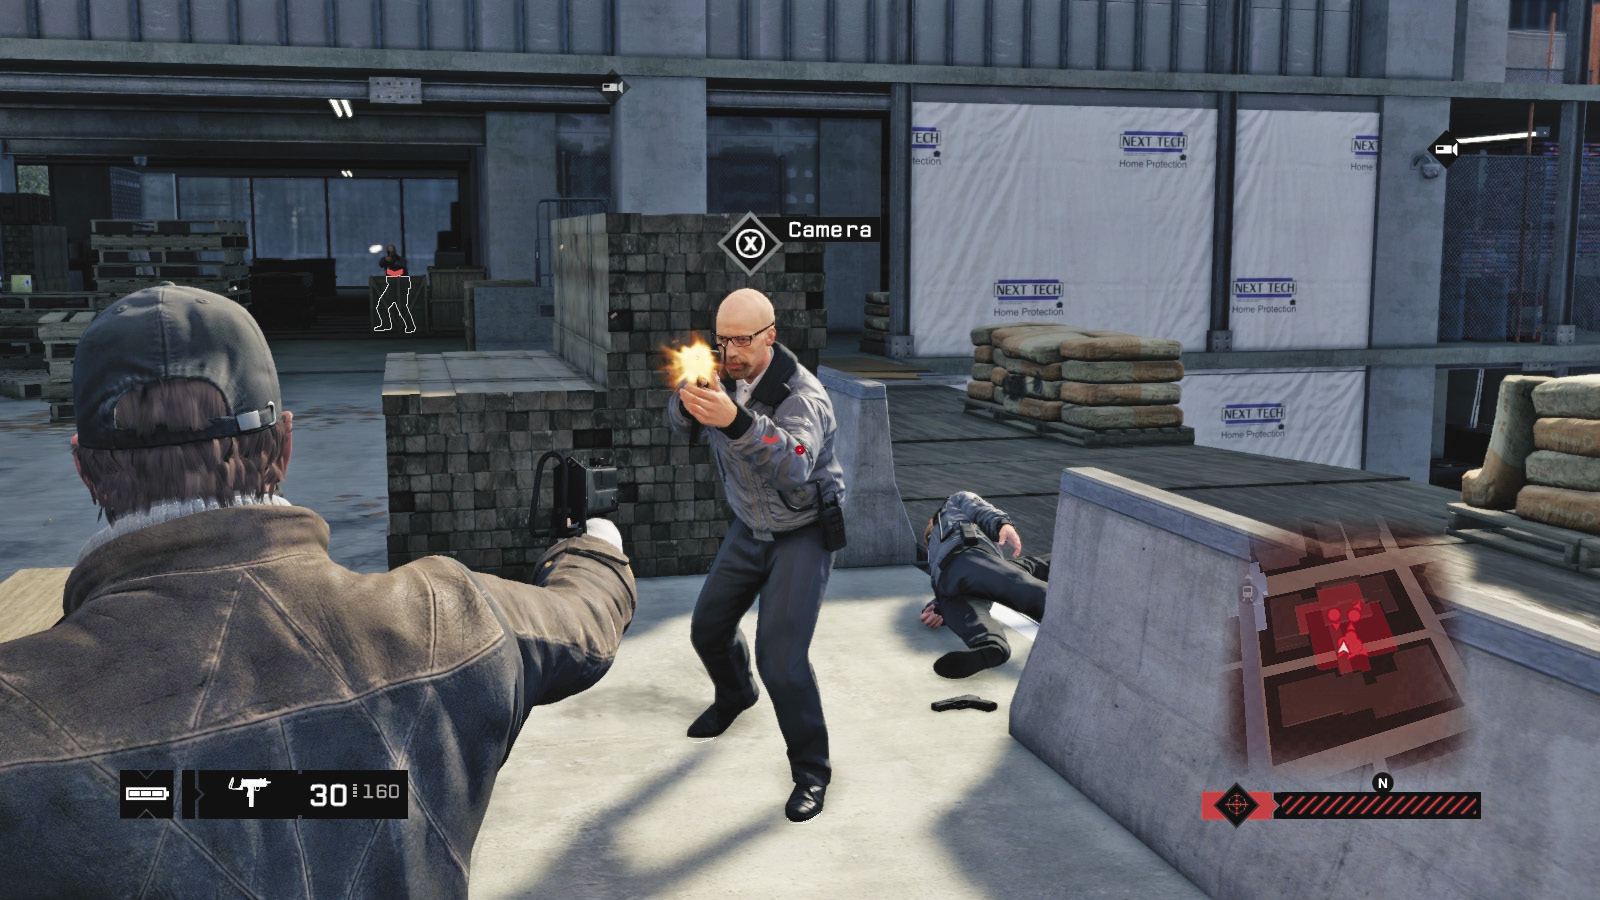
Generally, it’s great to try stealth melee takedowns until you’re discovered, and then switch to your firearm. If you’ve been busy between missions finding or purchasing new weapons, crafting lures and grenades, and gathering an impressive arsenal, you may want to attempt more devastating options. For now, try any of the routes detailed previously, but bring out a weapon and aim for the head. Marking foes using cameras helps a great deal. Try some or all of the following brutal takedowns:
Some weapons (like the sniper rifle) pass through pallets, allowing you to drop foes who are behind some types cover (wood and glass, usually).
Use cover, rather than running about like a maniac: Pop out, pop a cap, and pop back into cover.
Don’t worry if you haven’t gathered weapons; your pistol is a great firearm to use (with careful aiming).
Height is advantageous, so begin on the bridge, at the north bridge entrance. Hit the guard below and left by the gate, then the one on the right before he reacts to the noise. All your foes are now in front of you, usually running at you. Easy pickings if you aim at their heads from cover; you don’t need to find any inside the building afterward.
When two or three foes are milling about, drop the container from the crane onto them for an impressive kill.
Lob grenades into the upper floor where the majority of the guards are. Messy.
Aim at the gas canisters sitting atop some of the pallets. These can send foes flying.
 Aggressive // Violence: Lunacy to Bring ctOS Down to Size

Difficulty: 
Of course, you can try a more maverick approach. Here are a few ideas to try out:
Drive a fire engine or other large truck to outside the east gate. Leap atop it, and run across its roof, onto the building lip, and enter the grounds without opening the gate.

Another great plan is to reverse a dump truck or other large vehicle against the south windows, climb atop the truck’s roof, shoot the guard through the window, and leap into the building; you’re close to the access code and intrusion area, though you can be trapped in the ensuing firefight.
The parked ctOS vans are great to hop into and use as moving cover or to ram into the foes in the yard.
Visit the Adams/Wabash station, climb atop the brown steel tower, and aim your sniper rifle (or other gun) at the foes milling about in the yard and bridge. Not subtle, but it works!
3.2 CODE MAKER
 Location / The Loop // ctOS Control Center
|
|
 Hack the guard for the access code
 Data Hack
 Infiltration
Difficulty: 
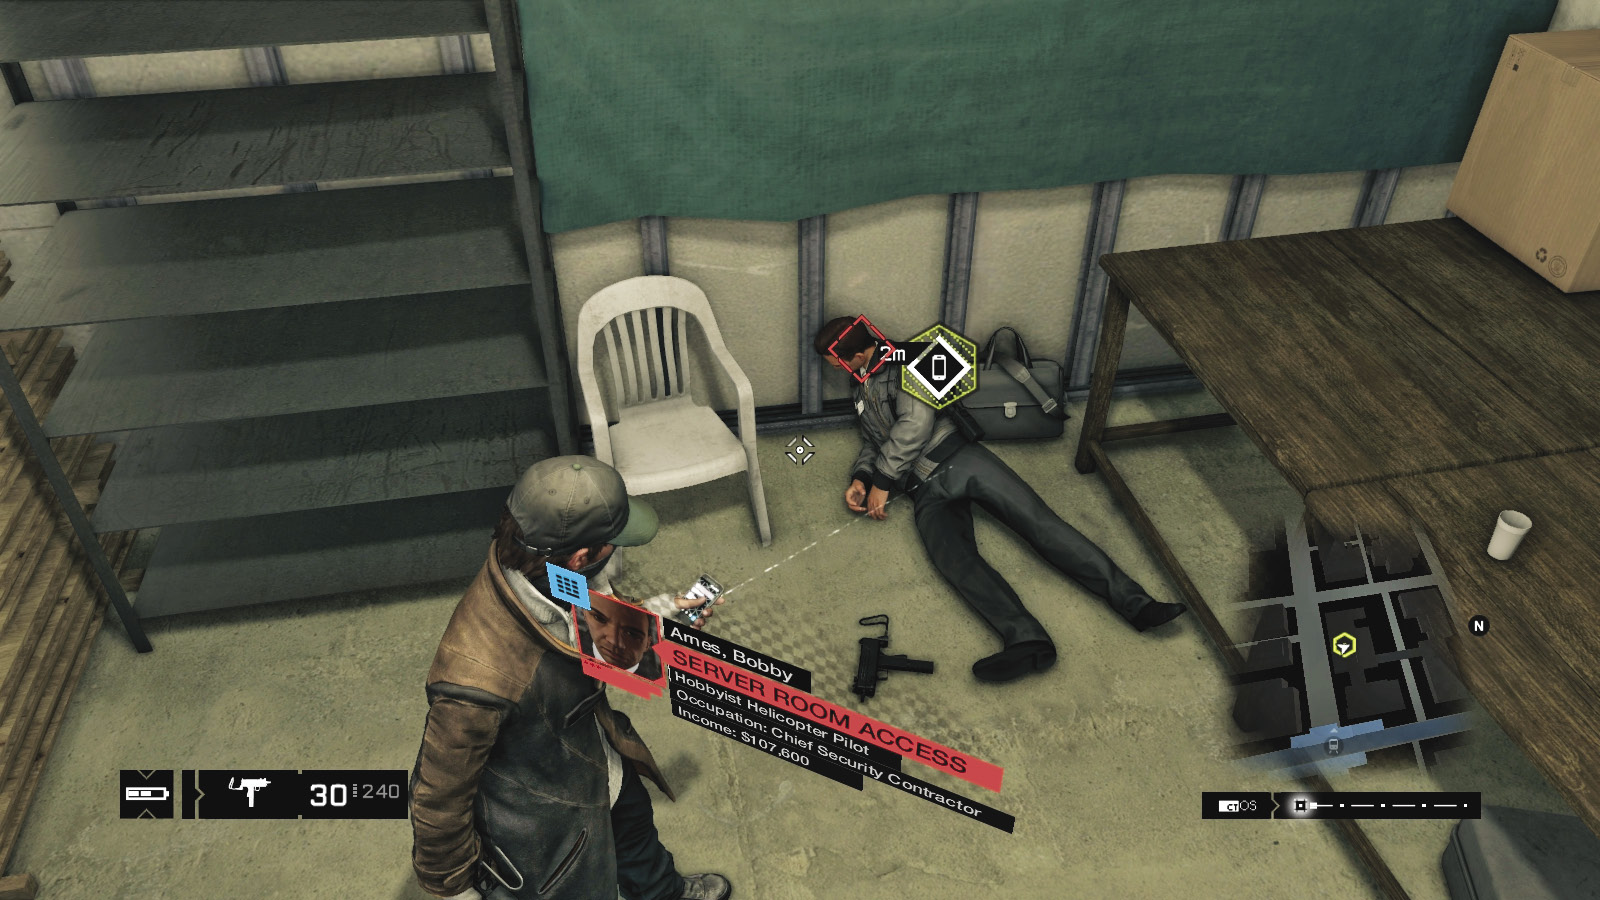
After the stealth and/or mayhem of the previous approach, this objective is delightfully simple. Find the head guard (his starting position is across from the table with the laptop in the south-central part of the upper interior level), and hack him. He can be dead or alive for this to happen.
3.3 CODE BREAKER
 Location / The Loop // ctOS Control Center
|
|
 Use access code to reach the servers
 Leave the area
 Data Hack
 Infiltration
Difficulty: 
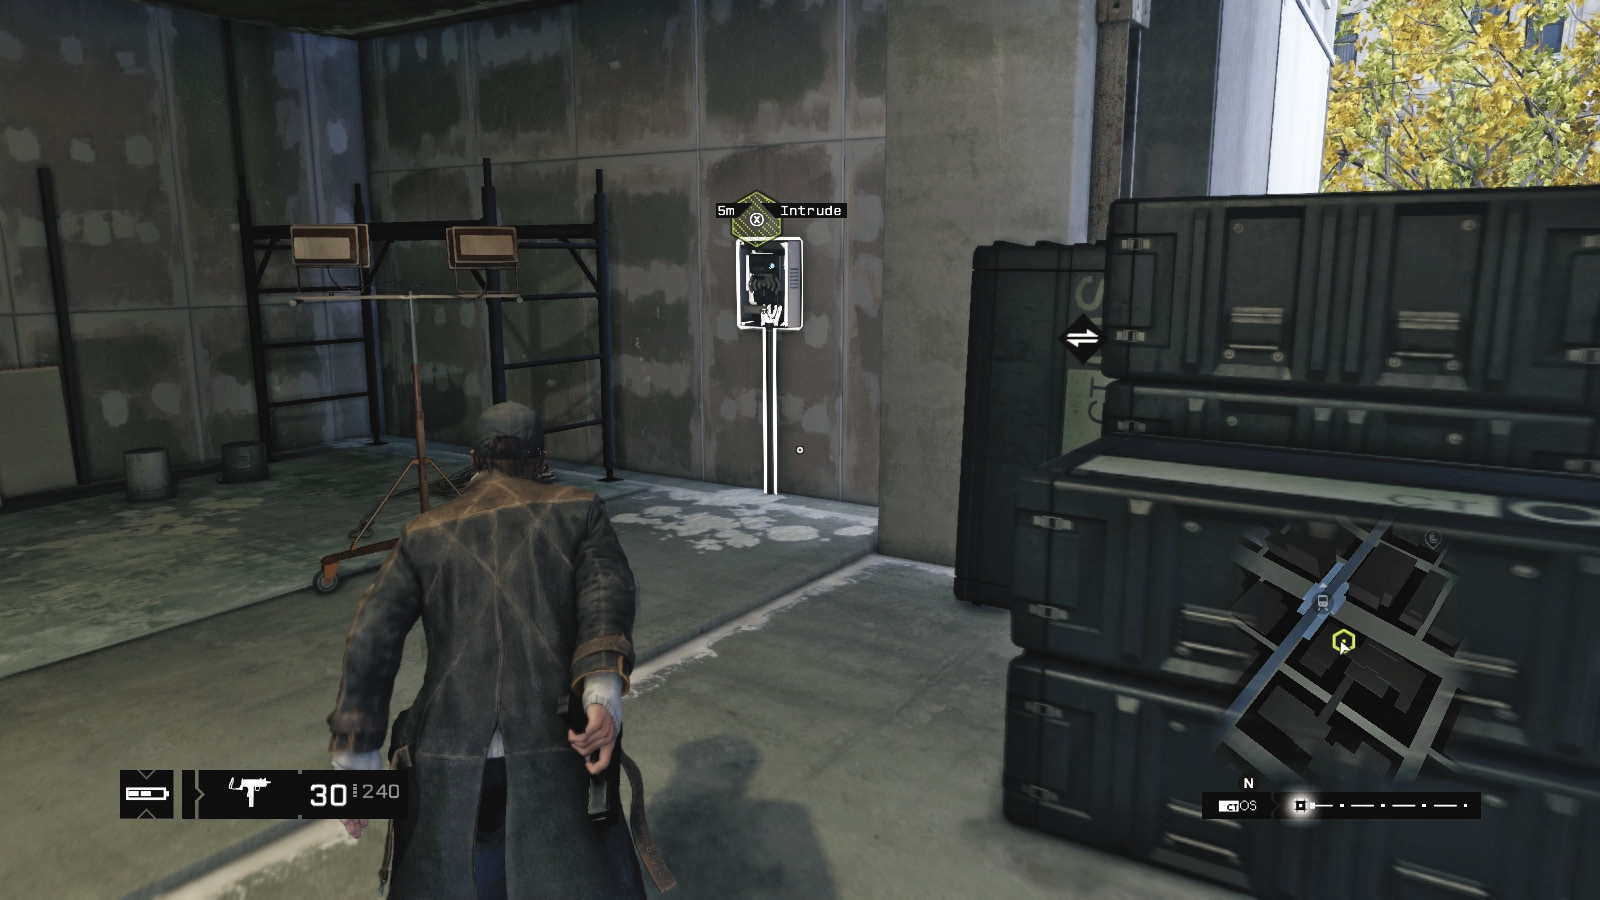
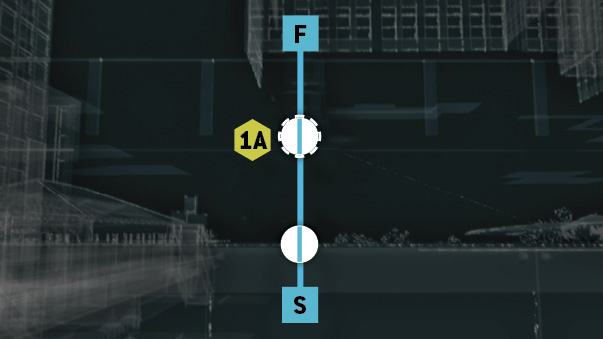
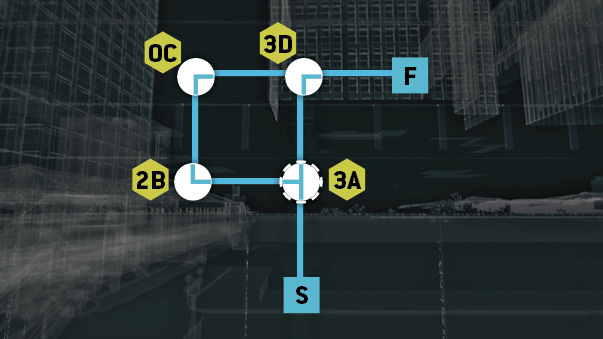
The access point to the server is in the southeast corner of the upper interior level. Depending on your previous actions, there may be two guards here, one guard staring out of the window to the right, or sprawling corpses in this area. If the guard with the camera hasn’t seen you but is causing you problems, you can always move him toward a cell phone you “Attract” hack, to his left. Sneak or sprint to the server intrusion point and begin the hack at the first hotspot.
Solution: Hotspot 1
Solution: Hotspot 2
Solution: Hotspot 3
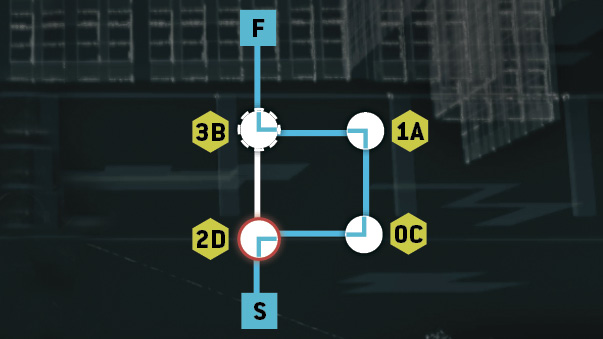
You soon reach The Loop control room, where you hack the server and reveal this part of the city. Badboy17 warns you of Fixers online in the network. As soon as the server hack is completed, the mission concludes, and you’re contacted with your next mission.
MISSION REWARDS (PER MISSION)Gained XP +500 District Access Unlocked (The Loop) INVESTIGATION: MISSING PERSONS (BEGINS) ctos Control center: Pawnee (Accessible) ctos Control center: The Wards (Accessible) ctos Control center: Brandon Docks (Accessible) ctos Control center: Mad Mile (Accessible) |