
Watch Dogs Guide ADVANCED TRAINING
/ _ENEMIES AND TACTICAL ADVICE
This section covers the lifesaving maneuvers and tactical plans you need to navigate around a restricted area, whether you’re on foot and using parkour or driving one of the many vehicles available. Infiltration, intimidation, driving, chase, escape, and police avoidance tactics are all explained in detail. A list of terminology used in the missions throughout the guide concludes this training chapter.
// ENEMY TYPES
It’s important to know who you’re going up against: faction members, street gangsters, corrupt cops, and Fixers with access to better weapons and technology. All are after you, and all need to be avoided or eliminated.
/// Faction Members
Here’s what to look for in an enemy—their rank. Whenever you tag or “mark” someone (using your Profiler, a security camera, or the ctOS scan tool), their digital insignia is superimposed over them, helping you identify what you’re dealing with. Now look at the foe’s weapon to see what type of damage they can inflict (check the table after the enemy descriptions). Note these enemies can be on foot or in vehicles or can change from vehicle to foot at any time (except for Marksmen in helicopters).
 //// Gunman

WEAPONS USED:
Pistol: P-9 mm
Assault Rifle: OCP 11
SMG: SMG-11
SHotgun: D12
Frag Grenade
This is a common thug, patrolling guard, or low-level criminal. They are easily spotted and are the most plentiful. Their insignia is a single-arrow rank chevron.
 //// Veteran
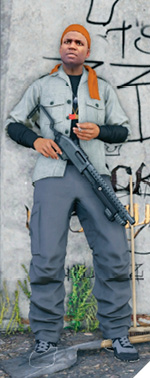
WEAPONS USED:
Pistol: 1911
Assault Rifle: AK-47
SMG: MP9
SHotgun: SG-90
Frag Grenade
Targets you need to take down, or more competent or seasoned enemies, are of Veteran status and carry more potent weaponry. Their insignia is a double-arrow rank chevron.
 //// Elite
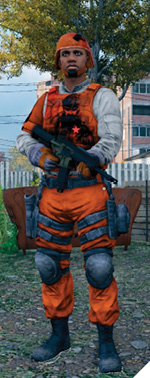
WEAPONS USED:
Pistol: D50
Assault Rifle: Goblin
SMG: R-2000
SHotgun: RSG-12
Frag Grenade
Expect a more difficult battle when these foes turn up. They are dressed in body armor and can withstand serious punishment (except for headshots, which are the only option outside a melee strike). Their insignia rank is a star.
 //// Enforcer
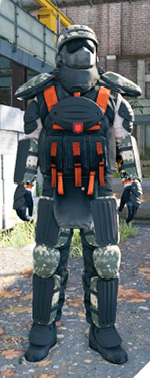
WEAPONS USED:
Shotgun: SG-90
AUto Shotgun: ATSG-12
LMG: U-100
Enforcers are feared and rightly so; they are clad head to toe in tough armor and take hideous amounts of punishment before they fall. They can’t be melee-attacked (until you unlock the Enforcer Combat Take Down skill) and can take multiple sniper rounds to the head. Defeat using explosives (grenades and infrastructure detonations), or run them over...twice. Their insignia rank is a shield.
 //// Marksman
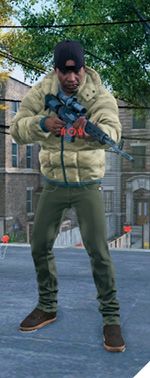
WEAPONS USED:
Pistol: P250
SNIPER RIFLE: SVD
SNIPER RIFLE (ELITE): AC-AR
Anyone standing on a vantage point or patrolling with a sniper rifle and bearing the circular reticle insignia is a Marksman. He’s usually the first one you should target, due to his advantageous sniping position and strength of his weapon. You can also see him due to the laser sight he uses on his sniper rifle. There are Elite Marksmen, too, who are dressed in Elite garb but are otherwise identical to regular Marksmen.
 //// Shot-Caller

From the previous list of enemy types, some may have the additional ability to call reinforcements. These are known colloquially as “Shot-Callers,” and additional foes arrive within ten seconds unless you cut off their communication with a Blackout, Jam Coms, or takedown. Their insignia is the enemy’s rank, with a Wi-Fi wave.
/// Police Officers
The weapons used by police officers (not corrupt cops) are listed below. To maintain Reputation, seriously consider shooting to wound (in the knee or other extremity) or using melee strikes to lessen the hit your Reputation takes—unless you want to be considered a menace. The following officers appear when the Heat rises:
 //// Officer (Veteran)
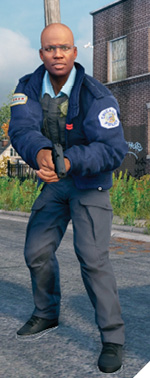
WEAPONS USED:
Pistol: Px4
Assault Rifle: 416
SHotgun: SG-90
Frag Grenade
These appear on foot or in squad cars (two per vehicle). Expect those with pistols first, then shotguns, and when the Heat level rises and the chaos escalates, officers with assault rifles appear on the scene. They show the same insignia ranking: single and double chevrons.
 //// Elite (SWAT)
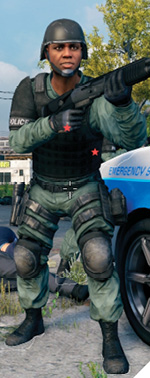
WEAPONS USED:
SHOTGUN: M1014
ASSAULT RIFLE: MP5
Frag Grenade
When the Heat level reaches 4 or more, expect a unit of SWAT members to appear from a black SUV. They are armed to the teeth and wearing battle armor, making them extremely difficult to take down with a weapon (aside from headshots). Use melee strikes if you’re worried about your Reputation, which you shouldn’t be if you’re seeing these guys!
 //// Enforcer (SWAT)
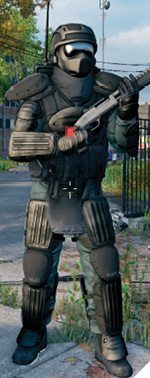
WEAPONS USED:
SHOTGUN: SG-90
LMG: U-100
If you’ve really angered the Chicago PD and your Heat level is at maximum (5), the ultimate in criminal deterrent is sent out: one or more Enforcers! They have booming, almost robotic voices and have enough armor to absorb multiple sniper rifles to the face. Drop them (ideally from a distance) with explosions or continuous gunfire, or ram them two or three times in a vehicle.
 //// Marksman (Chopper)
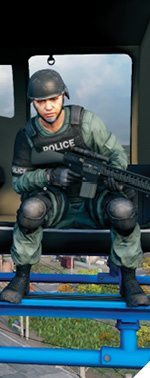
WEAPONS USED:
SNIPER RIFLE: SR-25
Whenever you see a police helicopter with a Marksman on the side, this is the cop you’re dealing with. He’s a crack shot but can be neutralized if you shoot him and watch him fall from the chopper, which retreats back a bit before returning with another Marksman.
/// Enemy Weapons Table
This shows the damage that enemies attempt to inflict on you (in Hit Points). This is extremely helpful, as you can see the distance of their attacks, the types of weapons they usually carry, and how damage is impacted over distance. When you encounter an enemy, tag or “mark” to learn his approximate rank, then note the weapon he is using and cross-reference this into the following table.
//// Faction Members
| medium difficulty | easy difficulty | HARD/REALISTIC difficulty | |||||||||||||||||||||
|---|---|---|---|---|---|---|---|---|---|---|---|---|---|---|---|---|---|---|---|---|---|---|---|
| NPC | Weapon Type | Weapon | Damage | DR Perk Value | Dmg After DR | Shots to Near Death | Shots to Kill | Shots to Near Death / DR | Shots to Kill / DR | Multiplier | Damage | Damage / DR | Shots to Near Death | Shots to Kill | Shots to Near Death / DR | Shots to Kill / DR | Multiplier | Damage | Damage / DR | Shots to Near Death | Shots to Kill | Shots to Near Death / DR | Shots to Kill / DR |
| Grunt | Pistol | P-9mm | 23 | 0.75 | 17.25 | 4 | 5 | 5 | 6 | 0.66 | 15.18 | 11.385 | 6 | 7 | 8 | 9 | 1.25 | 28.75 | 21.5625 | 3 | 4 | 4 | 5 |
| Assault Rifle | OCP 11 | 23 | 0.75 | 17.25 | 4 | 5 | 5 | 6 | 0.66 | 15.18 | 11.385 | 6 | 7 | 8 | 9 | 1.25 | 28.75 | 21.5625 | 3 | 4 | 4 | 5 | |
| SMG | SMG-11 | 23 | 0.75 | 17.25 | 4 | 5 | 5 | 6 | 0.66 | 15.18 | 11.385 | 6 | 7 | 8 | 9 | 1.25 | 28.75 | 21.5625 | 3 | 4 | 4 | 5 | |
| Shotgun | D12 | 40 | 0.75 | 30 | 2 | 3 | 3 | 4 | 0.66 | 26.4 | 19.8 | 4 | 4 | 5 | 6 | 1.25 | 50 | 37.5 | 2 | 2 | 3 | 3 | |
| Veteran | Pistol | 1911 | 27 | 0.75 | 20.25 | 3 | 4 | 4 | 5 | 0.66 | 17.82 | 13.365 | 5 | 6 | 6 | 8 | 1.25 | 33.75 | 25.3125 | 3 | 3 | 4 | 4 |
| Assault Rifle | AK-47 | 27 | 0.75 | 20.25 | 3 | 4 | 4 | 5 | 0.66 | 17.82 | 13.365 | 5 | 6 | 6 | 8 | 1.25 | 33.75 | 25.3125 | 3 | 3 | 4 | 4 | |
| SMG | MP9 | 27 | 0.75 | 20.25 | 3 | 4 | 4 | 5 | 0.66 | 17.82 | 13.365 | 5 | 6 | 6 | 8 | 1.25 | 33.75 | 25.3125 | 3 | 3 | 4 | 4 | |
| Shotgun | SG-90 | 50 | 0.75 | 37.5 | 2 | 2 | 3 | 3 | 0.66 | 33 | 24.75 | 3 | 4 | 4 | 5 | 1.25 | 62.5 | 46.875 | 2 | 2 | 2 | 3 | |
| Elite | Pistol | D50 | 40 | 0.75 | 30 | 2 | 3 | 3 | 4 | 0.66 | 26.4 | 19.8 | 4 | 4 | 5 | 6 | 1.25 | 50 | 37.5 | 2 | 2 | 3 | 3 |
| Assault Rifle | Goblin | 40 | 0.75 | 30 | 2 | 3 | 3 | 4 | 0.66 | 26.4 | 19.8 | 4 | 4 | 5 | 6 | 1.25 | 50 | 37.5 | 2 | 2 | 3 | 3 | |
| SMG | R-2000 | 40 | 0.75 | 30 | 2 | 3 | 3 | 4 | 0.66 | 26.4 | 19.8 | 4 | 4 | 5 | 6 | 1.25 | 50 | 37.5 | 2 | 2 | 3 | 3 | |
| Shotgun | RSG-12 | 50 | 0.75 | 37.5 | 2 | 2 | 3 | 3 | 0.66 | 33 | 24.75 | 3 | 4 | 4 | 5 | 1.25 | 62.5 | 46.875 | 2 | 2 | 2 | 3 | |
| Enforcer | Shotgun | SG-90 | 40 | 0.75 | 30 | 2 | 3 | 3 | 4 | 0.66 | 26.4 | 19.8 | 4 | 4 | 5 | 6 | 1.25 | 50 | 37.5 | 2 | 2 | 3 | 3 |
| Auto Shotgun | ATSG-12 | 40 | 0.75 | 30 | 2 | 3 | 3 | 4 | 0.66 | 26.4 | 19.8 | 4 | 4 | 5 | 6 | 1.25 | 50 | 37.5 | 2 | 2 | 3 | 3 | |
| LMG | U100 | 27 | 0.75 | 20.25 | 3 | 4 | 4 | 5 | 0.66 | 17.82 | 13.365 | 5 | 6 | 6 | 8 | 1.25 | 33.75 | 25.3125 | 3 | 3 | 4 | 4 | |
| Marksman | Sniper Rifle | SVD | 80 | 0.75 | 60 | 1 | 2 | 2 | 2 | 0.66 | 52.8 | 39.6 | 2 | 2 | 3 | 3 | 1.25 | 100 | 75 | 1 | 1 | 2 | 2 |
| Sniper Rifle (Elite) | AC-AR | 80 | 0.75 | 60 | 1 | 2 | 2 | 2 | 0.66 | 52.8 | 39.6 | 2 | 2 | 3 | 3 | 1.25 | 100 | 75 | 1 | 1 | 2 | 2 | |
//// Chicago Police Officers
| medium difficulty | easy difficulty | HARD/REALISTIC difficulty | |||||||||||||||||||||
|---|---|---|---|---|---|---|---|---|---|---|---|---|---|---|---|---|---|---|---|---|---|---|---|
| NPC | Weapon Type | Weapon | Damage | DR Perk Value | Dmg After DR | Shots to Near Death | Shots to Kill | Shots to Near Death / DR | Shots to Kill / DR | Multiplier | Damage | Damage / DR | Shots to Near Death | Shots to Kill | Shots to Near Death / DR | Shots to Kill / DR | Multiplier | Damage | Damage / DR | Shots to Near Death | Shots to Kill | Shots to Near Death / DR | Shots to Kill / DR |
| Officer (Veteran) | Pistol | Px4 | 27 | 0.75 | 20.25 | 3 | 4 | 4 | 5 | 0.66 | 17.82 | 13.365 | 5 | 6 | 6 | 8 | 1.25 | 33.75 | 25.3125 | 3 | 3 | 4 | 4 |
| Assault Rifle | 416 | 27 | 0.75 | 20.25 | 3 | 4 | 4 | 5 | 0.66 | 17.82 | 13.365 | 5 | 6 | 6 | 8 | 1.25 | 33.75 | 25.3125 | 3 | 3 | 4 | 4 | |
| Shotgun | SG-90 | 40 | 0.75 | 30 | 2 | 3 | 3 | 4 | 0.66 | 26.4 | 19.8 | 4 | 4 | 5 | 6 | 1.25 | 50 | 37.5 | 2 | 2 | 3 | 3 | |
| Elite (SWAT) | Shotgun | M1014 | 40 | 0.75 | 30 | 2 | 3 | 3 | 4 | 0.66 | 26.4 | 19.8 | 4 | 4 | 5 | 6 | 1.25 | 50 | 37.5 | 2 | 2 | 3 | 3 |
| Assault Rifle | MP5 | 40 | 0.75 | 30 | 2 | 3 | 3 | 4 | 0.66 | 26.4 | 19.8 | 4 | 4 | 5 | 6 | 1.25 | 50 | 37.5 | 2 | 2 | 3 | 3 | |
| Chopper Marksman | Sniper Rifle | SR-25 | 50 | 0.75 | 37.5 | 2 | 2 | 3 | 3 | 0.66 | 33 | 24.75 | 3 | 4 | 4 | 5 | 1.25 | 62.5 | 46.875 | 2 | 2 | 2 | 3 |
| Enforcer (SWAT) | Shotgun | SG-90 | 40 | 0.75 | 30 | 2 | 3 | 3 | 4 | 0.66 | 26.4 | 19.8 | 4 | 4 | 5 | 6 | 1.25 | 50 | 37.5 | 2 | 2 | 3 | 3 |
| LMG | U100 | 40 | 0.75 | 30 | 2 | 3 | 3 | 4 | 0.66 | 26.4 | 19.8 | 4 | 4 | 5 | 6 | 1.25 | 50 | 37.5 | 2 | 2 | 3 | 3 | |
// FEELING THE HEAT: POLICE AND FACTION AVOIDANCE MANEUVERS
During your missions or when the citizens of Chicago call the police after you create havoc, you are expected to avoid the cops or face arrest. Take them on, and you will lower your Reputation and have more run-ins with the law. Similarly, factions sometimes search for you and give chase. This section helps you understand what to look out for.
/// Police Search
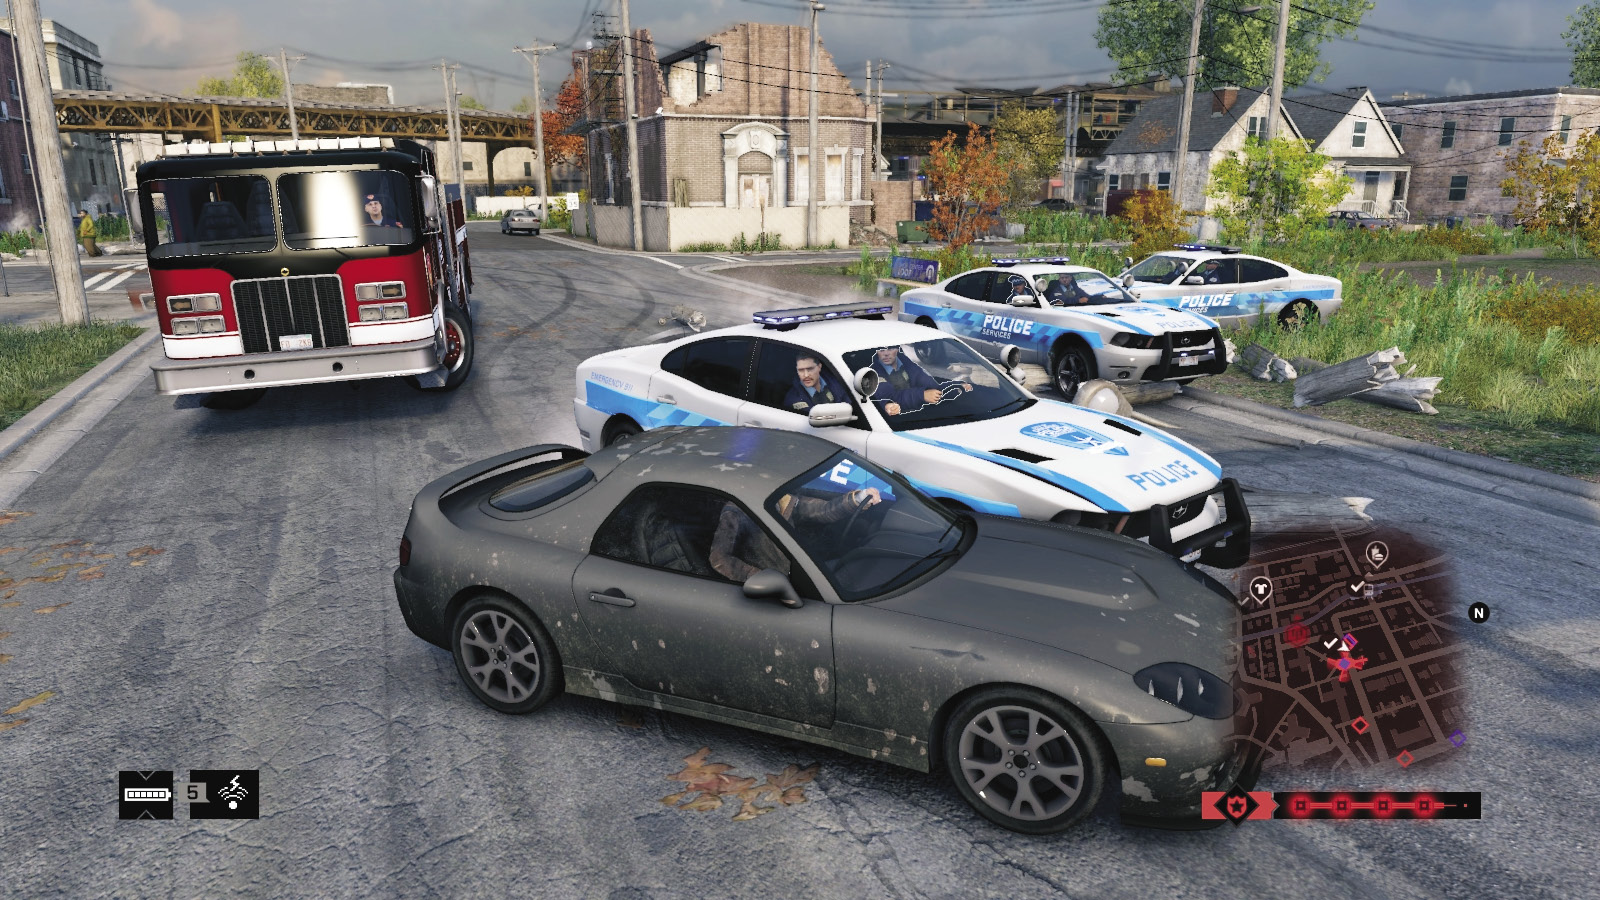
Evade a police or faction chase by breaking the line of sight with your pursuers. Then you can escape by hiding until the search timer (the yellow alert in the bottom-right corner) reaches 0% or by fleeing the search circle without being detected. Or, you can use a Jam Coms and remove the search circle entirely. The many additional tactics later in this chapter work well too.
/// Police Alert
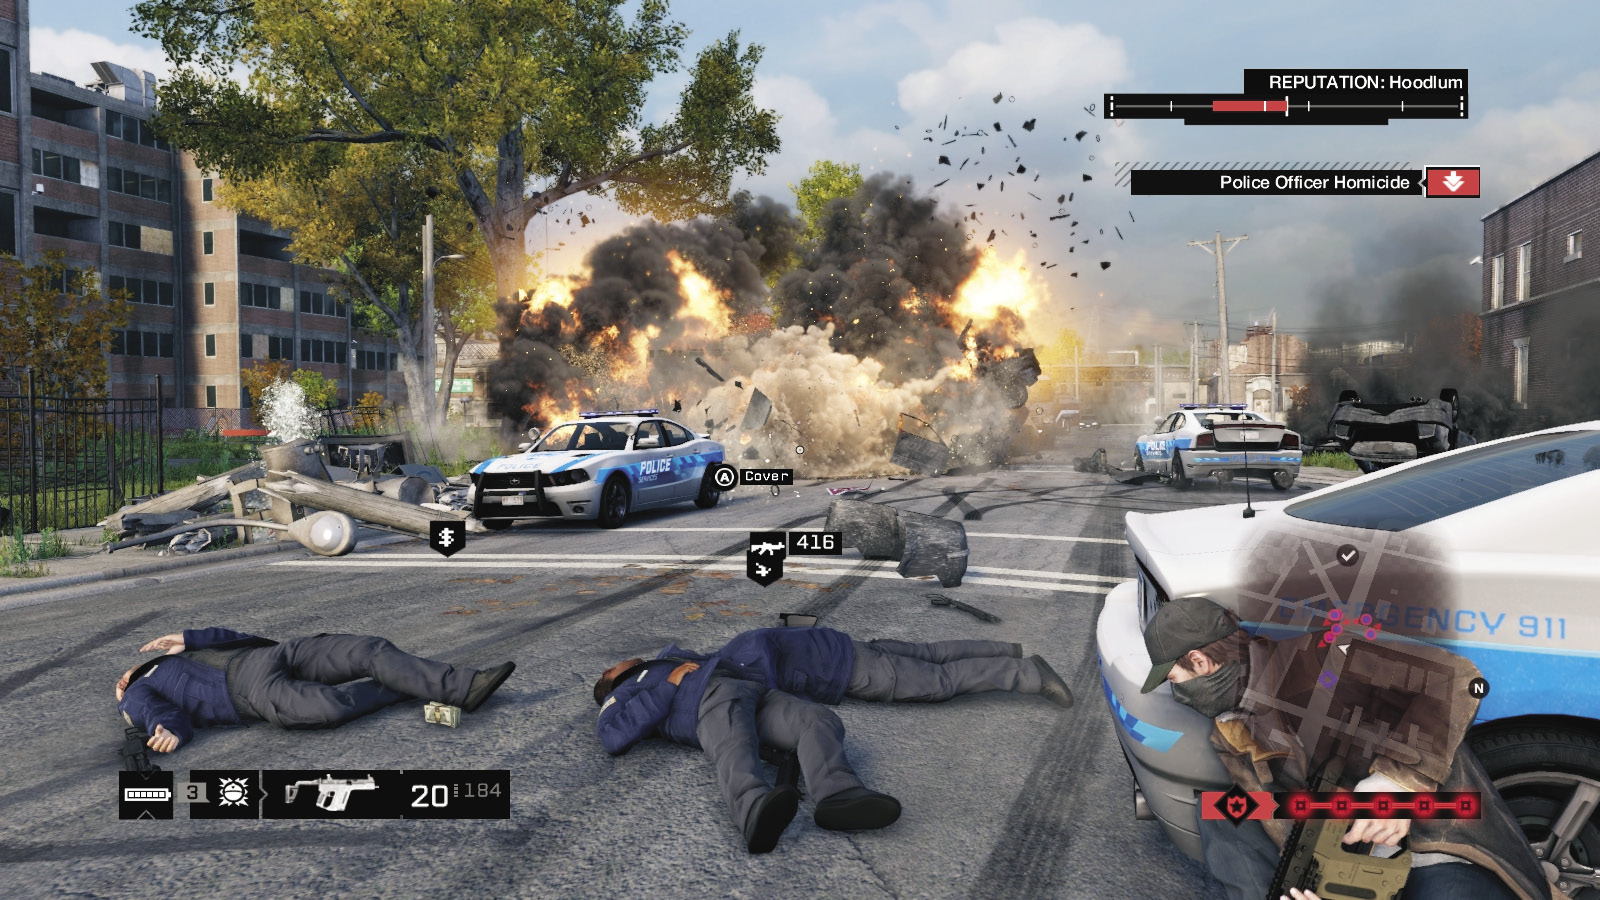
If you fail to escape the police or faction search, your Heat level turns red and has a number of stages. The higher the stage, the more police are summoned. With factions, you simply have up to six vehicles to avoid. With the cops, you have a number of vehicles depending on how far through the main missions you are; these modify your Felony (or Heat) level. Expect the following maximum number of vehicles dependent on your mission completion and level:
Stage 1 (Start)
Heat Level 1: 2 vehicles
Heat Level 2: 2 vehicles
Heat Level 3: 3 vehicles (+helicopter)
Heat Level 4: 4 vehicles (+helicopter)
Heat Level 5: 5 vehicles (+helicopter)
Stage 2 (Once Act II is completed)
Heat Level 1: 2 vehicles
Heat Level 2: 3 vehicles
Heat Level 3: 4 vehicles (+helicopter)
Heat Level 4: 5 vehicles (+helicopter)
Heat Level 5: 6 vehicles (+helicopter)
Stage 3 (Once Act IV is completed)
Heat Level 1: 3 vehicles
Heat Level 2: 4 vehicles (+helicopter)
Heat Level 3: 5 vehicles (+helicopter)
Heat Level 4: 6 vehicles (+helicopter)
Heat Level 5: 7 vehicles (+helicopter)
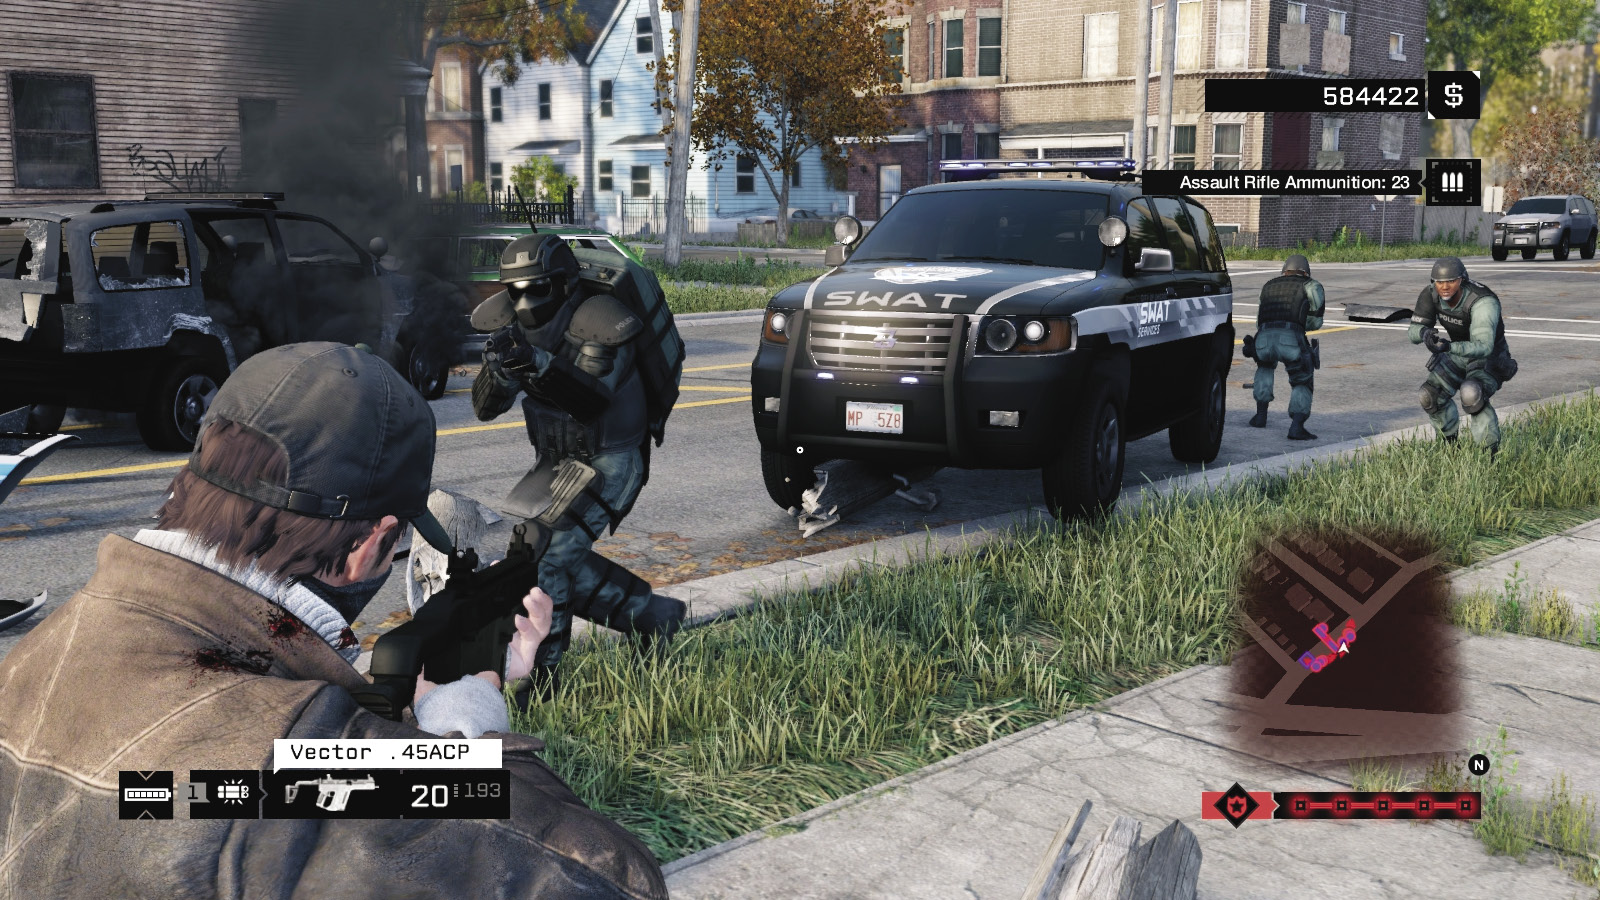
At Heat levels 1 and 2, expect cops with pistols and shotguns. At Level 3 and above, expect assault rifles and SMGs. At Level 4 and above, SWAT team members will exit a black SUV and begin a tactical strike. They are heavily armored, so you must flee from them or shoot them in the head. Want to become a menace and raise your Heat to Level 5? Simply keep killing cops.
/// Rest and Heat System
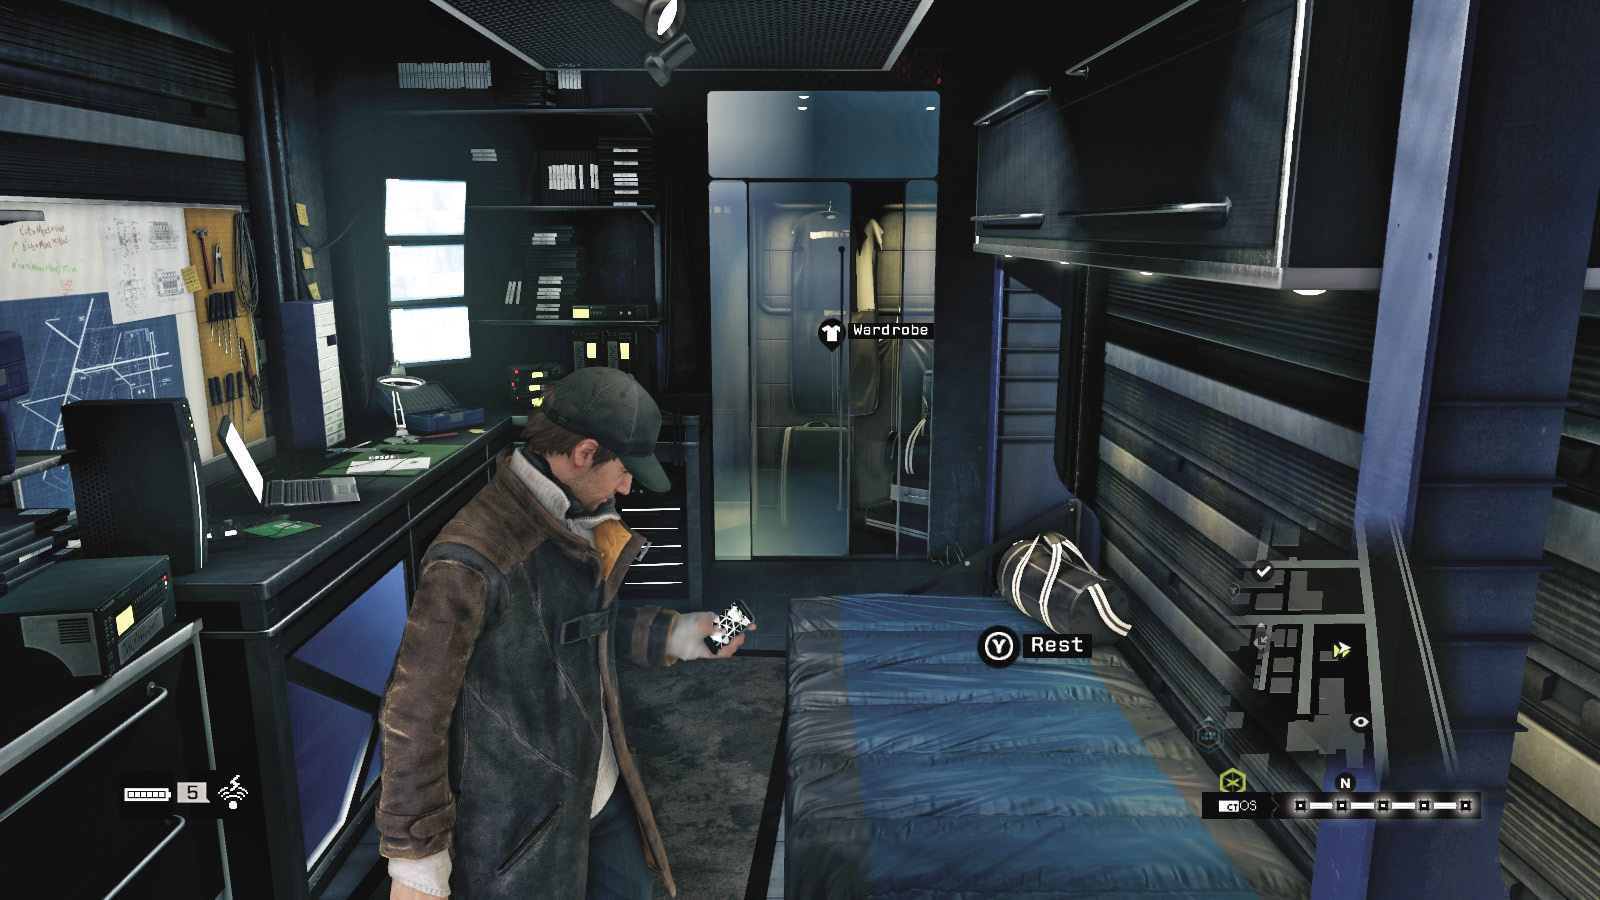
You reduce your Heat by fleeing from the cops (you need to reach beyond their giant circular search area radius), losing them while they search for you and waiting for the Heat Alert Level to go from red (active chasing) to yellow (searching) and finally white (your Felony level). This Felony level is problematic at Level 3 and above, as the public are more swayed to call the cops, and you appear on news broadcasts. So flee to your Hideout and sleep to reduce your heat.
// INVESTIGATION, INFILTRATION, AND INTIMIDATION
This part of the training chapter provides a thorough overview of every possible method you should think about attempting when faced with enemies and an area to explore. Obviously, the specific restricted areas you’ll be infiltrating, the roads you’ll be ambushing from, and the criminals you’ll be chasing may lead you to make different decisions or utilize plans not discussed here, but this still gives a good overview of the tactics you can try.
/// ON-FOOT INFILTRATIONS
Many missions involve a similar tactical plan: You have a building, yard, or apartment block to maneuver through, with several guards inside the area. One or two might be snipers. Two or four might be Shot-Callers. One may be a target you need to hack, or there’s a waypoint to reach and the foes stand between you and it. What do you do?
Quite a lot, actually. There’s an incredible amount of nuance to your sneaking, due to the complete freedom you have and the flexibility you have with climbing, hacking, using scenery to your benefit (via climbing, hacking, or shooting it), and accessing the firepower or vehicles you can bring along. But here are the general ways to approach such a mission:
/// Passive Tactics
You can complete most missions without unholstering your gun or taking your baton from your coat. In fact, it’s daring and entertaining to try utilizing a combination of the environment and technology to minimize bloodshed. Try the following:
01. Smart: Remote Camera Hacks
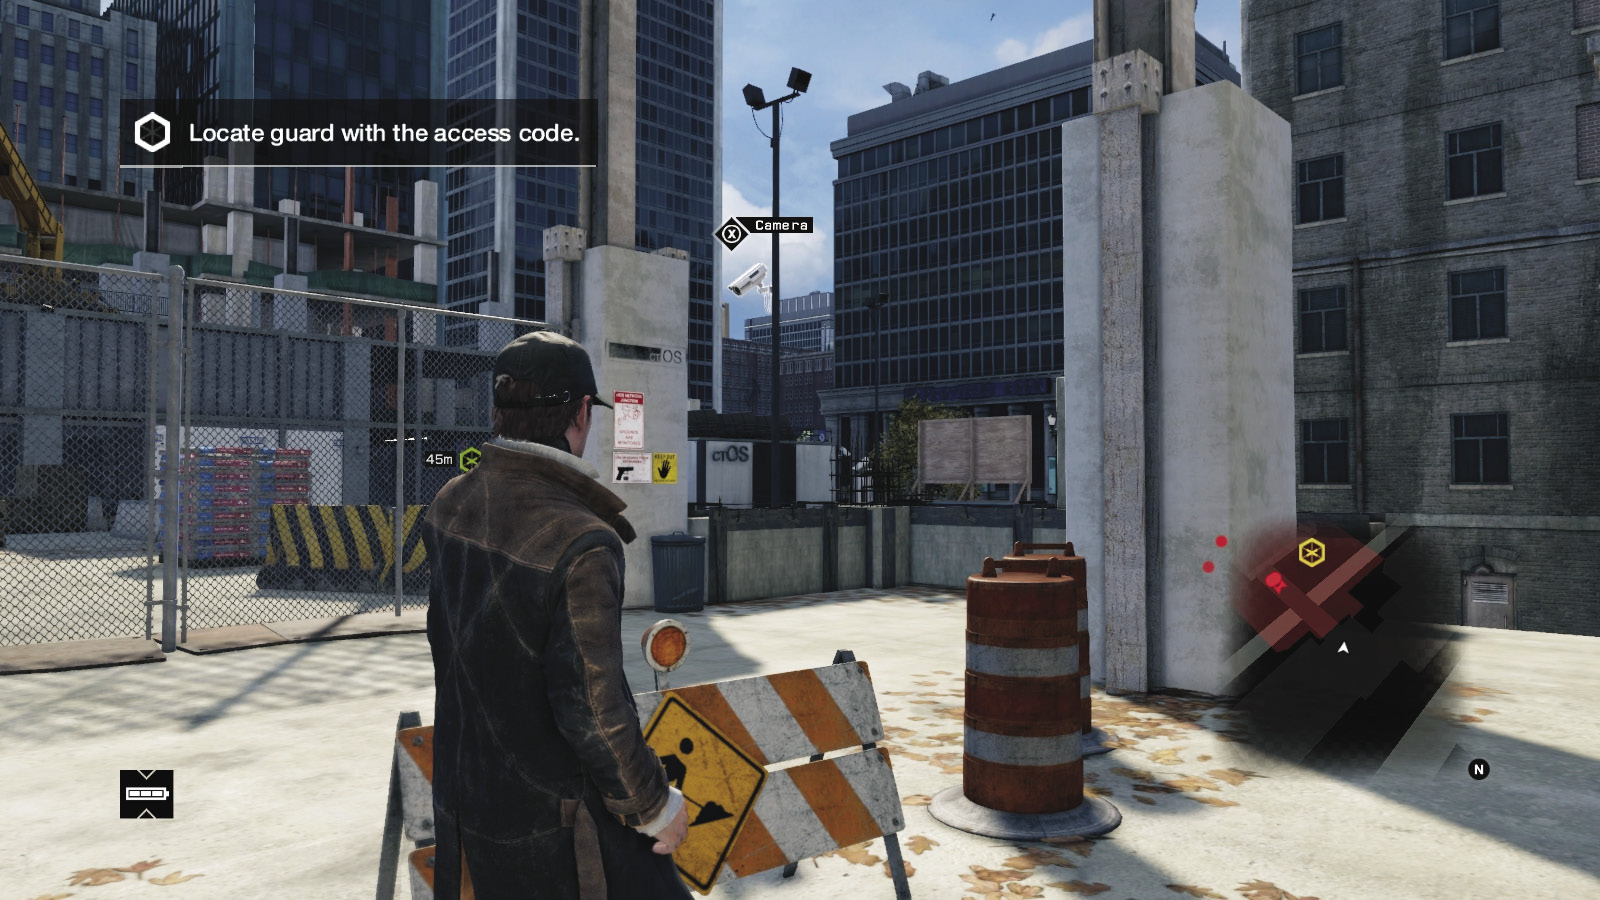
The first tactic doesn’t even need you to be in the restricted area! Look around for a ctOS camera and access it for a remote view. Then move into subsequent cameras, tagging enemies to easily see them when you revert back to Aiden. Remember there are cameras in laptop computers, too, and cameras are often facing, or can be moved to face, an objective target, which you can hack while still outside and out of danger. Can you complete an entire mission without stepping foot inside a restricted area? Occasionally, even this is possible!
02. Smart: Guard Camera Hacks
There are also enemies patrolling the grounds who may have cameras on them. These provide movable views of an area to judge guard routes and to find additional static cameras to move to, and even objective targets they may be guarding, which could be hacked while you’re looking through their view.
03. Smart: Guard Disruption or Explosion Hacks
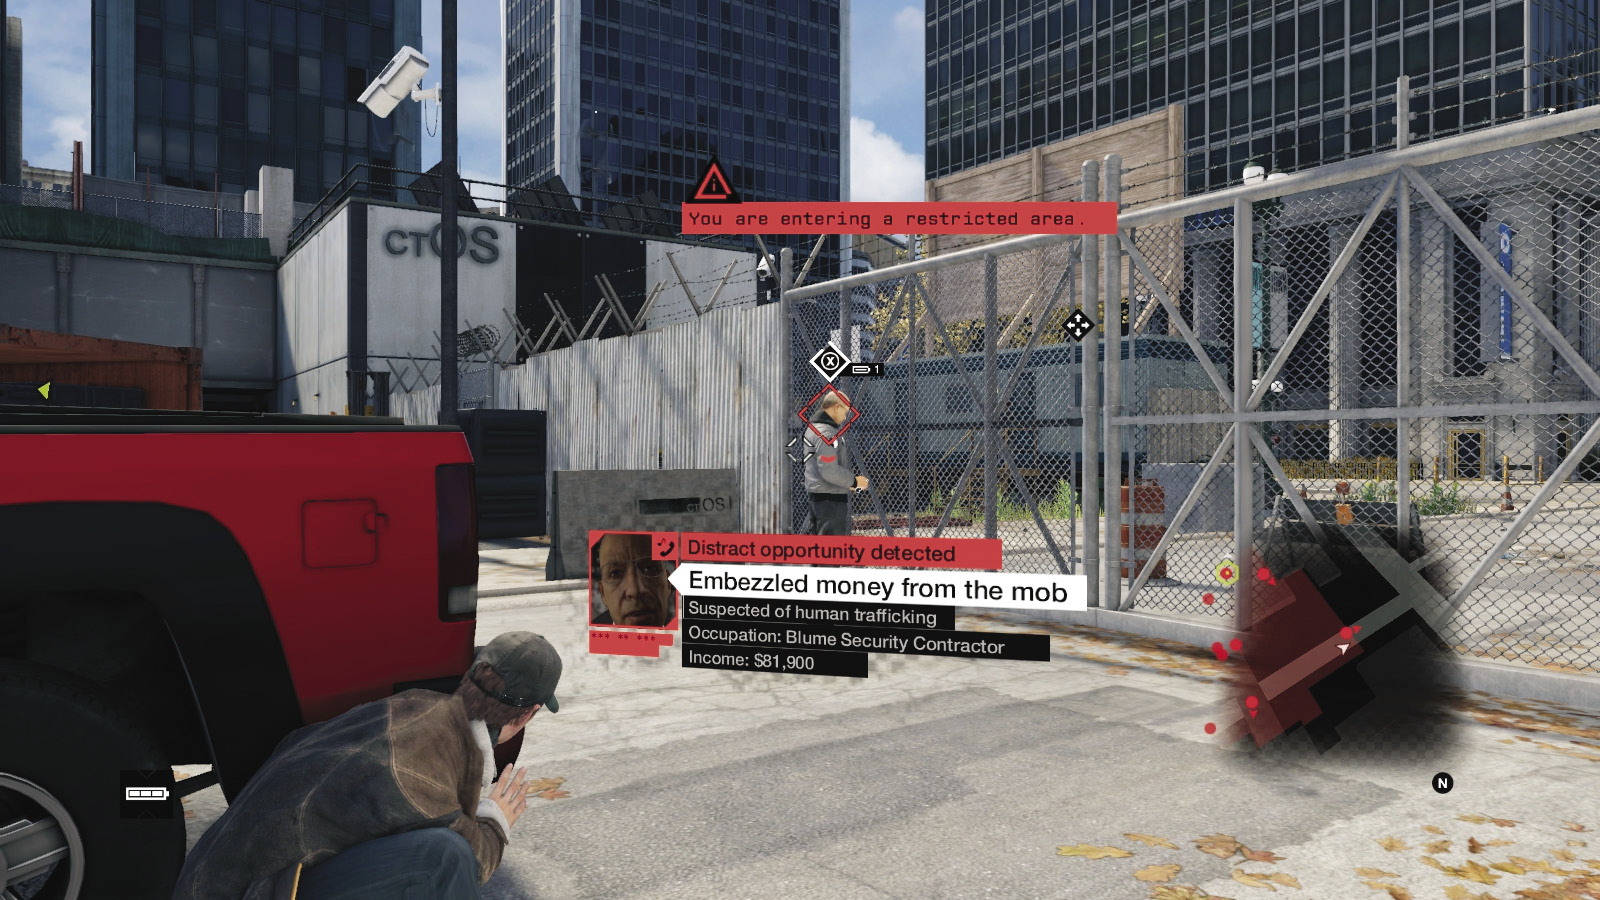
With your Hacker’s Tool Kit skill, around half the enemies you encounter may have an additional technological short-coming you can exploit. These are random, but worth attempting. You can “disrupt” (one battery slot) a foe by temporarily incapacitating him after sending him a text message or phone call. This lasts around five seconds and enables you to sneak past him without being seen. Or, you can “explode” (two battery slots) a foe’s grenade, which causes others to investigate the location and the foe to throw the grenade away, or drop it and explode himself. This technique is great if used at distance, leading foes away from your sneaking path. Or, it can be used just prior to changing to a more violent path.
04. Smart: Crafted Tools
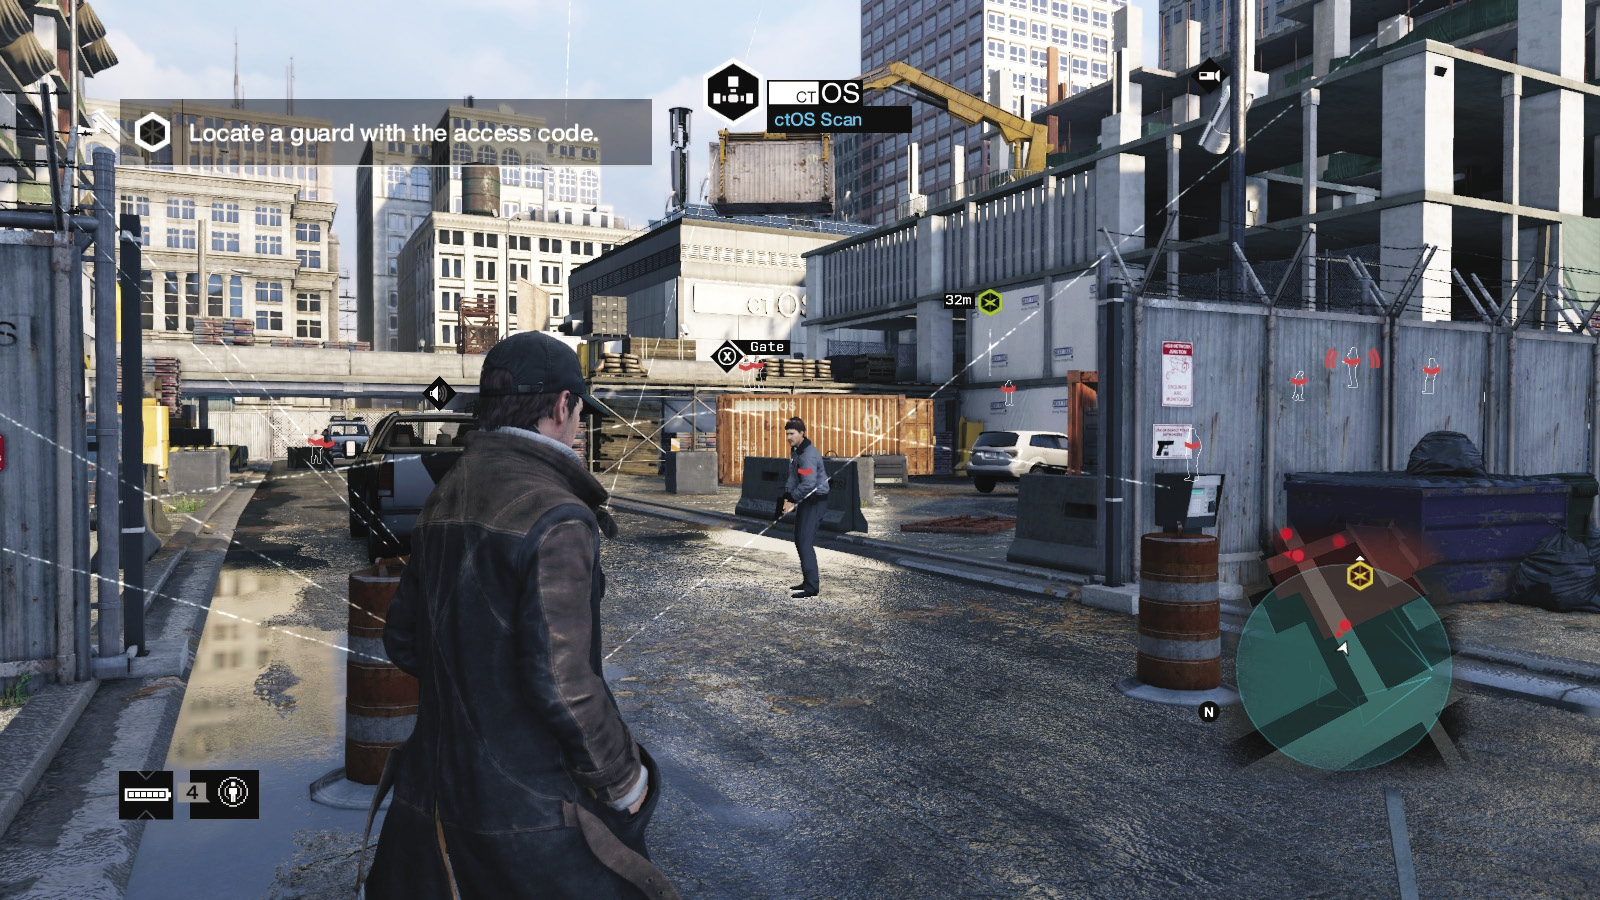
While Blackout works well at night, it cuts off technology while the lights are out, but it still makes stealthy creeping much easier and safer (if you aren’t wanting to hack as you go). Also begin an infiltration with a simple ctOS Scan, usually after using the remote cameras and catching and tagging any foes you might have missed, just to be sure you can see the outlines of every single foe before you move in.
05. Smart: Infrastructure Hacks
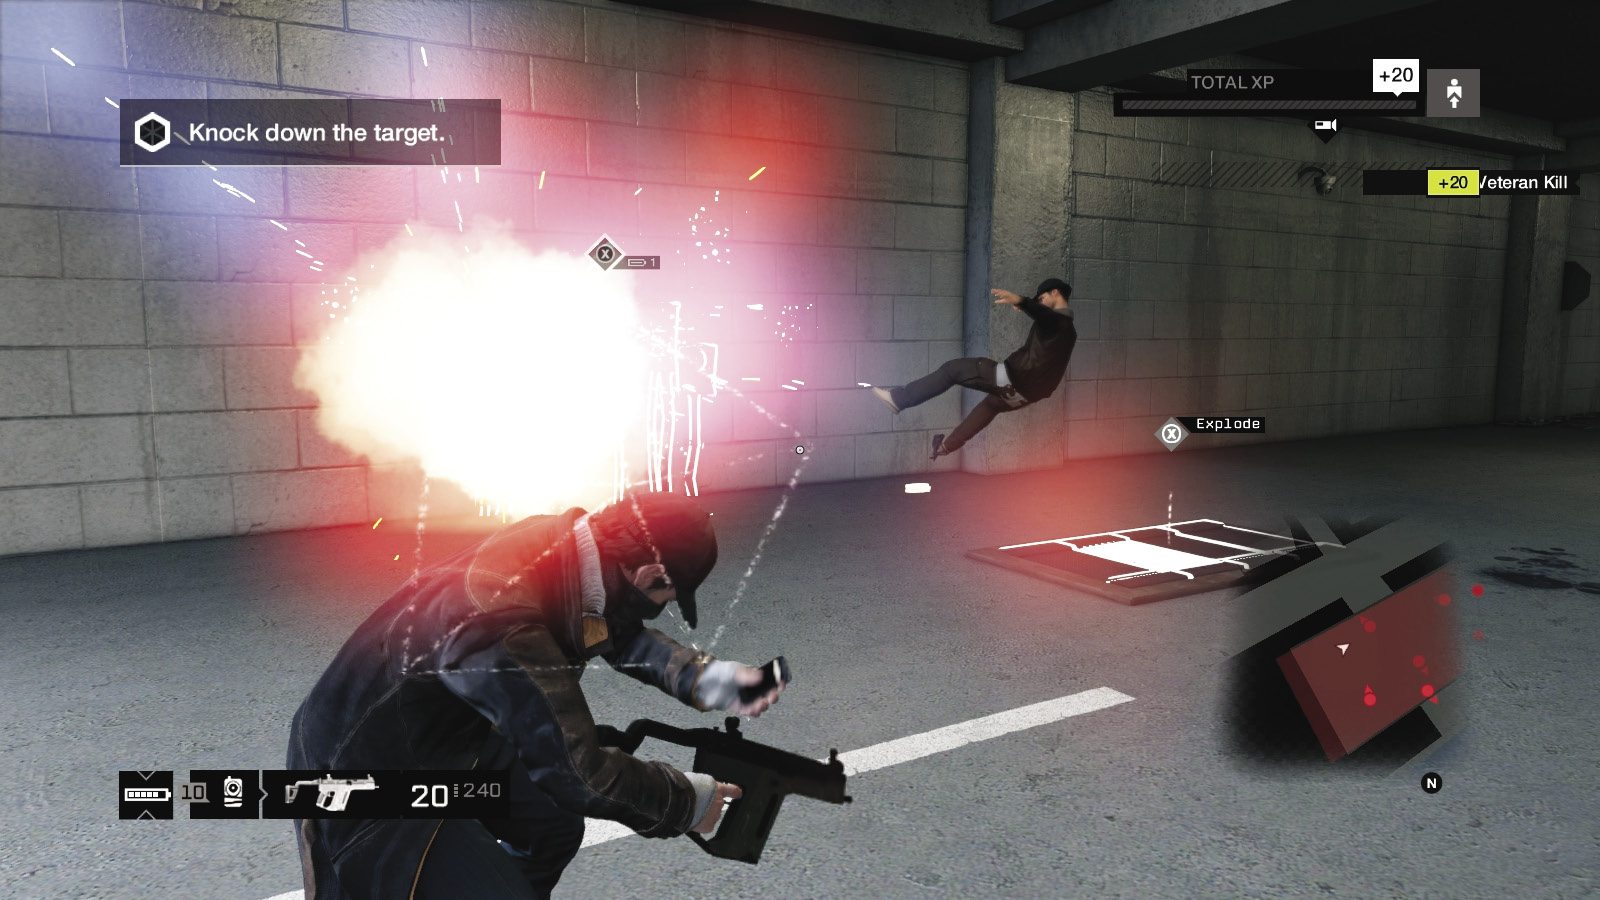
Infrastructure or scenery such as vaults, pipes, and other explosive areas can be hacked remotely from cameras, so you can remain safely away from the confusion it causes. See how many foes you can defeat in this manner, or distract them to another part of the area you’re thinking of moving through. It’s also important to use lifts, gates, garages, bridges, and other non-explosive infrastructure to help enter the area you wish to maneuver through, if applicable.
06. Using Cover
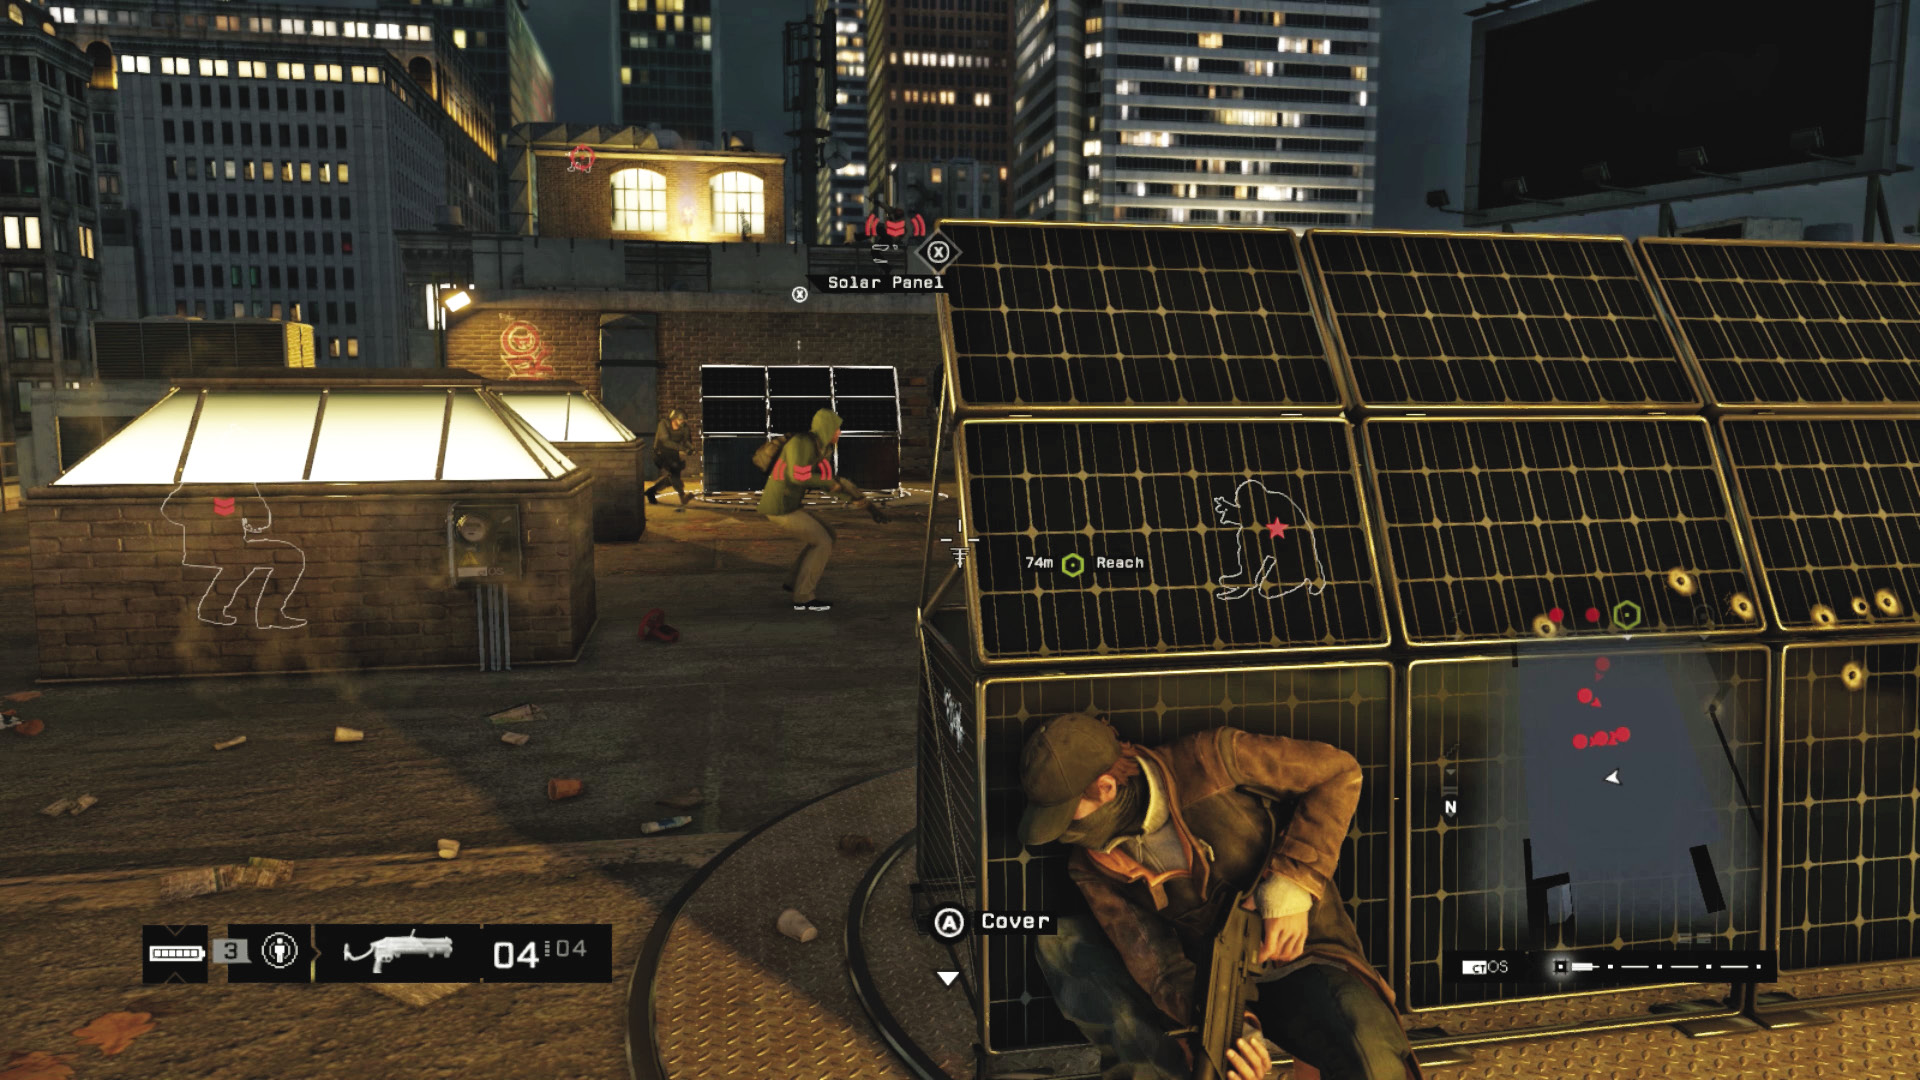
The elements of cover are critical to remaining hidden; scurry from cover to cover, staying out of sight of every enemy, moving behind them, and creeping to their side (their peripheral vision isn’t great, so try outflanking them). If you can’t reach a cover point using the Cover button, press the Vault button to stop being in cover, and scurry over to the cover point instead. Your plan is to get as far through the restricted area as you can without interacting with any foe (only hacking).
07. Parkour
There are many more routes to take if you take elevated pathways: climb and use low barriers as cover, work your way around an upper perimeter, and use any part of a building’s structure that you can reach. Move around walls to avoid a patrolling foe. Check every door to see if it opens. Eye all exits, stairwells, and clusters of scenery that create climbing opportunities. Are there open windows above you? Is there a crane with a container you can climb on and ride to a better vantage point? Then use them to reach your target, rather than a more dangerous ground-level infiltration.
/// Stealth Tactics
This is where you can try the majority of your impressive takedowns, using a combination of stealthy creeping in Passive play, but with the added benefits of relying on melee strikes for the majority, if not all, of your takedown opportunities. Enter restricted areas with stealth on your mind, before everything degenerates into more violent combat if or when you’re spotted.
08. Vehicle Parkour
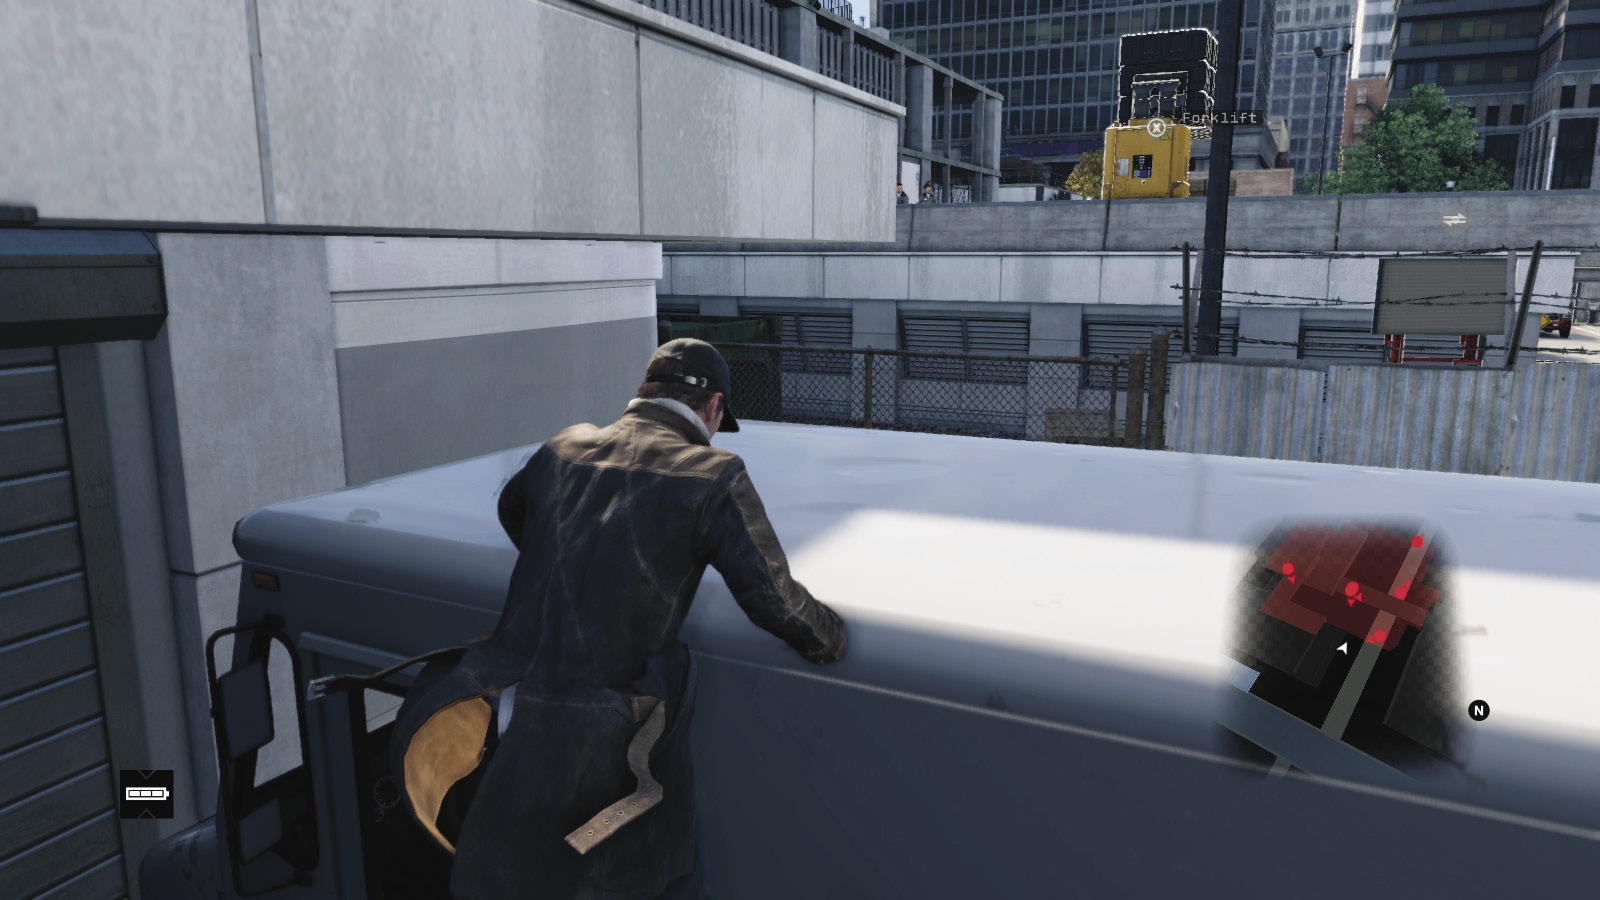
Need help infiltrating an area? If you don’t want to use the usual lifts, doors, or gates, you can always park a van, truck, or fire engine against a perimeter wall, climb onto the vehicle, and then hop over the wall. Make sure the perimeter is sturdy enough; you can easily ram through a fence and start violence, so try vehicle parkour only against higher walls or lower rooftops you can’t normally reach.
09. Cover and Melee Strikes
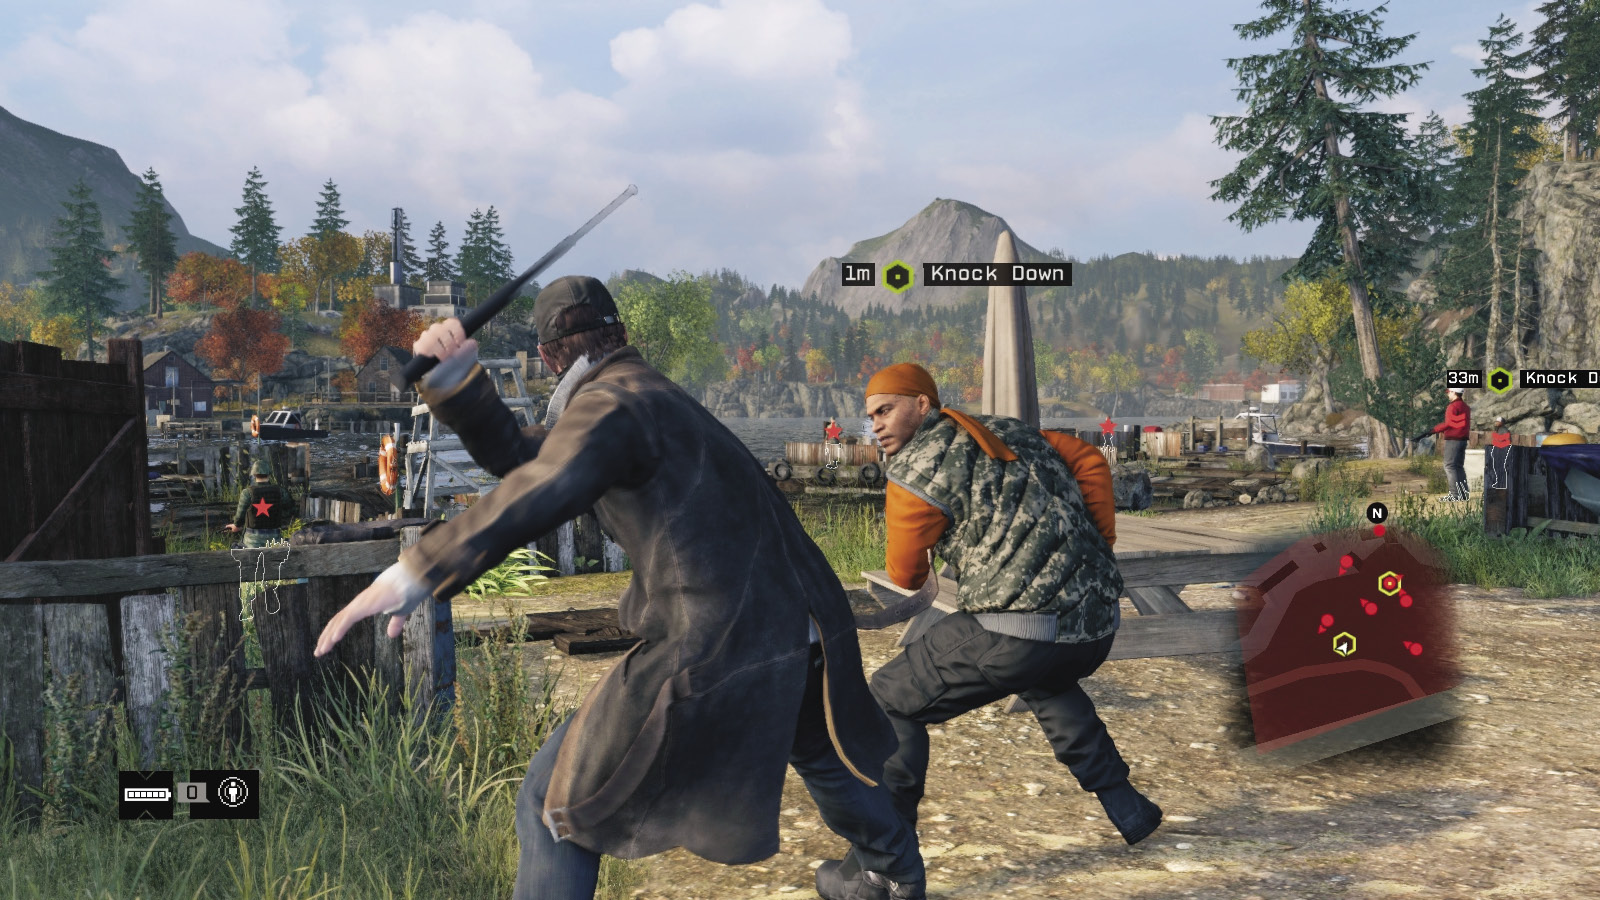
Many restricted areas are a maze of containers, walls, low barricades, and other cover opportunities. Spend most of your time flitting from cover to cover, and then reach out, dispatch a foe with a melee strike, and then drop back into cover. Move to a position where you’re to the side of a foe as he walks past, so you can easily (and automatically) step out and bring him down. Try to maneuver around and behind any stationary foes so they don’t know what’s hit them. And don’t let anyone see you when you’re doing it (check the minimap to see where foes are facing).
10. Parkour and Melee Strikes
Use all the aforethought and passive planning as you utilize the environment (stairs made of stacked pallets, scaffold platforms near high windows, and other infiltration opportunities), but with the added knowledge that you can bring your baton into a foe’s skull at any moment. Check your position against all foes, using the minimap to ensure you won’t be seen, and then vault or drop onto a foe and incapacitate them.
11. Focus and Melee Strikes
Focus is used more with shooting than melee strikes, but it’s still worth employing if you have a rush or maneuver you need to make before reaching the foe to grab them. You will usually use this when the terrain you’re moving through features areas you might be caught in, like a foe being on the other side of a table and you needing some precise “steering” to move Aiden around and at the enemy in a fluid motion.
12. Rushing and Melee Strikes
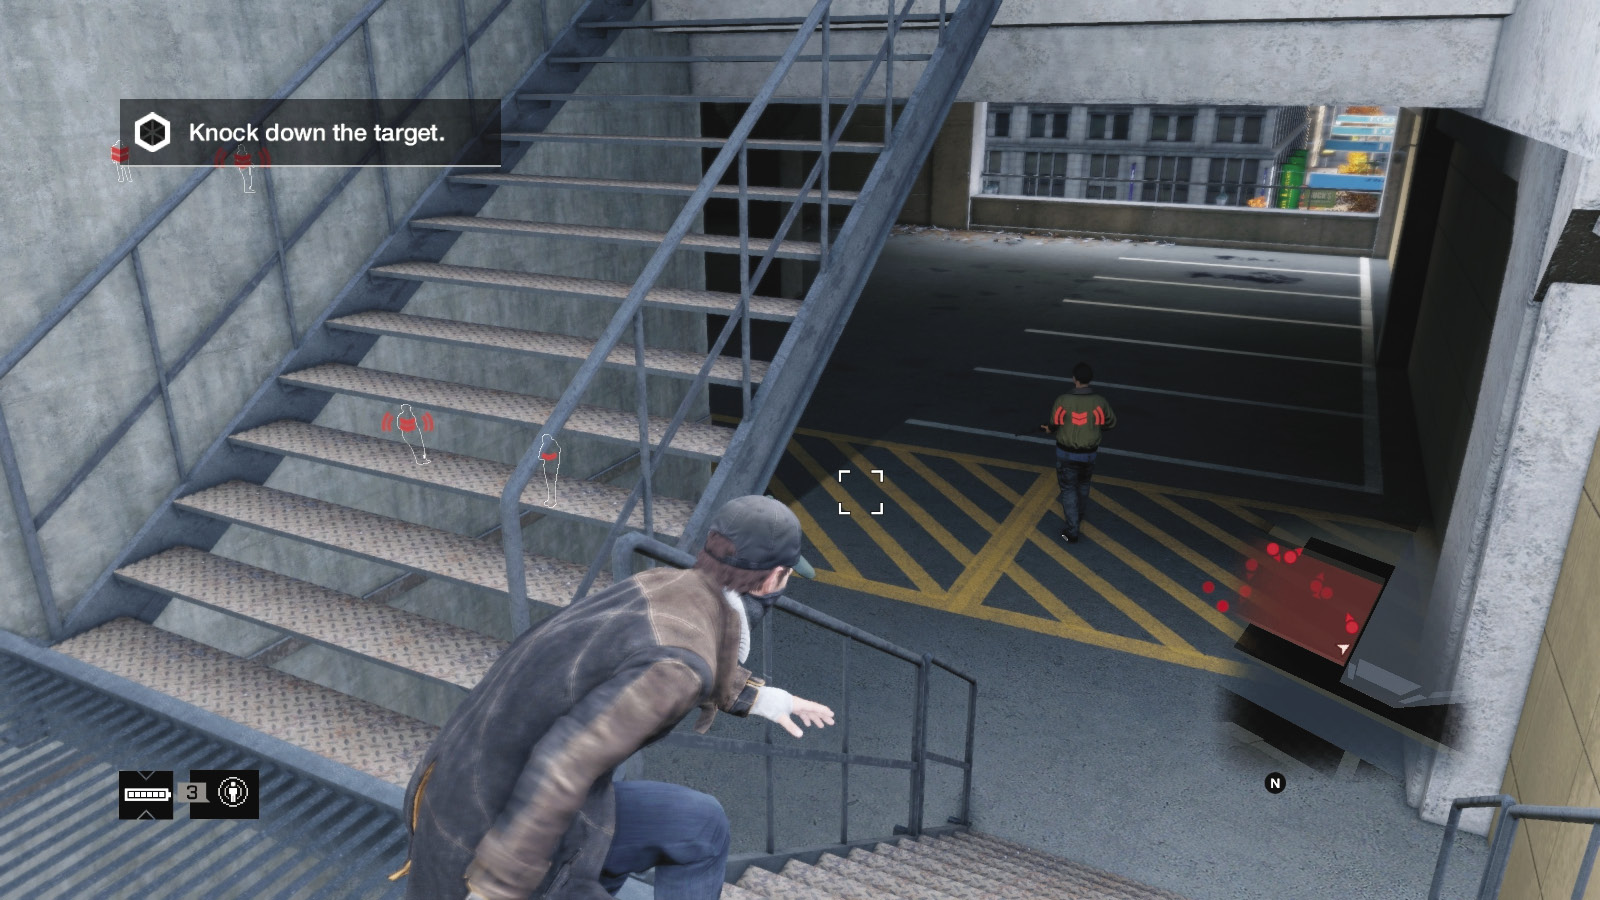
Don’t be afraid to use this all the time; you usually have a couple seconds where, if you’re spotted, a foe stalls before raising his gun to fire at you. Use this window of opportunity to rush in, grab the foe, and melee-strike him, keeping the others unaware of your location even though you made a misstep and were discovered. Be swift, and use this on Shot-Callers in particular, before they summon reinforcements. Or, simply rush and flatten the last few foes when most of the threats are already gone or you’re out of ammunition.
13. Tools and Melee Strikes
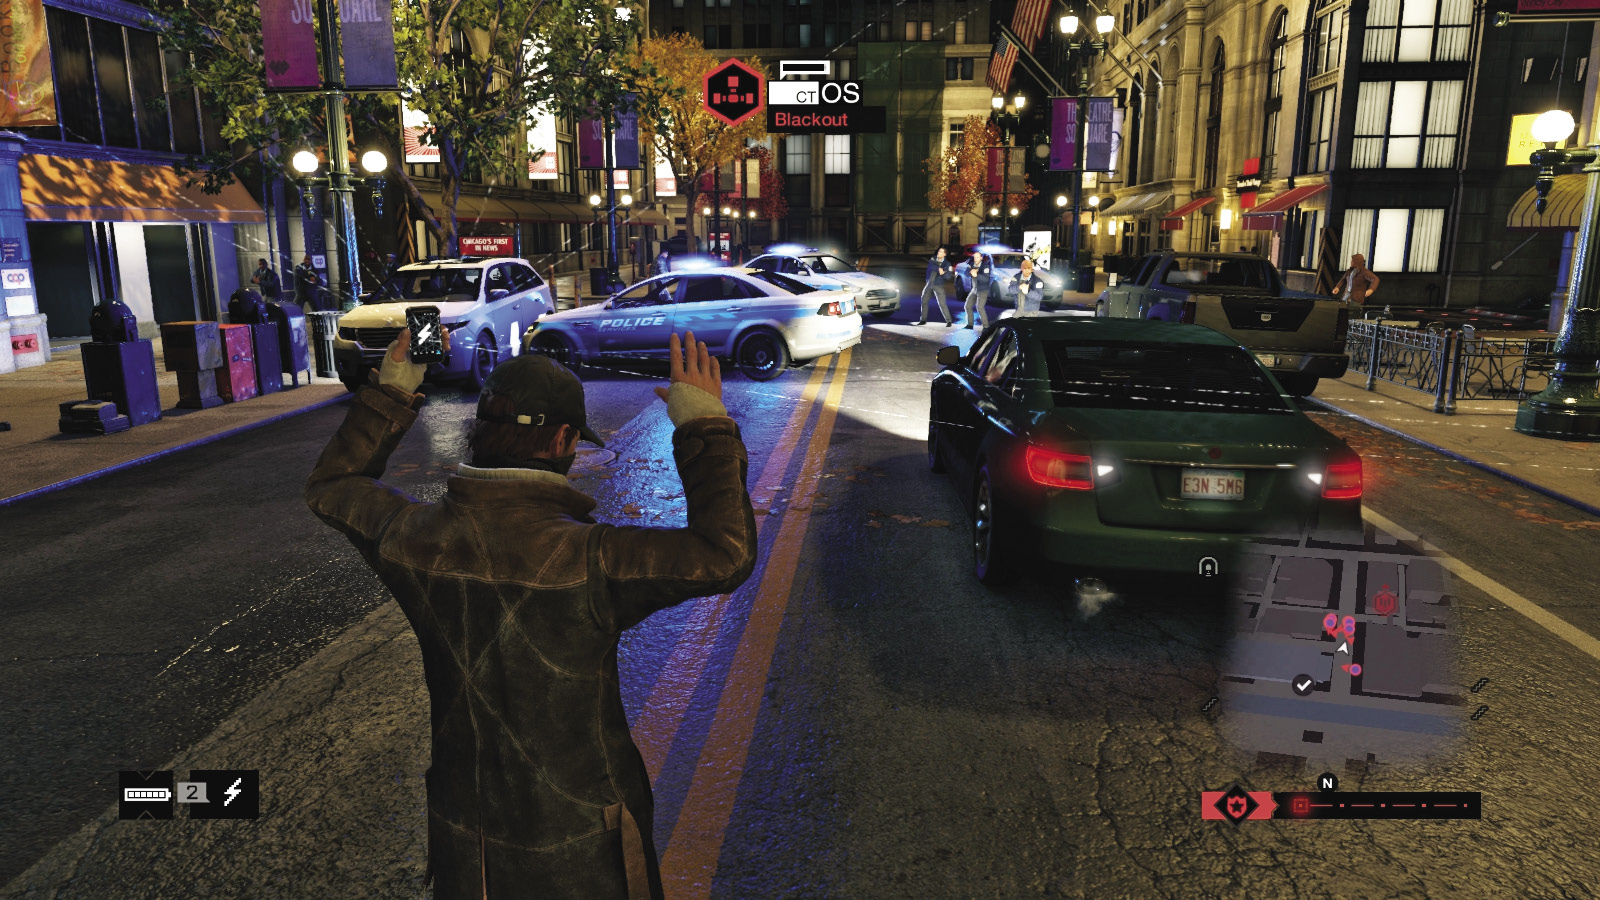
The Blackout and distracting lure are both excellent options if you want to distract or bewilder your foe. The former is a great option at night, and you can then sneak up and melee-strike multiple foes quickly and with less chance of a gunfight. Distracting lures are another option, as they allow you to “steer” a foe into an ambush; lob a lure into a foe’s path but close enough for you to quickly take them down without anyone seeing (e.g., around a corner).
14. Melee Executions
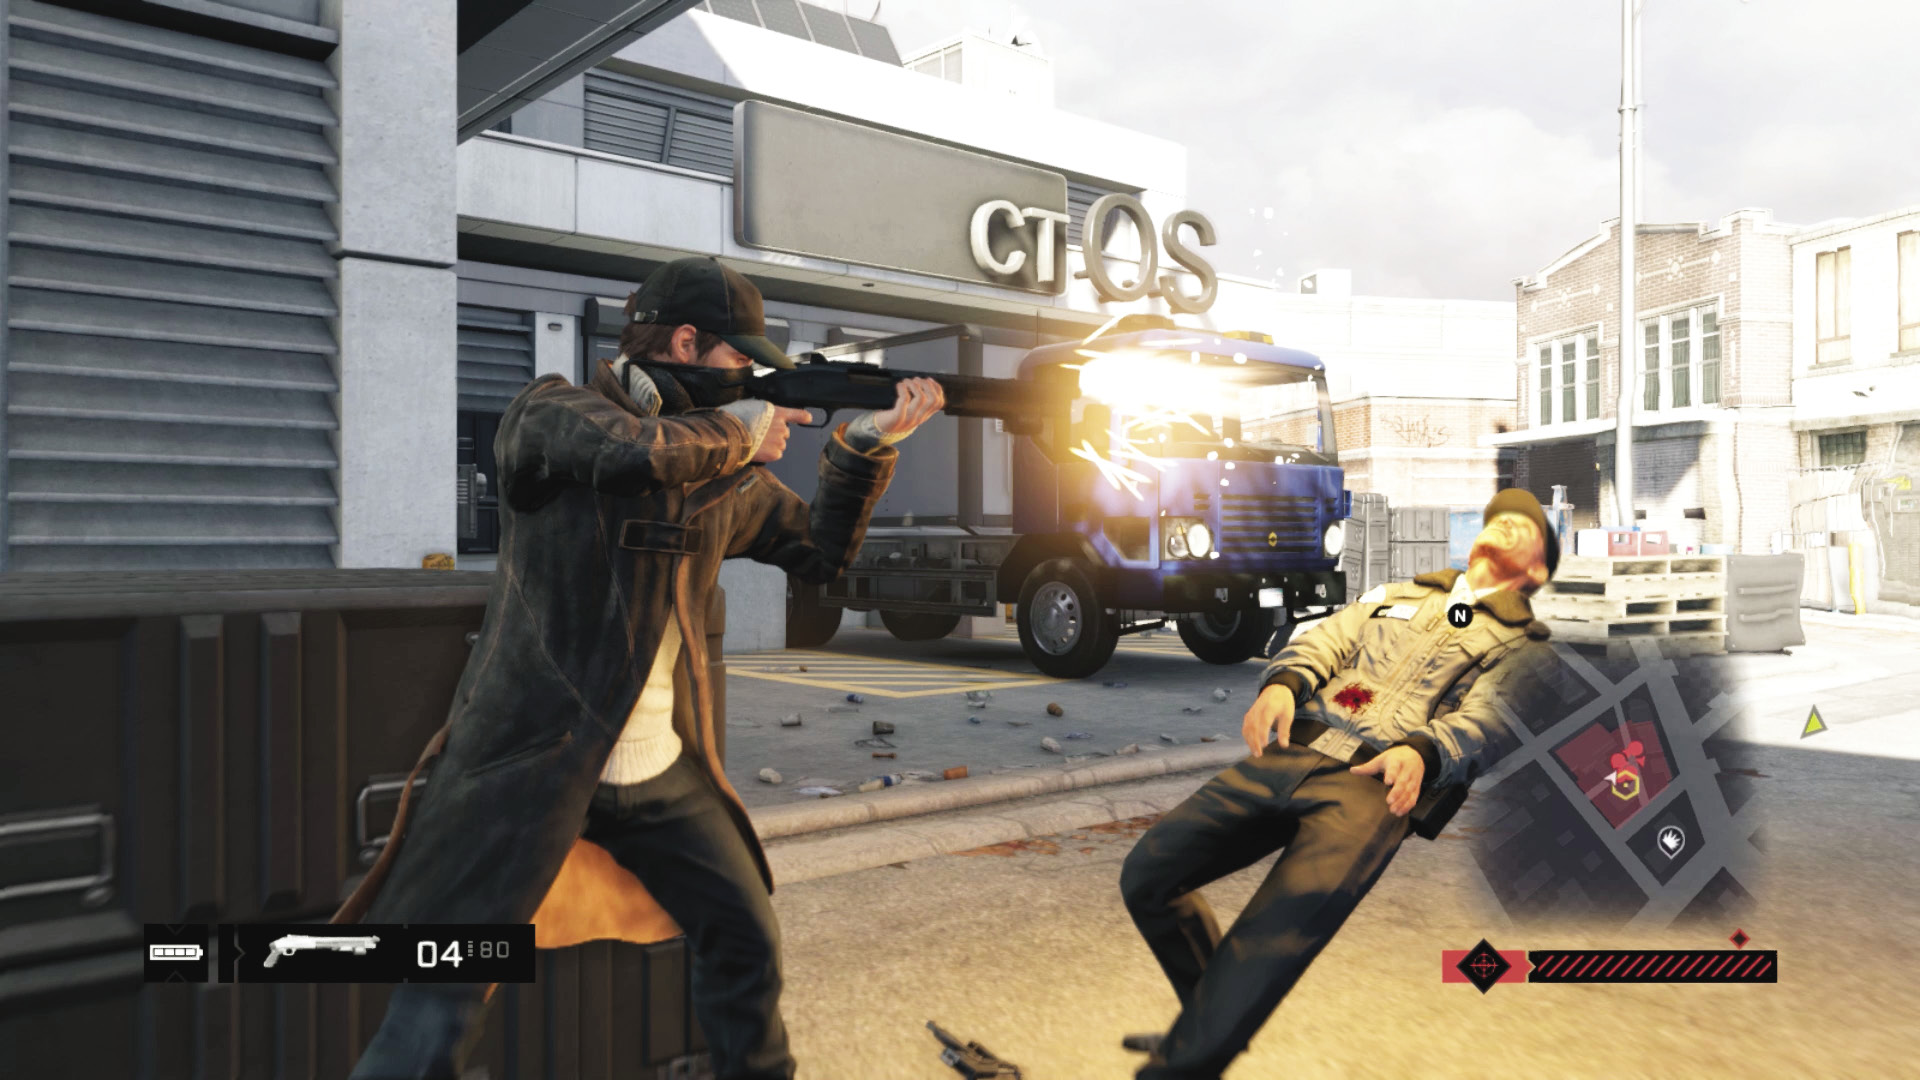
Remember that enemies (except the police) can be taken down with any weapon you’re carrying. At melee range, with a melee attack, this is an execution. All are automatic and achieve the same goal; however, they waste ammo (as you can simply switch to your baton and not use up the bullet), and alert other foes.
15. Hacks: Protectors
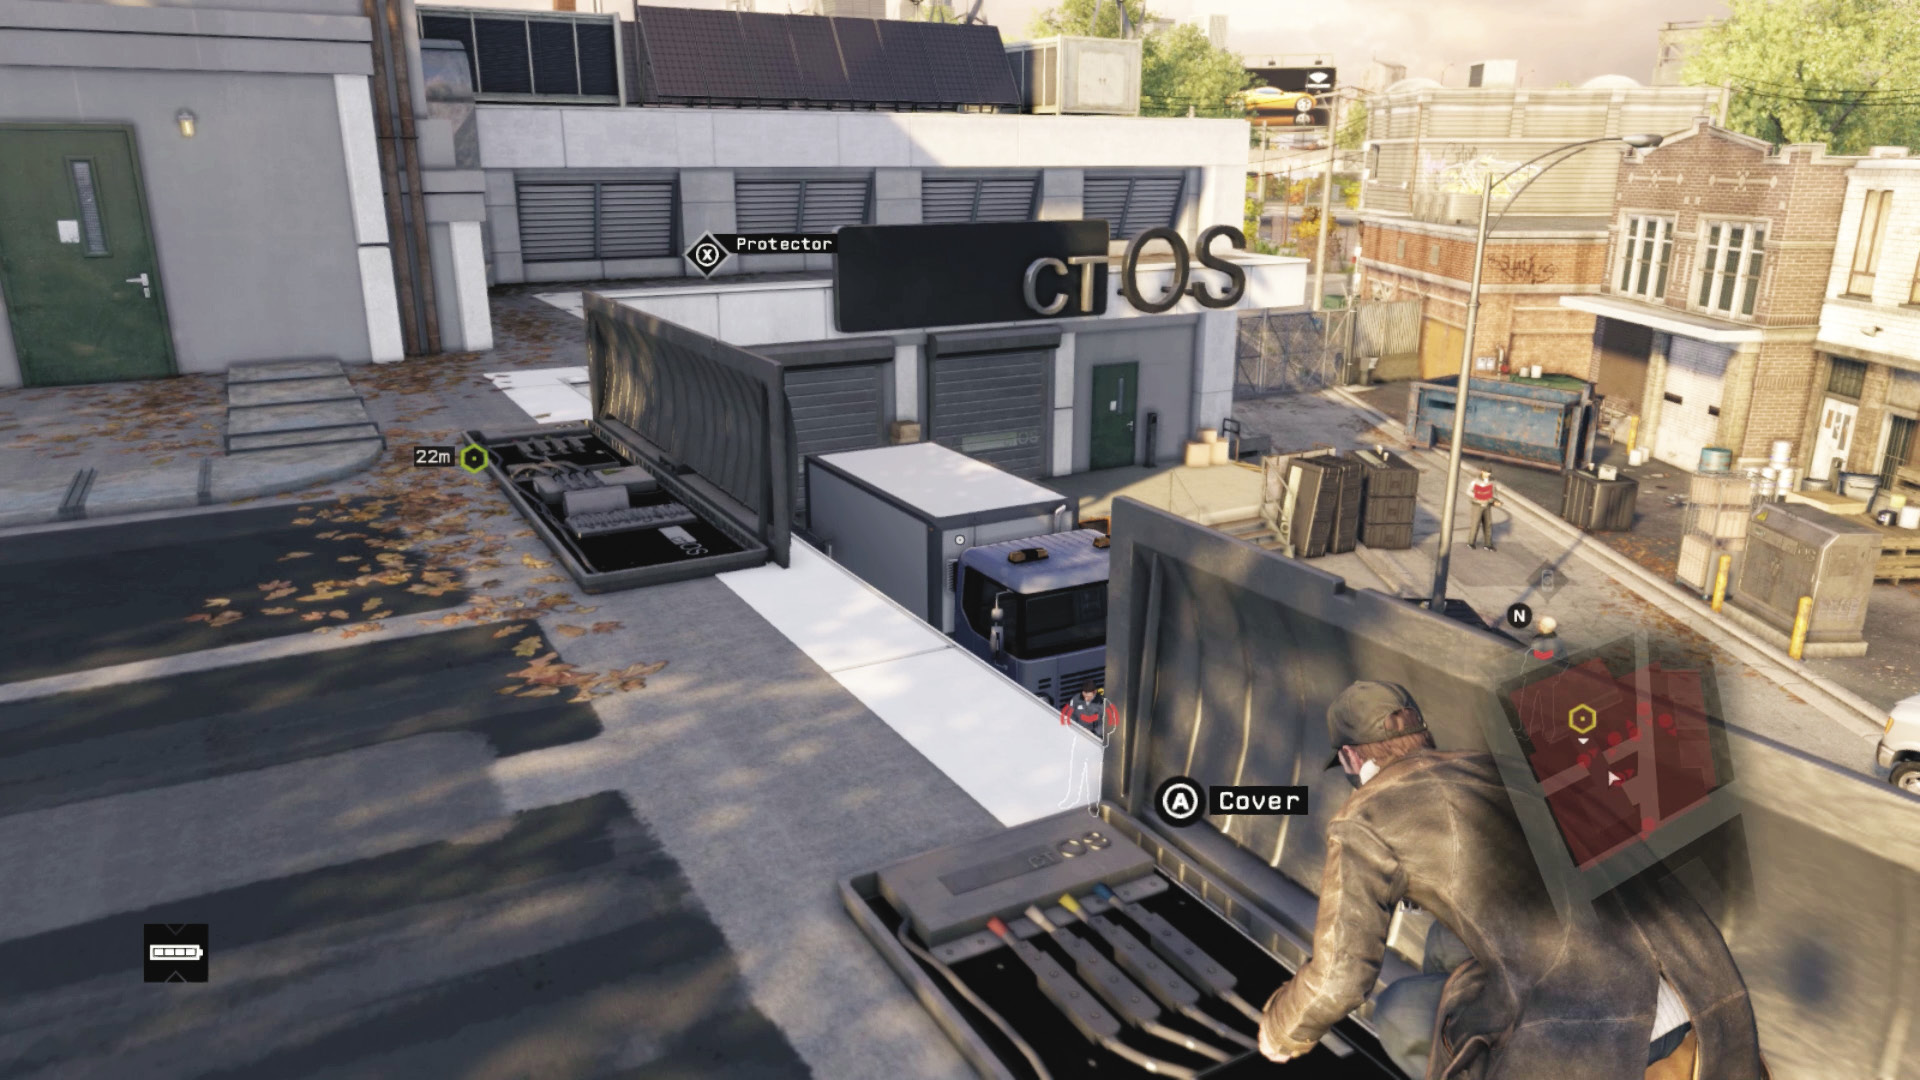
If you run out of cover, create your own if there are protectors in your area. Raise these early enough so any distracted foes move away from them (or use them as a distraction), then step into the cover they afford. They can also be used to halt enemy vehicles and collapsed if a foe is hiding behind them, allowing a more easy takedown.
16. Hacks: Attractions and Distractions
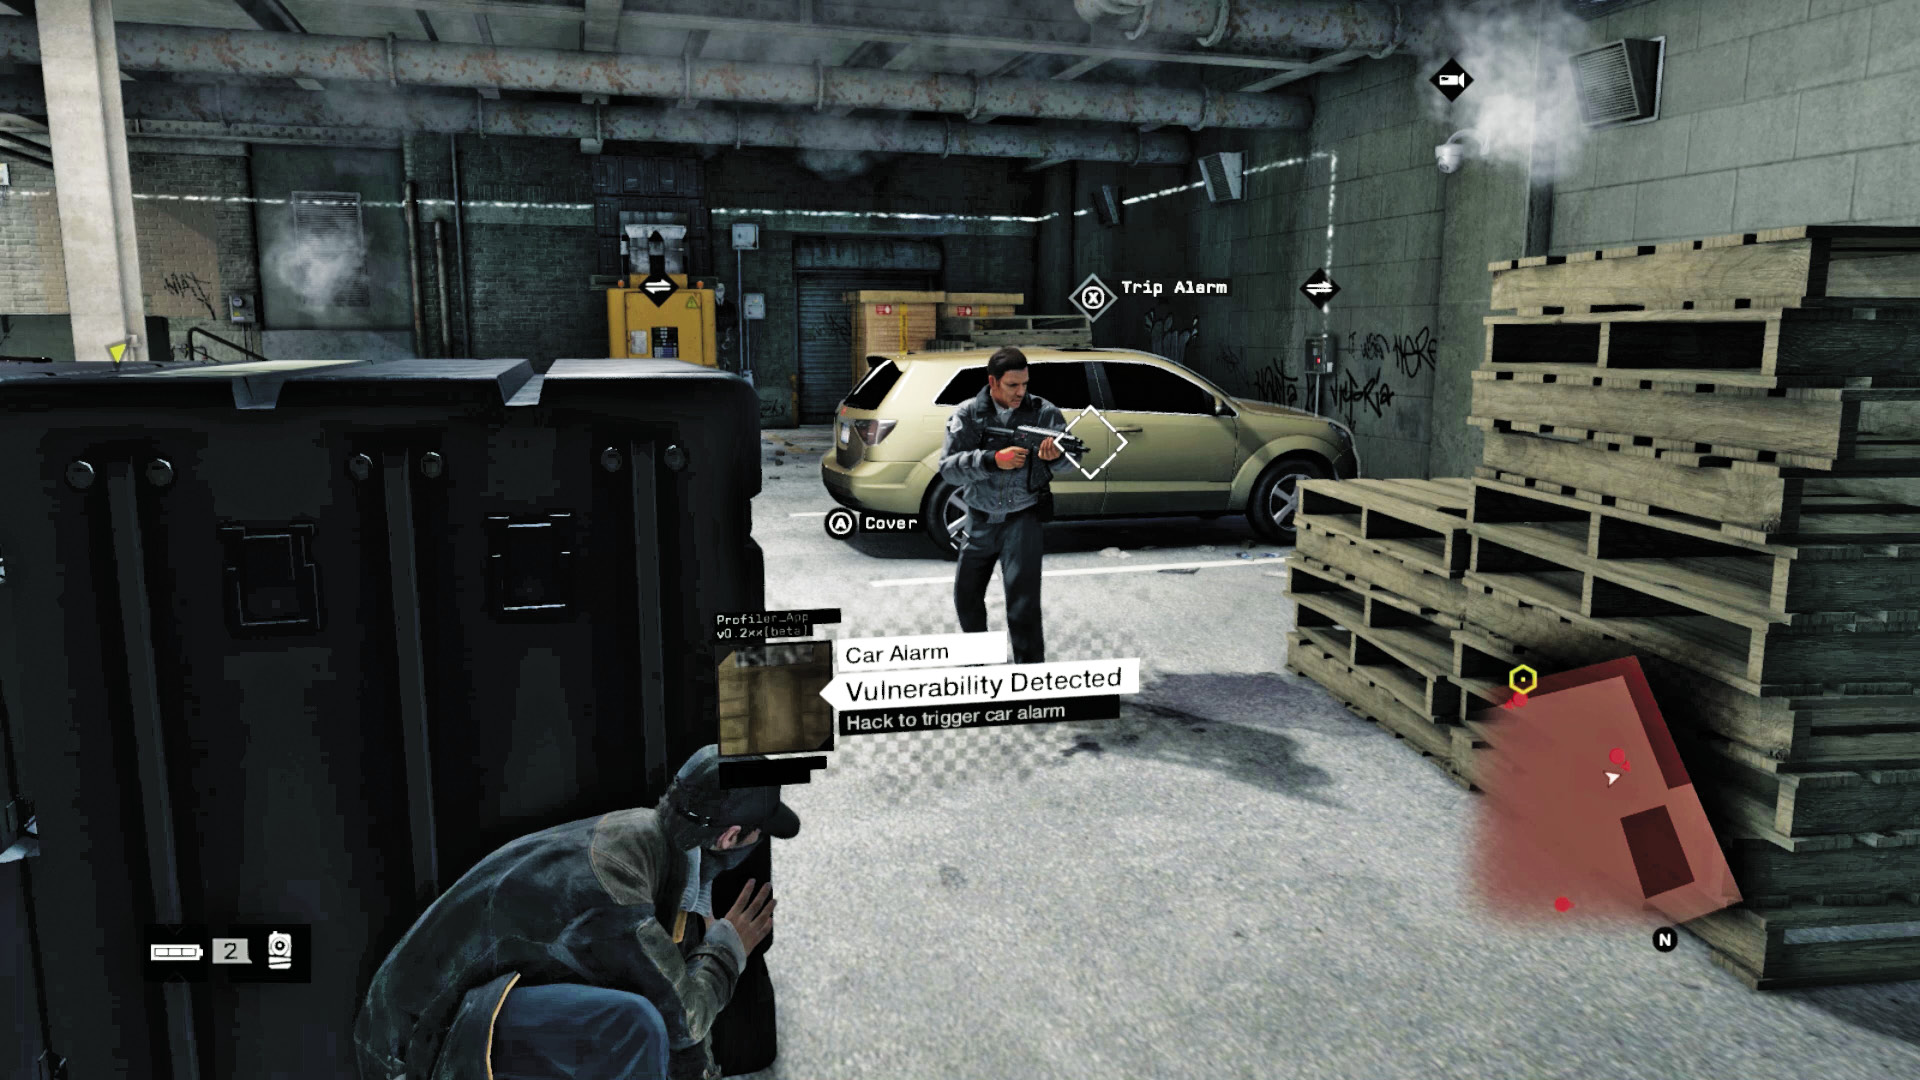
There are many hacks to attract foes, so you can pass by them without combat or lure them toward you and possibly melee-strike them. Attract phones, forklifts, cranes, lifts, gates, garages, on-person distractions and disruptions, the prevention of reinforcements, and most other non-explosive infrastructure can be triggered. Hack them again and more foes may arrive to see what’s going on. Use this technique consistently with good results; you’re effectively “herding” enemies to a location you want them to be in. Follow up with a melee strike, gunfire, or explosive detonations.
17. Hacks: Explosions
Just like the passive explosions you can inflict on enemies, these are also recommended when you’re actively infiltrating the area. If there’s a foe standing by a junction box, detonate it to remove him as a threat and start foes exploring that part of the map for you, while you outflank or ignore them and get on with your goals. If no one is nearby, use these to attract and distract instead. Look for explosive canisters close to the detonation radius of an explosive hack, or find a foe with a grenade that you can detonate to daisy-chain the explosion. You can shoot this infrastructure instead of hacking it if you wish.
18. Hacks: Remote Deaths
Utilizing the infrastructure in one part of the area while you’re in a safer part is a great way to thin out the enemy, especially if you want to start a firefight soon. Watch for a guard (either using remote cameras or those on the foe) to wander too close to infrastructure you can explode and then detonate it. Or hide and line up a container hanging from a crane, hack the crane, and watch the container crush the foe. Try to attract multiple foes to the area with lures or attract hacks before the remote deaths occur.
/// Violent Tactics
If you can’t complete passive and stealth tactics, or if you’re thirsty for blood, change up your tactics and bring out your favorite weapons to finish a mission. These tactics are far less subtle and a lot more dangerous, but they still get the job done, and often in spectacular style.
19. Weapons and Parkour
Although you can’t climb and carry a weapon at the same time, where you are, height-wise, is extremely important and helpful: Do you want to wade into a restricted area with guns blazing, or do you want to ascend to where you gain the height advantage over your foes as you start firing on them? Remember that you can climb most buildings, and roofs are especially helpful as you can step back from the edge and use the tops of walls to shield you from incoming fire.
20. Weapons and Cover
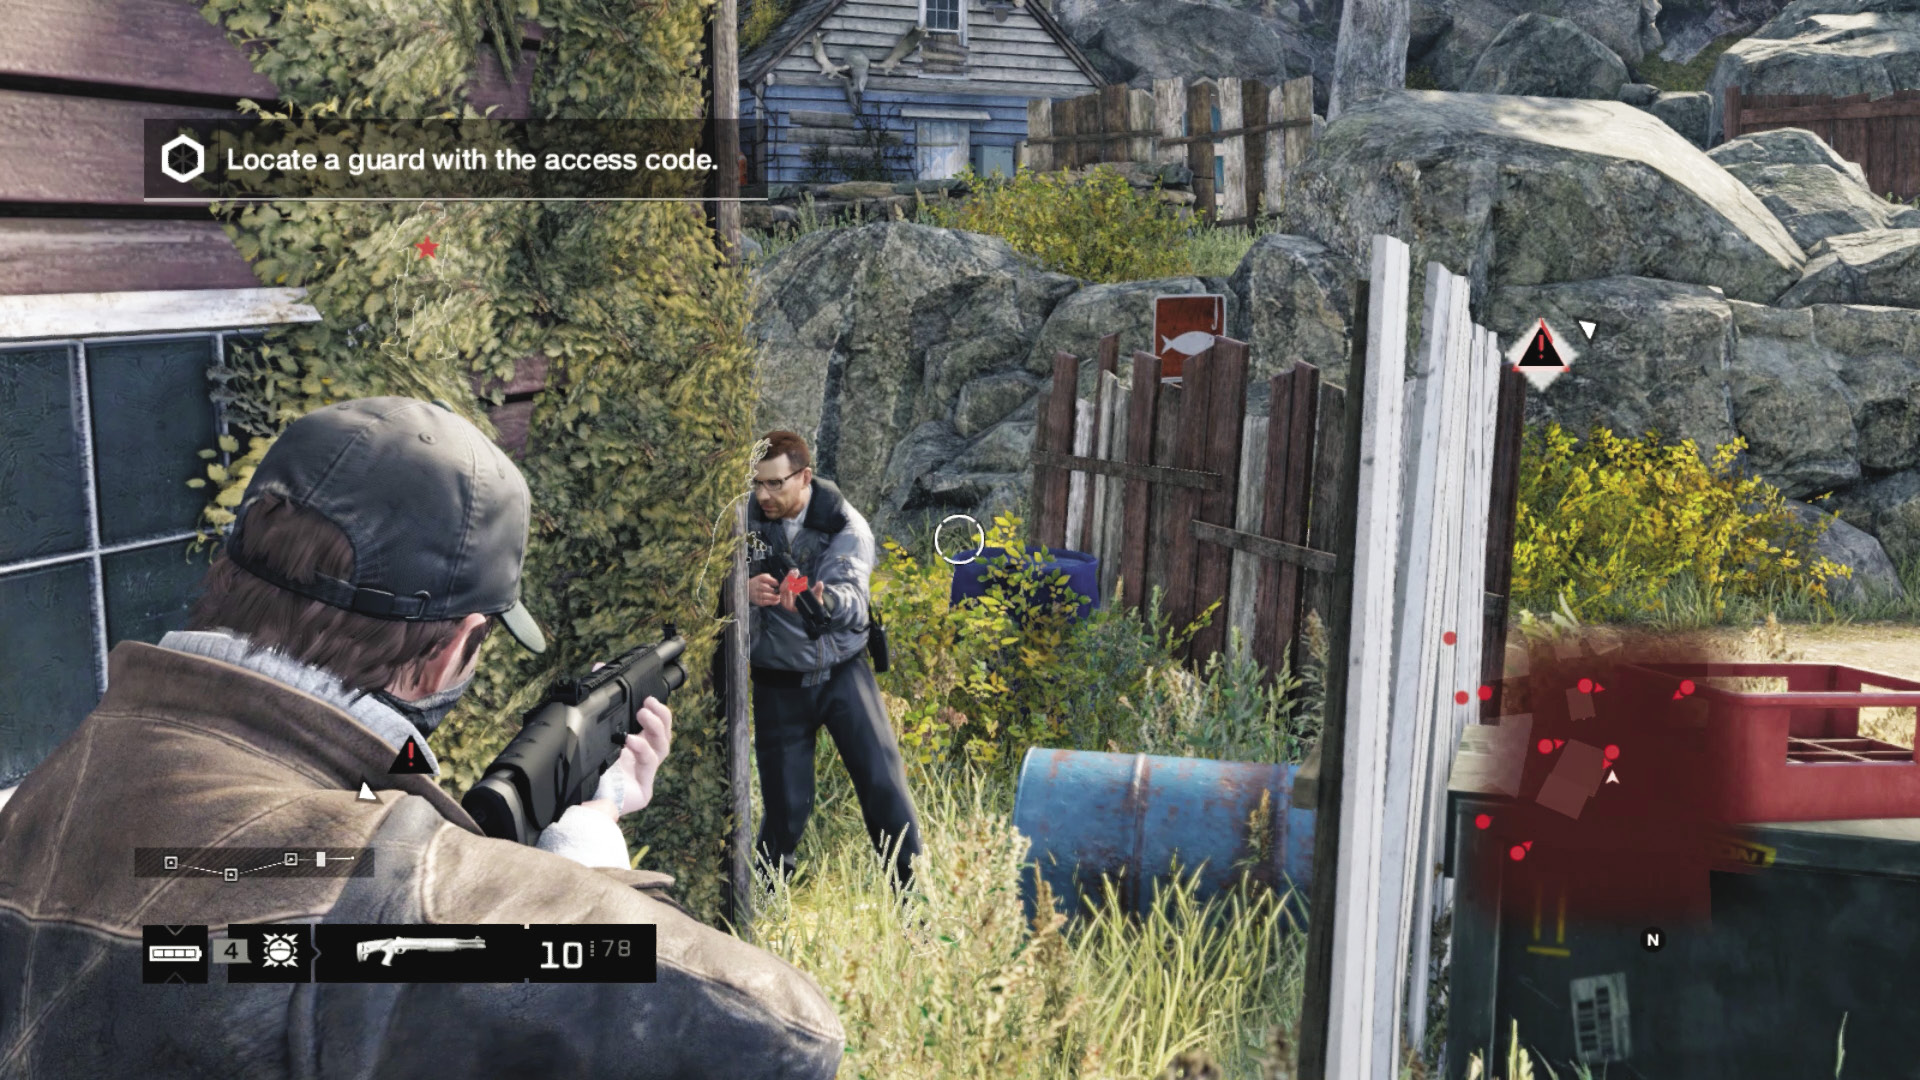
Peeking out from cover and firing at enemies is a tactic you must perfect quickly, as it’s vital for your continuing safety. While dashing in with guns firing can get you takedowns, it can also get you killed: But dropping to cover behind a barricade, car, or other scenery affords you the protection you need. Just be sure the enemy isn’t using weapons that can pierce your cover or your cover isn’t too restrictive (i.e., you can’t shoot over it if necessary).
21. Weapons and Infrastructure
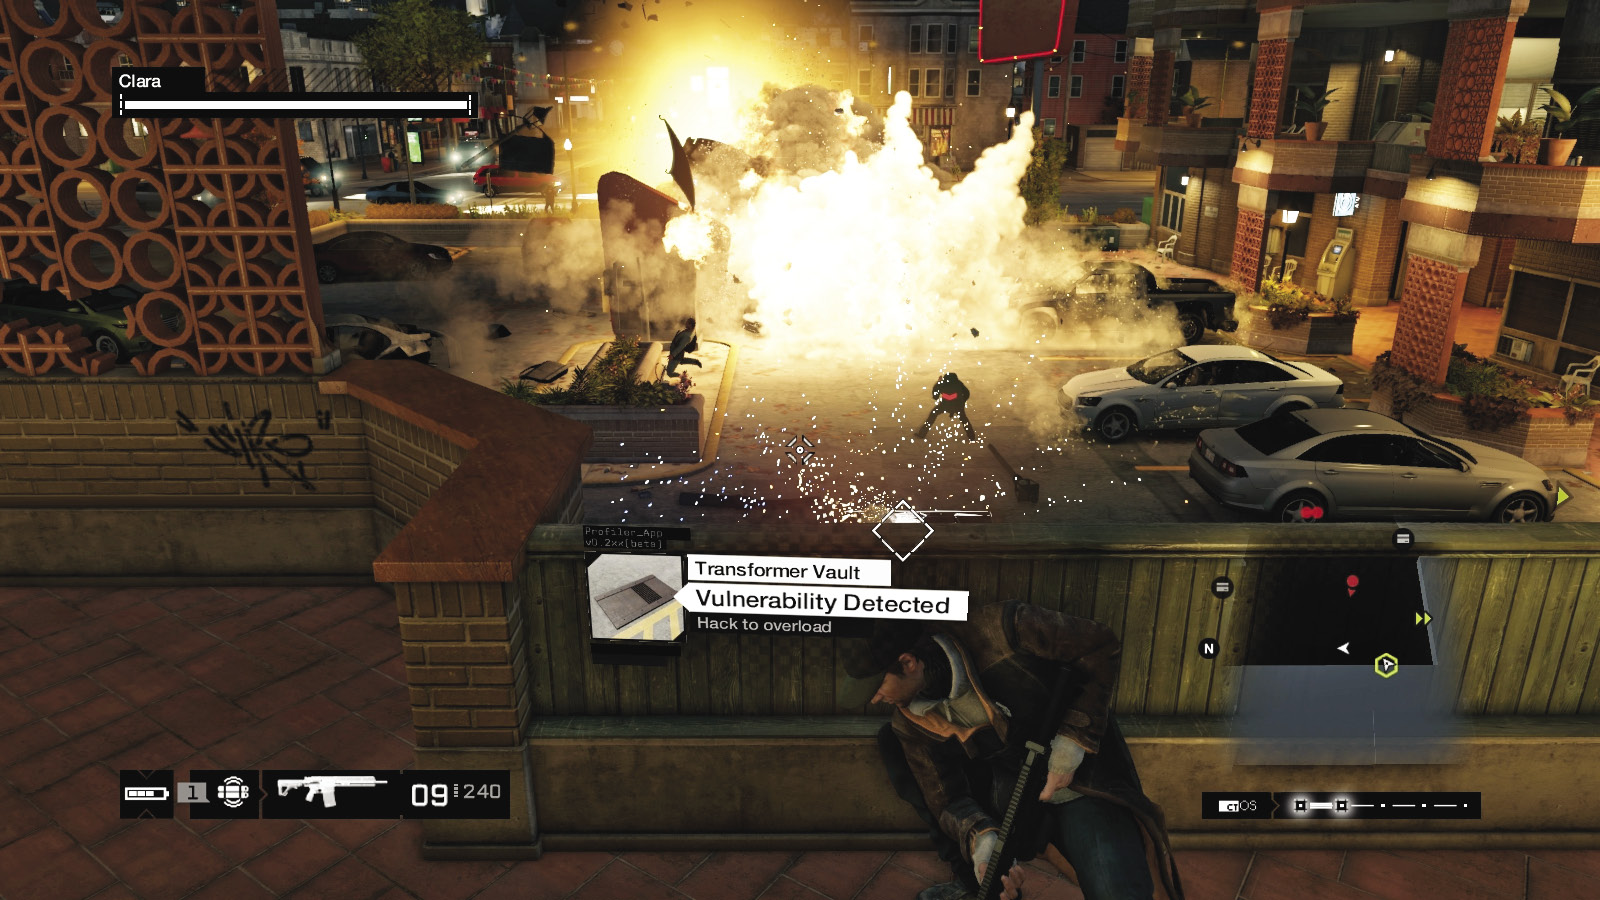
Moving infrastructure to aid your line of sight is a secondary but important consideration. If a container is blocking your view of a foe behind it, access the controls to move it out of the way (or into position so you can use it). Are gates, shutters, or garages preventing you from getting a good aim at a foe? Then open them so you can clearly aim and fire.
22. Weapons and Focus
Learn this technique as soon as you can, and unlock the skills that improve your Focus abilities! Buy drinks at shops to increase your Focus time, and equip Focus Boost Plus pills (a tool) to refill your Focus. Then make every elongated second count; slowing down time allows easier headshots, which is the main reason to perform a Focus attack while on foot. But you can also lob a projectile using Focus, more easily judging the arc and throwing in a brief (elongated) moment instead of lobbing at a grenade in a panic, while being shot at.
23. Weapons and Rushing
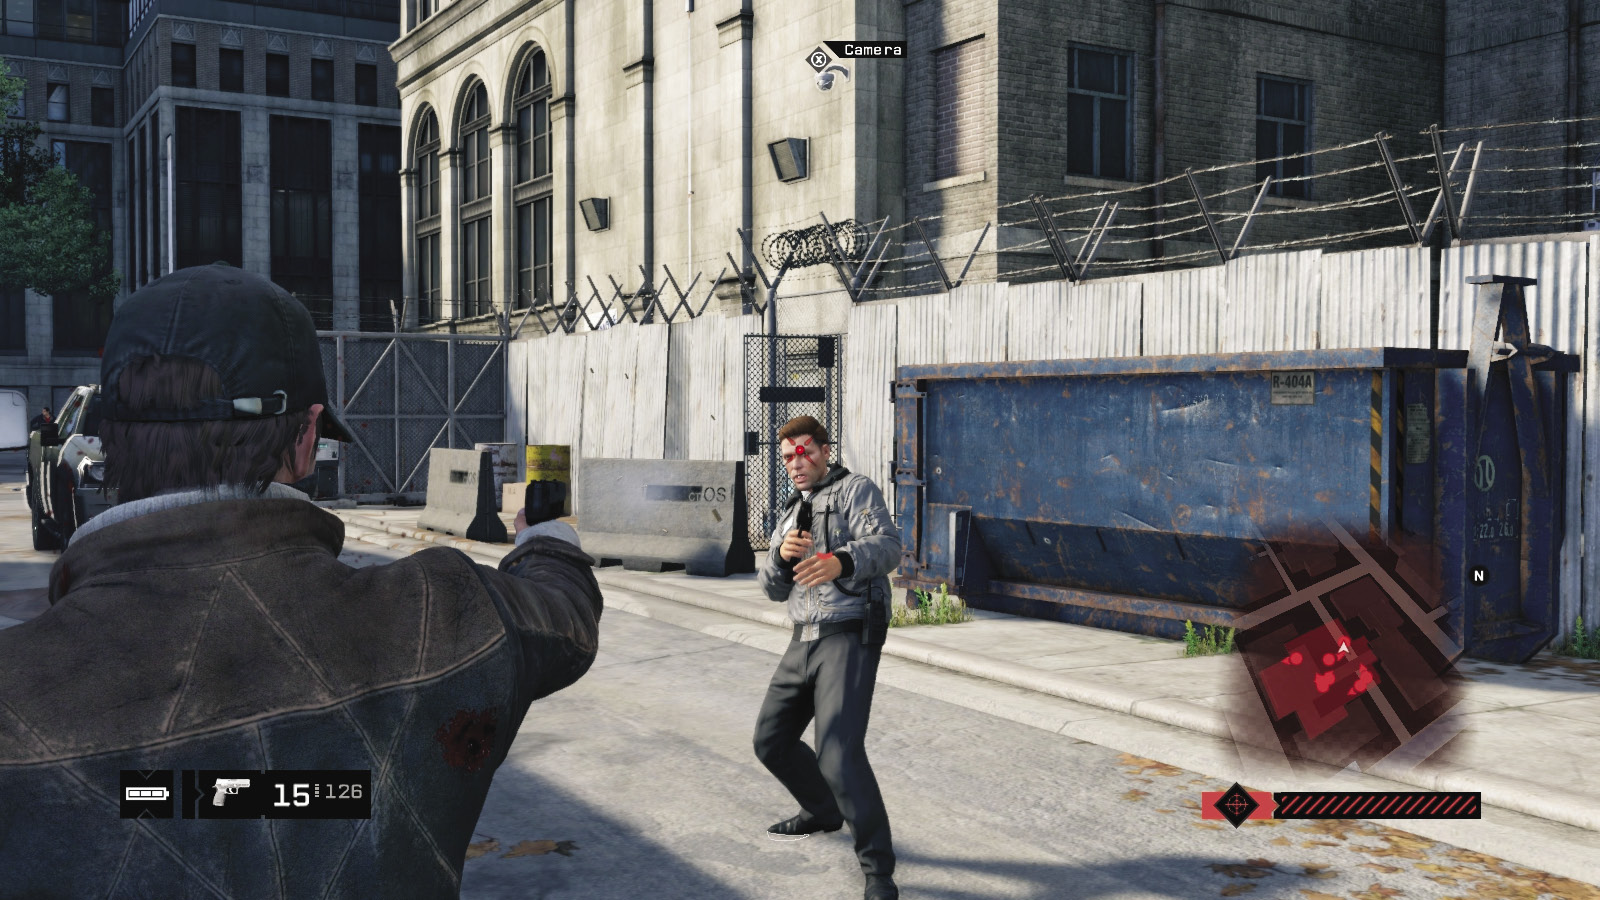
Sometimes you have to dash into the fray to bring down a foe. Be aware that you can’t sprint and fire, so it’s usually better to sprint and try a melee execution or drop into cover. But when cover is sparse and there’s a foe to defeat, dash at him, bring out your weapon, aim at the head quickly, fire, and resume sprinting. Then hope you didn’t absorb too many bullets during this time.
24. Weapons and Camping
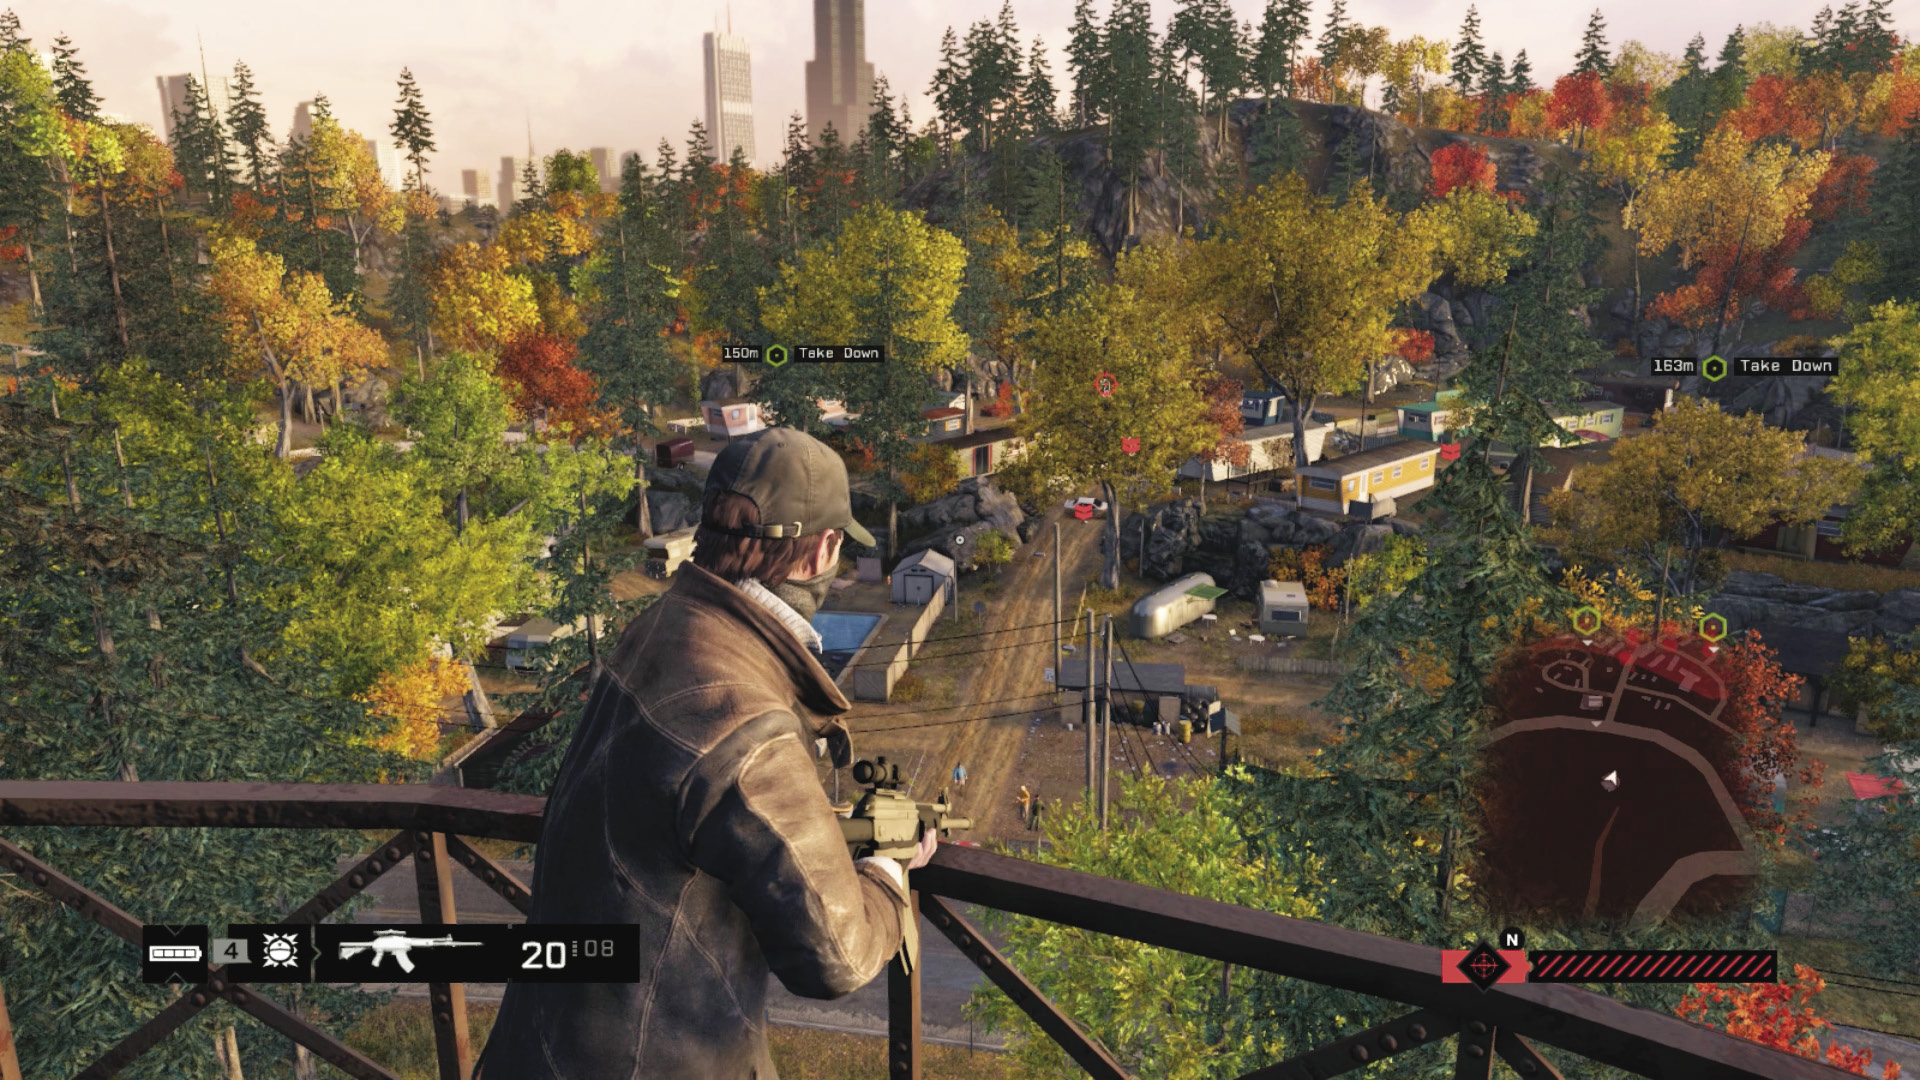
Got a sniper rifle and a few extra minutes to sit atop a vantage point (an adjacent building, L-train track, water tower, or hill)? Then start firing off at foes, beginning with the most threatening (rival snipers and Shot-Callers) first. Booby-trap the base of your vantage point with proximity IEDs, blowing up foes trying to storm it, and then set about the culling. Use of Focus is vital for swift takedowns. Let the enemies come to you, and tackle those closest first, once initial threats are cleared. Also try similar plans, but armed with a grenade launcher, and aim for clusters of enemies or explosive scenery.
25. Shooting Foes
Simply standing around out of cover and not rushing at foes is another option. Moving decreases your chances of being struck and gives you time to figure out which other options you should try next (e.g., dropping into cover, lobbing projectiles, or charging a foe). Shooting foes from the open is usually a midrange tactic; you don’t have the problem of leaning out and having cover obscuring your view. You can also be near cover without technically using it as a cover crouch point; stay close enough to have its protective benefits.
26. Shooting Infrastructure
During the chaos of a firefight, you may not have time to start hacking on your smartphone. But you can bring your weapon out and rattle off a few rounds at the explosive infrastructure (e.g., junction boxes, vaults, and pipes, using Focus if necessary). Certain scenery must be hacked (like road steam pipes), but others offer additional damage potential; this is handy if you don’t have the time to aim at the head or if you need a distraction.
27. Shooting Gas Tanks
There is a whole host of flammable and explosive items strewn across most yards. Use anything red or white and in turpentine cans, oil drums, gas canisters, or larger propane tanks as offensive weapons. Shoot them, stick IEDs near them, or drop explosives so they detonate and create a chain reaction.
28. Crafted Items
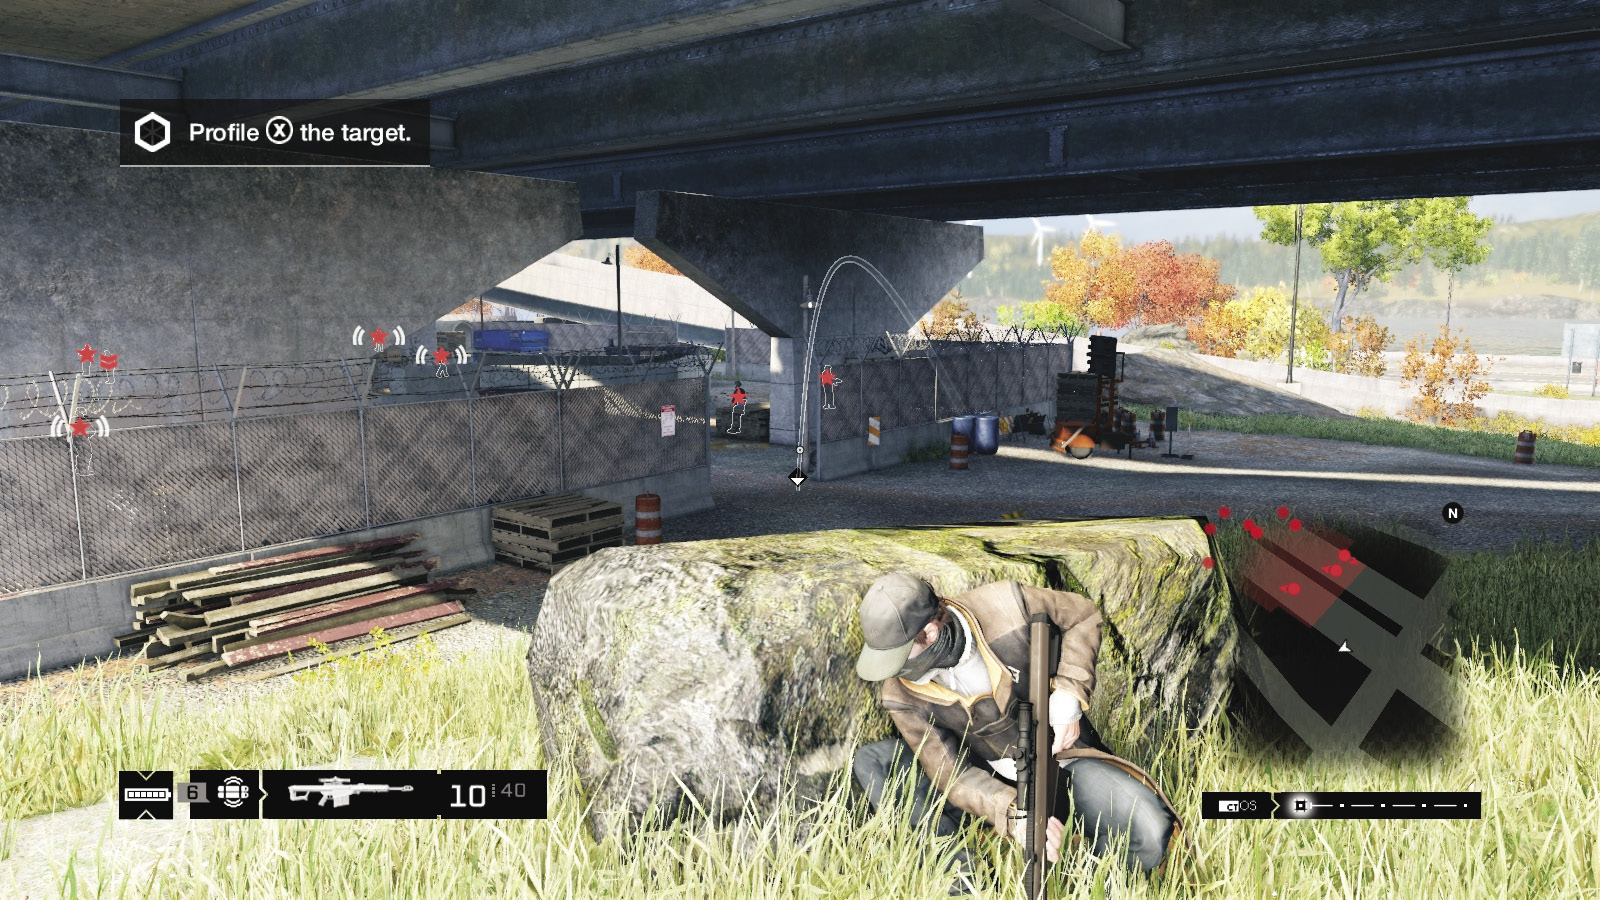
Don’t forget the fourth weapon at your disposal: the thrown projectile. Lob grenades at foes hiding behind cover to flush them out or blow them up. Do the same to clusters of foes. Lob proximity IEDs so you or nearby enemies set them off when the time is right. Shoot IEDs instead of hacking the ones that are remotely detonated. During nighttime infiltrations, kill the lights using Blackout, and then drop all the foes as they mill about, half blind in the confusion.
29. Crafted Items (Sticky)
Place sticky IEDs under or on vehicles so they explode when foes try to escape using those vehicles. Stick them on vehicles that are driving past a foe, and then hack or shoot to explode the vehicle, catching a foe in the explosion. Place IEDs on propane tanks or other explosive devices. Or around corners so foes walk straight into them. Or onto containers and activate the container so it moves to a high concentration of enemies and detonates. The possibilities are numerous.
30. Crafted Items (Traps)
You don’t have to be so direct with your crafted projectiles: Why not place or throw an IED on a lift or forklift, use it as a distraction so a foe comes over and investigates, and then detonate it? You can do the same by setting a trap at an Attract phone. Drop proximity or hackable IEDs at thresholds or choke points, such as the base of stairs that enemies have to climb to reach you. Trap the perimeters with similar devices, where you know enemy reinforcements are coming in from. Or drop IEDs behind you on pathways and coax foes toward you. There are numerous possibilities when figuring out takedowns with traps.
31. Crafted Items (and Weapons)
A combination of weapons and tools often yields excellent results. Drop IEDs at perimeter insertion points, and then retreat to a sniping point. Then shoot the IED instead of hacking it, exploding it and taking out multiple (and usually vehicular) threats in one go? Lob in a grenade, and follow it up with a rush and shotgun blasts. Throw out a lure, wait for foes to congregate in one area, then attack from another.
32. Defensive Driving
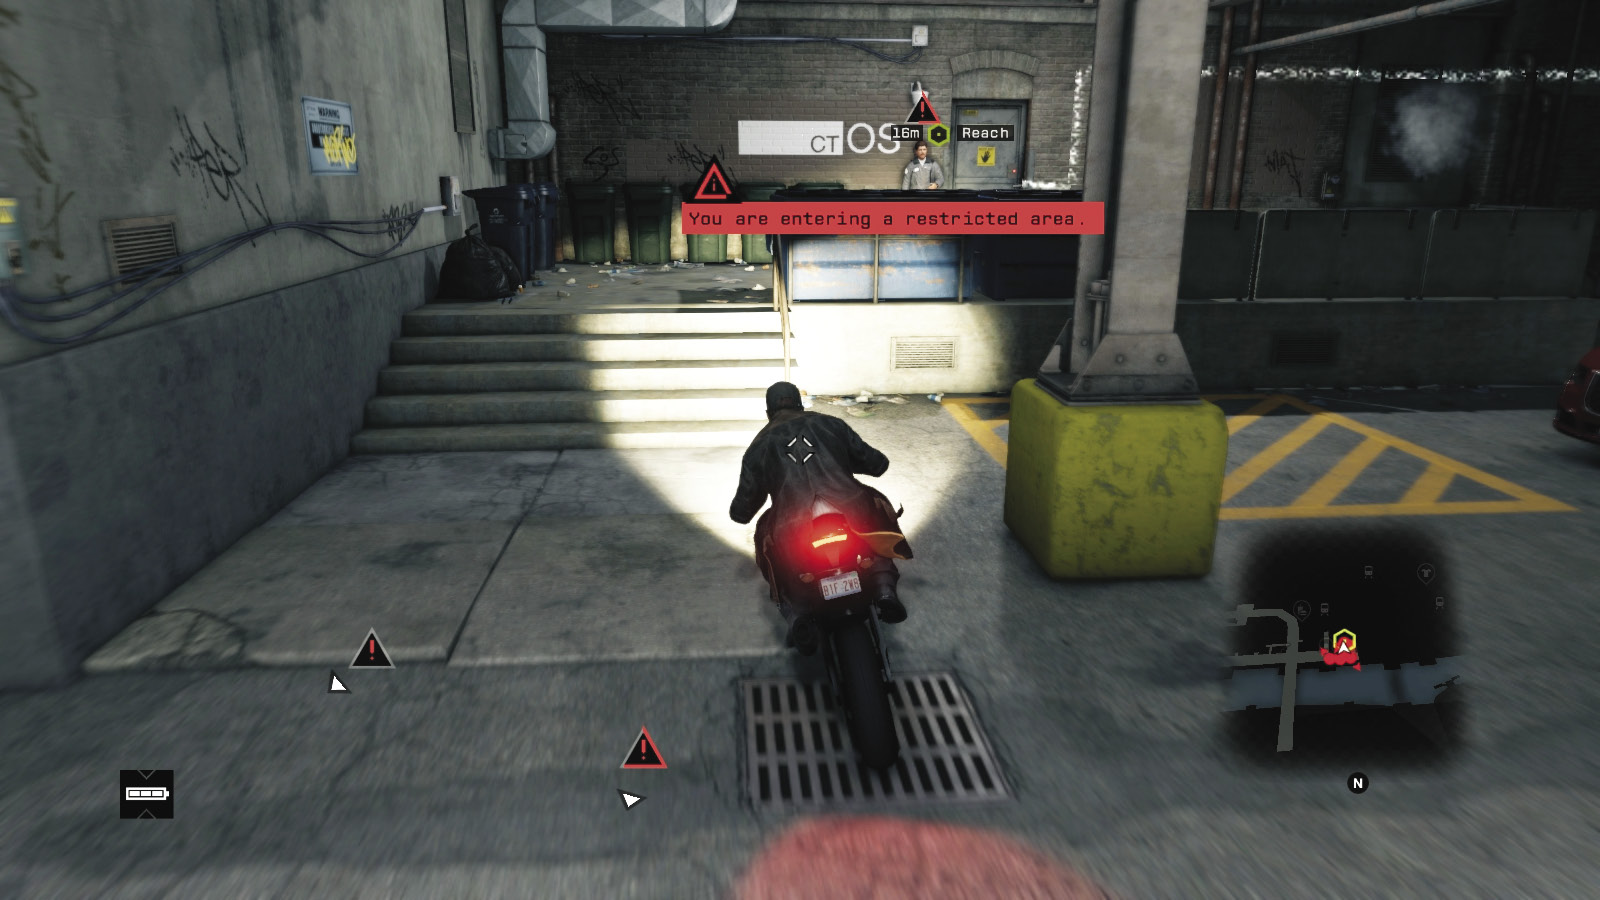
If you’re trying to reach an objective point on the yard’s opposite side, your inclination is usually to sneak there. But try approaching on a motorbike, careening through the guards, ignoring them and the gunfire, and reaching the objective in the fastest possible time, before foes have a chance to react. You may find this completes a mission in seconds. Of course, you may also find that you’re cut to ribbons before you reach the objective.
33. Offensive Driving
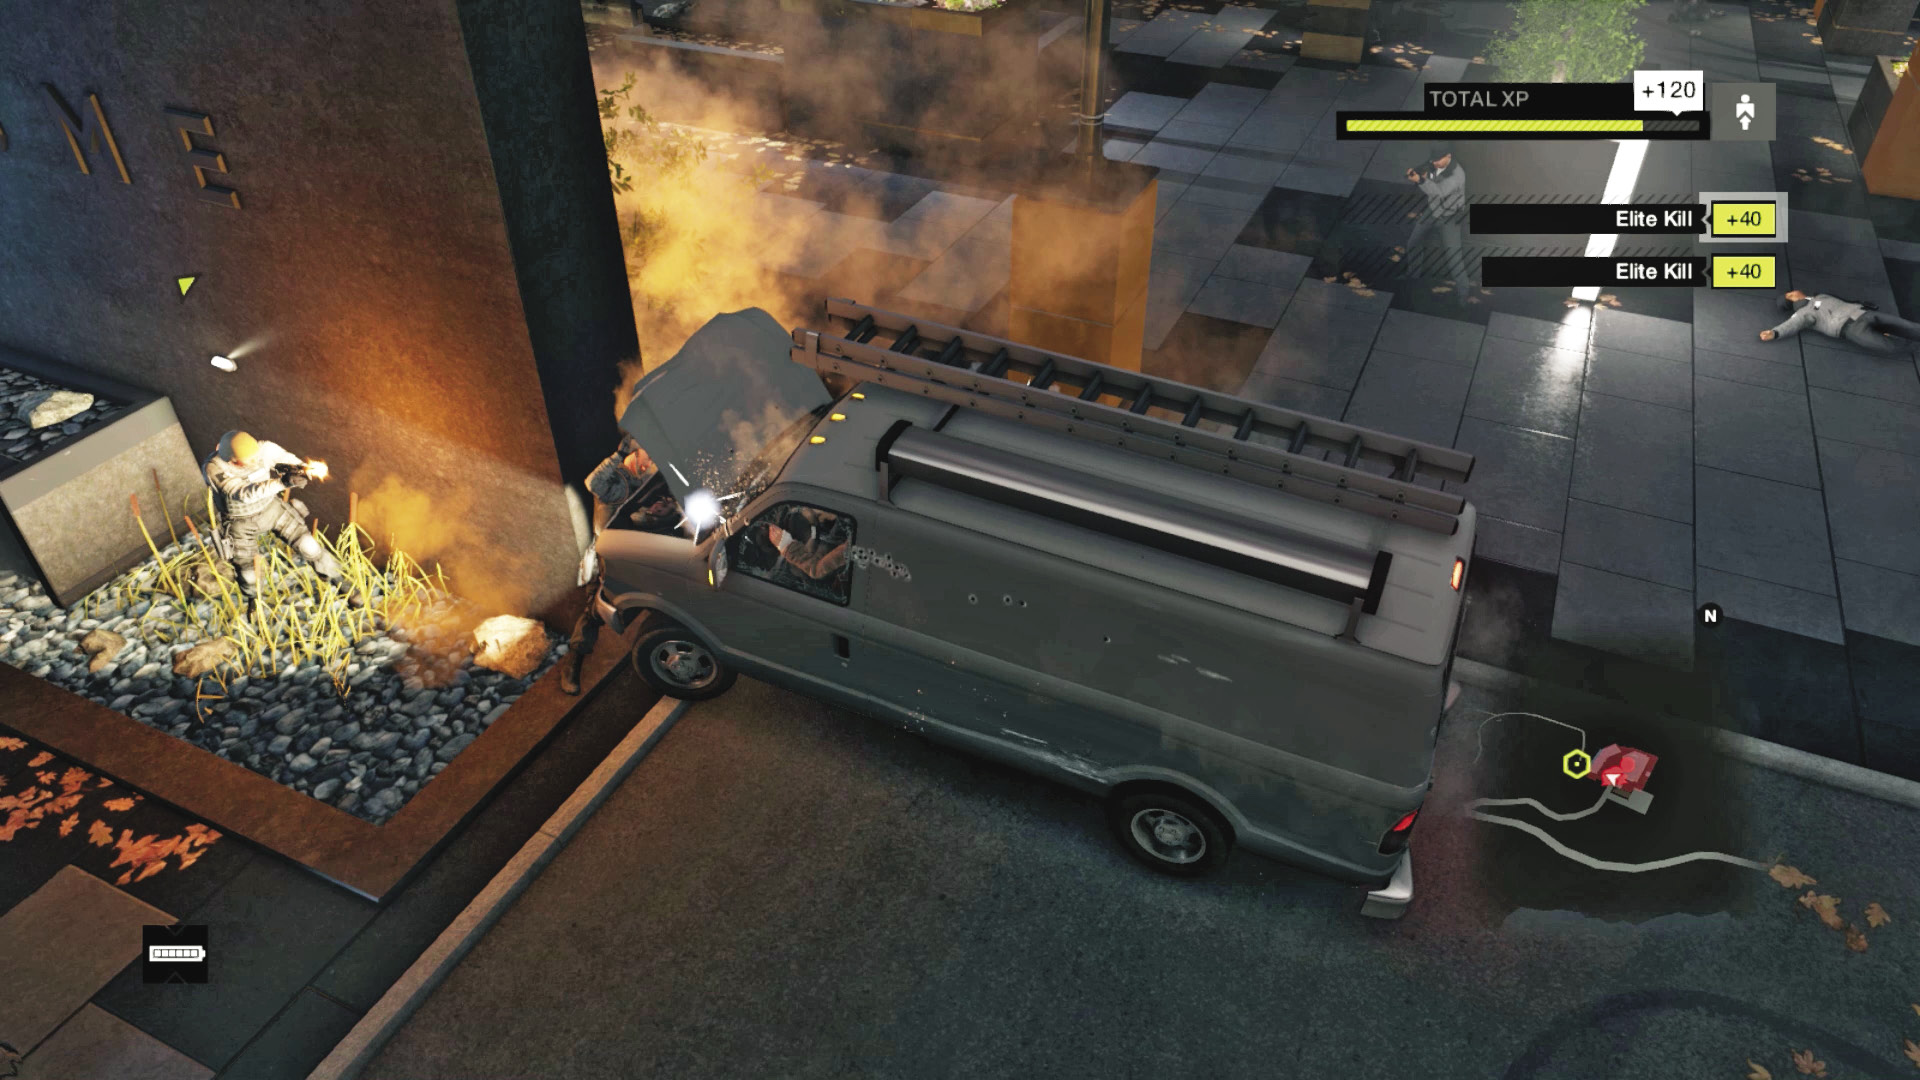
Charging into a restricted area in a vehicle is fine if you can reach an objective or cover. But you can throw caution to the wind and use a vehicle to simply cause as much carnage as possible. The abundance of concrete barriers and other obstacles can make this tricky, but there’s still a possibility of taking out two or three foes before your vehicle becomes immobile. Another option is to use a vehicle parked within the restricted area, if you’re close to running out of ammo or just want to strike foes with a car.
34. Movable Cover
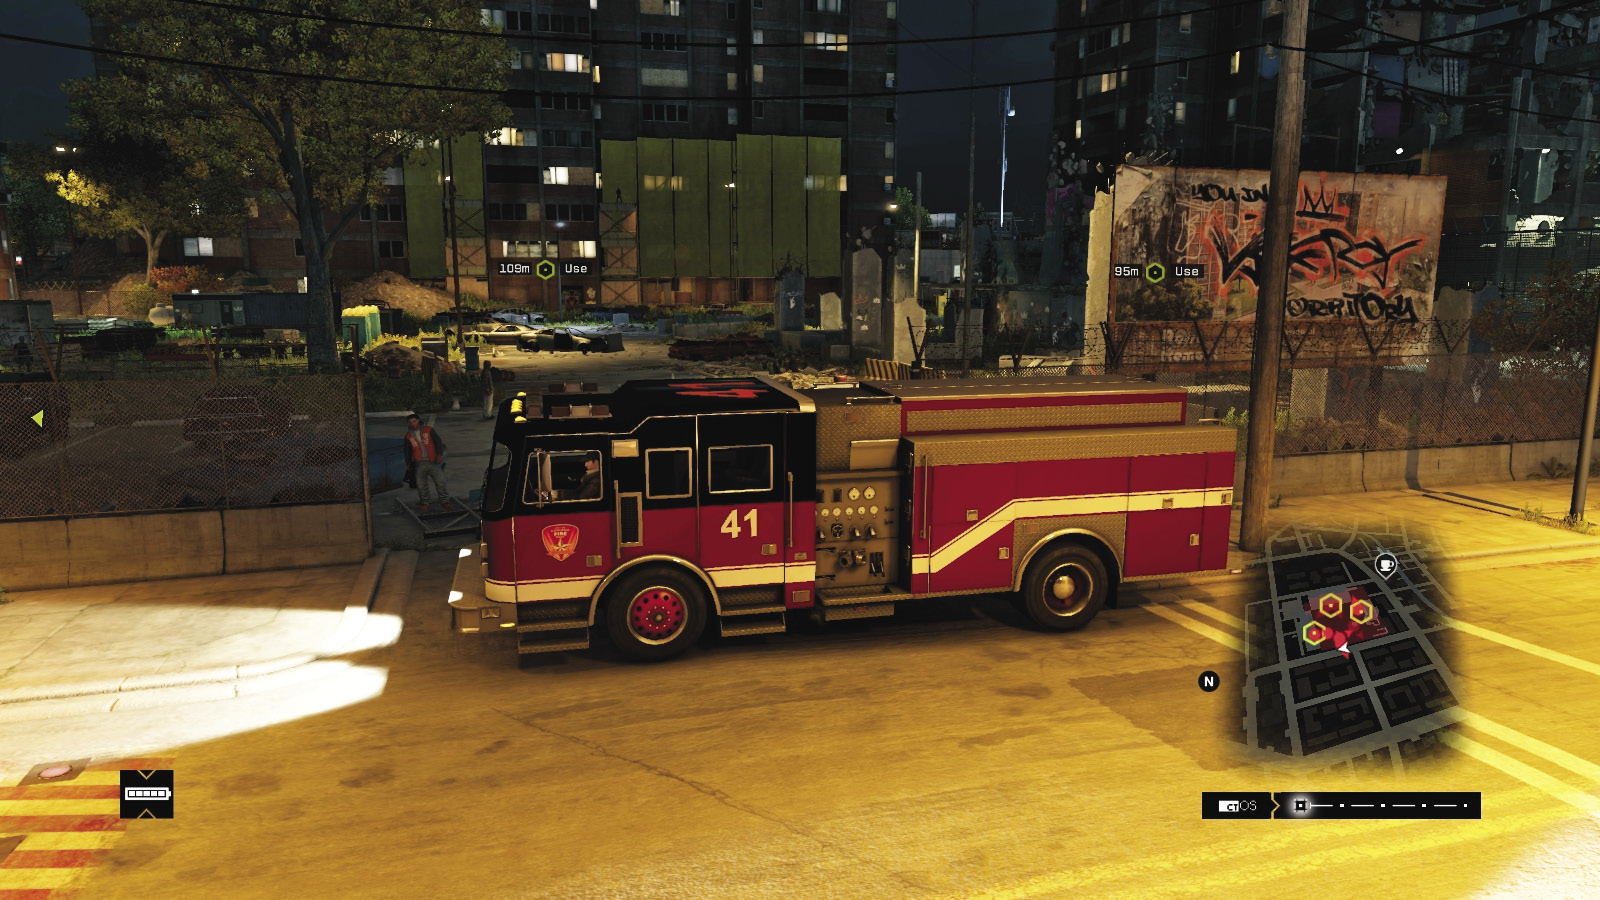
Vehicles have another important function: they can act as movable cover. If you need to reach one end of a location and don’t want to trek through cover to get there, you can drive in, get out and duck behind your vehicle, shoot foes, then drive to a subsequent point and repeat the process. Or, take a vehicle and use it to block each of the incursion points where reinforcements arrive from. When additional foes do turn up, launch a grenade or rig the vehicle with explosives and take out multiple foes at once. Try tougher vehicles like the armored truck for best results.
/// Escape Tactics
If you’re on foot and are attempting to flee an overwhelming number of foes or simply wish to remove yourself from the action and aren’t concerned about finding a vehicle (or you’re running to a vehicle), there are a few tried-and-true tactics to try:
35. Alleyways
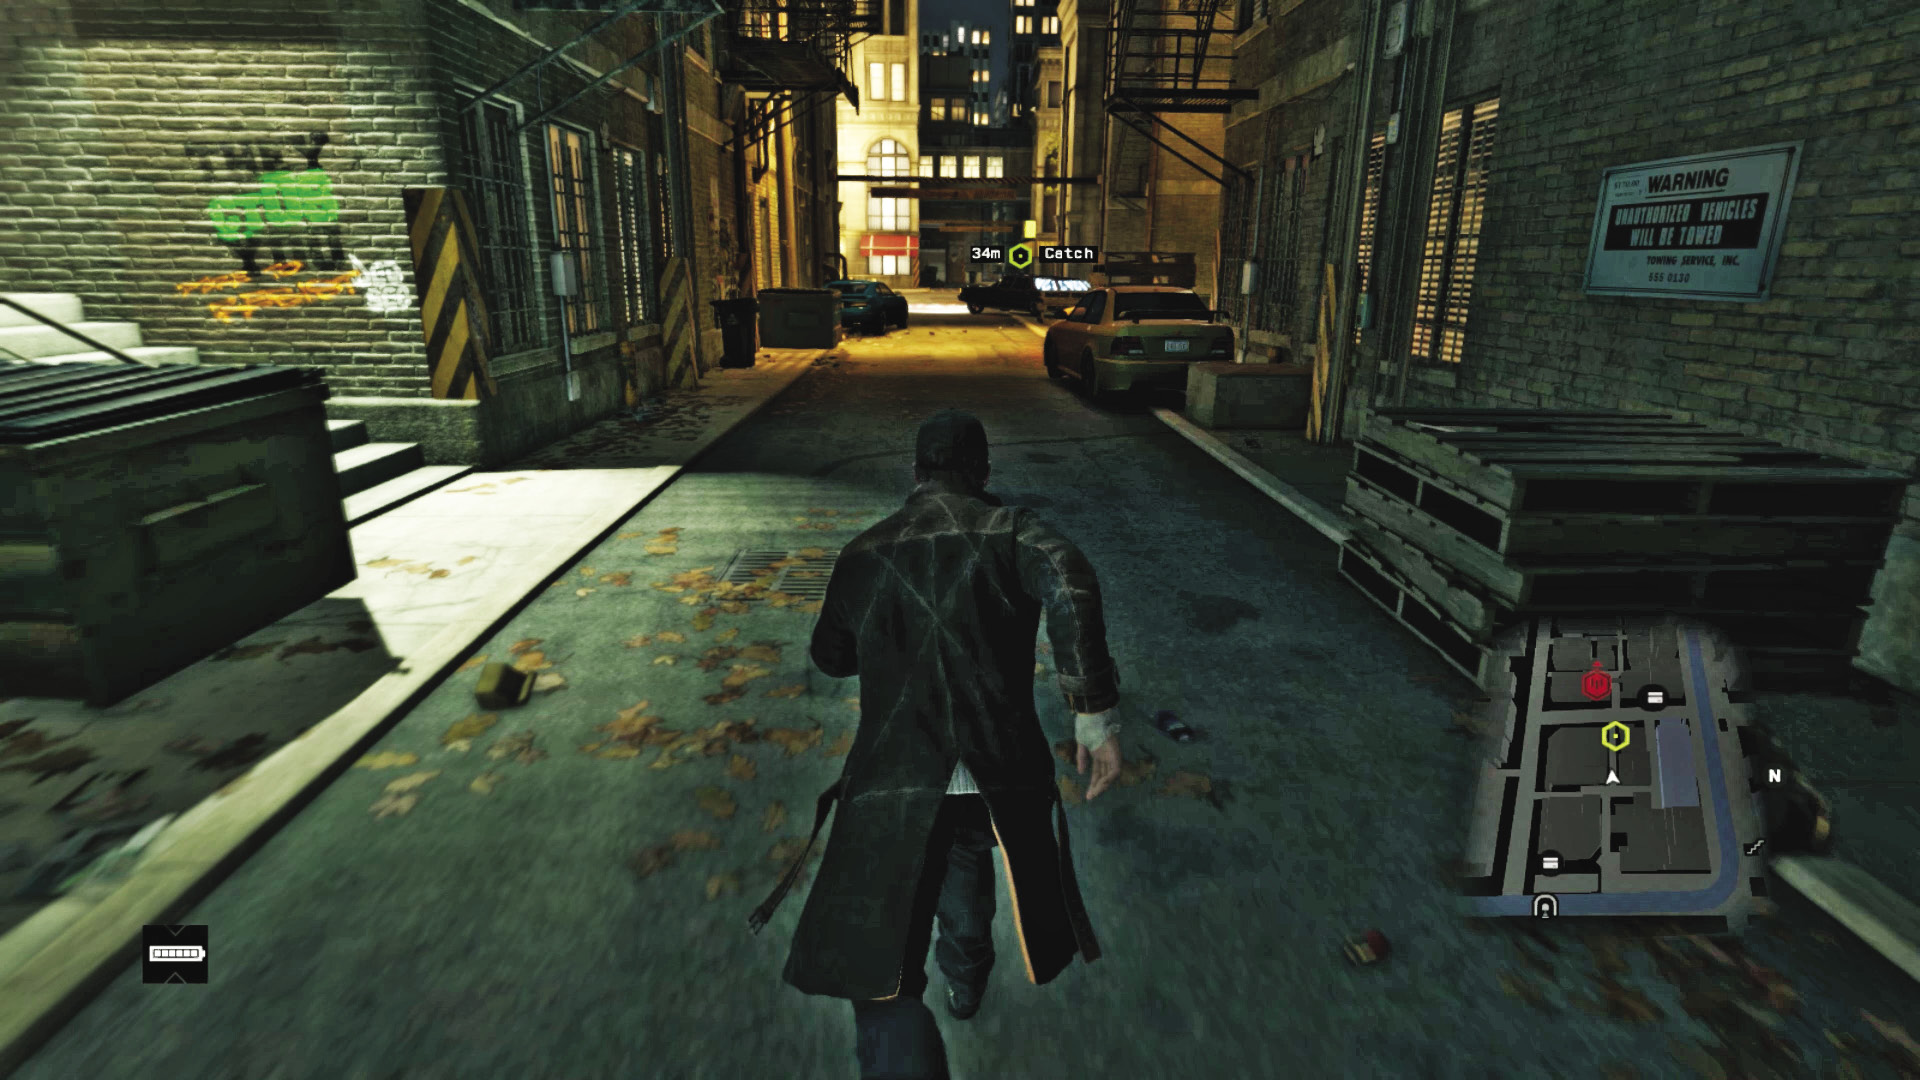
Duck into a dimly lit alley, varying the route you’re taking and finding more turns as fast as possible so the enemy doesn’t have a constant view of your overcoat. Vary your route so it’s random, or plot out a route based on previous missions or explorations. But stay off the main streets where you’re more easily spotted.
36. Hiding
It’s almost too easy to avoid enemies searching for you, if you can pinpoint an area where most enemies won’t venture—such as the rooftops of the alleys in the middle of the Loop or up a series of parkour-accessible rooftops to a cover opportunity—then wait for the heat to die down.
37. Off the Beaten Path
Check the world map for dirt trails, grassy hills, abandoned buildings, a maze of tenement housing, into stores and out the rear exits; don’t limit yourself to running down the streets. Open up garages, close them behind you, and hide inside. Do anything you can to slip into a dense section of cover and let the action cool down.
38. Enemy Damage
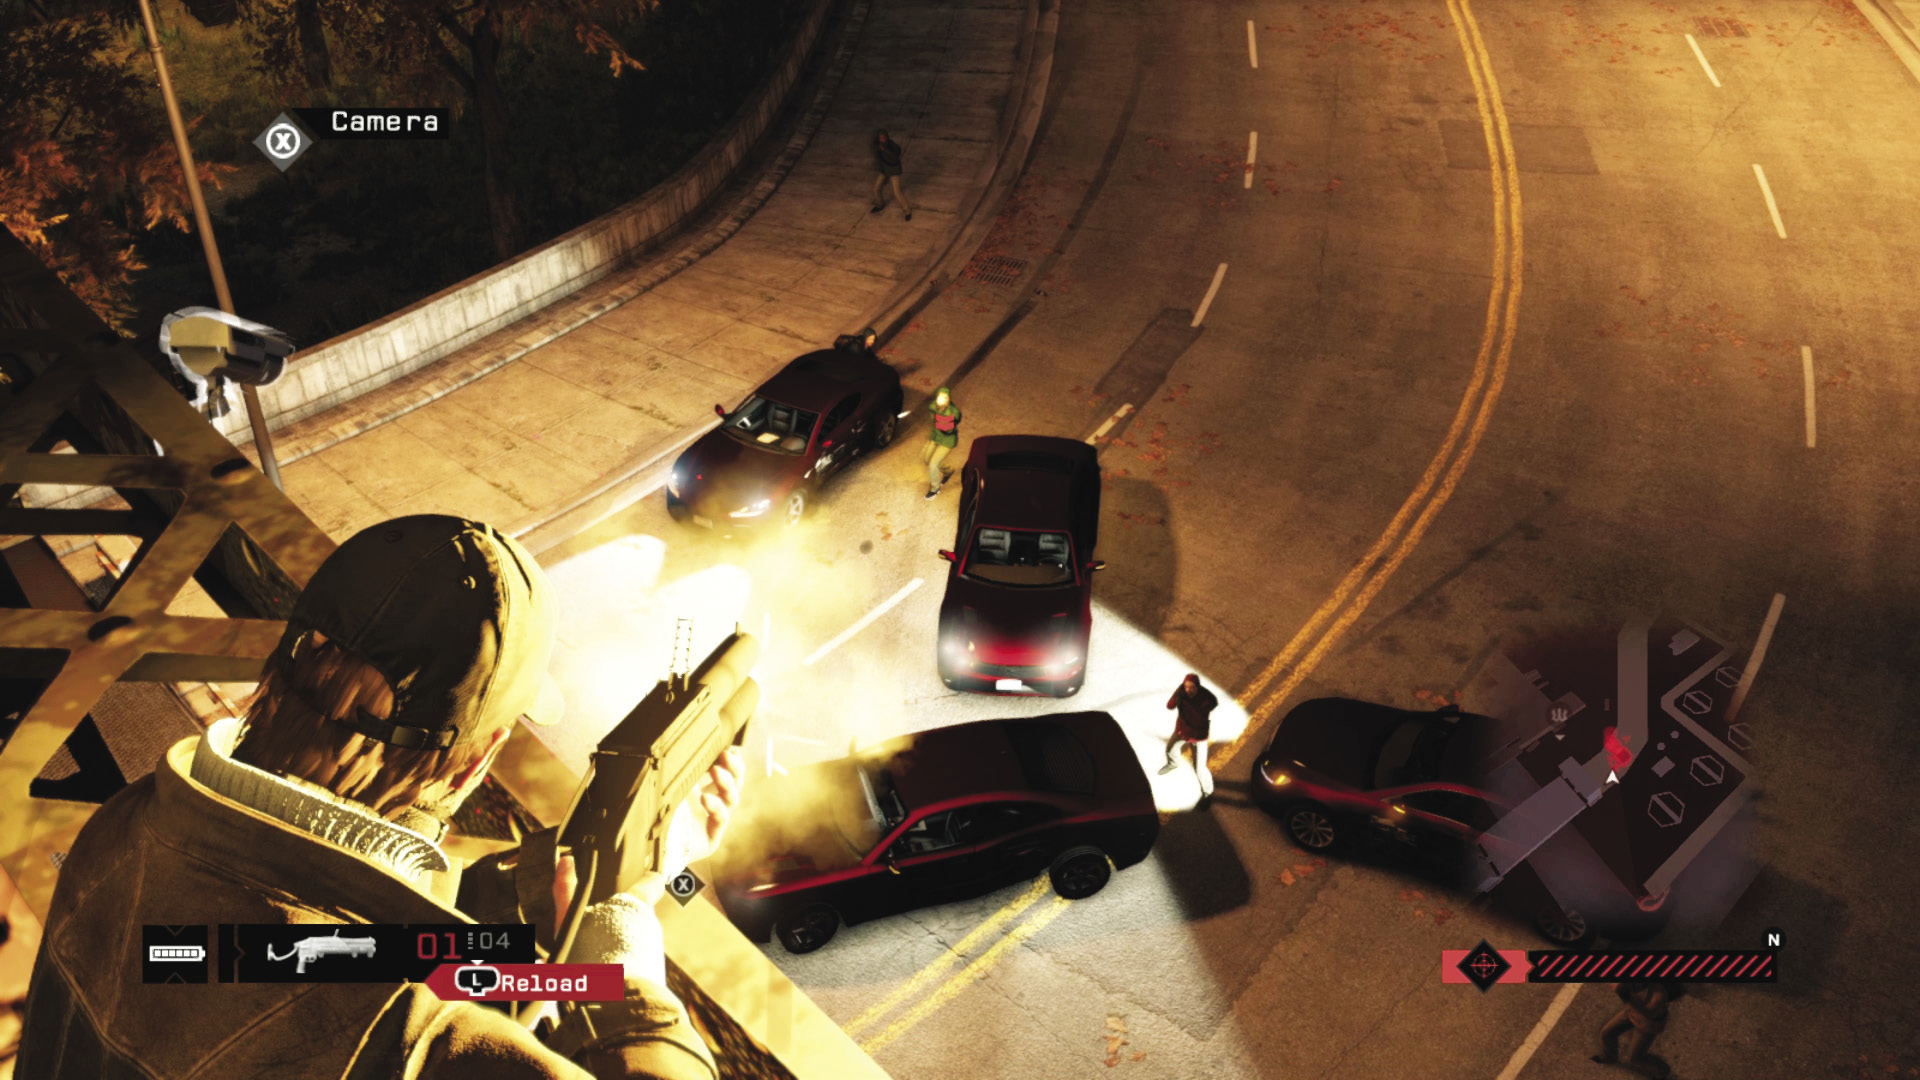
Your objective is to escape; if you want to take down all enemy foes, the previous section has a host of preferable strategies. But you can gain some distance between you and your foes, spreading them out so only one or two are close enough to be a problem. Then deal with them using a violent spray of gunfire or a melee strike. Leading foes away from the pack before removing them so no one is nearby is a great way to truncate a faction’s search for you.
39. Collateral Damage
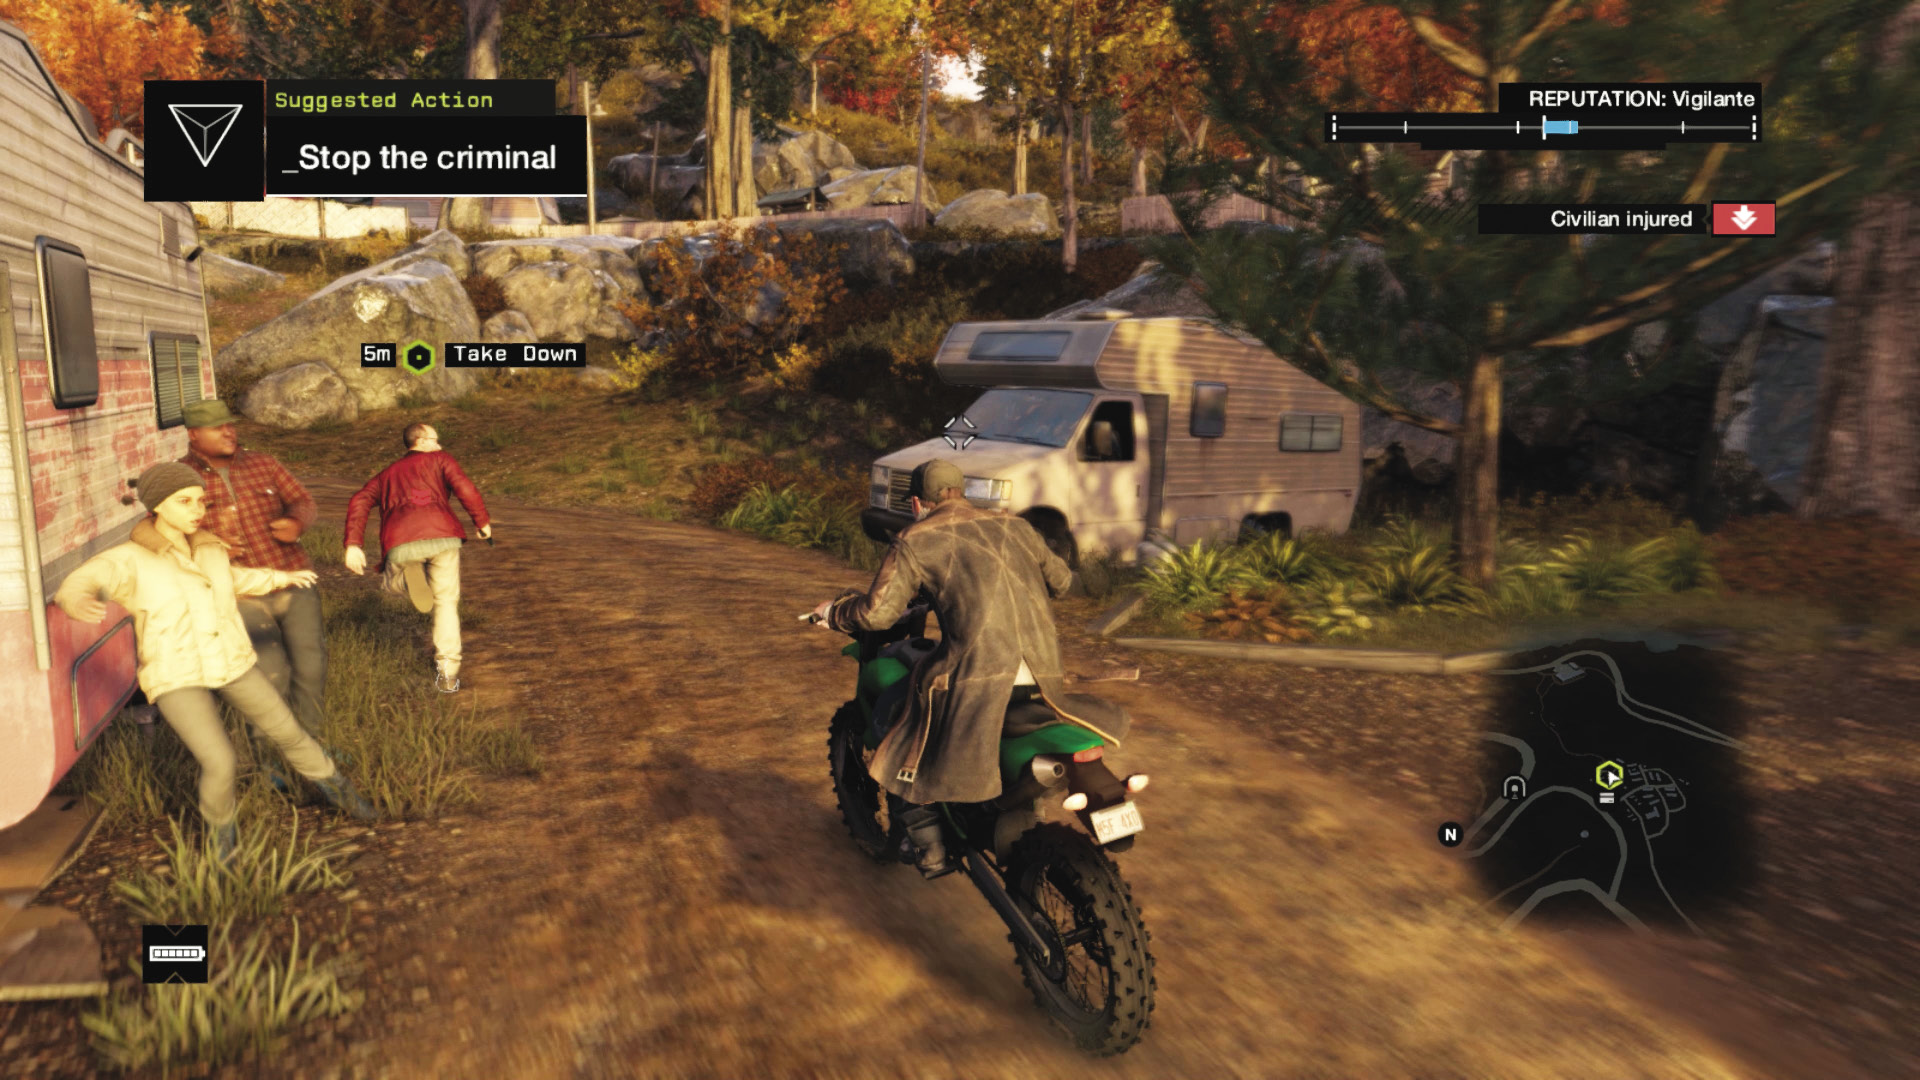
While you’re sprinting away from enemies firing at you, try and find a crowded plaza if there are no other escape routes available. Place innocents between the enemy and you; collateral damage is the fault of your pursuers, and you gain some extra seconds to shrug off any damage and search for a hiding or escape spot.
40. Tools for the Job
If you need help extricating yourself from troublesome foes, use a Blackout to cut the power and lights. Obviously this is only helpful during night escapes, but you’re able to sneak or rush by foes and maneuver away from their search patterns more easily if their vision is even more limited.
41. Search Area: Circle of Influence
Whether you’re in a vehicle or not, your escape is only successful once you lose your tail, they start looking for you, and a large search area appears on your minimap. This occurs whether you’re running from cops or faction members, and it’s important to chart a course out of this circle but without any enemies (on foot or in vehicle) seeing you during the run. Once you’re out, consider the escape successful.
42. Chopper Takedown Hack
Use your Disrupt Helicopter skill to remove the eyes in the sky constantly hunting you. You then have five seconds to reach a hiding spot before the chopper returns (or slightly more with the improved version of this skill). Do this before the ground forces find you, and you can end a pursuit in seconds.
/// DRIVING EVENTS
You have copious plans to try while you’re on your feet, but it’s worth learning what to do when your mission primarily involves driving. Use the following driving techniques, coupled with out-of-vehicle activities, to draw down threats and easily escape even the most tricky of driving getaways, chases, and convoys.
/// Offensive Driving Tactics
When you’re preparing to deliver a knockout blow to an enemy convoy or chasing a foe in a car or truck, you want to have a vast array of options at your disposal. Here are some of the best.
43. Following
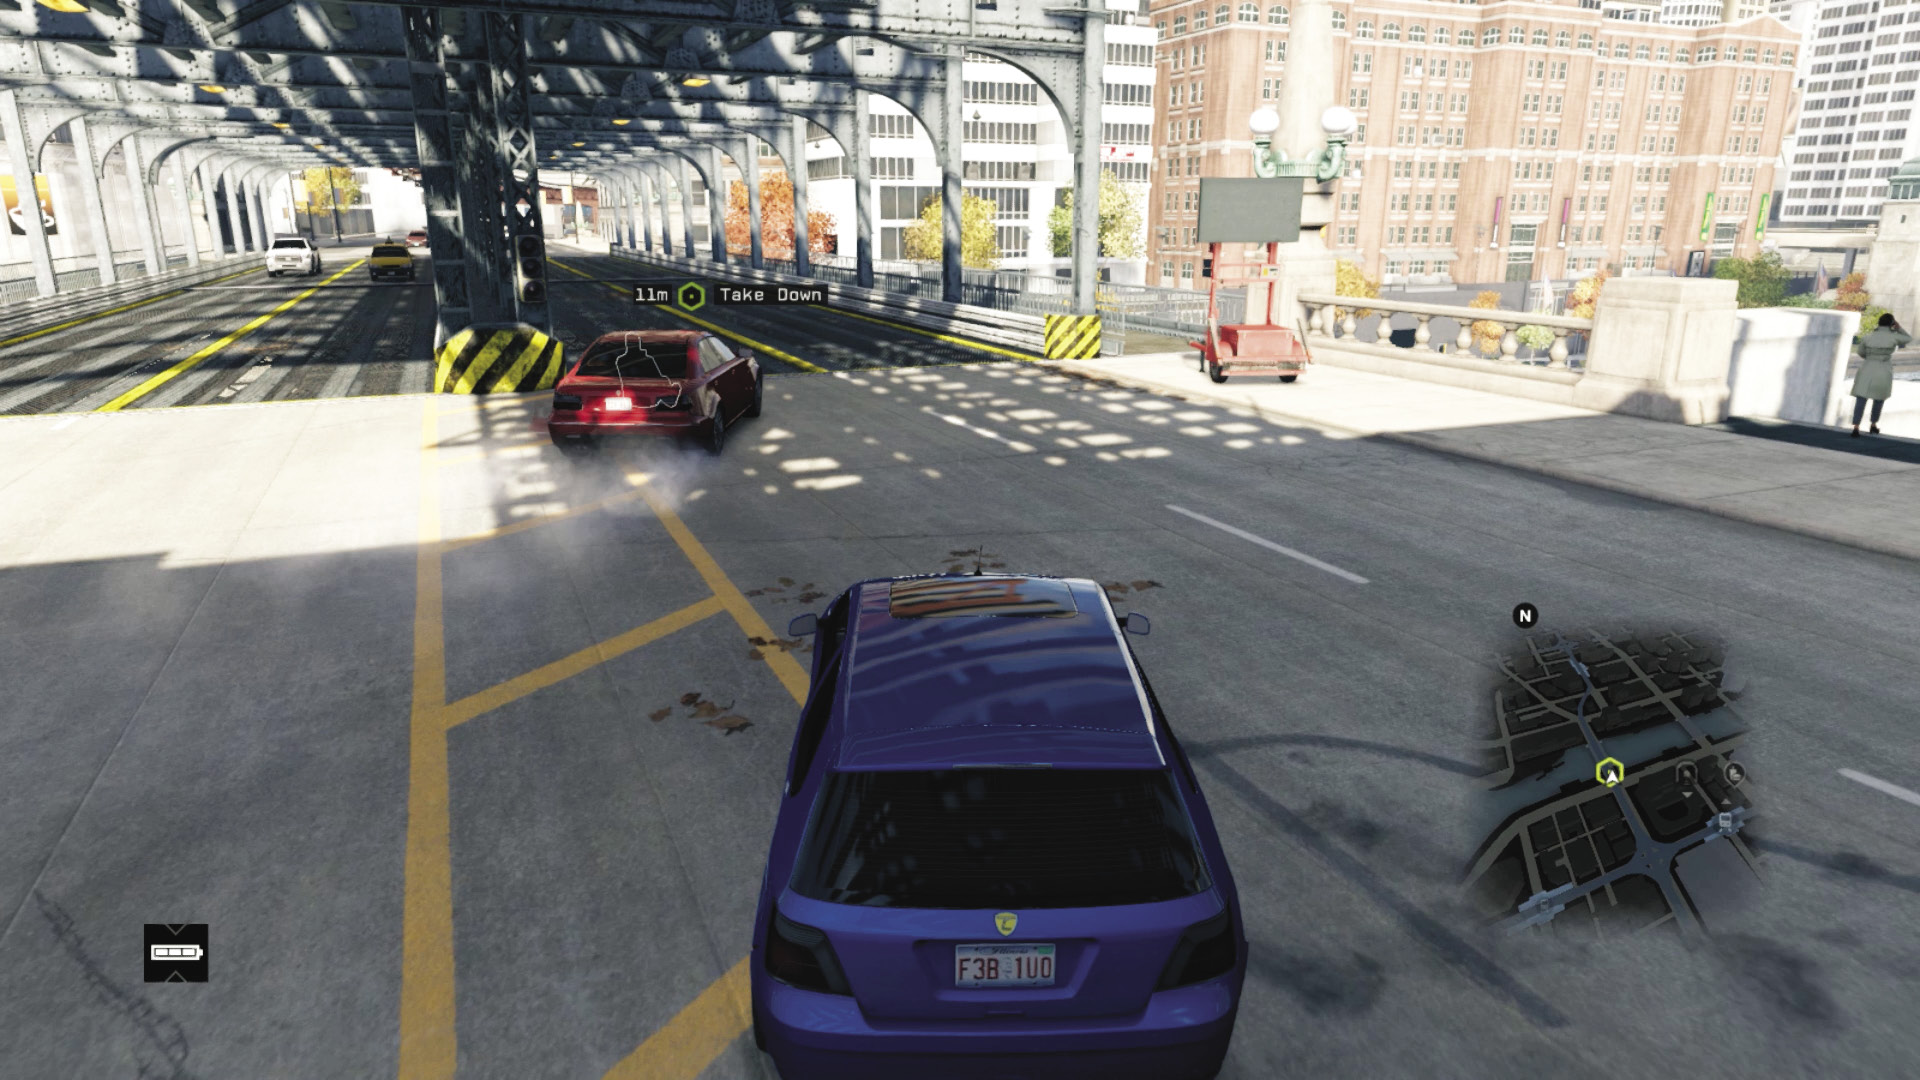
When you’re dealing with a convoy of enemies, you’re usually on a head-on interception course. But this doesn’t have to be the case. Circle around their route and then follow them from behind (ideally without them noticing until it’s too late). Enact any of the following plans when you close in on the target vehicle (whether it’s a single enemy or part of the convoy).
44. Following and Hacking
Some missions involve gathering information from a suspect inside a vehicle, downloading information until a status bar reaches 100%, and then ignoring or killing the suspect. This involves simply driving and matching your foe as he makes tight corners, drives off-road, and attempts other ways to lose you. Choose a vehicle with great handling, don’t be overzealous with your acceleration, and keep up!
45. Following and Offensive Hacking
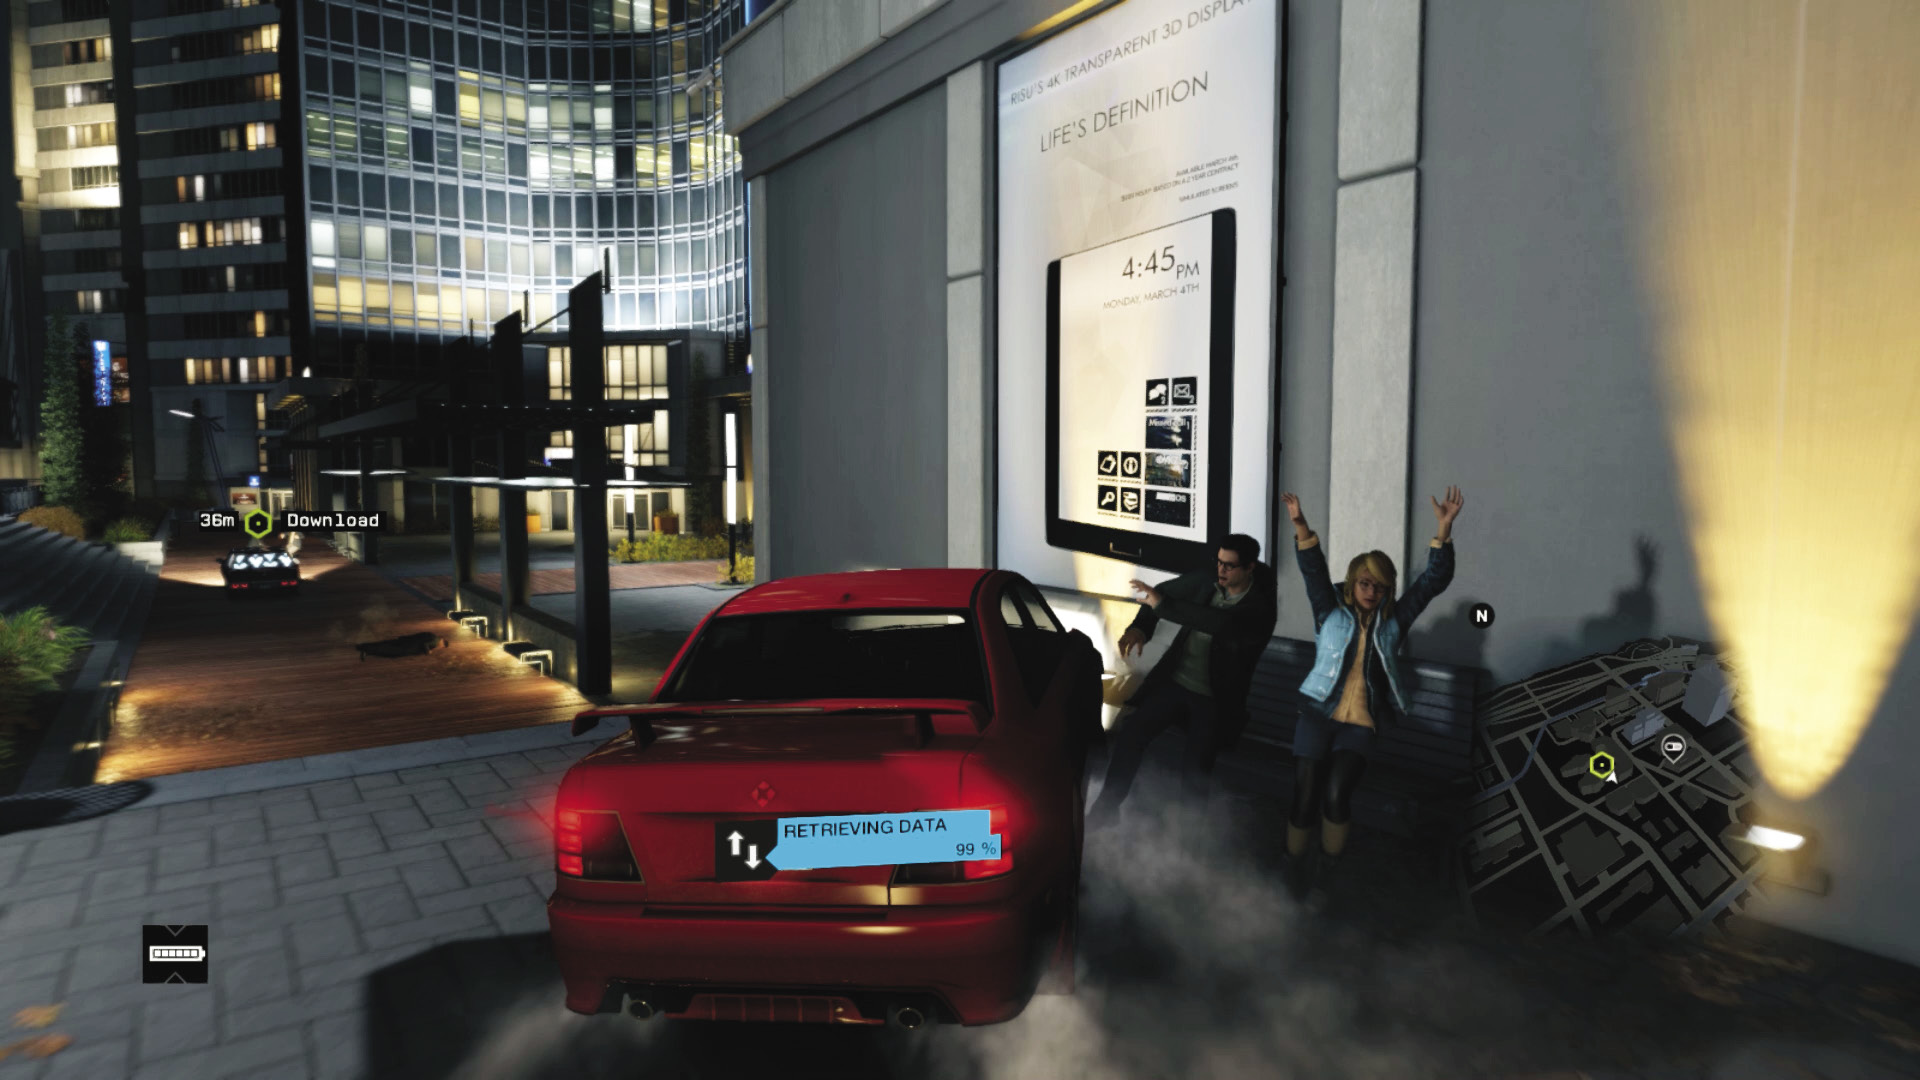
Usually there’s no need to chase the foe you’re hacking; instead, execute an offensive driving plan (any of the following) and stride over to the suspect’s corpse and hack his phone to get the data. This works well, unless you’re explicitly told not to do this.
46. Infrastructure Hacking (Bollards)
This is also a key defensive driving technique. Follow your foe, look to the road ahead (which is easier if you’re tracking a sedate convoy and much less easy when you’re chasing a speeding foe), and activate a set of bollards at the end of the street. The target vehicle hits the bollards. Follow up with ramming or weapons.
47. Infrastructure Hacking (Blockers)
This is also a key defensive driving technique. Follow your foe, and look for blockers to activate at the end of the road or street you’re on. Watch out; some blockers act as ramps and launch the foe, meaning a chase begins (or continues). You want the foe to hit the blocker and stop so you can follow up with ramming or weapons.
48. Infrastructure Hacking (Spikes)
This is also a key defensive driving technique. Follow your foe, tracking the road ahead for signs of a barrier and spikes to raise. Then hack and raise them, causing the vehicle to plow through the barrier and burst its tires. Retract or avoid the spikes so your tires aren’t affected. Then follow up with ramming or weapons.
49. Infrastructure Hacking (Steam Pipes)
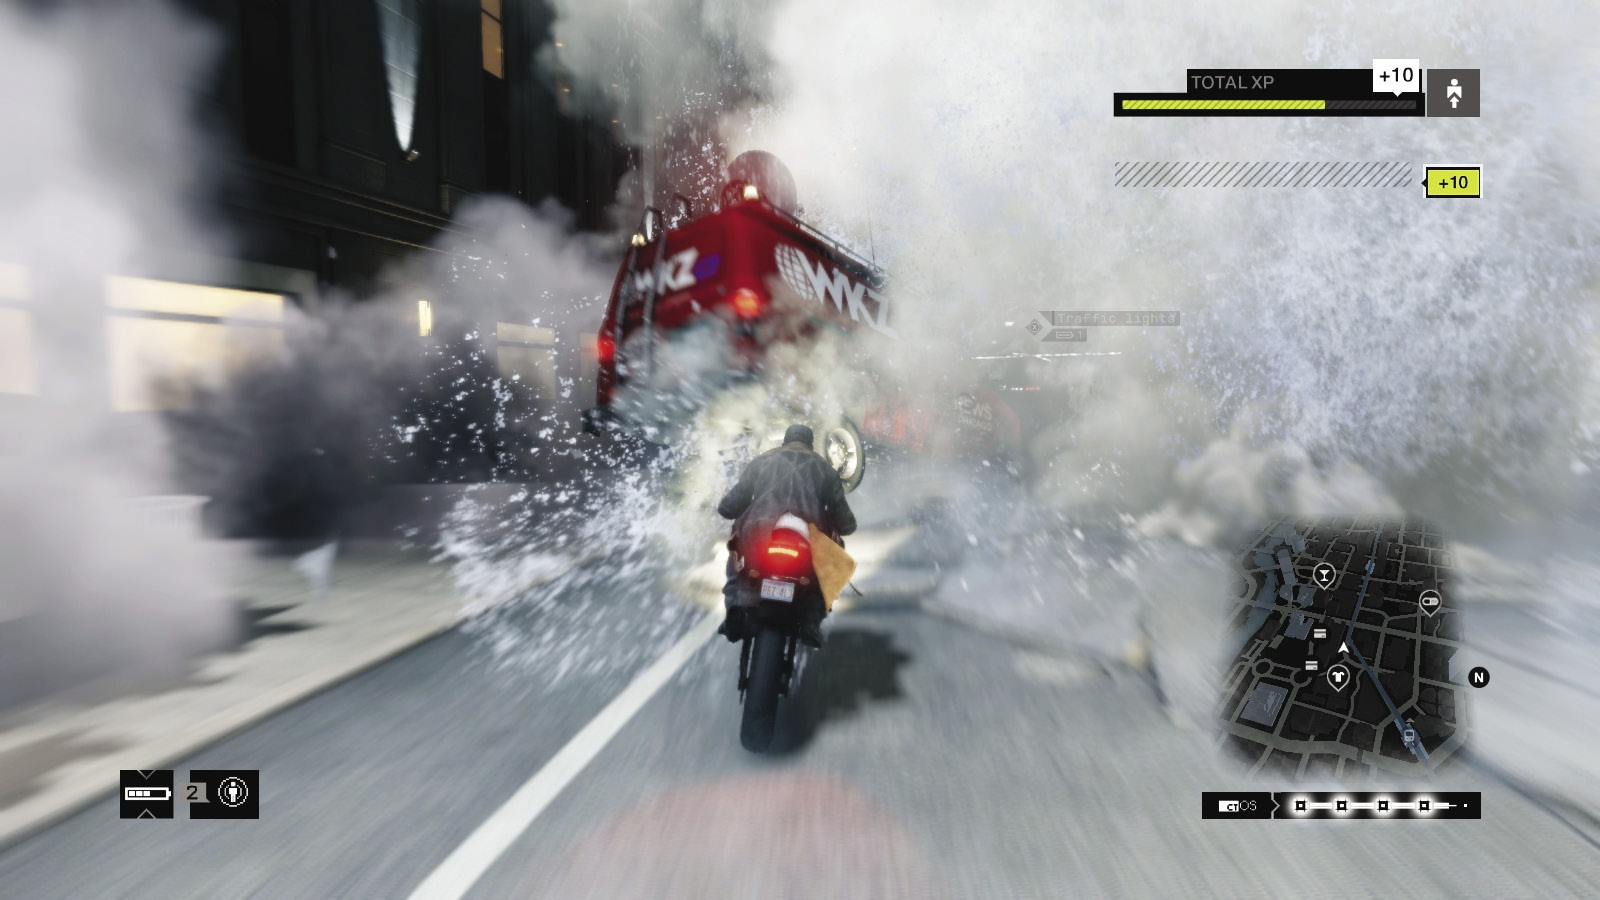
This is also a key defensive driving technique. Follow your foe, tracking the main street ahead for a steam pipe to burst. This is the easiest of the “follow and hack” techniques and incredibly helpful to pull off, providing you have the skill. Detonate the steam pipe so the target vehicle flies up and the foe dies or stumbles from the vehicle. Then follow up with ramming or weapons.
50. Infrastructure Hacking (Traffic Lights)
This is also a key defensive driving technique. Follow your foe, watching at intersections for traffic lights and several waiting vehicles. Change the lights at the right time so the convoy slows or the chase target hits vehicles moving after the lights change. Then follow up with ramming or weapons.
51. Shoot-Hacking
This is usually easier to attempt when you get in front of a convoy as part of an ambush technique, but any explosive infrastructure can be hacked or detonated by gunfire just as the target vehicle passes near it, in an attempt to incapacitate vehicle and victim.
52. Infrastructure Explosions
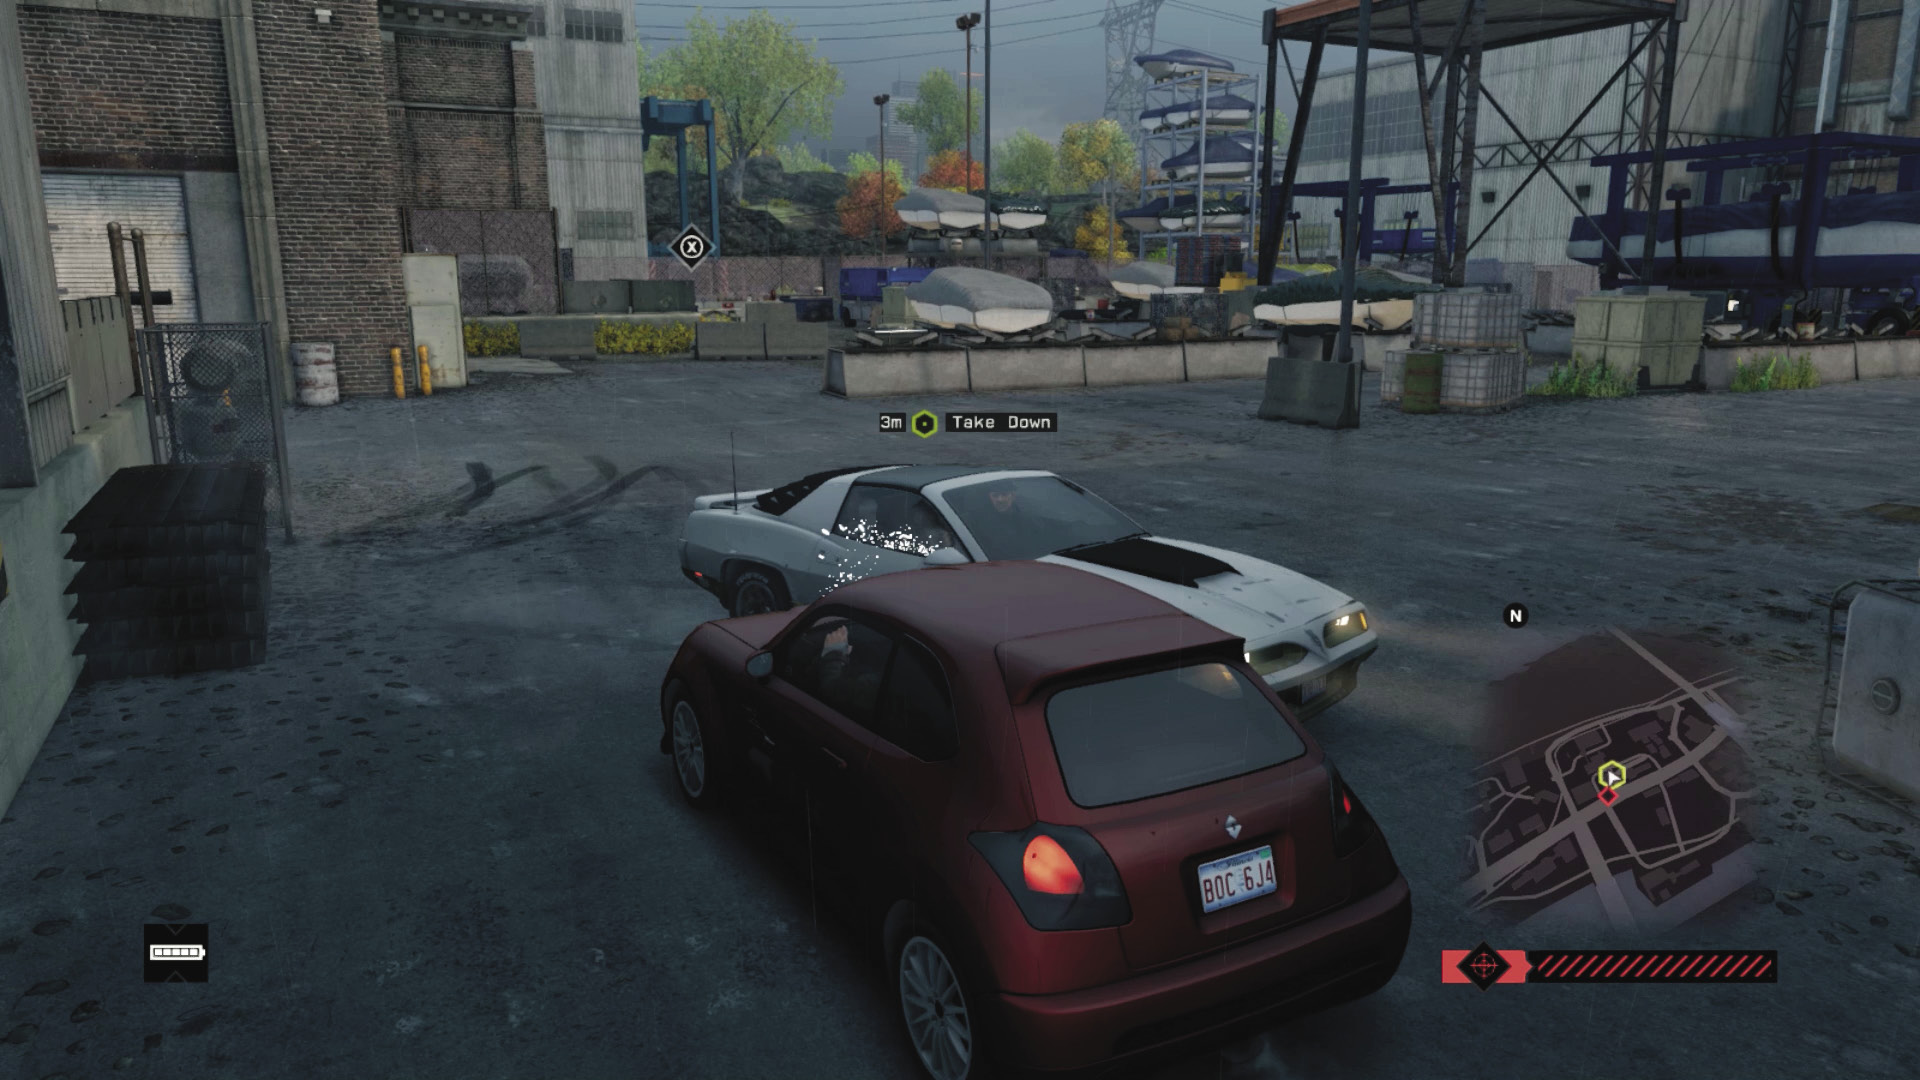
When chasing, watch for three pieces of scenery: ctOS Boxes, propane tanks, and metal cages filled with gas canisters. If you can push your opponent into any of these, the resulting explosion usually wrecks their vehicle. Just don’t overshoot and hit the explosive scenery yourself!
53. Ramming
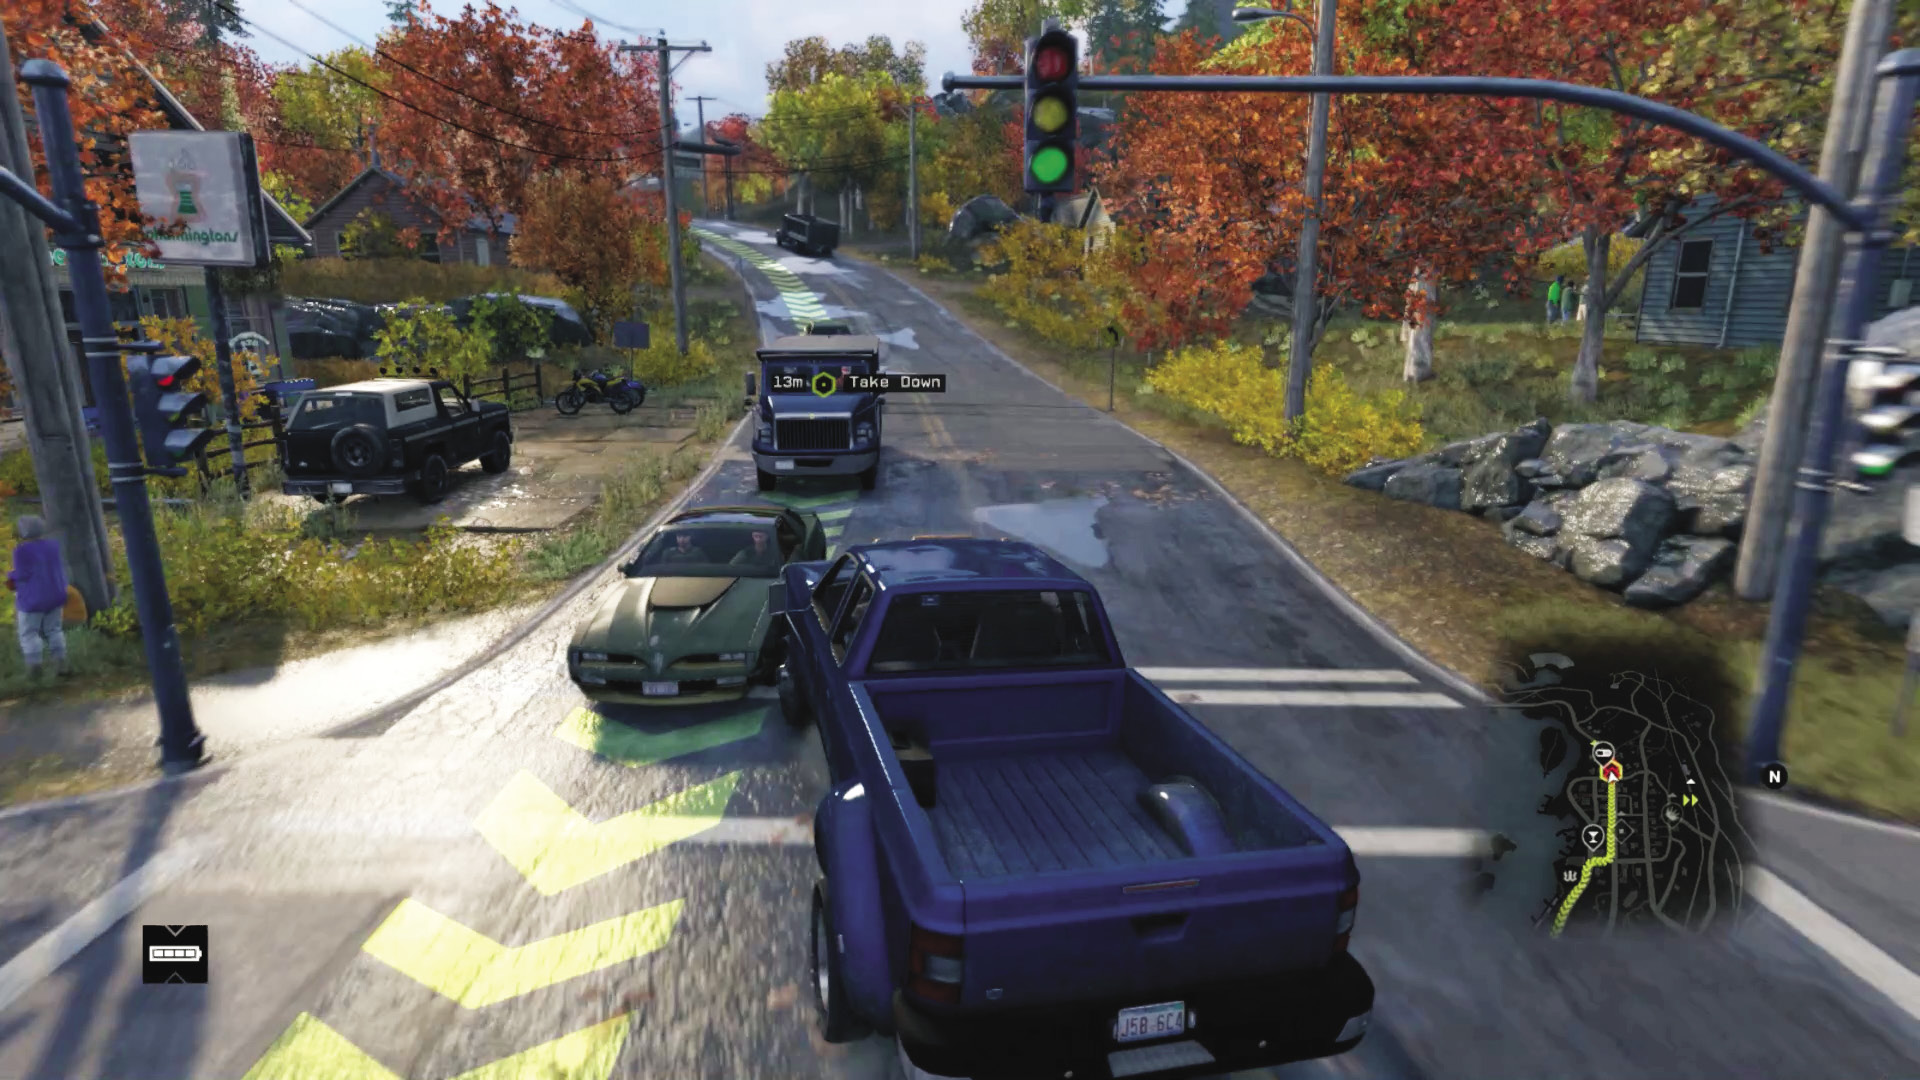
One of the best ways to stop a vehicle is to ram it. From the front. Head-on. Any other ramming location simply allows the enemy to continue speeding away, or in the case of a convoy suspect, start to flee. So set yourself up for a head-on collision if you can. This is easy during convoys but pretty impossible during chases.
54. Shunts and PIT Maneuvers
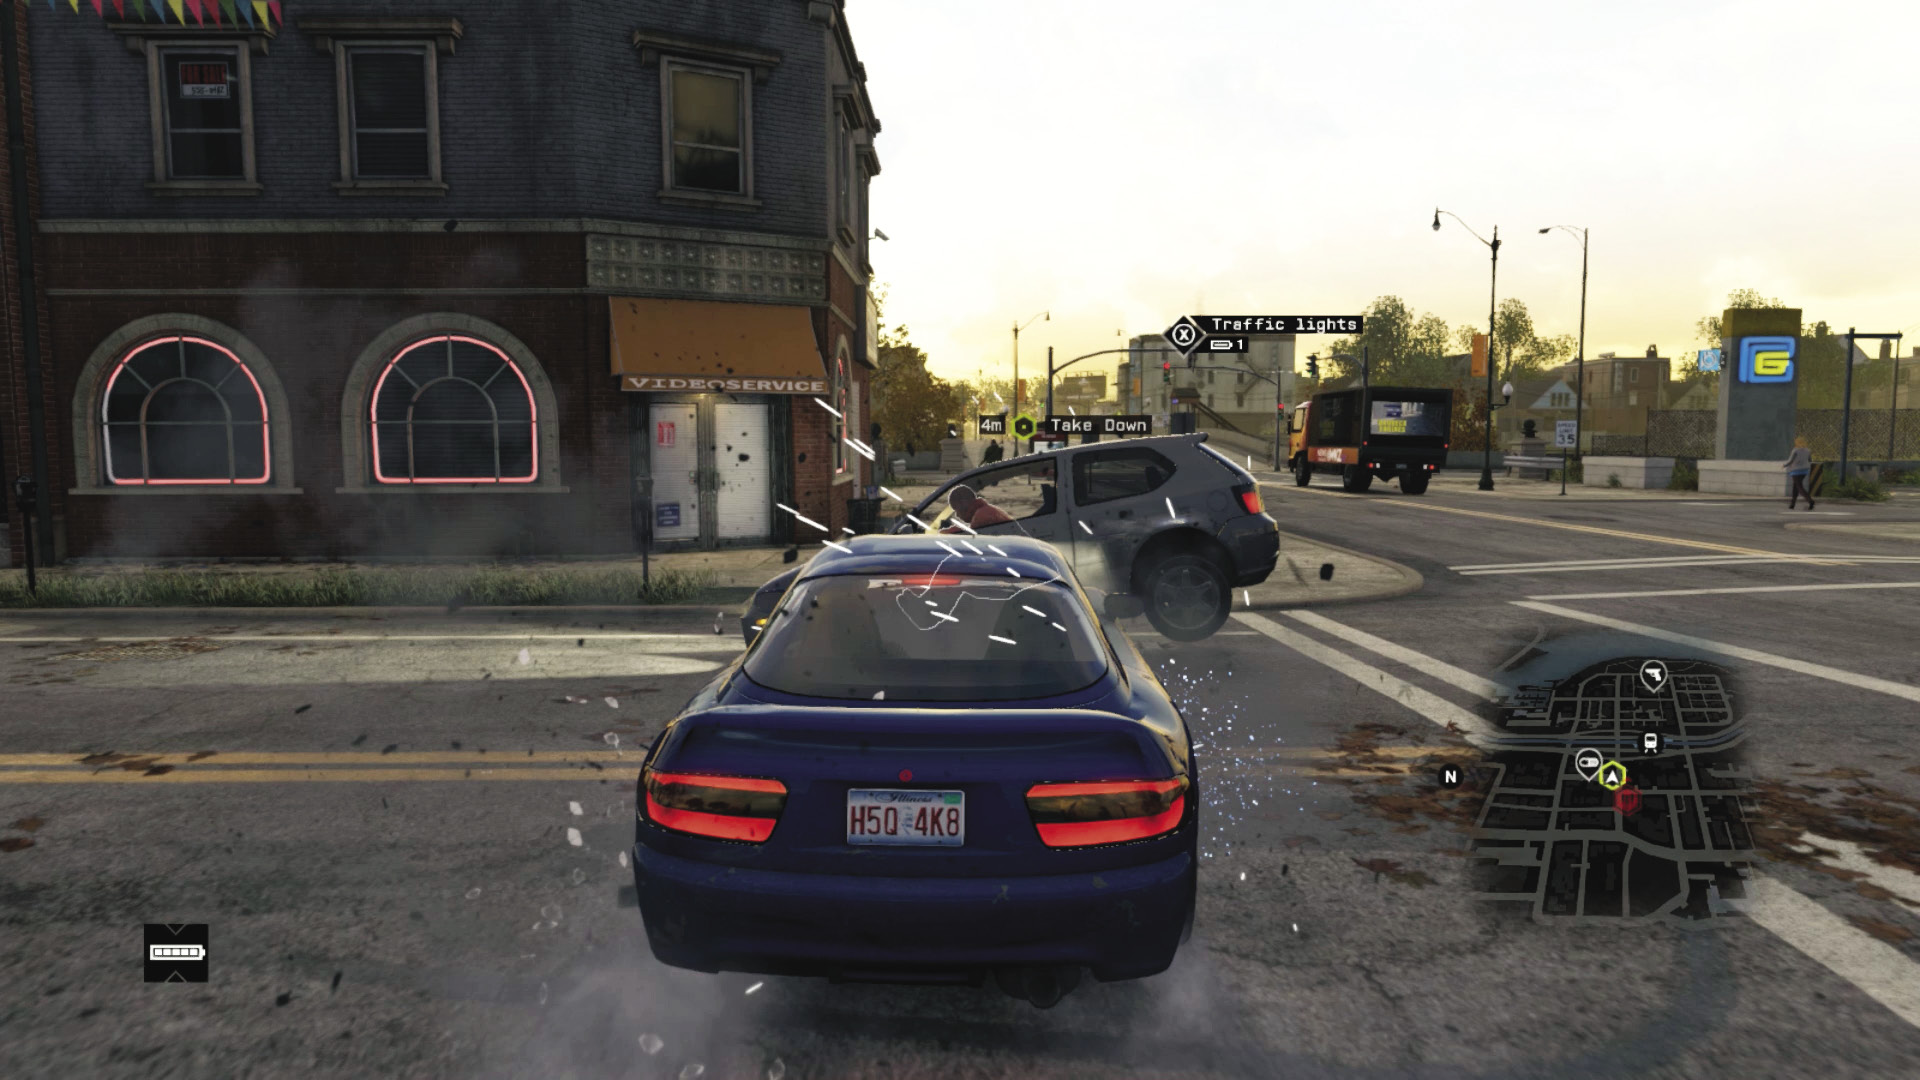
These occur during chases. Approach the speeding vehicle (ideally in a vehicle that has a better top speed and acceleration) and start to shunt it. Simply knocking it from the rear or sides is fine, but if you can turn in and strike the back-left or back-right corner and spin the target around in a PIT maneuver, so much the better.
55. Prediction Takedowns
These are far more easy to attempt during Convoy missions and involve you temporarily ignoring the route the enemy vehicle is taking and instead driving through alleys and other shortcuts to outflank your foe. Then come around and hit them at a predetermined location. Check your convoy route so you know where to drive out and strike the enemy.
56. Jamming, Grinding, and Flipping
When you first hit your target vehicle, continue to press on the gas and try to pivot the vehicle down into an alley, between obstacles, or flip the enemy over a central freeway barrier and jam or overturn them so the chase comes to a grinding halt.
57. Side Alley Sideswipes
This is similar to the Prediction Takedown but involves waiting down a side alley until your foe is about to drive past you. Accelerate hard and crash into his side, so the enemy vehicle flips over or is caught by scenery or stopped by other vehicles. Timing is essential here.
58. Vehicle Blockades
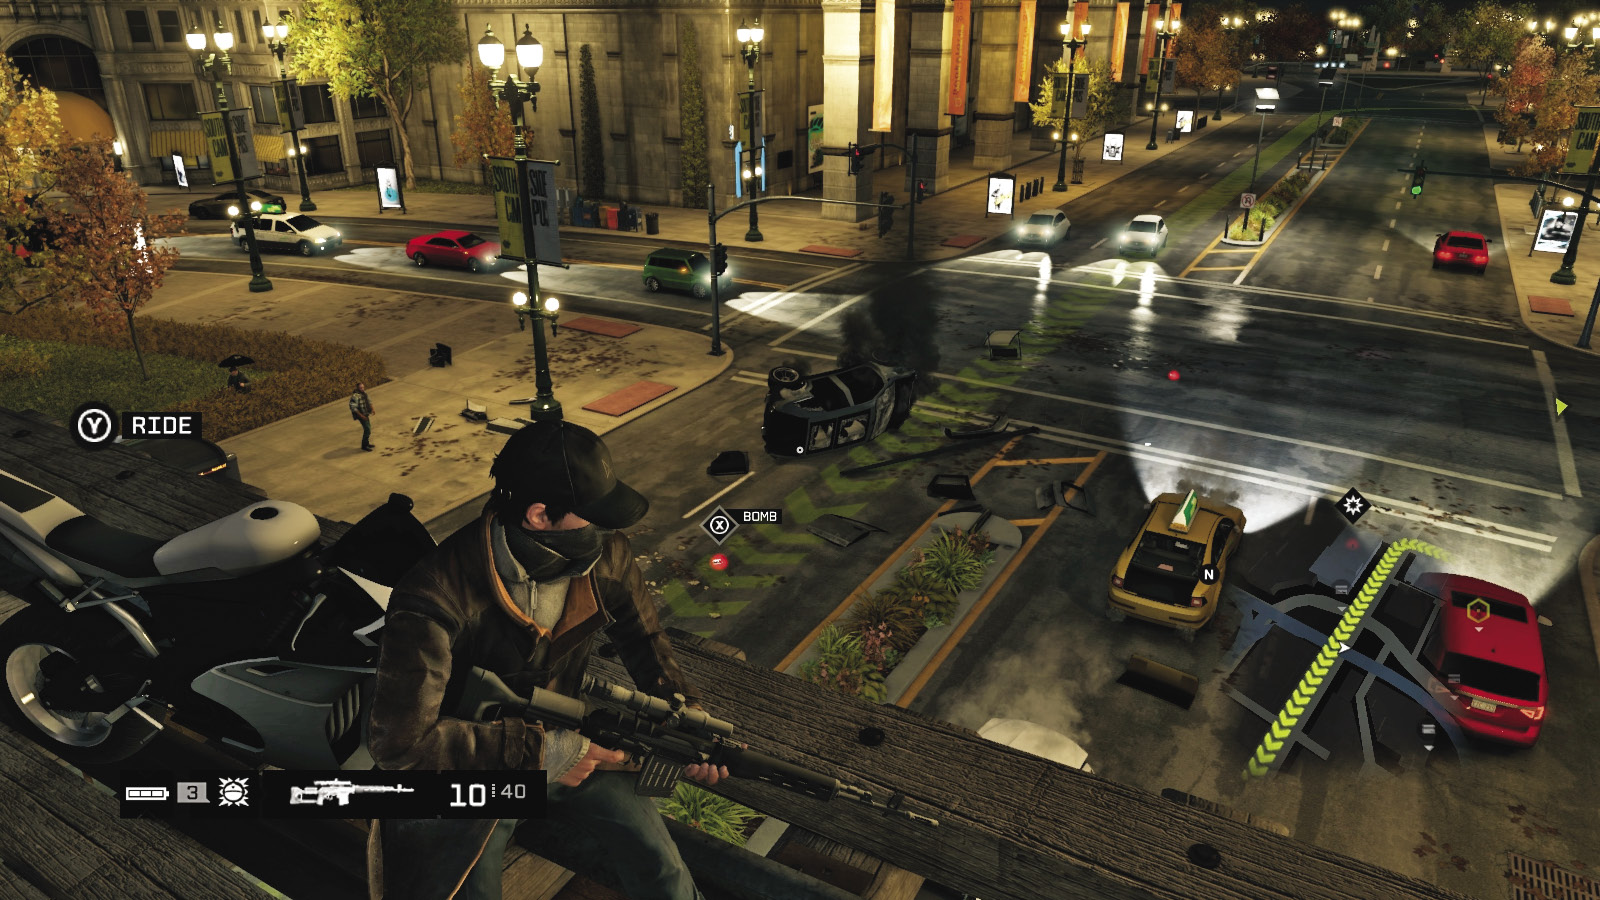
Another convoy plan, this involves stealing and gathering all vehicles at a street junction, ideally at a narrow street, and jamming together a load of vehicles (or one very large vehicle like a fire truck) so the convoy has to stop. Then accelerate in from the sides or behind and catch them in a blockade, or seal off the opposite end of a street with another wide vehicle and bring out your guns.
59. Ambushing
There are a wide variety of ambush options, but most involve parking a vehicle on the convoy’s route so they have to stop; then step out with weapons and tools to lay waste to the target vehicle. Or hack infrastructure. Or explode infrastructure. The guide is full of potential ambush spots, usually after turns and where bollards or blockers can help stop your foe in his tracks.
60. Spotting and Camping
During Convoy missions, or if you have an insanely quick aim and Focus ability during a chase, you can drive to a location along the target vehicle’s route well before they arrive there. Get out and position yourself behind your vehicle or on a high vantage point (atop a building or bridge), and wait for the target vehicle to come into view. Then snipe the driver (using Focus) at extreme range so there’s fewer chances of the vehicle driving away. Train the remaining shots on the target, who usually tries to escape the vehicle. Wider areas are better for this so the foe doesn’t run into cover.
61. Grenade Launching
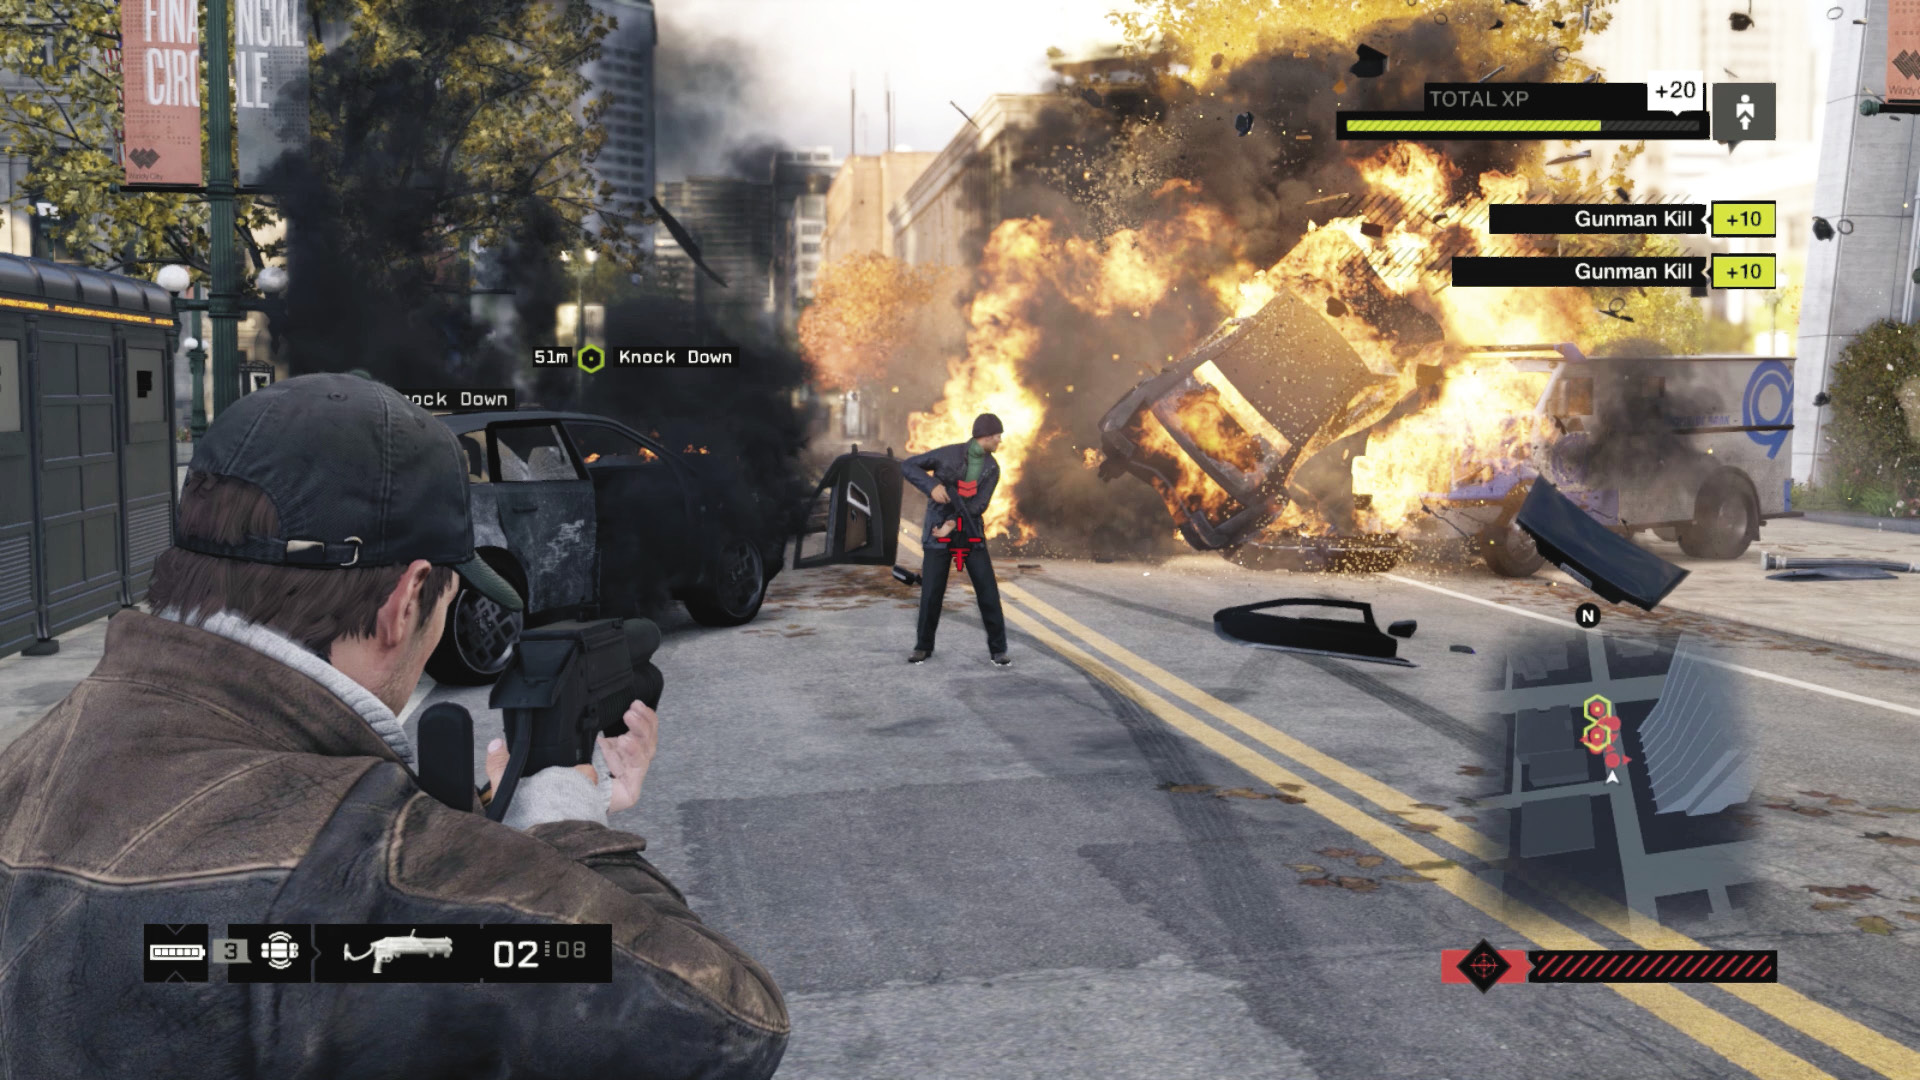
Pack a grenade launcher when you roam the street on foot; this stops incoming enemy vehicles at closer ranges. Aim your grenade just in front of or under the front of the vehicle, and keep firing until the target vehicle is incapacitated. For the biggest takedowns, grenades should explode as enemies are just departing their vehicle, but this isn’t usually possible with Convoy or chase mission adversaries.
62. Shotguns
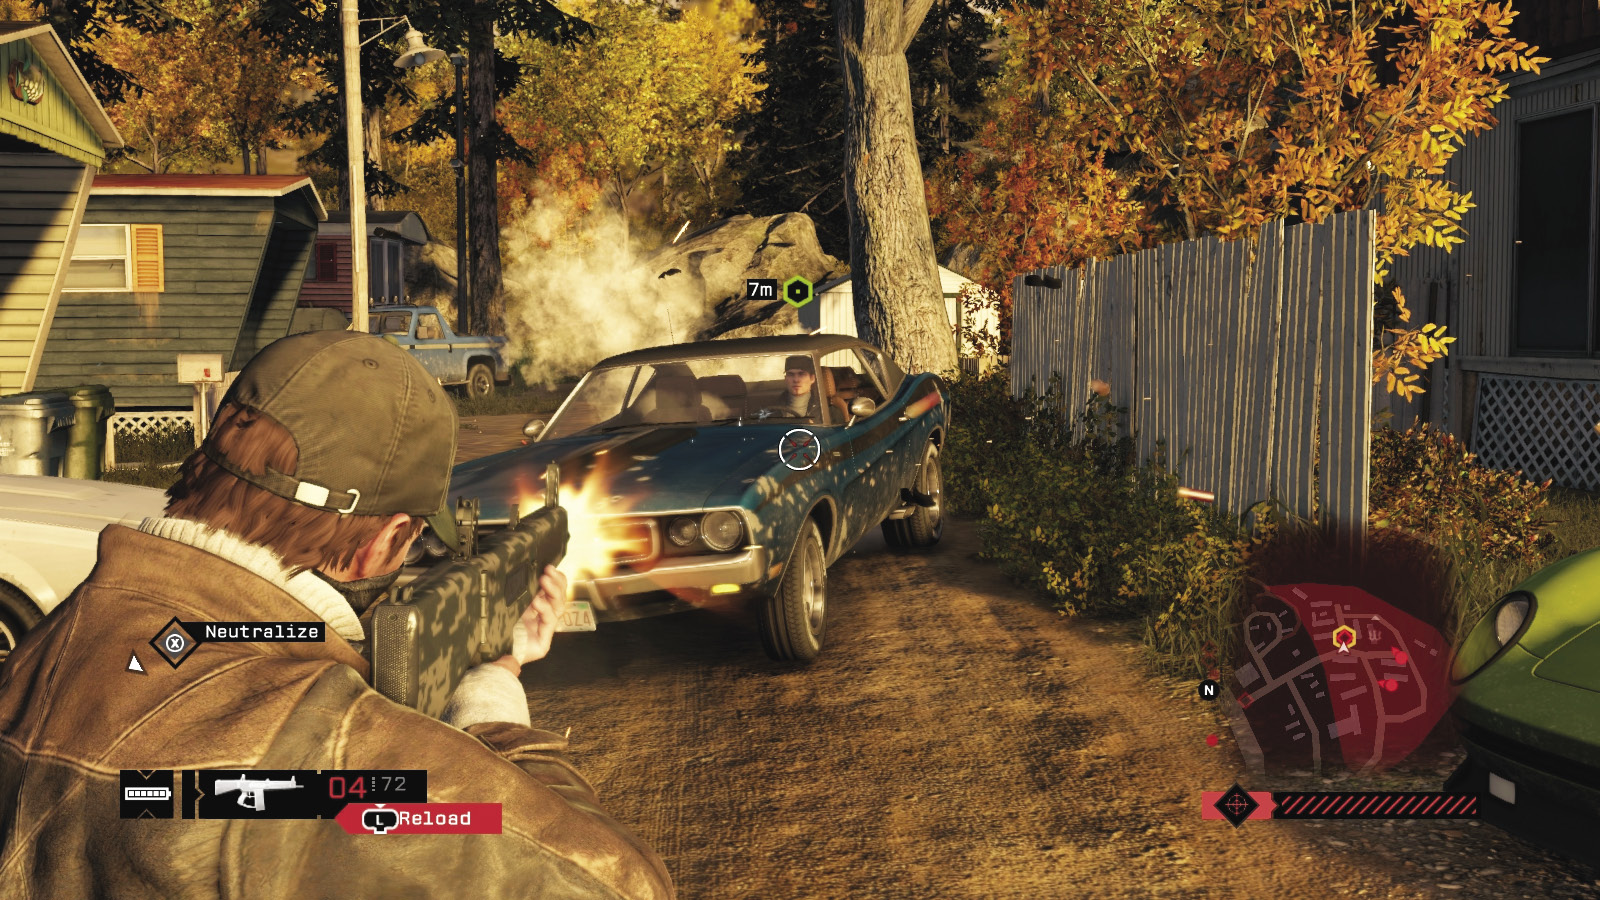
If you’re on foot and need to stop foes inside a vehicle, switch to a shotgun. This weapon (along with its associated skill, Shotgun Expert) can blast sections of vehicle off its chassis and can blast apart the doors, trunk, hood, and finally the occupants. Try the tires and engine to stop foes escaping. This is far better than other weapons, though a quick, accurate headshot aimed at the driver is just as effective.
63. Crafted Items
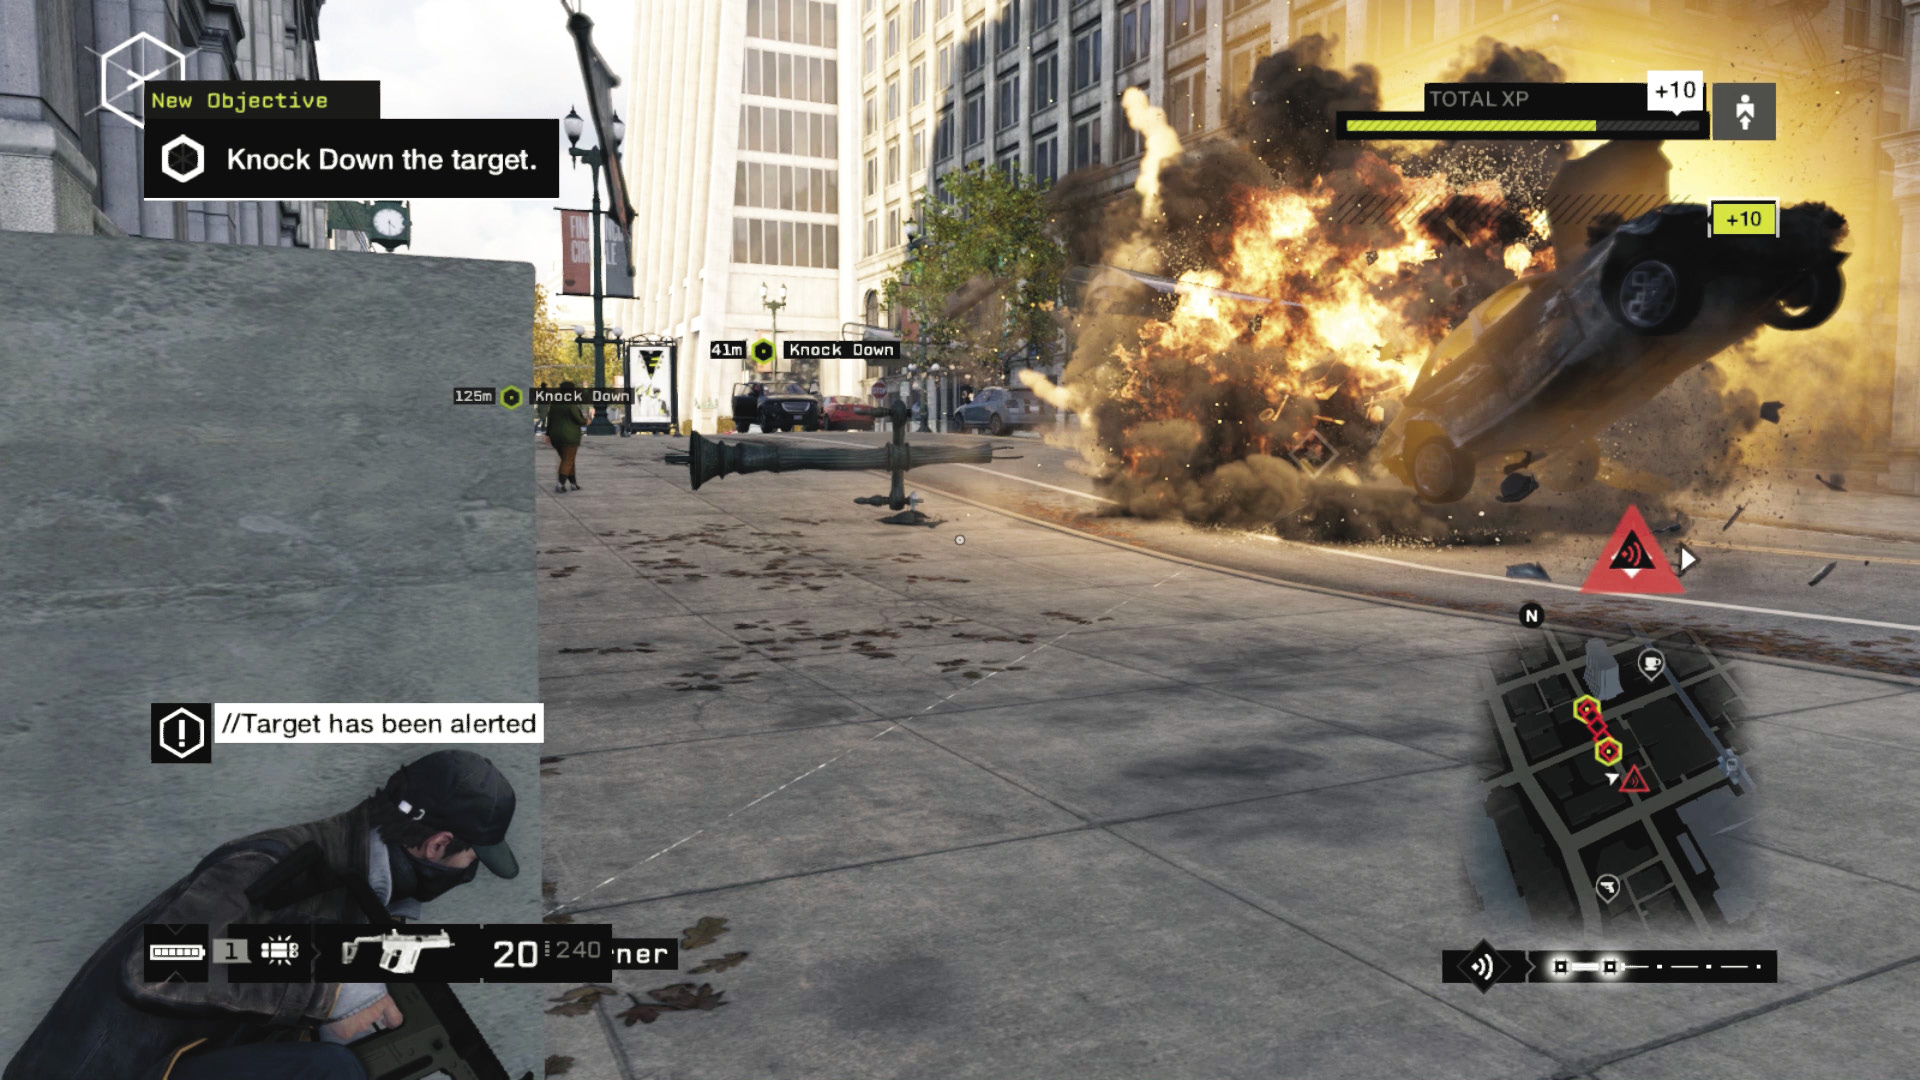
Though Blackout has limited use during nighttime convoy chasing, as the enemies are on a fixed path, but it can still bewilder foes. You’re really utilizing tools like the proximity IED: Drop it onto the convoy route so the lead vehicle hits and explodes over it; then follow up with guns on the target vehicle. Or throw grenades or stick IEDs to the target vehicle from an ambush point.
/// Defensive Driving Tactics
Now you know how to deal with foes in vehicles aggressively. But what about when you have to escape the cops or faction members moving in on your location? This calls for some defensive driving techniques.
64. Map Appreciation
Look to your world map as the escape begins, and perhaps place a GPS route to a hiding spot you frequent, or study the area for freeways, alleys, rail lines within easy access to your vehicle, and anywhere else you can quickly drive to. Constantly check your minimap for incoming foes, police barricades, and ground troops, and avoid accordingly.
65. Hide in Car (Stealth Driving)
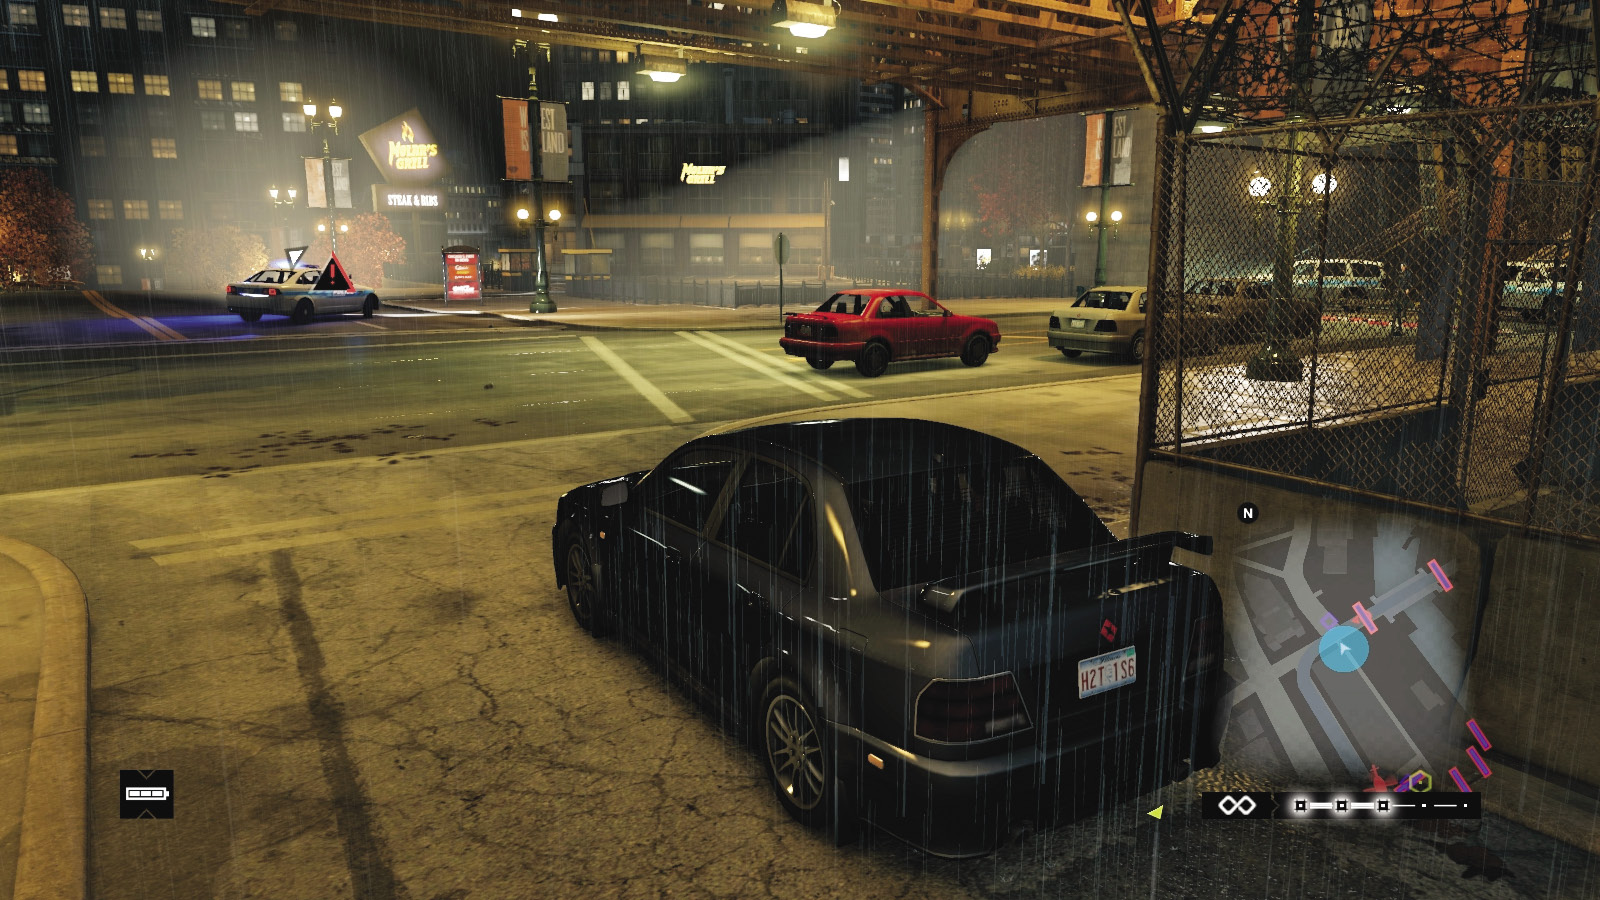
When prompted, you can hide in your vehicle, switching off the engine and lights and slumping down in your seat. This only works if enemies don’t have a direct line of sight; you can still be discovered if one passes by. But if you’ve quickly sped down a couple of side streets where no immediate threats are incoming, employ this stealthy hiding spot until the heat clears. Add the Escape Artist skill to take your pursuer’s chances of spotting you from 20 to 2 meters!
66. Alleyway Hiding
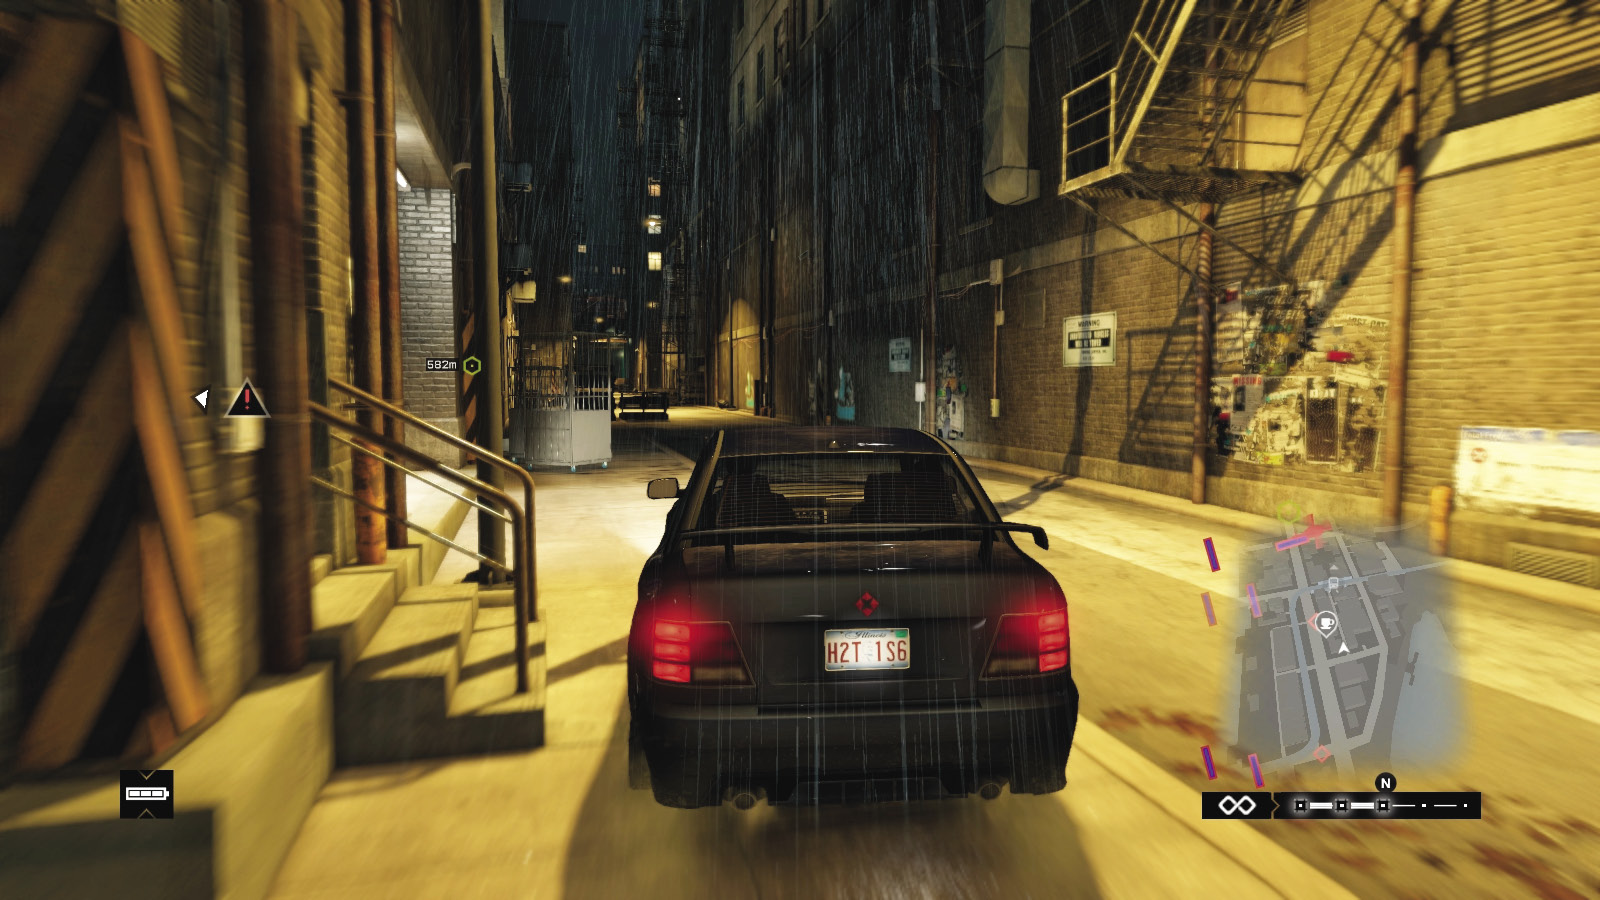
Alleys are great for maneuvering down and waiting. The enemy passing by on the street has an alert icon, so back up away from the foe if you see it, and watch foes attempt to find you. Optionally climb to rooftops or speed away in the opposite direction and lose your foes.
67. Weaving
When the chase really heats up, you have to make some critical decisions; if a chopper is following you, even a dash across a freeway to another part of town isn’t an assured escape. Make yourself as difficult to follow as possible: Weave down alleys and side streets, make 90-degree turns at every block, make evasive maneuvers and launch infrastructure hacks as you go. You’re a lot less easy to follow if you’re constantly moving.
68. The Correct Vehicle
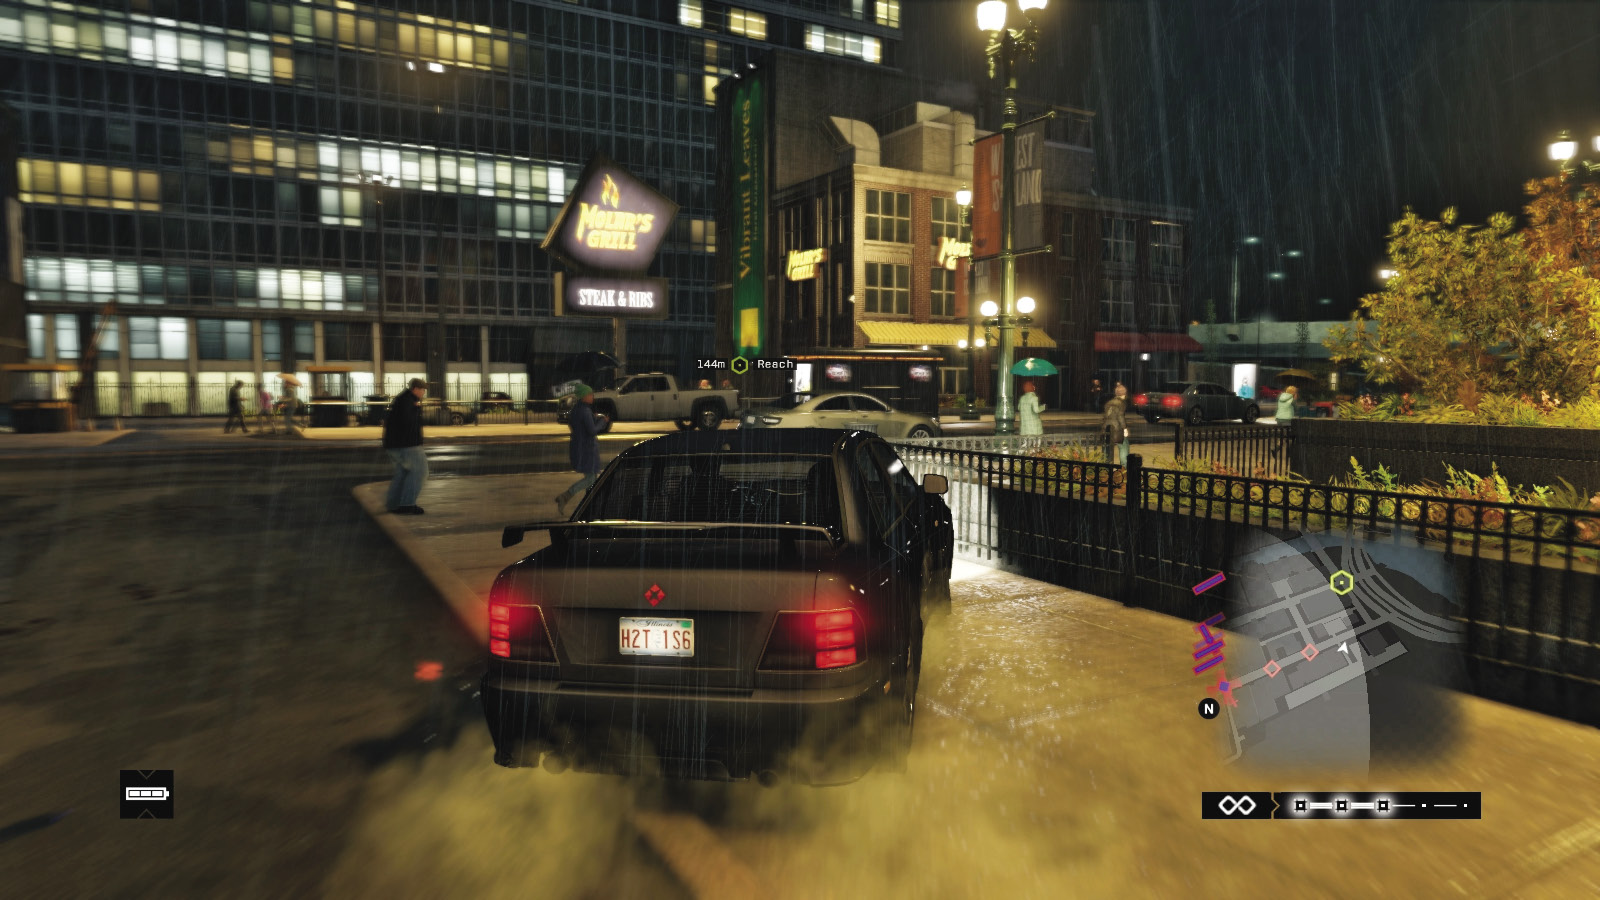
It’s important that your vehicle is fast, accelerates well, has good handling, and isn’t too tough, as vehicles with a high toughness aren’t usually adept at quick turns and fast acceleration. Any sport or performance vehicle is good, as are bikes if you’re confident you won’t crash or be rammed.
69. Off-Road Antics
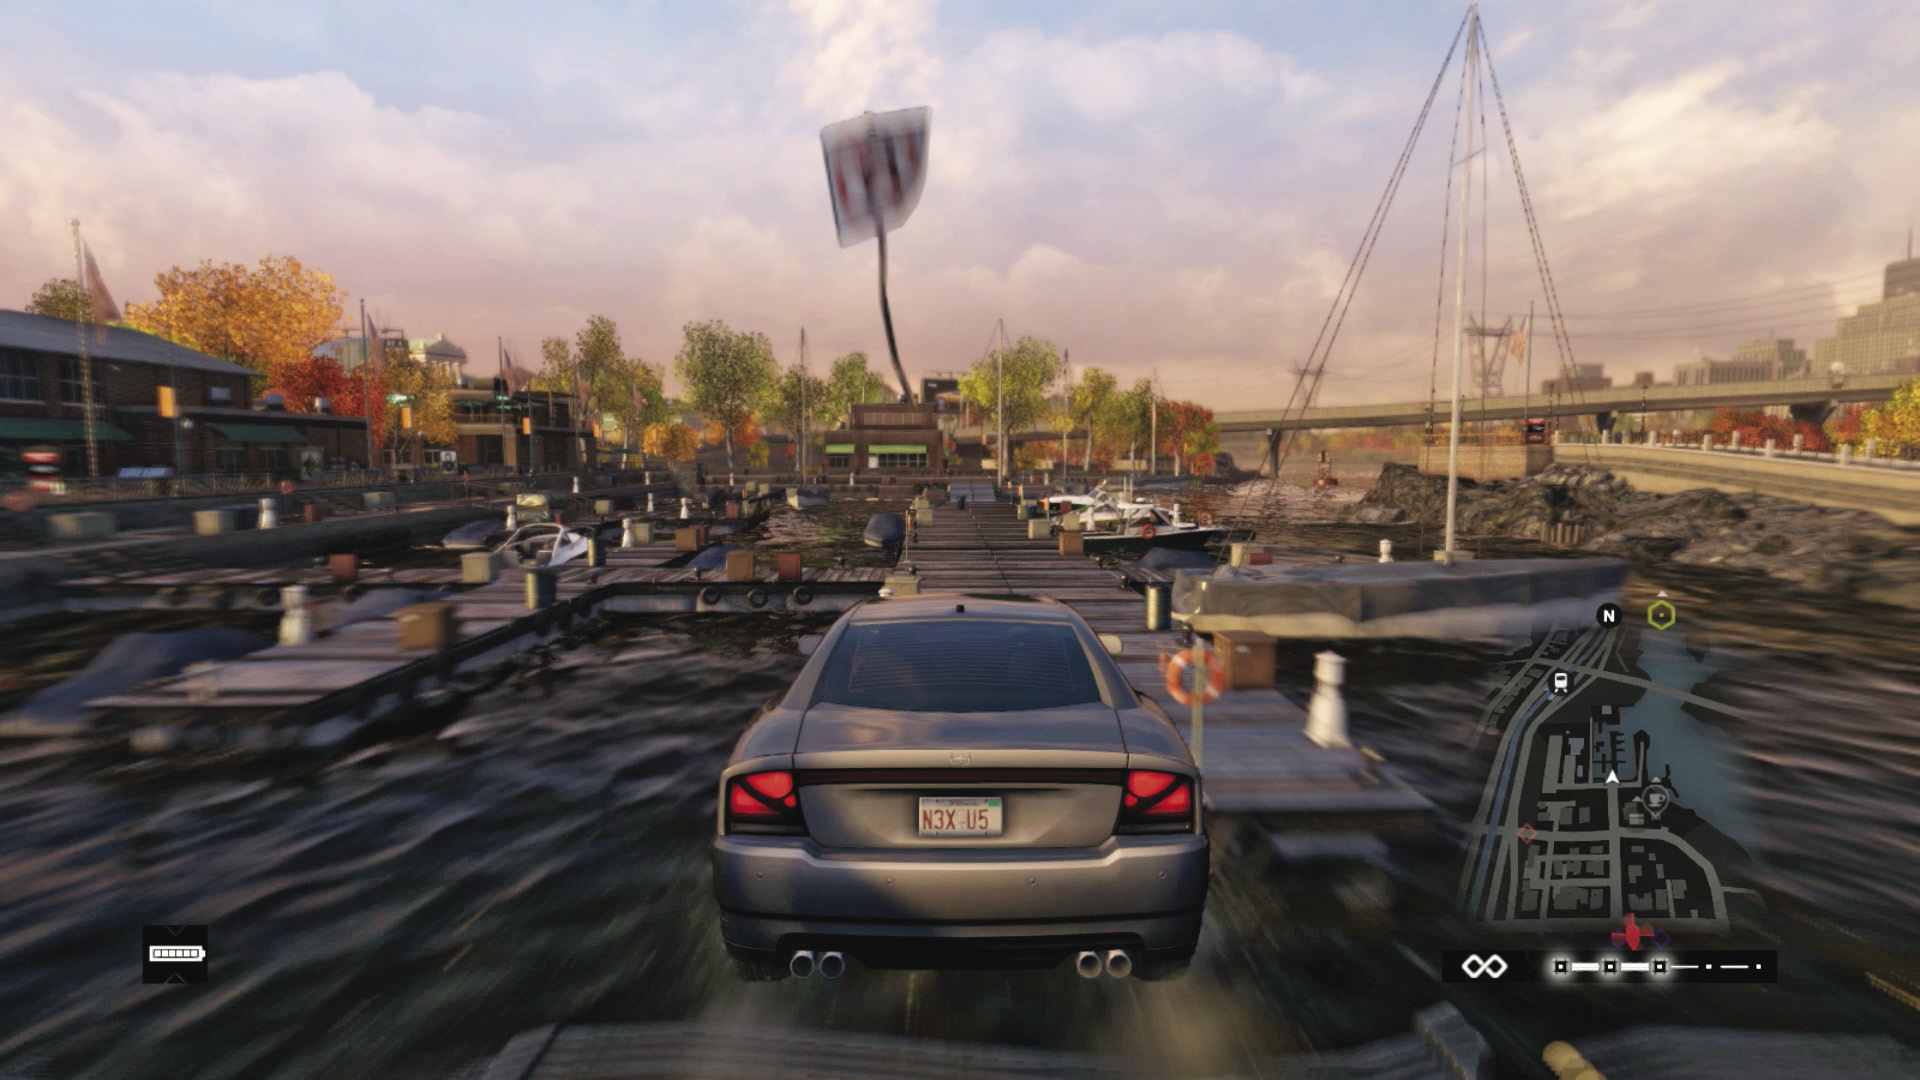
There are ramps scattered across the city, such as this one in Parker Square, which leads to a wharf, under a freeway, and to a dirt track that follows the main road north toward Pawnee. Foes can’t usually reach off-road locations, so try heading onto rail lines, through industrial areas, and anywhere that isn’t a tarmac road.
70. District Fleeing
If you’re fleeing faction members and a police helicopter isn’t following you, accelerate strongly and flee the district, moving directly along the freeway to a different district location. Use the fastest vehicle you can, and seek hiding spots when you get there.
71. Under the Overpass
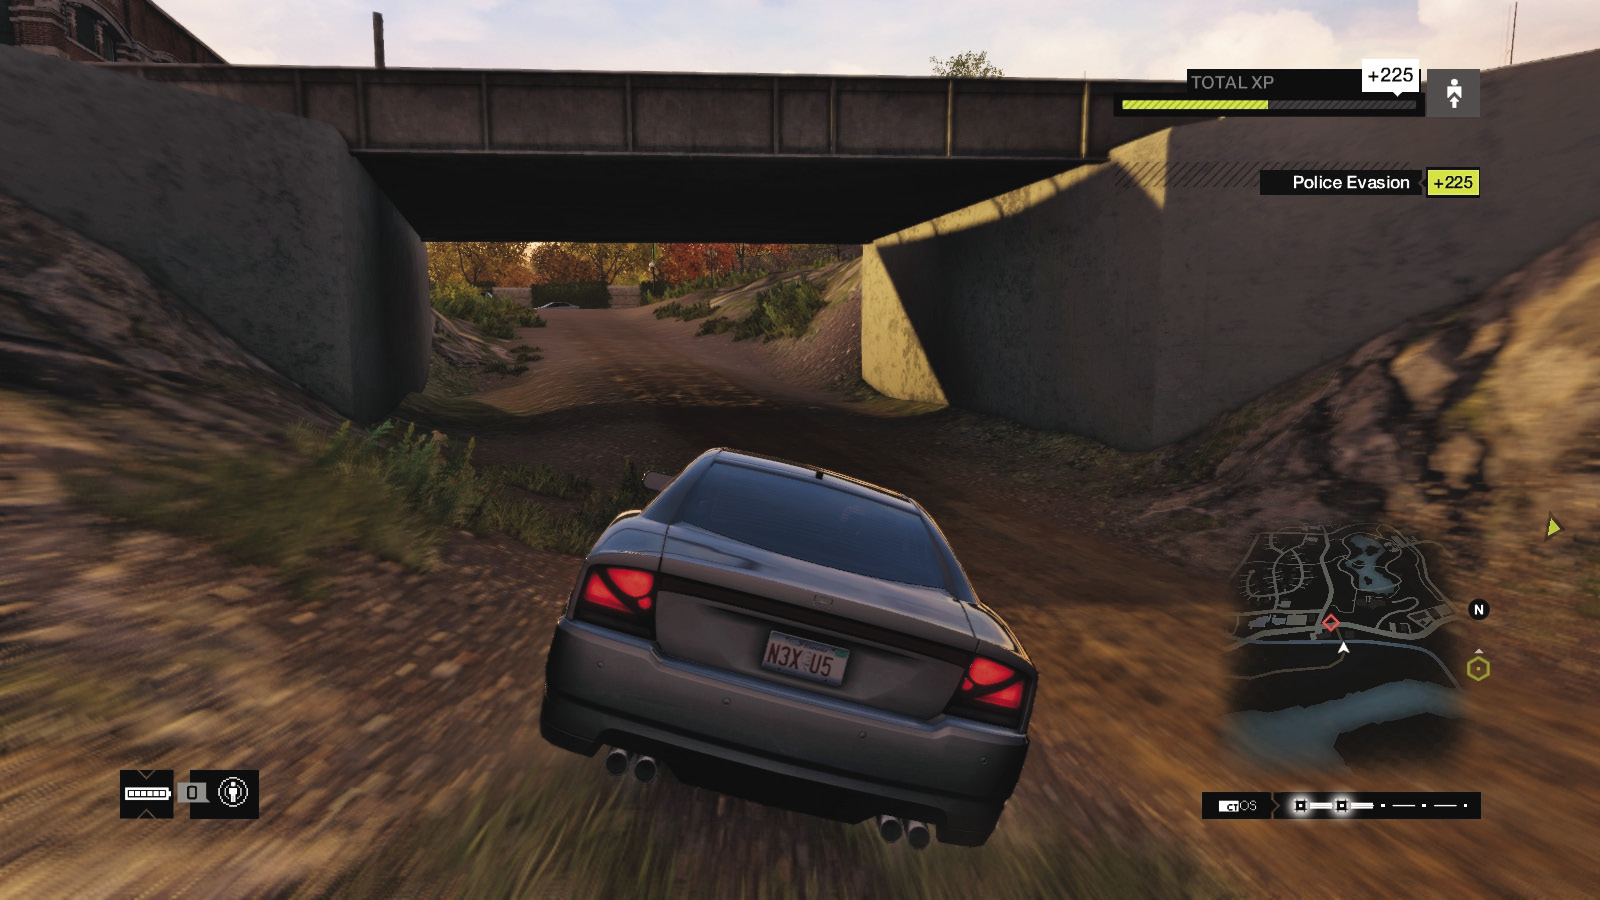
Even with the largest police presence around, if you have enough of a head start and can find an appropriate area (usually with grass and hills rather than at the end of a road), head under a freeway overpass and hide in your vehicle. The enemy will try to seek you out, but sit tight and they usually give up. Police helicopters usually lose you here too.
72. A Change in Height
Tour the city thoroughly, especially the areas immediately around a location where you know you’ll be fleeing from. Drive up into a garage or descend into the traffic tunnels under the Loop or Mad Mile, take a ramp that shoots you onto the L-train tracks, get on a mountain trail above Pawnee, or access the train track across Parker Square. Fleeing foes using untoward routes is an excellent idea if you can get there.
73. Into the Water
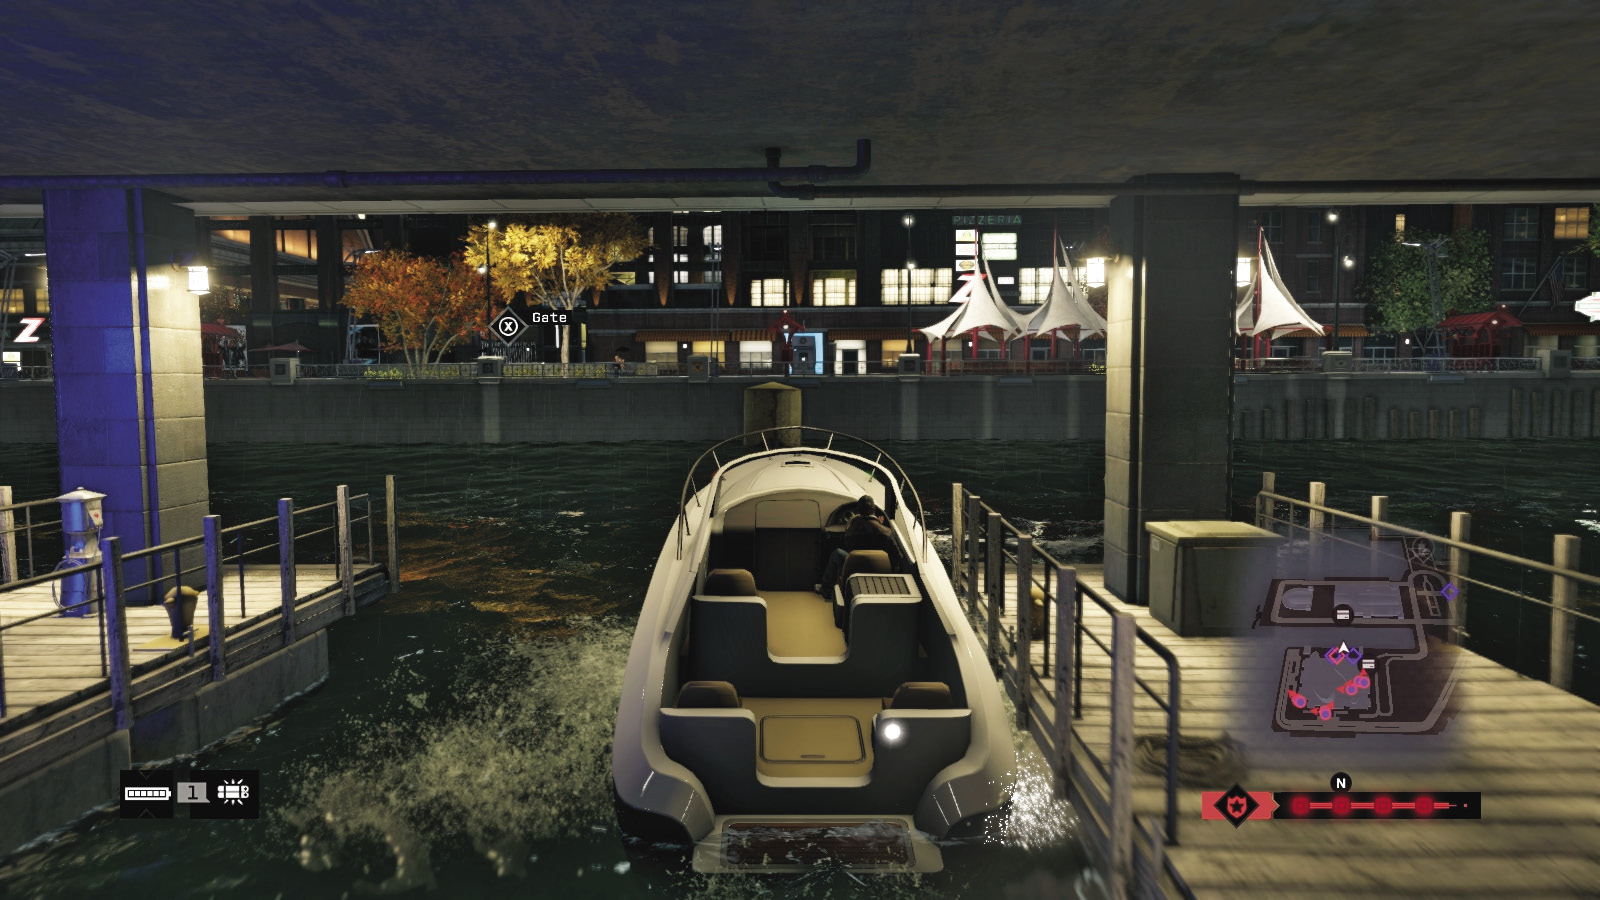
Got a load of cops or thugs on your tail? Then head to a jetty and locate a water craft. Speed out of the heat radius and easily complete your escape plan. Just be sure the jetty has a boat, as swimming for it usually gets you shot or tailed by a chopper.
74. Eyes off the Sky
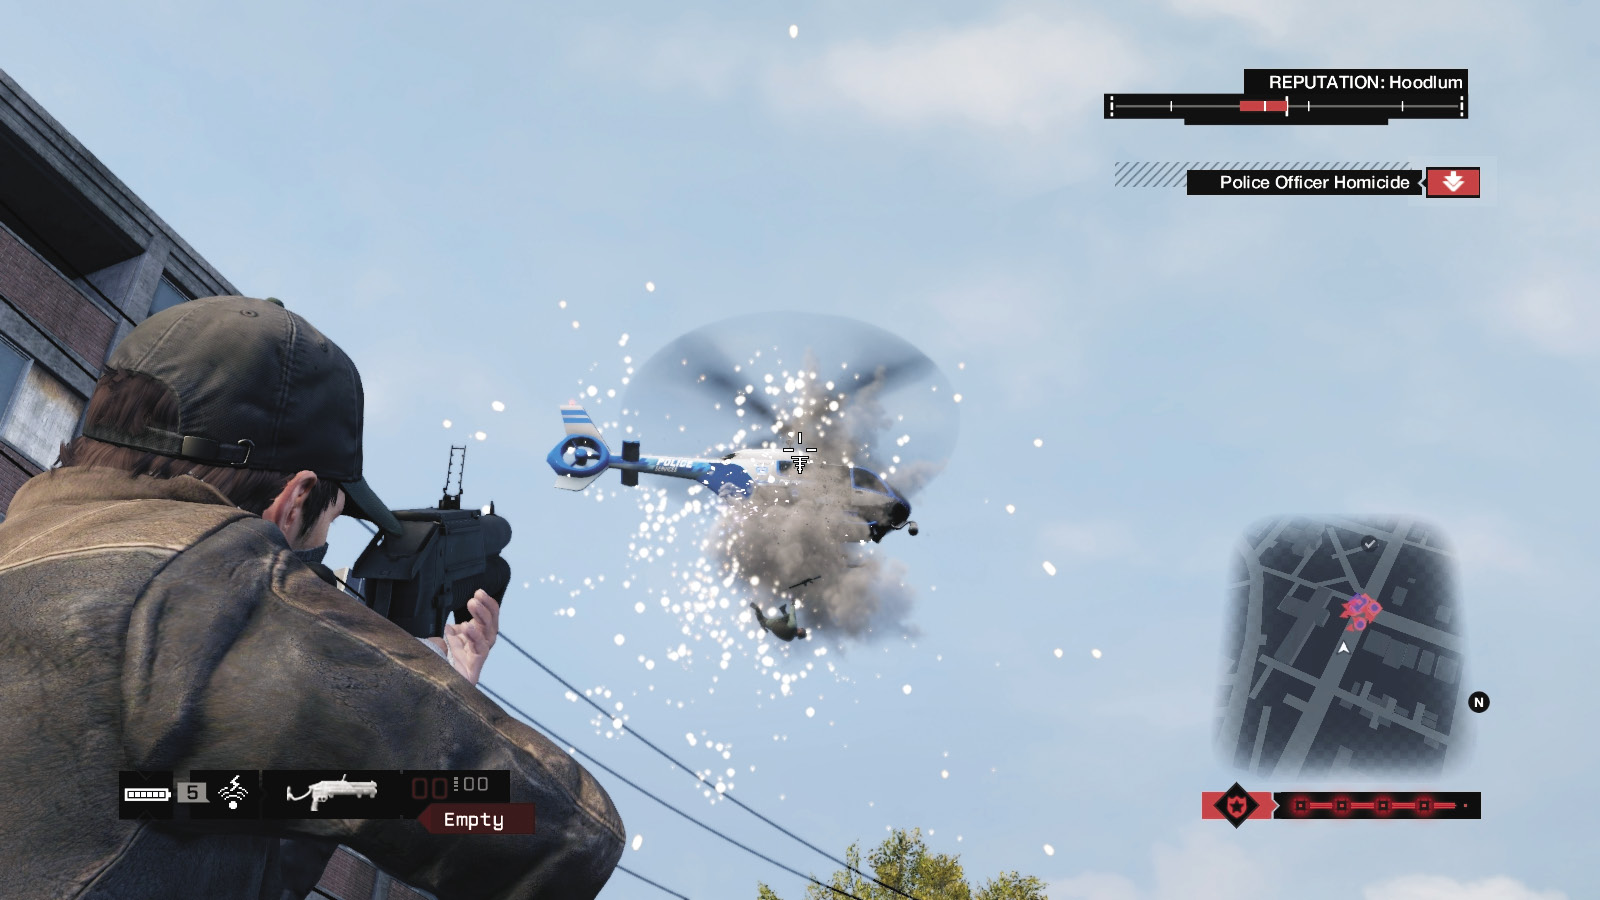
Are the cops chasing you with a police marksman taking potshots at you? Then you can wait for the chopper to leave or you can fight back, shooting the marksman, using Focus to help you aim. Then get back in the vehicle and flee, hampering the police efforts somewhat. This is usually more helpful if the chopper has spotted you but ground forces haven’t reach you yet.
75. Jam Coms
This is an amazing crafted item to use, especially during police scanning phases of your escape. You must have this prepped at any time an escape mission is called for; then before you’re spotted, jam the enemy communications and maneuver away from any approaching enemy vehicles. This makes your escapes incredibly easy.
76. Infrastructure Explosions
If your escape plans only involve a minor infraction or two with enemy vehicles, you should attempt to push or shunt them into infrastructure such as ctOS boxes, propane tanks, or stacks of gas canisters, finishing the chase in spectacular style. But don’t hit these explosive scenery pieces yourself!
77. Infrastructure Hacking (Bridges)
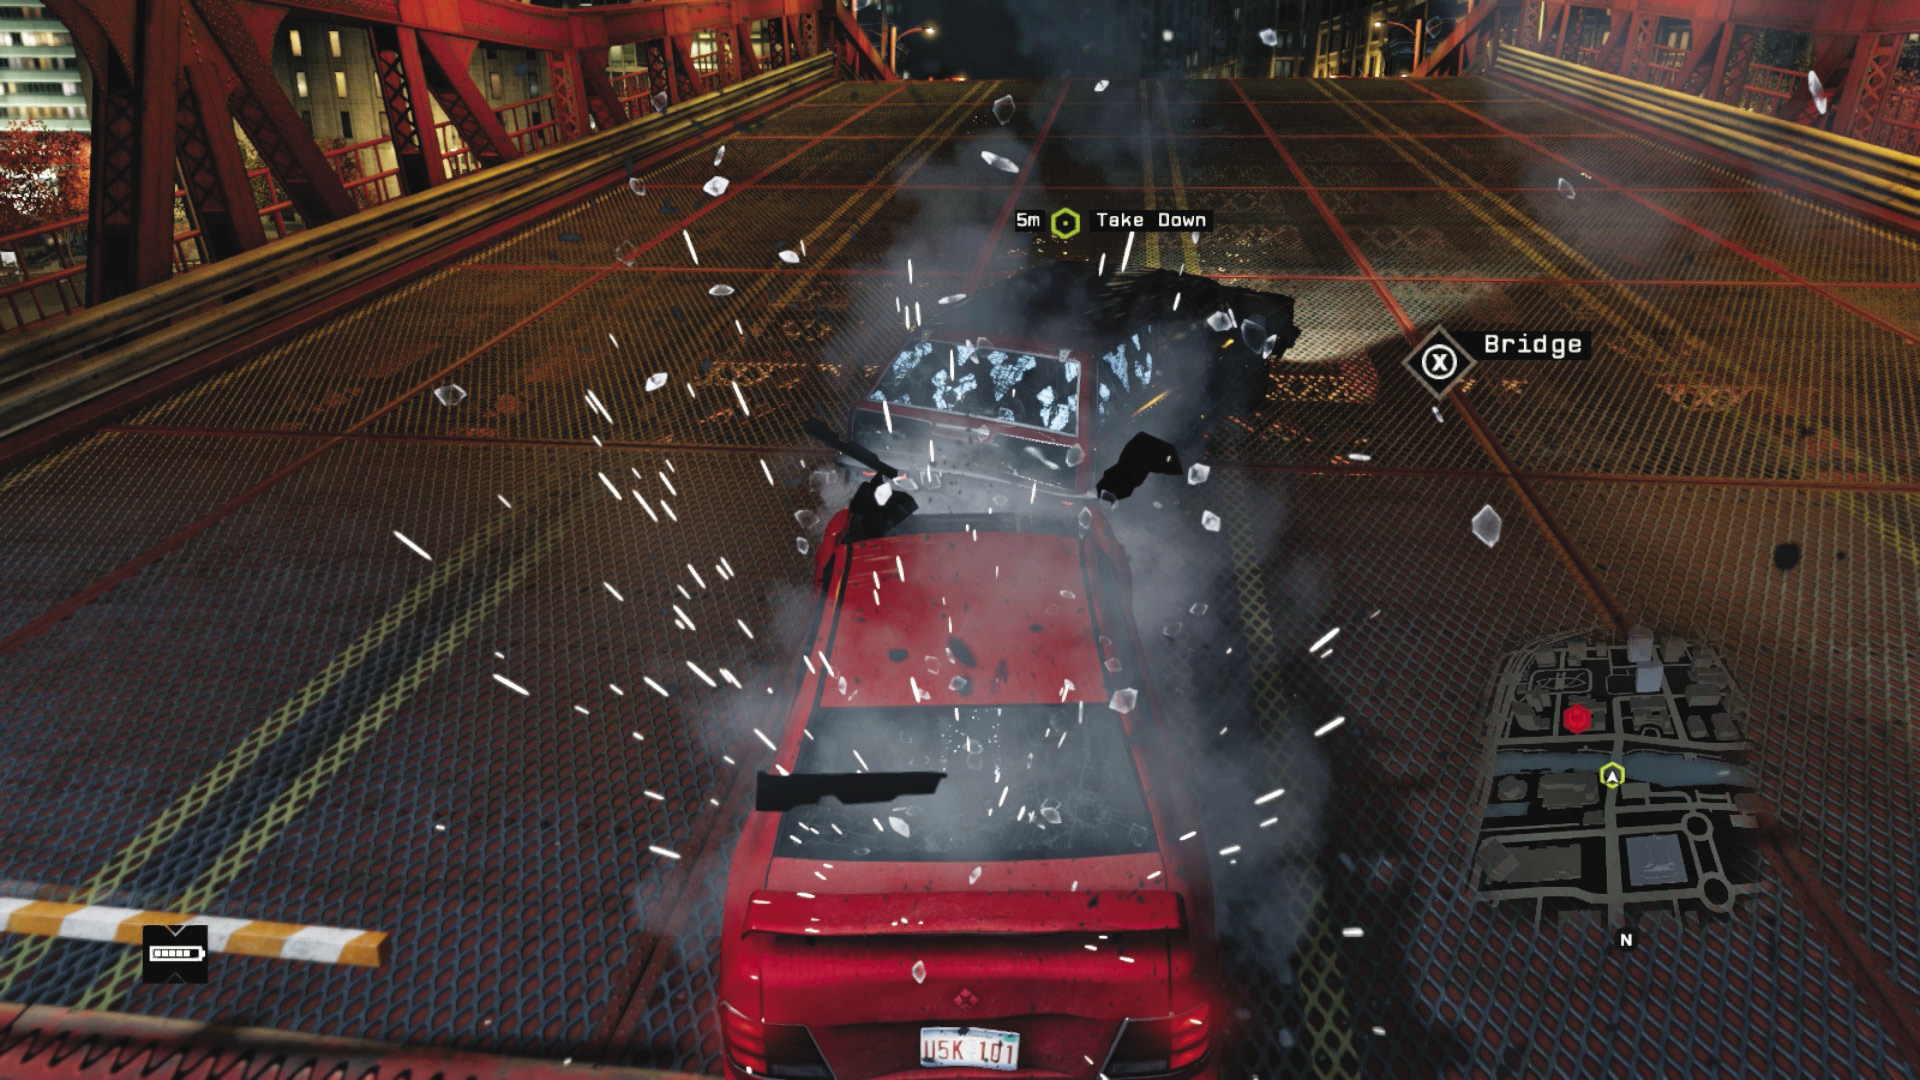
You can hack any type of road bridge that rises, so raise the bridge and jump the ramp—but keep the foe behind you from doing the same. The bridge needs to be rising sharply by the time the foe hits it to thwart him. Vertical-lift bridges are easier, and they can send your foe into the water easily.
78. Infrastructure Hacking (Garages)
Another key plan of escaping is heading into any of the garages that are predominantly in the Loop, Mad Mile, and sometimes Parker Square. Open a garage, enter, and shut the door behind you. Then change floors and wait out the foe; usually this is enough to lose your heat. Escape the way you came, out a door opposite, or off the roof.
79. The Shoot-Out
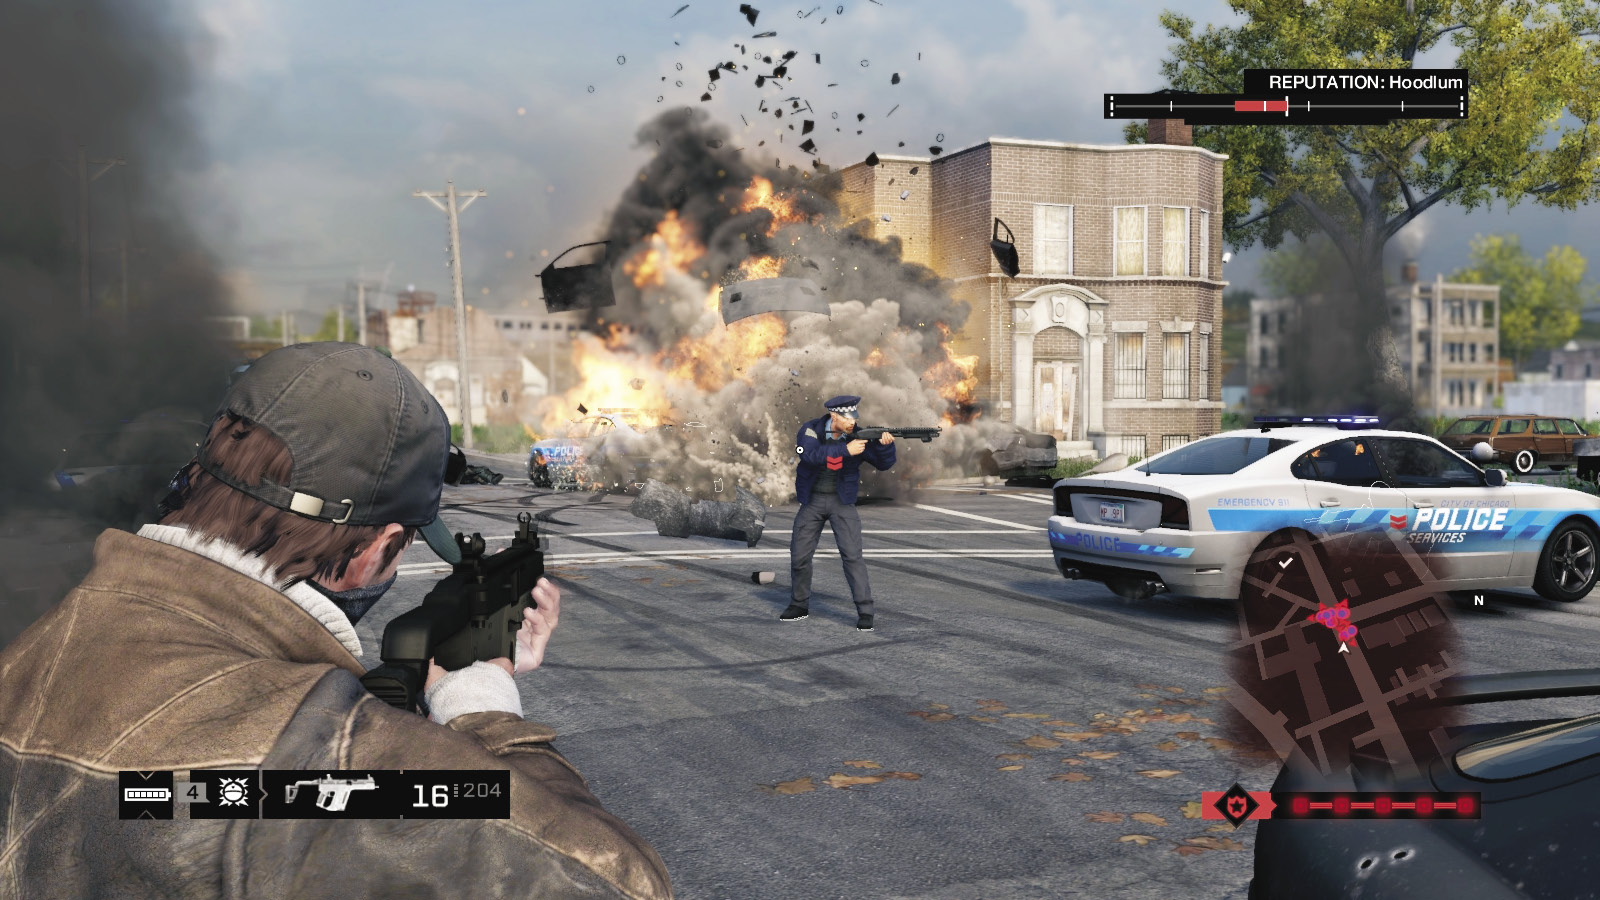
Just because you’re driving and escaping foes doesn’t mean you can’t stop, bring out a favorite weapon, and use a violence tactic discussed previously, like punting a grenade into a pursuing foe. This is a good idea only if one or two enemies are close by, and you have the time to remove them before reinforcements arrive.
/// Chase Tactics
Lastly, there are times when a target on foot simply bolts from you, and you need to chase him. This might end in a vehicle chase if you let the foe go, or your foe may be fleeing from a vehicle you just totalled. So employ any of the following techniques so this doesn’t happen.
80. Melee Strike
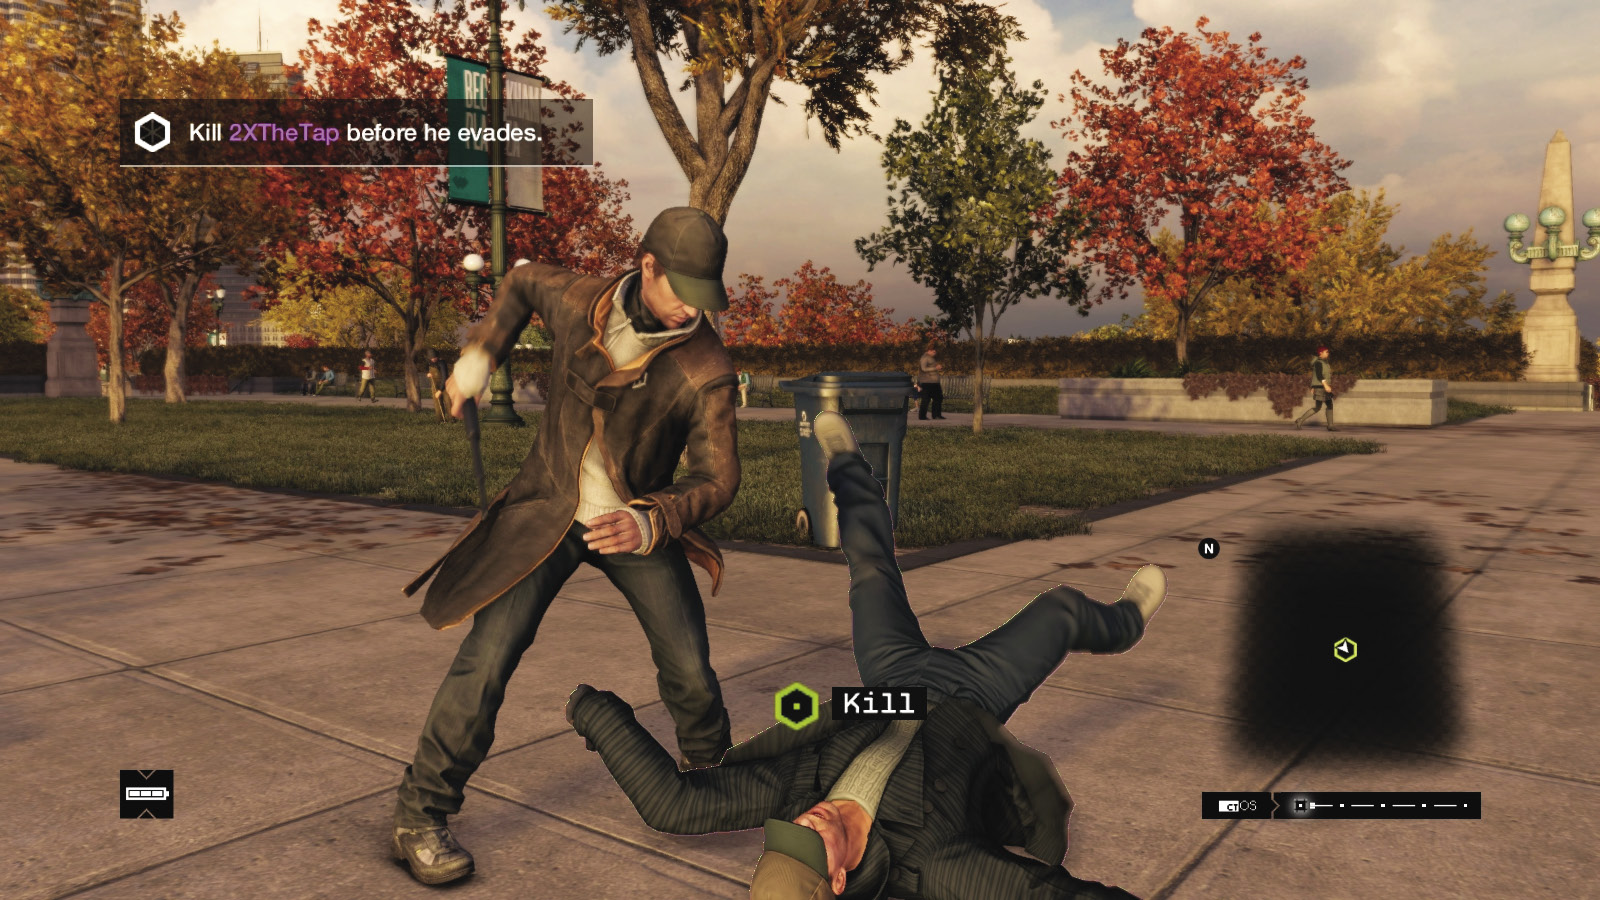
Sprint after your foe without a gun out, and try to narrow the gap between you and him; avoid citizens and obstacles that slow you down. Then leap on him and administer a beat-down.
81. Running Over
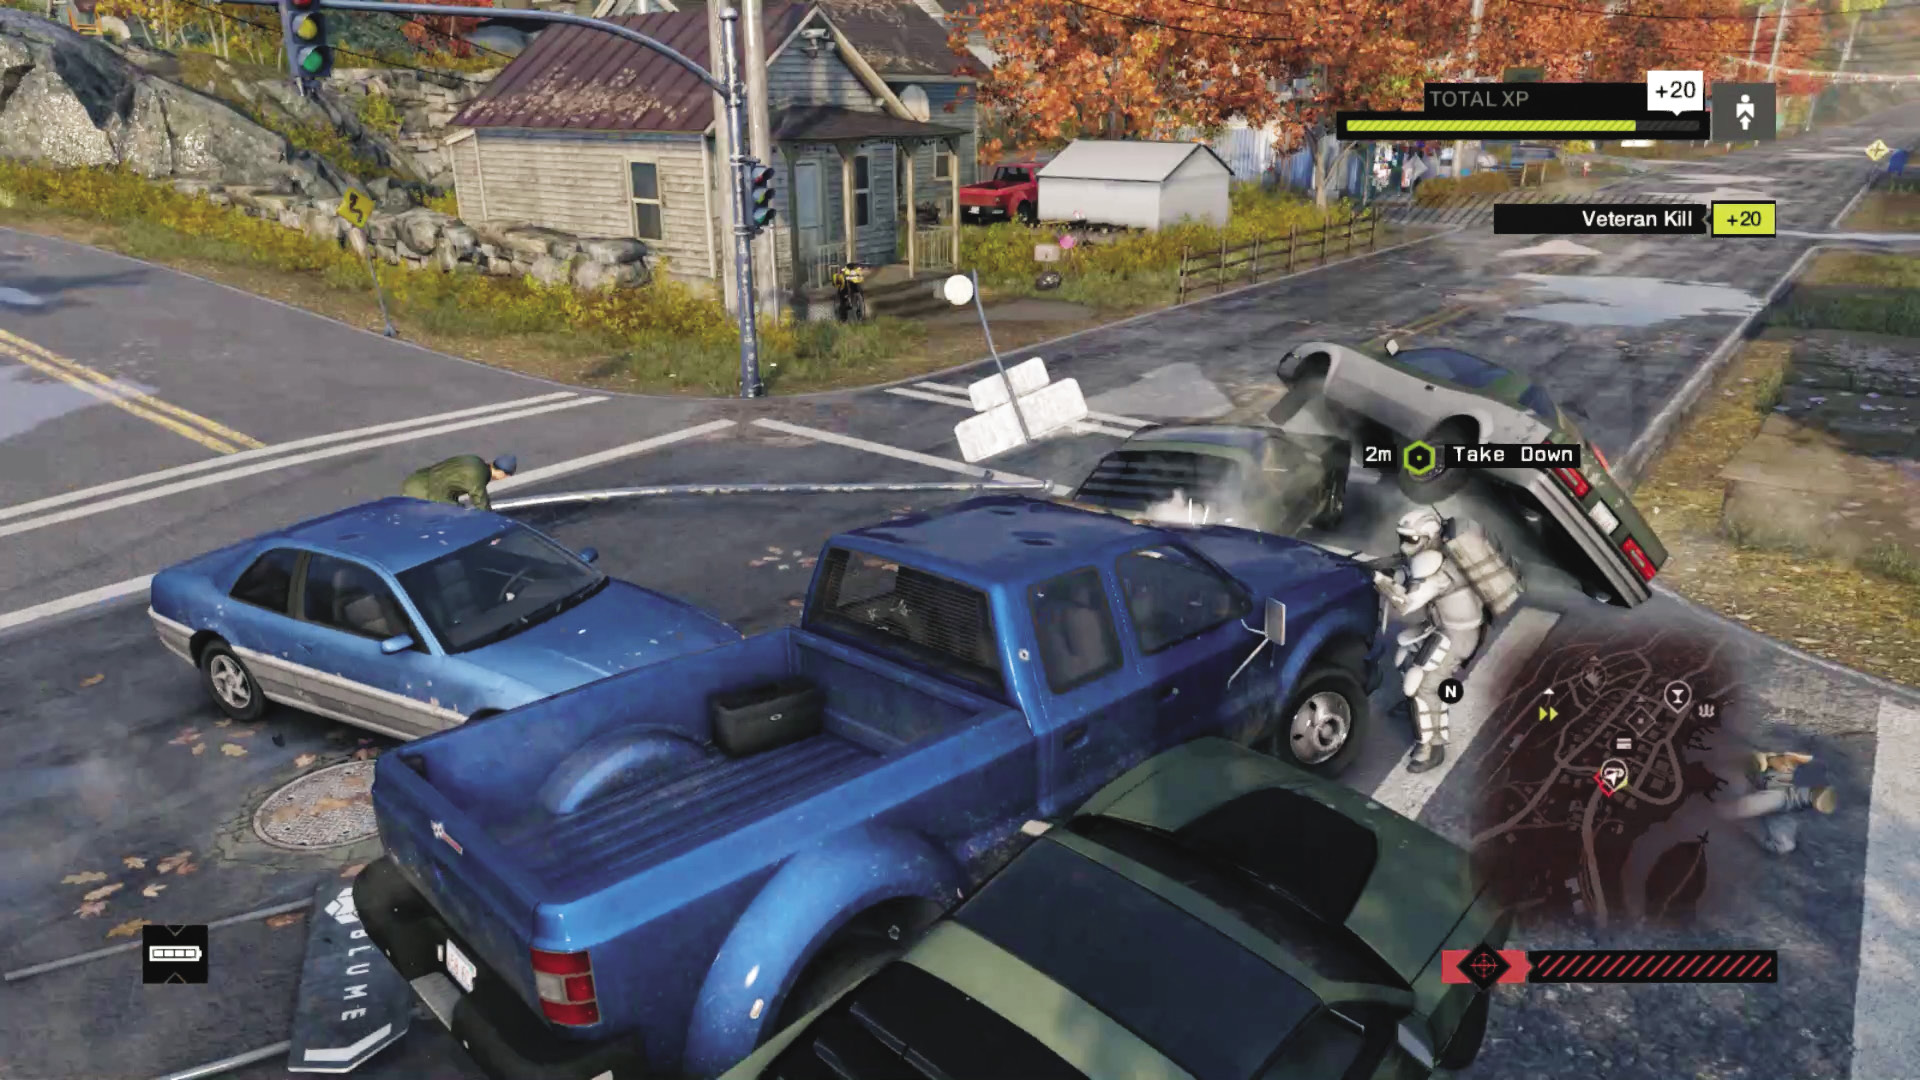
Stay in a vehicle or find one, and drive it directly at the foe. Bikes are great here, as they can fit down narrow alleys that your foe may use. Then run over the foe, which is now an effective technique as you’re chasing someone on foot. If he’s needed alive, get out of your vehicle and melee-strike him.
82. Shooting and Hacking
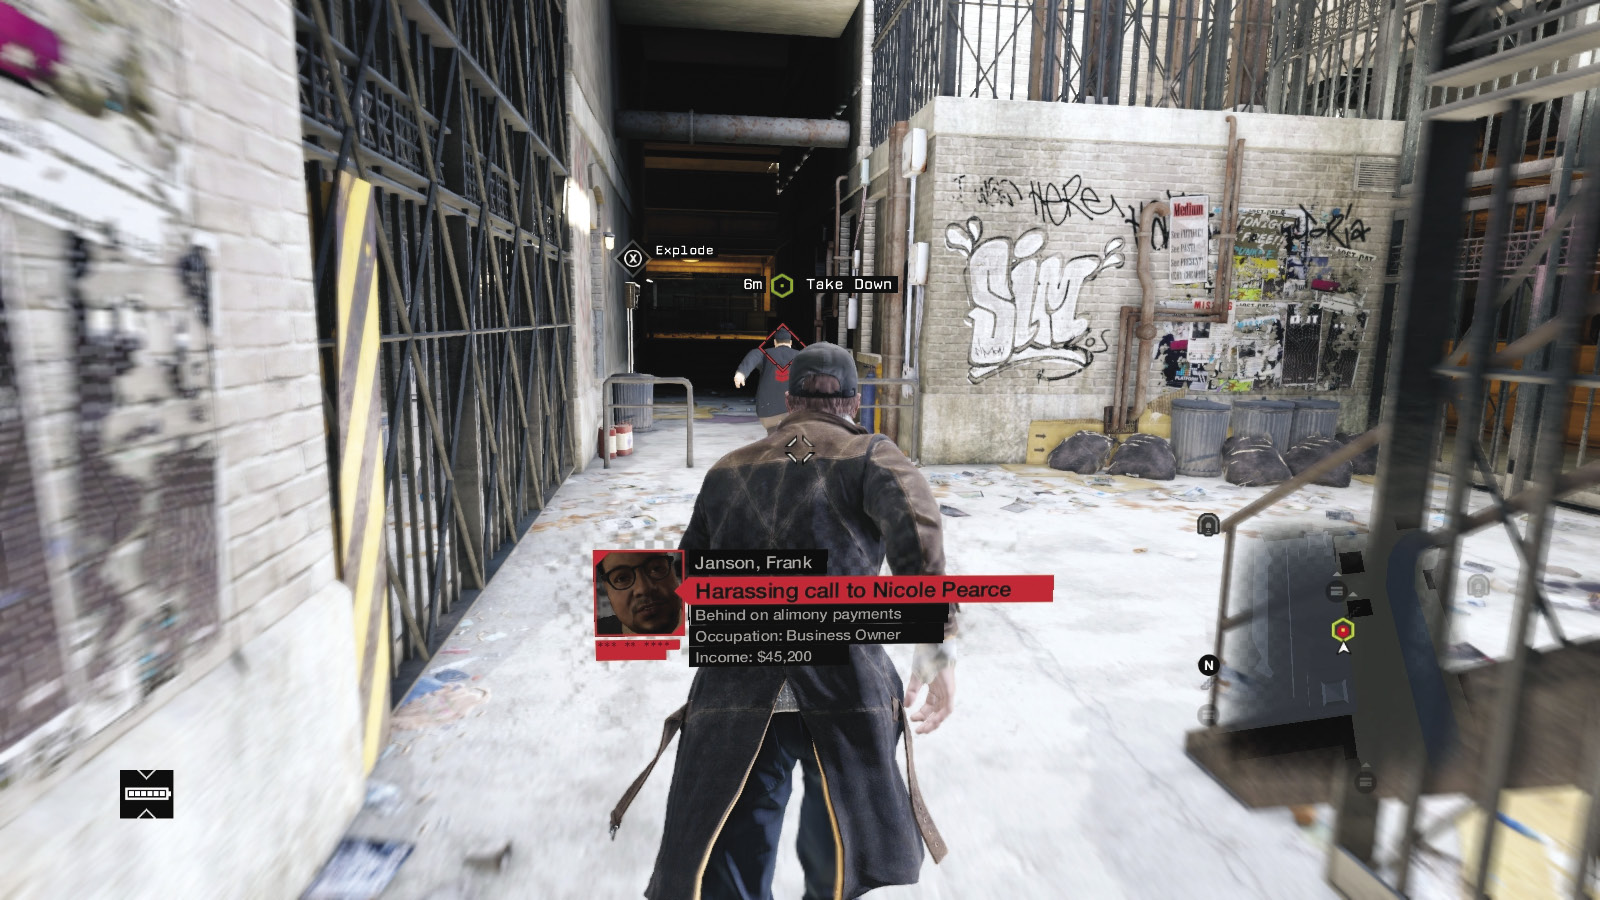
Junction boxes, transformers, regulators, vaults, ctOS boxes—any scenery you can hack or shoot to explode, which also includes canisters and propane tanks, can stagger your foe or kill him outright during a chase.
83. Shooting (and Crafted Items)
Or you can shoot him with a well-aimed and Focus-influenced headshot. Or launch him off the ground with a grenade. You can also quickly lob an IED his way and explode it as he steps on it. Or drive a vehicle with an IED attached to it, get out, and detonate the car bomb near him: There’s a pretty robust set of plans for removing a fleeing foe.
// GUIDE TAGS AND FLAGS
Finally, most of the missions throughout this guide have tags and flags, which offer an immediate visual note of what type of action is required in a particular part of a mission. Explanations on these marks and flags is listed below:
 This icon indicates a course of action should be tried over the others listed. If more than one action is recommended, choose the one with least difficulty, or the one you prefer.
The difficulty rating indicates the complexity or danger of the course of action (and isn’t related to the difficulty of the game), as follows:
- Difficulty:
 Extremely straightforward, with completion assured almost every time.
 - Difficulty:
 Easy, with minor problems to worry you during your excursion.
 - Difficulty:
 Manageable, with a couple of tricky spots to worry about.
 - Difficulty:
 Problematic, with looming threats and difficult maneuvers.
 - Difficulty:
 Dangerous, with multiple threats and completion hard to achieve.
| Action | Description | |
|---|---|---|
| Investigation | On-foot exploration through an area, usually without stealth or violence. Example: Trailing a target to a coffee shop. | |
| Driving Investigation | Vehicular exploration through an area, usually without swift or complicated maneuvers. Example: Following a target in a vehicle through a neighborhood, at a safe distance. | |
| Infiltration | On-foot scouting into a restricted area, where threats and violence are expected. Example: Moving into a faction territory and securing it. | |
| Driving Infiltration | Driving through a restricted area, where evasive maneuvers, chases, and violence are expected. Example: Intercepting a convoy of faction members and neutralizing a target. | |
| Data Hack | Hacking infrastructure or enemies to receive information. Example: Locating a guard with access codes to a server. | |
| Vehicle Chase | Pursuing a suspect with a mixture of defensive driving and lane discipline. Example: Driving after a convoy vehicle after you fail to stop them. | |
| Escort | A precious target must be guided remotely through a dangerous location without being spotted. Example: Guiding a gang member through a territory filled with foes looking for him. | |
| Escape | Extract yourself from a location where the enemies are likely to have knowledge of your whereabouts. Example: Heading out from a compound that has been ambushed by enemies. | |
| Melee Force Likely | Usually relating to stealthy methods of infiltration, unarmed combat with a baton is recommended. Example: Assaulting a faction territory where a specific enemy must be knocked out and not killed. | |
| Lethal Force Likely | Guns, projectiles, and tools should be carried at all times. Expect violence in the form of a firefight, vehicular manslaughter, etc. Example: Assaulting a faction territory where all enemies can be killed. | |
 |
Passive | Tactics presented here involve limited or no enemy interaction; usually stealth and cover options only. |
 |
Passive // Flee | Tactics presented here involve limited or no enemy interaction and the extrication from danger as swiftly as possible. |
 |
Passive // Smart | Tactics presented here involve limited or no enemy interaction; usually stealth with hacking of infrastructure. |
 |
Aggressive // Chase | Tactics are based on the assumption that you are constantly moving after a foe. |
 |
Aggressive // Smart | Tactics involve mainly melee strikes, use of cover, and hacking of infrastructure, without resorting to gunfire. |
 |
Aggressive // Stealth | Tactics involve mainly melee strikes, use of cover, and limited or no use of firearms. |
 |
Aggressive // Violence | Tactics involve the use of weapons, projectiles, and tools to neutralize enemies. |
 |
Driving // Defensive | Tactics rely on minimal damage to your own or any other vehicle in the area. Stealth and hiding are used. |
 |
Driving // Offensive | Tactics concentrate on maximizing the damage you inflict on your opponent by using your vehicle with skill. |
 |
Driving // Smart | Tactics rely on the use of hacking infrastructure to achieve your goal, while driving. |