
The Legend of Zelda: Twilight Princess HD Guide Overworld: Ordon Village; Tranquility Before the Twilight
Task 6: Investigate the Dark Tunnel
Wander into Faron Woods

Speed up from a canter to a charge and steer Epona through the glade, and into a smaller glade with a low fence ahead of you. Spur Epona on, and leap the fence. Make sure you’re dead-on, or Epona refuses to jump. After the jump, you land near Faron Woods Spring.
Ignore the spring for the moment, and take the cave entrance on your right. Gallop through the tunnel-like cavern until you reach a fork in the road. Pull up beside the sign and read it. You need light before you venture farther!

Turn right, and head down the sunlit trail to a clearing. A chap with excellent hair is sitting near his campfire. Dismount and head over to talk to him. This guy’s name is Coro, and he wrote the sign at the junction. He warns you not to venture around these parts without illumination, even in the daylight. After this warning, he gives you a special gift.

Coro: A gatekeeper living in a cottage and eking out a subsistence in the woods, Coro is content with his primitive surroundings. He’s between 15 and 16, and he loves the animals and birds of the woodland. City dwellers refer to him as a “bumpkin.” Coro is the younger brother of Iza and the older brother of Hena. He’s a little timid, but jocular. |
 Lantern
You got the Lantern! It’s a must for lightingdark areas.
|
Set the Lantern to the X button on the Wii U GamePad menu screen and press the X button again to use it. It uses up fuel, so make sure you stand still, and then press the A button to snuff the light out! |

Coro also sells extra Lantern fuel, but you’ll need an empty Bottle (like the one Sera gave you) to hold this liquid. Practice lighting bits of the clearing on fire! Move the Lantern onto the the X button by dragging it to the X button slot on your Wii U GamePad menu screen. Access it by pressing the X button. Press the B button and light the stove. Now make sure you keep a lookout for the Lantern fuel meter under your Hearts. It is slowly depleting, so don’t hold your Lantern for long.
Store
Coro’s Clearing: Lighting Supplies
| Item | Name | Price | Effect |
|---|---|---|---|
|
|
Lantern |
Free |
Lights your way in the dark |
|
|
Lantern Refill |
20 Rupees |
Refills your Lantern |
|
|
Lantern Fuel |
100 Rupees |
Refills Lantern completely; fuel needs a container |


 Lantern Fuel
You got Lantern fuel! It refills your Lantern if you select it, then press the button you assigned it to.
|
Use your Lantern sparingly. Refill the Lantern only when it’s really low on fuel because any excess liquid is wasted. It is more cost-effective to fill the Bottle and refuel during an exploration, so empty it of Milk or Bee Larva, and fill it with Lantern fuel. |
After you light the stove, and Coro congratulates you, move to one of the two unlit torches on the clearing’s opposite side. Practice your lighting skills by waving the Lantern at both of them. When you’re done, put the Lantern away (stand, then press the A button).

Optionally explore the clearing. Currently, the place is a dead end. At the clearing’s northern end is a vine-filled gate preventing your progress. On the west side, a boulder stops your path. Head back to Coro.

If your Lantern is near full, and you’ve bought more fuel and filled your Bottle, it’s time to investigate that dark, dank tunnel! Head to the long grass and sign, and bring out your sword. A Deku Baba plant rears up and tries to strike you! Fight back, then enter the cave, or head back to your house.
Deku Baba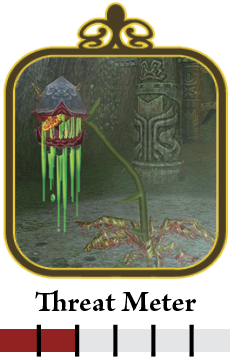 The Deku Baba is a weed that’s grown out of control, and it hungers for anything nearby, including you! Fortunately, it isn’t hardy when struck by a sword, and your makeshift weapon is adequate for the job. ZL target the Deku Baba, and slice it with a couple of well-timed strikes or a spin. It collapses, and you can open the head for Deku nuts, which you can use with your Slingshot.  This large man-eating plant with a vicious mouth needs battering with something sharp. Pulverize it with your sword.  |
Missing Links
1. Grass, Trees, and Rock Inspection
Inspect the first and second glades in Faron Woods, plus the spring and Coro’s clearing. You’ll get Rupees, Hearts, and other items from horseback or by rolling into trees, picking up rocks, and sword slicing through the grass.
2. Coro’s Clearing: Scarecrow Tactics, and Low Ramp

Investigate the area southeast of where Coro sits to get more practice time with a scarecrow. A ramp leads up to a corner and an upper window into Coro’s house, but you can’t reach there for the moment.
3. Coro’s Clearing: Deadheading Flowers
You’ve tried slicing through the long grass with your Wooden Sword, but those small patches of white flowers are impervious to your swings. However, if you use the spin attack, you’ll deadhead the flowers. This is the only way to cut into them!
4. Inside the Hut
Coro is a messy little pup, as a quick peek inside his home will tell you. Garbage, old lanterns, drapes, and other debris is scattered about here. Unfortunately, none of it is useful.
5. Dark Tunnel Entrance: Spinning in the Grass

The Dark Tunnel entrance is the best spot to execute a few good 360-degree spins, as the amount of grass you cut is more than with slashing. Grab those Rupees!
|
You now have illumination! Remember the pitch-black cellar of your treehouse? This is the earliest opportunity to see what’s down there. There’s a better time to investigate your home in a few minutes, but if you must know what’s down there, read on! |
Returning to Link’s House: Basement Investigation
Head to Ordona Province and your treehouse, enter it, and run to the ladder leading to the dark basement. Remember to equip your Lantern! Step forward and turn your Lantern on. The room illuminates, revealing a chest ahead. Open it! The prize is well worth it. Now head back to the Dark Tunnel.

Overworld Chest #2:
Purple Rupee (50)
 Purple Rupee
It held a Purple Rupee (50)!
|
This is the first time you receive a purple Rupee, worth 50 green Rupees! |
Missing Links
1. Link’s Looking Lovely

Before you leave, check out the basement more thoroughly. Amid the supplies and debris is an old mirror. Step up to it to inspect yourself. (Push the Right Analog Stick in for a close up!)
The Dark Tunnel

After you defeat the Deku Baba, you can enter the Dark Tunnel. Note the suspicious patch of earth to the gate’s side. Don’t worry about it now. There’s also a play Wooden Sword. It’s Talo’s and you can’t pick it up, so enter the cave tunnel.

Inside, the cave is gloomy, so edge forward and press the X button to swing your Lantern near a torch, lighting it. Put your Lantern away to conserve fuel. Optionally slash the nearby grass for Hearts and Rupees before you continue. Up ahead, you can hear a squeak and flapping!
Keese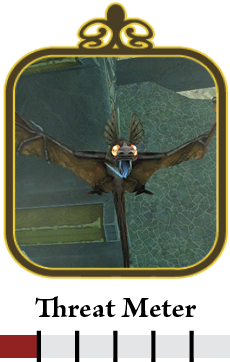 The Keese is a vicious little airborne rodent who loves to swoop and nip at you. Retaliate in one of two ways. If you spot a Keese (or a group) sleeping upside down on a cave ceiling, use your Slingshot and target each one. Close in to auto-target for easier takedowns. If one is attacking, target with the ZL button, then swipe or jump and swipe. You can easily slay them. You can also auto-target incoming Keese with your Slingshot, but you may miss.  The Keese is a brown bat with piercing yellow eyes. It’s more of a nuisance than a threat. Swipe once to keep it at bay.  |

Engage the Keese, then run to the next torch and light it with your Lantern. You have plenty of fuel left, so keep the Lantern out, produce your sword, and head up the tunnel. As it bends to the left, a Deku Baba rises to scare you. Battle back with sword swipes!

Beyond the Deku Baba is a web a Skulltula (a giant arachnid you heard adventurers tell stories about) spun. It’s blocking your path, so wave your Lantern at it, and it burns up quickly. Press on, heading around the snaking corner, to encounter a Rat!
Rat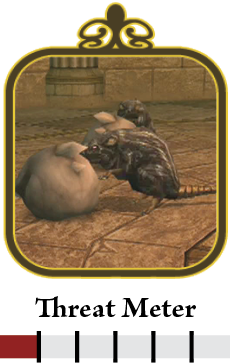 Rats are the least of your worries on this adventure. Listen for them squeaking, produce your sword, and press the ZL button to target. This works well because you’ll face your target even in the darkness! Slice or jump in and slice.  Rats are scuttling creatures who live in shadows and emerge to give you a nasty nip. Return the favor with one sword slice! |
The Rat was guarding a junction in this Dark Tunnel. Swipe the torch and put your Lantern away for a moment. Interestingly, there are two suspended pots and the entrance to a side tunnel and two more behind you. Shoot them with your Slingshot to retrieve a total of 12 Rupees.


Investigate the side tunnel on the left wall, and bring out your Lantern and sword as you enter this dark place. A Deku Baba halfway up here needs trimming! Then immediately slice into a Keese. Remember that you can also mow the grass with your blade, too!

The side tunnel ends abruptly, but don’t head back until you light the torch and check out the object next to it. This is a small chest, but it contains a few Rupees. Kick it open, then head to the junction and make a left. Slicing grass on the way yields a Heart.
Overworld Chest #3:
Yellow Rupee (10)

Bring the Lantern out and burn through a large web. This is the final part of the Dark Tunnel, and you can see the forest ahead of you. Dash out, and remember to put away your Lantern (stand still and press the A button).