
The Legend of Zelda: Twilight Princess HD Guide Overworld: Ordon Village; Tranquility Before the Twilight
Task 3: Rescue the Cradle from the Monkey
Monkey Business: Ordon Village Objectives
You awaken the next morning. Three children shout to you from in front of your house. Optionally, you can peer through your upper window at the view.
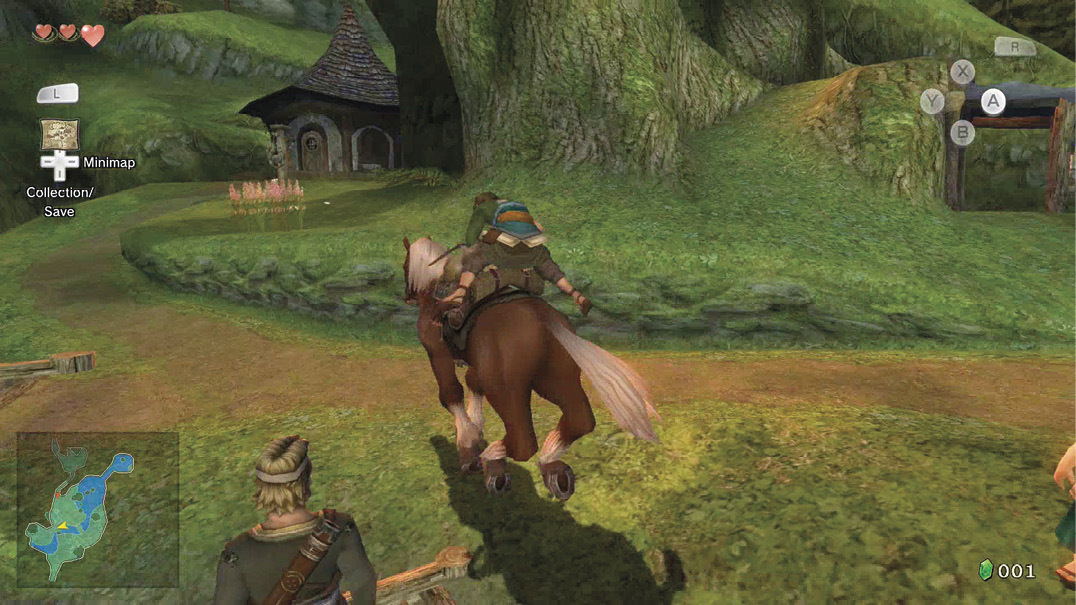
Head down two ladders to the main floor, and exit your home. Beth is here along with two young tykes, Talo and Malo. Talo explains with glee that there’s a Slingshot for sale at the store!
Leave those three to argue, and talk to Colin, who’s tending to Epona near your house. He’s finished the Fishing Rod, but you’ll need to find Rusl to get it.
Talo: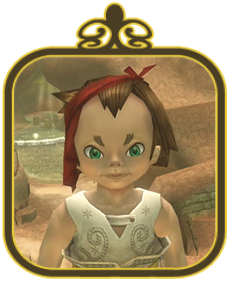 He is between 8 and 11 years old, and shares similar features with his mother and father, Jaggle and Pergie. He’s Malo’s elder brother. Talo is a scamp who longs for a chance to receive sword-play instructions from you. Immature, even at this age, Talo also looks down on the shy Colin. |
Malo: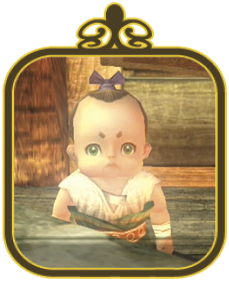 The youngest boy in your village, Malo is the child of Jaggle and Pergie, and Talo’s brother. Oddly mature, especially when compared to his overly excitable brother, Malo is only around 4–6 years old. He seldom speaks, but when he does, he speaks incisively and sternly as if he were an adult. Malo is a true champion of commerce and hopes to run a successful store one day. |
Missing Links
Along with the squirrel-watching, horse-inspecting, scarecrow-targeting, and grass-running, there are a few other matters to optionally watch for while you’re here:
1. The Machinations of Malo

That odd-looking Malo keeps talking in a low voice, with (often hilarious) ideas that belie his apparent age. This chap may be cute, but he’s a master of cunning. Follow his requests and you may land a prize worth wearing…later into your adventure!
2. The Five Rupee Rock

One of the rocks, hidden in the middle of the patch of long grass behind where Epona stands, awards you with a blue Rupee (5), multiple times!
 Blue Rupee
You got a blue Rupee (5)!
|
This is the first time you secure a blue Rupee (worth five green Rupees). Unlike the green Rupee, this denomination is large enough to show up as an in-game cutscene. Blue Rupees become more plentiful later on. |
Hive Inspection, and Hawk Summoning

Run down the path to the village, and spot Hanch looking up at the tree above Fado’s house. Head on over and speak with him. He has to restock the store and he has spotted some Hylian Hornets nestled in the branches.

The moaning and groaning doesn’t end there, either! The family cat hasn’t come home since yesterday, and Sera’s in a bad mood. Hanch is thinking the Hylian Hornets might help his situation, as he can at least return to Sera with Bee Larva. Use your free-look and check out the hive.
Free-LookingWhen you want a full view of the area around you (including areas above and below you), enter this viewing mode. Press the Right Analog Stick in to go into Free-Look mode. If you’re stuck, check your surroundings with free-look to help your predicament. |

Keep the hive on your mind, then ignore Fado’s house (it’s locked) and run across to Sera’s Sundries: One-Stop Shopping. There’s a sign to one side and a cat-flap next to the door; you can’t miss it. Open the door, and head inside to meet Sera.
Sera is draped over the table, looking at a Bottle of Milk. She scolded the family cat, and he hasn’t returned. She’s so fraught, she has exhausted herself. Leave the shop; she isn’t in the mood to sell the Slingshot, pot of Bee Larvae, and Bottle of Milk.
Exit Sera’s house and inspect the main sign in town, then inspect every part of the village you can. There’s a wide variety of extra fun to be had (see the Missing Links list nearby). On your way to checking the area out, move to the pumpkin patch. You’ll hear a hollering!

It’s Jaggle! He’s standing on a nearby rock between the waterwheel and Sera’s Sundries. Follow his instructions, and talk to him by pressing the ZL button targeting, then pressing the A button. He asks you to do the same with Talo and Malo.

Jaggle asks you to climb the vine up to the top of the rock he’s standing on. Once you’re up there, he points down to the creek near his house (the one with the waterwheel) at the cat. He wonders if the cat can catch a fish….
|
Talking to folks from a distance saves you time, but ZL targeting is also important for targeting enemies. You automatically face them as well, making combat easier. Learn this technique now! |
Jaggle: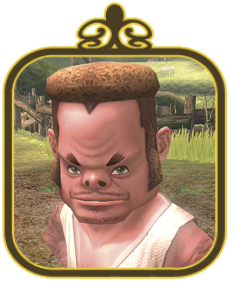 The father of Talo and Malo and Pergie’s husband, he lives in your village and is in his 30s. He’s a farmer, although he frequently works on his hobby: crafting items out of wood. A strong-headed but laid-back fellow, Jaggle doesn’t care about the details, and neglects his duties to take a nap. |
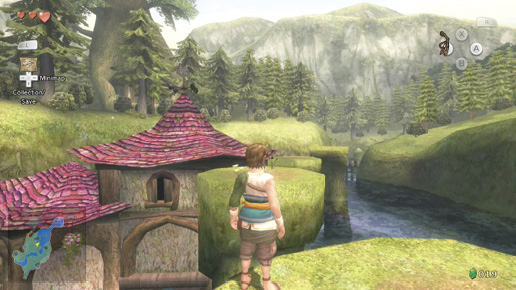
The cat isn’t Jaggle’s reason for getting you here, however. He points to some Hawk Grass growing out of a nearby rock. He tells you to hop across the rocks to check it out. Press up on the Left Analog Stick to jump the gap.
|
When you’re jumping across gaps, you automatically make the leap. There is no “jump” button to press. However, it is wise to re-orientate the camera directly behind you with ZL so you move in a straight line! |
Head to the rock with the Hawk Grass, then pick it and blow it. A hawk (the one you saw from your window earlier) swoops down and lands on your arm. You can now rotate your view using either the Left or Right Analog Sticks or by moving the Wii U GamePad around and use the red target to line up a location for the hawk to fly to when you set him free (with the A button).
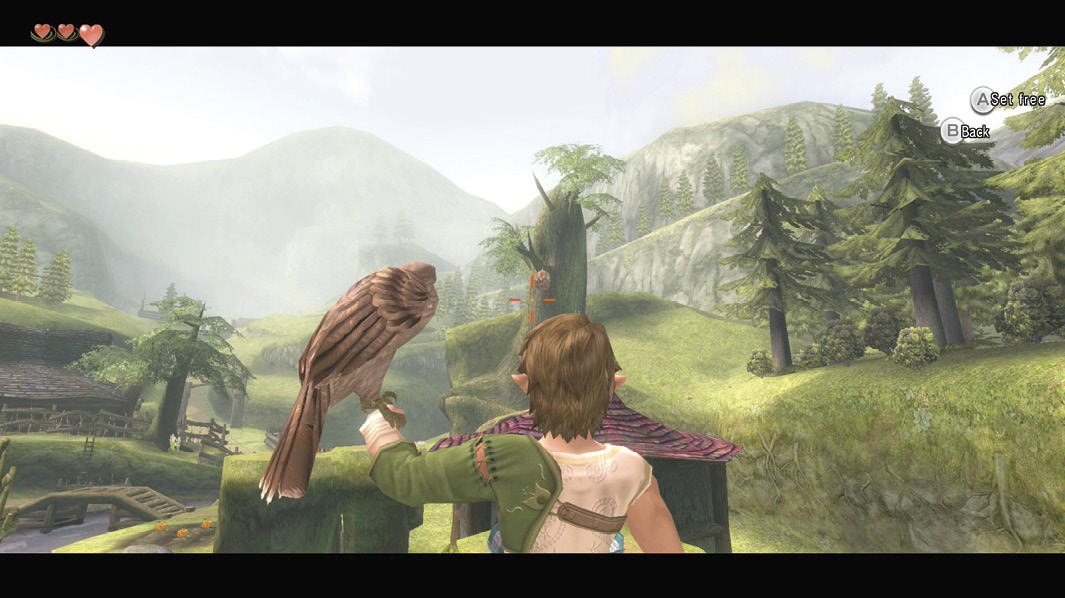
Face the tree above Fado’s house. You can see the Hylian Hornets’ hive from here. Line up the hive and set the bird free. It flies at the hive, knocking it to the ground and smashing it. This is the first method of dealing with the Hylian Hornets.
|
To summon the hawk, locate a patch of Hawk Grass, pick it, and blow on the grass to summon the bird for another target. If the hawk can’t interact with the target, it flaps its wings and leaves. The friendly hawk is useful for striking down troublesome insects and cradle-snatching monkeys. |
Missing Links
The hamlet of Ordon Village is brimming with entertainment to keep you occupied for hours! Try some or all of the following:
1. Sera’s Sundries: What a Cat-astrophe!
Free-look survey the inside of Sera’s store, and you’ll spot not only the three items behind Sera, but her cat in pictorial form. There are three pictures of her feline friend here; two more than of her own daughter, Beth!
2. Cucco Catching

There’s a strutting, squawking Cucco in the area between Sera’s Sundries and the pumpkin patch. You can pick the bird up and run around carrying it above your head! When you’re done, throw (while moving) or place (while halted) it on the ground.
3. Cucco Flying

Another amusing diversion is taking to the skies as the Cucco flaps manically to stay in the air. Leap off a low rock and you’ll glide to the ground in a second. Jump from the roof of Fado’s house, under the Hylian Hornet tree, and you’ll glide for more seconds! This trick comes in handy later, so practice it.
|
You can let go of the Cucco at any time and drop to the ground. If you’re dropping from a great height, press the A button to roll and keep running. If you don’t do this, you’ll land heavily and slow down. |
4. Hawk vs. Cat

When you’ve talked to Jaggle and summoned the hawk for the first time, you may be tempted to launch it down at Sera’s cat. Alas, a battle between bird and feline doesn’t break out.
5. Pulverizing Pumpkins
The village has four pumpkin patches: one by Jaggle’s rock, one near Jaggle and Pergie’s house, one in a fenced area near the mayor’s home, and one next to Rusl and Uli’s house. They each release a different item in each specific location (a Heart, a Rupee, or nothing).
6. Jaggle’s Pumpkin Surprise

Jaggle doesn’t take kindly to complete pumpkin patch devastation; if you destroy all four pumpkins in the patch near the rock he’s standing on, he shouts at you for your lack of vegetable respect.
7. Pumpkin Slingshot Seeds
When you obtain the Slingshot, you can gather 50 seeds from any nearby pumpkin patch. Some pumpkins release seeds, but only after you obtain the Slingshot.
The Monkey and the Cradle

When you learn to summon the hawk, head to the stream in the village center and speak with Uli. Rusl has already left the village with the sword. But Uli seems worried; she’s lost a cradle made from finely woven tree bark. She made it when Colin was born, and she cherishes it.

It’s time to look for the cradle! First though, as you’re near the mayor, head over and talk to him. He’s fearful of Fado handling the goat ranch today. He’s right to be nervous!

A goat bounds down the path toward you both. It’s up to you to stop it! Move left and right so you’re blocking the goat’s path, then grab it using the A button. You automatically swing it around, throwing the goat to the ground.
The mayor thanks you for stopping the goat. If you try to enter the mayor’s house, he tells you Ilia is inside, working like crazy on something. You can’t disturb her, so head toward the house with the waterwheel on the side of it.

Enter the home of Jaggle, Pergie, Talo, and Malo and after optionally inspecting the residence, walk over to Pergie and talk to her. She says Jaggle’s probably asleep somewhere (he’s actually on that rock), and he’s making a shield for Rusl.
|
The Wooden Shield in their home sure looks familiar. Too bad you can’t claim it…yet! |
Pergie: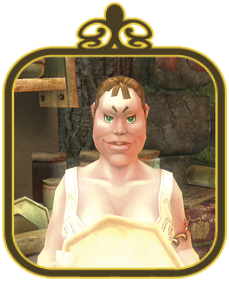 The mother of Talo and Malo, Pergie is married to Jaggle and is in her 30s. Due to her slothful husband, she’s always working and constantly struggling to deal with her mischievous sons. But, although she’s tough, she loves and supports her brood. |

Head out of Pergie’s home, and climb up on the rock where Jaggle is standing. Hop across the flat rocks, onto the roof of Sera’s Sundries, then to the rock in the middle of the pond, heading northeast. Check the narrow stream ahead.
|
If you move off this final rock with the Hawk Grass on it, you automatically make a graceful dive into the clear water below. |

Optionally, you can investigate the leaping figure atop a rock ahead of you. Dive into the water, and swim up the narrow gap between the hillsides. As you close in on the figure, you can hear eeping and monkey calls. It’s the cheeky monkey!

Swim right and clamber onto the pond-side bank. That monkey is leaping up and down, carrying Uli’s cradle. This will not do! Optionally inspect the rocks for Rupees (one has a blue Rupee), then swim to the jetty where the cat waits. She runs when you approach her.

Run to the rock on which Jaggle is standing. Return to the end rock, and use the clump of Hawk Grass to summon the hawk. During the cutscene, carefully look for the 10-Rupee piece. It’s on a tree somewhere. You’ll get that in a moment.

You can get the cradle thanks to the hawk! All you need now is a lady who’s a fan of intricate woven furniture.

Although you can’t hit the Hylian Hornets from here, you can strike something equally important: that pesky monkey! You can’t attack or approach him from the ground or water, so aim and send in the hawk. The bird steals the cradle back from the monkey, and drops it at you. You catch it. Now return (carefully) to Sera’s roof, and drop down to the grass below. You can fall into the pond, but you need to push the cradle to shallow water.

Head toward Uli’s location and give her the cradle. She’s thankful and realizes she needs to give you something. She wants you to accompany her to her home. Follow slowly behind, or run up and around to the front door.

Uli presents you with the rod Colin made. It is simple (it lacks a reel), but finely crafted. Set it to the Y button on your Wii U GamePad menu screen. When it’s equipped, press the Y button to hold it, then press it again to cast your line into the water. Press Y once it’s in the water to reel it in.
 Fishing Rod
You got a Fishing Rod! It’s simple and has a bobber.
|
This is your first “real” item! Many items stay with you throughout your adventure. Some are upgraded. Others are stolen, or downgraded! Your items are accessed on the Wii U GamePad menu screen. |
Missing Links
There are still more interesting asides to find around in this village. Why not try the following, while you look for the cradle?
1. Rusl and Uli’s House: One-Eyed Rocking Horse

After speaking with Uli, run up to her house behind her and up the path to the right, and open the door. Inside, amid the finely woven cushions and well-made sofas is a scary-looking rocking horse with one eye! This must be Colin’s.
2. Rusl and Uli’s House: Wall Art and Equipment
Survey the room (with the Left Analog Stick to notice a piece of wall art drawn by Colin showing the family (is the second child you?), a Fishing Rod, and a helmet and bladed implement. Unfortunately, none of it can be taken.
3. Rusl and Uli’s House: The Pumpkin Patch and Dirt Patch

Head outside, and optionally devastate the two pumpkins growing at the dwelling’s side. A patch of earth near the stacked logs looks like it could lead somewhere, if you could dig it up. Hmmm….
4. Frogs, Fish, and Rupees in the Stream

Head down to the stream below Rusl and Uli’s house, and wade in. Turn right and at the end of the stream are a couple of Rupees that are easily missed. There are also tiny frogs leaping near the stream, and fish in this area.
5. Goat Petting
After you stop the goat from charging, pet it when you’re close, and it calms down, bleating with delight!
6. Jaggle and Pergie’s House: Rupee Collecting
Don’t forget the pumpkin patch, tree to roll into, grass to inspect, and rocks to throw near the picnic table and waterwheel home of Jaggle and Pergie. You can watch tiny birds, too!
7. Jaggle and Pergie’s House:Puppy Love!

An adorable puppy wags his tail and follows you around the house when you enter it. You can pick him up, but unfortunately, you’re cannot leave the building with this playful pooch.
8. Jaggle and Pergie’s House: Straw Dolls
The evidence of the unruly Talo and strange Malo are scattered around the house; a straw doll lies on the floor, and three more are propped on the upper bunk bed if you climb the ladder to check.
9. Jaggle and Pergie’s House: Pumpkin and Pottery

The biggest surprise comes from the pumpkins. There are Rupees in some of the four near the fireplace (the ones on the table don’t break), and there are two pots to smash, too. The one near the chest and shelves gives you five Rupees.
10. Mayor’s House Roof: Up on Top

Get a great view of the village by climbing the ladder near the pumpkin patch leading to Jaggle and Pergie’s house. At the top, head right to claim Rupees from two pumpkins, roll into the tree, then climb the crates and hop onto the roof.
11. One Giant Leap

A long ladder leads up onto the dwelling’s top, and this leads to a narrow roof area with a great prize: a yellow Rupee (10)! Claim it, look around (you can spot the hive), then peer over the edge. You can make the drop to the ground without getting hurt. Don’t forget to roll!
 Yellow Rupee
You got a yellow Rupee (10)!
|
This is the first time you secure a yellow Rupee (worth 10 green Rupees). Unlike the green Rupee (1), this denomination is large enough to show up as an in-game cutscene. Yellow Rupees become more plentiful later. |
12. Ten Rupee Wrangling
While on the upper roof, look to your left, and take the Hawk Grass from the clump at the edge of the roof. Summon a hawk. The hive is too far away to hit, but the hawk is the key to obtaining the 10 Rupee piece you can see on the hillside.

Normally you can’t reach this hillside, but if you locate the Cucco below you on the left side, and aim the hawk at it, the bird of prey grabs it and brings it back to you! Take the Cucco, fly over to the hillside, and claim your Rupee prize! Check the rocks for a five Rupee piece, too!
Author NoteThat yellow Rupee (10) had us stumped for some time. We tried launching the hawk at the Rupee. Nope! We leapt up at the hillside, jumped from the roof. We even shouted at the screen. It didn’t help. In the end, we spotted the Cucco, and all was well. But how would we fare when the puzzles were actually difficult, later in the adventure? It didn’t bode well…. |