Prima Games eGuides
primagames.com Browse Redeem a code Help
The Legend of Zelda: Twilight Princess HD eGuide
Sign in My Guides

Sign in or create an account

We'll email you a link. No password needed, and if you don't have an account yet, the link makes one.

By creating an account or signing in, you agree to our Terms of Service and Privacy Policy.

Have a password?

Had an account on the old eGuides site, or a code from a printed guide? Help and troubleshooting

Sign in with a password

By signing in, you agree to our Terms of Service and Privacy Policy.

Check your email

A sign-in link is on its way. It works once and expires in 15 minutes. Open it and you're in, with an account if you didn't already have one.

Contents

  • Training
    • Link's Moves and Abilities
    • Environmental Effects
  • Weapons & Equipment
    • Weapons & Equipment
  • Amiibo and the Cave of Shadows
    • Amiibo
  • Friends & Fiends
    • Characters
    • Enemies
    • Bosses
  • How to Use This Walkthrough
    • Walkthrough Overview
  • Overworld: Ordon Village; Tranquility Before the Twilight
    • Ordon Village; Tranquility Before the Twilight: Overview
    • Task 1: Enter Ordon Village
    • Task 2: Explore Ordon Village
    • Task 3: Rescue the Cradle from the Monkey
    • Task 4: Remove the Buzzing Threat from the Tall Tree
    • Task 5: Leave Your Home and Explore Faron Woods
    • Task 6: Investigate the Dark Tunnel
    • Task 7: Unlock the Gate to the Forest Temple Woods
    • Task 8: Return to Ordon Village, and Prepare for the Big Day
  • Overworld: A Wolf Howls in the Twilight
    • A Wolf Howls in the Twilight: Overview
    • Task 1: Escape to the Castle Tower
    • Task 2: Gain an Audience with the Twilight Princess
    • Task 3: Find a Sturdy Sword and Shield
    • Task 4: Speak with the Spirit of Faron Spring
    • Task #5: Locate All 12 Twilit Parasites
    • Task 6: Learn Your First Hidden Skill and Enter the Forest Temple
  • Dungeon 1: The Forest Temple
    • The Forest Temple: Overview
    • Task 1: Secure the Second Monkey
    • Task 2: Free the Third and Fourth Monkeys
    • Task 3: Battle the Bad Baboon Named Ook
    • Task 4: Find the Fifth Monkey
    • Task 5: Obtain the Big Key
    • Task 6: Save the Sixth Monkey
    • Task 7: Escape with Monkeys Seven and Eight
    • Task 8: Defeat Twilit Parasite Diabab
  • Overworld: From Faron Province to the Goron Mines
    • The Epic Journey Begins--From Faron Province to the Goron Mines: Overview
    • Task 1: Smell the Scent, Learn the Danger
    • Task 2: Explore the Twilight Village of Kakariko
    • Task 3: Fill the Vessel of Light with Tears from Parasites
    • Death Mountain Trail: Twilit Parasite #10
    • Death Mountain Trail: Twilit Parasite #11
    • Task 4: Find the Location of the White Wolf
    • Task 5: Find Mayor Bo and Learn the Secrets of Sumo
    • Task 6: Defeat King Bublin and His Hordes
    • Task 7: Obtain the Hylian Shield
    • Task 8: Meet Gor Coron and Gain Access to the Goron Mines
  • Dungeon 2: Goron Mines
    • The Goron Mines: Overview
    • Task 1: Locate the Volcano Center and Forge
    • Task 2: Find the First Key Shard from Gor Amoto
    • Task 3: Journey to the Mine Loading Docks
    • Task 4: Obtain the Second Key Shard from Gor Ebizo
    • Task 5: Battle the Feared Goron Dangoro for the Hero's Bow
    • Task 6: Complete the Key Shard from Gor Liggs
    • Task 7: Search for the Great Volcanic Passage
    • Task 8: Change the Fate of the Gorons: Fight Fyrus!
  • Overworld: Journey Through Lanayru Province
    • Journey through Lanayru Province--Pushing Back the Twilight: Overview
    • Task 1: Purchase Some Bombs in Kakariko Village
    • Task 2: Locate and Retrieve All Newly Available Items and Treasure
    • Task 3: Find the Scent of Ilia
    • Task 4: Locate Telma's Bar in Castle Town
    • Task 5: Journey to the Domain of the Zoras
    • Task 6: Restore Warmth to Zora's Domain
    • Task 7: Locate All 12 Twilit Parasites: Face Twilit Bloat
    • Task 8: Learn the Secrets of the Goddess From Lanayru
  • Overworld: Thorough Explorations and Saving the Zora Prince
    • Thorough Explorations and Saving the Zora Prince: Overview
    • Task 1: Thoroughly Explore Lake Hylia
    • Task 2: Learn to Fly by Fowl
    • Task 3: Complete Exploration of Lantern Cavern II
    • Task 4: Thoroughly Explore the Fields and River
    • Task 5: Thoroughly Explore Castle Town and Southern Field
    • Task 6: Escort Telma, Ilia, and Prince Ralis Safely to Kakariko Village
    • Task 7: Obtain the Zora Armor
    • Task 8: Locate All the Underwater Bomb Rocks, Then Enter the Water Temple
  • Dungeon 3: Lakebed Temple
    • The Lakebed Temple: Overview
    • Task 1: Enter the Connecting Bridges, Fight Enemy Lizalfos
    • Task 2: Open the Locked Door in the Hub Chamber
    • Task 3: Open the Floodgate in the First Reservoir Tower
    • Task 4: Locate the Fabled Clawshot from a Bloated Deku Toad
    • Task 5: Open the Floodgate in the Second Reservoir Tower
    • Task 6: Locate the Big Key
    • Task 7: Find Both Pieces of Heart
    • Task 8: Defeat Twilit Aquatic Morpheel
  • Overworld: The Great Hylian Treasure Hunt
    • The Great Hylian Treasure Hunt: Overview
    • Task 1: Journey to Princess Zelda
    • Task 2: Obtain the Master Sword
    • Task 3: Begin to Hunt for Treasure and Imp Poes Across the Land
    • Task 4: Repair the Bridge to Castle Town
    • Task 5: Continue to Hunt for Treasure and Imp Poes Across the Land
    • Task 6: Obtain the Magic Armor
    • Task 7: Continue the Hunt, Enter the Gerudo Desert
    • Task 8: Locate the Entrance to Arbiters Grounds
    • The Great Hylian Fish Hunt
  • Dungeon 4: Arbiter's Grounds
    • The Arbiter's Grounds: Overview
    • Task 1: Gain Entrance to the Grand Ceremonial Hallway
    • Task 2: Locate and Defeat the Second Poe
    • Task 3: Locate and Defeat the Third Poe
    • Task 4: Locate and Defeat the Fourth and Final Poe
    • Task 5: Defeat Death Sword in Battle; Obtain the Spinner
    • Task 6: Obtain the Big Key
    • Task 7: Ascend the Great Spiral Shaft
    • Task 8: Defeat Twilit Fossil Stallord in Combat
  • Overworld: Climbing Snowpeak Mountain
    • Climbing Snowpeak Mountain: Overview
    • Task 1: Locate All Available Items with the Spinner
    • Task 2: Learn the Scent of the Reekfish
    • Task 3: Climb to the Summit of Snowpeak Mountain
    • Task 4: Gain Entry to Yeto's Abode
  • Dungeon 5: Snowpeak Ruins
    • Snowpeak Ruins: Overview
    • Task 1: Try Yeto's Simple Soup
    • Task 2: Locate the Bedroom Key (First Attempt)
    • Task 3: Defeat Darkhammer, Claim the Ball and Chain
    • Task 4: Sample the Superb Soup
    • Task 5: Defeat All Imp Poes
    • Task 6: Remove the Freezard from the Bedroom Ledge
    • Task 7: Locate the Bedroom Key (Final Attempt)
    • Task 8: Battle Twilit Ice Mass Blizzeta
  • Overworld: Return to the Sacred Grove
    • Return to the Sacred Grove: Overview
    • Task 1: Thoroughly Hunt for Items Around Snowpeak Mountain
    • Task 2: Find the Golden Cucco
    • Task 3: Follow and Fight the Strange Skull Kid
    • Task 4: Obtain the Giant Wallet
    • Task 5: Enter the Temple of Time
  • Dungeon 6: Temple of Time
    • Temple of Time: Overview
    • Task 1: Defeat Your First Armos, the Mechanical Guardian
    • Task 2: Unlock the Door in the Central Mechanical Platform Chamber
    • Task 3: Locate the Big Key
    • Task 4: Face the Deadly Darknut in Combat
    • Task 5: Maneuver the Statue Over the Scales of Time
    • Task 6: Collect Both Heart Pieces
    • Task 7: Reach the End of the Crumbling Corridor
    • Task 8: Defeat Twilit Arachnid Armagohma!
  • Overworld: Ascension to the City in the Sky
    • Ascension to the City in the Sky: Overview
    • Task 1: Jog Ilia's Memory with a Wooden Statue
    • Task 2: Assault the Hidden Village; Rescue Impaz
    • Task 3: Restore Power to the Dominion Rod
    • Task 4: Locate All Six Book Characters
    • Task 5: Head to the Heavens
  • Dungeon 7: City in the Sky
    • City in the Sky: Overview
    • Task 1: Enter the Central Fan Chamber
    • Task 2: Obtain the Small Key
    • Task 3: Defeat the Dynafols Duo
    • Task 4: Fly to the Great Wind Tower
    • Task 5: Battle the Aeralfos
    • Task 6: Locate and Enter the Peahat Gardens
    • Task 7: Activate the Fan Turbine In the Central Chamber
    • Task 8: Defeat Twilit Dragon Argorok
  • Overworld: Assembling the Mirror of Twilight
    • Assembling the Mirror of Twilight: Overview
    • Task 1: Obtain All Remaining Chests Using Double Clawshot
    • Task 2: Obtain the Giant Quiver
    • Task 3: Collect All Remaining Poe Souls, Meet Jovani and Gengle
    • Task 4: Assemble the Mirror Shards
  • Dungeon 8: Palace of Twilight
    • Palace of Twilight: Overview
    • Task 1: Obtain the First Sol Sphere
    • Task 2: Return the First Sol Sphere to the Plateau
    • Task 3: Obtain the Second Sol Sphere
    • Task 4: Return the Second Sol Sphere to the Plateau
    • Task 5: Gain Access to the Battlements
    • Task 6: Obtain the Big Key
    • Task 7: Gain Access to Zant's Throne Entrance
    • Task 8: Battle Usurper King Zant
  • Dungeon 9: Hyrule Castle
    • Hyrule Castle: Overview
    • Task 1: Solve the Riddle of the Graveyard
    • Task 2: Defeat King Bulbin in Final Combat
    • Task 3: Exit to the Battlements
    • Task 4: Traverse the Collapsing Chamber of Staircases
    • Task 5: Ransack the Castle's Treasure Trove
    • Task 6: Prepare for Final Combat!
    • Boss Battle! Ganondorf
  • Legendary Checklist
    • Track Your Progress

The Legend of Zelda: Twilight Princess HD Guide › Dungeon 9: Hyrule Castle

Hyrule Castle: Overview

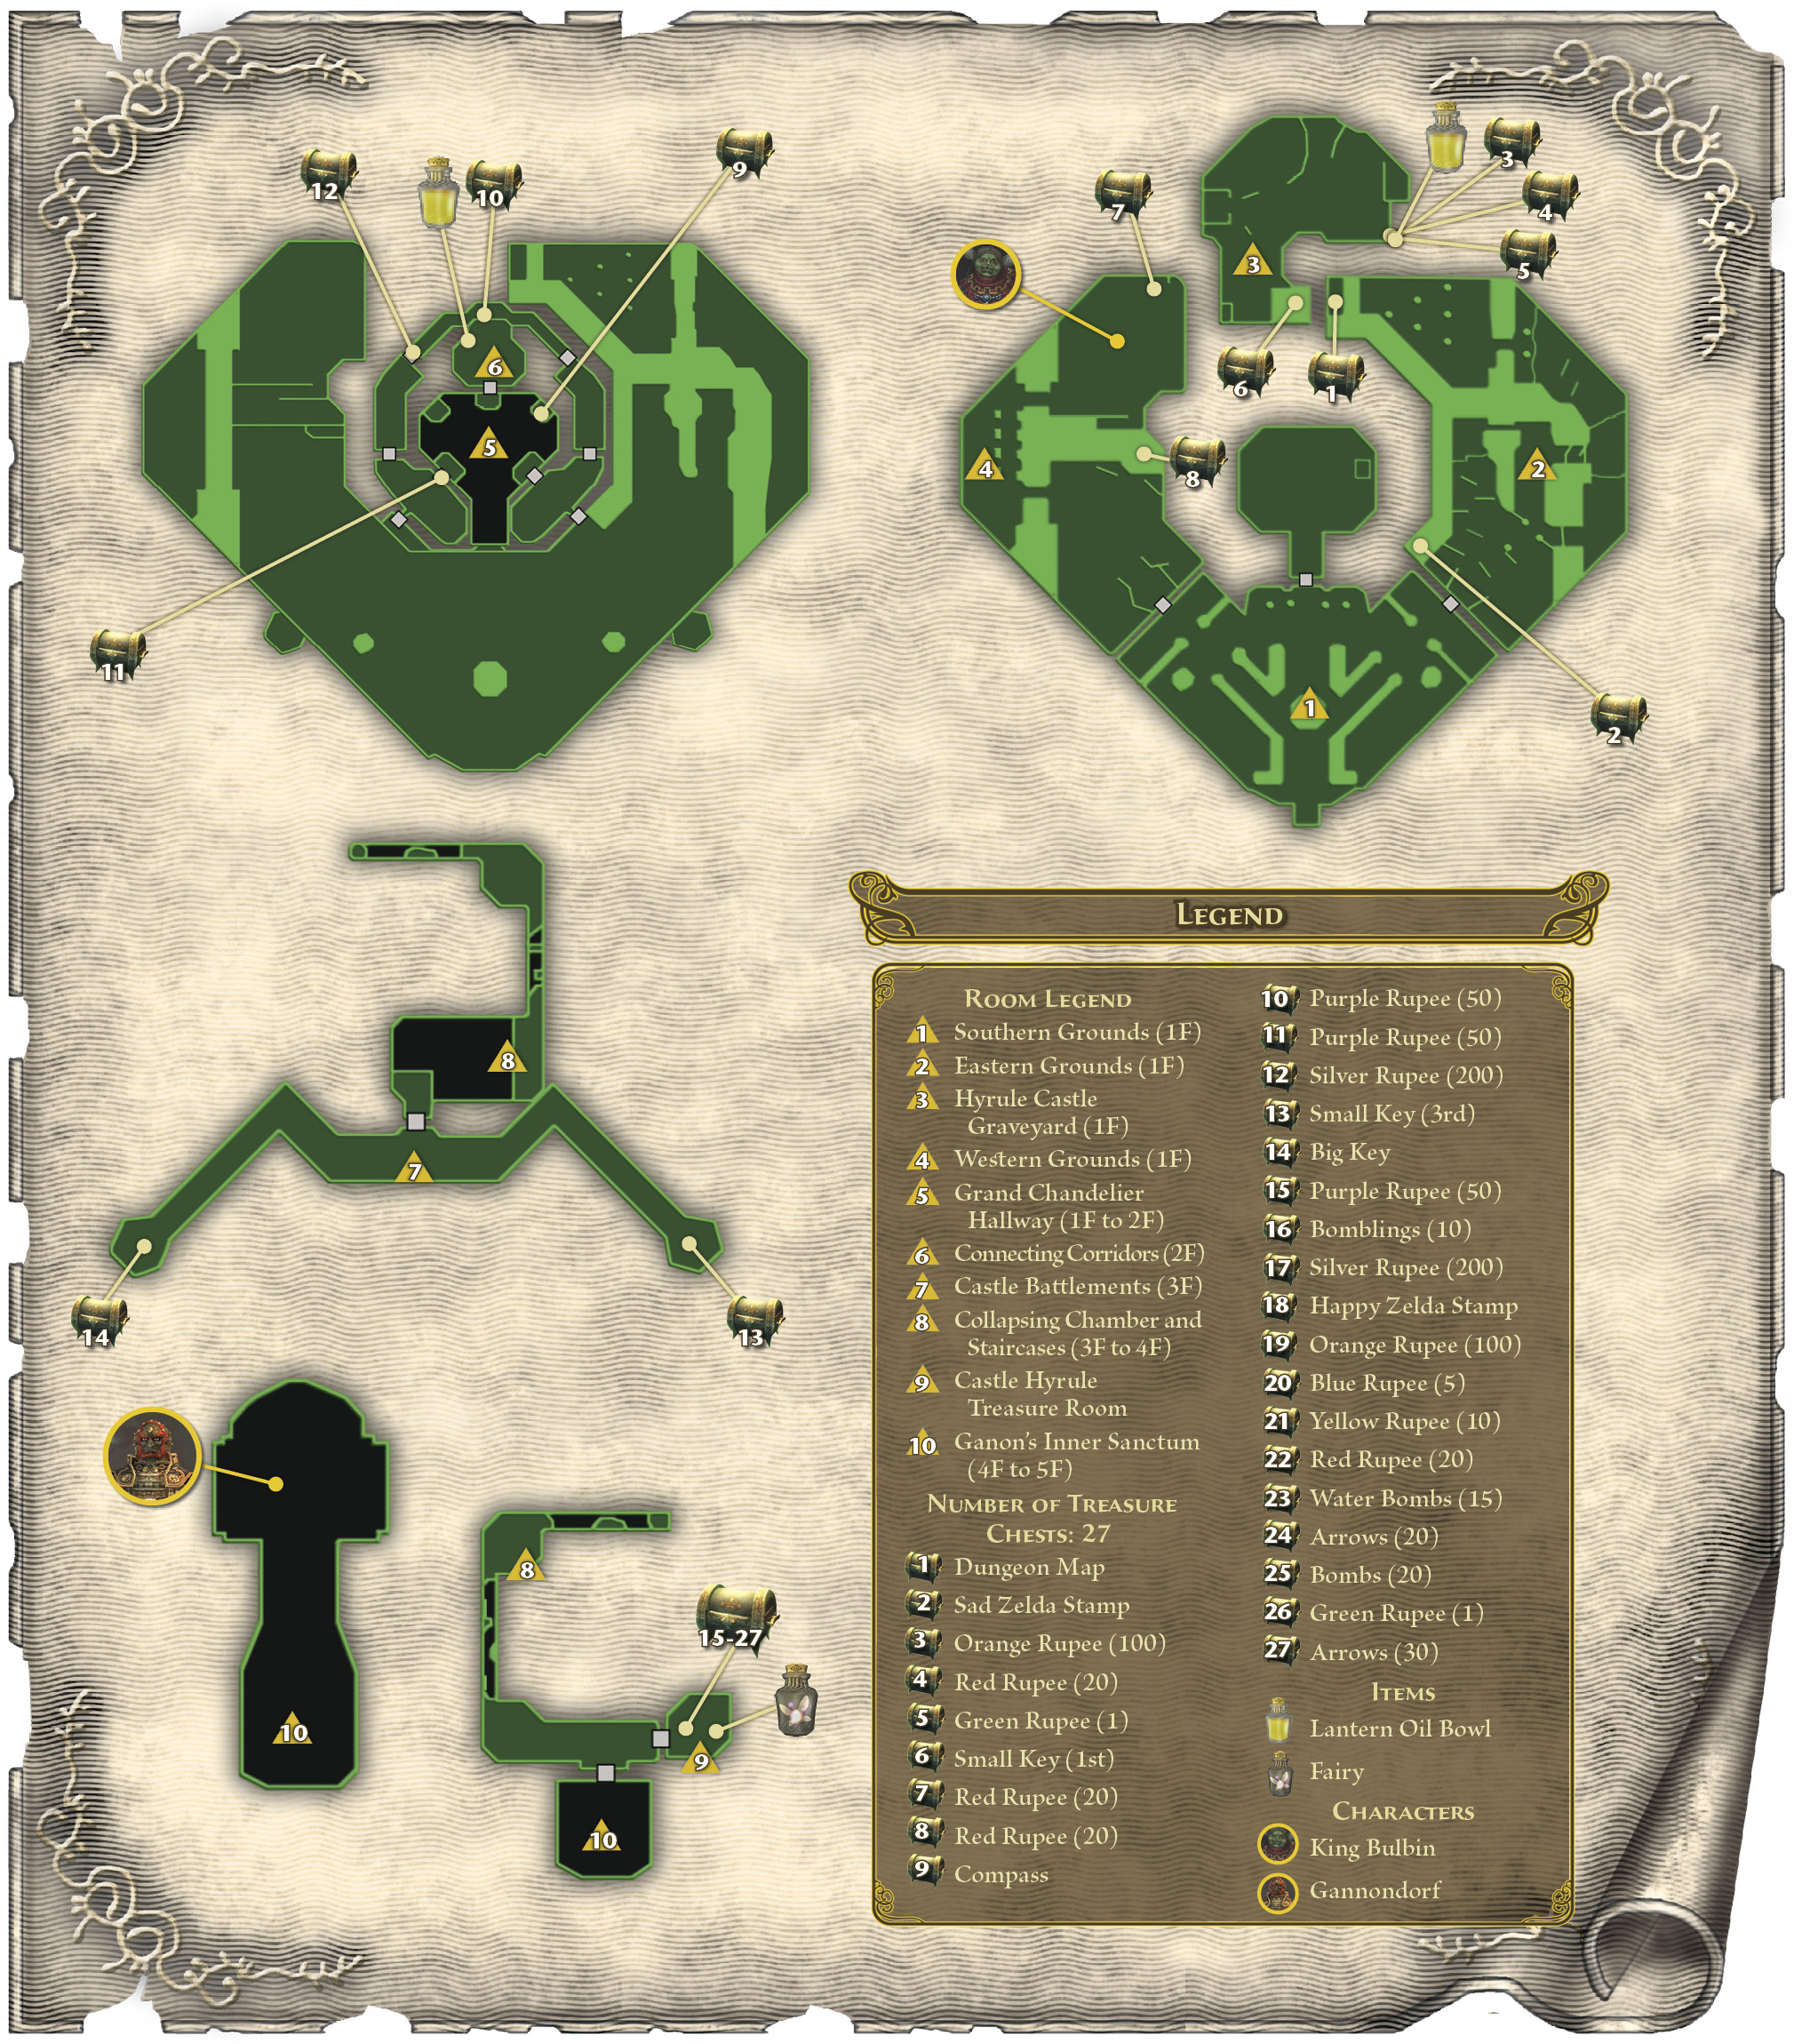
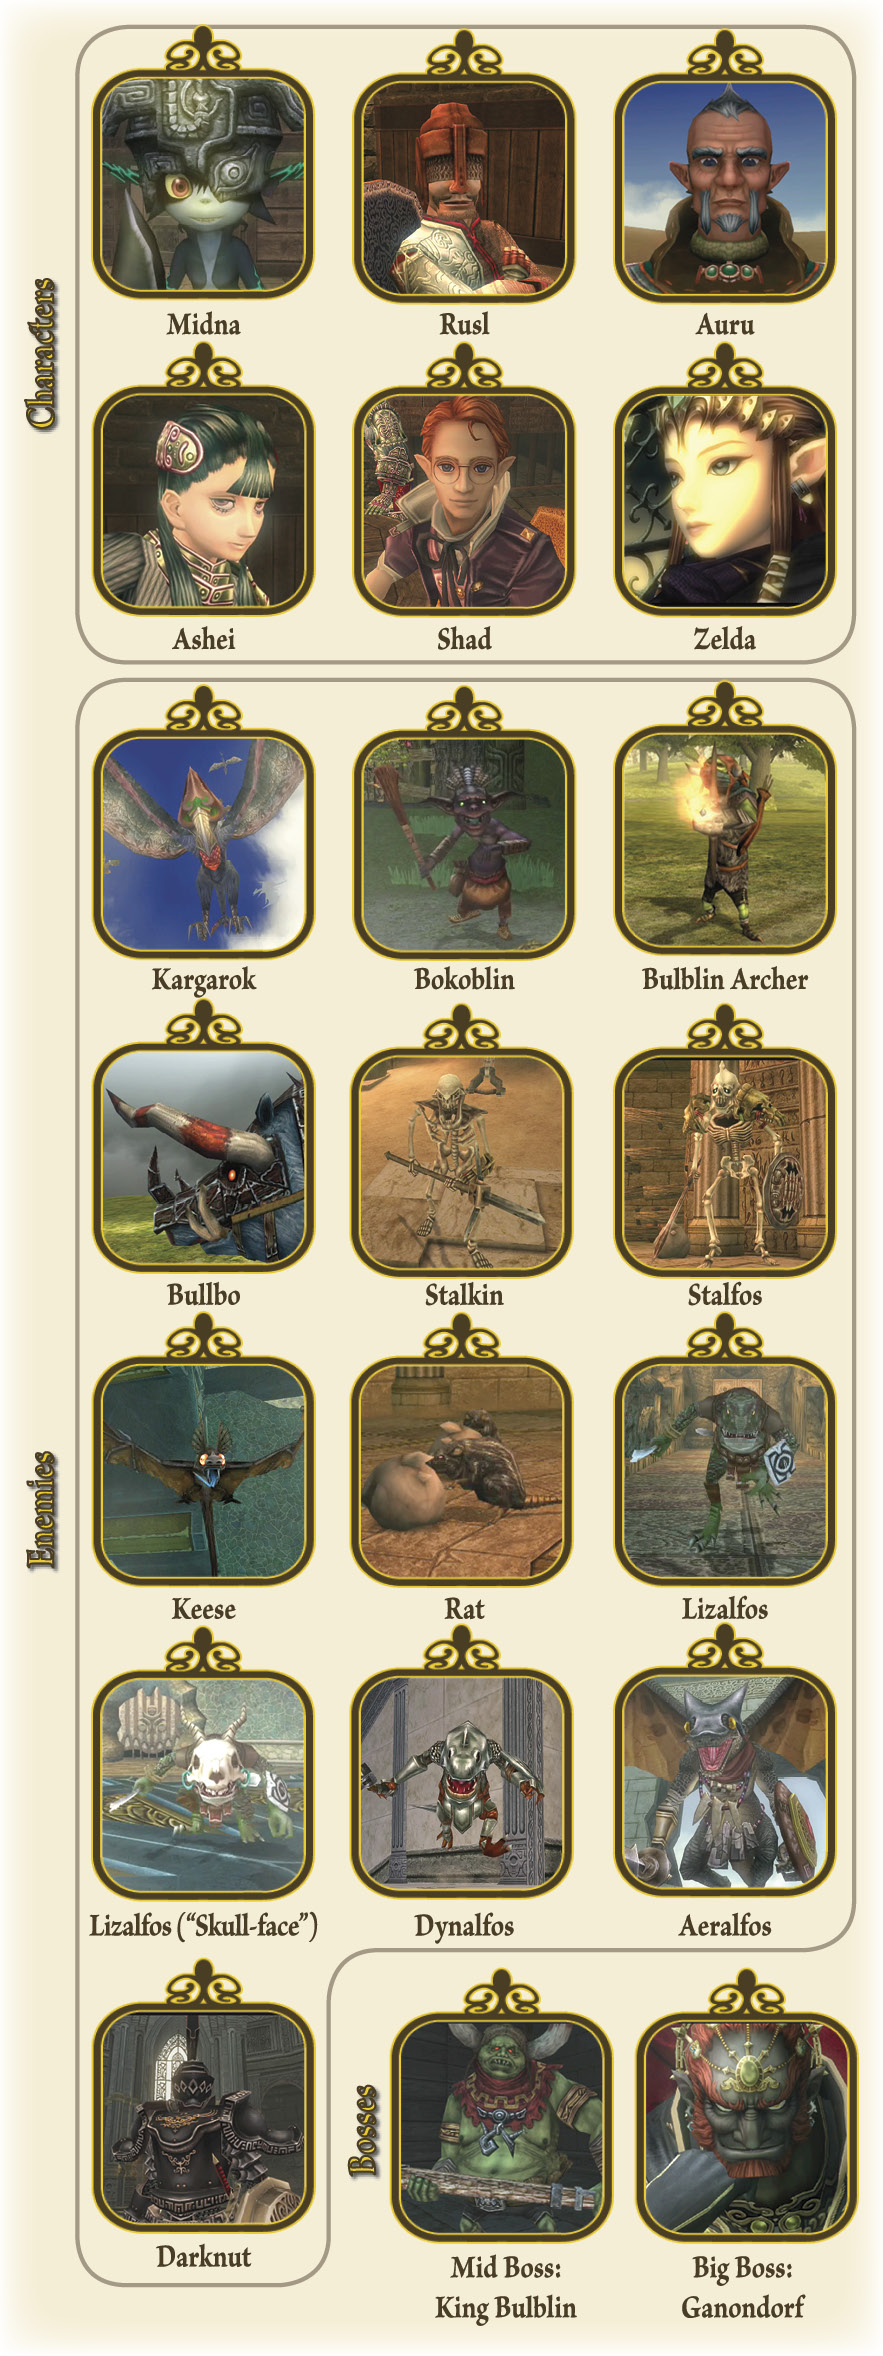
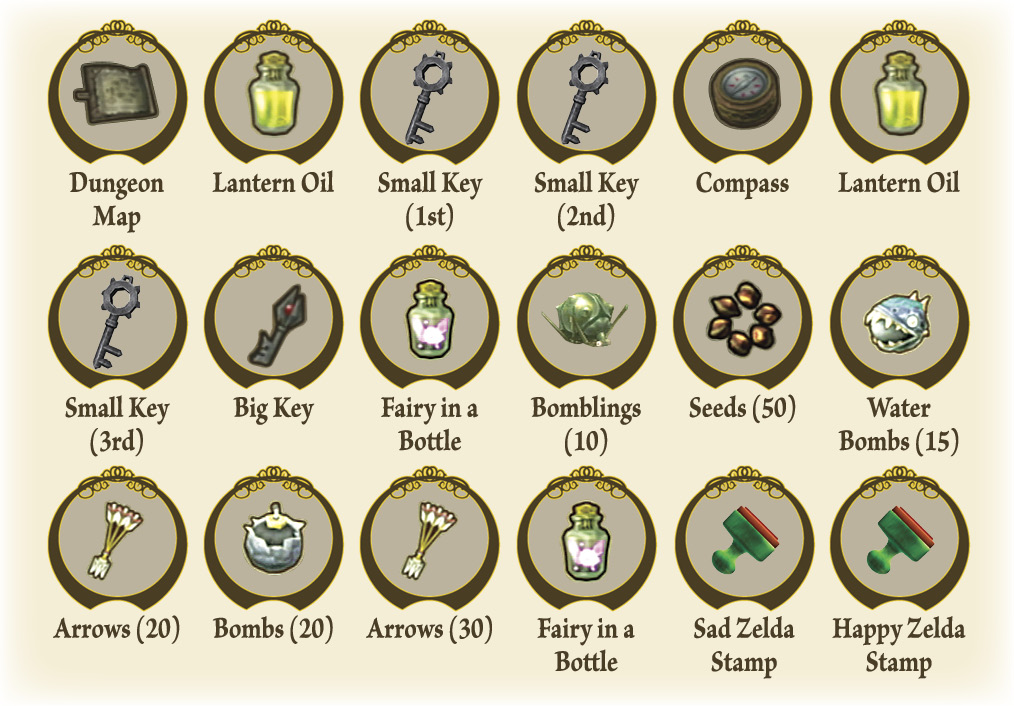
The time has come to halt the evil thief, puppet master, and tyrant known as Ganondorf once and for all! He holds the sway of power from an upper chamber—Zelda’s throne room in fact—and you must journey to this tightly guarded area. Once Midna reveals the true power of her ancestors, you can finally enter Hyrule Castle of your own free will, and wander the massive grounds locating chests, puzzles, keys, and an old fiend for one more Bulblin battle! Once you’ve gathered all the Small Keys outside, head into the castle, where the toughest foes you’ve faced in your journeys have been summoned by Ganondorf to do battle in arenas. In between your swordplay, raid the castle’s many chests before heading up the central tower, optionally opening a treasure trove, and finally facing your final foe for the ultimate confrontation!

Dungeon Denizens
A Link to the Present
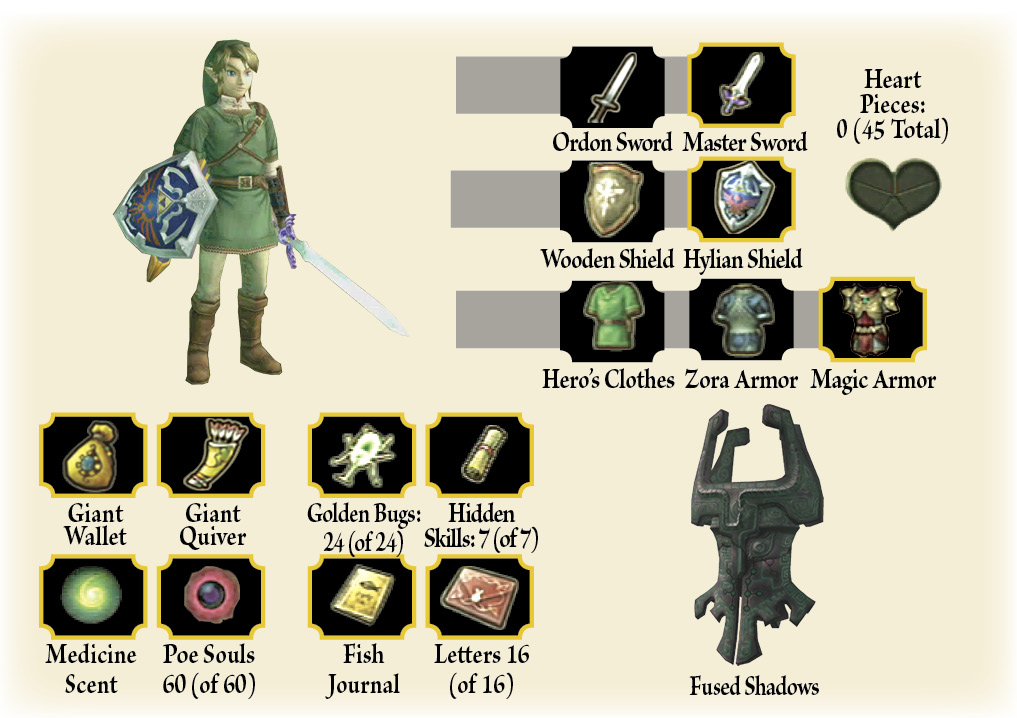
Items Already Acquired
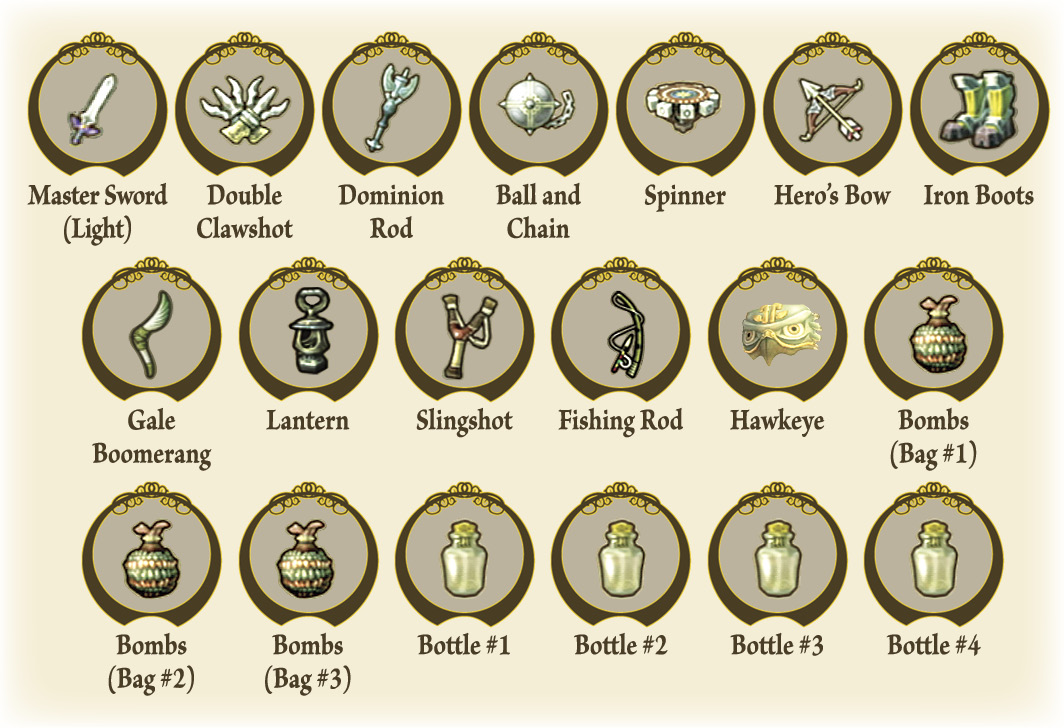
Items to Obtain
Keep reading with a free account

The first 3 sections of The Legend of Zelda: Twilight Princess HD are open to everyone. An account opens the rest of it, and every other guide in the archive. It's free, and there's nothing to buy.

Bought guides on the old Prima Games site? Your account and every guide you own moved here, so there's nothing to buy again. Sign in.

Create a free account Or browse our free guides

PreviousTask 8: Battle Usurper King Zant NextTask 1: Solve the Riddle of the Graveyard