Mobile Gaming Guide — Tips, Tricks, and Strategies for Today's Hottest Mobile Games Candy Crush Saga
What You Need to Know
When you start playing Candy Crush for the first time, you may feel like it takes no more skill than a Vegas slot machine, and that there’s no strategy involved at all since the candy dropping onto the board is completely random. But the more you play, the more you discover that—although luck of the candy drop does play a role—there’s plenty here for those who seek strategy. You need a keen eye for recognizing combo opportunities and creating those opportunities. Creating special power-ups that clear large portions of the board is more often than not the key to clearing levels. Once you can see the patterns that lead to special combinations, you begin to control the outcome of all the random candy drops.
Candy Crushing
Following are all the candy-crushing combos available in Candy Crush Saga.
Match Three
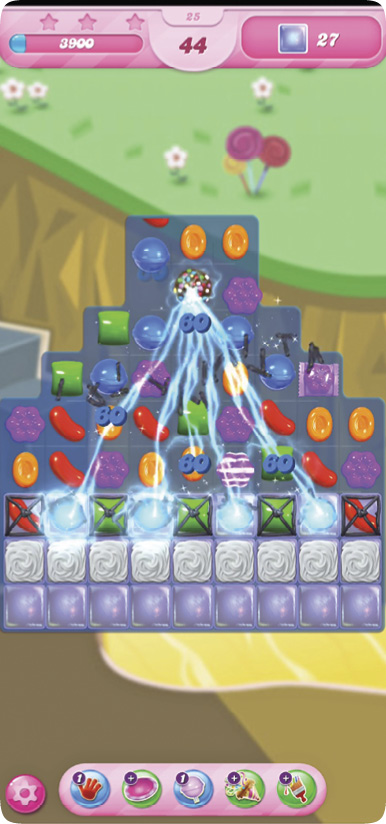
This core gameplay move consists of swiping a colored candy to create a row or column of at least three matching-color candies. Once performed, the three matched candies are crushed and removed from the board. New randomly colored candies enter the board to replace the spaces created by the three you crushed. This action can cause cascades (chain reactions) as falling candies automatically match three or more candies in other areas of the board. Each candy crushed earns you points, and cascades create point multipliers.
Special Candy
Special Candy is made when you swipe four or more same-color candy in a particular pattern. When used, these Special Candies produce more points. They’re often used as moves needed to solve certain puzzle elements. Special Candies are used to destroy Blockers that a normal match-three-candy-crush cannot.
Striped Candy
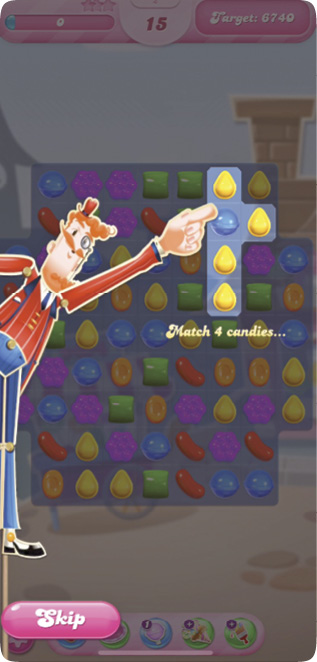
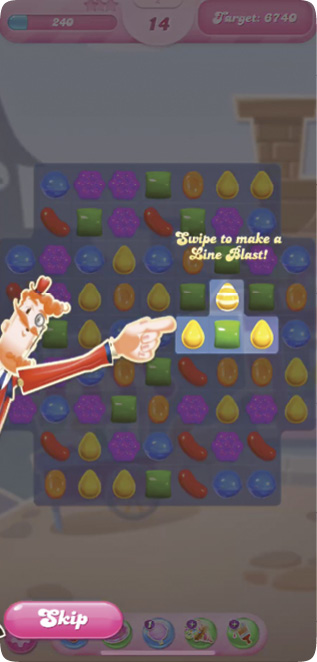
Striped Candy is formed when you arrange a row or column of four same-color candy in a straight line. The direction in which you create it determines whether the stripes are horizontal or vertical on the candy. When the Striped Candy is activated, the direction of the stripes determines the direction in which the line of destruction moves.
Wrapped Candy
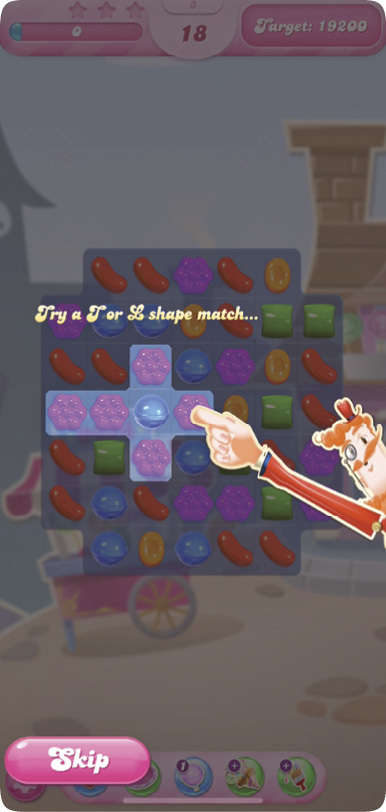
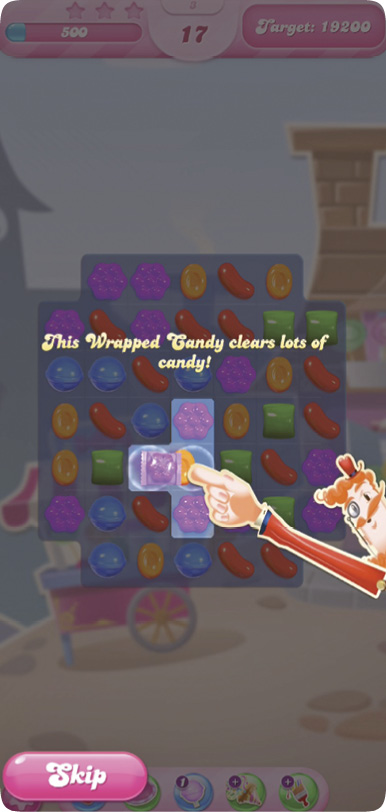
Wrapped Candy is created when you combine five same-color candies in an L or T shape. The shape of the candies can be created at any orientation. The Wrapped Candy can be detonated by combining it with a match of three or more colors, when hit with a Striped Candy shot or exploded with a Color Bomb or another exploding Wrapped Candy. The blast area takes out all adjacent candies in the first blast (eight adjacent candies), and as it moves to the next clear spot, the second explosion takes out another eight surrounding candies.
Color Bomb
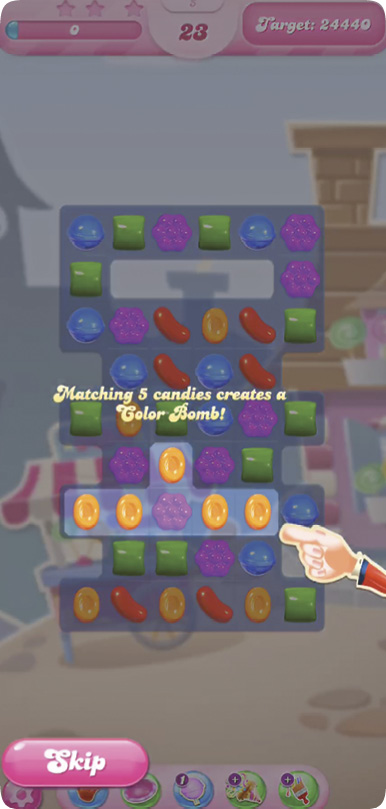
A Color Bomb looks like a chocolate ball with candy sprinkles. This is the most powerful Special Candy available. Color Bombs are formed when you combine five or more same-color candies in a straight line. When switched with a regular candy, all candies of that same color are eliminated from the entire board with laser precision. See “Special Candy Combinations” for all the amplified effects from using the Color Bomb in combination with other Special Candies.
Special Candy / Boosters
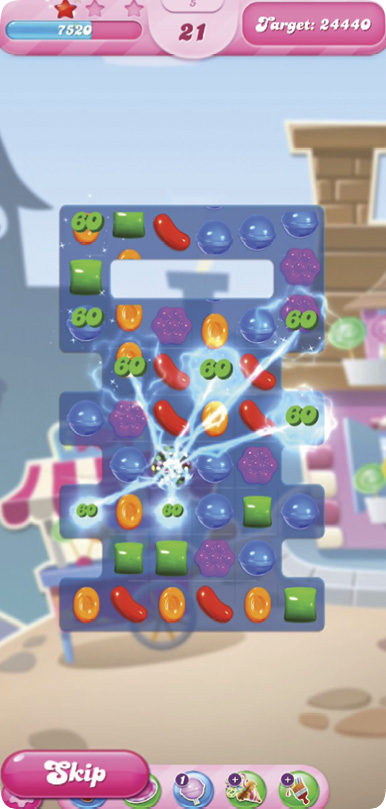
There are a few more Special Candies that you encounter on various puzzle boards. These Special Candies cannot be created; rather, they’re dispensed or already on the board when you start the level. These are also boosters that can be earned or purchased and become available for selection before the level starts, to be used in the level (depending on the level type). They appear or can be used in Jelly, Ingredient, Mixed Mode, and Candy Order Levels.
Jelly Fish
Swedish Jelly Fish come in as many colors as normal candy. In Candy Crush sequels, these Swedish Jelly Fish can be created by combining four candies in a square shape—but unfortunately, Candy Crush Saga has not adopted this move. Currently you can only bring it into play as a booster, or it may already exist in the level (maybe stuck in Marmalade or spawned out of Mystery Candy), or it can be generated by striking a Bobber.
Use Jelly Fish by combining one with two other same-color candies (like a normal match-three), or matching three same-color Jelly Fish. Otherwise, Jelly Fish must be used in a combo with other Special Candies, or caught up in the effects of a Special Candy.
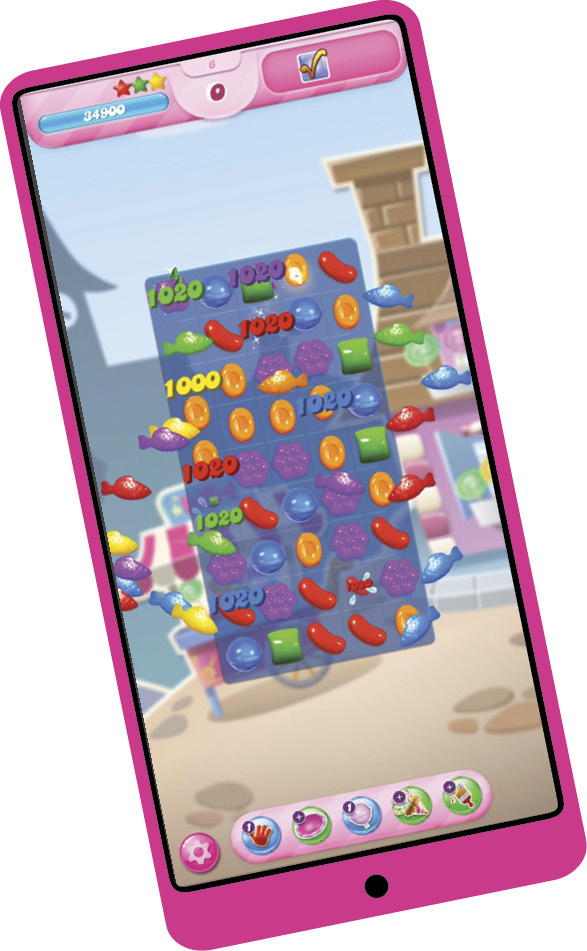
When activated, the Jelly Fish swims off-screen and returns as three. Each of the three Jelly Fish swims to a target to destroy it. Jelly Fish cannot be sent to an intended target. You cannot direct them. They have minds of their own and first target Jelly (if multiple layers, then only one layer is destroyed) and Blockers (if Jelly is under some Blocker types, it goes under the Blocker and takes out the Jelly). However, if the Jelly is under a Liquorice swirl or Liquorice Locks, the Jelly Fish only takes out the Blocker and not the Jelly underneath.
Jelly Fish appear during a Sugar Crush if you have remaining lives at the end of a completed Jelly Level. Each remaining life converts to three randomly colored Jelly Fish, which in turn eat candies at random, awarding points—a number dependent on the targets they hit.
 Coconut Wheel
This round pink candy is a Coconut Wheel and is a Special Candy that naturally appears only in Ingredient Levels before Level 824. After Level 824, you can find Coconut Wheels in any level type, but the booster version is only available for ingredient-type levels.
The Coconut Wheel cannot be created by any candy combination, but is only spawned by using a booster, or uncovered on the board trapped under Marmalade or Liquorice Locks.
To activate the Coconut Wheel, swipe it with the candy adjacent to it. This destroys the candy and starts the spinning. It eventually moves in the direction it was swiped, turning the next three candies into Striped Candies, which are automatically activated. If you swipe the Coconut Wheel horizontally, it creates vertical Striped Candies, which can bring down ingredients from the top of the board. If you swipe vertically, horizontal Striped Candies are created. All candies must come to a resting place before the Coconut Wheel starts creating Striped Candies.
If the Coconut Wheel is activated by another action (say, exploding candy), it spins and randomly choses a move direction. Even more powerful moves occur when you swipe a Coconut Wheel with a Special Candy (see “Special Candy Combinations” for details).
 Lucky Candy
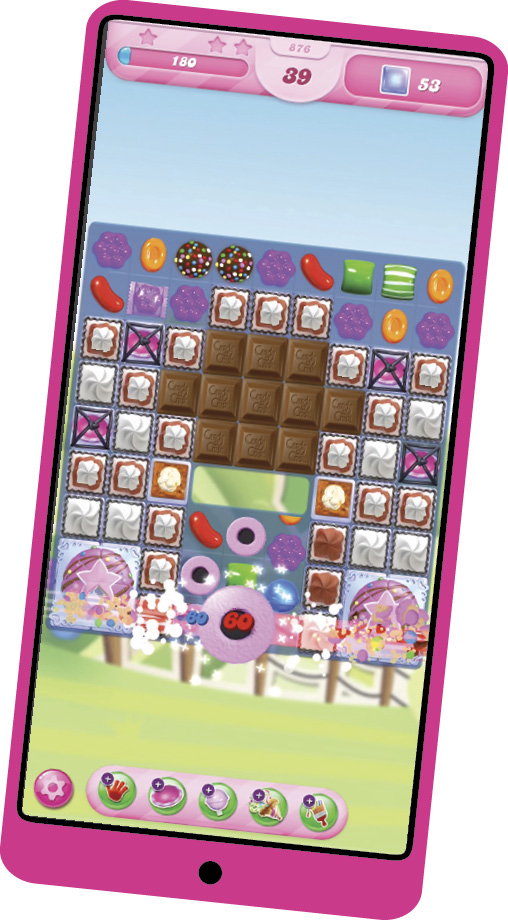
These Special Candies only appear as boosters or in Candy Order Levels, and can come out of a Mystery Candy or be found under Liquorice Locks. These Special Candies cannot be formed by any combination of candy, and can be one of six colors, like normal candy.
Activating Lucky Candies is done the same way as any normal candy—match three or more same-color candies together. Once destroyed, the checkmarked candy becomes the candy type needed to fulfill the order in the board objectives. It could become a regular candy with a specific color, a Special Candy, or in some cases, a Blocker.
 Lollipop Hammer
The Lollipop Hammer is a booster-only item. These don’t appear on a board, nor are they dispensed. The only way to use a Lollipop Hammer is to have been awarded one or to have purchased them. Lollipop Hammers are rare and should be saved up for the very difficult levels. They allow you to destroy anything on a space. You can remove a candy, a Jelly below a candy, or a Blocker (or one layer of a Multilayered Blocker) without using a single move. You cannot, however, destroy a Chocolate Spawner, ingredient, or a Sugar Chest. You can use it to reveal the contents of a Mystery Candy or a Lucky Candy. When used on a Special Candy, that candy’s effect is activated.
You can win these from the Daily Booster Wheel and the Sugar Drop. You can also purchase them while in a level if the booster icon is visible beside the board (if it’s an active booster for that level type).
 Extra Moves
The Extra Moves Booster is usually first discovered on the Failed Level Attempt menu that pops up at the end of a failed board. Clicking on the Extra Moves Booster automatically takes 10 Gold Bars and puts you back in the game with five more moves. Or, if you don’t have the Gold required, the same button takes you to the Candy Shop, where you can purchase more Gold.
Extra Moves on mobile devices also appears on the prize wheel accessed when you click on the Win Moves button on the same Failed Level menu. You earn a free spin every 24 hours, and if that’s been used, it costs you seven Gold Bars to spin the wheel. This wheel consists of three +5 Extra Moves and one +15 Extra Moves space. There are also Jelly Fish, a Lollipop Hammer, Color Bombs (x2), and a Wrapped Candy/Striped Candy combo between the Extra Moves spaces.
If you continue to fail the mission after using Extra Moves, the price of Extra Moves increases each time it’s accessed. In fact, at the seventh failed attempt, the Extra Moves becomes a +15 move. At the eighth it becomes +50, which means you’ve used 45 Extra Moves.
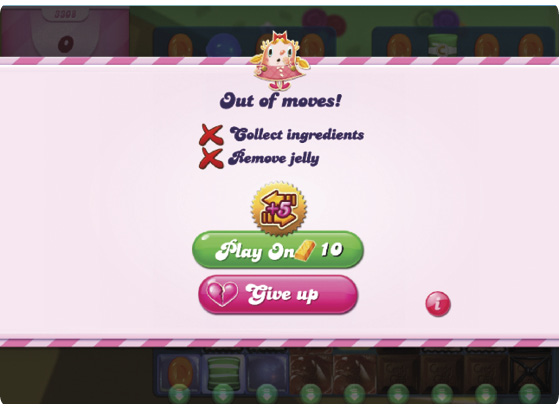
On web versions of the game, the Extra Moves Booster can be activated at any time during the game, and each use costs Gold Bars.
 Free Switch
The red hand with three fingers is a booster that, when used, allows you to switch any two adjacent candies (even if they don’t match) while not using a move. You can also use it as an extra move. Move matching candy to save a move. However, when swiping two Special Candies together with a Free Switch, the Special Candies don’t release their combo effect; instead they just switch places.
You can use a Free Switch to move ingredients with another ingredient, candy, or movable Blocker. This is useful if the ingredient gets stuck in a space adjacent to the column where the exit is located.
Free Switches are given as awards from side challenges, such as Star Chaser, or purchased in bundles at the Candy Shop. You can also land on these on the Daily Booster Wheel, or earn them by participating in the Sugar Drop challenge and the Treat Calendar.
 Striped & Wrapped
This booster is available on many pre-level menus, and gives you one Wrapped and one Striped Candy at the beginning of the level to use when you please (just make sure to use them wisely and quickly so that a cascade doesn’t activate them in an unintended location). This booster can be won from the Daily Booster Wheel, the Treat Calendar, and from the Sugar Drop challenge.
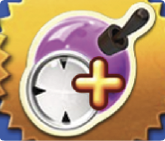 Bomb Cooler
This booster is only available after failing a level that has Candy Bombs (time bombs) in the puzzle. On the Fail screen, you’re given a chance to purchase +5 Extra Moves and a +Bomb Cooler for 10 Gold. The +Bomb Cooler allows you back in the game and resets the Candy Bombs that had fewer than five moves on them back up to five moves. So, in other words, if you left the game and some Candy Bombs were on the board with six moves left on them, they would be unaffected.
If you fail the same board again, the next Fail screen offers you a +5 Bomb Cooler (and a +5 Extra Moves and a Striped Candy) for 16 Gold. Now the +5 Bomb Cooler affects all Candy Bombs, adding five moves to every bomb. This continues to grow with each failure. After the seventh failure, you can get a +10 Bomb Cooler. All fails after that allow you to purchase a +15 Bomb Cooler. This is the only way to get these boosters; you cannot get them through features like the Daily Booster Wheel, etc.
 UFO
UFO
This fun booster usually comes in a group of two or more on a board, locked or out of reach from typical matches. In most cases, you must use Special Candy effects to unlock and then activate a UFO. Once activated, the UFO shoots three Wrapped Candies on the board and typically targets Jelly, Blockers, or Chocolate, or blasts things under ingredients so they fall. If the UFO is free and sitting in a reachable space on the board, you only need to swipe the UFO with any candy to activate it manually.
This booster cannot be won on the Daily Booster Wheel. The only way to receive this booster is if it already exists on a board, or if you purchase one for 20 Gold from the Sweet Supplies Inventory menu. They don’t appear in any of the bundles in the Candy Shop.
 Striped Brush
This booster lets you paint stripes onto any candy of your choice, and you get to choose the stripe direction. This booster is unlocked at Level 37. The only way to obtain this booster is by purchasing it for 15 Gold through the Sweet Supplies Inventory menu. This is probably the least-purchased booster there is—it isn’t all that special since Striped Candy is a common combo created on the boards.
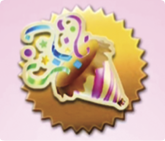 Party Booster
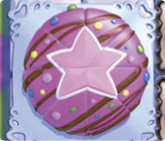
Party Boosters are the newest boosters. When they first appear (you can be anywhere after Level 29), you’re given three. Use them wisely; after these three are gone, the only way to get more is to purchase them from the Candy Shop for 30 Gold Bars each. A Party Booster has two stages of attacks. In the first stage, a large star-shaped piñata floats over the board and releases a blast that completely clears a board of unlocked or trapped candy, similar to a Cake Bomb; it only clears one level of Multilayered Blockers. When the dust settles, a Jelly Fish, Striped Candy, Wrapped Candy, and Color Bomb spawn in random areas on the board. If you need to get past a tricky level, this is the booster for you.
Other Special Candy
There are a few other Special Candies that appear in certain level types. These are not available as boosters.
 Chameleon Candy
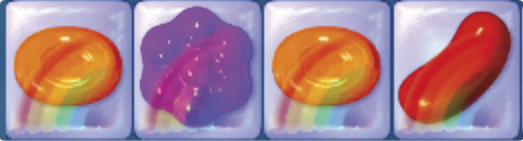
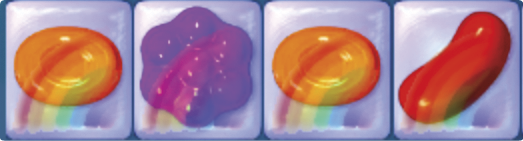
The Chameleon Candy looks like rainbow-colored candy. They’re easily identifiable, as they change between two colors with every move you make, and a rainbow effect sweeps across them every few seconds. They cause difficulty in otherwise easy puzzle situations; their color-changing nature causes possible color matches to disintegrate as the color changes to a non-matching one.
Chameleon Candy can be dispensed from Candy Cannons and is destroyed like any normal candy—when color matches of three or more are swiped together, or from the effects of a Special Candy activation.
 Mystery Candy
Mystery Candy behaves and is crushed just like normal candy and comes in as many color variations. They’re identified by the question mark painted on them, and they’re all egg-shaped. When they’re crushed, you have a 50/50 chance of getting a good power-up from within. They produce good outcomes, such as Striped Candy, Wrapped Candy, Color Bombs, Special Booster Candy, and Chameleon Candy. The type of Booster Candy that could be produced depends on the level type, so you could get Jelly Fish, Coconut Wheel, or Lucky Candy.
The possible bad outcomes include Chocolate, Icing, Sachet/Multilayered Icing, Candy Bomb, Liquorice Swirl, Popcorn, and a Chocolate Spawner.
 Candy Frog
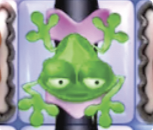
The Candy Frog is one of the most complex elements of Candy Crush Saga. One frog appears at a time on the board. It feeds on candies that match its current color when matches of three candies or more are swiped. The frog doesn’t get crushed when matched with candies. It only moves when swiped to a new position, or when moved to be activated after it reaches its fully charged state. It can also be moved onto conveyor belts. It’s fed same-color candy or Special Candy until it becomes a special power-up that acts like a Wrapped Candy.
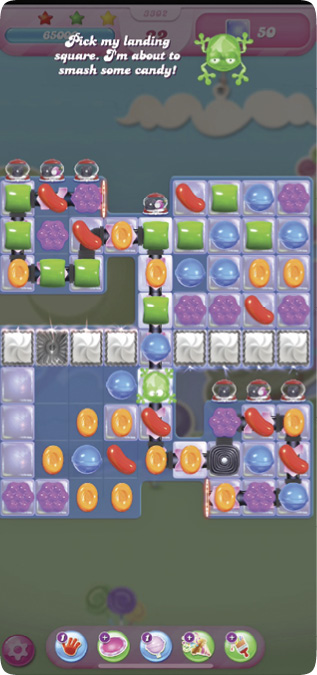
When fed 12 same-color candies, it reaches its full “Frogtastic!” state. You hear a voice announcing this achievement. Select the Candy Frog, then select a location on the board for the frog to jump to. The frog lands and destroys whatever is on that space, plus the surrounding eight squares (like a Wrapped Candy explosion). After which the frog changes colors and is ready to be fed again. Activating the Candy Frog effect doesn’t cost you a move unless it’s a Moves Level.
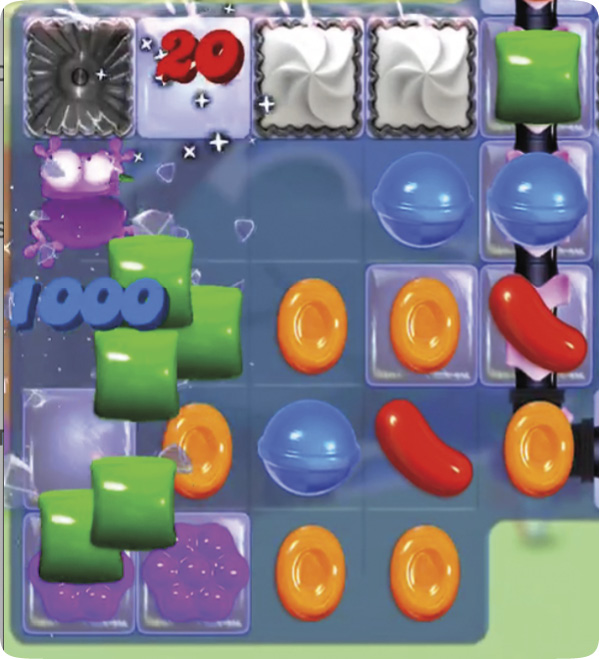
When swiped with Special Candies, the Candy Frog mimics the effects of that candy’s abilities. Swipe with a Striped Candy and the frog becomes striped, and with the next frog move it shoots and clears a row or column of candy from the space it moves to. Likewise, when swiped with Wrapped Candy, the Candy Frog becomes wrapped, and with its next move it clears a 3x3 area just like a Wrapped Candy explosion.
A Color Bomb swiped with a Color Frog turns the frog brown with sprinkles and eliminates all the colors associated with the candy swiped with the frog on its next movement.
Here are a few of the curiosities of the Candy Frog. When a normal colored frog is matched with a Special Candy, the Special Candy is activated, and the frog copies that special effect (Jelly Fish is the exception to this rule). When the colored frog already carries a Special Candy effect and is then matched with another Special Candy, it acts as if it were a normal Special Candy combination (see “Special Candy Combinations”).
Candy Frogs can be covered by Chocolate—the frog’s eyes are visible through the Chocolate. In this case, the Chocolate must be broken through normal gameplay to release the frog and thus begin feeding it with subsequent moves. You cannot feed a frog that’s in Locked Chocolate or inside a Sugar Chest.
Special Candy Combinations
This table reveals all the possible combined effects created by swiping all variations of Special Candies together.
| Candy | Candy Combo | Resulting Effect |
|---|---|---|
|
|
Striped Candy + Striped Candy |
Both candies detonate in the space swiped into, and from that space a horizontal and vertical line of destruction occurs. This takes out any candy, Jelly, and one layer of Blockers unless an effect Blocker exists in the path. |
|
|
Striped Candy + Wrapped Candy |
Both candies form a huge, powerful candy in the space swiped into, and a large 3x3 area of destruction moves vertically and horizontally across the board, wiping out every candy, Jelly, and one layer of Blockers in its path (unless an effect Blocker exists in its path). |
|
|
Striped Candy + Color Bomb |
When this combination is swiped, all same-color candies (that match the color of the Striped Candy combined with the Color Bomb) turn into horizontally and vertically Striped Candies across the entire board and are instantly activated, clearing rows and columns of candy, Jelly, and one level of Blockers unless effect Blockers are present. The Striped Candy originally swiped in the combo doesn’t activate; instead it just disappears. |
|
|
Striped Candy + Jelly Fish |
Combining a Striped Candy with a Jelly Fish creates three Striped Jelly Fish that land on a random space on the board and instantly activate, clearing the row or column (depending on the stripe direction on the Jelly Fish). This clears candy, Jelly, and Blockers in the paths. |
|
|
Striped Candy + Coconut Wheel |
Combine the Striped Candy with a Coconut Wheel to create a full row or column (depending on the direction you swipe) of Striped Candies that instantly activate, wiping out all candy, Jelly, or (one layer of) Blockers. The wheel goes off-screen and comes back to cross candies it missed on the first trip (say, if you start in the middle of a row or column). |
|
|
Wrapped Candy + Wrapped Candy |
Combining two Wrapped Candies results in a huge explosion—each creates a 5x5 blast separately, but since they’re side by side, a 6x5 blast is the first result. Then both Wrapped Candies individually drop, and each explodes again when they reach a resting space. Again they explode, each creating a blast covering a 5x5 space. |
|
|
Wrapped Candy + Color Bomb |
This combination results in the Color Bomb selecting all the same-color candies as the Wrapped Candy it’s swiped with, then turning them all into Wrapped Candies. They’re immediately activated (exploded) from the top of the board to the bottom. Wrapped Candies always deliver two explosions each. |
|
|
Wrapped Candy + Jelly Fish |
When combined, the Jelly Fish are converted into three Wrapped Jelly Fish that swim across the board and pick three random spaces to explode in, each doing 3x3 space damage. They drop to a resting spot and again explode another 3x3 area. |
|
|
Wrapped Candy + Coconut Wheel |
This combo behaves the same way it would when combined with a Striped Candy, except Wrapped Candy Bombs are created vertically or horizontally across the entire board, and normal Wrapped Candy Bomb behaviors follow. |
|
|
Color Bomb + Color Bomb |
When combining two Color Bombs, a large board-wide explosion occurs and acts as a single hit on all spaces, so it destroys all uncovered or non-locked candy, Jelly, Blockers, and a single layer of Multilayered Blockers and Popcorn. |
|
|
Color Bomb + Jelly Fish |
Creates three Color Bomb Jelly Fish that swim off to three random spaces and eat the candy in those spaces. Next, those three eaten candies convert into fish (a one-to-one ratio) and repeat the process. This happens three times and ultimately destroys 12 random candies. |
|
|
Color Bomb + Coconut Wheel |
The Color Bomb is activated first, randomly picking a color group to strike, then the Coconut Wheel turns a row or column into Striped Candy. From here it behaves like a Color Bomb crossed with a Striped Candy. |
|
|
Coconut Wheel + Coconut Wheel |
When two Coconut Wheels are combined, the effect is two continuous lines (vertical and horizontal) of Striped Candy specials created. All the Striped Candies are activated and clear every row or column they face, only stopped by effect Blockers. |











Secondary Elements
Secondary Elements are puzzle features to keep the game fresh, fun, and challenging. Secondary Elements can be broken down into two categories: Blockers and Non-Blocker elements. These Blockers can alter the nature of candies with every move, spawn elements and Blockers, and move candies from one place to another. Non-Blocker elements cannot be removed from a board, unlike Blockers, which can be destroyed.
| Image | Element Name | Description |
|---|---|---|
|
|
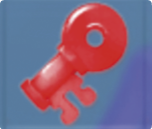
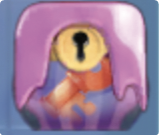
Sugar Key |
Comes in a variety of colors, and when matched with two other same-color candies, the key is destroyed. All existing Sugar Chests lose one layer. A puzzle with Sugar Keys usually means you must destroy the keys before you can beat the objective. |
|
|
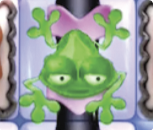
Candy Frog |
The frog comes in all the colors of normal candy, and when fully fed, it acts like a Wrapped Candy that can be placed almost anywhere on the board to destroy what’s on the eight surrounding squares. Feed the frog the same-color candies to fully charge it. The frog is unaffected by gravity and sits in one place until it’s swiped or moved for activation. The frog can take on characteristics of Special Candy it’s swiped with, and once activated (exploded), the frog changes to another color. |
|
|
Teleporter |
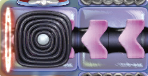
Teleports candy and Blockers from one space to another. The blue Teleporter is the entry point, and the pink one is the exit portal. You typically have to clear candies below them to make them drop through. |
|
|
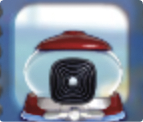
Candy Cannon |
These look like gumball machines and dispense candy onto the board when items below them are removed. The Candy Cannon can release Liquorice Swirls, Candy Bombs, Sugar Keys, Mystery Candy, Chameleon Candy, and Special Candy. Candy Cannons cannot be destroyed, but some may be covered by Blockers. |
|
|
Conveyor Belt |
Vertical or horizontal belts move any candy or Blocker that falls onto them one space per user move. Objects on a belt move in the direction indicated by the arrows on the belt. Conveyor Belts have portals at each end to transport objects to the next Conveyor Belt. Portals come in three colors: blue, green, and red). Chocolate cannot cover Conveyor Belts. |
Blockers
Blockers can prevent levels from being completed, cover up candies, prevent Special Candies from executing their normal functions, prevent candies from taking up a space until cleared, or worst of all, prevent you from accessing candies for matching. A typical Blocker is Chocolate. It starts in one space and covers candies, making them inaccessible. If the Chocolate isn’t destroyed in the next move, it multiplies and occupies an adjacent space, covering yet another candy.
Some Blockers can be useful. Marmalade, Icing, and Liquorice Swirls could stop Chocolate from spreading. And sometimes Chocolate covers a Candy Bomb just before it goes off and fails the level.
| Image | Blocker Name | Description |
|---|---|---|
|
|
Chocolate |
Spawns and covers candies one space every move that it’s not destroyed. Destroy Chocolate by crushing candy beside it, or hit it with Special Candy effects. Chocolate can be created by Chocolate Spawners or Magic Mixers, neither of which can be destroyed. When these Chocolate creators are present and a single piece of Chocolate is destroyed, they don’t produce another Chocolate for the next two moves. |
|
|
Locked Chocolate |
The same as Chocolate, but locked down by a Liquorice Lock. This Chocolate doesn’t spawn until the lock is broken, which can only be done with a Special Candy effect. Once the lock is broken, you must destroy the Chocolate with the next move, or it begins to spawn more Chocolate. |
|
|
Chocolate Spawner |
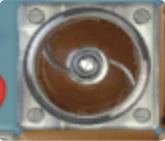
This is a machine that churns out Chocolate in the adjacent spaces around its location. After a certain number of moves, the spawner starts creating one Chocolate per move until you break a piece of Chocolate, at which point the spawner doesn’t create another Chocolate until there are two moves with no Chocolates being destroyed. Levels with this element often have more than one Chocolate Spawner, making the spawning location unpredictable. |
|
|
Marmalade |
A translucent brown Jelly that holds candy, Special Candy, and Blockers. It’s a weaker version of the Liquorice Lock; it can be destroyed by normal matches adjacent to its space. A match can even be made using the candy of the same color that’s under the Marmalade Blocker. The candy underneath can even be moved to make a match in the next space. These types of matches also destroy the Marmalade. It’s the weakest of all Blockers. |
|
|
Liquorice Swirl |
This swirl of black Liquorice moves with gravity like all other candy, but takes up the much-needed space. It can be selected and moved and matched with other Liquorice but is not destroyed. It’s resistant to Special Candy effects and weakens combinations, especially the Striped ones. A hit from a Striped Candy gets rid of only the one swirl and doesn’t affect any Blockers or candy beyond it. Break the candy next to it or hit it with a Special Candy effect to destroy it. Jelly Fish cannot destroy a Blocker below a Liquorice Swirl. Wrapped Candy attacks and large candy matches are the best offense. |
|
|
Liquorice Lock |
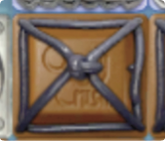
Looks like a black-liquorice barn door (a square with an X in it). Anything blocked underneath it cannot be moved or destroyed until the lock is removed, which can only happen with a Special Candy effect. You can also remove it by making a match with the colored candy under the Liquorice Lock. |
|
|
Candy Bomb |
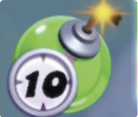
Also known as the time bomb, this Blocker is the most feared and difficult Blocker in the game. Levels with these can eat through lives in minutes. It appears as a colored sphere with a number in it. The number varies by level and counts down with every move on a one-to-one ratio. When the bomb reaches zero, the level is failed instantly no matter how many moves you have left. The only thing that can stop this is a booster called a Bomb Cooler, which can only be purchased with Gold. Bombs are destroyed by matching three or more same-color bombs just like candy. Or they can be wiped out with Special Candy effects. Bombs can be created from dispensers or Mystery Candy. They can appear under Liquorice Locks, Marmalade, or Sugar Chests, making them difficult to destroy. |
|
|
Icing |
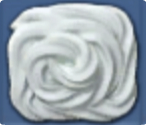
Icing is a low-level Blocker that looks like a square of white cake icing. It can hide Jelly beneath it, and the Icing must first be cleared to break the Jelly below. Icing can be removed with adjacent matches or Special Candy effects. A Striped Candy effect takes out a vertical or horizontal row of Icing. Color Bomb attacks have no effect on Icing. |
|
|
Multilayered Icing |
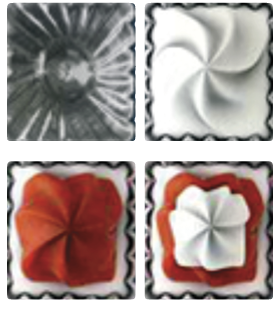
Occupies one space, but there can be multiple instances of it on one board. Multilayered Icing can have two to five layers present. Each layer must be removed to get to the possible Jelly below. Each layer is destroyed by making matches next to it or using Special Candy effects. You must hit it once for every layer there is to completely remove it. Color Bomb effects don’t harm the Icing unless it takes out a candy adjacent to it. As pictured, the layers are named as such: Sachet (Layer 1—the bottom layer); Two-Layered Icing; Three-Layered Icing; Four-Layered Icing; Five-Layered Icing. |
|
|
Cake Bomb |
This Blocker is large and takes up four spaces in a 2x2 area. The number of times you need to hit it to remove sections of the Blocker depends on the level, but can range from one hit to a maximum of eight. Jelly is often found underneath this Blocker. You can destroy this Blocker by making matches adjacent to it or by hitting it with Special Candy effects and combinations of Special Candy. Once destroyed, a party popper appears and explodes all the candy, uncovered Jelly, and Blockers (one layer of Blockers) from the board. The party popper doesn’t remove sections of any other Cake Bombs on the board. A Striped Candy can remove two sections from the Cake Bomb, and a Wrapped Candy can remove four. A Wrapped + Wrapped Candy combo can take out all eight pieces if both explosions are adjacent to the Cake Bomb. Color Bombs have no effect on these Blockers, even if candies adjacent to the Blocker are zapped. A Color Bomb + Color Bomb combo can remove one slice from each of the four quadrants. A Color Bomb + Wrapped Candy (or Striped Candy) combo has a chance to remove several pieces. Jelly Fish target Cake Bomb slices. |
|
|
Sugar Chest |
These single-space Blockers are immune to any attack and can only be removed from a board by destroying the matching Sugar Key. There can be up to five layers on a Sugar Chest Blocker, which means five keys must be destroyed to take the Sugar Chest off the board. Sugar Chests can cover Jelly or contain ingredients, candy, Special Candy, or Candy Bombs. Jelly Fish cannot eat the Jelly under a Sugar Chest. |
|
|
Popcorn |
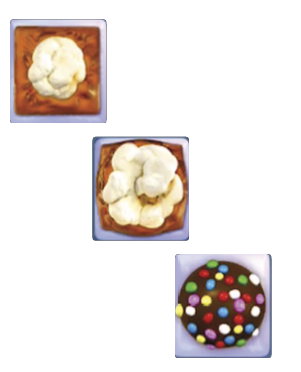
One of the toughest Blockers in the game, Popcorn occupies one space but can have multiple instances on one board. Popcorn has three layers to destroy before it’s eliminated. It must be hit with the effects of Special Candy and Special Candy combos—adjacent matches do nothing. Each hit expands the popcorn graphic on the square. Popcorn can be produced by Lucky Candy, be Liquorice Locked, be inside a Sugar Chest, or be covered with Marmalade. Jelly Fish avoid Popcorn even if there’s Jelly underneath. Destroying Popcorn can reveal Jelly, Special Candy, or a Color Bomb. Cake Bombs don’t affect Popcorn. Popcorn takes damage but stops the effects of a Striped Candy attack and combinations thereof. |
|
|
Bobber |
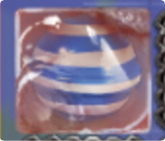
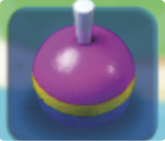
The Bobber looks like a floating fishing bobber. It’s round with pink, yellow, and blue stripes. When activated with only Special Candy effects, the Bobber produces Jelly Fish. One Jelly Fish is spawned per hit. However, three Jelly Fish are spawned if hit with a Special Candy combination (like Striped Candy + Wrapped Candy), or if a Magic Mixer explodes and the Bobber is within effect range. Multiple Bobbers usually appear on a board at a time and are always indestructible. Jelly Fish spawned from Bobbers are programmed to attack targets in this order if present: Jelly, Blockers, Sugar Keys, Special Candies, and random candies if the other targets aren’t present. Bobbers don’t block the effects of Striped Candy or Special Candy combos. Activated Cake Bombs have no effect on Bobbers. |
|
|
Magic Mixer |
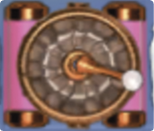
These are the most annoying Blockers in the game, next to the Chocolate Spawners. A Magic Mixer takes up one space and looks like a clock with two battery cells on the left and right sides. After two to four turns pass, the Magic Mixer begins spawning Blockers adjacent to the mixer. If these Blockers aren’t cleared, the Magic Mixer can spawn Blockers adjacent to the previous Blockers. These Blockers can be locked under Liquorice. They can spawn Popcorn, Sugar Chests, Candy Bombs, Chocolate, Liquorice Locks, and Liquorice Swirls. Unlike Chocolate Spawners, the Magic Mixer is destructible. You can hit it with candy matches adjacent to it, or with Special Candy effects and Special Candy combos. Destroying it takes five hits, and each time you hit it, it delays spawning Blockers for one move. Damage is shown with an immediate spark, battery drainage, and a gradual degradation in the clock graphic. Once destroyed, the blast radius covers a 5x5 space radius around the mixer (equal to a Wrapped Candy + Wrapped Candy combo). The blast can hurt other nearby Magic Mixers and take out candy, Jelly, and a layer of Blockers. Jelly can be hidden under these Blockers. |
|
|
Candy Cane |
You won’t encounter these Blockers until Level 3246. You find these completely encapsulating a square, or just one side of a square (horizontally or vertically). They’re indestructible, designed to protect individual spaces on the board. They don’t block Special Candy effects, but they can block simple matches. For example, a single horizontal Candy Cane can block a simple three-same-color candy match if it intersects one of three candies in the potential match. It’s not possible to swap candy from one side of the Candy Cane to the other. Candy Canes also block candies from falling. They’re designed to limit the space on the board for making matches. They can encapsulate Blockers, making them only vulnerable to Special Candy effects. |



Level Types
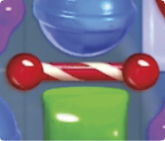
You can find the level type display icons on the Booster Selection menu, reached just before you enter a level. The Level Type button is located to the left of the Play! button that starts the level. Click on the Level Type button to learn the objective details of that particular level.
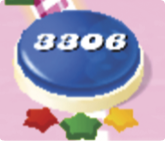
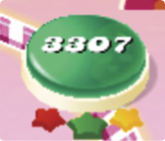
The numbered space on the world map is color-coded to match the type of level located there.
| World Level Image | Level Type Image | Name | Description |
|---|---|---|---|
|
|
|
Moves Level |
Reach the target score in a limited amount of moves. |
|
|
|
Jelly Level |
Clear all the Jelly, and reach the target score to complete the level. |
|
|
|
Ingredients Level |
Bring down all ingredients, and reach the target score to complete the level. |
|
|
|
Candy Order Level |
Collect all orders by removing the wanted items! |
|
|
|
Mix Mode Level |
A mix between two or more game modes. |





Moves Levels
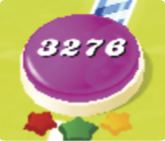
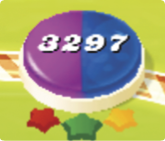
A Moves Level is one that has a target score to reach, with a certain amount of moves available. This is the first level type in Candy Crush (Level 1 is a Moves Level). Moves Levels are the easiest level type and are very rare, making up less than 10% of all the existing levels.
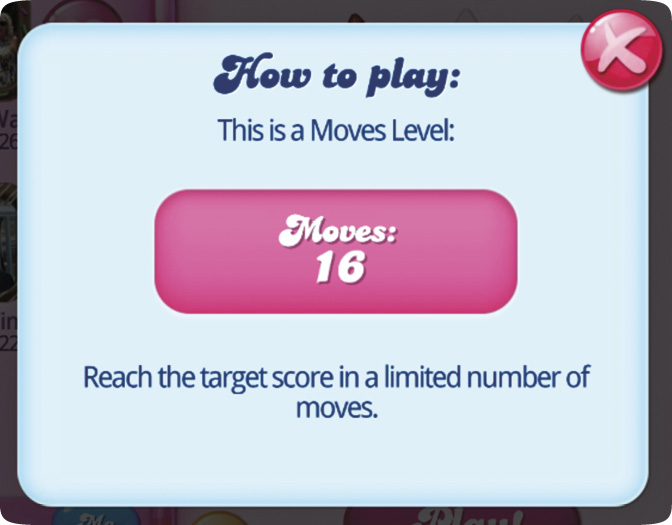
The number of moves needed to reach a score is clearly displayed; as soon as you enter the level, look at the top of the screen. The largest, boldest number displayed is the amount of candy-swiping moves you have, and the target score is to the right or below this number (depending on which way you have your device oriented). All the moves can be used to reach beyond the target score; in fact, you must use all the moves to complete this game type. When all moves are spent, Sugar Crush activates any Special Candies left on the board. Many times, this last action allows you to reach the target score. This is the only level type that never has Bobbers.
The name “Moves Level” is a little confusing, as all level types are restricted to the amount of moves you have. If you always had unlimited moves, none of the level types would be very challenging. This level type should be more accurately named “Target Score Levels.”
Jelly Levels
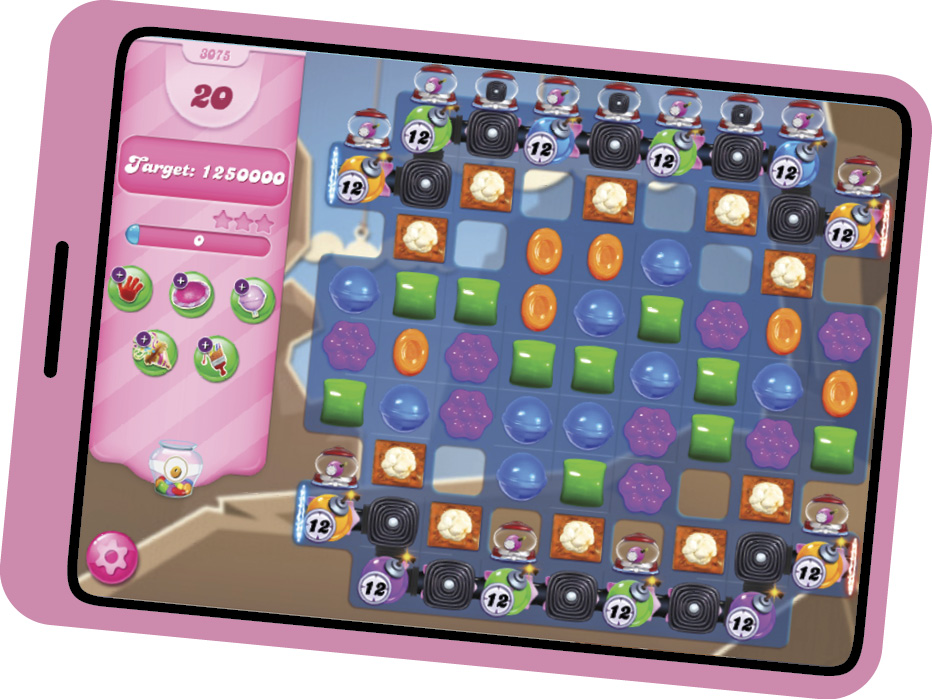
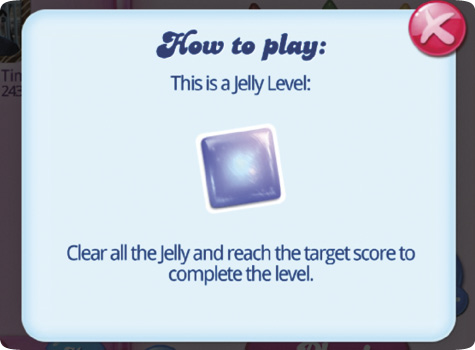
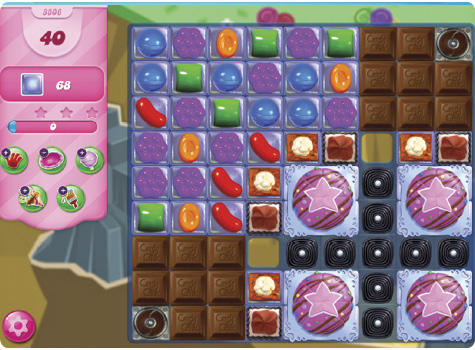
Jelly Levels make up around 40% of all levels currently in Candy Crush Saga. In a Jelly Level, you must clear all the Jelly from the board within a set number of moves. Jelly is removed by eliminating the candy that sits on the same square, with normal matching swipes and Special Candy effects and combinations. Blockers and Locks can keep you from easily removing Jelly. When all Jelly is removed from a board, a Sugar Crush is activated, which releases three Jelly Fish per remaining move. These Jelly Fish then eat random candies on the board, increasing your score. Jelly Levels can be the hardest level type in the game. Jelly Fish are good boosters to use in those hard-to-reach Jelly spaces.
Ingredient Levels
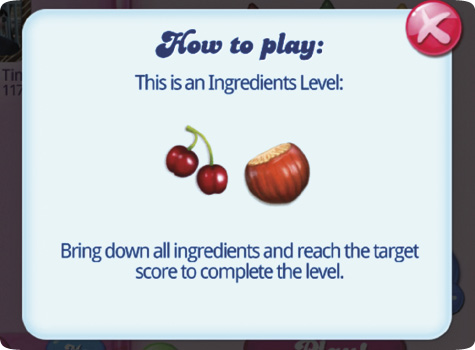
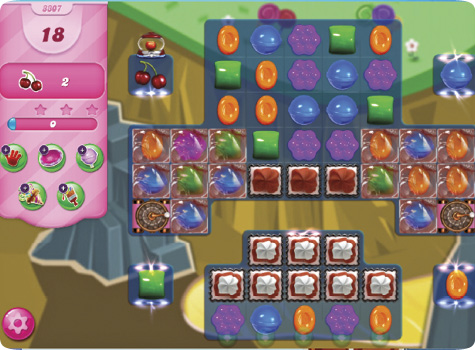
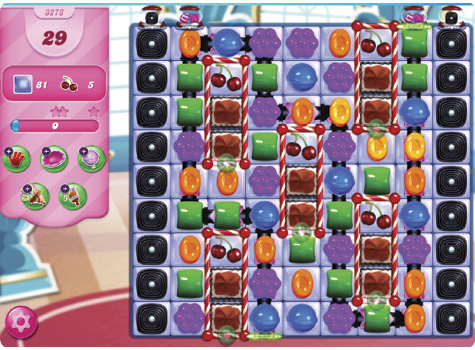
Ingredient Levels make up around 20% of all the boards in Candy Crush Saga. The objective is to collect all the indicated ingredients (Hazelnuts and Cherries) by sending them through a green arrow portal. The green portal can be set anywhere but is typically at the bottom of the board. Levels can request varying amounts of Cherries and Hazelnuts, and sometimes it’s just one ingredient type. They fall like normal candies but cannot be destroyed or covered by Chocolate. Sometimes the ingredients are on the board at the beginning of the level, and sometimes they drop out of dispensers. When all the ingredients have been collected within the set number of moves, the level is a success. At the end of the level, Sugar Crush creates a Striped Candy out of each remaining move and activates it to rack up more points. You fail the level if you fail to pass all the ingredients through the green arrow portal. Striped Candy, Color Bomb combos, and Coconut Wheels make short work of Ingredient Levels.
Candy Order Levels
These are the second-most-common level type in the game, making up around 25% of the boards. In this level type, you must collect a certain number of candies, candy combinations, or Blockers within a certain number of moves. Once all those orders have been fulfilled, the remaining lives are converted into Striped Candy and activated during the Sugar Crush.
Collecting orders simply means destroying the candy on the order, or creating and destroying the number of candy combos listed. One of the best boosters for this type of game is the Lucky Candy Booster—when broken, it produces one of the candies on the order. This is especially useful when candies on the order are out of reach or trapped under Blockers or Locks.
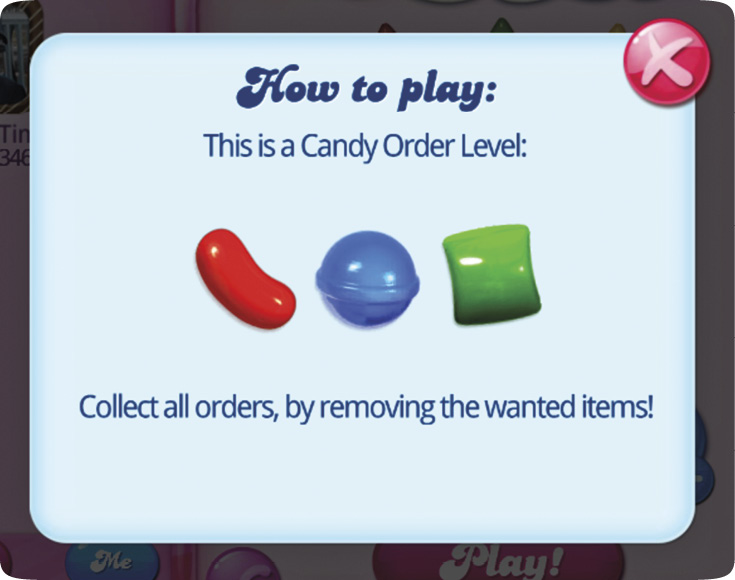
One of the easiest ways to collect all the orders of candy, Striped Candy, or Wrapped Candy is to use a Color Bomb on that candy type. It either zaps all those colors or creates many Striped or Wrapped Candies and destroys them. Try your best to create Color Bombs during Candy Order Levels (or bring them in as boosters).
When Chocolate is on the order, you must strategize not to destroy Chocolate as soon as it appears, or you risk forcing it not to materialize for a couple of moves. This often causes you to run out of moves to complete the order. Keep Chocolate spawning one after another if possible, then take out large orders of Chocolate with fewer moves or by taking out many Chocolates with Special Candy effects and combos.
Mixed Mode Levels
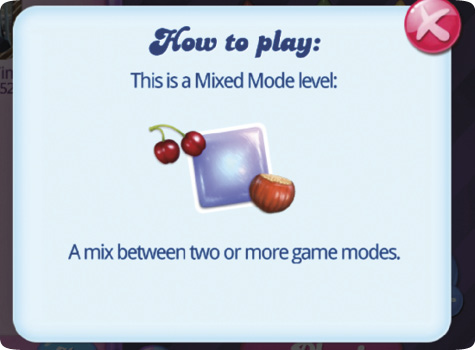
Mixed Mode Levels are exactly as stated: two or more different objectives in one level. Mixed Mode Levels make up around 10% of all the boards. All Mixed Mode Levels are a combination of Jelly and Ingredient Levels. Previously, there were Jelly and Time Levels, until all Time Levels were taken out of the game. All these that were mixed were turned into Jelly Levels
Free Boosters: Challenges & Events
If you refuse to spend real-world money and want to earn your way through all the worlds, you can still use boosters, but you have to work harder and wait longer for them—as opposed to forking over some cash at the Candy Shop. Events are challenges that are being constantly created. Partaking in events allows you to earn boosters.
Sugar Drop
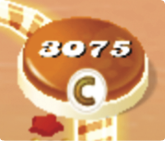
Have you seen those levels on the world map with the letter “C” on them? That means that level is a Sugar Drop level. A Sugar Drop is a normal candy but has a white band around it with the letter “C” written in gold. You collect these to obtain rewards. They appear in Sugar Drop levels and in subsequent newly unlocked levels. The Sugar Drop only appears on the board during a cascade event, when the announcer says, “Sweet,” “Tasty,” “Delicious,” or “Divine.” When this happens, a regular candy is turned into a Sugar Drop. Once on the board, they’re collected no differently from a normal candy.
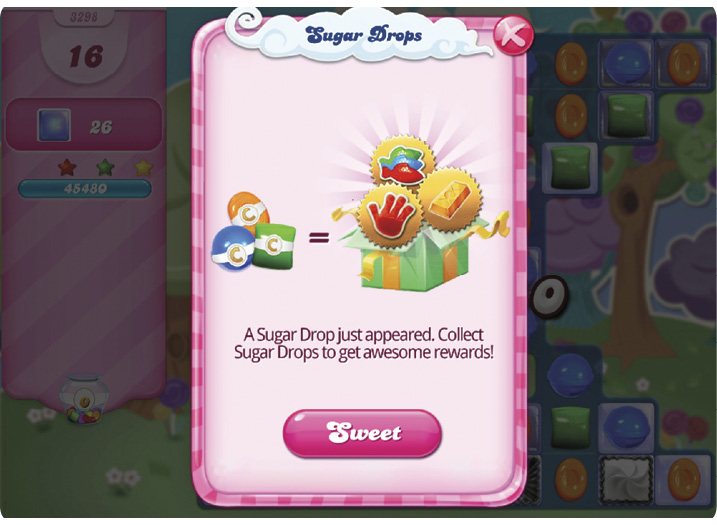
The idea is to collect a certain number of Sugar Drops to earn prizes. Jumping back into the same level where Sugar Drops appeared doesn’t spawn them again. When you click on the Play button on a Sugar Track prompt, a progress bar indicates the number of candies you’ve collected, as well as the number needed for the next reward.
When you complete a level—and also achieve one of the stages of Sugar Drop collection (24, 60, 84, 120, 180 Sugar Drops collected)—the reward screen pops up and you can claim your reward then and there. Your rewards are: Lollipop Hammer, Jelly Fish, Color Bomb, Coconut Wheel, Free Switch, Striped and Wrapped Candy, Lucky Candy, and Gold Bars. The higher the collection number, the better and more rewards you earn.
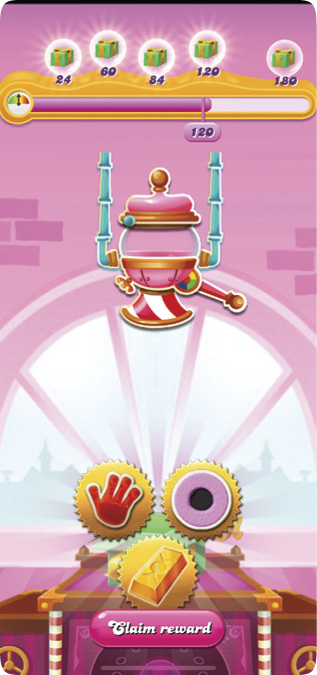
When one round has been achieved, there’s an eight-hour cooldown period where no Sugar Drops are available for collection.
| Present Number | Rewards |
|---|---|
|
24 |
Gold (x2) |
|
60 |
Coconut Wheel, Wrapped and Striped Candy (x2) |
|
84 |
Coconut Wheel, Lucky Candy |
|
120 |
Free Switch, Coconut Wheel, Gold |
|
180 |
Lollipop Hammer (x2), Lucky Candy |
Star Chaser (Misty the Unicorn)
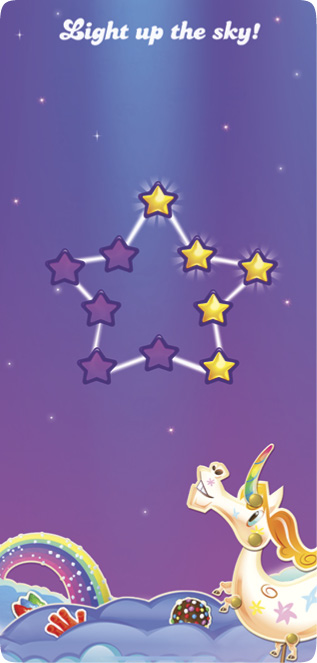
This is the event that features Misty the Unicorn. She needs 10 stars to create a star-shaped constellation. The more stars you earn per level, the quicker you fill up her constellation with gold stars. You can’t replay the same level to get more stars; you must complete new levels to add to Misty’s constellation chart. You have a limited time (around 24 hours) to complete the challenge. When active, the Star Chaser details appear in the Fun Events menu found on the World Map screen. Here you can see how you rank with others and how much time is left in the challenge.
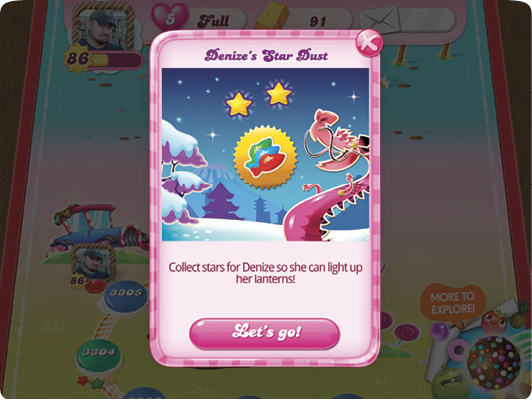
Denize’s Star Dust (Denize the Dragon)
Much like the Star Chaser event, Star Dust features a mystical creature, Denize the Dragon, and you must help her light lanterns by collecting stars. All the same rules apply as Star Chaser; it’s just a different host. This event lasts around 30 hours.
Space Dash
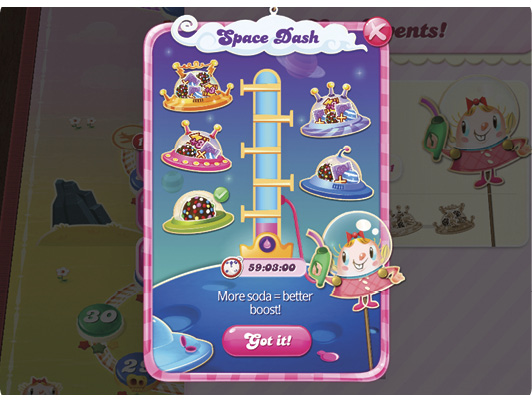
When this event is active, finishing levels without losing a life earns you boosters that become active on the first move in the next level. Continue winning levels, and each subsequent level another booster is added to the list of boosters you begin with. The bonuses are over when you fail a level and must restart at the beginning of the challenge to build up stacked boosters again. There are five levels of booster awards.
| Levels Won in a Row | Booster Reward |
|---|---|
|
1 |
Color Bomb |
|
2 |
Color Bomb, Wrapped and Striped Candy |
|
3 |
Color Bomb, Wrapped and Striped Candy, +3 Extra Moves |
|
4 |
Color Bomb, Wrapped and Striped Candy (x2), +3 Extra Moves |
|
5 |
Color Bomb (x2), Wrapped and Striped Candy (x2), +3 Extra Moves |
Magic Dash (Mort the Magician)
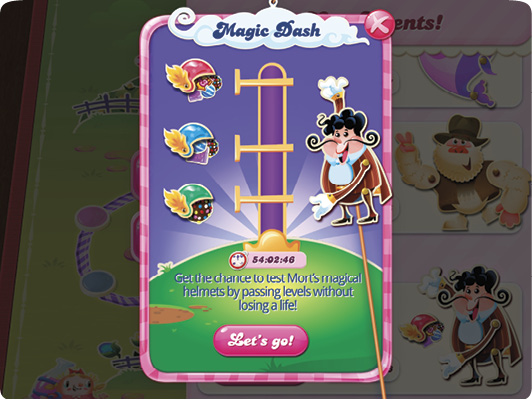
This event is much like the Space Dash. Once you complete one or two levels, the event kicks in. Continue to pass levels without failing to stack booster prizes that become available on the board on the first move of each next level reached. Helmets fill with boosters after completing a level. The booster rewards are the same as in the Space Dash table in the previous section.
Dexter’s Delight Candy Collection (Dexter the Whale)
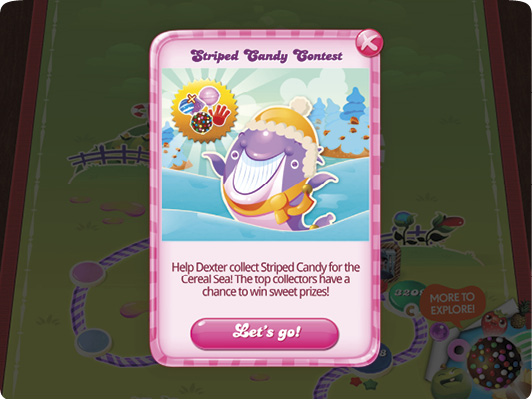
You get rewards by collecting Orange or Striped Candies, but the level must be completed for these collections to count toward the total. When it’s completed, you can earn a group of prizes: Free Switch, Wrapped and Striped Candy, Lollipop, Jelly Fish, Coconut Wheel, and a Color Bomb. The problem with this event is that you must stay in the world to complete the challenge, so many are out of the world before the event ends. There’s no way to opt out of the event. While this guide was being written, King announced that they were altering the way this event works.
Candy Pet
This is one of the newest events in the game. Collect candies by winning levels, then bake treats for Rami the Sheep (Thursday through Sunday) or Didi the baby dragon (Monday through Thursday) to earn a sweet reward. You have six stages to earn the big prize. First, you must tap the capsule to hatch the Candy Pet. The first order is 20 (same-color) candies, and the baking time is five seconds. Next, the color of the candy changes, the amount changes to 80, and the baking time greatly increases. This goes on for six stages of increasing orders and baking time. Repeat the process to fill the meter and collect the reward. Candies collected during baking time don’t go toward the challenge. Each stage award is one hour of free Color Bomb Boosters, and the final prize includes a Free Switch, Coconut Wheel, Lucky Candy, Color Bomb, and a Lollipop Hammer. These are added to your inventory.
Treat Calendar
Play every day and accept the treats earned every day for seven days in a row. Miss a day, and you start back at Day 1.
| Day | Prize |
|---|---|
|
1 |
Wrapped and Striped Candy combo |
|
2 |
Color Bomb |
|
3 |
Coconut Wheel |
|
4 |
Wrapped and Striped Candy combo, Jelly Fish |
|
5 |
Wrapped and Striped Candy combo, Color Bomb |
|
6 |
Coconut Wheel, Jelly Fish |
|
7 |
Free Switch, Color Bomb, Wrapped and Striped Candy combo |
Daily Booster Wheel
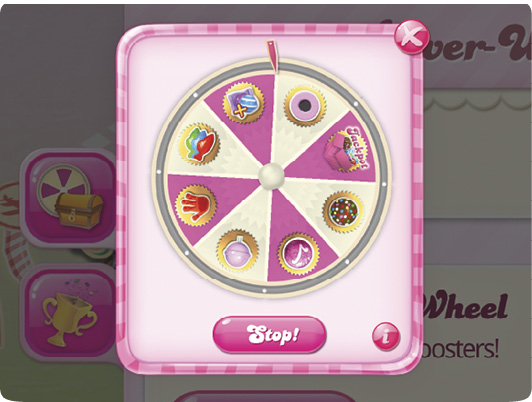
This is the best way to get a free booster every day. Give the Booster Wheel a spin every 24 hours to get a free booster. The Jackpot space is rigged; it speeds up or slows down just before reaching it. It’s not impossible to land on it but it’s very rare. When you do land on it, you earn one of each prize on the wheel. Eventually you learn how many times the wheel goes around so you can try to pick your prize, but the wheel speed and number of revolutions are different on each device.
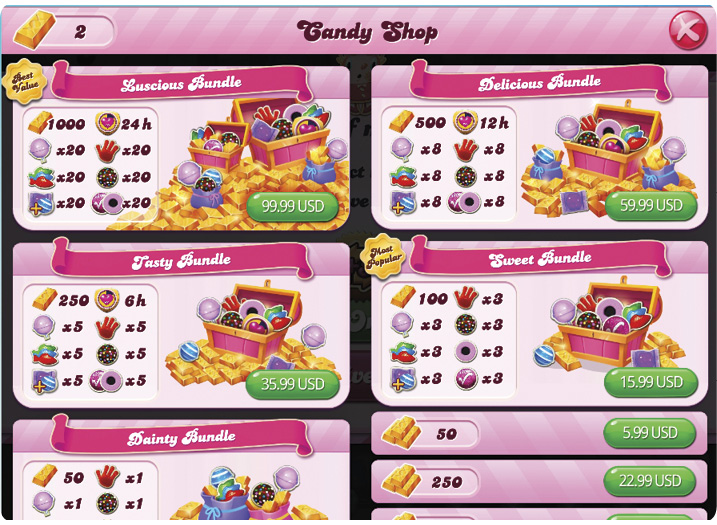
Candy Shop
The Candy Shop has multiple bundles available that contain all types of boosters and Gold. The three most expensive bundles also include Free Play hours. The bundles range from $6.99 to $99.99 (there are five bundles). You can also buy bundles of Gold in case you simply need a little something to get you through a tough spot. The lowest Gold package contains 15 Gold and costs $1.99, while the most expensive and largest bundle contains 1000 Gold and costs $79.99.