
Mobile Gaming Guide — Tips, Tricks, and Strategies for Today's Hottest Mobile Games Bloons TD 5
What You Need to Know
The quickest way to get up to speed and start beating levels is to understand the Bloon hierarchy and what tower you need to destroy each Bloon type. So first we’ll jump into the Bloon tables, and once those Bloons’ weaknesses are revealed, we’ll discuss the tower types and their strengths. Finally, we’ll discuss strategy, and how to easily control the chaos and start winning games and earning metals.

Bloon Types
This table lists all the Bloon types and their characteristics in ascending order, from the most basic to the most advanced. To understand “child of” and “parent to,” keep in mind that Bloons encapsulate other Bloons. Since the Red Bloon is at the core of all Bloons, the Red Bloon is a child of (spawned from) a Blue Bloon and is the parent of (spawns) nothing.
| Image | Bloon Name | Child Of(Spawns From) | Parent To(Spawns) | Hits to Destroy | Speed (1 to 11) | Immune To | Round Appearance |
|---|---|---|---|---|---|---|---|
|
|
Red |
Blue |
— |
1 |
3 |
— |
1 |
|
|
Blue |
Green |
Red |
2 |
4 |
— |
3 |
|
|
Green |
Yellow |
Blue |
3 |
5 |
— |
6 |
|
|
Yellow |
Pink |
Green |
4 |
10 |
— |
11 |
|
|
Pink |
Black and White |
Yellow |
5 |
11 |
— |
15 |
|
|
Camo |
DDT (Bloons Monkey City, Ceramic with Regrowth) |
Depends on original Bloon color |
11 |
Depends on original Bloon color |
Cannot be detected by most towers (without special upgrades). Dartling Gun, Ninja Monkey, and Spike Factory can detect Camo without upgrades. |
24 |
|
|
Black |
Zebra and Lead Bloons |
(x2) Pink |
11 |
5 |
Explosions |
20 |
|
|
White |
Zebra and Lead Bloons |
(x2) Pink |
11 |
6 |
Freezing |
22 |
|
|
Lead |
— |
(x2) Black |
23 |
3 |
Sharp Projectiles and Lasers |
28 |
|
|
Zebra |
Rainbow (spawns 2 Zebras) |
(1) Black, (1) White |
23 |
5 |
Bombs and ice |
26 |
|
|
Rainbow |
Ceramic |
(x2) Zebra |
47 |
7 |
Its children are immune to bombs and Ice |
35 |
|
|
Ceramic |
MOAB, DDT (spawns 6 Camo Regen Ceramics) |
(x2) Rainbow |
104 |
8 |
Glue (takes one hit to break immunity to Glue) |
40 |
|
|
Massive Ornery Air Blimp (MOAB) |
BFB |
(x4) Ceramic |
616 |
3 |
— |
46 |
|
|
Brutal Floating Behemoth (BFB) |
ZOMG |
(x4) MOABs |
3164 |
1 |
— |
60 |
|
|
Zeppelin Of Mighty Gargantuaness (ZOMG) |
Nothing |
(x4) BFBs |
16,656 |
4/5 |
— |
85 |








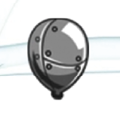



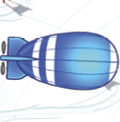
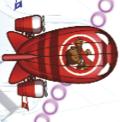
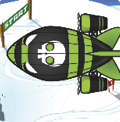
Camo Bloons
One of the biggest, earliest obstacles is the Camo Bloon. A single one comes out early to warn you of what’s ahead. At Level 33, a group comes out alone, so if you don’t have a Ninja Monkey and a Spike Factory, you could be in trouble. There’s also a group that comes out last on Level 37. When you start combining them with Ceramic, things get ugly.
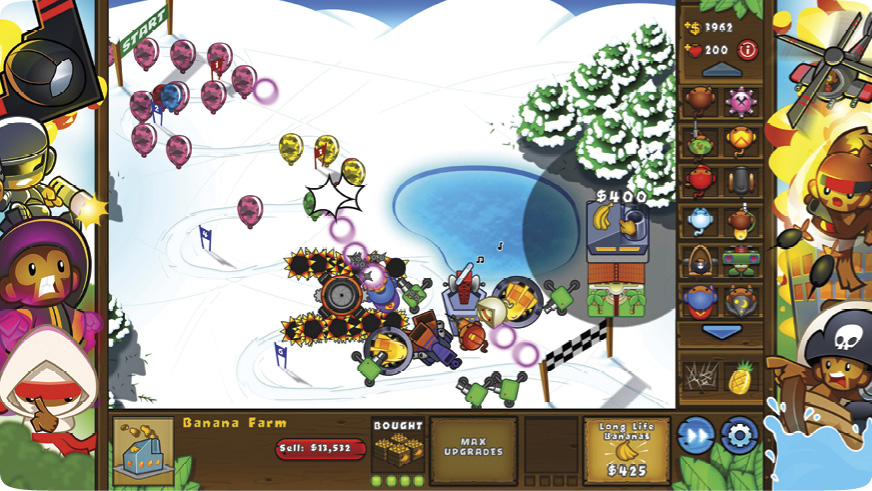
Camo Bloons can only be seen by Dartling Guns and Spike Factories. All other towers require upgrades or nearby towers that give them the ability to see Camo. If a tower can’t see them, the Camo Bloon passes through undetected and unharmed, even if explosions are occurring all around them. If they have Regrowth, they become extremely dangerous. This table shows how to combat Camo Bloons.
| Tower | Upgrade | Notes |
|---|---|---|
|
Dart Monkey |
Enhanced Eyesight 1st path, 2nd upgrade |
Gives better range. With the Triple Darts upgrade, it can destroy three layers of the Camo Bloon. The Juggernaut (1st path, 4th upgrade) pops Camo Leads. |
|
Monkey Sub |
Submerge and Support 1st path, 3rd upgrade |
It can pop Camos if using Advanced Intel (1st path, 1st upgrade), but only if there’s another tower that can see Camo. With Submerge and Support, Camos lose their status when they pass through the green target that appears when submerged. |
|
Monkey Engineer |
Cleansing Foam 1st path, 3rd upgrade |
Sprays foam that removes Camo and Regen, and pops Leads but cannot detect Camo unless its Camo is first removed with the foam. |
|
Sniper Monkey |
Night Vision Goggles 2nd path, 2nd upgrade |
Allows detection and shooting of Camo Bloons. Also pops Camo Leads with the Full Metal Jacket upgrade (1st path, 1st upgrade). |
|
Boomerang Thrower |
Glaive Lord 1st path, 4th upgrade |
Two permanent Glaives orbit the tower and pop an infinite amount of Bloons as long as the Glaives make contact. This also pops Lead Bloons. |
|
Ninja Monkey |
— |
The Ninja Monkey sees Camo with no upgrades. With Double Shot (1/3) or Bloonjitsu (1/4), can pop two to five layers of Camo Bloons. Destroys Camo Leads with a Flash Bomb upgrade (2/3). |
|
Bomb Tower |
MOAB Assassin 2nd path, 4th upgrade |
This only works if the Camo Bloon is the strongest Bloon on the board, and only pops one layer. This is one of the weakest Camo-popping options. |
|
Ice Tower |
Viral Frost 1st path, 4th upgrade Absolute Zero 2nd path, 4th upgrade |
Viral Frost causes Frozen Bloons to freeze others that come in contact, Camo Bloons included. Absolute Zero (ability) freezes Camo Bloons, and the Tier 4 Ice Fortress can take away the Camo status. |
|
Glue Gunner |
Glue Striker 2nd path, 4th upgrade |
Glue Striker (ability) glues everything on-screen, Camos included, no matter if there’s Camo-detection support. |
|
Monkey Buccaneer |
Crows Nest 2nd path, 2nd upgrade |
Allows Buccaneer to hit Camo Bloons. |
|
Monkey Ace |
Spy Plane 2nd path, 2nd upgrade |
Spy Plane allows Camo Bloon hits. Neva-Miss Targeting (1/3) and Spectre (1/4) need Spy Plane upgrade to pop Camo Bloons. |
|
Super Monkey |
Temple of the Monkey God 1st path, 4th upgrade |
With a Tier 3 Super Monkey Lair, allows Camo detection—even if another tower with Camo detection is sacrificed. |
|
Monkey Apprentice |
Monkey Sense 2nd path, 2nd upgrade |
Allows the Monkey Apprentice to hit Camo Bloons. |
|
Monkey Village |
Radar Scanner 2nd path, 2nd upgrade |
Allows towers within its radius to hit Camo Bloons. The Energy Beacon (1st path, 4th upgrade) can’t pop Camo Bloons without this upgrade. |
|
Mortar Tower |
Signal Flare 2nd path, 3rd upgrade |
Camo Bloons popped by Flares permanently lose their Camo, and the tower cannot detect Camos without this upgrade. |
|
Dartling Gun |
No upgrade required |
Pops Camo Bloons without upgrades, but needs Depleted Bloontonium (2/2) or Ray of Doom (1/4) to pop Camo Leads. |
|
Spike Factory |
No upgrade required |
Non-upgraded Spikes pop Camo Bloons, but need White Hot Spikes upgrade (1/2) to destroy Camo Leads. |
|
Heli Pilot |
Enhanced IFR Instruments 2nd path, 2nd upgrade |
Detects and shoots Camo Bloons, but needs upgrades—Razor Rotors (1/3) or Apache Dartship (1/4)—to pop Camo Leads. |
|
Road Spikes |
— |
Costs $30 per use. Pops 10 Bloons, including Camo, but doesn’t destroy Leads. |
|
Pineapple |
— |
Costs $25 per use. Has to be timed right, as they explode three seconds after being placed. |
|
Bloonsday Device |
(Special Agent) |
Gives you temporary control of the orbital strike satellite, whose beam destroys all Bloons on-screen, including Camo Bloons. |
|
Meerkat Spy |
(Special Agent) |
No attack, but uses his super-keen senses to spot Camo Bloons, granting Camo Detection for all towers within his radius. |
|
Bloonberry Bush |
(Special Agent) |
Plant this right on the track. Loses a thorn for each Bloon popped, but grows 10 thorns between each round (up to 200). Does not pop Lead. |
|
Angry Squirrel |
(Special Agent) |
Armed with sharp acorns, it goes berserk and can spot Camo and pop Lead. |
|
Super Monkey Storm |
(Special Agent) |
Destroys every single Bloon (including Camo) on-screen with a squadron of flying super-powered Laser-beamin’ monkeys. |
Tower Types
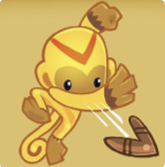
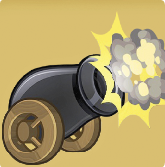
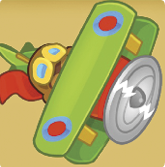
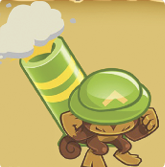
Now that we’ve covered all the targets, let’s talk about the towers. Each tower (mostly made up of monkeys) has two paths of upgrades, and these upgrades are unlocked by reaching a higher rank, which is accomplished by earning XP (popping Bloons). Rank 45 is the point where every tower’s fourth tier of upgrades is unlocked. Once tiers are unlocked, you need only have the money to purchase the upgrade in each game. Be aware that the cost of upgrades per game is dependent on the difficulty you select: Easy is the least expensive; Hard is the most expensive.
Keep in mind that once you reach the third-tier upgrades, you must choose either the Path 1 or 2 Tier 4 upgrade, as you cannot have two Tier 4 upgrades on one tower. The following table lists all the towers and their upgrade details and paths.
| Image | Name | Rank Unlocked | Upgrades | Notes | ||||
|---|---|---|---|---|---|---|---|---|
|
|
Dart Monkey |
1 |
|
Tier 1 |
Tier 2 |
Tier 3 |
Tier 4 |
Cheapest tower. If used first, upgrade to Triple Darts, and it could hold its own up to Level 13–15, depending on placement. Path 1 focuses on popping power, and Path 2 increases darts per shot. Since upgrade 1/2 reveals Camo, you don’t need a Ninja as soon. |
|
Path 1 |
Long-Range Darts |
Enhanced Eyesight |
Spike-O-Pult |
Juggernaut |
||||
|
Makes it shoot farther than normal. |
Shoots even farther and can detect Camo. |
Catapult fires spiked balls that can pop 18 Bloons. |
Hurls a giant spiked ball that excels at crushing Ceramics. Unlocks at Rank 21. |
|||||
|
Path 2 |
Sharp Shots |
Razor-Sharp Shots |
Triple Darts |
Super Monkey Fan Club |
||||
|
Can pop one extra Bloon per shot. |
Can pop two extra Bloons per shot. |
Throws three darts at a time instead of one. |
Ability: Up to 10 nearby Dart Monkeys go Super for 10 seconds. Unlocks at Rank 21. |
|||||
|
|
Monkey Sub |
20 |
|
Tier 1 |
Tier 2 |
Tier 3 |
Tier 4 |
This is a cheap tower that you can only place in water. Multiple 2/3 upgraded subs can withstand the Ceramic rush. Using Advanced Intel makes it useful for taking out Camos when other towers that can see Camos are in play. |
|
Path 1 |
Barbed Darts |
Advanced Intel |
Submerge and Support |
Bloontonium Reactor |
||||
|
Makes the Submarine’s Darts pop up to three Bloons each. |
Allows long-range targeting of Bloons that are in the radius of your other towers. |
Activates Submerge, using target option to permanently reveal Camo Bloons in its radius. |
Activates Submerge, using target option to detect Camo, pop Bloons, and reduce Water Tower cooldowns 15% (doesn’t attack). |
|||||
|
Path 2 |
Twin Guns |
Airburst Darts |
Ballistic Missile |
First-Strike Capability |
||||
|
Added twin gun doubles attack speed. |
Airburst Darts split into three on impact for massively increased popping power. |
Ballistic missile seeks its target over any distance and does extra damage to Ceramic and MOAB Bloons. |
Ability: A devastating missile strike on the largest Bloon on-screen. Destroys up to a ZOMG Bloon in one go, or many lesser Bloons. |
|||||
|
|
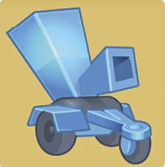
Bloonchipper |
21 |
|
Tier 1 |
Tier 2 |
Tier 3 |
Tier 4 |
This is one of the most powerful towers in the game. Use this early on to shred everything. The more you upgrade, the more it tears through all layers of any Bloon quickly. You really only need one unless you want to use another further down the line to get Bloons that get past your initial offense. Since some power has been taken from it in updates, consider using a Bomb Tower or the Monkey Ace in its place. |
|
Path 1 |
Suckier |
Heavy-Duty Suction |
Dual-Layer Blades |
Super-Wide Funnel |
||||
|
Increased suction sucks Bloons in faster. |
Higher-wattage motor allows for sucking in heavier Bloons such as Lead Bloons. |
Dual-layer Blade array doubly shreds Bloons, taking off two layers instead of one. |
Wide funnel can suck in MOAB-class Bloons, which will be shredded for up to three seconds before being ejected. |
|||||
|
Path 2 |
Long-Range Suck |
Faster Shred |
Triple Barrel |
Supa-Vac |
||||
|
Increases suction range. |
More efficient internal componentry decreases the time Bloons take to be shredded. |
Triple barrels provide the most efficient Bloon-shredding possible. |
Huge burst of suction power brings all nearby non-MOAB Bloons toward it and holds them there until they’ve been sucked into the tower. Lasts eight seconds. |
|||||
|
|
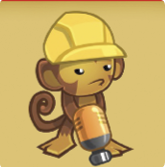
Monkey Engineer |
21 |
|
Tier 1 |
Tier 2 |
Tier 3 |
Tier 4 |
This is a good tower to use early on as a solo tower, as with upgrades it can spawn sentries to assist with popping Bloons. Great to use against Camo with the Cleansing Foam upgrade. |
|
Path 1 |
Sentry Gun |
Fast Engineering |
Cleansing Foam |
Bloon Trap |
||||
|
Creates temporary sentry guns and deploys them nearby. |
Increased build speed produces sentry guns more often. |
Sprays foam that removes Camo and Regen, and pops Leads. |
Trap captures Bloons until full. Can be emptied for cash. |
|||||
|
Path 2 |
9-Inch Nails |
Larger Service Area |
Sprockets |
Overclock |
||||
|
Massive Nail pops eight Bloons at once, including Frozen Bloons. |
Shoot farther, and deploy sentries in a larger area. |
Increases sentry fire rate appreciably. |
Ability: Target tower becomes super-powered for 60 seconds. |
|||||
|
|
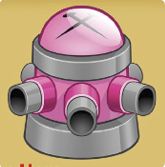
Tack Shooter |
2 |
|
Tier 1 |
Tier 2 |
Tier 3 |
Tier 4 |
The Tack Shooter is great for putting behind a Bloonchipper to pick up everything it misses. The Ring of Fire is a must. It has no Camo detection on its own. Artic Wind (Ice Tower upgrade), and use with Ring of Fire to destroy Ceramics and Leads. Monkey Beacon does not increase the range of the Tack Shooter. |
|
Path 1 |
Fast Shooting |
Even Faster Shooting |
Track Sprayer |
Ring of Fire |
||||
|
Shoots Tacks faster. |
Shoots Tacks even faster! |
Sprays out 16 Tacks per volley instead of the usual 8. |
Shoots a deadly ring of flames instead of Tacks. |
|||||
|
Path 2 |
Extra-Range Tacks |
Super-Range Tacks |
Blade Shooter |
Blade Maelstrom |
||||
|
Tacks fly out farther than normal. |
Tacks go much farther than normal. |
Shoots out big razor-sharp Blades. |
Ability: Covers the area in a storm of Blades. |
|||||
|
|
Sniper Monkey |
3 |
|
Tier 1 |
Tier 2 |
Tier 3 |
Tier 4 |
Infinite range and Camo detection at upgrade 2/2. Set stance to Strong or Last to take advantage of their high damage. Path 1 upgrades are great for Camo, Lead, and Frozen Bloons. With their unlimited range, you can place them anywhere on the map. If you use more than one, make sure their target priorities are different so they don’t all go for the same target and miss. |
|
Path 1 |
Full Metal Jacket |
Point Five Oh |
Deadly Precision |
Cripple MOAB |
||||
|
Shots can pop through four layers of Bloons. Can pop Lead and Frozen. |
Shots can pop through seven layers of Bloon! |
Erases 18 layers of Bloons per shot—enough to destroy a Ceramic. |
Immobilizes MOAB-class Bloons for a short time. |
|||||
|
Path 2 |
Faster Firing |
Night Vision Goggles |
Semi-Automatic Rifle |
Supply Drop |
||||
|
Allows Sniper to shoot faster. |
Allows Sniper to detect and shoot Camo Bloons. |
Allows Sniper to take multiple shots and attack 3x as fast. |
Ability: Drops a crate full of cash. |
|||||
|
|
Boomerang Thrower |
4 |
|
Tier 1 |
Tier 2 |
Tier 3 |
Tier 4 |
This is a good tower for early-to-mid-game challenges. Turbo Charge can be used for Camo Lead rushes. |
|
Path 1 |
Multi-Target |
Glaive Thrower |
Glaive Ricochet |
Glaive Lord |
||||
|
Boomerangs can now pop seven Bloons each. |
Throws sharper, faster, bigger Glaives instead of Boomerangs. |
Glaives now automatically bounce from Bloon to Bloon. |
Two permanent Glaives orbit the tower. |
|||||
|
Path 2 |
Sonic Boom |
Red-Hot ’Rangs |
Bionic Boomer |
Turbo Charge |
||||
|
Sonic Boomerangs can smash through Frozen Bloons. |
Red-hot Boomerangs can melt through Lead Bloons. |
Throws Boomerangs twice as fast. |
Ability: Attacks incredibly fast for 10 seconds. |
|||||
|
|
Ninja Monkey |
6 |
|
Tier 1 |
Tier 2 |
Tier 3 |
Tier 4 |
This is a great tower to use first, as its speed can be ramped up quickly and cheaply. Plus, it can take out Camo Bloons. Sabotage Supply Lines is a great ability to have in later levels. |
|
Path 1 |
Ninja Discipline |
Sharp Shurikens |
Double Shot |
Bloonjitsu |
||||
|
Increases attack range and attack speed. |
Shurikens can pop four Bloons each. |
Throws two Shurikens at once. |
Throws five Shurikens at once! |
|||||
|
Path 2 |
Seeking Shuriken |
Distraction |
Flash Bomb |
Sabotage Supply Lines |
||||
|
Shuriken seeks out and pops Bloons automatically. |
Some Bloons become distracted and move the wrong way. |
Sometimes throws a flash bomb that stuns multiple Bloons. |
Ability: Lasts for 15 seconds. During the sabotage, all new Bloons are crippled to half-speed. |
|||||
|
|
Bomb Tower |
7 |
|
Tier 1 |
Tier 2 |
Tier 3 |
Tier 4 |
Cannot detect Camo alone. If you upgrade beyond Path 1, Tier 2 (Frag Bombs), you’ll be locked out of Path 2 upgrades. The same goes for Path 2: if you upgrade past Path 2, Tier 2 (Missile Launcher), you’ll be locked out of further Tier 1 upgrades. This is an important tower to have to go up against MOAB-class Bloons. It’s a flexible tower. |
|
Path 1 |
Extra Range |
Frag Bombs |
Cluster Bombs |
Bloom Impact |
||||
|
Gives tower long attack range. |
Each explosion throws out eight sharp fragments for more popping. |
Throws out secondary bombs instead of frags. |
Bloons become stunned for a short time when they’re hit. |
|||||
|
Path 2 |
Bigger Bombs |
Missile Launcher |
MOAB Mauler |
MOAB Assassin |
||||
|
Larger blast area and more popping power. |
More velocity and range, more damage, and faster firing. |
Inflicts 10x damage on MOAB-class Bloons. |
Ability: Deadly missile seeks the nearest MOAB and destroys it. |
|||||
|
|
Ice Tower |
8 |
|
Tier 1 |
Tier 2 |
Tier 3 |
Tier 4 |
This tower is good for slowing down Bloons, allowing your other towers to do their jobs more efficiently. Without upgrades, it’s useless against White, Zebra, and MOAB-class Bloons. Suggest keeping it away from your front line, as it can hinder some towers from breaking Frozen Bloons. Absolute Zero is a useful ability at high levels, as it slows down MOABs. |
|
Path 1 |
Enhance Freeze |
Snap Freeze |
Arctic Wind |
Viral Frost |
||||
|
Larger freeze area that freezes Bloons for longer. |
Pop a layer off of each Bloon frozen. |
Super-cold aura slows all Bloons in its larger radius. |
Frozen Bloons freeze other Bloons that come in contact. |
|||||
|
Path 2 |
Permafrost |
Deep Freeze |
Ice Shards |
Absolute Zero |
||||
|
Larger blast area and more popping power. |
Freezes two layers, extending the slow duration. |
Razor-sharp shards fly out when Frozen Bloons pop. |
Ability: Freezes all Bloons on-screen temporarily. |
|||||
|
|
Glue Gunner |
9 |
|
Tier 1 |
Tier 2 |
Tier 3 |
Tier 4 |
No Camo detection until you upgrade it with Glue Striker, which takes awhile and is expensive. This is one of the least-used towers, even though it can eat through layers of Bloons. Money spent on other towers is usually better for strategy. |
|
Path 1 |
Glue Soak |
Corrosive Glue |
Bloon Dissolver |
Bloon Liquefier |
||||
|
Glue soaks through all layers of Bloons. |
Glued Bloons pop one layer every few seconds. |
Extreme solvents melt two layers every second. |
Pops once instantly and liquefies Bloons ten times every second! |
|||||
|
Path 2 |
Stickier Glue |
Glue Splatter |
Glue Hose |
Glue Striker |
||||
|
Makes Glue effect last much longer. |
Splatters Glue across eight Bloons at a time. |
Shoots Glue more than 3x as fast! |
Ability: Glues everything on-screen temporarily. |
|||||
|
|
Monkey Buccaneer |
11 |
|
Tier 1 |
Tier 2 |
Tier 3 |
Tier 4 |
This tower must be set in water or in a Portable Lake (Special Agent). After you purchase the third upgrade in a path, you can only purchase the first two upgrades in the other path. It’s nice to pair this up with a farm and an Apprentice. |
|
Path 1 |
Faster Shooting |
Longer Cannons |
Destroyer |
Aircraft Carrier |
||||
|
Shoots its big Darts faster. |
Much longer range. |
Attacks super duper fast! |
Launches fast strafing Monkey Ace pilots. |
|||||
|
Path 2 |
Grape Shot |
Crow’s Nest |
Cannon Ship |
Monkey Pirates |
||||
|
Adds a spray of four sharp grapes. |
Allows the Buccaneer to hit Camo Bloons. |
Adds a powerful, independently firing cannon to the Buccaneer. |
Ability: Grapples the nearest MOAB and brings it down. |
|||||
|
|
Monkey Ace |
12 |
|
Tier 1 |
Tier 2 |
Tier 3 |
Tier 4 |
Make sure to choose your flight path to work best with your map. It can fly a circle, or two differently oriented figure-eights. Circle usually does best, as figure-eights could send it off-screen. This is one of the weakest towers but is good as a support tower to help keep Bloon count down. |
|
Path 1 |
Rapid Fire |
Sharper Darts |
Neva-Miss Targeting |
Spectre |
||||
|
Shoots Darts more often. |
Monkey Ace Darts can pop eight Bloons each! |
Darts seek out and pop Bloons intelligently. |
Missiles pierce through anything and pop two layers. |
|||||
|
Path 2 |
Pineapple Present |
Spy Plane |
Operation: Dart Storm |
Ground Zero |
||||
|
Drops an exploding pineapple every three seconds. |
Allows Monkey Ace to hit Camo Bloons. |
More Darts = win. |
Ability: Drops a devastating bomb that destroys all Bloons and damages MOAB class. |
|||||
|
|
Super Monkey |
13 |
|
Tier 1 |
Tier 2 |
Tier 3 |
Tier 4 |
This is a tower best used toward the end of a game because of the expense involved. You must upgrade to make it as effective as you would expect. A few Sun Gods can hold off swarms of MOABs. This tower is extremely fast. |
|
Path 1 |
Laser Blasts |
Plasma Blasts |
Sun God |
Temple of the Monkey God |
||||
|
Fast-firing twin Laser beams pop twice as much as before. Each Laser pops two Bloons instead of one. |
Plasma vaporizes everything it touches. Shoots twice as fast as individual Laser blast, each popping four Bloons, and is able to pop Lead. |
It is said that Bloons should never touch the sun. This is an unstoppable power and an upgrade to strive for. |
Tower sacrifices enhance and modify Temple’s awesome arsenal. It demands a sacrifice! Use at your own risk. |
|||||
|
Path 2 |
Super Range |
Epic Range |
Robo Monkey |
Technological Terror |
||||
|
Increases attack range. |
Why settle for super when you can have epic? This gives Super Monkey ultimate attack range. |
Half Super Monkey, half killer robot of death (not quite as coveted as Sun God). Can pop Frozen and Lead even if Path 1 isn’t upgraded. |
Ability: Destroys all Bloons within short radius of tower, completely. Does 1000 damage to MAOB-class Bloons and can hit Camo. |
|||||
|
|
Monkey Apprentice |
14 |
|
Tier 1 |
Tier 2 |
Tier 3 |
Tier 4 |
This is a popular tower because of its affordability, to help pop Camo Lead. Since the Apprentice pushes balloons, it’s a good idea to put it near the end of the path. They can pop Lead without upgrades, so you could use this instead of a Bomb Tower early on. |
|
Path 1 |
Intense Magic |
Lightning Bolt |
Summon Whirlwind |
Tempest Tornado |
||||
|
Shoots larger and more powerful magic bolts. |
Unleash the power of lightning to zap many Bloons at once. |
Whirlwind blows Bloons off the path, away from the exit, but also removes Ice and Glue. |
Pops Bloons and blows them faster, farther, and more often. |
|||||
|
Path 2 |
Fireball |
Monkey Sense |
Dragon’s Breath |
Summon Phoenix |
||||
|
The Apprentice adds a powerful fireball attack to its arsenal. |
Allows the Monkey Apprentice to hit Camo Bloons, but doesn’t help other towers detect them. |
Spews endless flames at nearby Bloons. |
Ability: Super-powerful phoenix wreaks Bloon havoc for 20 seconds. |
|||||
|
|
Monkey Village |
15 |
|
Tier 1 |
Tier 2 |
Tier 3 |
Tier 4 |
This is a support tower and is recommended for use on your front line as early as you can afford to take advantage of Radar Scanner and Monkey Intelligence Bureau upgrades. Try putting a few Super Monkeys within its range toward the end of the game. You can’t stack the powers of multiple Monkey Villages placed within range of each other. |
|
Path 1 |
Monkey Beacon |
Jungle Drums |
Monkey Town |
Energy Beacon |
||||
|
Increases attack range by 15% of all towers in its radius. |
Jungle drums inspire nearby towers to attack 15% faster. |
Bloons popped near the Monkey Town get 50% more cash per pop. |
Nearby ability cooldowns reduced by 20%. |
|||||
|
Path 2 |
Monkey Fort |
Radar Scanner |
Monkey Intelligence Bureau |
MIB Call to Arms |
||||
|
Increases the popping power of all nearby towers by 1. |
Allows all towers within its radius to hit Camo Bloons. |
Allows all nearby towers to pop all Bloon types, and increases its range. |
Ability: Increases attack speed, pierce, and range for towers in radius for 10 seconds. |
|||||
|
|
Banana Farm |
16 |
|
Tier 1 |
Tier 2 |
Tier 3 |
Tier 4 |
Use this to create a money farm. Place three or four next to each other. Use the Banana Farmer (Special Agent) to collect the Bananas automatically (when placed nearby). Money Bank negates the use of the Banana Farmer. Having a money farm is pivotal to your survival in later levels. The increased money flow allows you to purchase much-needed towers sooner. Upgrade them with Path 1, Tier 1 as soon as you buy one. Consider selling some farms to upgrade one or two to Tier 4. |
|
Path 1 |
More Bananas |
Banana Plantation |
Banana Republic |
Banana Research Facility |
||||
|
Grows three big bunches of Bananas. |
Generates seven big bunches each round. |
Generates 13 big bunches of Bananas every round. $520 per round without Valuable Bananas. This prevents you from Path 2, Tier 3-4 upgrades. |
Produces five boxes of Bananas every round. Each box is worth $200. Unlocked at Rank 36. |
|||||
|
Path 2 |
Long-Life Bananas |
Valuable Bananas |
Monkey Bank |
Banana Investments Advisory |
||||
|
Bananas last 25 seconds longer on-screen before disappearing. |
Increases the value of each Banana or box of Bananas by 50%. Purchase this if you only want to pursue full Path 2 upgrades, or if you’ve maxed out Path 1. |
No longer drops Bananas but deposits them directly into your account. Creates $450 per round, plus 10% interest. Holds up to $5000. Locks Path 1, Tier 3-4. |
Increases money generated to $1000 per round, increases interest to 20%, and max held at a time to $20,000 per round. Unlocked at Rank 36. |
|||||
|
|
Mortar Tower |
17 |
|
Tier 1 |
Tier 2 |
Tier 3 |
Tier 4 |
This is a popular tower. It’s effective at bombarding the front line and other areas where Bloons are bottlenecked. Burny Stuff is its first upgrade that allows you to damage Black and Zebra. The Tier 4 upgrades are both useful in the final levels. |
|
Path 1 |
Increased Accuracy |
Bigger Blasts |
Bloon Buster |
The Big One |
||||
|
Makes your Mortar shots more accurate. The targeting reticle becomes 60% smaller. |
Heavy ordinance delivers a bigger explosion radius. Explosions are bigger. |
Smash through two layers of Bloons at once! Doesn’t damage Black or Zebra. |
Devastating explosions each pop three layers of Bloons. Pops Black and Zebra. |
|||||
|
Path 2 |
Rapid Reload |
Burny Stuff |
Signal Flare |
Artillery Battery |
||||
|
Increases the attack speed of the Mortar. Also reloads faster. |
Pops additional Bloons two seconds after impact. Burns Black and Zebra Bloons. |
Camo Bloons popped by Flares permanently lose their Camo. This allows towers without Camo detection to attack Camo. Removes Camo status. |
Ability: Immobilizes and bombards the entire screen for five seconds. Doesn’t fully affect MOAB but stuns them. |
|||||
|
|
Dartling Gun |
18 |
|
Tier 1 |
Tier 2 |
Tier 3 |
Tier 4 |
This tower aims its gun wherever your mouse or finger is placed on the screen. A 4/2 upgraded Dartling Gun outmatches a 4/2 Super Monkey (if no sacrifices are being made). If you upgrade to Laser Cannon and add Depleted Bloontonium, it allows you to pop any Bloon type at a high rate of fire. |
|
Path 1 |
Focused Firing |
Faster Barrel Spin |
Laser Cannon |
Ray of Doom |
||||
|
Greatly reduces the spread of the gun. |
Makes gunfire much faster. |
Rapid-fire plasma can pop 13 Bloons each and also pops Frozen Bloons. |
The Ray of Doom is a persistent solid beam of Bloon destruction. |
|||||
|
Path 2 |
Powerful Darts |
Depleted Bloontonium |
Hydra Rocket Pods |
Bloon Area-Denial System |
||||
|
Darts move faster and can pop three Bloons each. |
Shots can now hurt any Bloon type. |
Shoots vicious little missiles instead of Darts. |
Ability: Shoots missiles toward the nearest 100 Bloons on-screen. |
|||||
|
|
Spike Factory |
19 |
|
Tier 1 |
Tier 2 |
Tier 3 |
Tier 4 |
This is one of the least-used towers, next to the Glue Gunner and the Sniper Monkey. However, it’s good for stopping any kind of Bloon early on in a game. When possible, place them where their radius overlaps multiple tracks. Spikes are spit out onto all tracks it overlaps. This tower can pop Camo Bloons with no upgrade. |
|
Path 1 |
Bigger Stacks |
White-Hot Spikes |
Spiked-Ball Factory |
Spiked Mines |
||||
|
Generates larger Piles of Spikes per shot. |
Cuts through Lead like a hot spike through…lead. |
Produces sharp spiked balls that do extra damage to Ceramics. |
Spiked balls explode when they lose all their Spikes. |
|||||
|
Path 2 |
Faster Production |
Even Faster Production |
MOAB-SHREDR Spikes |
Spike Storm |
||||
|
Increases the rate of Spike production. |
Rate of Spike production increases even more. |
Super-Hard-Rending-Engine-Driven-Razors shred MOAB-class Bloons. |
Ability: Lays down a thick carpet of Spikes over the whole track. |
|||||
|
|
Heli Pilot |
17 |
|
Tier 1 |
Tier 2 |
Tier 3 |
Tier 4 |
Set the targeting option to hold a position, Follow Touch, or Patrol, which you need to set two patrol points on the screen. Unlocking Pursuit opens another option: pursuit. This attacks the Bloon farthest along on the track (closest to the exit). It’s an expensive tower, but when you get mid to late game, it’s worth it for Downdraft or Razor Rotors. |
|
Path 1 |
Quad Darts |
Pursuit |
Razor Rotors |
Apache Dartship |
||||
|
Shoots four Darts per volley instead of two. |
Superior targeting computers enable a new targeting option to pursue Bloons. |
Rotor Blades rip up Bloons on contact, including Frozen and Lead. |
Adds a large missile array and a powerful machine gun. |
|||||
|
Path 2 |
Bigger Jets |
Enhanced IFR Instruments |
Downdraft |
Support Chinook |
||||
|
More powerful jets enable the Heli to move much faster. |
Allows Heli Pilot to detect and shoot Camo Bloons. |
Blows Bloons away from the Heli. |
Ability: Drops med and cash crates, or can pick up and reposition most towers. |
|||||











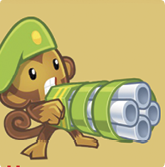
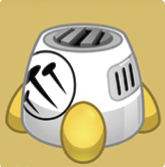

Bloon Appearance Per Level
Based on a normal 85 rounds, this is what you can expect to go up against.
| Level | Bloons That Enter the Level |
|---|---|
|
01 |
20 Red |
|
02 |
30 Red |
|
03 |
20 Red, 5 Blue |
|
04 |
30 Red, 15 Blue |
|
05 |
5 Red, 25 Blue |
|
06 |
15 Red, 15 Blue, 4 Green |
|
07 |
20 Red, 25 Blue, 5 Green |
|
08 |
10 Red, 20 Blue, 14 Green |
|
09 |
30 Green |
|
10 |
102 Blue |
|
11 |
10 Red, 10 Blue, 12 Green, 2 Yellow |
|
12 |
15 Blue, 10 Green, 5 Yellow |
|
13 |
100 Red, 23 Green, 4 Yellow |
|
14 |
49 Red, 15 Blue, 10 Green, 9 Yellow |
|
15 |
20 Red, 12 Green, 5 Yellow, 3 Pink |
|
16 |
20 Green, 8 Yellow, 4 Pink |
|
17 |
8 Yellow Regen |
|
18 |
80 Green |
|
19 |
10 Green, 4 Yellow, 5 Yellow Regen, 7 Pink |
|
20 |
6 Black |
|
21 |
14 Pink |
|
22 |
8 White |
|
23 |
5 Black, 4 White |
|
24 |
1 Green Camo |
|
25 |
31 Yellow Regen |
|
26 |
23 Pink, 4 Zebra |
|
27 |
120 Red, 55 Blue, 45 Green, 45 Yellow |
|
28 |
4 Lead |
|
29 |
25 Yellow, 12 Pink Regen |
|
30 |
9 Lead |
|
31 |
8 Zebra, 2 Zebra Regen |
|
32 |
25 Black, 28 White, 8 Lead |
|
33 |
20 Yellow Camo |
|
34 |
140 Yellow, 5 Zebra |
|
35 |
35 Pink, 25 White, 5 Rainbow |
|
36 |
81 Pink |
|
37 |
20 Black, 20 White, 7 White Camo, 15 Lead, 10 Zebra |
|
38 |
42 Pink Regen, 17 White, 14 Lead, 10 Zebra, 4 Rainbow |
|
39 |
10 Black, 10 White, 20 Lead, 20 Zebra, 18 Rainbow |
|
40 |
10 Rainbow, 4 Ceramic |
|
41 |
60 Black, 60 Zebra |
|
42 |
6 Regen Rainbow, 6 Camo Rainbow |
|
43 |
10 Rainbow, 7 Ceramic |
|
44 |
50 Zebra |
|
45 |
200 Pink, 8 Lead, 25 Rainbow |
|
46 |
1 MOAB |
|
47 |
70 Pink Camo, 12 Ceramic |
|
48 |
120 Pink Regen, 50 Rainbow |
|
49 |
343 Green, 20 Zebra, 20 Rainbow, 10 Rainbow Regen, 18 Ceramic |
|
50 |
20 Red, 8 Lead, 20 Ceramic, 2 MOAB |
|
51 |
10 Rainbow Regen, 28 Ceramic |
|
52 |
25 Rainbow, 10 Ceramic, 2 MOAB |
|
53 |
80 Pink Camo, 3 MOAB |
|
54 |
35 Ceramic, 2 MOAB |
|
55 |
45 Ceramic, 1 MOAB |
|
56 |
40 Rainbow Regen, 1 MOAB |
|
57 |
40 Rainbow, 4 MOAB |
|
58 |
29 Ceramic, 5 MOAB |
|
59 |
28 Lead Camo, 50 Ceramic |
|
60 |
1 BFB |
|
61 |
150 Zebra Regen, 5 MOAB |
|
62 |
300 Camo Pink, 15 Rainbow Camo Regen, 6 MOAB |
|
63 |
75 Lead, 122 Ceramic |
|
64 |
9 MOAB |
|
65 |
100 Zebra, 70 Rainbow, 50 Ceramic, 3 MOAB, 2 BFB |
|
66 |
12 MOAB |
|
67 |
15 Ceramic, 10 MOAB |
|
68 |
4 MOAB, 1 BFB |
|
69 |
60 Lead, 70 Ceramic Regen |
|
70 |
200 Rainbow Camo, 4 MOAB |
|
71 |
30 Ceramic, 10 MOAB |
|
72 |
38 Ceramic Regen, 2 BFB |
|
73 |
9 MOAB, 2 BFB |
|
74 |
200 Ceramic, 1 BFB |
|
75 |
28 Lead, 4 MOAB, 3 BFB |
|
76 |
60 Ceramic Regen |
|
77 |
14 MOAB, 5 BFB |
|
78 |
150 Rainbow, 75 Ceramic, 72 Ceramic Camo, 1 BFB |
|
79 |
500 Rainbow Regen, 7 BFB |
|
80 |
31 MOAB |
|
81 |
9 BFB |
|
82 |
400 Rainbow Camo Regen, 10 BFB |
|
83 |
150 Ceramic, 30 MOAB |
|
84 |
50 MOAB, 10 BFB |
|
85 |
1 ZOMG |
Unlock All Upgrades
If you’re in a game already and you want a shortcut to unlocking a particular tower’s upgrades without waiting to reach the required rank to do so, simply click on the tower that’s placed on the board already, and click on the “Unlock All Upgrades” button next to the Settings (gear icon) button. This costs 99 cents, but beware that this is only for that one tower.
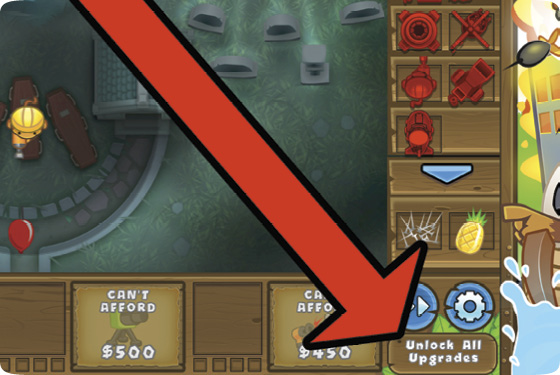
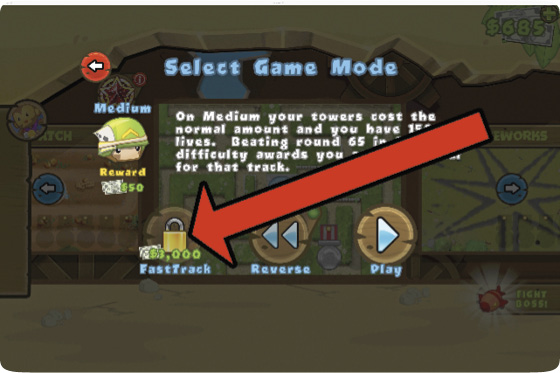
Fast Track
Unlocking Fast Track is an option you can select on the Pre-Level menu screen after you choose your difficulty level for single-player games. This option allows you to permanently unlock the Fast Track play mode, where you fast-track past the first 25 rounds. Start at Round 26 with $5000 cash to get up into those high rounds faster. This costs $3000 game cash. If you don’t have it, you’re taken to a Purchase menu where you can buy a Bundle ($2500 for $2.99), a Pile ($4250 for $4.99), a Vault ($18,000 for $19.99), or a Mountain ($50,000 for $49.99).
Premium Store
In the golden building that is the Premium Store, you can find new skins for your towers for $1.99; these are only visual enhancements, not gameplay ones. You can boost your rank by one point for 99 cents, and then make the same purchases you could from the Fast Track menu, and each bundle type has a similar offer for Tokens. You can also find a Double Cash Mode for $9.99, Healthy Bananas for 99 cents, and Bigger Beacons for 99 cents.