Prima Games eGuides
primagames.com Browse Redeem a code Help
Pillars of Eternity eGuide
Sign in My Guides

Sign in or create an account

We'll email you a link. No password needed, and if you don't have an account yet, the link makes one.

By creating an account or signing in, you agree to our Terms of Service and Privacy Policy.

Have a password?

Had an account on the old eGuides site, or a code from a printed guide? Help and troubleshooting

Sign in with a password

By signing in, you agree to our Terms of Service and Privacy Policy.

Check your email

A sign-in link is on its way. It works once and expires in 15 minutes. Open it and you're in, with an account if you didn't already have one.

Contents

  • History and Lore
    • World Climate and Culture
    • Empires and Nations
    • Eastern Reach
    • Rest of the Known World
    • Society
    • Technology
    • Alcohol and Narcotic Use
    • Religion
    • Soul and Soul Mechanics
    • Timeline
  • Training
    • Character Creation
      • Generate a New Ally
      • Attributes
      • Vitality
      • Skills
      • Experience/Leveling
      • Abilities
      • Talents
    • Game Mechanics
    • Crafting and Enchanting
    • Stronghold
    • Combat
  • Inhabitants of Dyrwood
    • Races
      • Races and Subrace
      • Aumaua
      • Dwarves
      • Elves
      • Humans (Folk)
      • Orlans
      • Godlike
    • Classes
      • Barbarian
      • Chanter
      • Cipher
      • Druid
      • Fighter
      • Monk
      • Paladin
      • Priest
      • Ranger
      • Rogue
      • Wizard
    • Friends and Foes
    • Companions
    • Pets
  • Equipment - Weapons
    • Weapon Overview
    • Melee Weapons
      • Introduction
      • Daggers
      • Sabres
      • Great Swords
      • Hatchets
      • Battle Axes
      • Pollaxes
      • Stilettos
      • Swords
      • Estocs
      • Rapiers
      • Spears
      • Pikes
      • Clubs
      • Maces
      • Morning Stars
      • Flails
      • War Hammer
      • Quarterstaves
    • Ranged Weapons
      • Introduction
      • Pistols
      • Arquebuses
      • Blunderbusses
    • Bows
      • Hunting Bows
      • War Bows
      • Arbalests
      • Crossbows
    • Implements
      • Wands
      • Rods
      • Scepters
  • Extras
    • Achievements
    • Bonus Quests & Tasks
    • Bounties
    • Companion Quests
      • Two-Sided
      • Fragments of a Scattered Faith
      • The Trials of Durance
      • The Long Hunt
      • Time and Tide
      • Dream and Memory
      • True to Form
      • The Child of Five Suns
  • Armor & Protective Gear
    • Armor
    • Protective Gear
    • Cloth
    • Padded
    • Hide
    • Leather
    • Scale
    • Breastplate
    • Plate
    • Mail
    • Brigandine
    • Neck
    • Capes/Cloaks/Mantles
    • Hands
    • Feet
    • Head
    • Waist
    • Rings
    • Shields
  • Items
    • Consumables (single use)
    • Potions
    • Food
    • Scrolls
    • Figurines
    • Traps
    • Ingredients
    • Quest Objects
    • Currency
    • Miscellaneous Objects
  • Walkthrough
    • Main Quest: Act I
      • The Watcher of Dyrwood: Encampment
      • The Watcher of Dyrwood: The Ruins of Cilant Ls
      • The Watcher of Dyrwood: Valewood
      • The Watcher of Dyrwood: Gilded Vale
      • The Watcher of Dyrwood: Magrans Fork and Black Meadow
      • The Watcher of Dyrwood: Caed Nua
      • The Watcher of Dyrwood: Woodend Plains and Aedelwan Bridge
    • Act I: Side Quests
      • Introduction
      • Side Quest: A Mothers Plea
      • Side Quest: The Smiths Shipment
      • Side Quest: Buried Secrets
      • Side Quest: Lord of a Barren Land
    • Act I: Tasks
      • Introduction
      • Task: Late for Dinner
      • Task: Vengeance from the Grave
      • Task: Against the Grain
    • Main Quest: Act II
      • The Watcher of Dyrwood: Copperlane
      • The Watcher of Dyrwood: Catacombs and Temple of Woedica
      • The Watcher of Dyrwood: First Fires
      • The Watcher of Dyrwood: Heritage Hill
      • The Watcher of Dyrwood: Stormwall Gorge
      • The Watcher of Dyrwood: Dyrford Village
      • The Watcher of Dyrwood: Dyrford Crossing
      • The Watcher of Dyrwood: Cliaban Rilag
      • The Watcher of Dyrwood: Brackenbury
      • The Watcher of Dyrwood: Ducal Palace
    • Act II: Side Quests
      • Introduction
      • His Old Self
      • A Voice from the Past
      • Rogue Knight
      • The Bronze Beneath the Lake
      • A Two Story Job
      • The Changing of the Guard
      • The Final Act
      • Built to Last
      • Winds of Steel
      • Cinders of Faith
      • A Farmers Plight
      • Blood Legacy
      • The Theorems of Pandgram
      • Far from Home
      • Supply and Demand
      • At All Costs
      • The Wailing Banshee
    • Act II: Tasks
      • Introduction
      • Ferry Flotsam
      • The Parable of Wael
      • Something Secret
      • Unwanted
      • The Forgotten
      • Missing Sentries
      • Safe Haven
      • Cat and Mouse
      • Nest Egg
      • Hard Feelings
      • All Hands on Deck
      • Brave Derrin
      • Clandestine Cargo
    • Main Quest: Act III
      • The Watcher of Dyrwood: Stormwall Gorge to Elmshore
      • The Watcher of Dyrwood: Hearthsong
      • The Watcher of Dyrwood: Elms' Reach
      • The Watcher of Dyrwood: Oldsong to Burial Isle
    • Act III: Side Quests
      • Introduction
      • Sacrificial Bloodlines
      • Hunter, Brother
      • At the Mercy of the Tribes
      • The Champion of Berath
      • Prison of Ice
      • Into the White Void
      • A Servant of Death
      • A Nest Above the Clouds
      • The Old Queen and the New King
    • Act III: Tasks
      • Introduction
      • Songs of the Wild
      • The Sealed Missive
      • Hard Bargain
    • Main Quest: Act IV
      • The Watcher of Dyrwood: Sun in Shadow
  • Bestiary
    • Bestiary Breakdown
    • Beasts
      • Fauna
      • DRAGONS
      • Spiders
      • Stelgaer
      • Beetles
    • Primordials
      • Oozes
      • Delemgan
      • Pwgra
    • Spores
      • Sporeling
      • Dank Spore
      • Lurker
    • Spirits
      • Blights
      • Cean Gwla
      • Phantoms
      • Shadows
      • Will-o-wisps
    • Vessels
      • Animats
      • Dargul
      • Fampyr
      • Gul
      • Revenant
      • Skeleton
      • Death Guard
      • Constructs
      • Wichts
    • Wilder
      • Ogres
      • Skuldrs
      • Trolls
      • Vithrack
      • Xaurips
  • Gold Credits
    • A-F
    • G-L
    • M-R
    • S-Z
  • Credits
    • A-F
    • G-L
    • M-R
    • S-Z

Pillars of Eternity Guide › Walkthrough › Main Quest: Act I

The Watcher of Dyrwood: Encampment
Part 1: A Slight Case of Rumbling Rot

New Main Quest: The Gilded Vale
Objective: Journey to Gilded Vale
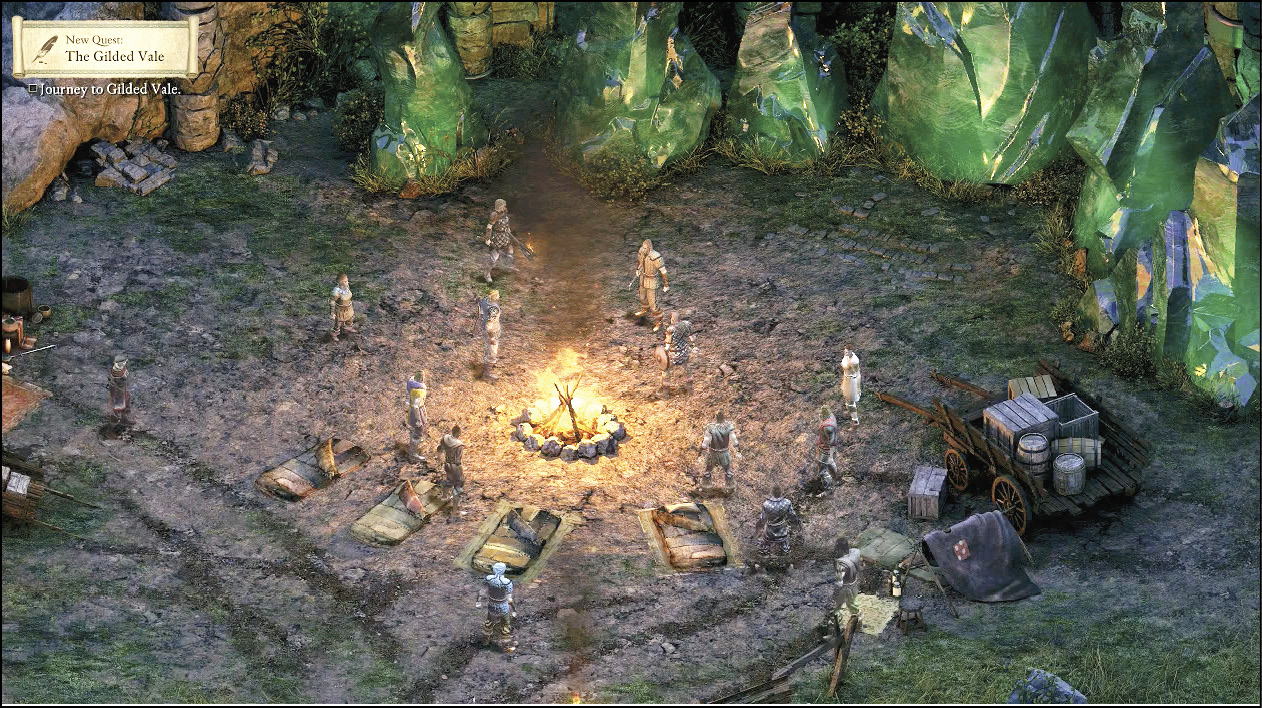
A fallen tree blocks your progress to Gilded Vale, so the caravaneers decide to set up camp for the night. Caravan Master Odema sends his assistant Sparfel off to hunt, and looks you up and down. You are sick with a possible case of Rumbling Rot. You need a specific berry that when made into a tea will calm your insides and help you make it through the night.

After learning of the type of berries you should be hunting, you may ask the following:

  • Finding the berries: They grow on a “funny-looking” bush nearby.
  • About the ruins: They’re on half the hills of Eir Glanfath, and are older than the Glanfarthan hunters that prowl nearby. They are mostly ransacked. Mostly.
  • Who built them? No one that liked them enough to stop them from becoming ruins.
  • Nearby dangers: None if you’re quick.
  • The type of weather: Usually rain and wind; but from time to time, a strange spirit breeze called a biawac may form.
  • What the huge rocks are: Green, shell-like material with strange properties, used by the soul butchers of Defiance Bay. They can hold a man’s soul, apparently.
  • [Leave] Go and look for the berries.

Once you leave, Odema recommends you take someone with you; a sturdy, armor-clad woman named Calisca. After some quick banter, you leave and are free to explore the Encampment.

Take Control

At this point, it’s a great idea to pause for a few moments and fiddle with the three menus at the bottom of your screen (the party portraits, Action Bar, and Combat Log). The Training section of this guide gives you more information about this.

Part 2: Trading at Camp

New Main Quest: A Moment’s Respite
Objective: Collect some springberries to concoct a remedy

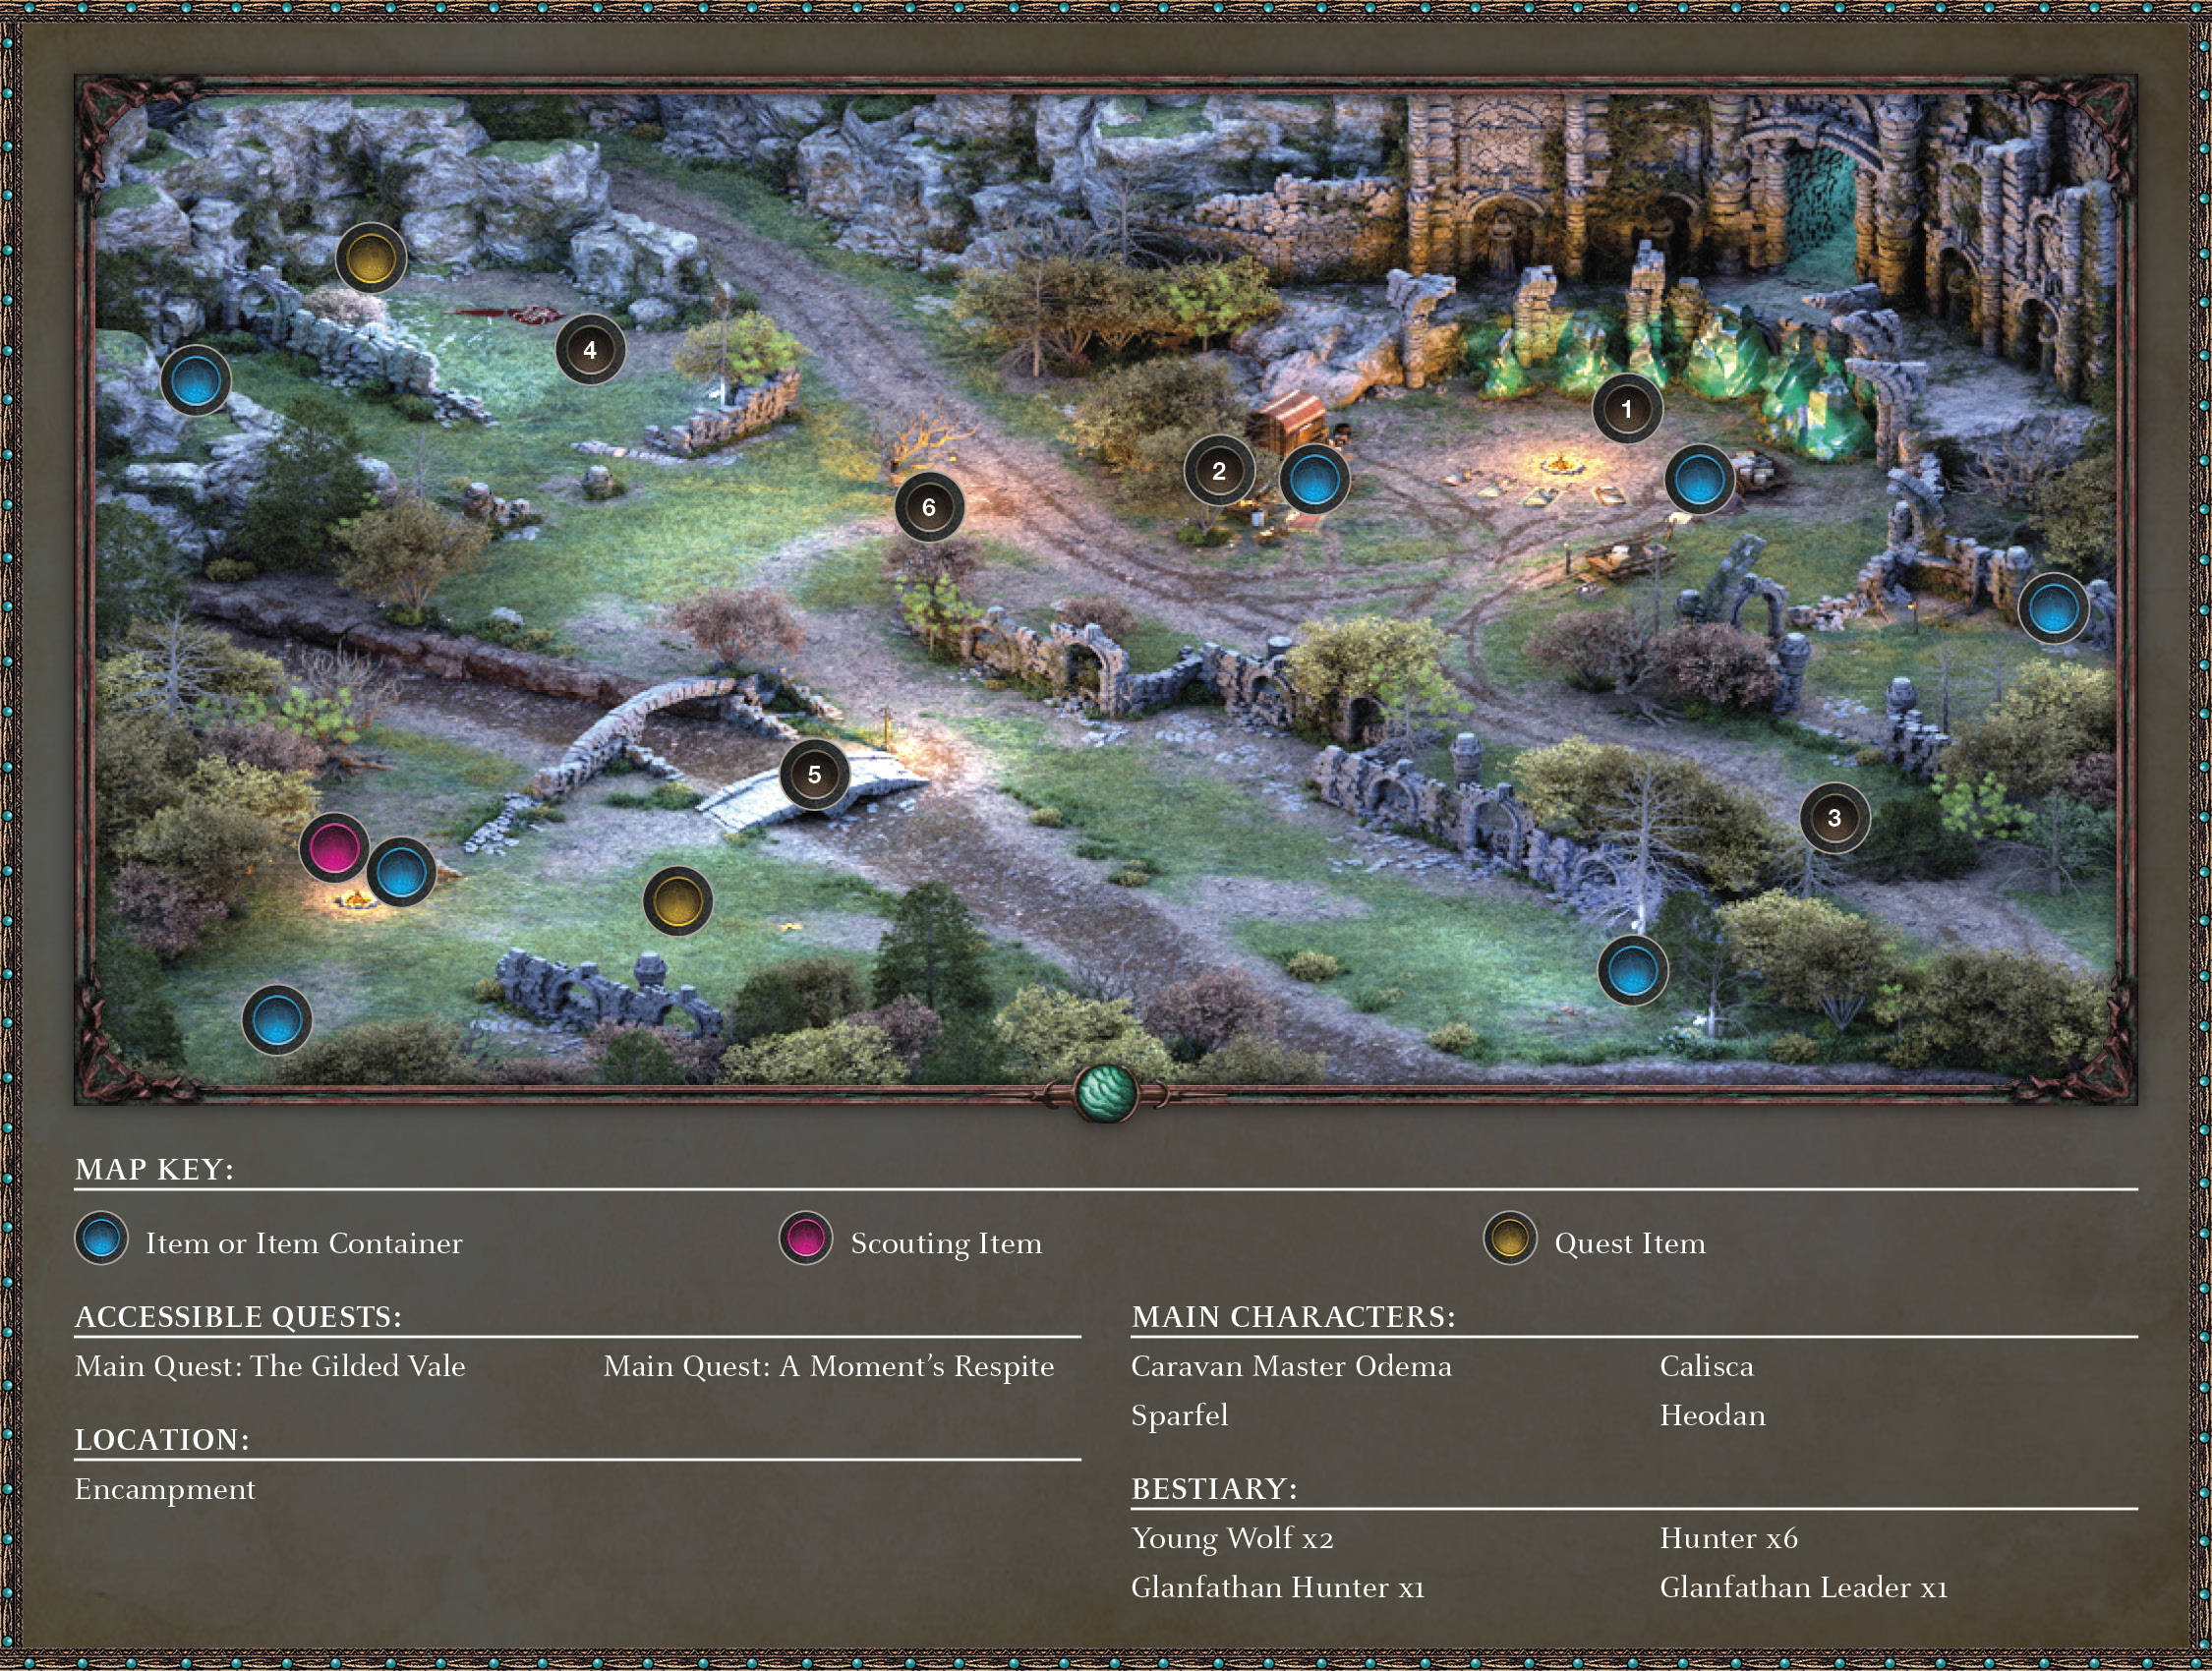
Spend a few moments in the camp (1), talking to the assembled folk (who mostly urge you to undertake your berry hunt). Then wander over to the man standing on the rug on the west side of the camp (2); Heodan the trader. Speak with him, and inspect his wares.

Think Before You Speak

Your talk with Heodan can encompass information regarding the chap’s past history, the Aedyr Empire, and can result in you choosing responses that are Passionate, Clever, Cruel, Diplomatic, and Rational. Selecting these responses influences your personality and standing with individuals and factions, so choose carefully (and continue to pick similar emotional responses if you wish to heighten—or lessen—your Disposition reputation.

Shop Now

You have around 70 cp to spend, and future events mean that now is the best time to buy. You and Calisca’s inventory can be augmented, though it’s best to add items that you’ll find useful in the near future; such as Lockpicks, and perhaps one or two weapons (like a Crossbow or Rapier).

Part 3: The Search for Springberry

Thorough Exploration

Usually, the Main Quest path encompasses only the critical areas of a location. However, exploring thoroughly allows you to discover Side Quests and Tasks, as well as hidden items that can be kept or traded for other items or currency at shops.

Head southeast of the camp, close to the wagon and through a stone arch where the horses are stabled, and claim the Orlan’s Cradle (a fungus) from the ruined stone wall. Then continue northwest of the camp, to the main thoroughfare and find Sparfel standing by a tree (6). If you follow this road to the southeast, it ends at an impassable fallen tree (3). You can inspect the tree for more information on it. Magnifying glass icons, like the one on the tree offer interesting information for the inquisitive traveler.

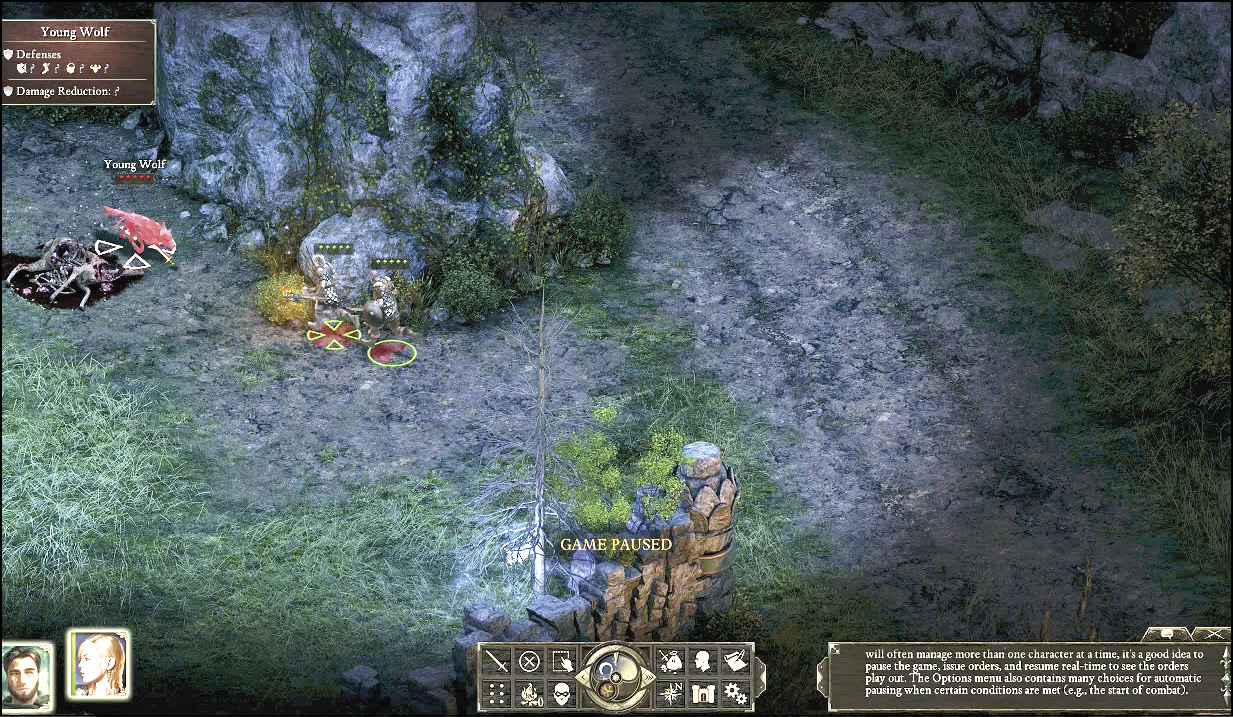
Proceed along the road to the west of Sparfel (6), then continue northwest toward the small, blue-lit glowing tree and into the stone outcropping ruins where a Young Wolf (4) is guarding a deer carcass. Engage it in combat (ideally attacking the foe using both your and Calisca’s attacks).

Body Loot

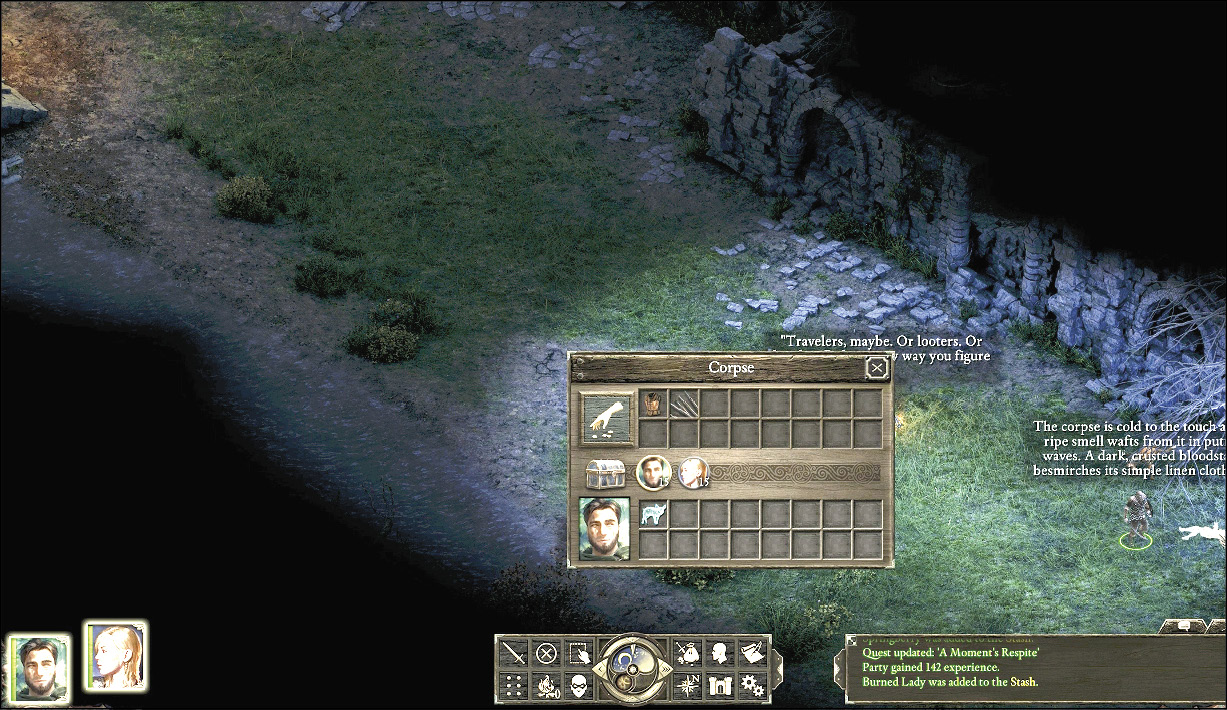
Don’t forget to search the items dropped by most enemies you slay; check the statistics of each, and pay particular attention to wolf pelts, which can be traded for a reasonable sum; you can try this now by returning to Heodan.

The wolf was guarding more than a recent kill; check the northwest rocky outcrop for a small bush, and gather the Springberry necessary to tend to your sickness. Your Side Quest now updates:

Part 4: Hunting for Sparfel

Quest updated: A Moment’s Respite
Objective: Find Sparfel
Just after you pick the Springberry, Calisca stops to talk to you. You can engage her in conversation, revealing as much, or as little, as you like. This conversation helps to fill out your character’s Background in your Journal. To continue, choose to tell her, “Let’s get back to camp.” She recommends you check up on Sparfel by the stream to the south. Head south, but immediately check to the west; additional fungi (called Burned Lady) grows near the rock wall here.

Follow the steam heading southeast, past a ruined arch to the stone bridge with the lantern (5).

(Optional) Don’t cross it yet; continue along the right side of the stream bank, frightening a deer, and inspecting two corpses by some trees at the end of the bank. One has some useful Lockpicks and armor to purloin.

Sneaky Secrets

Several items do not reveal themselves with a glowing object until you enter Scouting mode. For instance, take the Beer from the tent at the camp southwest of the bridge (5). Then enter Scouting mode, walk near the second shelter, mouse over the entrance, and watch the flap light up with a purple highlight. Click on the flap and take the Disappointer handgun. Always enter Scouting mode when searching for items!

Return and cross the bridge. Calisca isn’t surprised that Sparfel went hunting instead. His small camp to the west is empty, but he left the waterskin you need. Approach and gather it.

As you approach the Waterskin, Sparfel staggers out of the woods with a hunter’s arrow between his shoulder blades. You’re being attacked!
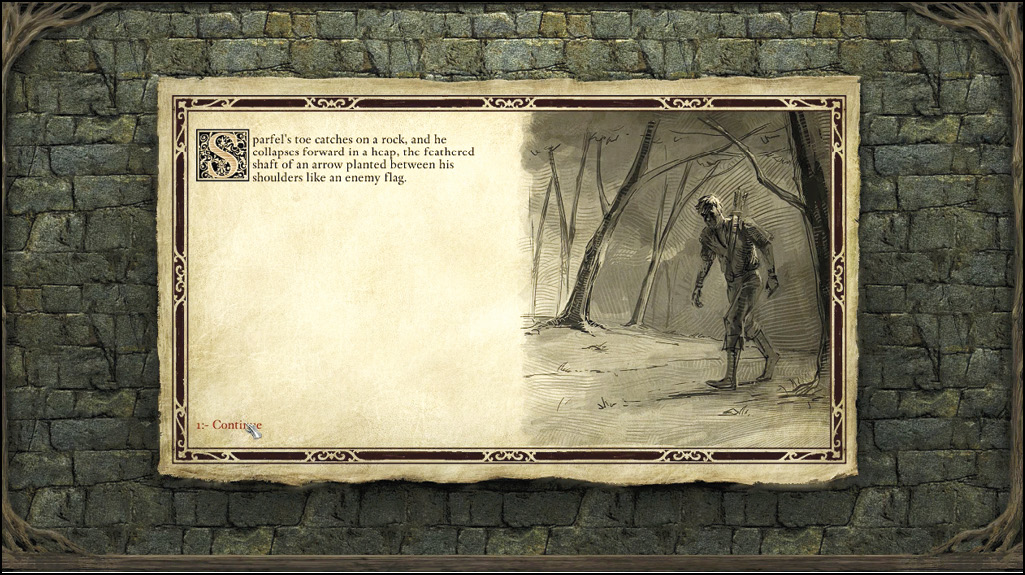
Part 5: Glanfathan Ambush!

Quest updated: A Moment’s Respite
Objective: Reach the camp
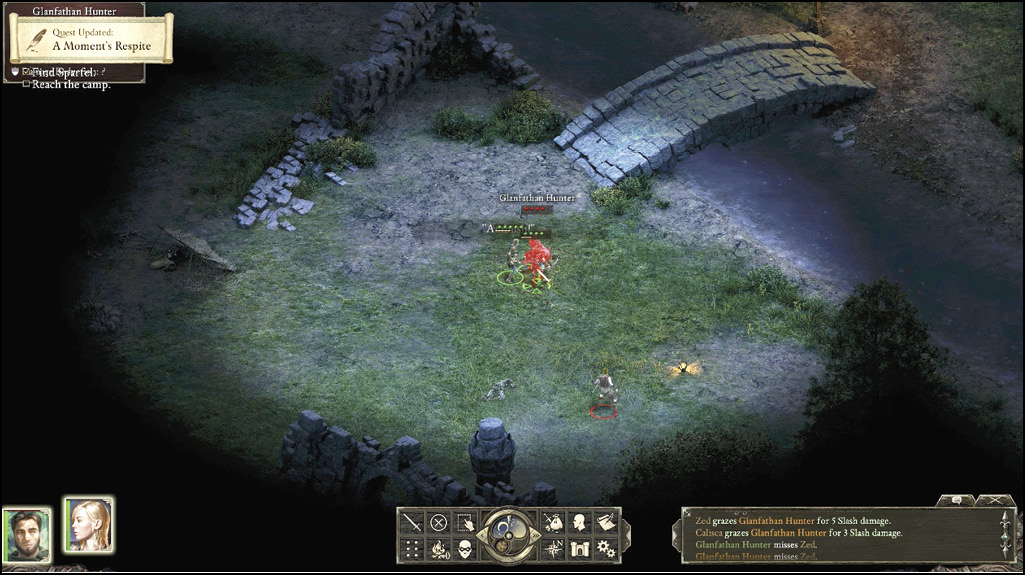
Two Hunters appear from differing directions, and begin to merrily hack at you. Concentrate your collective fury on the nearest one first, and then attack the bowman. Bring both these enemies down. Calisca urges you to quickly return to the caravan camp, but not before you inspect the Glanfathan Hunter’s corpse and grab his gold. You can also gather some Dyrcap mushrooms to the southwest and Beer from under the shelter next to the tent.

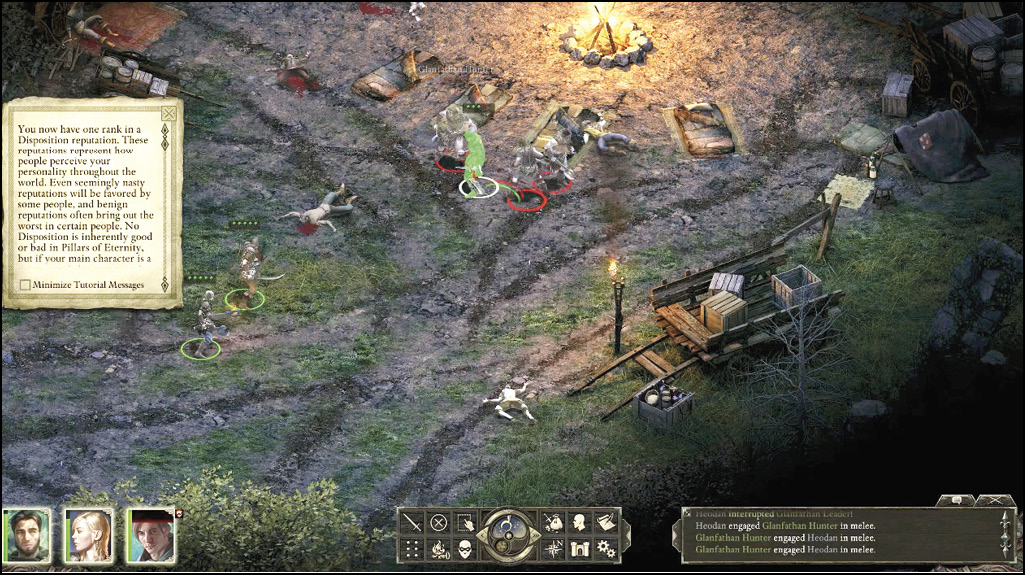
Follow the path over the bridge, north and east to the lantern tree, and stop before you’re pounced on by three more Hunters (6); prepare for combat and then tackle each Hunter one at a time using both Calisca and your character. Loot the corpses and then take the thoroughfare eastward back toward the camp (1), which has been thoroughly ransacked. You are too late to halt the Glanfathan massacre; all but one of your comrades lie dead!
Battle Prep

Prepare magical or special attacks, change your battle formation, and equip some different weapons if you wish, before engaging in combat. Master the Quicksave at this point, too.

Part 6: An Ill Wind

You face the thick bearded form of the Glanfathan Leader, who holds a wet blade at the throat of the only remaining survivor, Heodan the trader. He orders you to lay down your weapons in return for Heodan’s life. You can:

  • Ask why this has happened.
  • [Lore 1] [Diplomatic - Minor]: Tell him the ruins weren’t sullied by your hands.
  • [Honest - Minor]: Tell him you’re just passing through.
  • [Diplomatic - Minor]: Tell him you didn’t have anything to do with what the caravaneers did.
  • [Passionate - Minor]: Vow that they will pay for these murders.
  • [Rational - Minor]: Tell him they’ll kill you either way.

Any conversation option results in the Glanfathan Leader asking—a little more impatiently—to lay down your arms. Your second round of conversation options are as follows:

  • A plea for reason as you’re simply innocents.
  • [Might 14]: Call the Leader out for attacking a weak enemy while a stronger one lives. Conclusion 1.
  • [Perception 14]: Tell the Leader his courage is a mask, and none of them is a true warrior. Conclusion 1.
  • [Intellect 13]: Tell him that killing Heodan is like killing the Leader himself. Conclusion 1.
  • [Resolve 15]: Shouting to the Leader to kill Heodan immediately. Conclusion 1.
  • [Athletics 1]: Rushing the Leader before he can react. Conclusion 1.
  • [Intellect 15] [Lore 1]: Figuring out the hunters worship Galawain. Conclusion 2.
  • [Put down your weapons] Laying down your weapons, and hoping to surrender. Conclusion 3.
  • [Stay armed] Remaining armed, and waiting for the Leader to make a move. Conclusion 1.
Conclusion 1

Heodan is wounded by the leader’s attack, and the Leader starts combat with him. Attack!

Conclusion 2 (Recommended):

This allows Heodan to dodge the leader’s attack, and the Leader charges you instead. Attack!

Conclusion 3 (Not Suggested):

Heodan is wounded by the leader’s attack, the Leader starts combat with him, and you have no weapons to help you after the battle.
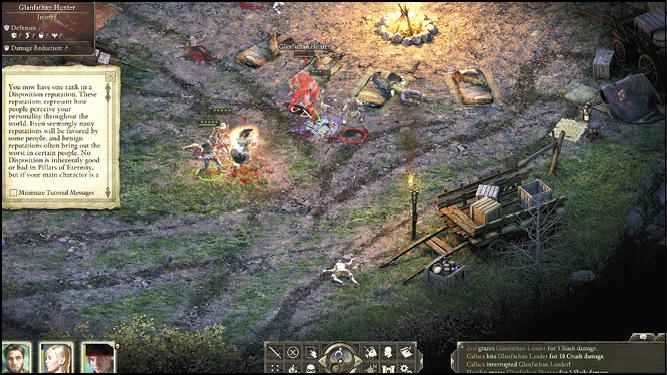
At this point, Heodan joins your party. If you don’t want him to hold the record for “least effective party member,” rush the Leader, and attack! Stop the Hunters from slaying Heodan (all three of you should concentrate your fighting on this foe, then mop up the two Hunters afterwards).
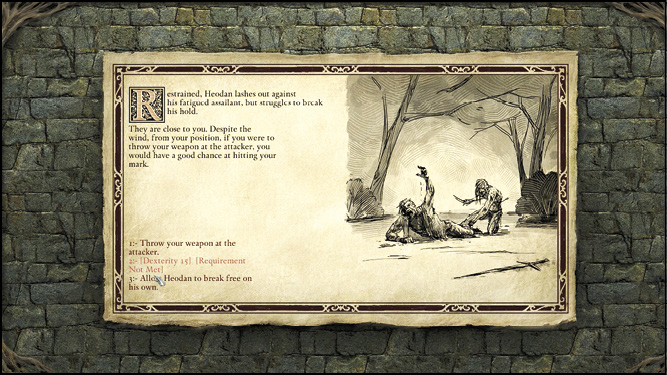
After the fight, orbs mysteriously emanate from the bodies of the dead attackers. The wind begins to swell, the near-dead body of Caravan Master Odema stirs, and he gurgles at you to run as the air becomes thick with a strange electrical discharge. You climb the rocks and attempt to flee into the ruins, but a Hunter tackles the wounded Heodan. You can:

  • Throw your weapon at the attacker: This option is available if you didn’t choose Conclusion 3, previously. Your weapon strikes the Hunter, and Heodan is freed.
  • Fire at the attacker: This option is available if you’re armed with ranged weapons (a bow, handgun, wand, or sceptre, for example). The projectile stops the Hunter, and Heodan is freed.
  • Allow Heodan to break free on his own: Heodan hasn’t the strength to free himself, and he succumbs to the biawac before you reach safety.

Amid the maelstrom, your party manages to stagger into the Ruins of Cilant Lîs, where the quest continues.

Keep reading with a free account

The first 3 sections of Pillars of Eternity are open to everyone. An account opens the rest of it, and every other guide in the archive. It's free, and there's nothing to buy.

Bought guides on the old Prima Games site? Your account and every guide you own moved here, so there's nothing to buy again. Sign in.

Create a free account Or browse our free guides

PreviousMiscellaneous Objects NextThe Watcher of Dyrwood: The Ruins of Cilant Ls