
Battlefield Hardline Guide Multiplayer Maps The Block
Team Deathmatch
| LEGEND | |
|---|---|

|
Spawn area |
| BATTLE PICKUPS | |
|---|---|

|
Ammo |

|
Defibrillator |

|
Grappling Hook |

|
Health |

|
LMG |

|
Rocket Launcher |

|
Stinger |

|
Zipline |
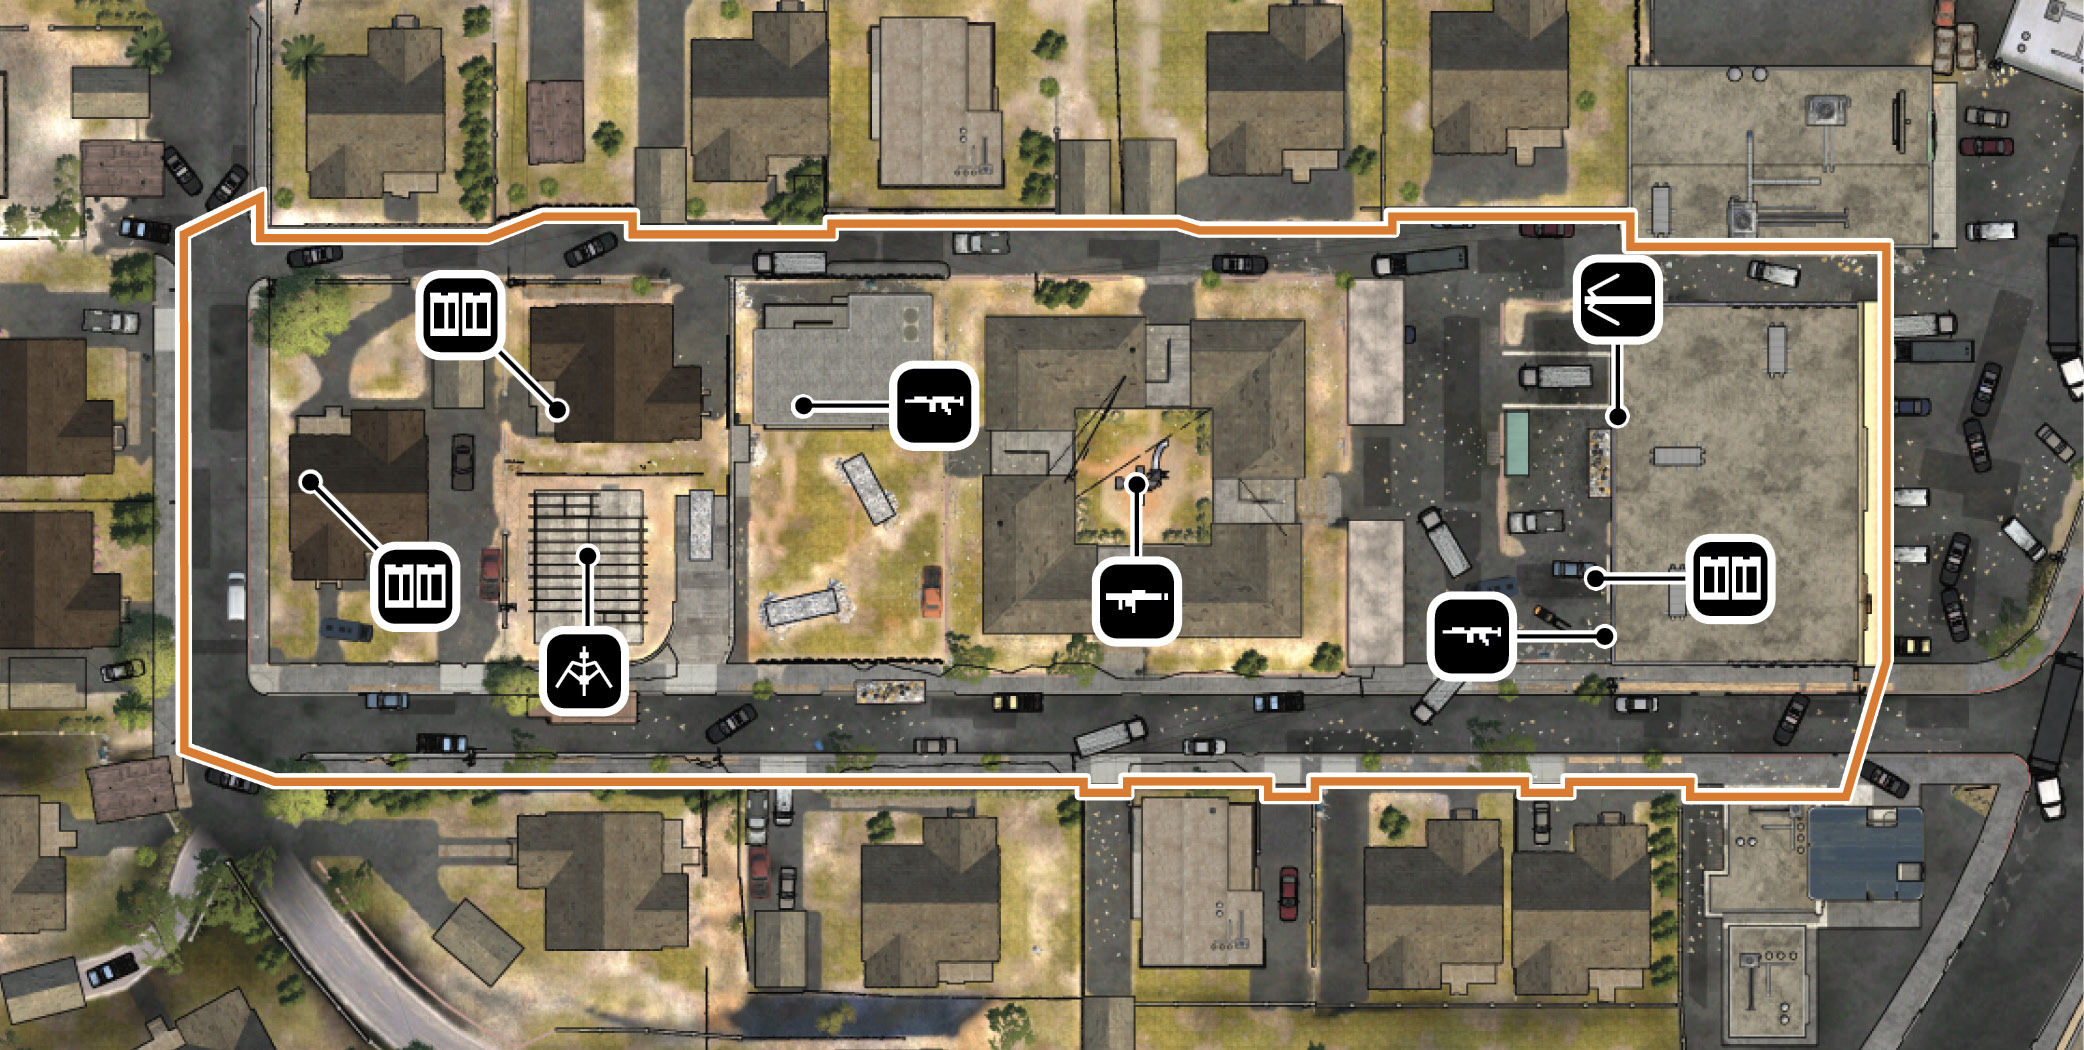
- The Block is a small map to begin with, and as a result, most of the map is accessible during Team Deathmatch. The only area that is off-limits is the parking lot on the east side of the Strip Mall. Make note of the MG36 LMG Battle Pickups behind the liquor store and at the Condo. These LMGs come with two 100-round magazines. The large magazines means you spend less time reloading, giving you a slight tactical advantage over your opponents. While operating these weapons avoid the urge of reloading after each kill. If you become skilled with this weapon you can score 8-10 kills without reloading.
- Given the small size of the map, there aren’t many safe places to hole-up in. But if you want to lockdown one location, consider taking up positions in the Condo or Strip Mall. Both of these locations flank the Apartments, allowing you and your team to engage opponents in this high-traffic area. The Condo offers limited sightlines, but most of the exterior walls are solid, holding-up against small arms and explosives—the same can’t be said of the Apartments. If hanging out in the Strip Mall, consider watching the Apartments from the back of the liquor store. But be mindful of opponents attempting to flank you from the bail bonds vault. There’s a hole in the wall connecting the two businesses.
- The majority of engagements on this map take place at close to intermediate range. As usual, the operator is a safe bet here as their assault rifles and carbines can get the job done at any range. If you’re brave enough to venture into the Apartments, consider bringing along a mechanic’s SMG or an enforcer’s shotgun. Though if carrying a satellite phone, the mechanic should consider deploying it in a safer location, like the Condo. Playing as a professional can be tricky due to the close quarter nature of the map. But these long-range specialists can find some opportunities by covering the Street and Alley, preferably with a fast-firing DMR. If playing as a professional, keep your fully-automatic sidearm at the ready when moving from one location to another.
- Instead of locking down one location, consider roaming the map with your squad, overpowering your opponents with teamwork and oppressive firepower. A full five-player squad can experience great success patrolling areas like the Houses and Strip Mall. But it’s best to avoid the action in the Apartments. Instead, bypass this hot zone by carefully moving along the Street to the south or the Alley to the north. Consider making regular sweeps of the liquor store and Condo so your squad can take advantage of the MG36 LMG Battle Pickups.
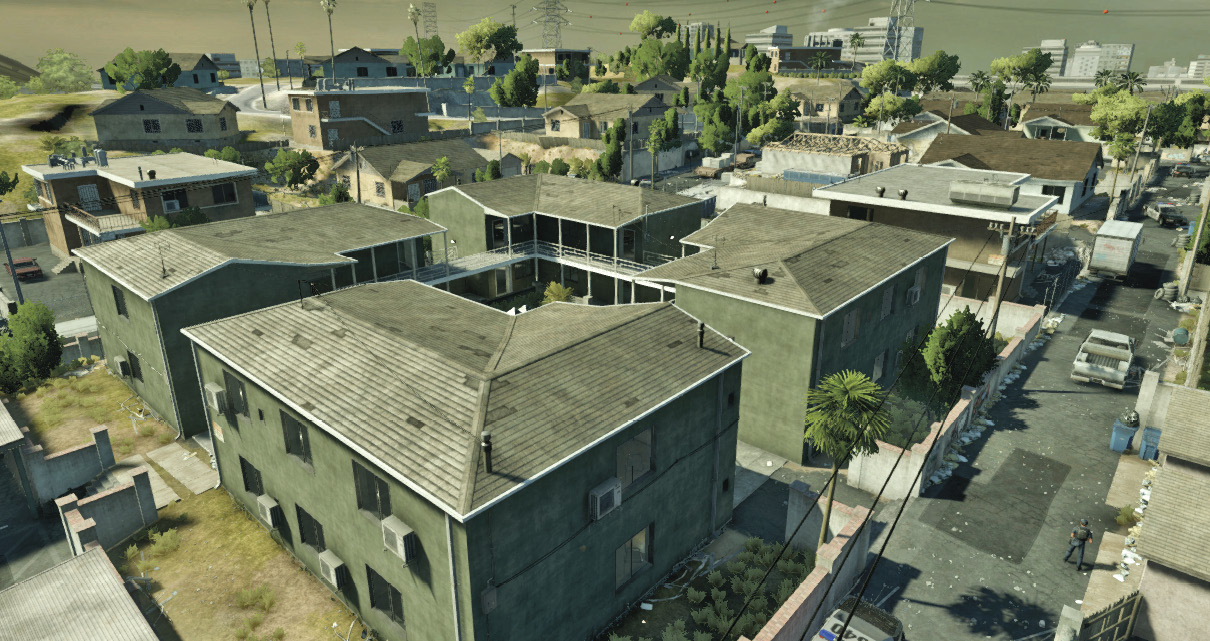
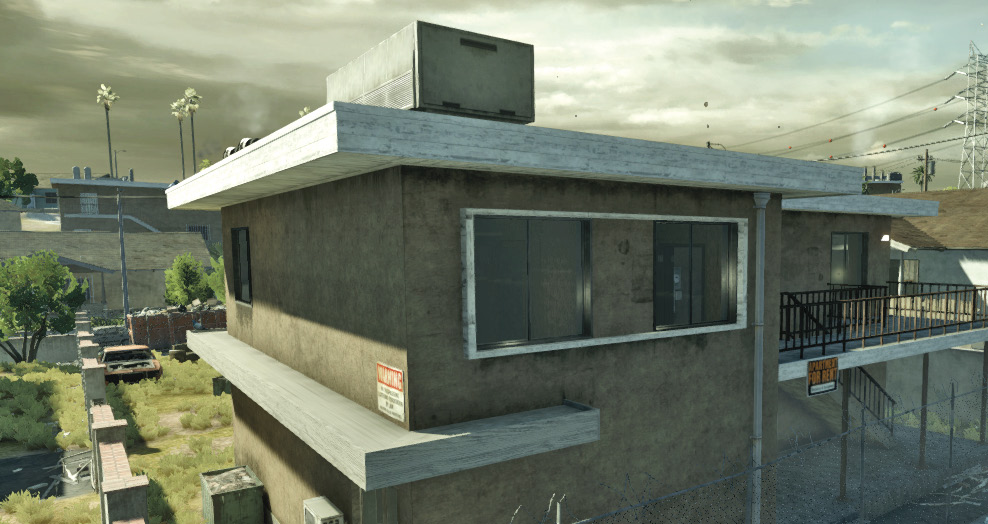
The outside edges have far more cover than the inside, but be careful about enemies coming out straight down the Alleyway from you. There are some long, long sightlines for snipers. If you are in the Apartments surrounding the central courtyard, remember to look behind you. Enemies are likely to run below you, and won’t have cover from your shots. —James Berg, User Experience Researcher
Pick a weapon with a high ammo count that packs a punch, in a mode that encourages quick kills and deaths on the smallest map in the game—reloading is your greatest enemy. —William Bordonaro, Quality Analyst