
Battlefield Hardline Guide Multiplayer Maps Dust Bowl
Hotwire
| LEGEND | |
|---|---|

|
Police Deployment |

|
Criminal Deployment |

|
Spawn Area |

|
Hostage |

|
Money Pile |

|
Police Vault |

|
Criminal Vault |

|
Vault |

|
Extraction |

|
Hotwire Cars |

|
Control Points |
| BATTLE PICKUPS | |
|---|---|

|
Ammo |

|
Defibrillator |

|
Grappling Hook |

|
Health |

|
LMG |

|
Rocket Launcher |

|
Stinger |

|
Zipline |
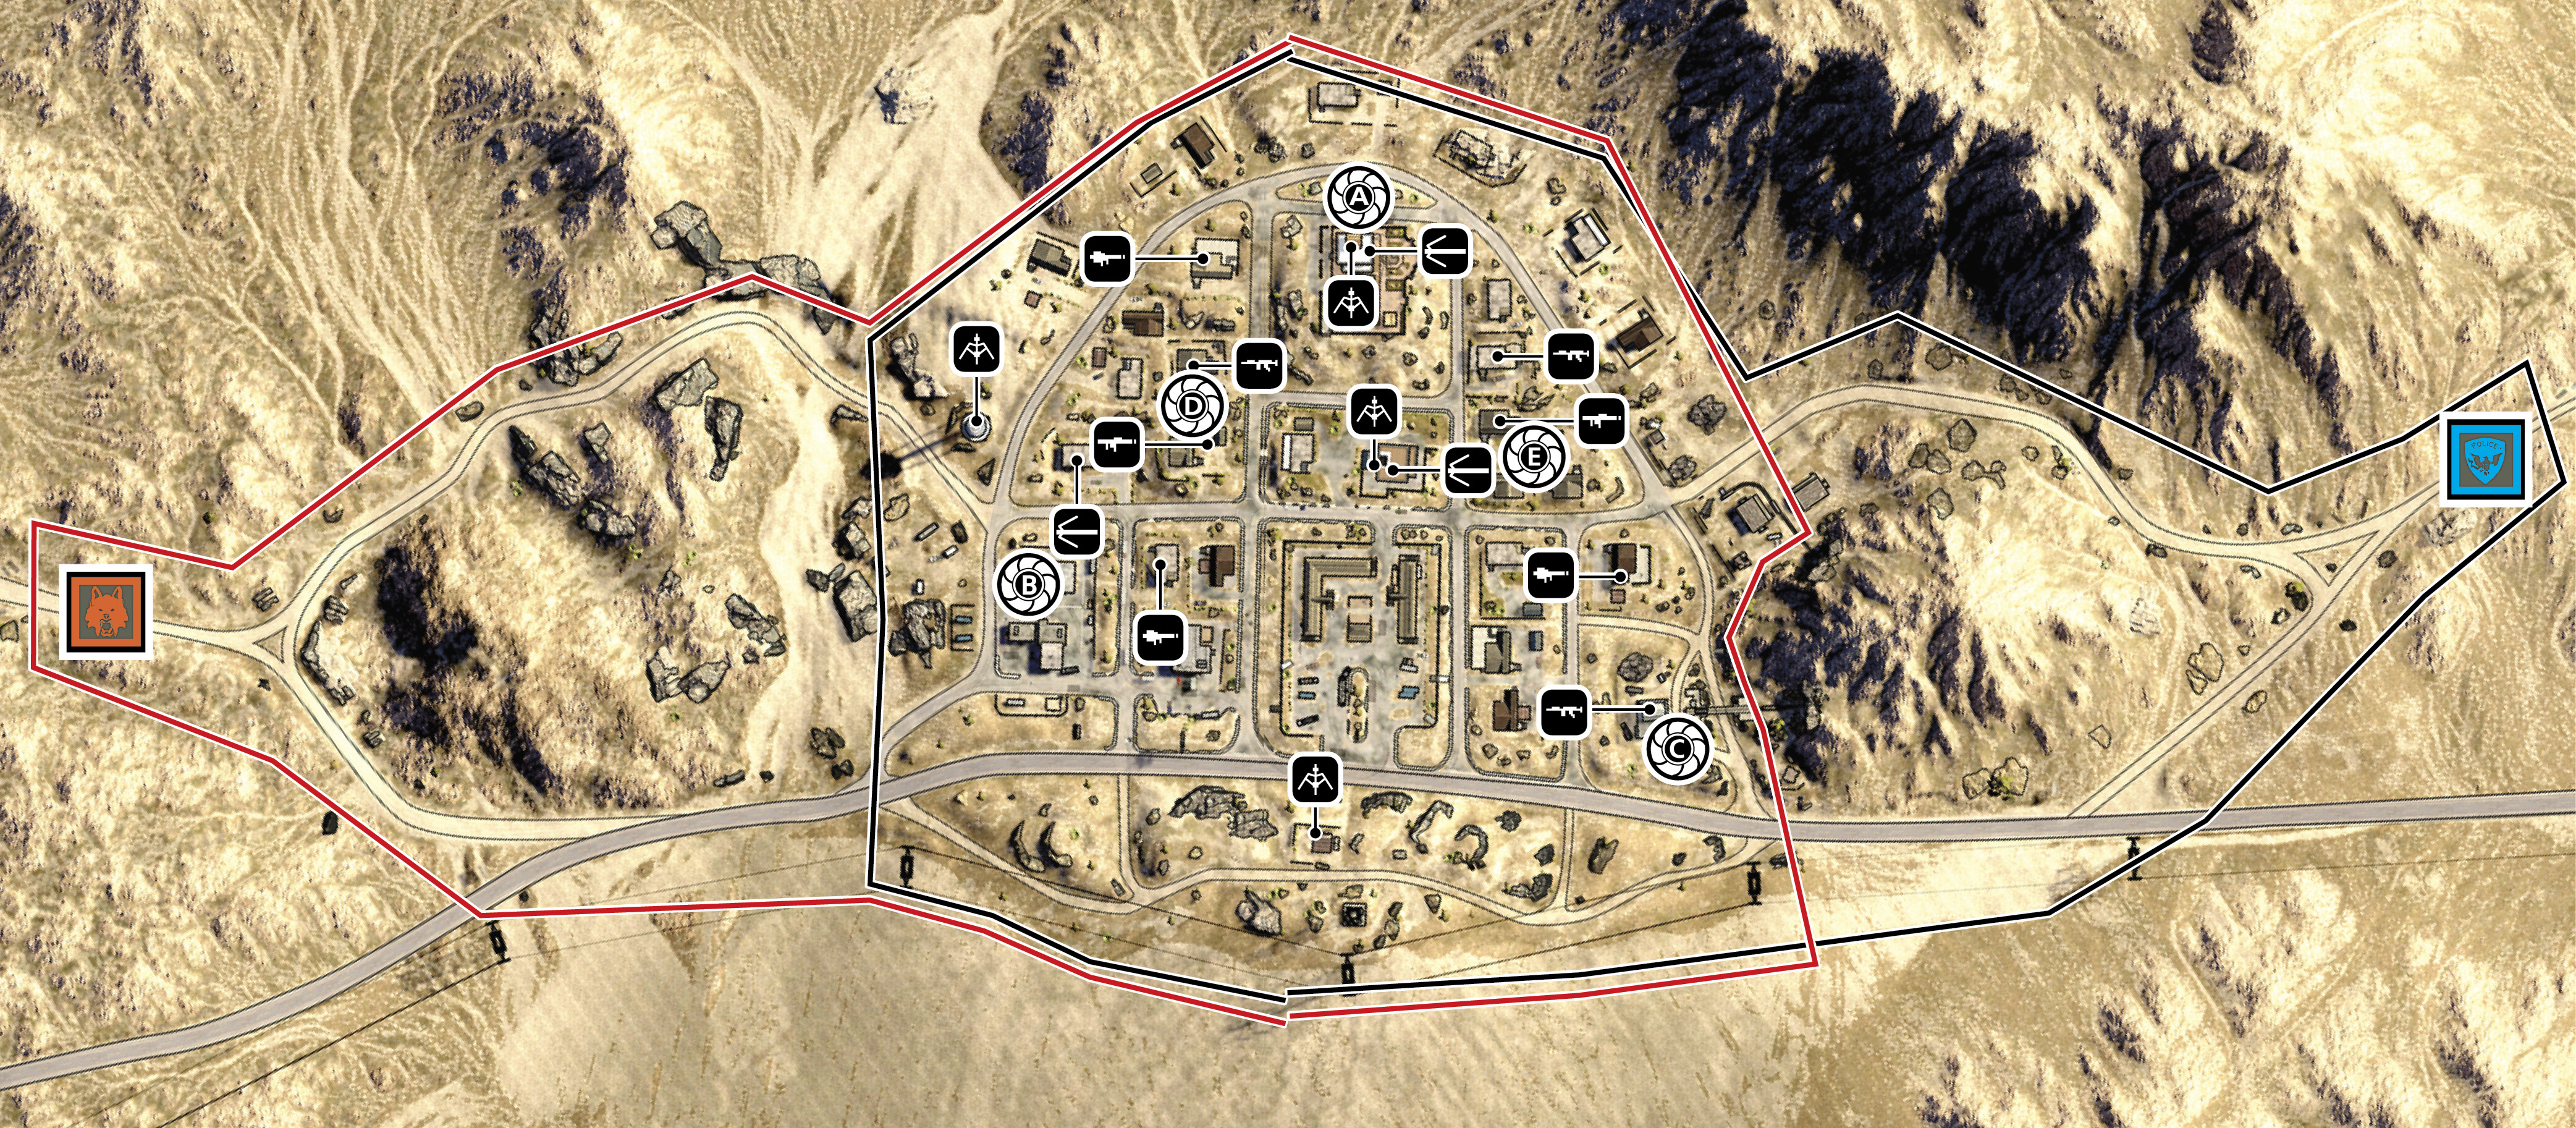
In the beginning of a round be sure to use as many vehicles in your spawn as possible and quickly spread your team out. There are many paths you can take, but charging straight for objectives (D) and (E) is the most useful when it comes to holding objectives for the maximum amount of time. (D) and (E) are sports sedans and driving them makes it muceasier to avoid enemy fire because of their speed and agility.
On Dust Bowl, eacteam starts witthe faster vehicles Battlefield: Hardline has to offer. Use the dirt bikes to cross the rougterrain of the desert and reacyour desired location without many obstacles to slow you down. The transport helicopter for the police and the executive helicopter on the criminal side serve as the most important vehicles eacteam starts with. Use the helicopters as fast-moving, mobile deployments to take your team closer to eacobjective and use the left and right gunners to take down enemy control points to prevent the enemy from bleeding your team of tickets. The air space is very open on this map; use this to get from point to point quickly and avoid anti-air fire from Battle Pickups and sniper fire.
The map is made up of a small grid-like street plan, so driving the Hotwire Vehicles around the outermost perimeter gives you the longest straightaways and allows you to stay spread out. However, wita full game there are enemy foot-mobiles waiting for you to enter their kill-zones near their deployments, so keeping to your own team’s half of the map and driving on that part of the grid allows you to keep your vehicle intact longer. Be ready to shift to a different section of the grid if your area gets too hot.
There aren’t many roads on Dust Bowl that can’t be avoided, so if you see a hazard or a roadblock ahead of you, make the first turn you see and keep moving. Keep your eyes peeled when driving up the two central roads in the middle of the map that lead to the MetCompound because even when they look open, there are several Battle Pickups located in this area and one good shot by an enemy will tear your car to shreds. It is likely that there will be enemies on botsides of your car, making these two roads the most dangerous to travel.
Controlling the Motel is a good tactic for Hotwire because it serves as a central point used for ambushing enemy vehicles and staying equidistant from objective deployment points. Use the ziplines that surround the Motel to get there quickly. There are two key pickups, an LMG and a rocket launcher, at bot(D) and (E) that prove most valuable; Hotwire Vehicles are extremely vulnerable and claiming these weapons grants you a large advantage.
Hotwire Cars
| Vehicle | Name | |
|---|---|---|

|
A | Fuel Tanker |

|
B | Utility Van |

|
C | Utility Van |

|
D | Sports Sedan |

|
E | Sports Sedan |
Road-kills are particularly fun and easy on this map. If you’re getting road-killed a lot, try equipping Survivalist—it’s a lifesaver! —Thad Sasser, Lead Multiplayer Designer
This map is big enougto have areas away from the action, great places to gain points on a quiet drive. —Brian Carden, Quality Analyst