
Battlefield Hardline Guide Multiplayer Maps Derailed
Conquest
| LEGEND | |
|---|---|
 |
Police Deployment |
 |
Criminal Deployment |
 |
Control Points |
| BATTLE PICKUPS | |
|---|---|
 |
Ammo |
 |
Defibrillator |
 |
Grappling Hook |
 |
Health |
 |
LMG |
 |
Rocket Launcher |
 |
Stinger |
 |
Zipline |
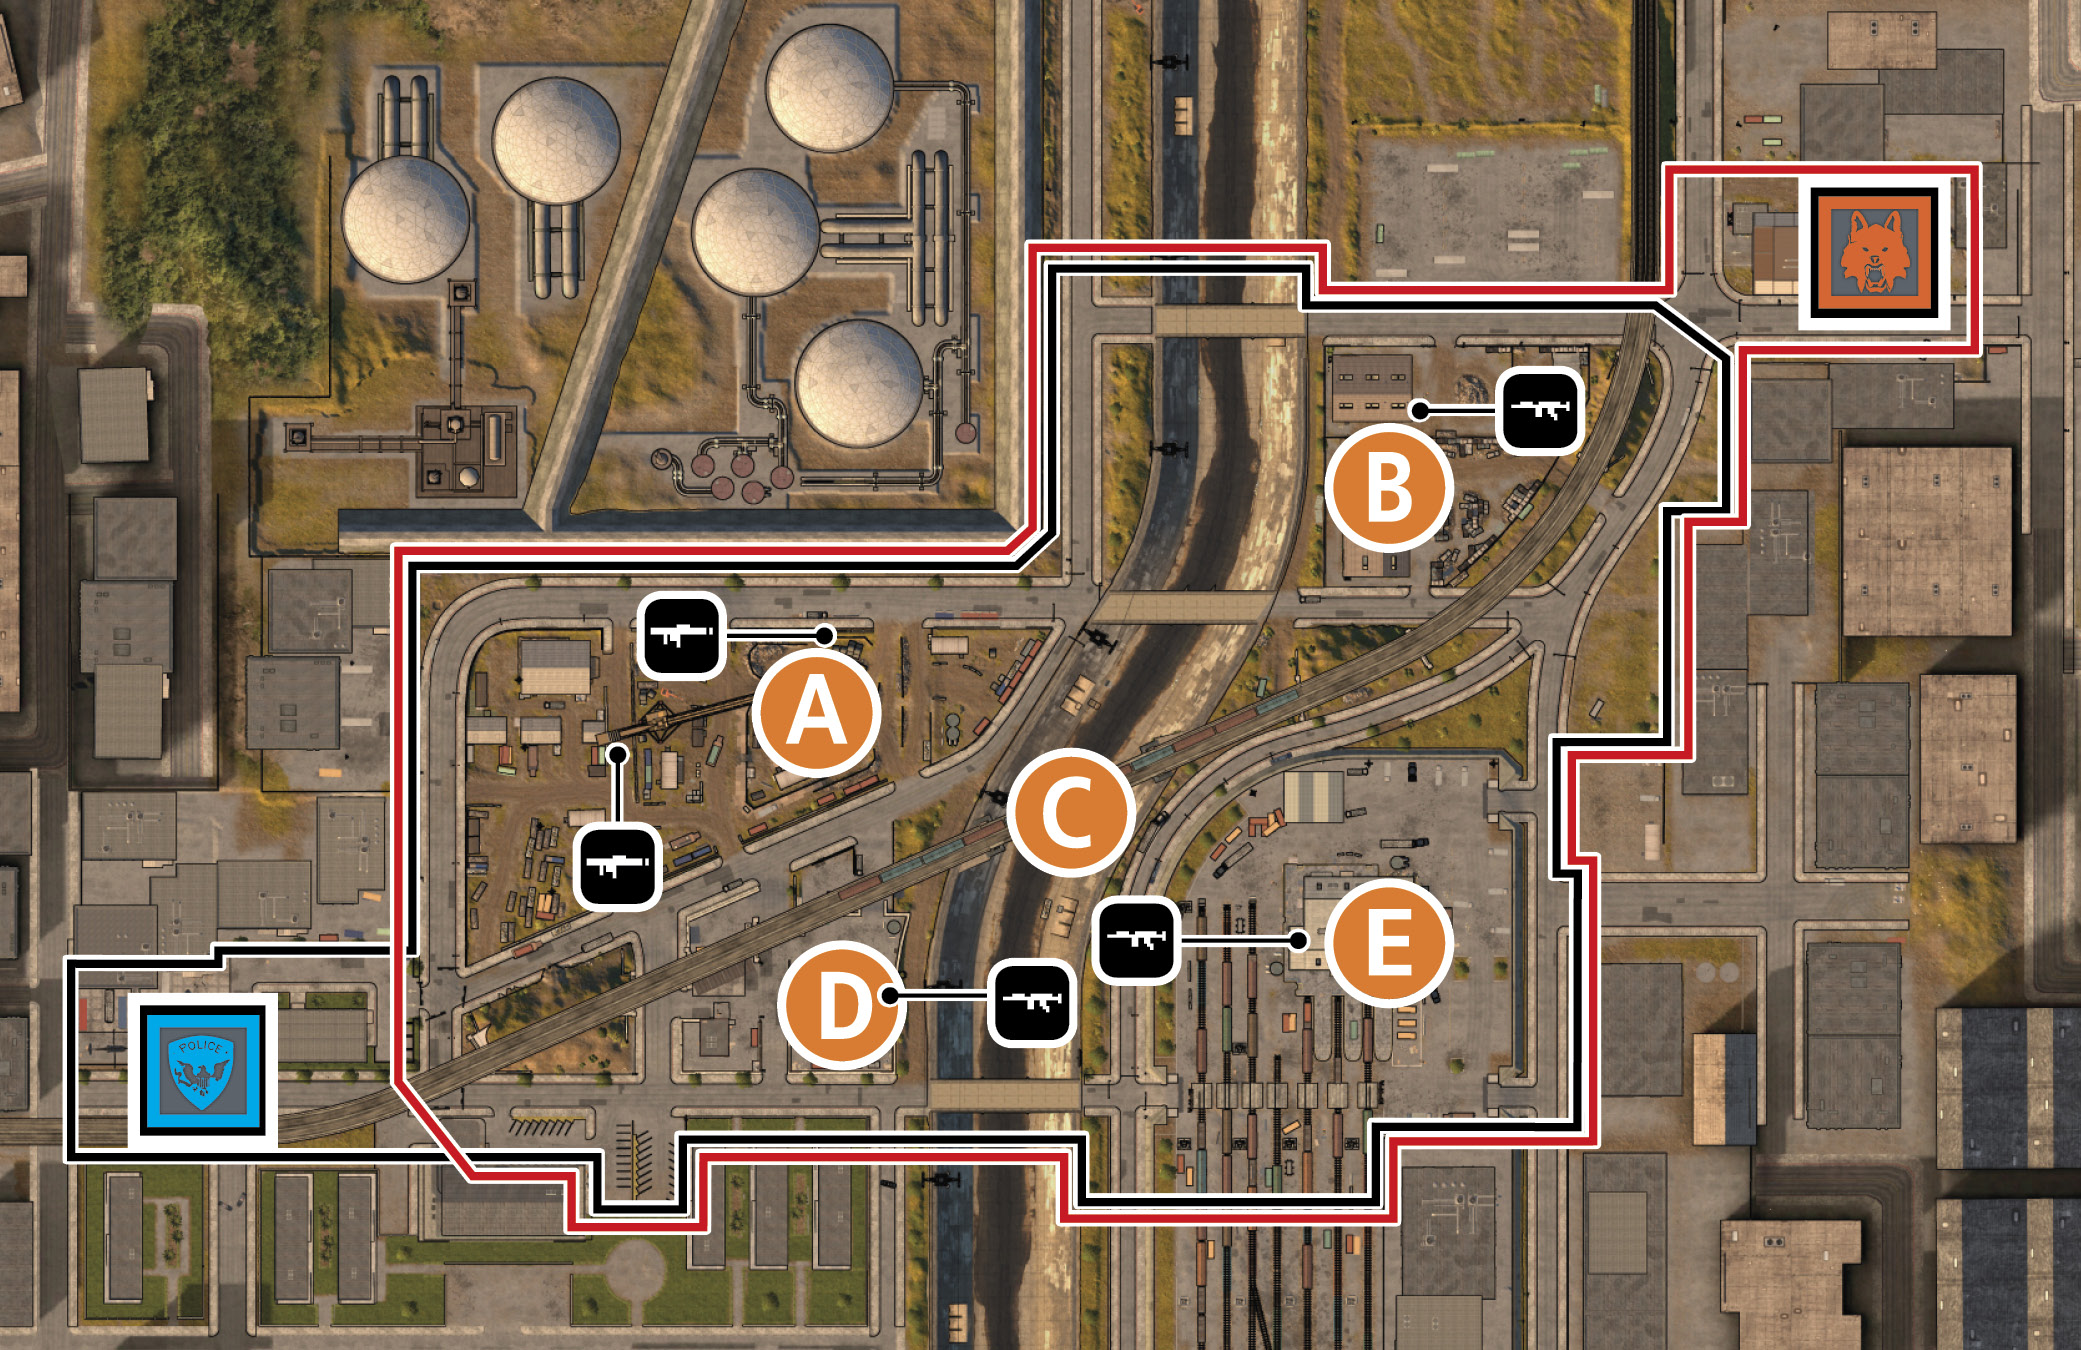
- Playing as the police, objectives (A), (C), and (D) are going to be the primary objectives that you want to take over. (A) and (D), the Construction Site and Logistics Center are going to be the easiest to get right at the start because they are close and the enemy cannot get there before you. However because they are so easy to capture, this doesn’t mean they should be ignored or put off until (C) is captured. Objective (C) is incredibly valuable, but at least one squad each should be moving to capture (A) and (D) as quickly as possible to avoid any ticket bleeding that will come if they’re not captured. The Tram Bridge is the central and most important key location because it is difficult to take over, but much easier to control. If the Tram Bridge is seeming too difficult to take after a couple of minutes of trying, go for (E). Taking the Train Depot from the criminals triggers a ticket bleed due to the fact that you control more points and it could draw some forces from (C) making it easier to take.
- Playing on the criminal side isn’t much different than the police, but based on your team’s deployment both (A) and (E) are relatively the same distance away. After taking control of (B) you might make the decision to go for the Construction Site which could be heavily guarded, but could also create a distraction telling the other team that you might want the Construction Site more than the Tram Bridge. Doing this at the beginning of the round is the most effective because the other team is still trying to figure yours out. If taking control of (A) fails to distract the enemy from leaving (C) more open, don’t worry. You can shoot the tanker on top of the bridge, killing anyone who decides to stick around. Wait for the bridge to fully collapse then move in to take the Tram Bridge because it is easier to reach and the police at this point are scrambling to decide which point they want to defend more, giving your team a major advantage.
- The most valuable control points in Conquest are (A), (C), and (E) because they are central, and depending on the side you’re on when you capture them, they have their backside facing your base for added defense. It is important not to forget (B) or (D) though. Even though they are considered the “gimme” locations due to their proximity to each team’s base, sometimes the enemy team deploys in the middle of the map in order to defend those points and don’t have anyone guarding the “gimme” control points. This situation is important to recognize because if you can weave through traffic or take the long way around to said points and take it over, it forces the entire team to draw their forces backward, opening up an opportunity for your team to begin their full frontal assault on the central control points.
- The fortunate thing about Derailed is it lends itself extremely well to each and every class, but each has its own very large drawback. Bring out the big guns like the sniper rifles, battle rifles, and assault rifles when you’re fighting out in the ravine or on top of any of the bridges, then equip your favorite shotgun or submachine guns when you’re fighting inside the Train Depot, Scrapyard, or Logistics Center. The downside is, using these weapons in areas that they’re not meant for could mean your downfall rather quickly. Don’t forget that you can still play as an operator in a close-quarters situation to heal teammates and bring them back to life, but you want to equip a carbine instead of an assault rifle. The assault rifle is far more powerful at medium range, but the fire rate and close range accuracy of the carbine set serves you far better in the smaller areas.
Destroy the red tanker train car to get easier access to objective B. —John Seefurth, Quality Analyst
Pesky snipers got you down? Destroy the fuel tanker on the rail bridge to take away their centralized high ground. —Evan Champlin, Senior Multiplayer Level Designer