
Battlefield Hardline Guide Multiplayer: Getting Started
Overview
While the single player campaign offers a great story and plenty of memorable moments, it’s only a small part of Battlefield: Hardline. Playing against others and working together as a team with members of your squad adds an entirely new dimension of intensity and fun. Plus, earning new ranks and unlocks is incredibly addictive, making hours melt away.
Hardline Fundamentals
Are you new to Battlefield? If so, don’t worry about it. Hardline is different than previous entries in the series, making the game a learning experience for rookies and veterans alike. Regardless of your experience or skill level, there’s a role for everyone in Hardline. In fact, this is one of the only online shooters where you can post a big score without even firing a shot. In this chapter we take a look at the basic gameplay mechanics as well as the different multiplayer game modes, helping you get up-to-speed before spawning into your first match.
Interface
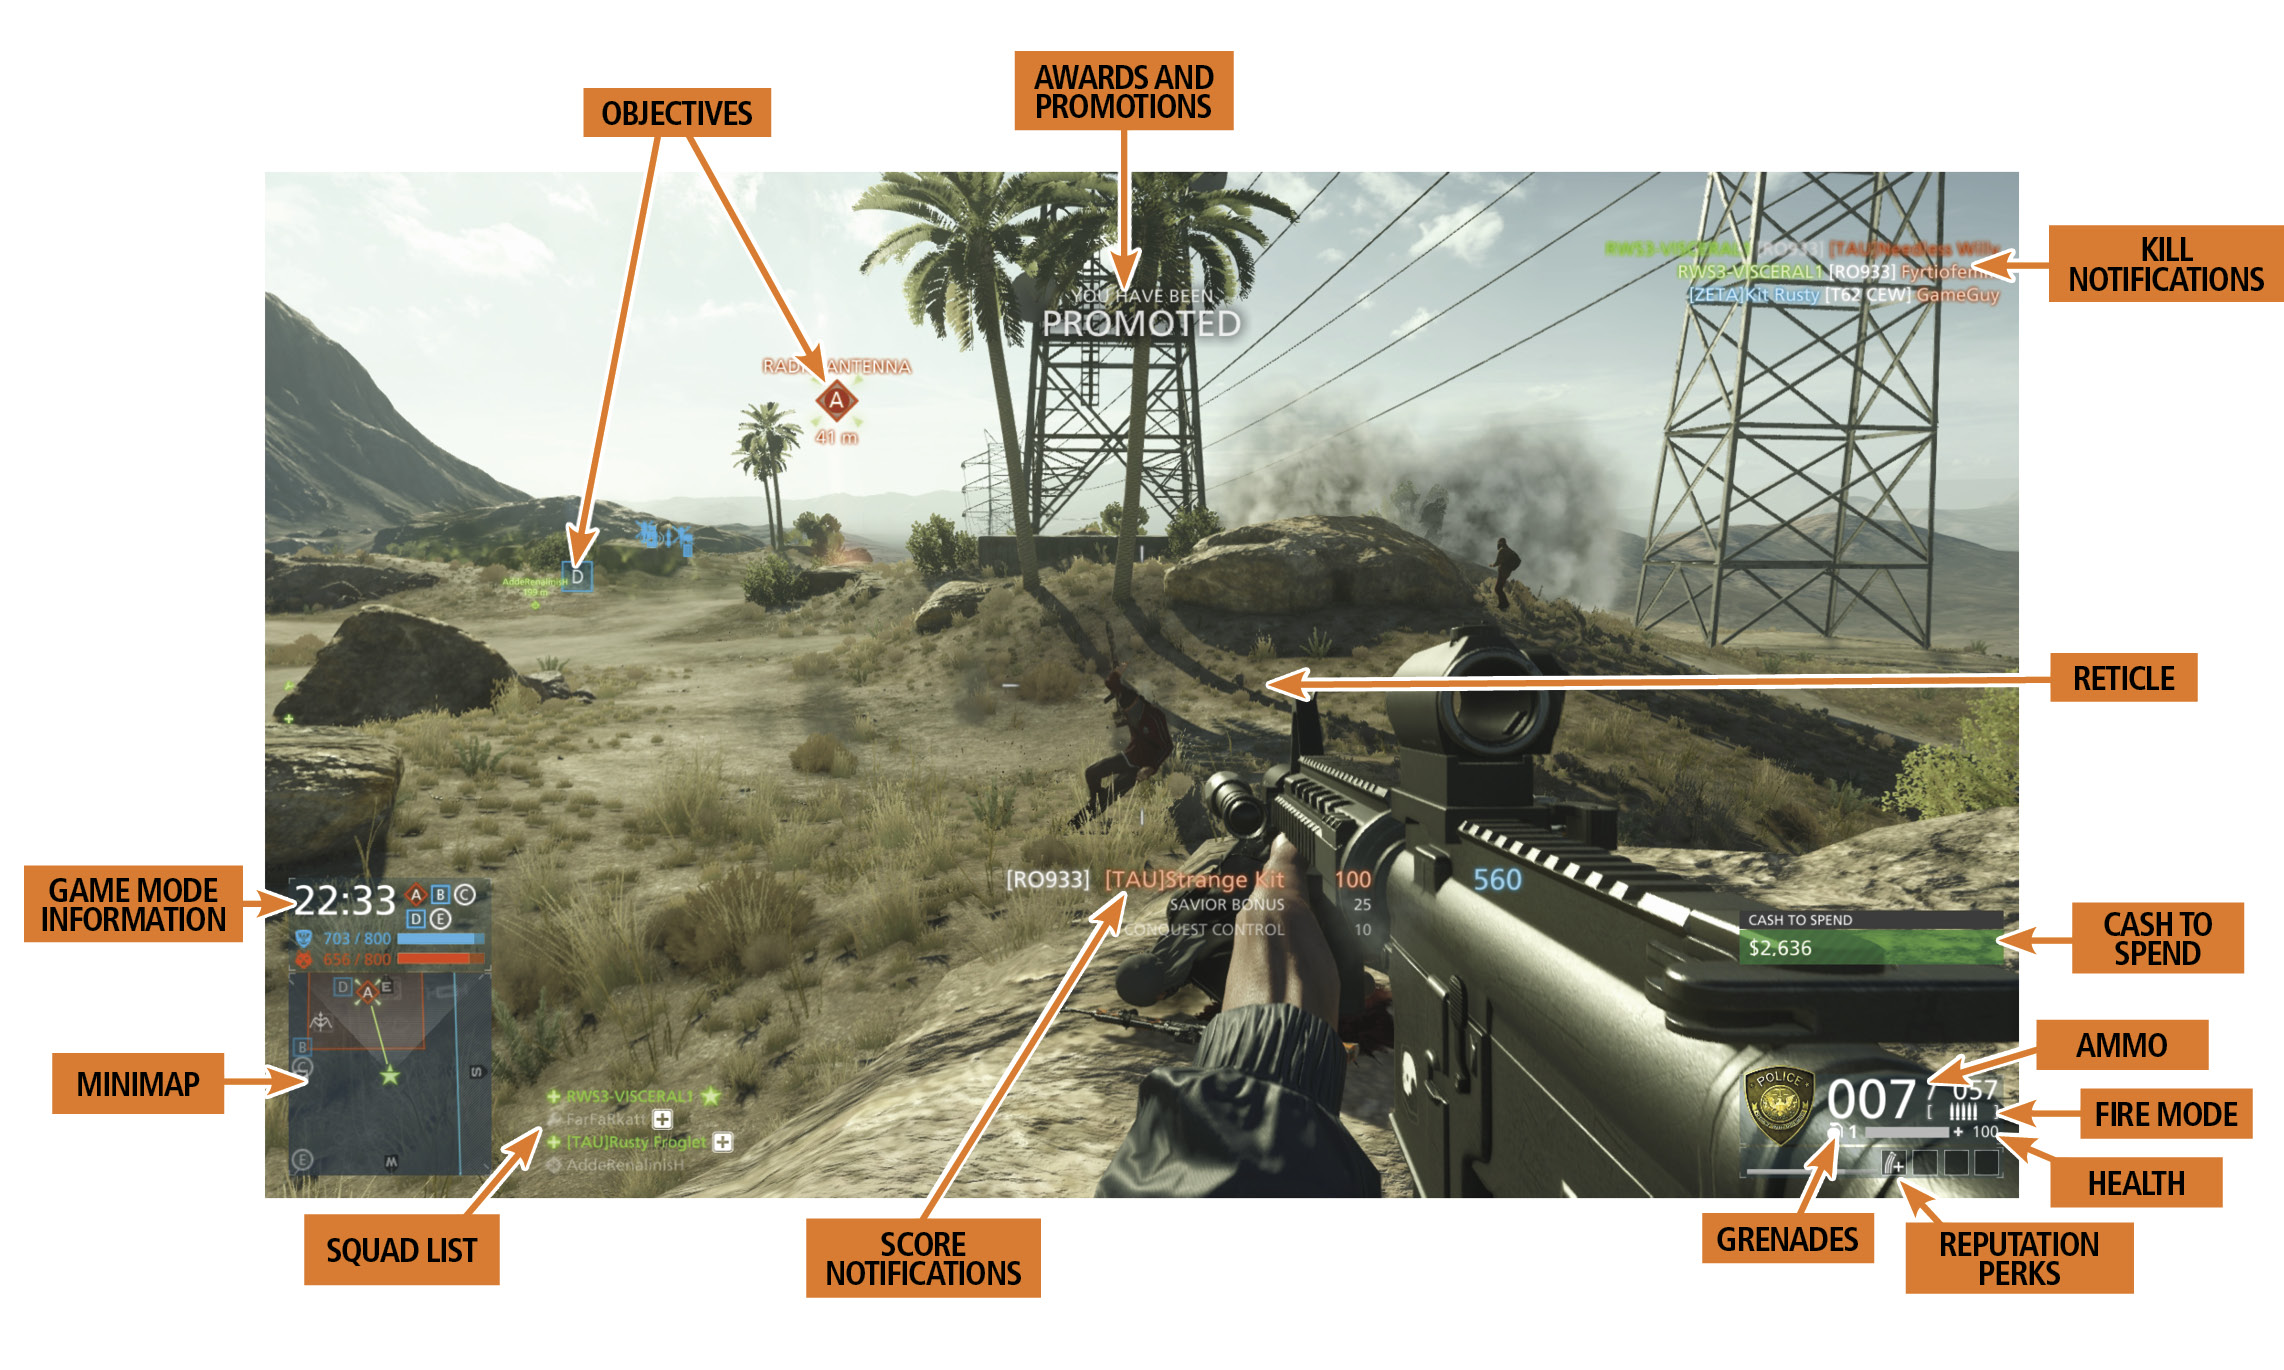
The heads up display, or HUD, is the way that vital information is displayed on your screen. None of the items on your HUD are there for aesthetics alone. They are there to help you accomplish your objectives and keep you alive. Here’s a brief explanation of every major item on the HUD.
Reticle: The reticle is always located in the center of the HUD. The reticle is the aiming point for your selected weapon. To hit a target, place the reticle over it and fire. The reticle may change based on the weapon you’re using (shotguns have ring-shaped reticles, for example). When firing at an enemy, watch for diagonal lines flashing around the perimeter of the reticle—these are hit markers. Hit markers appear when your weapon is hitting the target. There are different types of hit markers in Hardline. White hit markers indicate a standard hit on-target while red hit markers represent headshots. Bracketed hit markers indicate a successful hit on an enemy vehicle.
Cash To Spend: Every time you score points, you’re awarded with cash, shown here. Use this money to purchase new weapons, grenades, gadgets, attachments, and vehicle enhancements.
Awards and Promotions: Each time you rank-up or complete the criteria necessary for a coin, bounty, or assignment, you’re notified here.
Minimap: Located in the bottom left corner of the screen, the minimap provides a top-down, 360-degree view of the environment through which you are moving. The minimap rotates as you change direction so that the top of the minimap is always the direction you are currently facing—make note of the compass headings on the perimeter of the map. In addition to showing the terrain, the minimap also shows the location of all detected enemies, appearing as red triangles or red vehicle icons. Teammates show up as blue icons, while squad members are green. Empty vehicles and Battle Pickups are represented by white icons. It is a good idea to constantly refer to the minimap to keep track of all detected enemies. Even if you can’t see them visually, the minimap lets you know where they are located, whether behind a hill or inside a building. Finally, blue and red icons show you the location of objectives. These same objective icons also appear on the HUD. The color of the ground on the minimap also has meaning. The shaded area behind the red line is out of bounds. If you move into this area, you have ten seconds to get back on the map before you die.
Game Mode Information: The icons and meters above the minimap relate to the current game mode. All game modes have slightly different configurations, but most have a ticket meter and a timer. The ticket meter indicates how many reinforcements your team has. When your team runs out of tickets, you lose.
Objectives: The colored icons on the HUD represent objectives. Blue-colored icons are held by your team while orange-colored icons are held by the opposing team. Beneath each of these icons is a number showing the distance to each objective, measured in meters.
Health: By default your health is at 100%. But if you take damage, your health drops. If it reaches 0%, you die. You can slowly regenerate health by staying behind cover and avoiding injury, but the fastest way to heal is with a First Aid Pack dropped by an operator. Stand close to a First Aid Pack to rapidly restore your health.
Ammo: Your ammo is represented by two numbers. The large number to the left is the number of rounds you currently have loaded in the weapon’s magazine while the small number to the right is the amount of ammo available in unloaded magazines.
Grenades: This number represents how many grenades you have. By default you can only carry one M67 Frag grenade, but you can purchase other grenades which allow you to carry multiples. The Extra Grenade reputation perk allows you to carry one extra grenade of any kind.
Fire Mode: Some weapons allow you to switch fire modes, choosing from single shot, automatic, and burst modes. The weapon’s current fire mode is shown here.
Kill Notifications: The text in the top right corner of the screen reports recent deaths, showing who killed whom and with what weapon or vehicle.
Score Notifications: Every time you earn points, text appears in the middle of the screen describing what action you’re being rewarded for and how many points you gain.
Reputation Perks: This meter represents progression toward your next reputation perk. Score squad-based actions to progress through the four levels of upgrades. If your squad is eliminated, you lose progress.
Squad List: Shown in green text on the right side of the minimap, the squad list shows every member of your squad as well as the kit and specialization they currently have equipped. The squad leader appears at the top of the list with a star icon next to their name.
Deployment Screen
When you first join a game, the deployment screen is where it all begins. Before immediately jumping into the game, take a few seconds to choose your class. But if you want to make more adjustments to your kit, choose the loadout option. This opens a new screen allowing you to make even more tweaks to your loadout, including weapon attachments and camo. Once you’re finished adjusting your loadout, return to the deployment screen and figure out where you want to join the fight. If you’re in a squad, you can spawn on any living squad member. Or if a mechanic squad member has deployed a satellite phone, you can spawn at its location. Depending on the game mode, there are also bases, deployment areas, and control points at which you can spawn. You can also spawn directly into the seat of a vacant vehicle belonging to your team. As you can see, the spawning options are numerous.
In most instances you should spawn on or close to your squad so you can provide support. But if your squad is in a tense firefight, sometimes it’s safest to spawn at a less dangerous location, otherwise you may get killed as soon as you spawn into the game. Study the small video monitor in the bottom left corner of the deployment screen before spawning on a squad member. This live video feed allows you to see if the selected squad member is under fire. When you’ve determined your spawn location, choose the deploy option to enter the game. By simply choosing safe spawn locations you can improve your kill-death ratio significantly, as many deaths occur due to poor spawn choices.
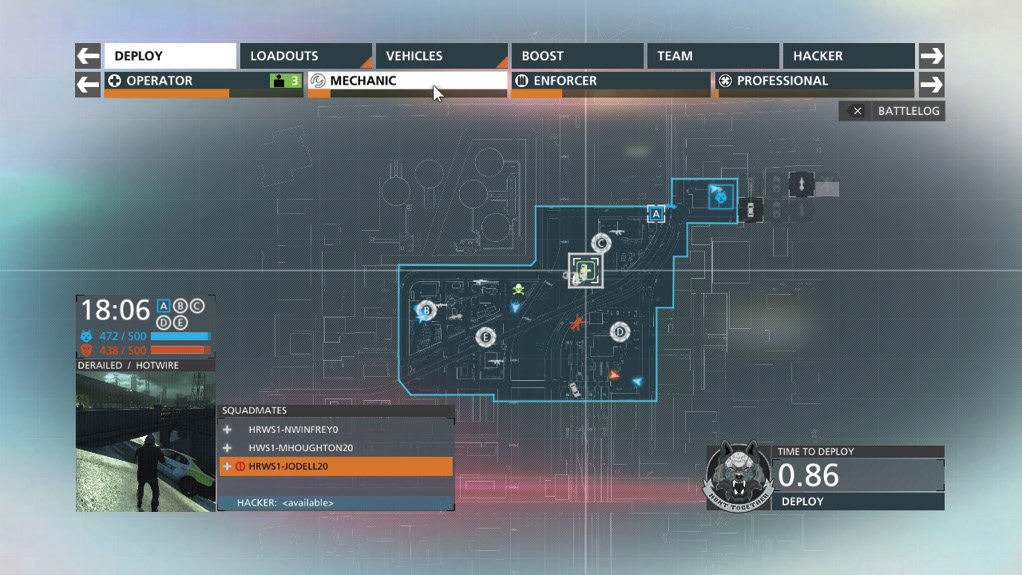
Before spawning on a squad member, monitor their view in the video monitor, located in the bottom left corner of the deployment screen.
Movement
Congratulations, you’ve made it onto the battlefield. Now what? Moving your character around the map is simple, especially if you’ve played the earlier Battlefield installments or other first person shooters. When standing, your soldier jogs at a moderate pace, ideal for getting around areas where threats are minimal. While crouched, you move more slowly, and while prone your speed is literally reduced to a crawl. However, since you are lower, you make a smaller target for the enemy to hit and you can more easily duck behind cover. When advancing against an enemy position, it is best to move while crouched or prone, as it is harder for the enemy to detect you. Weapon accuracy is also increased while you are crouched or prone, so make a habit of dropping to a knee or down on your belly before firing a shot.
At times, it is better to move fast, by sprinting. You can’t use weapons or gadgets while sprinting, but you are much more difficult for the enemy to hit. Sprint when you have to cross a dangerously open piece of ground, dashing from one piece of cover to another. Never sprint in tight, confined spaces where you’re likely to encounter enemy troops. If you encounter an enemy at close-range while sprinting, chances are you won’t have time to stop, raise your weapon, and fire before your opponent does. Don’t give in to the temptation to sprint. You’re better off moving at a slower speed with your weapon raised and ready to fire.
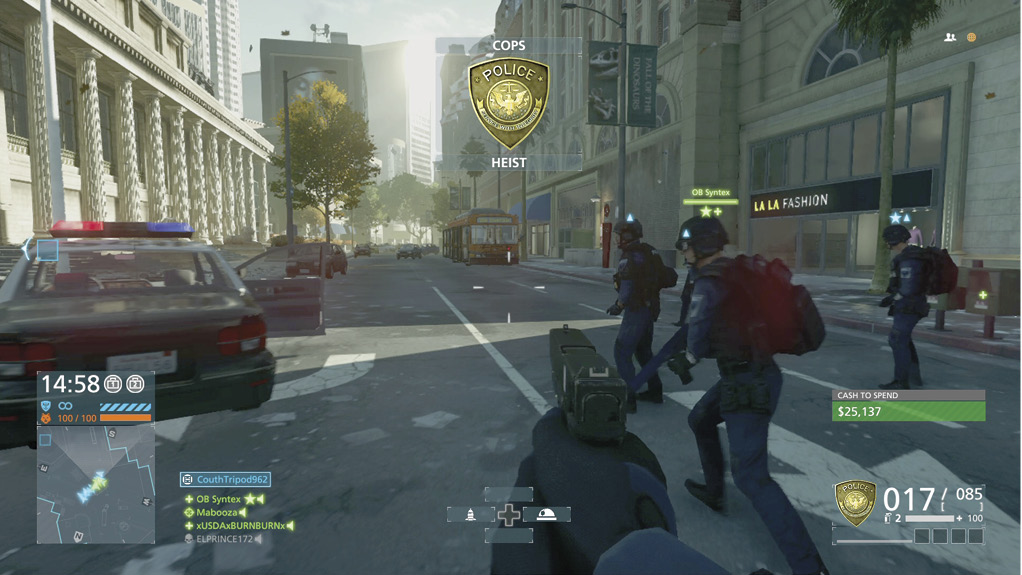
In Hardline, you can sprint faster when equipping a handgun or melee weapon. Switch to you sidearm when rushing to objectives at the start of a match.
Swimming
If you encounter deep water, like in Riptide or Everglades, it’s possible to swim. Swimming works just like moving on land, but at a significantly slower pace. Just as on land, you can sprint in the water. This is called sprint swim, a quick freestyle stroke. Sprint swim is the fastest way to cross deep bodies of water. Swim to shore as fast as possible and seek cover. You can also dive and swim underwater, using the water to conceal your movements. Simply crouch while in deep water to dive beneath the surface. Swimming underwater is a good way to stay out of sight, but you’re not invincible to incoming fire. Bullets still penetrate the surface of the water and can injure or kill you. Furthermore, you can only hold your breath so long. If you remain underwater for an extended period of time, you begin losing health at a steady rate. Get to the surface before you drown! For the most part, it’s best to avoid swimming when possible. While in the water your ability to defend yourself is greatly diminished, literally making you a sitting duck for enemy troops. While you’re incapable of accessing your primary weapon or gadgets while swimming, you can equip your sidearm and some gadgets, like breaching charges. Firing a pistol while swimming is highly inaccurate, but it’s better than nothing.
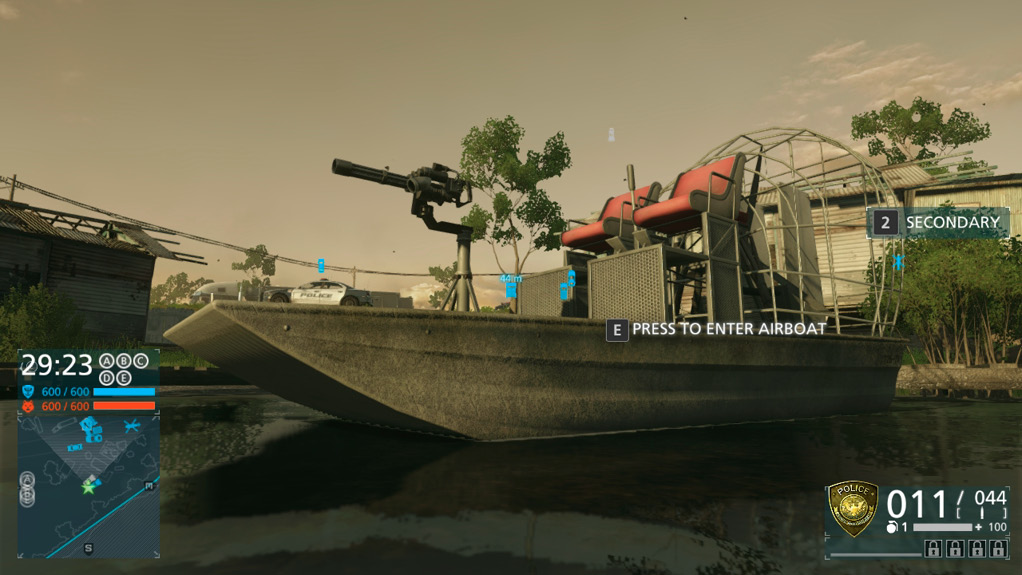
While in deep water, you can’t access your primary weapon. Switch to your sidearm until you can swim to shore or hop on a boat.
Parachutes
Whether jumping out of a damaged helicopter of hopping off a tall building, you can avoid cratering into the ground by deploying your parachute. While in free fall, press the jump button/key once to open your parachute. You can steer the parachute with standard movement inputs. Unless you’re parachuting from dizzying heights, don’t expect to travel great distances, as the descent is rapid. It’s possible to fire your weapons during the descent, but your accuracy is greatly diminished. If you’re descending directly over an enemy position, consider dropping grenades or breaching charges—just make sure they explode before you reach the ground. But the longer you’re in the air, the more attention you’re likely to attract. For this reason, free fall as long as possible and open the parachute just before you reach the ground. This is a great way to sneak into enemy-held locations.
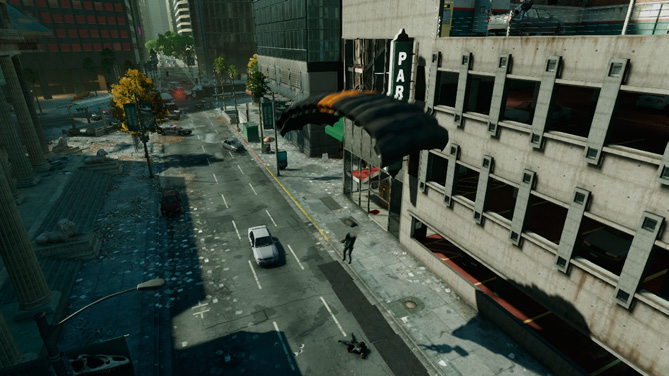
Instead of looking for ladders or ziplines, simply jump off rooftops and parachute safely to the ground.