Battlefield Hardline Guide Multiplayer: Getting Started
Combat Basics
While moving about the battlefield is a major part of gameplay, the sole purpose of movement is to place you in a position where you can deploy your weapons, engaging and eliminating the enemy. When it comes to weapons, Hardline has you covered, offering a wide range of knives, firearms, grenades, and anti-vehicle options.
Spotting
Before attacking your first enemy, you must learn how to spot them. When you have an enemy player or vehicle in your sight, press the spot button/key to highlight it for your team. This places a red icon on the HUD and minimap, showing your entire team where the enemy unit is located. Enemy players show up as red triangle icons while enemy vehicles are represented by red vehicle icons. Targets only remain spotted for approximately five seconds, but that’s usually more than enough time for your team to take notice of the threat. Also, once the icon disappears, you can spot the target again as long as you’ve maintained a line of sight. If a teammate kills the target you tagged, you earn a Spot Bonus worth 25 points. Consider playing as a professional with a high-powered scope and simply spot enemy units for your team. Even if you don’t fire a shot, you can still rack-up a decent score by spotting enemies. Spotting is crucial for your team’s helicopters, making it easier for pilots to perform strafing runs against enemy players and vehicles. If nobody is spotting vehicles for your team’s pilots, don’t complain about a lack of close air support.
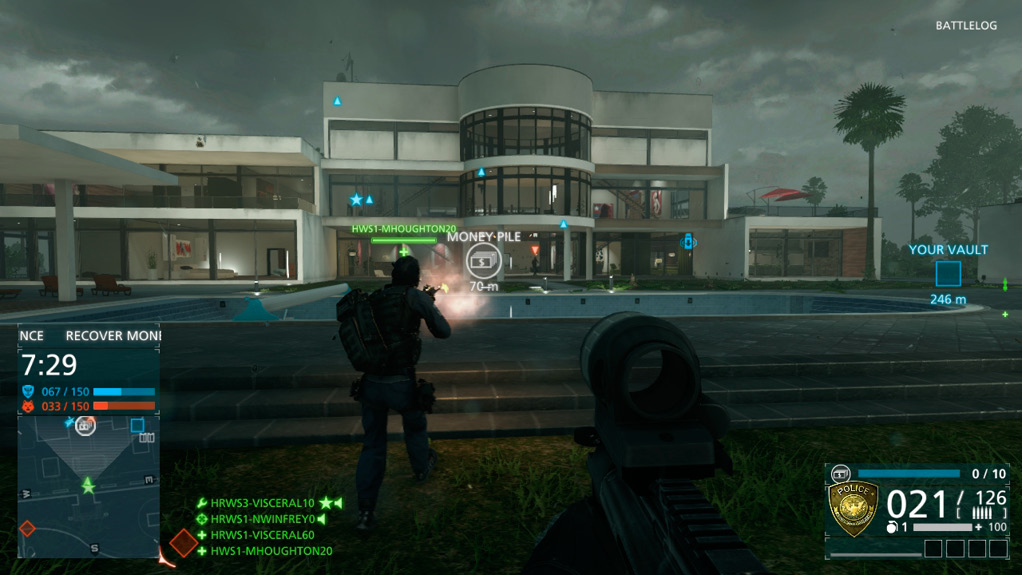
See an opponent? Spot them so your teammates can assist you in taking them out.
Melee Combat
Don’t want to give away your position? Out of ammo? Consider taking out your unsuspecting opponent with a silent melee attack. The police baton or baseball bat are the standard-issue weapons available to law enforcement and criminal players, respectively. New melee weapons can be purchased, unlocked, or obtained from Battlepacks. There are two types of melee weapons in Hardline: blunt and sharp. Sharp weapons, like knives, are always lethal. Blunt weapons can be used to incapacitate opponents, but only when attacking from behind. If you attack an enemy head-on, it takes at least two swipes with your melee weapon to score a kill. If an enemy is looking in your direction, think twice before attempting a melee attack. They are likely to shoot you in the face before you can get within striking range. Instead, always look for opportunities to flank, sneaking up behind unsuspecting opponents and striking them from behind. In addition to scoring stealthy kills, the melee weapons are great for bashing through fences and other light obstacles.
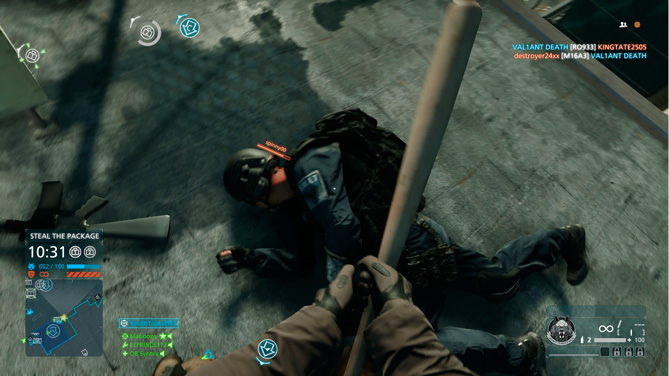
Always approach opponents from behind before initiating a melee attack. Opponents who are prone are particularly vulnerable.
Non-Lethal Takedowns and Interrogations
Non-lethal takedowns are new to Hardline, allowing you to incapacitate opponents. When using a blunt weapon, like the police baton or baseball bat, performing melee attacks from behind an opponent results in an instant non-lethal takedown. The T62 CEW stun gun, a secondary weapon purchase, can also incapacitate an opponent. Incapacitated players are down for the count and forced to redeploy. But before their body disappears, you can interrogate them. Interact with the incapacitated enemy at close range, holding down the corresponding button/key to complete the interrogation. This takes a few seconds, leaving you vulnerable. But once the interrogation is complete, the locations of the opponent’s teammates appear on your minimap. This information is relayed to your entire team, offering a brief tactical advantage. Use this intel to hunt down nearby enemies. Their positions only appear on the minimap for a few seconds.
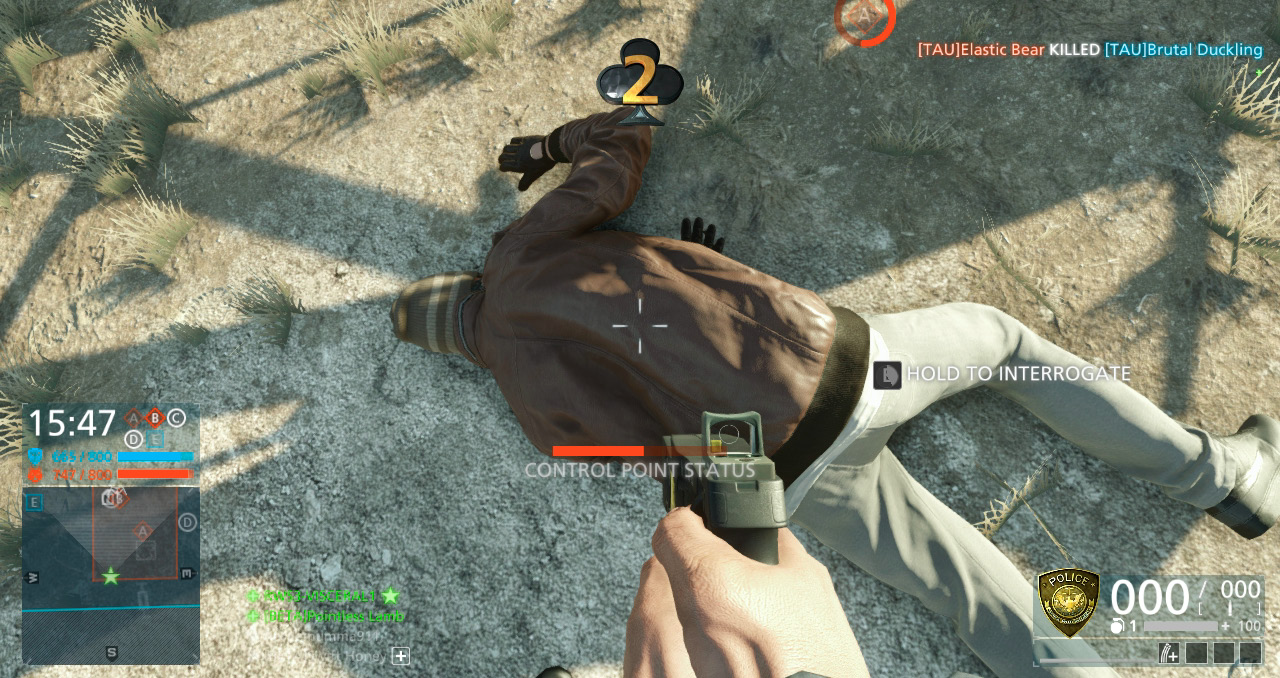
Incapacitated opponents can be interrogated, revealing the locations of their teammates.
Firearms
Battlefield: Hardline offers a wide range of firearms at your disposal. But it’s up to you to pick the best weapon for the job, taking into account your chosen class and preferred style of play. Unlike previous Battlefields, weapon unlocks aren’t tied to linear progression. Rather, most weapons can be purchased, allowing you to invest your hard-earned cash into the weapons you want. Let’s take a quick look at the types of firearms available.
Assault Rifles: Carried exclusively by the operator class, assault rifles are well-rounded full-auto weapons best deployed when engaging targets at intermediate ranges.
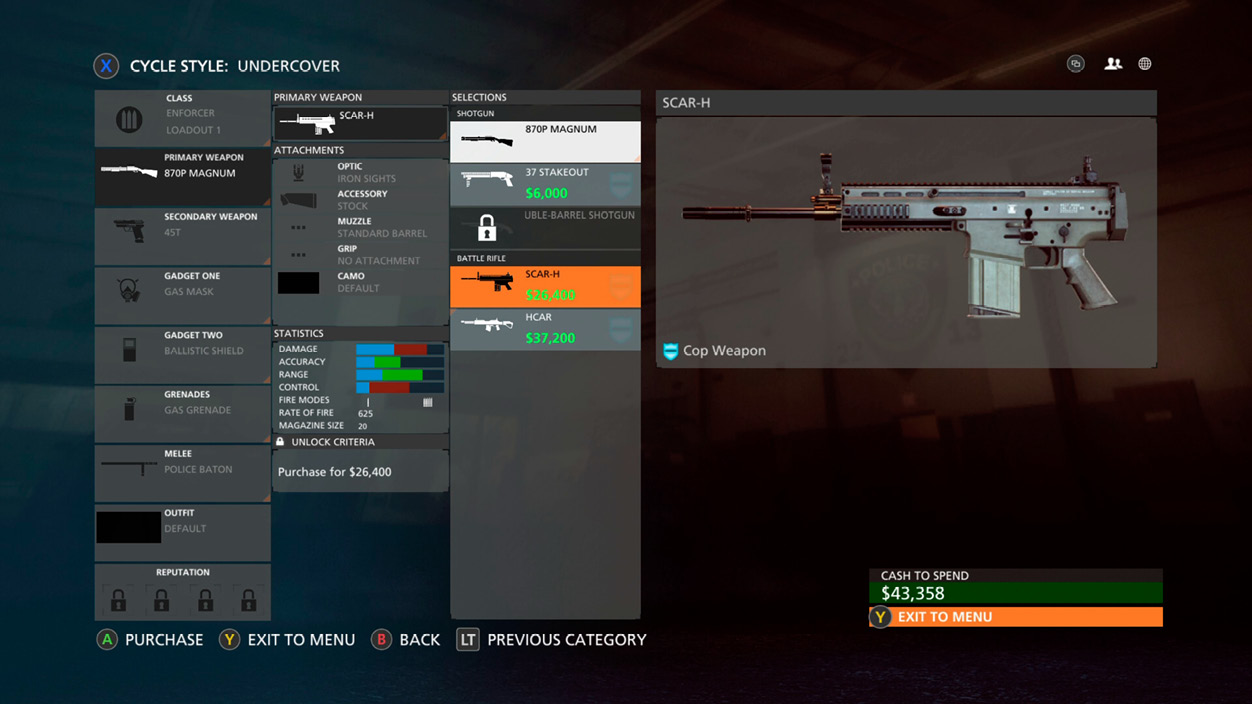
As you earn money in multiplayer matches, don’t forget to shop for new weapons.
Carbines: Also exclusive to the operator class, carbines offer the versatility and functionality of an assault rifle in a smaller, compact frame, allowing them to perform admirably at both close and intermediate ranges.
Submachine Guns (SMGs): These are the primary weapons of the mechanic class. SMGs are compact, fully automatic weapons known for their high rate of fire, making them ideal during close quarter engagements.
Shotguns: These close quarter beasts are available to the enforcer class. While extremely lethal at close-range, shotguns are largely ineffective beyond 25 meters.
Battle Rifles: When the enforcer class needs better long-range performance they can rely on battle rifles to get the job done. These function similar to the assault rifles, yet with improved damage and range.
Bolt-Action Sniper Rifles: The professional class’ bolt-action sniper rifles offer extreme power and precision, intended for long-range engagements—due to their low rate of fire, these are best deployed by marksman experts.
Semi-Auto Sniper Rifles: Also exclusive to professionals, these semi-auto rifles offer a great balance of precision and stopping power, putting them somewhere in between the assault rifles and bolt-action sniper rifles.
Handguns: Every player is equipped with a sidearm, serving as a backup to their primary weapon. Sidearms include a variety of pistols including the mechanic’s hard-hitting revolvers and the professional’s automatic machine pistols.
Basic Operation
As mentioned earlier, the reticle in the center of the screen is your aiming point for using weapons. Most of the weapons you use are direct fire, meaning that the projectile you fire travels in a straight line from your weapon to the target. However, when engaging targets at long range, be prepared to aim high to compensate for “bullet drop,” gravity’s pull on the bullet which causes it to drop over distance. Using these weapons is simple. Place the reticle directly over the target and then squeeze the trigger. This is called firing from the hip. Firing from the hip isn’t accurate, but it gets the job done at close range. Attach a laser sight to your weapon to increase hip fire accuracy.
Most weapons in Hardline have selectable fire modes, allowing you to choose from single-shot, burst, and automatic modes. For semi-automatic or single-shot weapons such as pistols, shotguns, and sniper rifles, each time you press the fire button/key, you fire a single round. However, automatic weapons, such as submachine guns, assault rifles, carbines, and battle rifles, continue to shoot as you hold down the fire button/key until they run out of ammo. So experiment with each weapon’s fire modes in an effort to increase accuracy and reduce recoil.
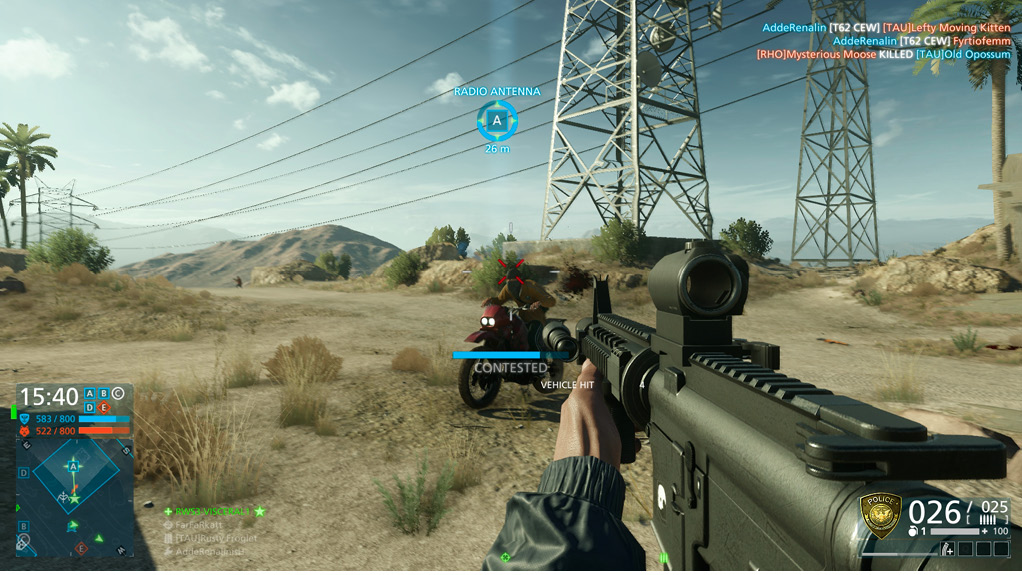
The hit markers on the HUD indicate a successful hit with your weapon. A red hit marker indicates a headshot.
Recoil Compensation
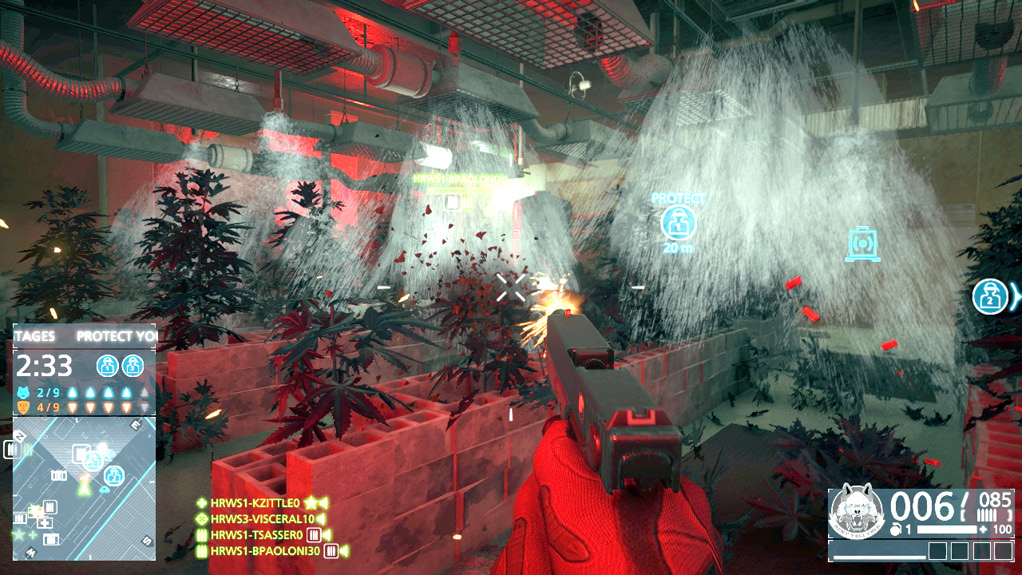
Recoil is unavoidable, but it can be reduced with attachments like muzzle brakes, compensators, and foregrips.
The first round you fire with any weapon exhibits the most recoil. As the muzzle climbs after the first shot, follow-up shots may miss the intended target completely. When firing automatic weapons, the longer the burst, the less accurate your fire. Therefore, to maintain greater accuracy and still put a lot of lead on-target, fire in short bursts. You are more likely to kill your target, especially at medium- to long-range, with a few accurate rounds rather than spraying an entire magazine over a wide area. If recoil is still a problem, consider switching to burst or single-shot mode. While attachments like the compensator, muzzle brake, angled grip, and vertical grip help reduce recoil, they don’t eliminate it entirely.
As you get more comfortable with the weapons, compensate for muzzle climb by applying slight downward pressure, using either your mouse or controller’s analog stick. This allows you to fight the recoil, helping keep the weapon on-target.
Aiming Down Sights
When you fire a weapon using the reticle on the HUD to aim, you are firing from the hip. Hip fire is not accurate and should only be employed when engaging targets at close range. To increase your accuracy, press the zoom button/key to aim down the weapon’s sights. This brings up the iron sights view, where you are actually looking through the weapon’s sight to aim. The butt of the weapon is brought up to your shoulder, giving you greater stability and accuracy. If your weapon is equipped with an optic attachment, the zoom button/key provides a view through the optic rather than iron sights. It is a good idea to get in the habit of pressing the zoom button to bring up your iron sights before firing. This not only is more accurate, but it also provides a zoomed-in view of the target. To further increase accuracy, crouch or drop prone and remain stationary while firing. When peering through high-powered scopes, found on bolt-action sniper rifles, there is noticeable sway, making it difficult to aim. You can temporarily reduce this sway by holding your breath. To do this hold down the sprint button/key, but you can only hold your breath for a few seconds. Be ready to fire after holding your breath to deliver a precise shot on-target.
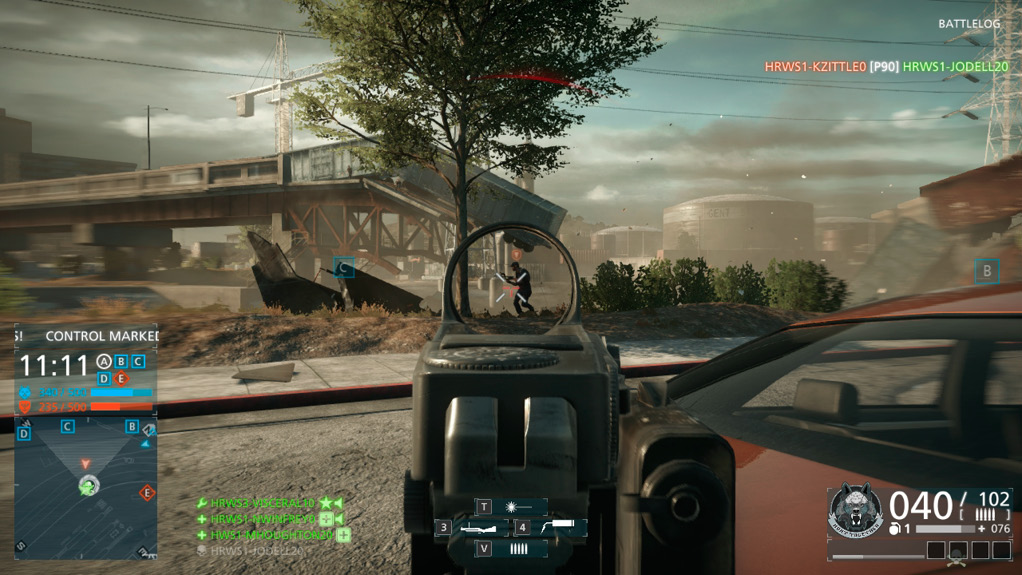
Take aim through your weapon’s iron sights or optic for improved shot placement.
Reloading
At some point you need to reload your weapon. While reloading, you’re very vulnerable, so make an effort to find cover or have a squadmate watch your back. For most weapons, rounds are loaded in detachable box magazines which are then inserted into the firearm. The capacity of magazines differs greatly based on the type of weapon you’re using. Some sniper rifle magazines only hold five rounds while the LMG Battle Pickups can hold 100 rounds.
It’s best to reload your weapon after each major engagement, when you have a few rounds left in a magazine. This means a round is already chambered in the weapon, significantly reducing the duration of the reload animation. If you fire a weapon until it runs dry, a reload animation automatically begins. But this time, the weapon’s chamber is empty, requiring your character to load a fresh round after seating a new magazine. While this extra action may only take a second longer, one second can make all the difference during a heated firefight. Sometimes you can’t avoid firing all the rounds in a magazine. If a threat is still active and your magazine is empty, instead of reloading your primary weapon, switch to your secondary weapon. It’s always faster to draw your handgun than it is to load a new magazine in your primary weapon. Shots fired from a pistol may be just enough to finish off your opponent.
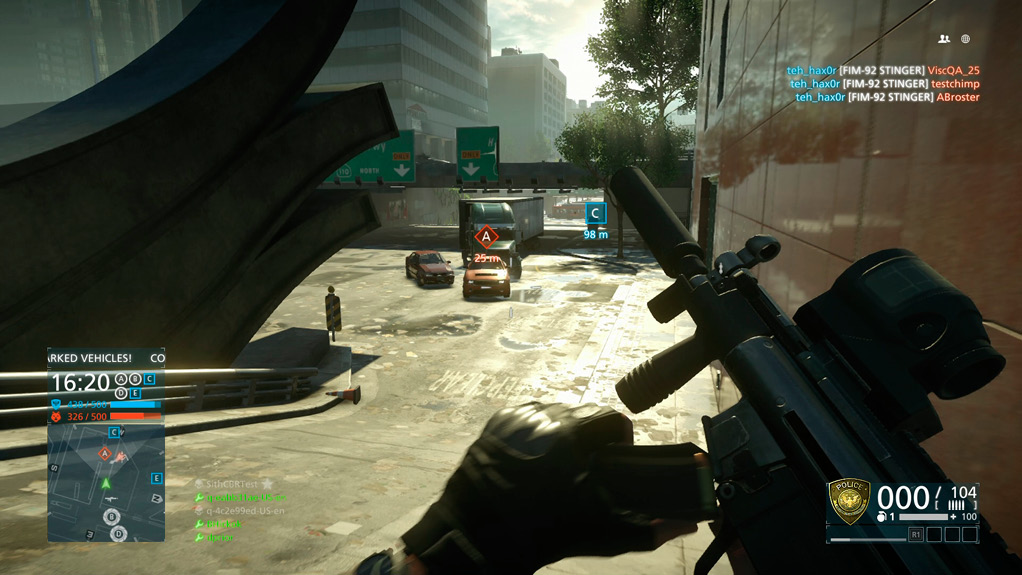
For faster reloads, don’t run a magazine dry; leave one round chambered to streamline the process.
Reloading should be a conscious decision and not a reaction. Many players get in the bad habit of reloading after each kill, leaving them open to retaliation by their victim’s teammates, who are usually lurking around the next corner. So quickly analyze the situation before initiating a reload, ensuring you’re in a relatively safe, covered location.
Attachments
All firearms can be equipped with a variety of attachments, allowing you to customize your weapon to meet the demands of any tactical situation. By default, most weapons have minimal attachments equipped—you must purchase the rest. Before attachments can be purchased, you must score several kills with the weapon. The number of kills required differs based on weapon and desired attachment. For example, you need to score 30 kills with the mechanic’s MP5K before you can purchase any of the optic attachments. Once the 30-kill threshold for optics has been met, you can then purchase any of the optics available for the MP5K.
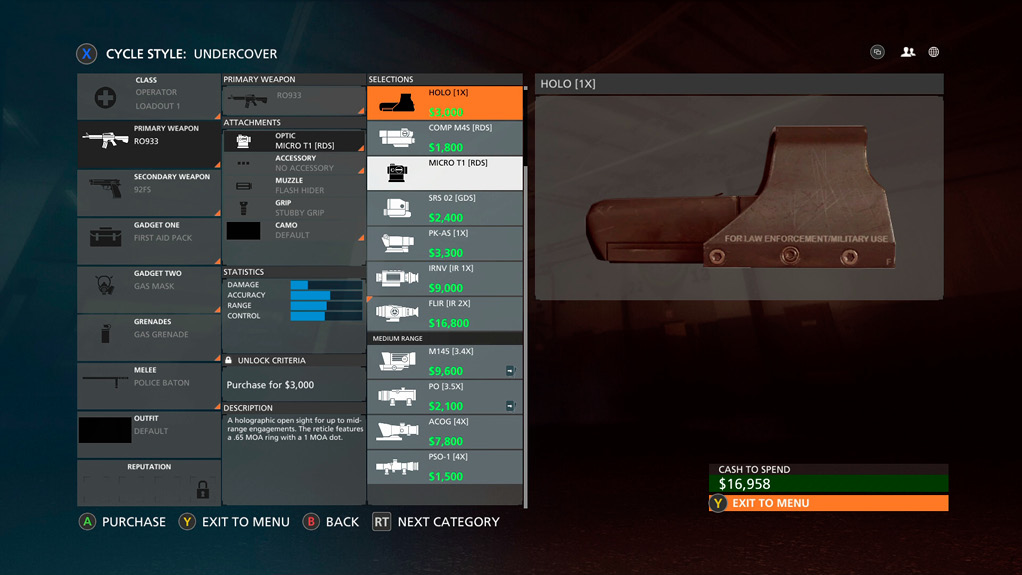
Before you can purchase attachments, you must first score several kills with the weapon you wish to customize.
Most firearms have five customization categories; here’s a brief description of each:
Optic: Here you can choose from three categories of optics from close-range red dot sights to long-range, high-magnification ballistic scopes.
Accessory: Choose from a variety of lights and canted iron sights for your weapon. You can also purchase an extended magazine for some weapons.
Muzzle: Swap out your weapon’s barrel for a heavy barrel or attach a muzzle brake, flash hider, or suppressor.
Grip: The grips available here help dampen recoil, making the weapon easier to control.
Camo: Select a camo pattern for your weapon to help blend in with your environment. Some camos can be purchased, others are unlocked in Battlepacks.
As you purchase more and more attachments for your weapons, experiment with different configurations until you find one that best matches your style of play. Like weapons, attachments are largely subjective. So don’t be afraid to try out new configurations, taking into account the type of weapon you’re customizing. A favorite configuration for an assault rifle might not feel the same when applied to a carbine or battle rifle. This is why it’s important to keep experimenting.
Vouchers
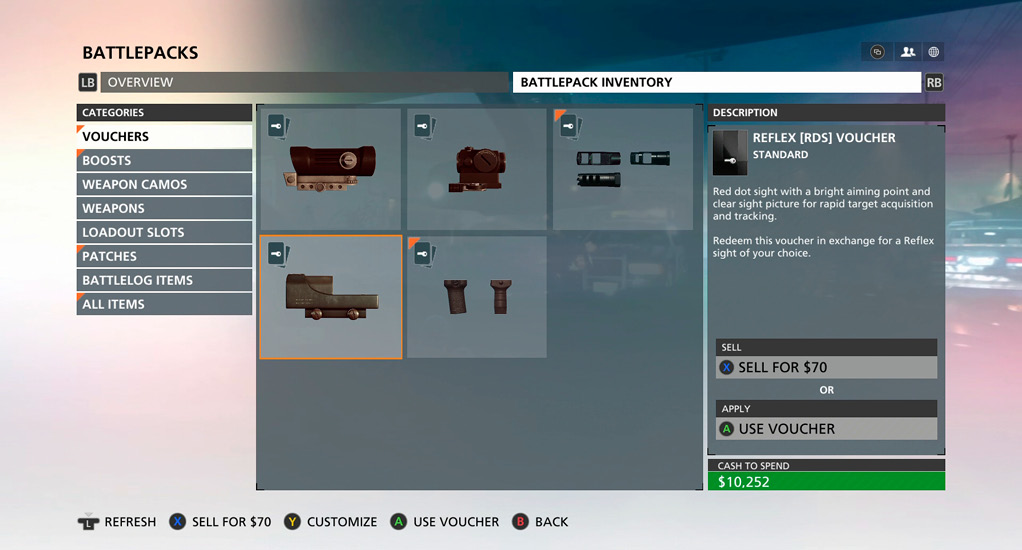
Vouchers, awarded in Battlepacks, are new to Hardline and allow you to acquire specific attachments for unlocked weapons. After receiving a voucher in a Battlepack, go to your Battlepack Inventory. Here you can see everything you’ve unlocked. In the Vouchers section you can see all of the attachments you’ve unlocked. Select one and then choose which weapon you want to apply it to. For example, if you have a voucher for a Reflex (RDS) optic, select it and then use the pop-up menu to apply it to one of the weapons in your arsenal. This unlocks the optic, even if you haven’t met the kill prerequisite to purchase other optics. This is a great way to add attachments to newly purchased weapons. If you don’t want to use a voucher, you can sell it, adding in-game cash to your account.
Grenades
Battlefield: Hardline has a fresh line-up of grenades, allowing you to further customize your loadout to meet the needs of your squad and team. Although these grenades perform different functions, they’re all deployed the same way—by throwing them. Use your weapon’s reticle on the HUD to best judge where you want to throw a grenade. One press of the grenade button/key causes the grenade to be thrown. But grenades have limited range, so you may need to aim high to get them near your intended target. The farther your target, the higher you should aim your throw. Grenades have a short time-delayed fuse, detonating within five seconds of being thrown. As a result, you can bounce grenades around corners or roll them down inclines. Like your own grenades, enemy grenades show up as white grenade icons on the HUD. So if you see one of these icons nearby, sprint in the opposite direction before it explodes.
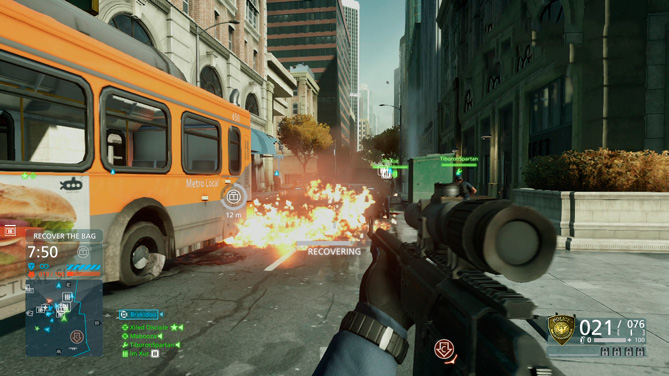
Incendiary devices and Molotov cocktails are great for denying the enemy access to objectives
Grenade Launchers
Hand grenades aren’t the only option. Grenades can also be launched from the mechanic’s M320 HE and M79 grenade launchers. Unlike a bullet or rocket which travels in a straight line, launched grenades travel in a parabolic arc due to their lower speed and the effect of gravity. Therefore, the farther away you are from the target, the higher you need to aim. That is why the reticle for a grenade launcher has several horizontal line aiming points. For a short-range shot, use the top line or aim directly at the target with the weapon’s iron sights. The farther away your target, use the lower lines on the reticle. By using a lower aiming point, you are essentially aiming the weapon up higher to lob the grenade towards the target. All launched grenades explode on impact, much like a rocket or missile. So take this into account, particularly when launching grenades at nearby targets. The splash damage may injure or kill you.
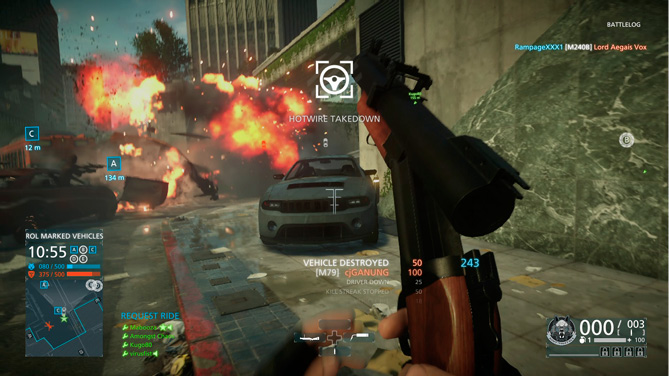
The grenade launchers are now exclusive to the mechanic class. They are especially handy for taking out vehicles in the new Hotwire game mode.
Battle Pickups
Battle Pickups are weapons and gadgets scattered across each map. In Hardline there are several different types of Battle Pickups: the MG36 and M240B light machine guns, the RPG-7V2 and MK153 SMAW rocket launchers, the FIM-92 Stinger anti-air missile launcher, grappling hooks, ziplines, defibrillators, first aid boxes, and ammo lockers. These items can be equipped by any player lucky enough to grab one. They’re not necessarily hidden; look for the white icons on the HUD, minimap, or deployment screen to find their locations. Battle Pickups function similarly to vehicles. They spawn at designated spots on the map, allowing any player to pick them up. Due to their power, the weapon Battle Pickups have very limited ammo, and they can’t be replenished with an ammo box, so make each shot count. Don’t be surprised if players flock around Battle Pickup spawn points, eager to grab a weapon or ambush those running for it.
But be aware, Battle Pickups can be booby-trapped with the mechanic’s new Sabotage gadget.
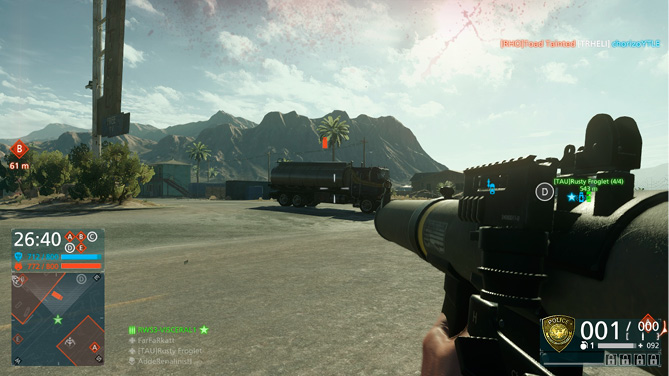
The SMAW rocket launcher is the most powerful Battle Pickup, capable of destroying any vehicle with one hit.
Vehicles
Vehicles have always been a huge part of the Battlefield experience, and this tradition continues with Hardline. Obviously, the game’s law enforcement vs. criminals theme has necessitated some changes as the game shifts away from military-style vehicles to police and civilian cars, vans, trucks, and helicopters. With less armor than their military counterparts, the new vehicles require greater skill on behalf of the driver and passengers, particularly in the new Hotwire game mode. A vehicle crew that communicates and works together can be a formidable threat, sometimes turning the tide in a close match.
Transportation
In Hardline, the roles of vehicles are different in each game mode. But the primary role of every vehicle is to transport teammates around the map. Use vehicles to get around whenever possible, making an effort to pick-up teammates along the way. There are several types of vehicles in the game, yet they all are driven with similar controls. All vehicles have more than one seat. When you get into a vacant vehicle, you are placed in the driver’s seat by default. However, you can move to another position inside the vehicle with the press of a button/key, cycling through all seats. The driver has control of a vehicle’s movement and, in the counter attack trucks and attack helicopters, also controls the vehicle’s primary weapon. Some vehicles even have gunner positions, allowing teammates to man vehicle-mounted weapons and machine gun-equipped gun ports. Passengers can help defend the vehicle too, firing their weapons and gadgets out of windows. In some vehicles, passengers can even lean out of windows for a better perspective, but this also makes them more vulnerable to incoming fire.
Vehicle Damage
With the exception of the heavily armored counter attack trucks and mobile command centers, all of vehicles in Hardline are light-skinned, meaning they can be damaged by all weapons, even small-caliber firearms. Furthermore, only a few of the vehicles have bulletproof windows, leaving the driver and occupants vulnerable to incoming fire. If you want to stop a car, simply shoot the driver. This requires a more defensive mindset on behalf of the driver and passengers. When you’re driving a sedan, coupe, utility van, or motorcycle do your best to avoid hazardous areas occupied by opponents, as you’re likely to come under attack. All it takes is one lucky shot or a hit from a grenade or rocket launcher to send you back to the deployment screen. Light damage can be patched up by a mechanic equipped with a repair tool. Instead of stopping the vehicle to repair it, have a passenger conduct repairs while you keep driving. Weapons aren’t the only threat. Collisions with other vehicles can also quickly erode a vehicle’s health, visible just above your health bar in the bottom right corner of the HUD. Avoid head-on collisions with oncoming vehicles.
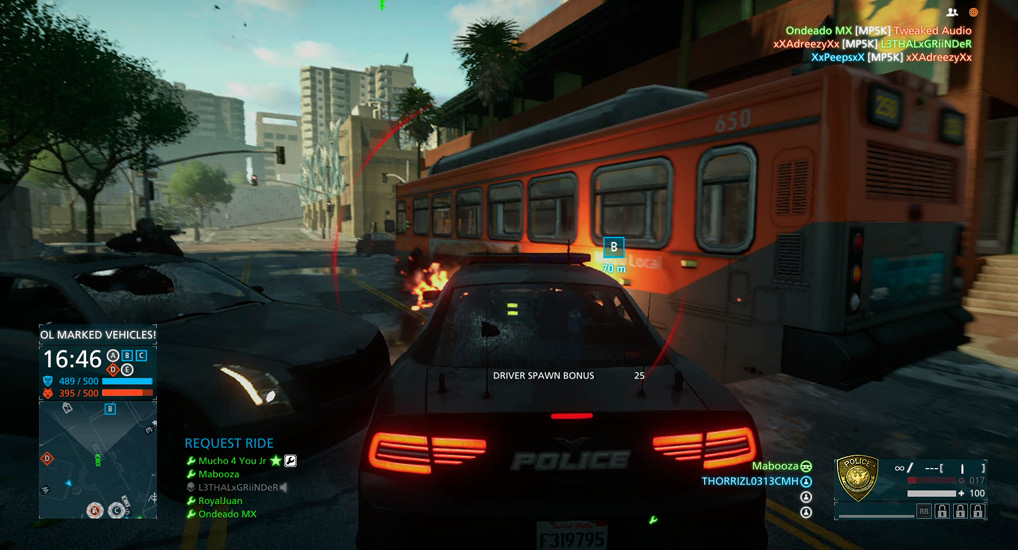
Most of the vehicles in Hardline are vulnerable to small arms fire. If your ride catches fire, get out!
“Junk in the Trunk”
Light machine guns, rocket launchers, and Stingers aren’t exclusive to Battle Pickups. By purchasing the LMG armory, anti-armor armory, or anti-air armory upgrades for the sedan or coupe, you can retrieve these hard-hitting weapons from the trunk of your car. The developers like to refer to these weapons as “junk in the trunk.” The LMG armory places a MG36 light machine gun (with 200 rounds of ammo) in your car’s trunk. An RPG-7V2 (with two rockets) is waiting in your trunk if you have the anti-armor armory upgrade equipped. Or if enemy helicopters are present, choose the anti-air armory upgrade to acquire a Stinger missile launcher (with two missiles) in your car’s trunk. Since these weapons are relatively rare, they can give you and your team a significant advantage. If you’re driving, let one of your passengers have the weapon in your trunk so they can help defend your vehicle. These armory upgrades are extremely expensive, but in a tight match, the heavy weapons provided can be a game-changer.
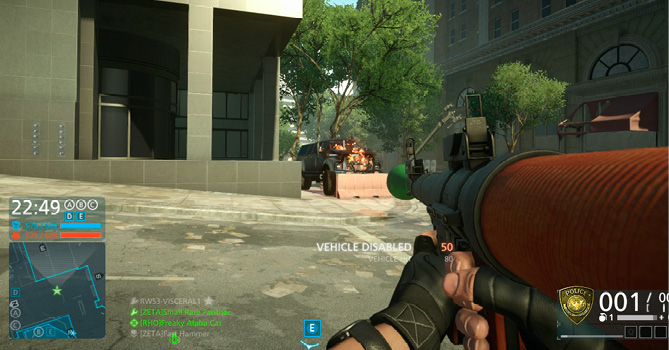
Passengers can now lean out of a vehicle’s window, providing better defensive coverage.