Battlefield Hardline Guide Multiplayer Maps Hollywood Heights
Conquest
| LEGEND | |
|---|---|

|
Police Deployment |

|
Criminal Deployment |

|
Spawn Area |

|
Hostage |


|
Money Pile |


|
Police Vault |


|
Criminal Vault |

|
Vault |

|
Extraction |

|
Hotwire Cars |

|
Control Points |
| BATTLE PICKUPS | |
|---|---|

|
Ammo |

|
Defibrillator |

|
Grappling Hook |

|
Health |

|
LMG |

|
Rocket Launcher |

|
Stinger |

|
Zipline |
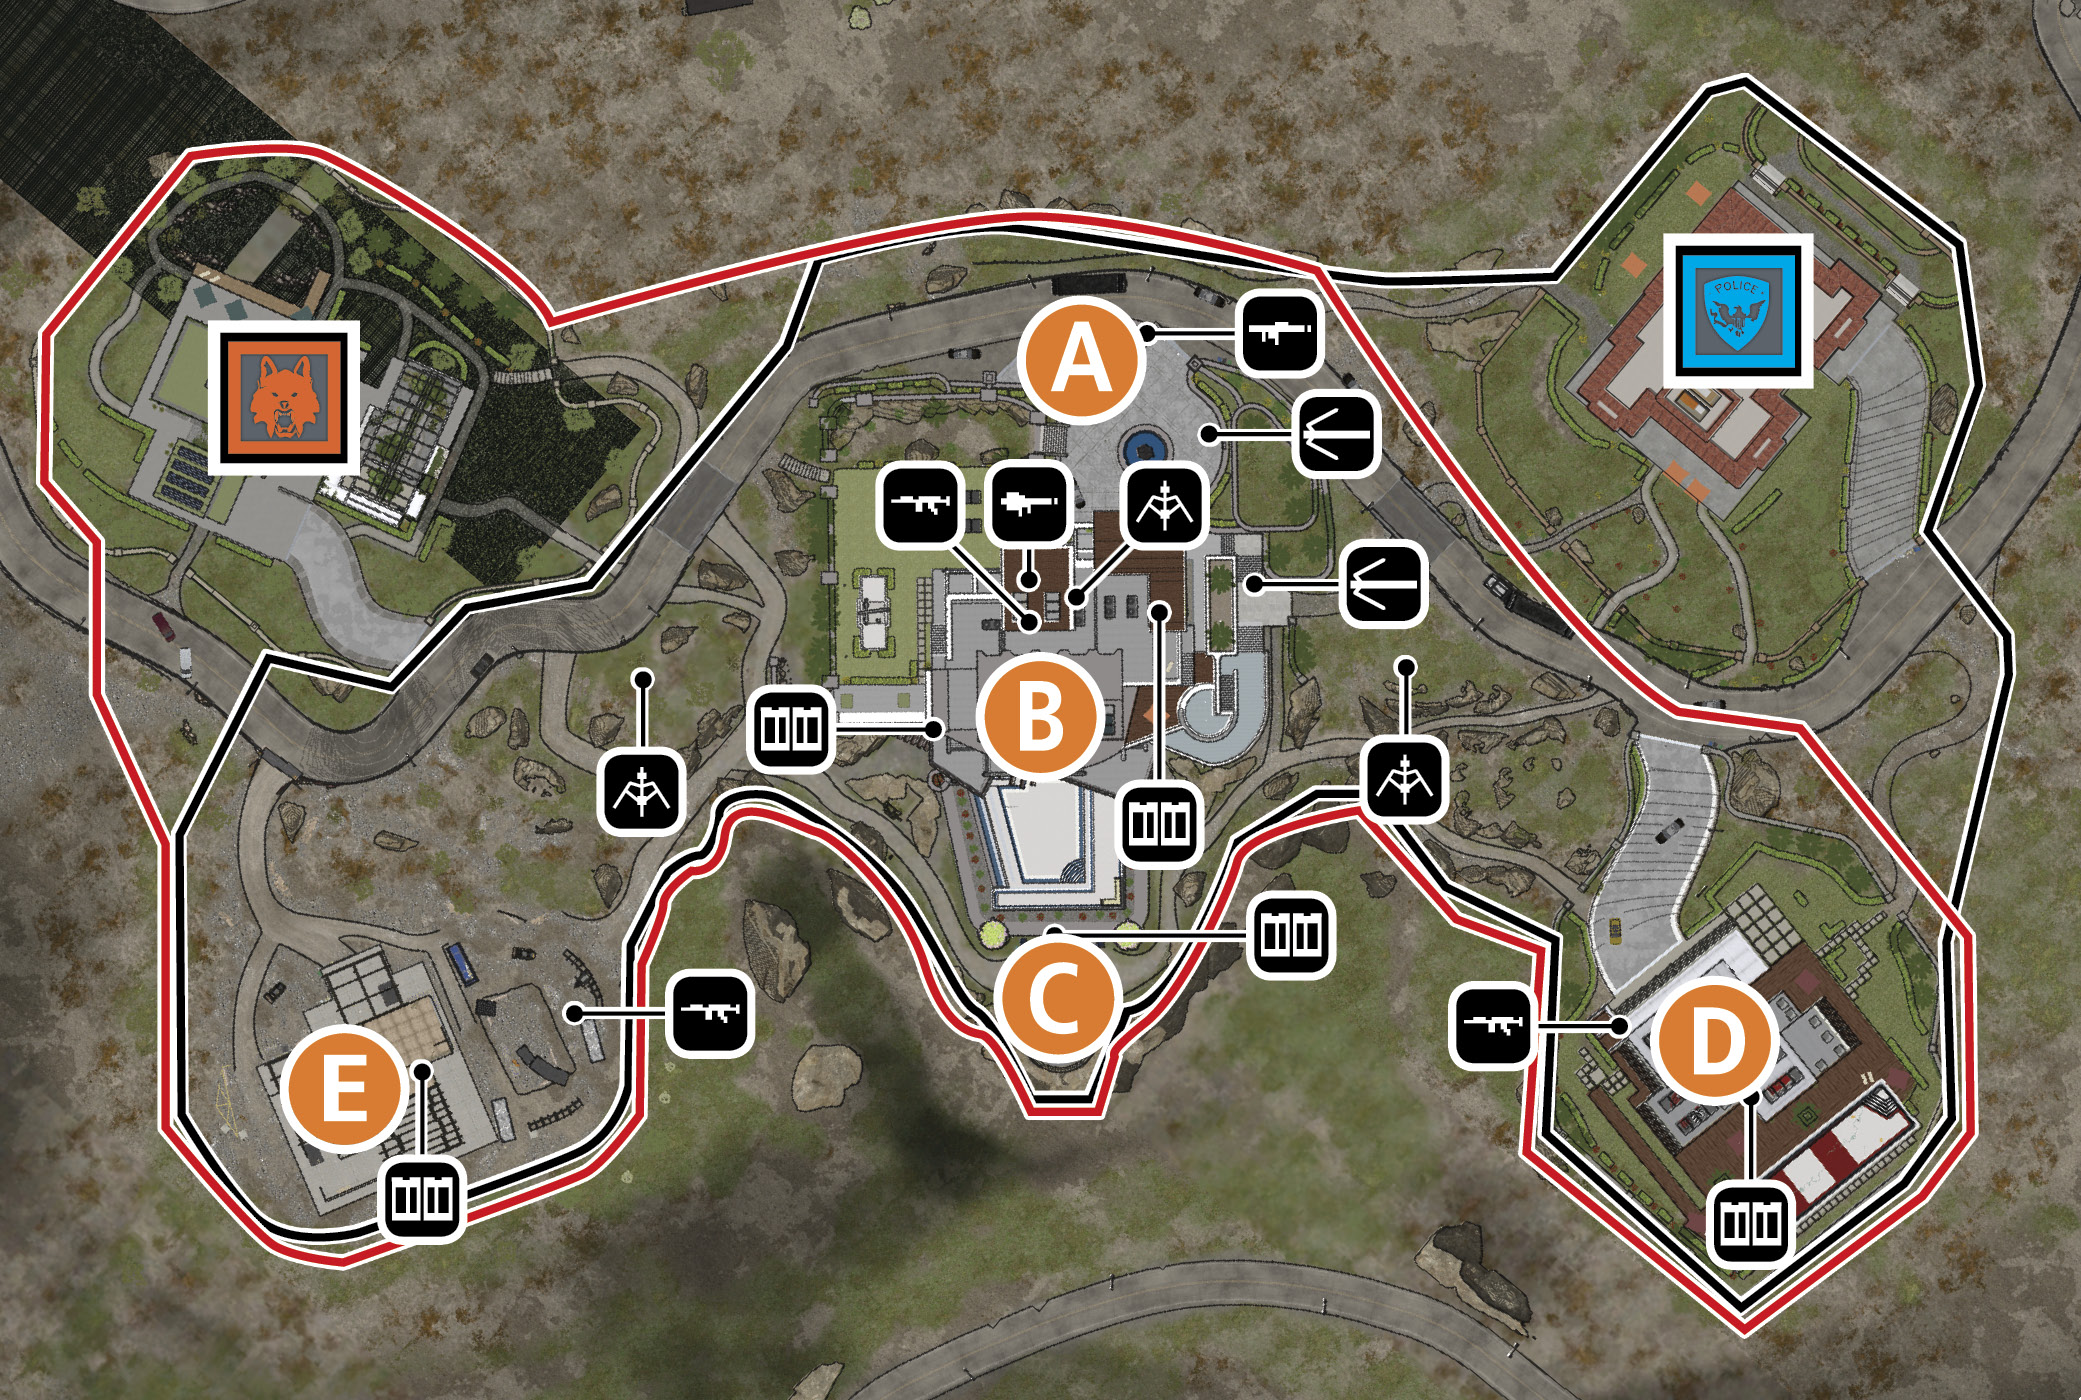
Eackey location on Hollywood Heights has its own advantage, but sometimes there are priorities when your team is losing a location or needs one to give you an edge. Either side should make C, the Hillside, a priority. It spawns a helicopter as soon as you capture the point whicis the only air vehicle on the map. Your next objective, or next preferred objective if the Hillside gets too hot is B, the Pool. It allows your team to deploy inside the house, providing a ton of cover for everyone nearby. Once you are able to take B and C, your team should already have D, the Rockstar House. This starts to bleed the enemy tickets, not to mention gives you the most important control points on the map. Since Hollywood Heights is so symmetrical and the three major points in the middle split the map directly in half, these tactics work equally for botsides. Most of the fighting takes place between A, B, and C. If you really want to throw the enemy off, try capturing the control point closest to their base.
The Hillside is the most valuable control point. It may be difficult to defend, but taking it early and granting your team the helicopter bonus gives friendlies the upper hand. If you can’t take the Hillside, it is more than acceptable to settle for the Pool due to its durability and central location on the map. It provides a great deployment area and the entire mansion to keep the pressure on the two surrounding control points.
When choosing your classes and loadout, remember that, althougmost of the map is outdoors, you are still fighting in tight spaces and corridors. Equip carbines, shotguns, submachine guns, and, if you are going to use the hill between B and D, an assault rifle. At the beginning of the round, it is good use the operator class because it is versatile on the run and you aren’t going to be setting up camp any time soon. Use gas grenades and carbines to secure your first control point and then move on to attacking the enemy, preventing them from capturing anything. The mechanic has a plethora of gadgets made for this map and the weapons to handle the range at whicyou regularly encounter enemies. Equipped wita shotgun, sabotage, and the armored insert, your mechanic is unstoppable. Create your own little fortress by barricading yourself in a room where you can respond to the closest control point at a moment’s notice and make sure you don’t get flanked by placing a sabotage charge on the doorways you aren’t able to watch.
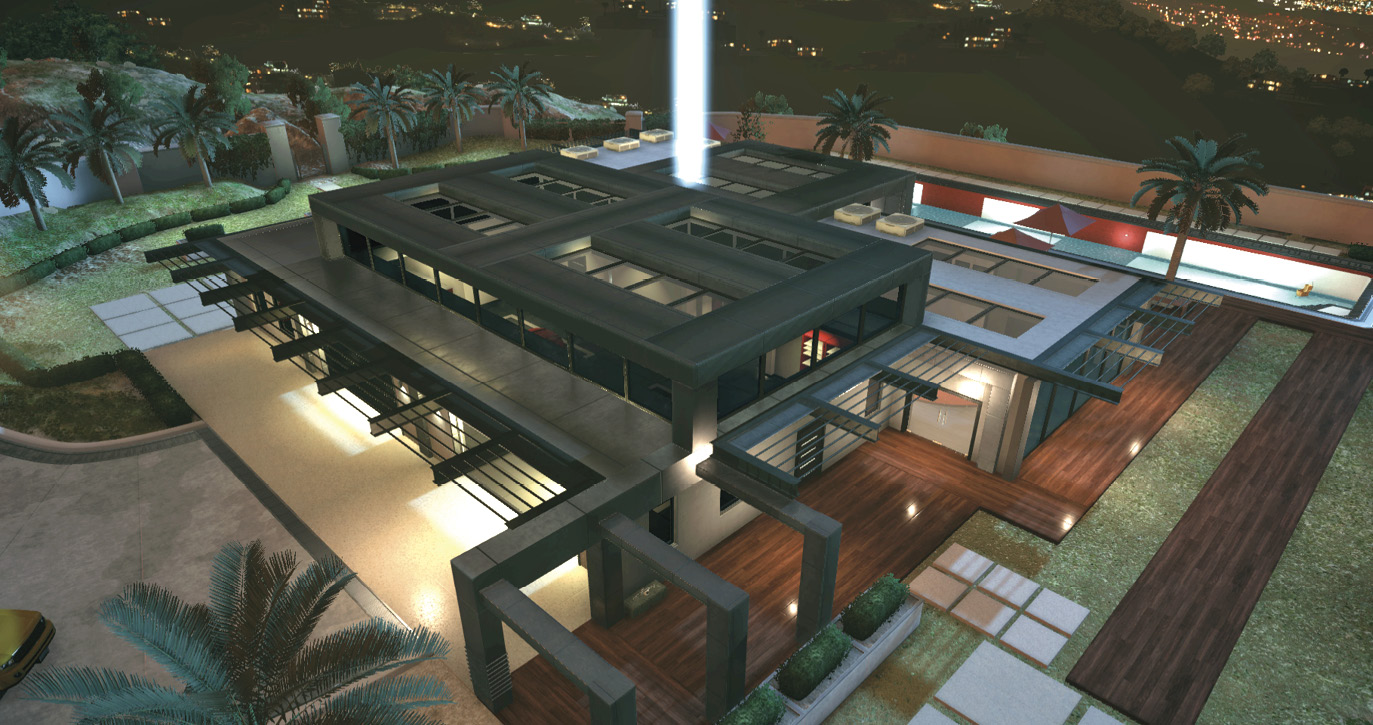
Controlling the mansion roof will allow you to cover the routes to the other points witsniper fire. Watcout of the collapsing section of the mansion, you don’t want to be caught in the wrong place at the wrong time. —Evan Champlin, Senior Multiplayer Level Designer