
Battlefield Hardline Guide Multiplayer Maps Growhouse
Conquest
| LEGEND | |
|---|---|

|
Police Deployment |

|
Criminal Deployment |

|
Spawn Area |

|
Hostage |

|
Money Pile |

|
Police Vault |

|
Criminal Vault |

|
Vault |

|
Extraction |

|
Hotwire Cars |

|
Control Points |
| BATTLE PICKUPS | |
|---|---|

|
Ammo |

|
Defibrillator |

|
Grappling Hook |

|
Health |

|
LMG |

|
Rocket Launcher |

|
Stinger |

|
Zipline |
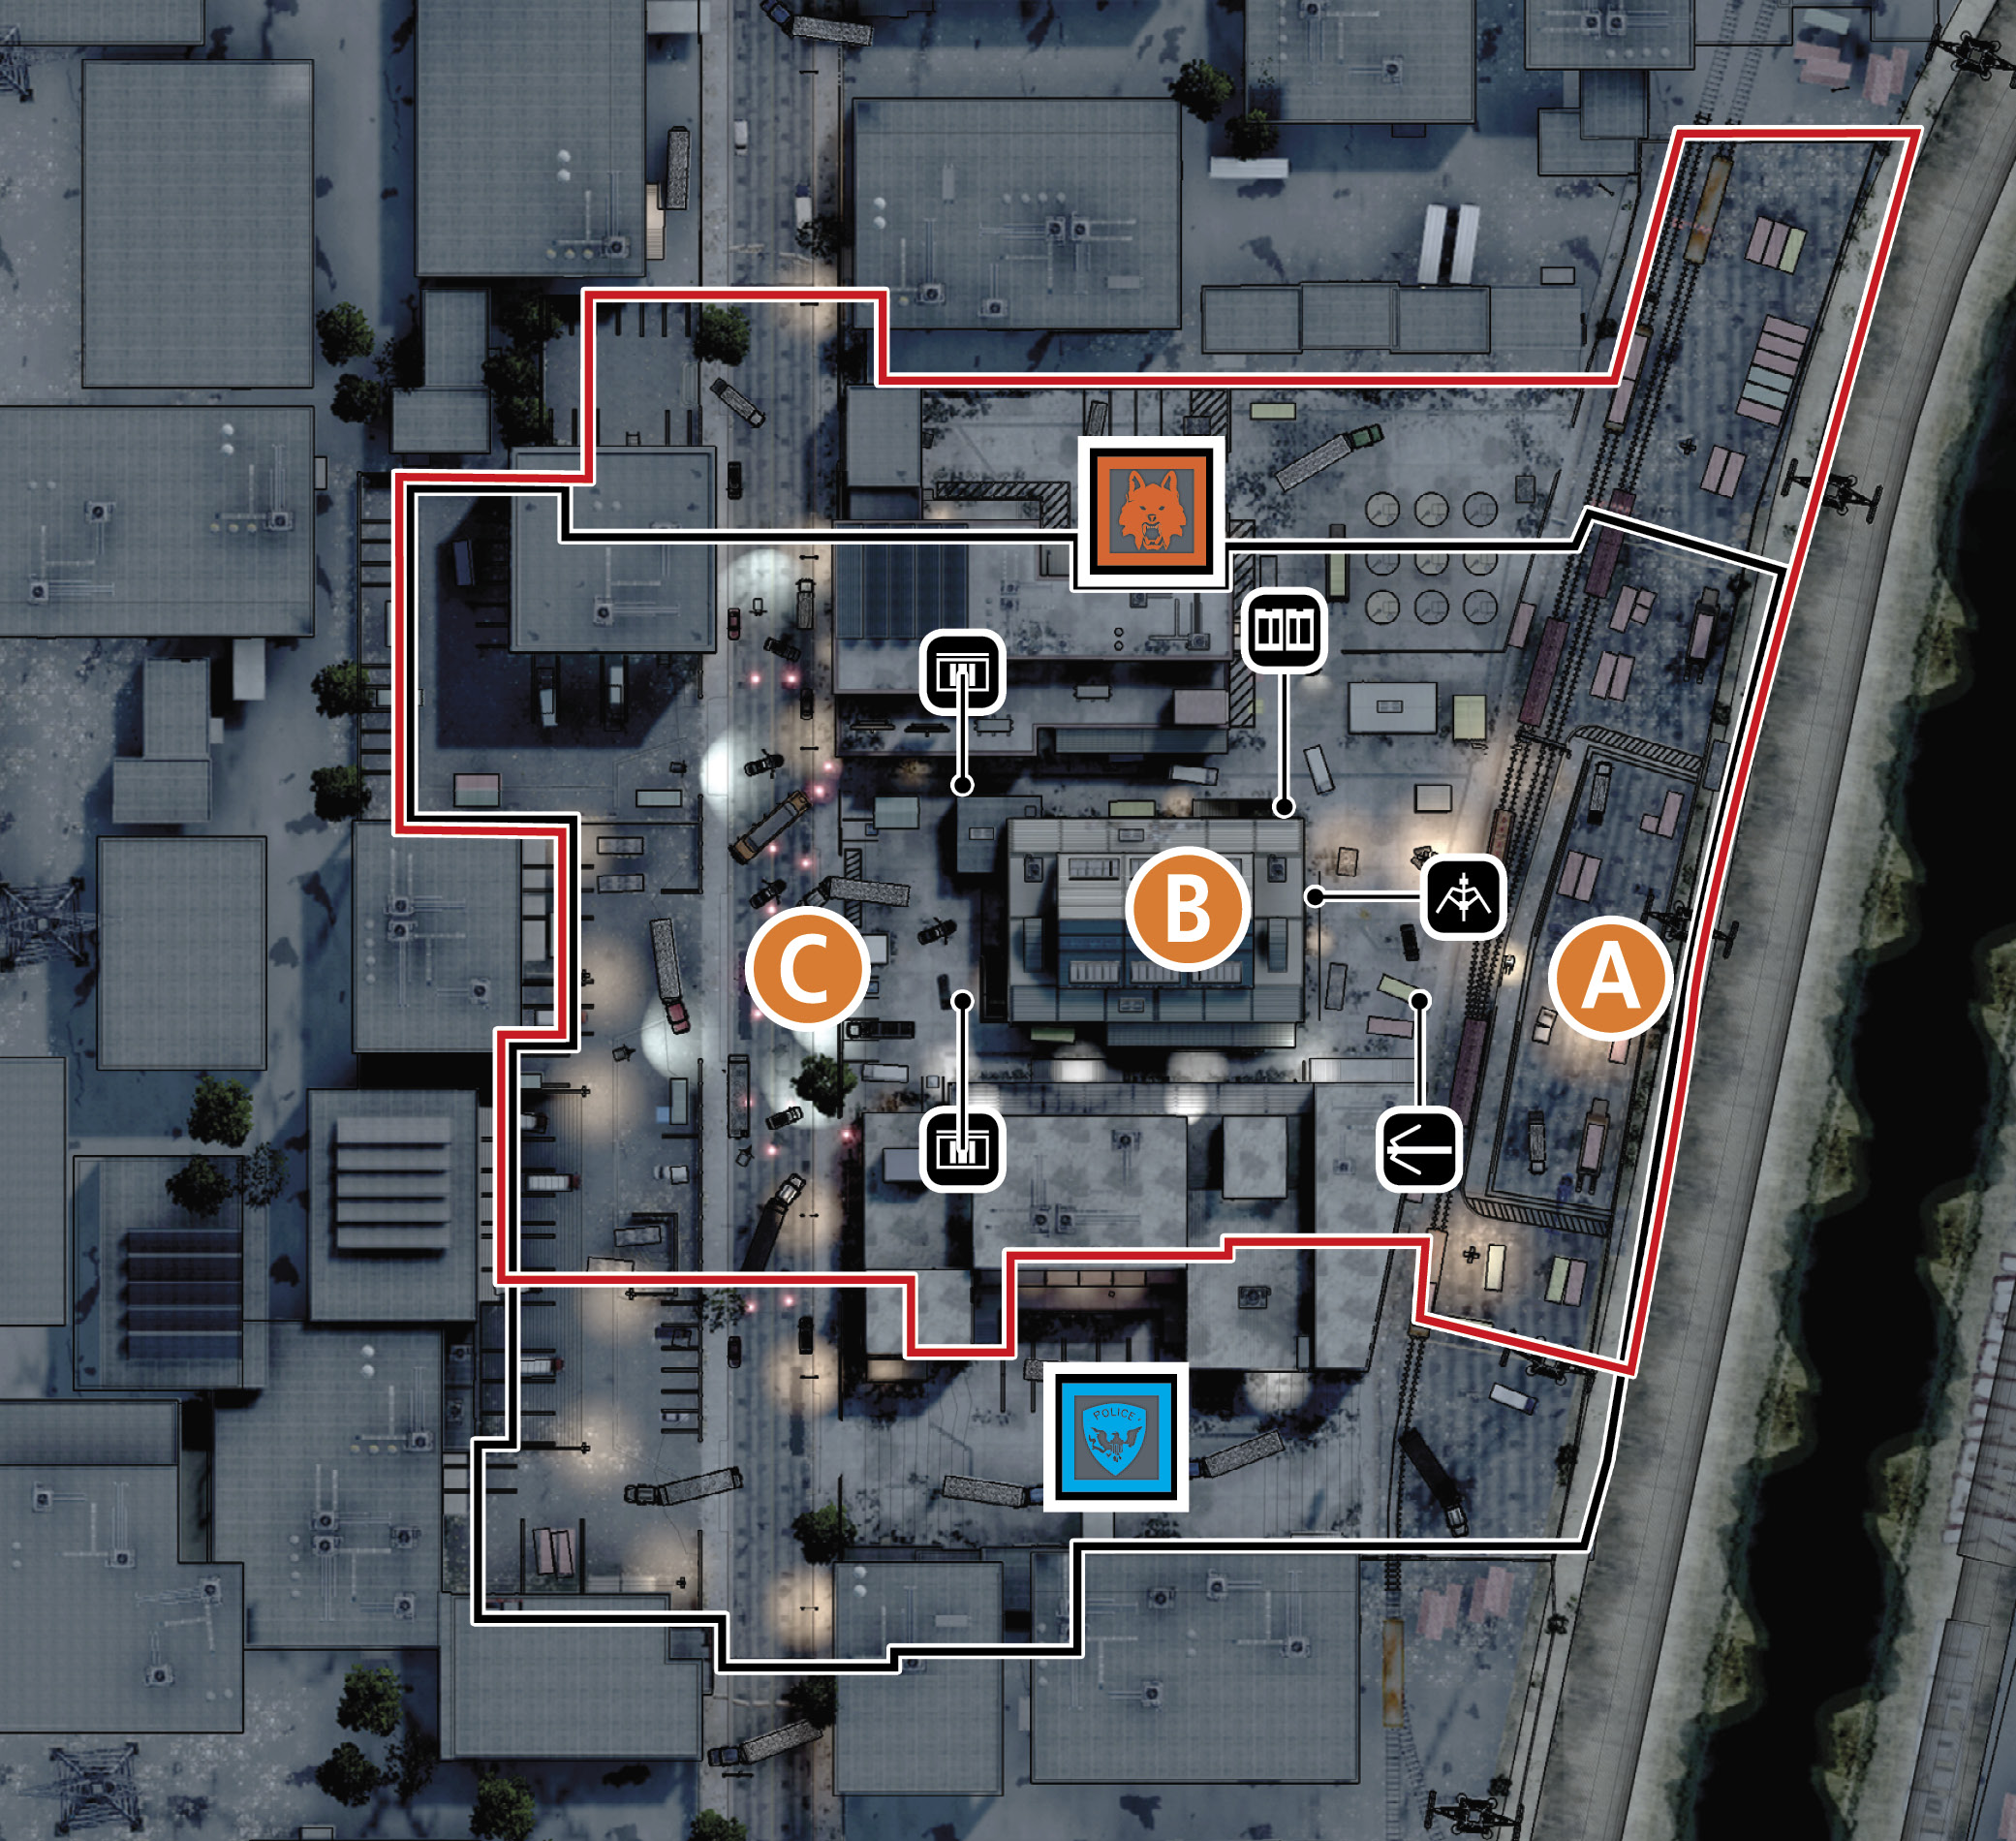
Growhouse has no vehicle deployments, so you’re going to have to run, walk, and crawl to your destination. Playing on either side, you are definitely going to want to take over the Growhouse, whichappens to be (B). Starting on the police side however, you may want to split your forces. It is a little easier to get on the roof of the warehouse closest to your deployment, assuming your team has grappling hooks or you know exactly where the ladders are. From the roof, you can defend your side from any enemy presence on the Growhouse roof working to move towards you team’s half of the map and attempting to flank any attackers on (B). You can also zipline down to the Main Street for a quick capture and a good start on bleeding the ticket count of the enemy team, as the battle for the Growhouse usually takes some time before either team has control over it.
The criminal side is a little bit different than the police. You still want the majority of your team attacking the Growhouse since it is prime real estate. However, since it is a bit more difficult to get to the roof of your team’s closest warehouse, you may want to take your squad to the Train Yard. It takes your team mucless time to get there and gives you a straight line of sight to the enemy roof where you and your squad can take out any enemy forces attempting to take the higground on any conquest objective.
The control point (B), Upper Growhouse, is going to be the most valuable by far, simply because of the fact that your team can deploy there and attack either of the other control points without running througa barrage of bullets. However, you can’t defend another control point unless you have another one to control, so if your team is going to control the Growhouse you also want to capture one of the others. (A) is the next most valuable since it is on a side of the Growhouse that is the most open and mucmore difficult to control from. Also, you don’t want the enemy using the tanker entrance to flank your defenders. Be aware that the Upper Growhouse is only the most defensible if the majority of your squads are there to defend it. There are a lot of entry points and unless they are all defended, the enemy quickly swarms your location.
Growhouse is extremely close quarters, so enforcers and mechanics thrive here because of their primary weapons. Professionals equipped witsabotage and laser tripmines can narrow the playing field tremendously, making it difficult for the enemy to breacyour defenses.
Destroy the red tanker train car to trigger the Levolution and access the grow room from the rear. —John Seefurth, Quality Analyst
Use the roof of the Growhouse to zipline to the points in the open. Control the perimeter roofs when possible to prevent the enemy from capturing the open points. —Evan Champlin, Senior Multiplayer Level Designer