
Halo 5: Guardians Guide Warzone
March on Stormbreak
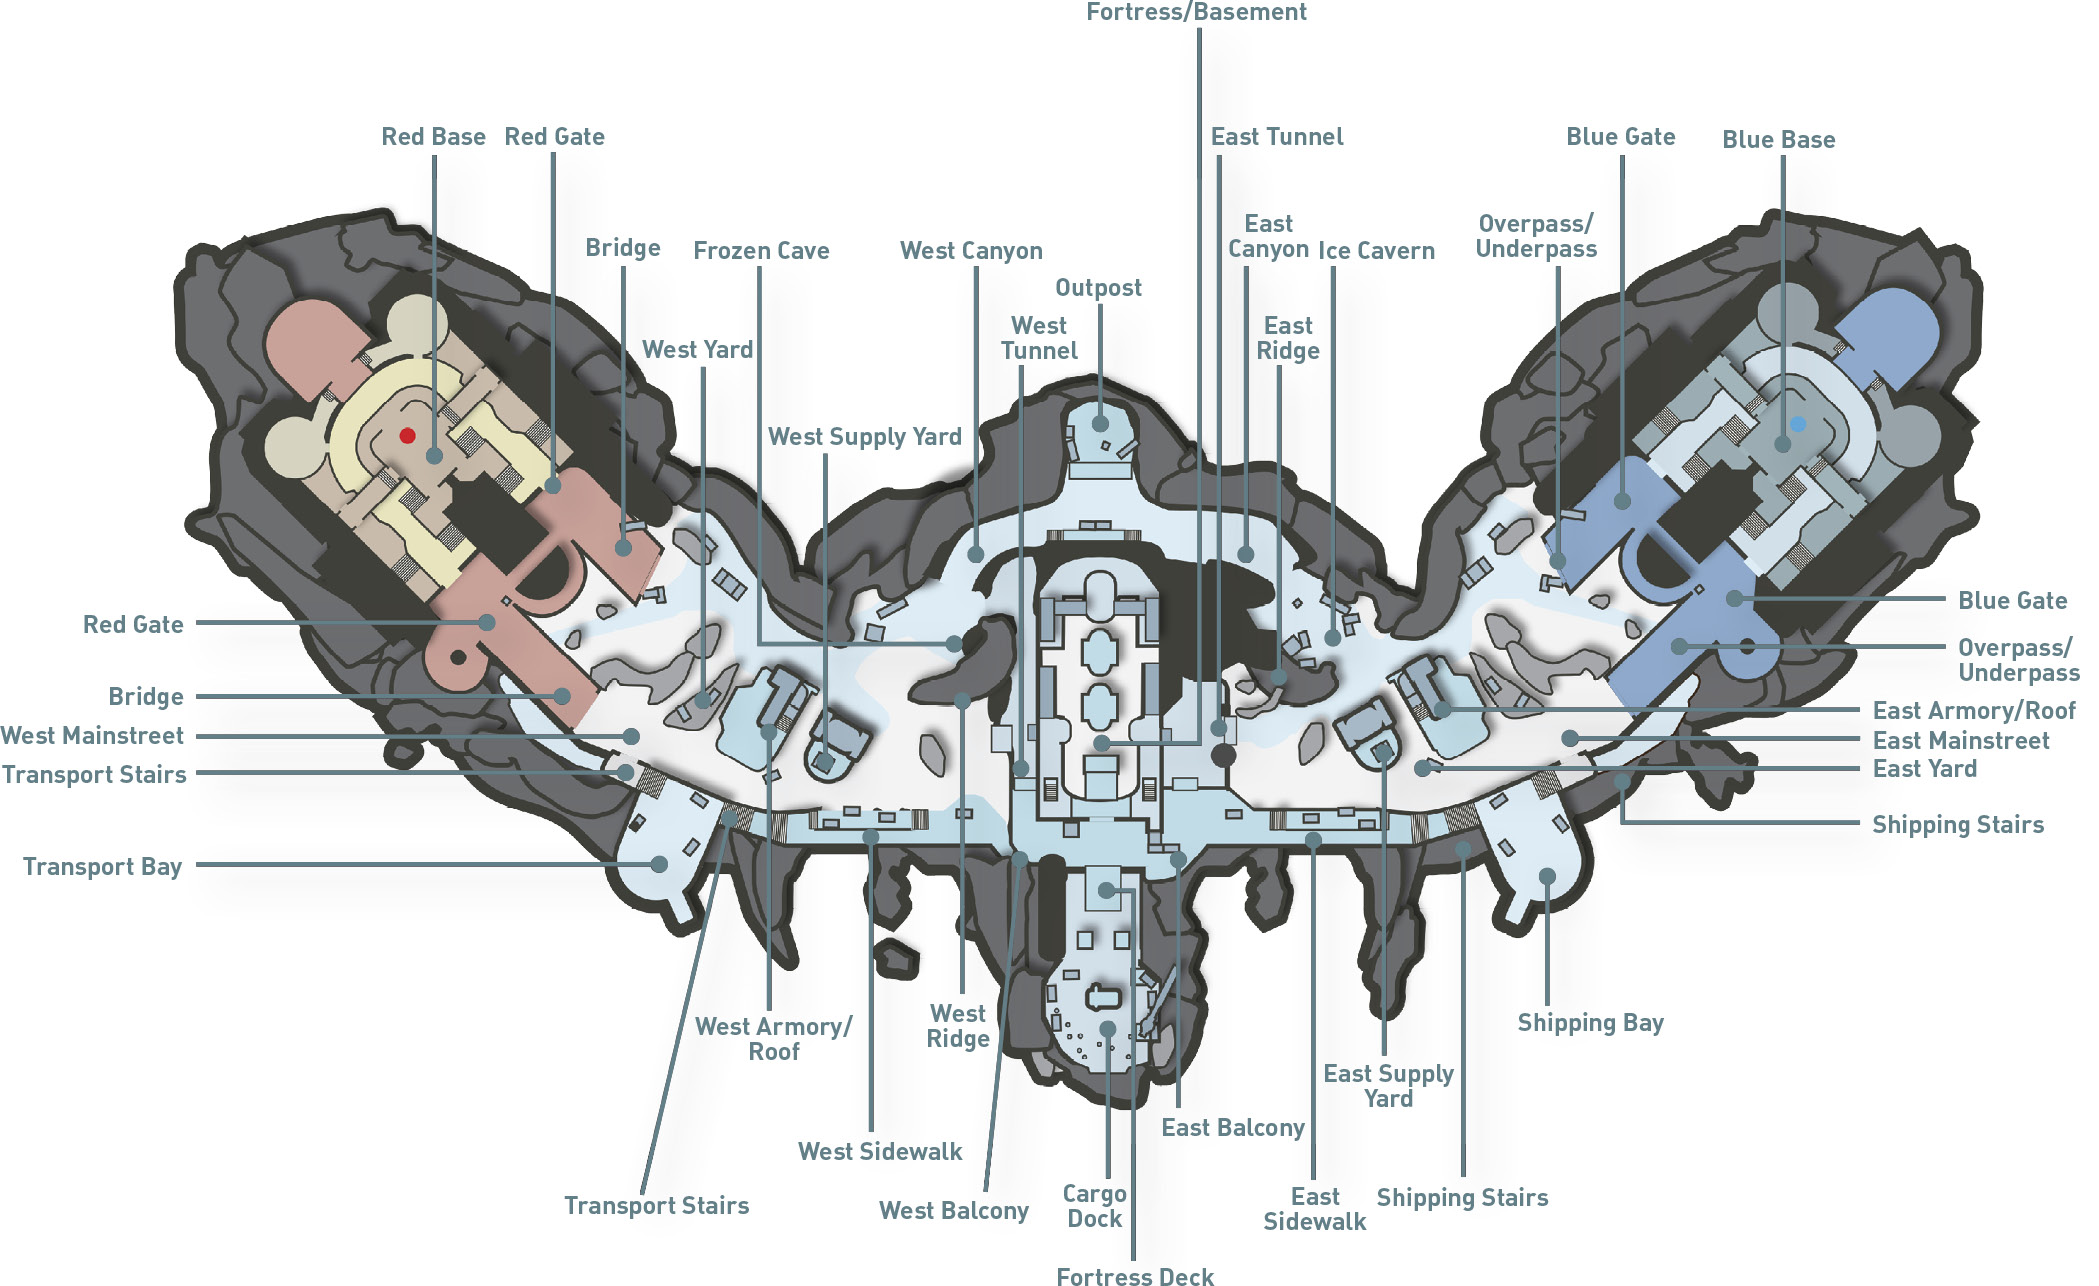
Description: The Stormbreak mountain range is the broken spine of Kamchatka, mended a thousand millennia ago by the Forerunners’ godlike power.
Game Mode: Warzone
Boss Lineup
| Boss | Location | Bounty | Time Active |
|---|---|---|---|
|
Commander Lochagos |
Fortress | 150 VP | 0:00 |
|
Elite General |
Transport Bay | 25 VP | 2:00 |
|
Elite General |
Shipping Bay | 25 VP | 2:00 |
|
Covert Major |
Outpost | 25 VP | 4:00 |
|
Knight Luminary |
Frozen Cave | 25 VP | 6:00 |
|
Knight Luminary |
Ice Cavern | 25 VP | 6:00 |
|
Captain Wamik |
Cargo Dock | 150 VP | 8:00 |
|
Soldier Commando |
Transport Bay | 25 VP | 10:00 |
|
Soldier Commando |
Shipping Bay | 25 VP | 10:00 |
|
Knight Bannerman |
Cargo Dock | 25 VP | 12:00 |
|
Serpent Hunters |
Transport Bay | 25 VP | 14:00 |
|
Serpent Hunters |
Shipping Bay | 25 VP | 14:00 |
|
Wraith Officer |
Cargo Dock | 25 VP | 16:00 |
|
Warden Eternal |
Outpost | 150 VP | 18:00 |
Team Strategy
On this symmetrical map, both teams rush out of their Home Bases and clash in the center of the map, struggling to take control of the Fortress. After securing your team’s Home Base, send two or three Spartans to the nearby Armory while the rest of the team pushes into the Fortress. The fight for the Fortress is key, because it houses the first Legendary Boss, Commander Lochagos. If you can secure the Fortress, your team has a good foothold on the center of the map. Strive to control the Fortress and the Armory closest to your team’s Home Base throughout the match. However, if taking the Fortress is too difficult, try to control both Armories instead. Controlling two out of the three Bases allows your team to accrue more points than your opponents. But in addition to holding down two objectives, branch out and defeat the bosses. All of the Legendary Bosses spawn near the center of the map. So if your team holds the Fortress, you have easier access to these high-value targets.
Bases
West Armory
Initial Opposition: Soldiers, Crawlers
» Red Team stands the best chance of capturing the West Armory at the start of the match. It’s only a few meters from Red Base, so capturing the West Armory is a quick detour while pushing toward the Fortress.
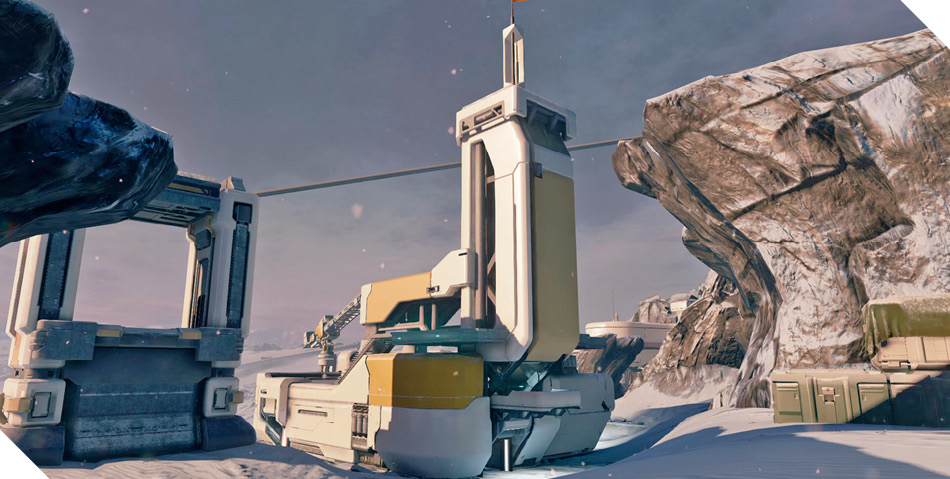
» When pushing out of the Red Base at the start of the match, don’t expend too many resources on capturing the West Armory. It is only lightly defended by a few Soldiers and Crawlers—two or three Spartans should be enough to secure this objective. Send the rest of your team to the Fortress!
» The interior of the Armory offers some welcome cover when rushing across the snow-covered landscape. This is a good place to stop and let your shields recharge or to access the REQ Station—but don’t linger here too long. Your lines of sight out of the ground-floor doorways are limited, leaving you vulnerable to incoming grenade attacks.
» For better lines of sight, move to the Roof. From here you have clear views of the Frozen Cave, perfect for engaging the Knight Luminary and his minions six minutes into the match. The objective can also be captured and contested from the lower level of the Roof—climbing to the upper levels puts you outside the capture radius. But once enemy aerial vehicles take to the skies, consider heading downstairs, as there’s very little cover on the Roof.
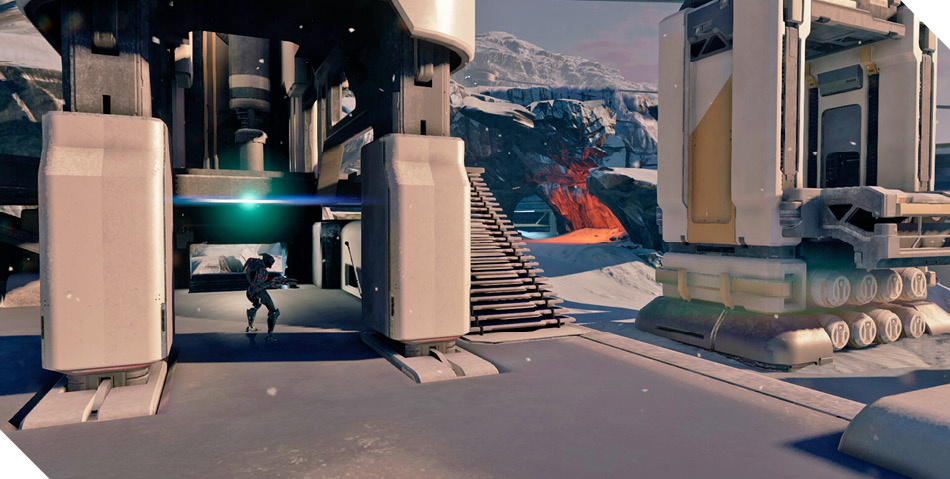
» The West Armory is easiest to access from the ground level. But the ground-level doorways aren’t the only way to access this objective. By jumping and clambering on top of the West Supply Yard structure, you can stage a jump over to the West Armory Roof. Sprint, jump, thrust, and then clamber onto the Roof. This is a sneaky way to stage an assault on the objective. Toss grenades down through the hatch in the Roof to take out opponents below.
Fortress
Initial Opposition: Commander Lochagos, Soldiers, Crawlers
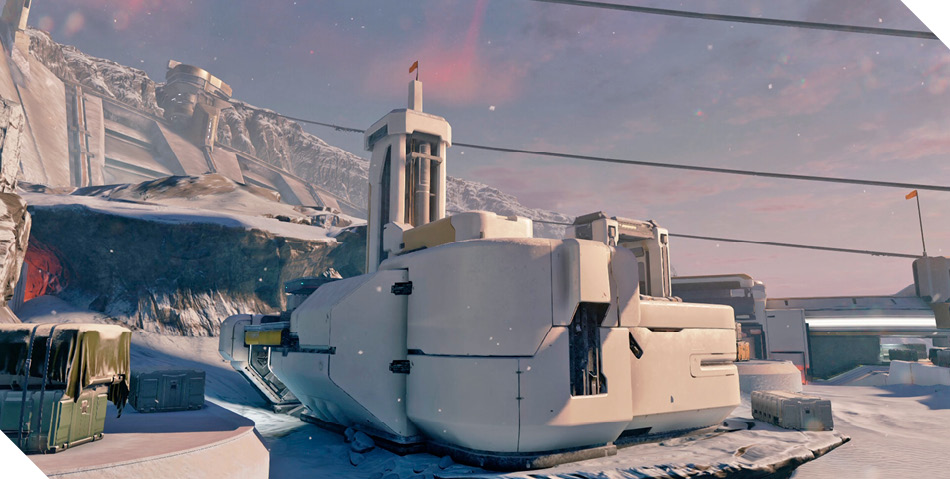
» Located in the center of the map, the Fortress is aptly named, as it is often the most fought-over Base. The cavernous interior of this facility consists of ramps, catwalks, and platforms—mid- to long-range weapons are most effective here. Teams who hold this objective not only acquire the most defensible objective on the map, they also gain access to a vehicle spawn point, located beneath the Basement.
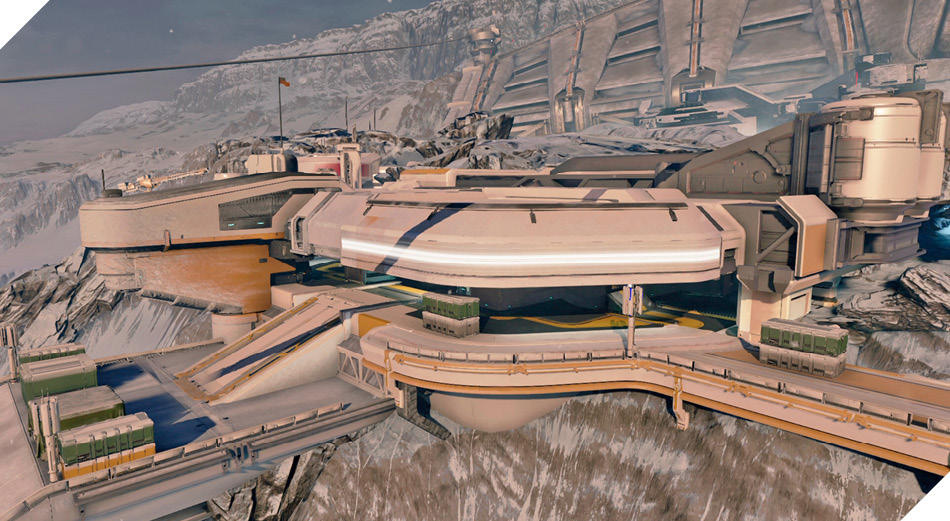
» Taking control of the Fortress is no easy task, so don’t go in alone. In addition to being guarded by a large contingent of Crawlers and Soldiers, this is also where Commander Lochagos appears at the start of the match. However, it’s important to note that Commander Lochagos does not have to be eliminated to capture the Fortress—you only need to eliminate the Soldiers, Crawlers, and any enemy Spartans. So avoid engaging Commander Lochagos until your team has secured the Base. Once your team can spawn at the Fortress, you’ll have a much easier time taking down this Legendary Boss.
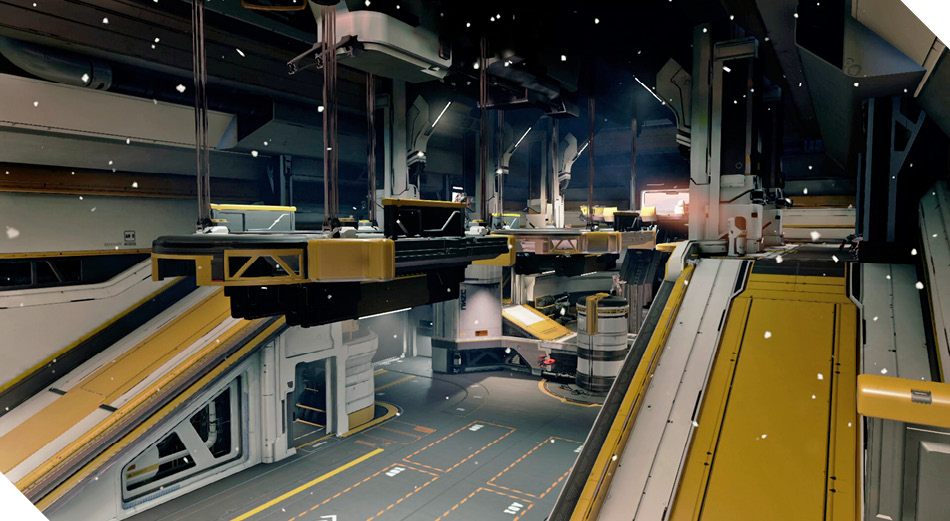
» The Fortress has many entrances, but not all of them are tactically sound. Always try to enter from the upper level, accessing the interior from the East Balcony, West Balcony, or Fortress Deck. These entrances put you on the objective’s upper-level walkways, where you have a better chance to seek cover and return fire.
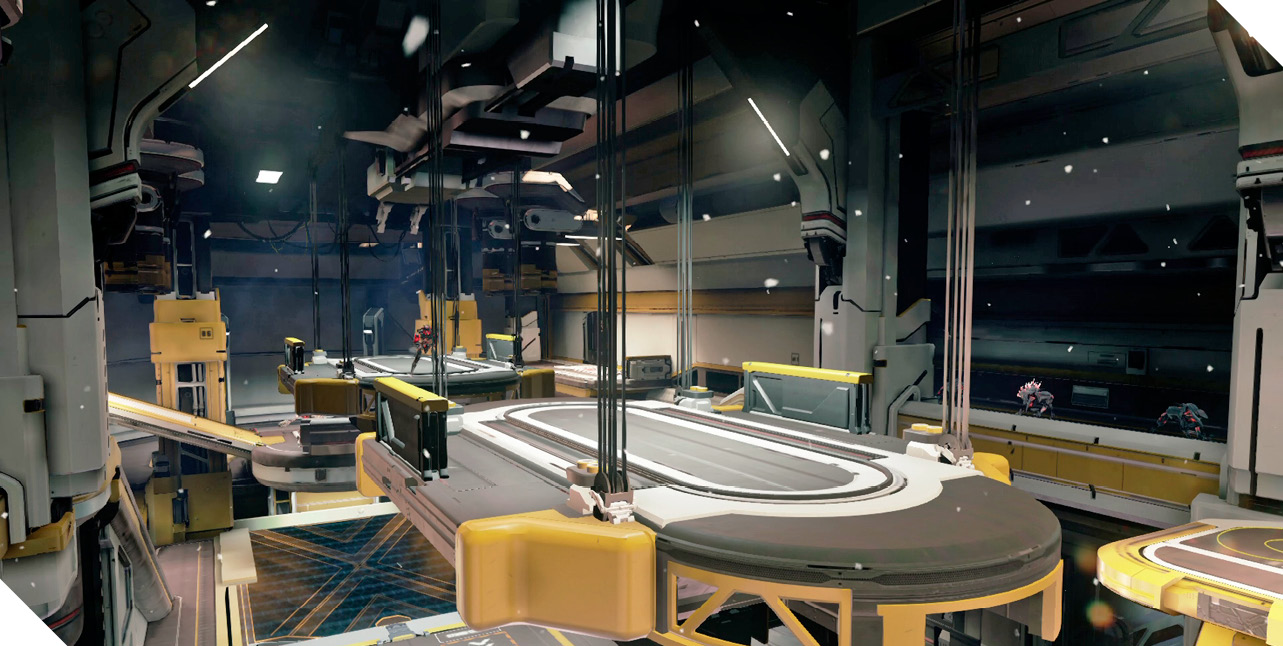
» Ground vehicles can access the Fortress Basement by driving through the West or East Tunnel—this is how ground vehicles spawning here exit. But its unwise to linger here too long, especially if your team doesn’t hold the objective. There isn’t much room to maneuver in the Basement, and opponents on the upper catwalks and platforms have an easy time raining down fire and grenades. Instead, use the West and East Tunnels as a thoroughfare, connecting the east and west sides of the map.
» Maintaining access to the Fortress also gives your team a spawn point close to the Cargo Dock. This is where Captain Wamik, Knight Bannerman, and the Wraith Officer appear. When possible, engage these bosses from within the Fortress or from the Fortress Deck, retreating as necessary to reload and let your shields recharge.
East Armory
Initial Opposition: Soldiers, Crawlers
» Structurally, the East Armory is identical to the West Armory. But its location on the east side of the map puts it well within the Blue Team’s sphere of influence. Once they’ve secured their base, Blue Team should focus on taking the East Armory—it can be captured from within as well as from the Roof.
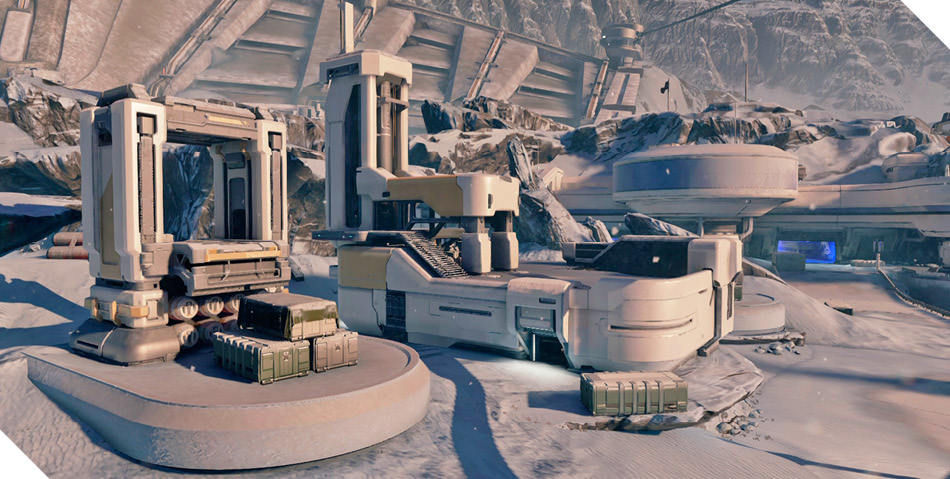
» Initially, the East Armory is occupied by a few Crawlers and Soldiers, mostly positioned on the ground floor. Attack with one or two teammates, tossing grenades through the ground-level doorways. Rush in with Assault Rifles and put down the surviving enemies to secure the objective.
» If you come under fire, the East Armory offers some decent cover—rush inside and recover before peeking out. There is also a REQ Station on the ground floor. But if you come under attack, you’re better off defending this Base from the Roof.
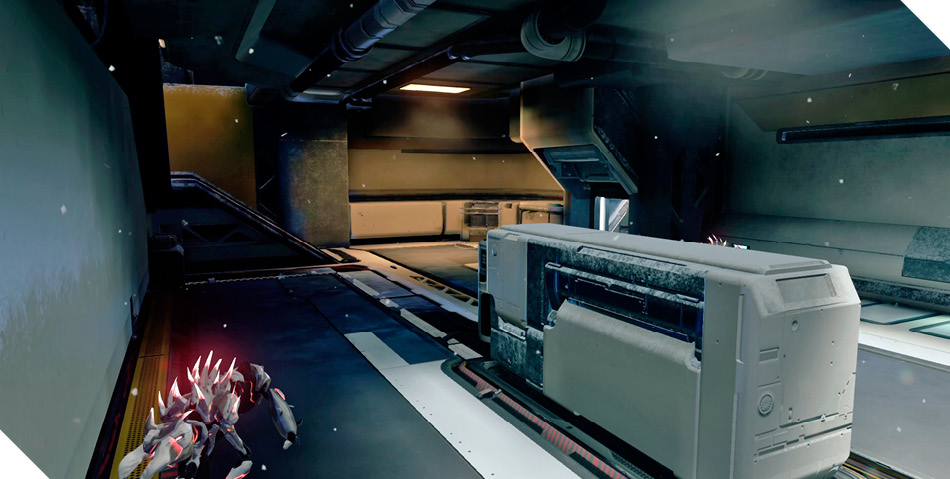
» The East Armory Roof offers a sweeping view of the map’s east side, ideal for engaging opponents and bosses alike. If you’re on the Red Team, use this vantage point to pick off opponents rushing out of the Blue Base. Or turn north and engage the Knight Luminary and his minions in the nearby Ice Cavern—they appear six minutes into the match. While the Roof offers some tempting views of the surrounding locations, keep your eyes peeled for aerial vehicles and be ready to seek cover.
» If you want to reach the East Armory Roof without stepping inside, jump and clamber atop the nearby East Supply Yard structure. From this slightly higher tower-like building, you can jump, thrust, and clamber onto the East Armory Roof. This is a good way to capture or contest the Base when you know enemies are hunkered down on the ground floor— toss grenades down through the Roof’s hatch to catch them off-guard.
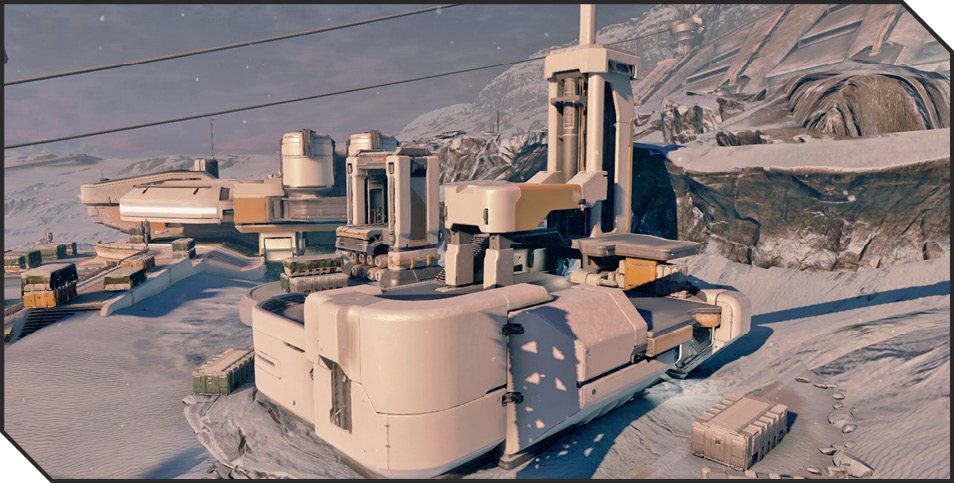
Boss Tactics
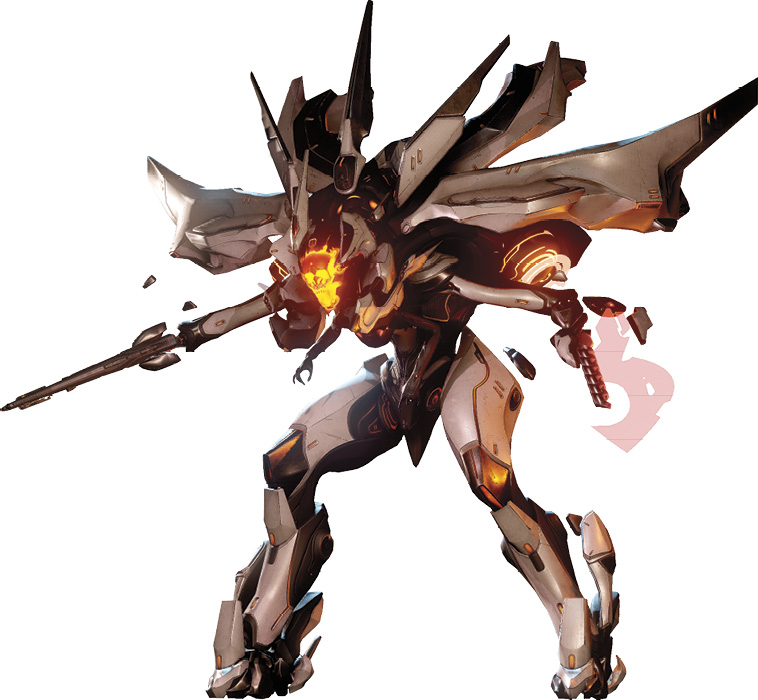
 Commander Lochagos
Location: Fortress at 0:00
Minions: None
Bounty: 150 VP
Commander Lochagos appears inside the Fortress at the start of the battle. Before attacking this Legendary Boss, contend with the numerous Crawlers and Soldiers swarming this location—eliminating these enemies allows your team to capture the Fortress, even if Commander Lochagos is still standing. Always attack this boss with a team. Spread out and use the elevated platforms and ramps to gain a height advantage—these features also offer good cover. Ground Pounding Commander Lochagos stuns him, exposing the weak spots on his sides and back for three seconds. Destroying these three weak spots exposes Commander Lochagos’s face—take him down with one precise shot to the face. Opponents are likely gunning for Commander Lochagos too, so make sure the Fortress is clear of enemies. Whichever team takes down this boss begins the match with a commanding lead.
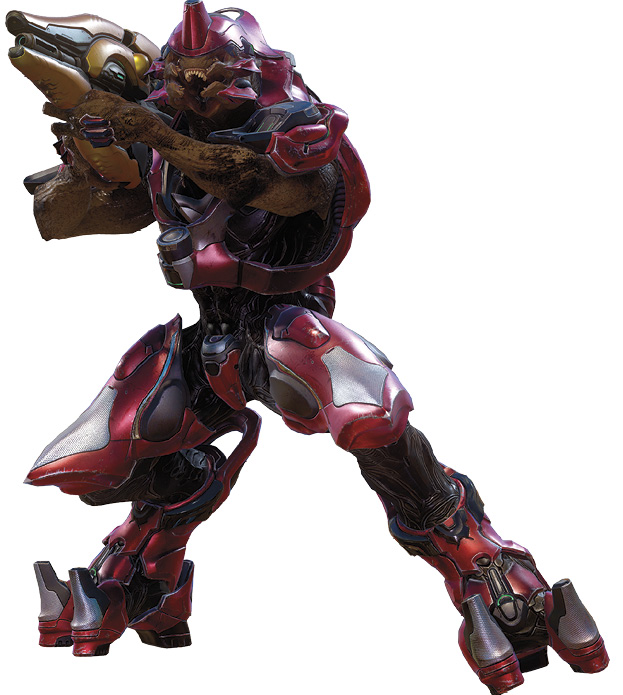
 Elite General
Locations:
» Transport Bay at 2:00
» Shipping Bay at 2:00
Minions: Grunts
Bounty: 25 VP
The Elite Generals are usually in place by the time each team emerges from its respective base. Both teams have no problem taking out these bosses during the early moments of the match. Pushing out of their base, Red Team has the best chance of reaching the Elite General at the Transport Bay while the Blue Team takes on the Elite General at the Shipping Bay. Instead of dropping down onto either bay, keep your distance and fight the Elite General from the railing above—you can find adequate cover to block incoming shots from the General’s powerful Fuel Rod Cannon. The three Grunts accompanying the Elite General drop Needlers—these come in handy for engaging the boss from midrange. If the Elite General hides from view in the bay’s concealed alcove, you’ll need to chase him, using the crates for cover. But make sure all the Grunts are eliminated before taking the fight to close range. For best results, have a teammate distract the Elite General while you sneak up behind him and perform an assassination. And don’t forget to take the General’s Fuel Rod Cannon with you.
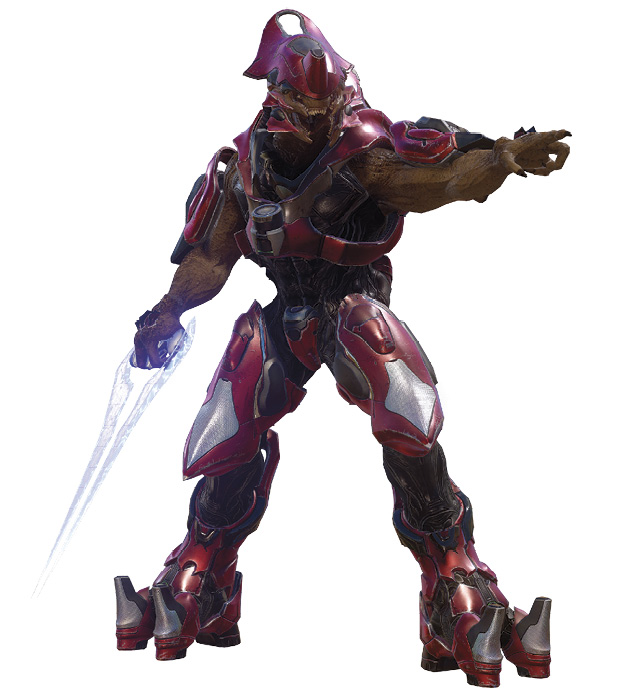
Covert Major
Location: Outpost at 4:00
Minions: Elite Officers
Bounty: 25 VP
The Covert Major and his minions appear at the Outpost early during the battle. Try to complete this fight before the Knight Luminaries appear at the Frozen Cavern and Ice Cavern. Otherwise you may find yourself caught between two bosses. Keep your distance and engage the two Elite Officers first—these enemies are equipped with Active Camo, making them tough to see. They’re also equipped with Energy Swords, making them extremely dangerous at close range. Once the Elite Officers are down, work with teammates to chip away at the Covert Major’s shields and health. The Covert Major can perform deadly melee attacks, so keep your distance. However, if he’s distracted, rush in from behind and take him down with an assassination or score some hits with an Energy Sword dropped by one of the Elite Officers.
Knight Luminary
Locations:
» Frozen Cave at 6:00
» Ice Cavern at 6:00
Minions: Soldiers
Bounty: 25 VP
These bosses appear at the entrances to the Frozen Cave and Ice Cavern six minutes into the match, visible from the East and West Armories. Take to the Roof of the East or West Armory and start off by engaging the boss’s two Soldier minions from long range—the Roof offers plenty of cover, so don’t forget to use it. Once the Soldiers are down, target the Knight Luminary’s orange, glowing weak points on its side. But be sure to keep your distance—the Knight Luminary is most dangerous at short-medium range. After you destroy the Knight Luminary’s weak spots, his face is exposed. All it takes is one precise shot to his exposed face to drop him. If you’re feeling confident, and have teammates serving as a distraction, rush up behind the Knight Luminary and perform an assassination.
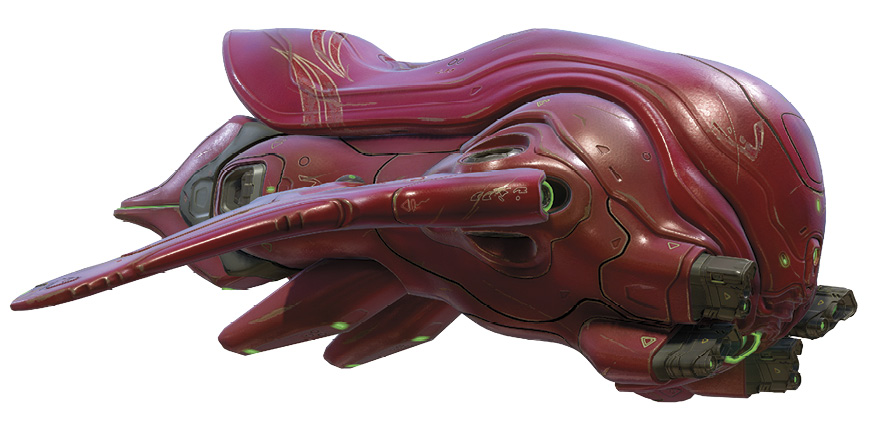
Captain Wamik
Location: Cargo Dock at 8:00
Minions: None
Bounty: 150 VP
Captain Wamik is the second Legendary Boss to arrive, appearing in a Banshee above the Cargo Dock. Engage Captain Wamik from within the Fortress or take cover on the Cargo Dock. Always stay behind cover to avoid getting blasted by the Captain’s explosive Fuel Rod shots. The crates on the Cargo Dock offer excellent protection. Work with your teammates to drop the Banshee’s shields, peeking out to fire as the Banshee is flying away or distracted by another target. Never shoot the Captain’s Banshee when it’s flying toward you—you won’t win that duel. By working together with teammates you can eventually drop the Banshee’s shields. Next, focus on whittling away the Captain’s health. The Warthog’s chaingun turret is ideal for dealing heavy damage. But make sure the Warthog stays on the move during the attack—a stationary Warthog is a dead Warthog. The fight against Captain Wamik requires intense focus, but don’t forget to scan your surroundings. Opponents may use this distraction to assassinate you and steal your bounty.
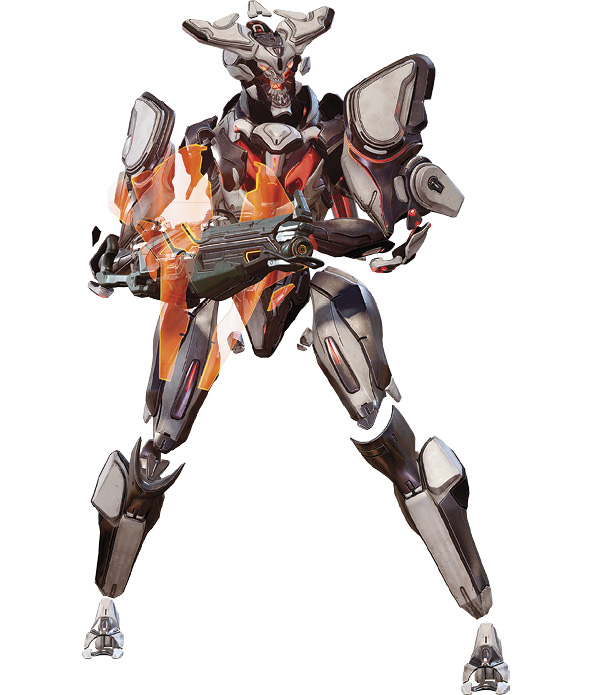
Soldier Commando
Locations:
» Transport Bay at 10:00
» Shipping Bay at 10:00
Minions: Soldiers
Bounty: 25 VP
If the Elite Generals have been defeated at the Transport Bay and Shipping Bay, Soldier Commandos are the next bosses to arrive at these locations. Just as when fighting the Elite General, stay on the high ground, firing down on the bay from the railing overhead. Peek in and out of cover while engaging the two Soldiers, then focus your fire on the Soldier Commando. He’s armed with a powerful Splinter Turret, but as long as you stay behind cover, this weapon isn’t a serious threat. Hammer away at the Soldier Commando with a rapid-firing weapon like the Assault Rifle or SMG. Once the boss’s armor has been stripped away, finish him off with a precision shot to the head. If the Soldier Commando hides in the bay’s alcove, pursue him. But always stay behind cover, using the crates to absorb incoming Splinter Turret bursts. Although risky, it’s possible to take out this boss with an assassination. Attempt this only if the Soldier Commando is distracted by a fellow Spartan.
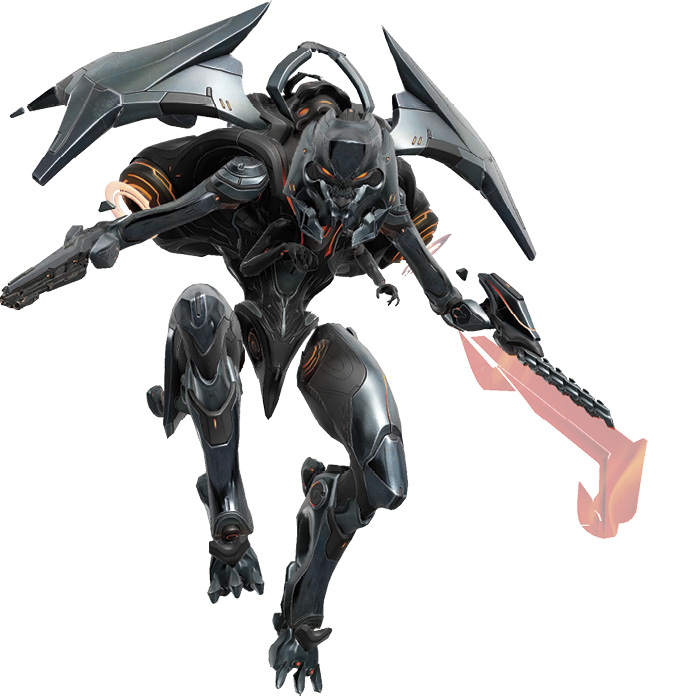
Knight Bannerman
Location: Cargo Dock at 12:00
Minions: Soldiers, Watcher
Bounty: 25 VP
If Captain Wamik has been eliminated, Knight Bannerman is the next boss to appear at the Cargo Dock. Initially, keep your distance and focus your attention on the two Soldiers and the Watcher, attacking from the Fortress Deck. Once the minions are down, go after the boss. Knight Bannerman is armed with a Scattershot, making him extremely deadly at close range. Always keep a solid piece of cover between yourself and the boss. Avoid jumping on top of the crates or attempting a Ground Pound—Knight Bannerman will take you down with one shot. Instead, stay behind cover and target the Knight’s weak points. Once his weak points have been damaged, Knight Bannerman can be killed with an assassination or quick shot to his exposed face.
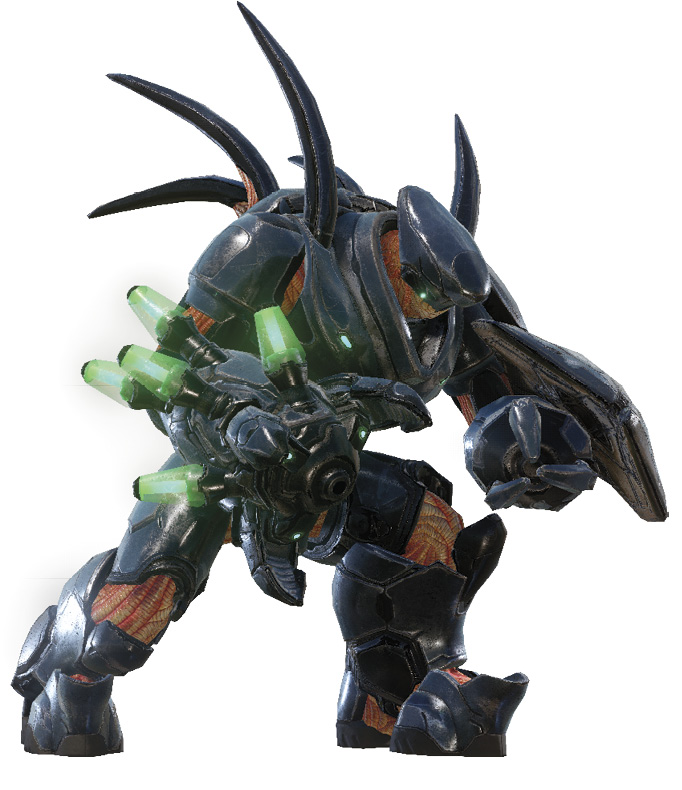
Serpent Hunters
Locations:
» Transport Bay at 14:00
» Shipping Bay at 14:00
Minions: None
Bounty: 25 VP
The Serpent Hunters are the third and final round of bosses to appear at the Transport Bay and Shipping Bay. They appear only once the preceding Elite Generals and Soldier Commandos have been defeated at these locations. Two Serpent Hunters arrive at each location, armed with Fuel Rod Cannons. If you have the support of teammates, try to lure the Serpent Hunters into the dead-end alcove while using the crates for cover. While your teammates draw their attention, circle behind and shoot the weak spots on the Serpent Hunters’ backs to deal critical damage—power weapons like the Rocket Launcher and Sniper Rifle inflict massive damage. Once one of the Serpent Hunters is down, the survivor is easier to flank. Use a Spartan Charge to stun him for three seconds, then flank him, shooting the weak spot on his back. The Serpent Hunters are tough bosses, so attempt taking them down only if you have the support of at least a couple of teammates.
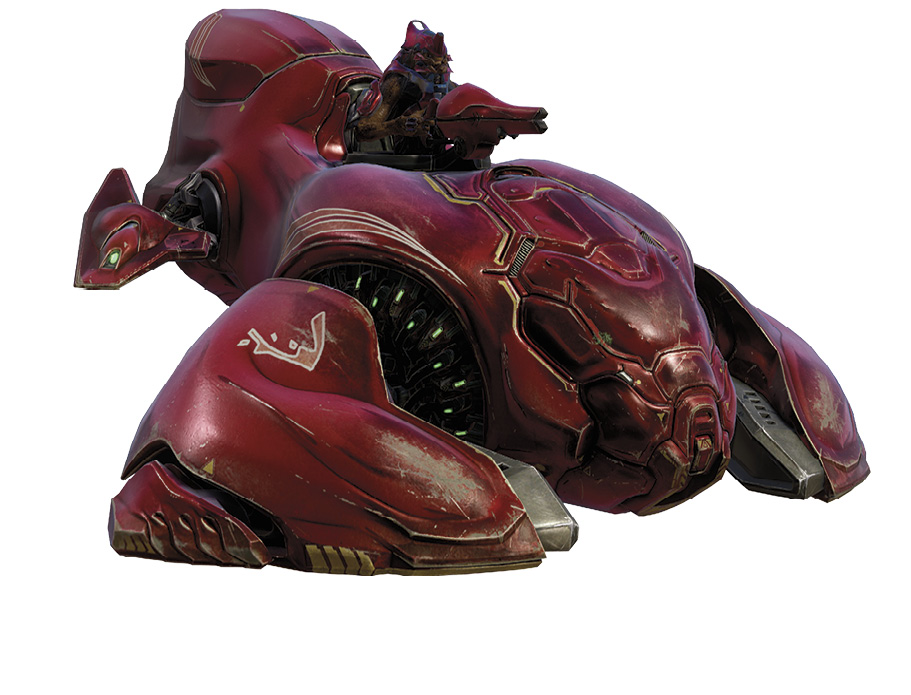
Wraith Officer
Location: Cargo Dock at 16:00
Minions: Elites, Jackals
Bounty: 25 VP
The Wraith Officer appears at the Cargo Dock after Captain Wamik and Knight Bannerman have been defeated. He arrives with a group of three Elites and two Jackals. Taking down the Wraith Officer requires teamwork and some vehicles of your own. Start off by engaging the Elites and Jackals on foot from a distance—peek out of the Fortress to trade shots. Once you have eliminated the minions, try to keep the Wraith Officer’s attention while teammates attack from the air using a Banshee or Phaeton. Aerial vehicles give your team the necessary height advantage to avoid getting hit by the Wraith Officer’s mortar attacks. The Banshee’s Fuel Rod Cannon and Phaeton’s rockets make quick work of the Wraith. The Wraith cannot be hijacked, so if you’re on foot, it’s best to keep your distance and engage from behind cover while friendly aerial vehicles swoop in for the kill.
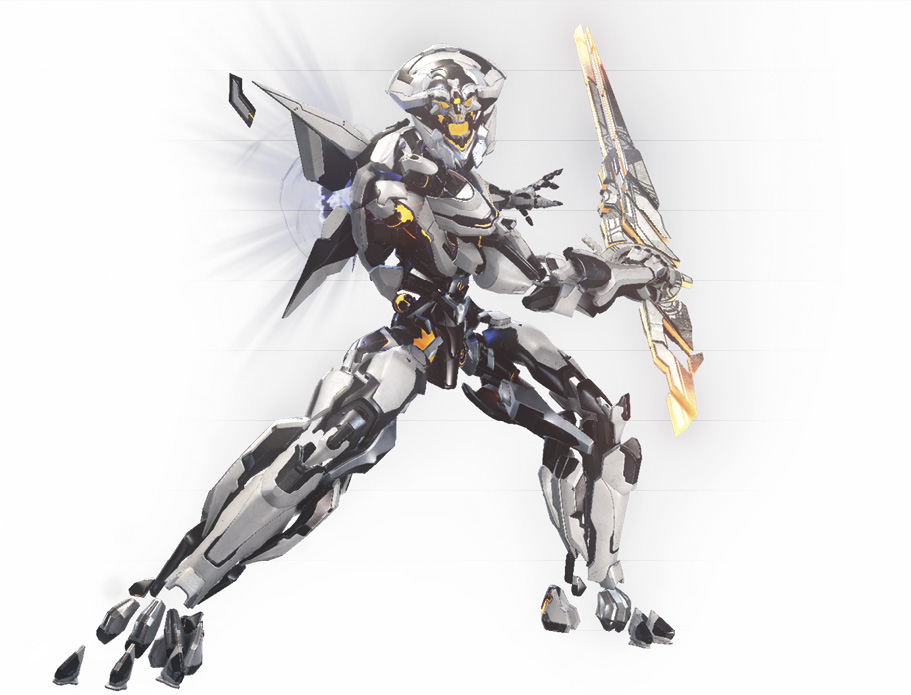
Warden Eternal
Location: Outpost at 18:00
Minions: Soldiers, Watchers
Bounty: 150 VP
The Warden Eternal arrives late in the match
at the Outpost—the Covert Major must be eliminated before the Warden arrives. Thanks to his large bounty and late arrival, whichever team manages to take out the Warden stands a good of winning the battle. But taking down this Legendary Boss requires a team effort—hit him with everything you have, deploying vehicles and power weapons to inflict heavy damage. Approach from the Frozen Cavern or Ice Cavern and engage the Warden’s minions from a distance. Take down the two Watchers first, as they have the ability to heal the four Soldiers. Once the minions are eliminated, take the fight to the Warden. To avoid getting killed by the Warden’s devastating orb attack, take cover behind the various crates in the Outpost. When you’re not dodging attacks, take aim at the Warden’s weak spots on his back and face—these are only exposed once he’s taken significant damage. Hit these weak spots with heavy weapons like the Rocket Launcher or Sniper Rifle to inflict massive damage. Once the Warden has been weakened, he can be killed with a risky but courageous assassination attempt from behind—attempt this only if teammates have distracted the Warden, leaving his back exposed. The Outpost is a relatively cramped space, so watch out for attacks by the opposing team. The three-way combat here can get very chaotic as both teams vie for the final kill shot on the Warden.