
Halo 5: Guardians Guide Warzone
Escape from A.R.C.
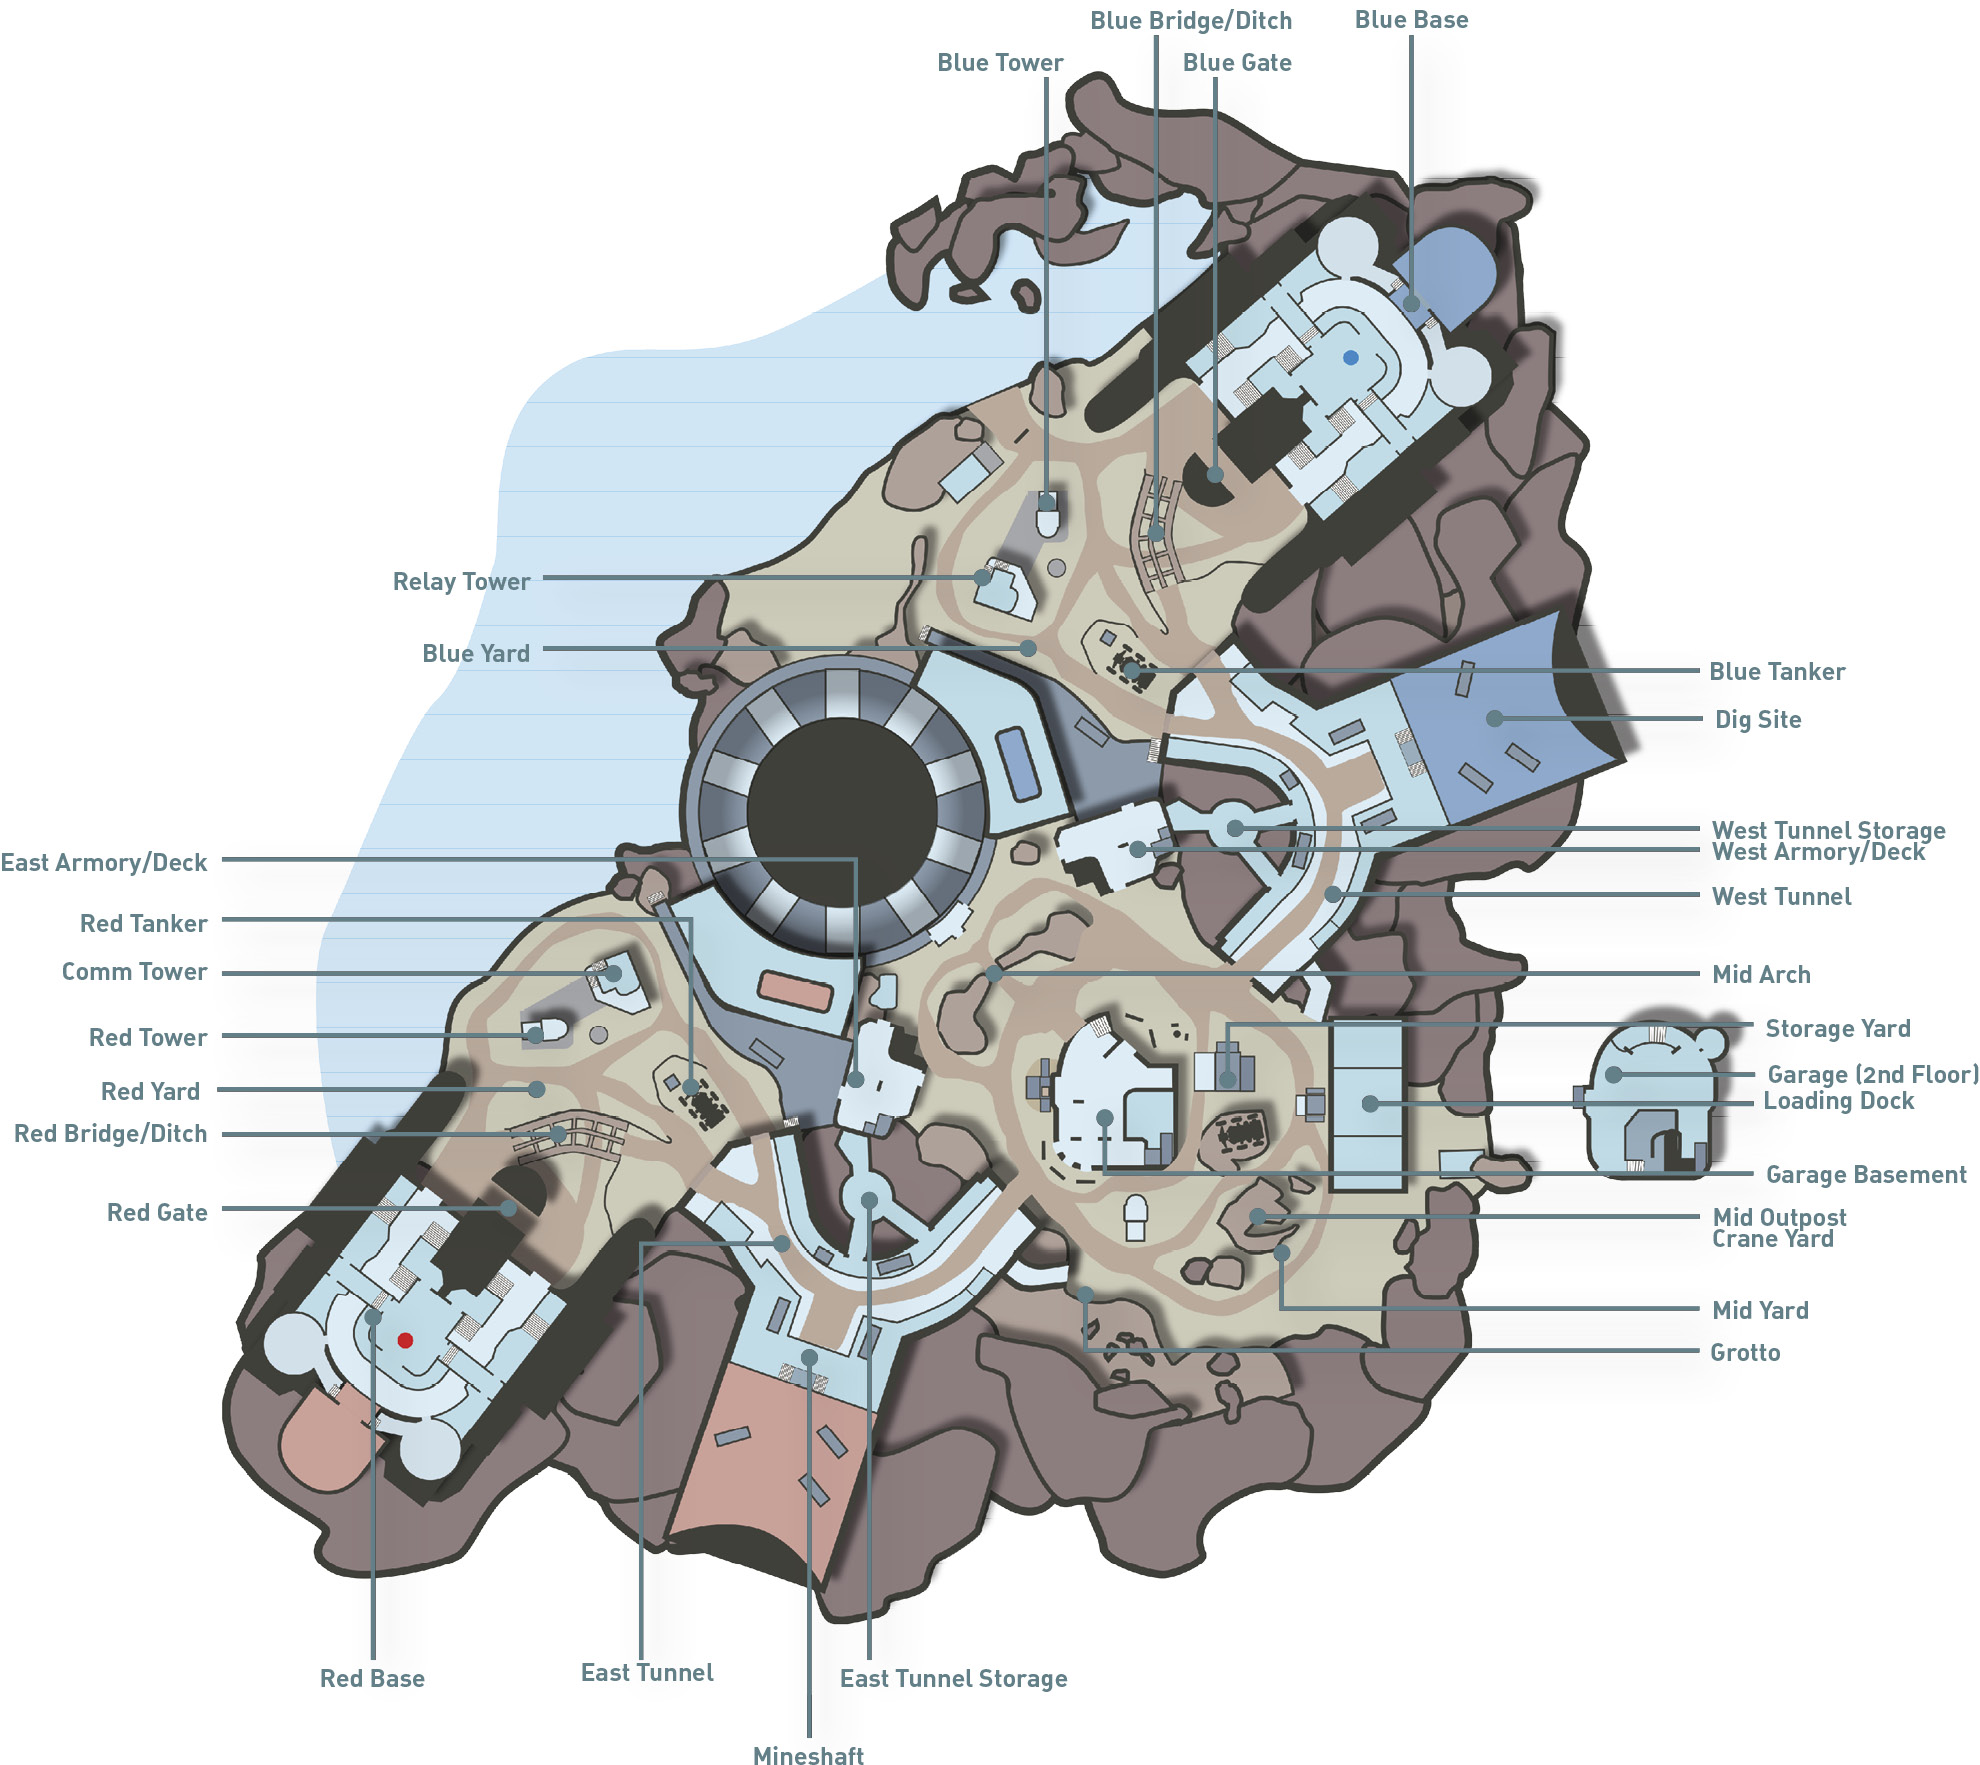
Description: Scientists flocked to this Forerunner excavation in search of new beginnings. What they unearthed will lead to their inevitable end.
Game Mode: Warzone
Boss Lineup
| Boss | Location | Bounty | Time Active |
|---|---|---|---|
|
Sangheili General |
Comm Tower | 25 VP | 0:00 |
|
Sangheili General |
Relay Tower | 25 VP | 0:00 |
|
Ranger Commander |
Mineshaft | 25 VP | 2:00 |
|
Ranger Commander |
Dig Site | 25 VP | 2:00 |
|
Soldier Enforcer |
Loading Dock | 25 VP | 4:00 |
|
Soldier Enforcer |
Grotto | 25 VP | 4:00 |
|
Baron ‘Sraom |
Crane Pit | 150 VP | 6:00 |
|
Knight Marshal |
Mineshaft | 25 VP | 8:00 |
|
Knight Marshal |
Dig Site | 25 VP | 8:00 |
|
Patrol Leader |
Comm Tower | 25 VP | 10:00 |
|
Patrol Leader |
Relay Tower | 25 VP | 10:00 |
|
Knight Strategos |
Crane Pit | 150 VP | 12:00 |
|
Remnant Hunters |
Mineshaft | 25 VP | 14:00 |
|
Remnant Hunters |
Dig Site | 25 VP | 14:00 |
|
Knight Dignitary |
Loading Dock | 25 VP | 16:00 |
|
Knight Dignitary |
Grotto | 25 VP | 16:00 |
|
Warden Eternal |
Crane Pit | 150 VP | 18:00 |
Team Strategy
Whether playing as the Red or Blue Team, it’s important to establish a foothold in the center of the map as early as possible. After breaking out of your Home Base, eliminate the Sangheili General at the Comm Tower or RElay Tower while pushing toward the East or West Armory. Once an Armory has been secured, attack the Garage. The Garage is an extremely important Base to hold because it provides quick access and lines of sight to the Crane Pit, where all the Legendary Bosses appear. Try to hold the Garage and at least one of the Armories throughout the match in an effort to outscore the opposing team. If your team can manage to lock down all three Bases, you have an opportunity to deny the opposing team access to the map’s center and most of the Bosses. Push the opposing team back into their base and counter breakout attempts by blocking passage in the adjacent Tunnel and Armory—these are the key chokepoints when attempting to contain the enemy to their Yard. Launching aggressive attacks on their Home Base’s core is also a surefire way to put them on the defensive. But don’t lose sight of the Bosses scattered throughout the battlefield. In addition to holding down Bases, you’ll need to knock off these Bosses to secure a demanding lead. When Legendary Bosses appear at the Crane Pit, make sure your teammates respond quickly to score the huge bounties offered by Baron ’Sraom, Knight Strategos, and Warden Eternal.
Bases
East Armory
Initial Opposition: Crawlers, Soldiers
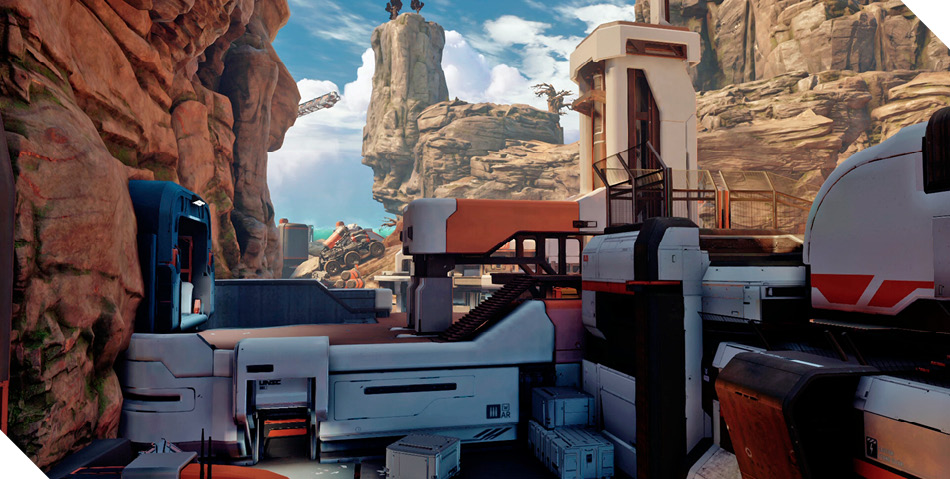
» Located a short distance from the Red Base, the East Armory is likely to fall into the Red Team’s hands at the start of the match—but that doesn’t mean the Blue Team shouldn’t make an attempt at an early capture.
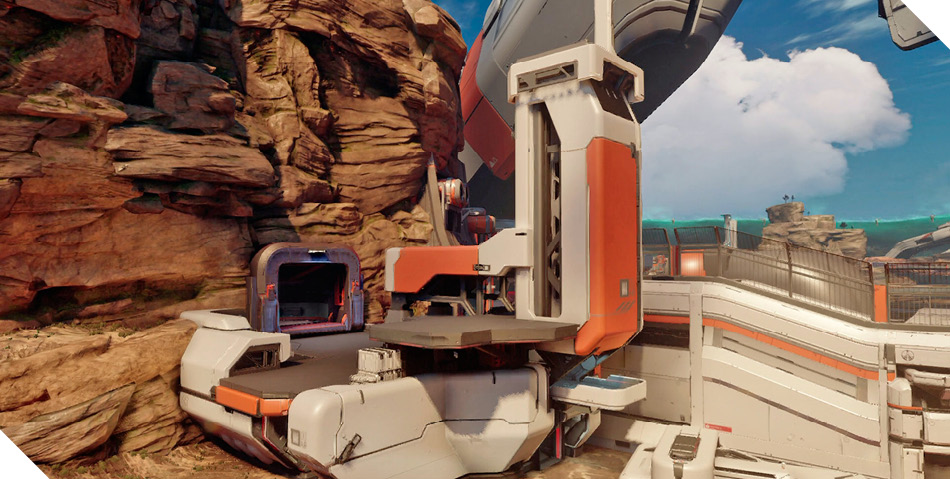
» Initially, the East Armory is defended by a small contingent of Crawlers and Soldiers—toss grenades through the ground-level doorways and then rush inside with at least a couple of teammates to finish off the survivors. The Base can be captured or contested from the Armory’s interior or on East Armory Deck.
» On the East Armory Deck there’s an alcove carved out of the adjoining cliff. Using a Spartan Charge, crash through the barrier at the back of this alcove to open a passage leading to the East Tunnel Storage—use this shortcut to move between the East Armory and East Tunnel. This also opens a long sight line to the Mineshaft, ideal for engaging Bosses like the Ranger Commander, Knight Marshal, and Remnant Hunters.
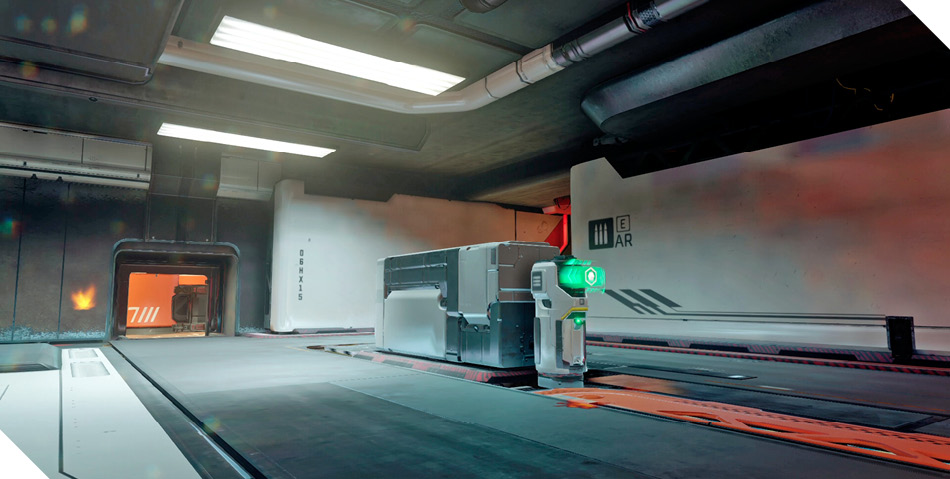
» The East Armory Deck offers great views of the Garage and West Armory, ideal for engaging opponents from long range. This rooftop also offers sight lines on the Comm Tower. Target the Sangheili General or Patrol Leader from long range. But seek out cover before engaging opponents from this elevated position—you’re very exposed on this rooftop, particularly once aerial vehicles are deployed.
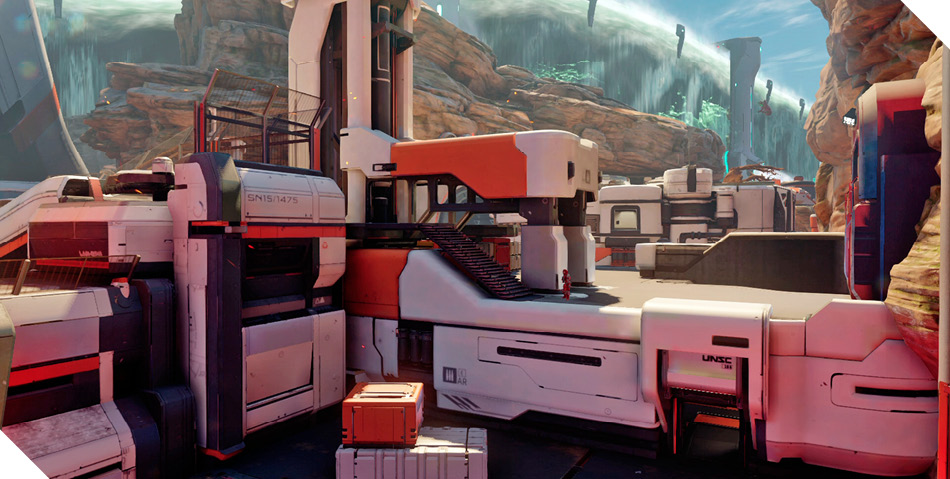
» Jump and clamber on top of the small structure just off the East Armory’s balcony. From this structure you can jump and thrust over to the balcony to infiltrate the Deck. This is good way to sneak up on defenders. When possible, attack from the top down, clearing the Deck before pushing inside through the rooftop ramp.
Garage
Initial Opposition: Crawlers, Soldiers
» The Garage is often the focal point of the battle, giving occupiers an infantry and vehicle spawn point in the center of the map. Once your team holds this location, make sure at least a couple of teammates stay back and defend it. Maintaining a spawn point in the center of the map gives your team the chance to branch out and attack the surrounding objectives as well as make a push toward the Bosses at the nearby Loading Dock and Crane Pit.
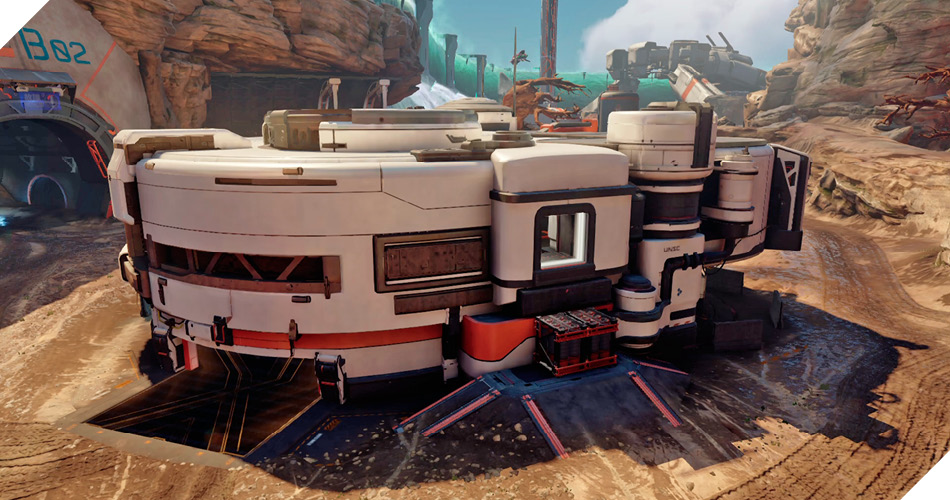
» Before either team can take control of the Garage, they must first clear out a large group of Crawlers and Soldiers, mostly positioned on the second floor. For best results, attack from the Garage Roof, firing down and tossing grenades through the circular skylight. But don’t attempt to clear out the Garage on your own—you’ll need the support of at least three teammates to overwhelm the enemies.
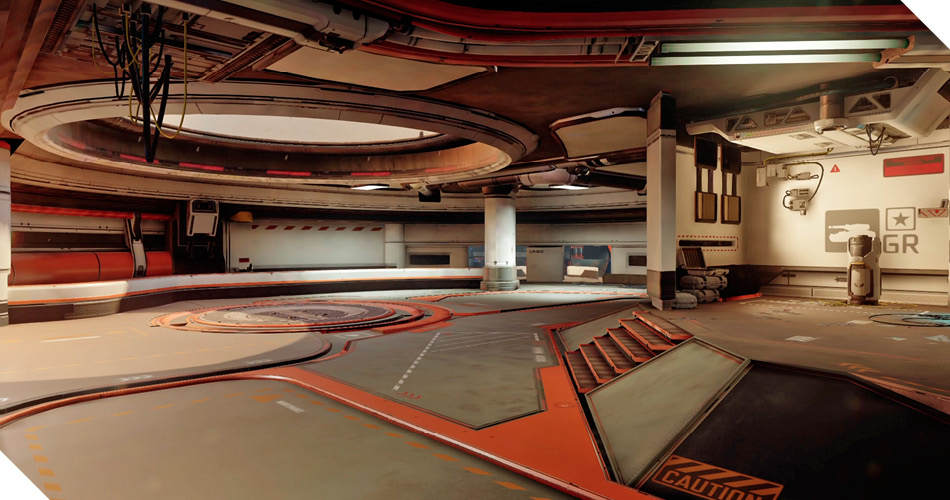
» The Garage’s rooftop is one of the highest points on the map, making it a popular perch when engaging opponents and Bosses. To reach the Garage Roof approach from the Storage Yard, run beneath the vehicle parked on the earthen ramp and then jump, thrust, and clamber onto the Roof. From here you can engage targets in all directions as well as drop through the skylight. But the Roof has very little cover, so be ready to drop inside the Garage once enemy aerial vehicles appear overhead. While the Roof is an advantageous position, the objective cannot be captured or contested from this spot.
» Two ramps in the Basement Garage lead up to the second floor. If you suspect there are opponents upstairs, avoid pushing up these ramps. Instead, exit the Garage and approach from the second-floor windows or the Roof.
» The Garage’s second floor is like a bunker, offering views of several key areas. The large semicircular balcony overlooks the West Armory, West Tunnel, and Loading Dock. Another window overlooks the East Armory and East Tuand Bosses.
West Armory
Initial Opposition: Crawlers, Soldiers
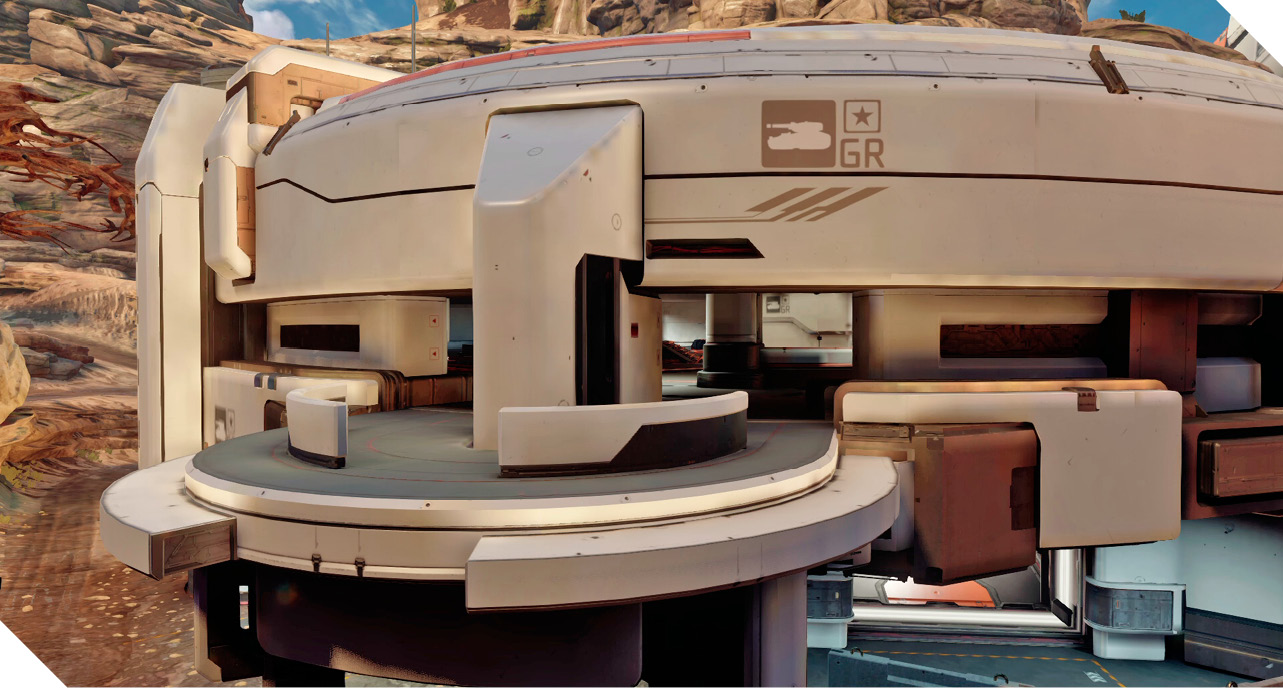
» By making a quick advance out of their base, Blue Team stands the best chance of capturing the West Armory at the outset of the match. But unless it’s adequately defended, Red Team has no problem pushing into this location from the Garage or East Armory.
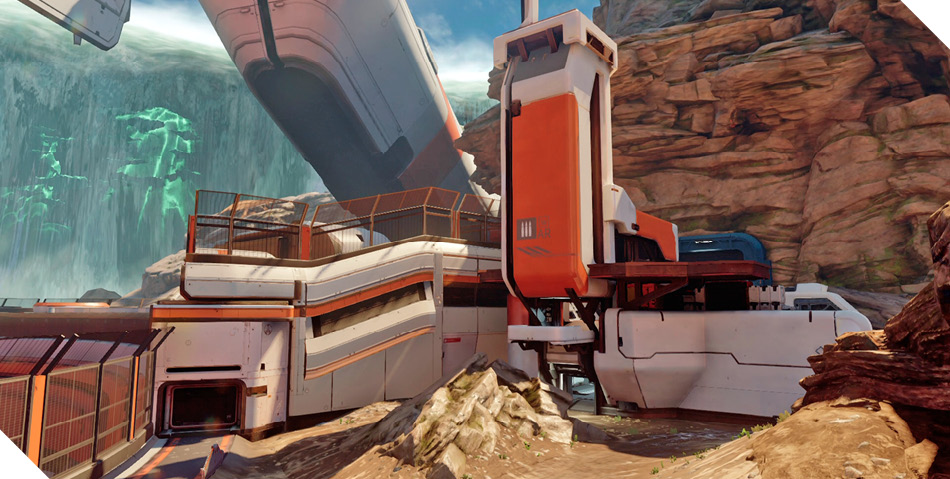
» At the start of the match, the West Armory is occupied by a small group of Crawlers and Soldiers. Since most of these enemies are clustered together on the ground floor, lobbing grenades through the doorways is extremely effective. Use grenades to soften up the resistance, then move in with a few teammates to secure the objective.
» As in the East Armory, there’s an alcove in the cliff adjacent to the West Armory Deck. The barrier in this alcove can be destroyed with a Spartan Charge, opening a passage to the West Tunnel Storage. In addition to serving as a shortcut, this passage opens up a line of sight to the Dig Site, ideal for engaging Bosses like the Ranger Commander, Knight Marshal, and Remnant Hunters.
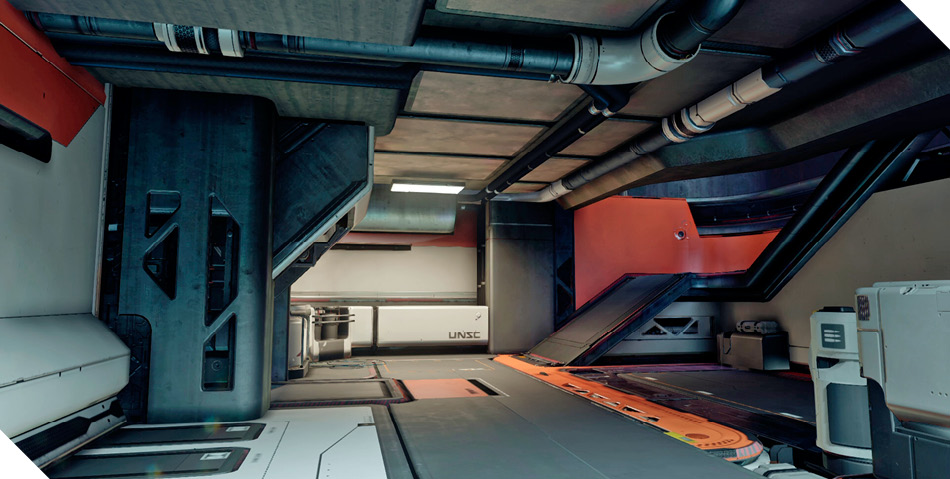
» The Base can be captured and contested from the West Armory Deck, but only if you stay on the lower rooftop area—climbing to the higher perches puts you outside the objective’s capture radius. Still, the West Armory Deck offers a great view of several surrounding locations, including the East Armory and Garage. Opponents and Bosses at the Relay Tower can also be spotted from here—hold back and place shots on the Sangheili General or Patrol Leader.
» The ramp-like rock formation outside the West Armory offers easy access to the objective’s balcony. Rush up the rock pile and then jump and thrust over to the balcony to land on the West Armory Deck—this is a good option when attacking from the East Armory.
Boss Tactics
 Sangheili General
Locations:
» Comm Tower at 0:00
» Relay Tower at 0:00
Minions: Jackals
Bounty: 25 VP
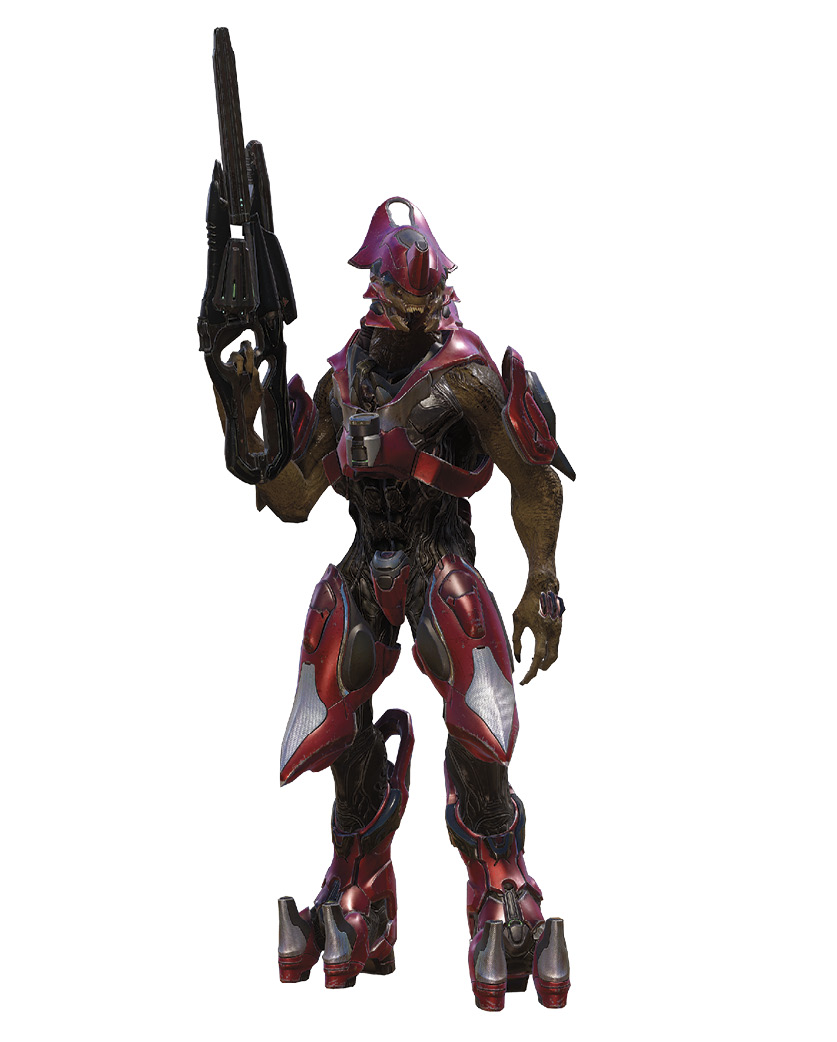
Sangheili Generals appear at both the Comm and Relay Towers at the start of the match. This is an easy Boss to deal with since all players will see him when exiting their respective bases. Take out the two Jackals first, then focus your fire on the Sangheili General. Combined Assault Rifle attacks by multiple Spartans are enough to chip away at the Boss’s stubborn shield. Once his shield is down, follow up with precise headshots using your Magnum—it doesn’t take many hits to drop this Boss once his shield is down. If facing off against the Sangheili General on your own, eliminate the Jackals and then keep your distance to avoid taking damage from the General’s Plasma Grenades and Energy Sword. Stay mobile and keep up the attack to prevent the General’s shield from regenerating.
Ranger Commander
Locations:
» Mineshaft at 2:00
» Dig Site at 2:00
Minions: Elite Rangers
Bounty: 25 VP
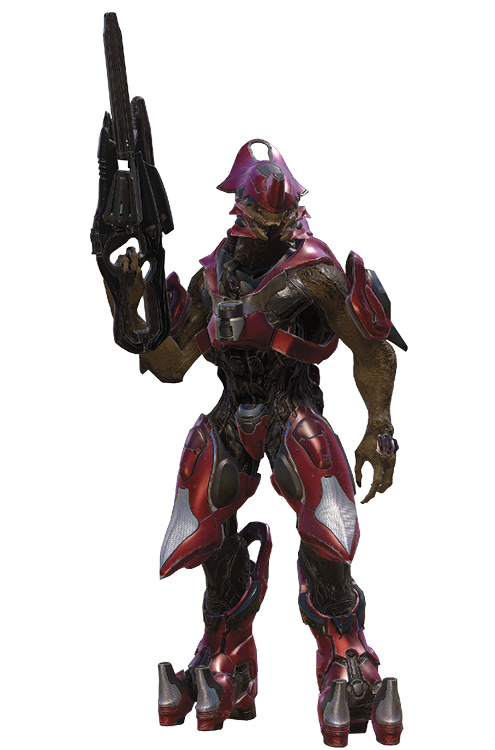
Before engaging the Ranger Commander, focus on taking out the two Elite Rangers. They’re usually positioned on the lower platform, allowing you to engage them without drawing fire from the Ranger Commander. Once the Elite Rangers are down, take the fight to the Ranger Commander with rapid-firing weapons like the SAW—this does wonders for wearing down the Boss’s shield. But don’t trade fire with the Ranger Commander. Retreat to the lower platform as necessary, using the stairways and ramps for cover. Mobility is key to avoid getting struck by the Ranger Commander’s Plasma Grenades—if one of these gets stuck to you, you’re done. Keep moving and firing until the Ranger Commander’s shield is down. At that point, all it takes is a few headshots to finish off this Boss.

Soldier Enforcer
Locations:
» Loading Dock at 4:00
» Grotto at 4:00
Minions: Soldiers, Watcher
Bounty: 25 VP
The Soldier Enforcer’s
Splinter Turret and rather sizable entourage make him a particularly dangerous foe. As usual, attack the two Soldiers and Watcher surrounding this Boss. Take cover and strike from a distance to avoid drawing fire from the Soldier Enforcer. Once the two Soldiers and the Watcher are down, cautiously close in on the Boss while using any available cover—there is far more cover at the Loading Dock than there is at the Grotto. The Splinter Turret weighs down the Soldier Enforcer, making it relatively easy to outmaneuver him. Circle-strafe around the Boss in an effort to stay clear of his Splinter Turret. As long as you keep moving, you’ll have no problem wearing down the Soldier Enforcer’s health, especially if you’re assisted by a teammate.
 Baron ’Sraom
Location: Crane Pit at 6:00
Minions: None
Bounty: 150 VP
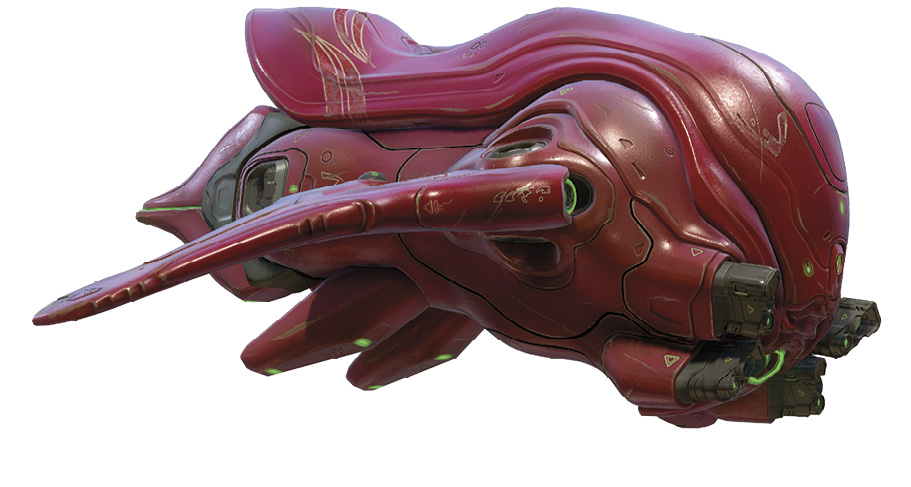
Baron ’Sraom is the first Legendary Boss to appear, cruising above the Crane Pit in a custom Banshee six minutes into the match. Taking on the Baron is much easier if your team holds the Garage, as it provides excellent cover—open fire from the Garage’s second-floor balcony. Otherwise, seek cover among nearby rocks or equipment in the Storage Yard or Loading Dock. With the help of some teammates, the Baron can be taken down rather quickly. Despite presenting an airborne threat, the Boss’s health is rather limited. A concerted effort by three or four Spartans is usually enough to bring down the Baron. Using an antivehicle weapon like a Spartan Laser can expedite the process. Given the Baron’s high bounty, expect to fight off the opposing team—pick them off while they’re preoccupied with fighting the Baron.
Knight Marshal
Locations:
» Mineshaft at 8:00
» Dig Site at 8:00
Minions: Crawlers, Watcher
Bounty: 25 VP
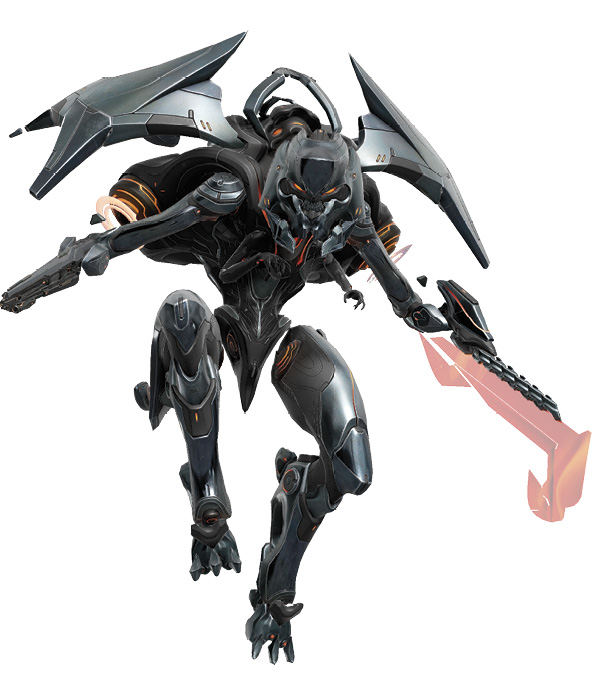
The Knight Marshals appear at these locations only once the preceding Ranger Commander has been eliminated. Appearing with three Crawlers and one Watcher, the Knight Marshals are a formidable threat when fought at close range. Fortunately, it’s possible to engage all of these threats from long range. For best results, attempt to get a line of sight on these enemies from the East or West Tunnel Storage—spotting the Crawlers from here might be tough, but you can still land shots on the Watcher and Knight Marshal. If you don’t have a long-range weapon, approach with caution, using the lower ramps and stairs for cover. When attacking at close range, always eliminate the Crawlers and Watcher first before engaging the Knight Marshal. If you stay on the lower platform, the Crawlers and Watcher have trouble reaching you.
Patrol Leader
Locations:
» Comm Tower at 10:00
» Relay Tower at 10:00
Minions: Grunts
Bounty: 25 VP
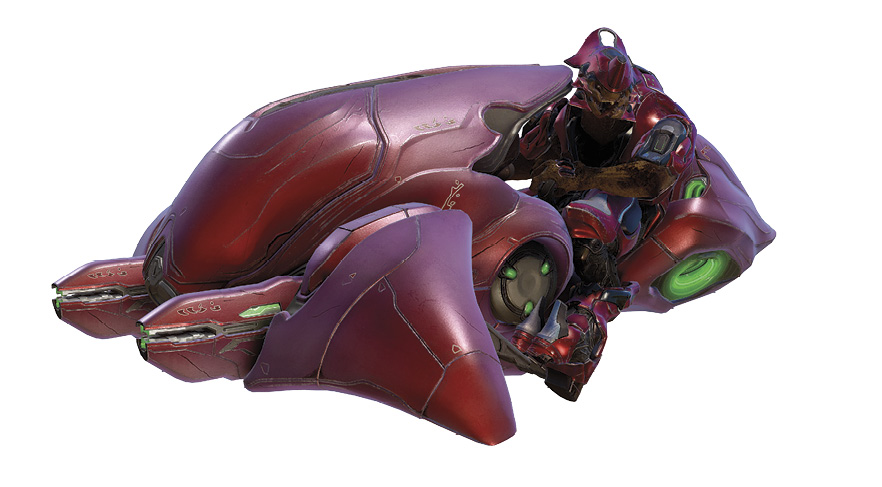
Cruising around the Red or Blue Yard in a Ghost, the Patrol Leader and his Grunt minions are a nuisance when pushing out of your team’s base. The Patrol Leader appears only once the Sangheili General has been eliminated. This gives you the opportunity to use the elevation of the Red or Relay Tower to fire down on this threat. Pick off the three Grunts from long range, then quickly ascend the Red or Relay Tower. The Patrol Leader’s speed and firepower are nothing to scoff at, so take care moving into position. Due to the enemy’s quick health regeneration, it’s often necessary to attack with the assistance of teammates—if you take a breather, the Patrol Leader will regain most of his health. For best results, shoot the Patrol Leader himself, not the Ghost he’s riding on—this deals much more damage. Explosive weapons like the Rocket Launcher and Hydra Launcher make this fight much easier.

Knight Strategos
Location: Crane Pit at 12:00
Minions: Soldiers, Watchers
Bounty: 150 VP
If Baron ’Sraom has been eliminated at the Crane Pit, Knight Strategos and his entourage appear 12 minutes into the battle. Before you even get close to Knight Strategos, you’ll come under fire by his four Soldiers. Keep your distance and engage these threats from long range, preferably from the second floor of the Garage—take out the two Watchers while you’re at it. Knight Strategos will not move until you’re within range of his close-range attacks. This makes him an easy target to pick off from long range. With the help of teammates, use weapons like the Sniper Rifle, Beam Rifle, Railgun, and LightRifle to quickly deplete his health. But don’t get tunnel vision—continually scan the area for opponents attempting to steal your bounty.
Remnant Hunters
Locations:
» Mineshaft at 14:00
» Dig Site at 14:00
Minions: None
Bounty: 25 VP
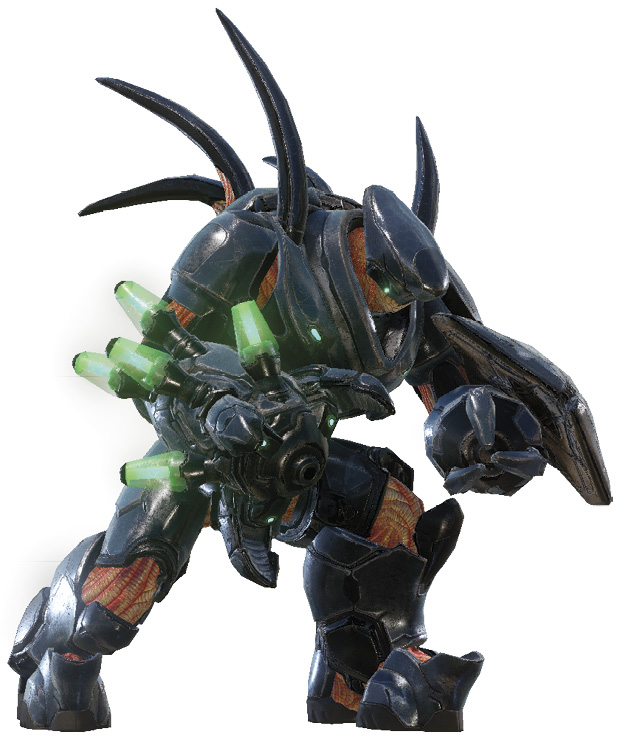
The Remnant Hunters appear at the East and Dig Sites only once the preceding Ranger Commanders and Knight Marshals have been eliminated. Although they spawn with no minions, the two Remnant Hunters that appear at each location are enough to keep you on your toes. Never take on this fight alone. These Bosses are extremely tough, absorbing tons of damage. If possible, engage the Remnant Hunters from long range, preferably from the East or West Tunnel Storage—they can’t retaliate against long-range attacks. If fighting them at close range, strafe up and down the lower platform’s stairs while firing—the Remnant Hunters will not pursue you down these steps. The Hunters fire a slow-moving Fuel Rod Cannon projectile that is relatively easy to dodge. But with two Remnant Hunters present, dodging both of their attacks can be tricky; always keep both enemies in front of you to avoid getting blindsided. The Remnant Hunters move very slowly, so keep moving, denying them the opportunity to fire a shot. If they’re distracted by a teammate, you can sneak up behind them and shoot the weak spot on their back for critical damage. Or hit them with a Spartan Charge to stun them, giving you the opportunity to flank.
Knight Dignitary
Locations:
» Loading Dock at 16:00
» Grotto at 16:00
Minions: Soldier Officers
Bounty: 25 VP
If the Soldier Enforcers have been eliminated at the Loading Dock and Grotto, Knight Dignitaries replace them at the 16-minute mark. They’re both accompanied by a pair of Soldier Officers. The fight at the Loading Dock is much easier, as all enemies can be engaged from distant locations like the Garage. But gaining a line of sight on the Grotto is much tougher unless you have access to an aerial vehicle. As usual, pick off the Soldier Officers first. Once they’re down, attack the Knight Dignitary. The Knight Dignitary can only retaliate against close- or midrange attacks, so it’s wise to keep your distance, attacking with precision weapons to hit its weak spots. If you don’t have access to a Banshee or Phaeton, taking out the Knight Dignitary at the Grotto is a bit more challenging. Attack with rapid-firing weapons while staying on the move—mobility is the key to avoiding the Boss’s close-range attacks.

Warden Eternal
Location: Crane Pit at 18:00
Minions: Soldiers, Watchers
Bounty: 150 VP
Assuming Baron ’Sraom and Knight Strategos have been eliminated, Warden Eternal makes his entrance at the Crane Pit 18 minutes into the match, joined by four Soldiers and two Watchers. Taking down Warden Eternal is a true team effort. Start by picking off the Soldiers and Watchers, preferably from the second floor of the Garage. Next, spread out with your teammates and attack the Warden from multiple angles. All of the Warden’s attacks are AOE—spreading out minimizes the effectiveness of these attacks. But don’t wander too far from a thick piece of cover. This is essential for avoiding the Warden’s devastating orb attack; the orb tracks you, passing through light cover. Rocks and the large cylindrical tanks in the Crane Yard can block the orb attack. Keep attacking the Warden until the weak spots on his back and face are exposed—hitting these spots with heavy weapons inflicts massive damage. When the Warden is weak, he can be eliminated with an assassination—but it’s much safer to keep your distance. Given the Warden’s late appearance, vehicles are likely to be available to players on both teams. Phaetons and Banshees are particularly effective against the Warden. But keep an eye out for opponents in the area—whichever team takes down the Warden stands a good chance of winning the battle.