
Halo 5: Guardians Guide Multiplayer Tactical Primer
Terminology
Throughout the guide and during online matches, you’re likely to encounter several common terms and phrases used by veteran Halo players. If you’re not quite sure what these mean, here’s a brief rundown of the terms you’re likely to hear, along with the techniques required to execute each maneuver.
Baiting
When baiting an enemy, a fishing metaphor is appropriate. Try to tempt opponents with a lure—this can be an easy kill, a weapon, or a power-up. When an opponent takes the bait, it’s up to you and your team to move in for the kill. Baiting comes in handy when the opposing team’s current positions are unknown. While your teammates hold back, consider moving forward in an attempt to bait opponents, forcing them to reveal themselves. Once the bait has been taken, retreat to a position held by your team where pursuers will be overwhelmed. If properly executed, baiting is a great way to lure opponents into ambushes.
Getting the Jump
This broadly refers to any maneuver that gives you an advantage over an opponent, usually allowing you to get off the first shot. Halo 5: Guardians’ vertical gameplay provides plenty of opportunities to get the jump on opponents. Use jump and clamber to reach high ledges and platforms, then fire down or Ground Pound unsuspecting opponents.
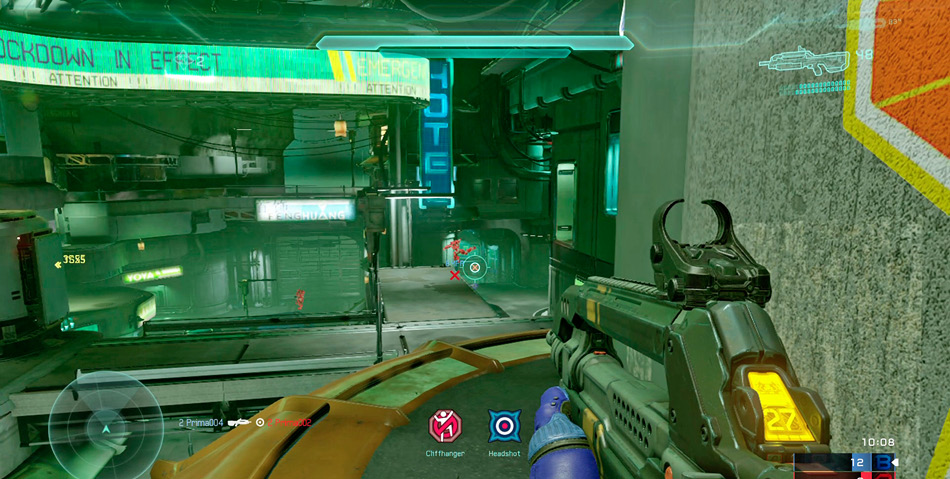
Plaza features several ledges you can utilize to get the jump on opponents.
Hot Spots
Also known as choke points, hot spots are high-traffic areas utilized by both teams. Hot spots are usually centered around weapon pads and power-ups—expect plenty of traffic in these locations as both teams attempt to control these items. In an effort to control these areas, set up around the perimeter, establishing multiple angles of fire. When they’re crowded with enemies, saturate these choke points with grenades and other explosive weapons to score some easy kills. As long as you maintain an angle on a hot spot, you’re bound to have plenty of targets.
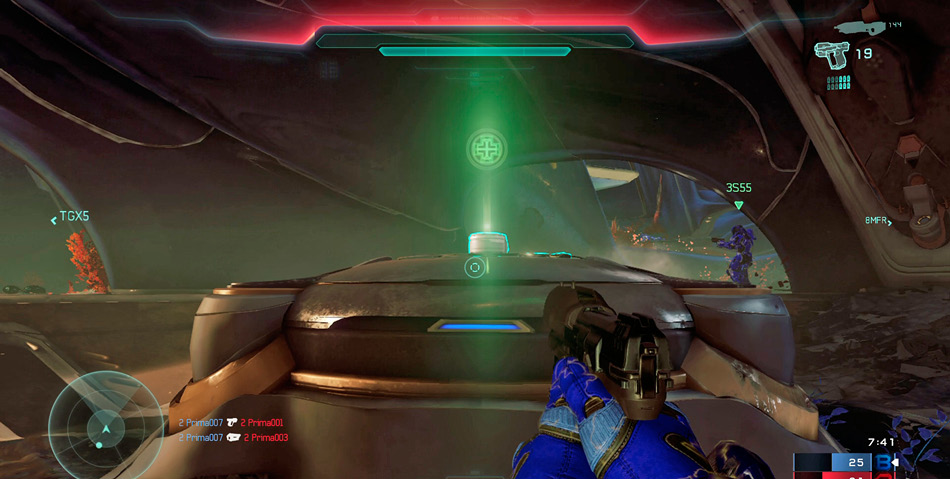
A newly spawned power-up is likely to draw some attention—rush in, grab the power up, and get out.
Flanking
Flanking is the act of maneuvering to an advantageous position without being noticed. Take advantage of perimeter routes and other sneaky paths to get the jump on unsuspecting opponents preoccupied by focusing on another part of the map. Flanking often requires a team effort. For instance, have one player draw attention from a highly visible power position—their job is to draw fire from the enemy. This gives the rest of the team the opportunity to flank, using side paths and other routes to take down distracted opponents.
Juking
Juking is all about catching an opponent off-guard, giving you a distinct advantage. This can refer to side-to-side lateral movements during firefights, useful for evading incoming fire—thrusting laterally is a great way to pull off a successful juke. But juking also refers to outsmarting opponents during 1v1 battles. If your shields are weak, retreat or take cover to give your shields time to recharge. As your opponent pursues, ambush them or request aid from a teammate to take them by surprise.
Nading
This is an abbreviated term for grenading, or the act of lobbing grenades. Grenades can be used in both offensive and defensive situations. Throw grenades at weapon pads and other high-traffic areas to score some easy kills. Or if being attacked, toss grenades in the path of an opponent to end their pursuit. Pinning down the enemy with grenades is also a good way to keep opponents from pushing out of their Base, providing flanking opportunities.
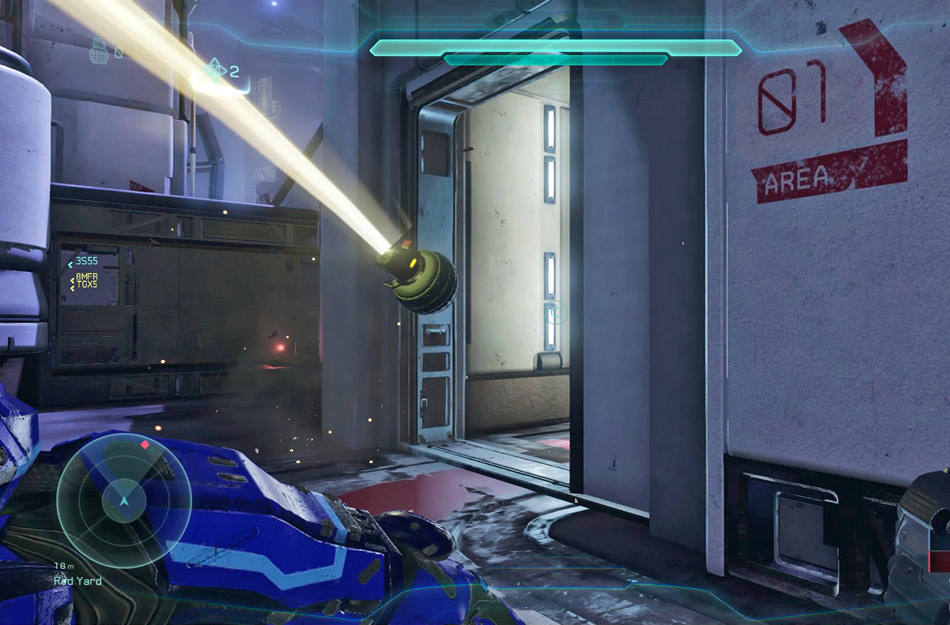
Did an opponent just escape by darting into a room? Toss a grenade inside before resuming the chase.
Peek Shooting
This is perhaps the most common and useful technique when attempting to line up quick precision shots. Use a wall or other piece of cover to peek around, strafing left and right to move in and out of cover. As you move out of cover, take aim, fire a shot, then strafe back behind cover. This minimizes your exposure to incoming fire while allowing you to shoot out from cover. But timing is critical—make sure you have a target acquired before squeezing the trigger. Also, alter the tempo of your movements to avoid making yourself an easy, predictable target for opponents.
Power Positions
Power positions often refer to the high ground or other advantageous locations that provide multiple lines of sight. These positions are usually fortifiable, too, making them difficult for other teams to take once they’re occupied. Due to their height advantages, power positions are popular sniper perches. Acquire a precision weapon and ascend to one of these positions to pick off opponents as they push out of their Base and other locations. But be aware of the position’s access points and be ready to either defend them or use them to escape.
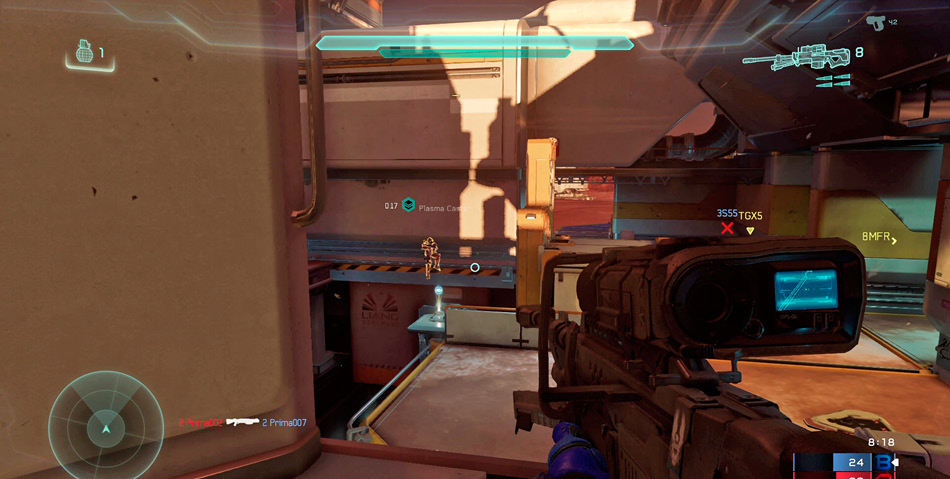
Tower Two on The Rig is an ideal power position, perfect for sniping.
Pushing
Pushing refers to an aggressive advance. Coordinate a push with your team when attempting to secure power positions or objectives. But only attempt pushes when your team has an advantage, preferably after at least one opponent has been eliminated. This gives your team numbers for a few seconds, increasing the chance of successfully capturing an objective, running a flag, or securing a power position.
Turtling Up
Teams with a lead often utilize a conservative style of play, often called turtling up. By fortifying their Base and playing defensively, a team can minimize its losses. This is a common tactic during close matches of Slayer. Since every kill counts, it sometimes pays to withdraw to a defensible position and ride out the match—maintain a line of sight with teammates to offer support.
Wall Shooting
Similar to Peek Shooting, this technique also utilizes cover to minimize your exposure to incoming fire. Take cover behind a low wall, crate, or other object, ensuring most of your body is hidden from opponents. This makes it difficult for opponents to score hits, while you can continually target opponents with no obstructions. If you come under fire, crouch behind your cover to evade incoming shots.