
Assassin's Creed Syndicate Guide Side Quest Associate and Income Activities
Bounty Hunts
 Bounty Hunts

Bounty Hunting requires you to bring the target back to a secure location dead or alive. The target is surrounded by his allies and attempts to run if you are detected.
Locating the Target
Use Eagle Vision to locate your target. Enemies appear as red, while your target appears as yellow. Ziplining from roof to roof over the Bounty Hunt area helps you quickly locate the target. Locating the target before making your approach is crucial as this helps you plan the escape and prevents you from killing them accidentally.
Choosing your approach
For 100% completion you must bring the target back alive. This leaves you with two general ways of going about securing the target and then extracting them to the specified location. Killing the target only grants you 90% completion.
Grabbing the Target
When deciding to grab the target you have three options.
- Killing the target and moving their dead body into the carriage is easy, but you do not get the 100% synchronization bonus, so avoid this if at all possible.
- Knocking the target out is the easiest way to move them. This allows you to engage in combat with any enemies that may be in between you and your way out. This also leaves your target incapacitated so you don’t have to worry about them running away during any accidental combat.
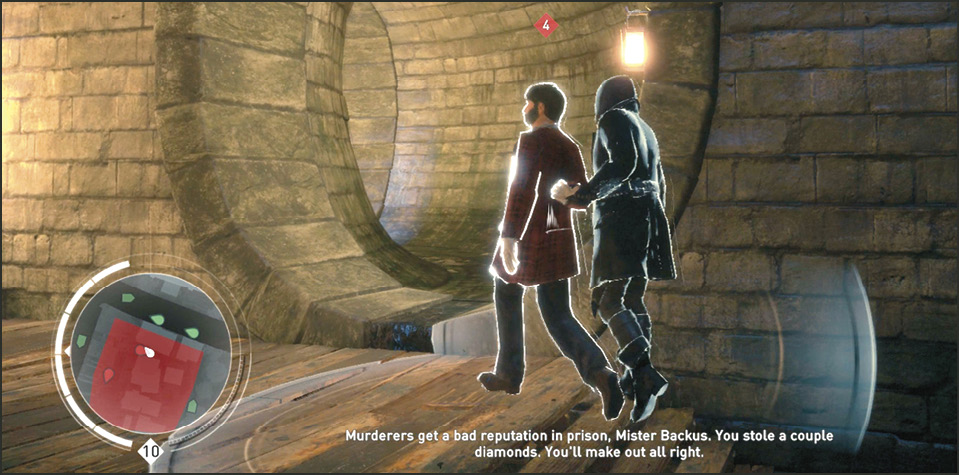
- The last option is kidnapping the target. While this may help you navigate through the maze of enemies, it can get complicated when exiting one of the small alleys on the way to the carriage.
The Loud Way
Going in “Loud” favors the gameplay of Jacob as you are going to be inviting all of the enemies in the area to fight you. Once the target learns of your presence they begin to flee the area. Quickly run and tackle them, being careful not to assassinate them. To kidnap or knock out the target you must not be in combat mode, which makes this method a little bit complicated. Wandering too far from the target during the fight may let the target begin to run away again so try your hardest to stay near the target. Knock out the target quickly before the main fight begins by utilizing hiding spots and high ground to get in close.
Keeping it Quiet
Evie is the best option for this approach, as her skills are more stealth oriented. Use high ground and throwing knives to pick off lone enemies, making an effort to clear your way to the target. Once you have a path to the target set, plot your exit before making contact. Make sure no enemies are between you and your way out as they are likely to spot you with the target. If you’ve eliminated a good amount of enemies, kidnapping the target makes it easy to work past the remaining enemies.
The Getaway
Once the target is either kidnapped and walking with you, or you have their body slung over your shoulder, you need to head for the nearest carriage. Luckily for you, the Rooks always have one parked nearby. Locate the cart by finding the small green icon on your map. If you are confronted you need to kill off any enemies in the area before you can put the target in the cart. Once the target is in the carriage, follow the GPS to the drop off point. Make sure to either wreck or lose any of the enemies chasing you as you need to be out of combat to complete the memory.
If you have enemies closing in on you, drop a smoke bomb while sitting in the cart at the drop off. If enemies followed you all the way to the drop off, get out and kill any who dared to follow you all the way. Once they are dead the memory completes.
Bounty Hunts
| Map | Lvl | Borough | Name | Challenges | Rewards/100% |
|---|---|---|---|---|---|
|
3 |
9 |
Ivan Bunbury |
Bring back the target Alive. |
£: 600 + 350 XP: 430 + 300 |
|
|
7 |
5 |
Harvey Hughes |
Bring back the target Alive. |
£: 264 + 125 XP: 250 + 150 |
|
|
8 |
6 |
Maude Foster |
Bring back the target Alive. |
£: 400 + 150 XP: 300 + 150 |
|
|
9 |
6 |
David O’Donnell |
Bring back the target Alive. |
£: 400 + 150 XP: 300 + 150 |
|
|
13 |
3 |
Leopold Bacchus |
Bring back the target Alive. |
£: 264 + 75 XP: 250 + 100 |
|
|
14 |
3 |
Mildred Graves |
Bring back the target Alive. |
£: 400 + 75 XP: 300 + 100 |
|
|
15 |
3 |
Jesse Butler |
Bring back the target Alive. |
£: 264 + 75 XP: 250 + 100 |
|
|
6 |
8 |
Sylvia Duke |
Bring back the target Alive. |
£: 532 + 250 XP: 360 + 250 |
|
|
4 |
8 |
Milton King |
Bring back the target Alive. |
£: 532 + 250 XP: 360 + 250 |
|
|
5 |
8 |
Gilbert Fowler |
Bring back the target Alive. |
£: 532 + 250 XP: 360 + 250 |
|
|
16 |
5 |
Anna Abramson |
Bring back the target Alive. |
£: 400 + 125 XP: 300 + 150 |
|
|
17 |
5 |
Albie Vassell |
Bring back the target Alive. |
£: 400 + 125 XP: 300 + 150 |
|
|
12 |
4 |
The Thames |
Simon Chase |
Bring back the target Alive. |
£: 264 + 100 XP: 250 + 125 |
|
11 |
3 |
The Thames |
Emmet Sedgwick |
Bring back the target Alive. |
£: 400 + 75 XP: 300 + 100 |
|
10 |
4 |
The Thames |
George Scrivens |
Bring back the target Alive. |
£: 264 + 100 XP: 250 + 125 |
|
18 |
2 |
White Chapel |
Homer Dalton |
Bring back the target Alive. |
£: 132 XP: 200 |
|
1 |
8 |
Harrison Harley |
Bring back the target Alive |
£: 532 + 250 XP: 360 + 250 |
|
|
2 |
9 |
Wade Lynton |
Bring back the target Alive. |
£: 600 + 350 XP: 430 + 300 |