
Prima Games eGuides
primagames.com Browse Redeem a code Help
Dark Souls III eGuide (Steam)
Sign in My Guides

Sign in or create an account

We'll email you a link. No password needed, and if you don't have an account yet, the link makes one.

By creating an account or signing in, you agree to our Terms of Service and Privacy Policy.

Have a password?

Had an account on the old eGuides site, or a code from a printed guide? Help and troubleshooting

Sign in with a password

By signing in, you agree to our Terms of Service and Privacy Policy.

Check your email

A sign-in link is on its way. It works once and expires in 15 minutes. Open it and you're in, with an account if you didn't already have one.

Contents

  • Changelog
    • Updates
  • Introduction
    • A Spark Flickers
    • A World of Ash & Cinders
  • Controlling the Game
    • Overview
    • The HUD
    • Controls
  • Gameplay
    • Overview
    • Understanding Your Stats and Attributes
    • Creating Your Character
    • Character Builds
    • Your Build Is Not Your Class!
    • Archetypes
    • Choosing Equipment
    • Combat
    • Health and Survival
    • Deaths, Souls, and Leveling
    • Using Equipment
    • Upgrading Equipment
  • Additional Rules & Helpful Tips
    • Looting the Spheres of Bones
    • Bonus Luck
    • Burn the Leeches
    • Roll Mechanics
    • Matchmaking Details
  • Walkthrough
    • A Path Through Lothric and Beyond
    • Cemetery of Ash
    • Boss: Iudex Gundyr
    • High Wall of Lothric
    • Boss: Dancer of the Boreal Valley
    • Boss: Vordt of Boreal Valley
    • Undead Settlement
    • Boss: Curse-rotted Greatwood
    • Road of Sacrifices
    • Boss: Crystal Sage
    • Farron Keep
    • Boss: Abyss Watchers
    • Cathedral of the Deep
    • Boss: Deacons of the Deep
    • Catacombs of Carthus
    • Boss: High Lord Wolnir
    • Smouldering Lake
    • Boss: Old Demon King
    • Irithyll of the Boreal Valley
    • Boss: Pontiff Sulyvahn
    • Irithyll Dungeon
    • Profaned Capital
    • Boss: Yhorm the Giant
    • Anor Londo
    • Boss: Aldrich, Devourer of Gods
    • Consumed King’s Garden
    • Boss: Oceiros, the Consumed King
    • Untended Graves
    • Boss: Champion Gundyr
    • Lothric Castle
    • Boss: Dragonslayer Armour
    • Grand Archives
    • Boss: Lorian and Lothric
    • Archdragon Peak
    • Boss: Ancient Wyvern
    • Boss: The Nameless King
    • Kiln of the First Flame
    • All Possible Endings (SPOILER WARNING)
    • Boss: Soul of Cinder
  • Multiplayer and Covenants
    • Overview
    • Multiplayer Basics
    • Helping, Surviving, and Hunting Other Players
    • Covenants! Who Will You Serve?
  • Weapons, Armor, Magic, and Tools
    • Overview
    • Weapon Skills
    • Tools
      • Overview
      • Critical Items
      • Typical Consumables
      • Permanent Items
      • Basic Consumable Souls
      • Boss Souls
      • Covenant Items
      • Special Items
    • Materials
      • Overview
      • Enhancement
      • Infusion
      • Weapon Enhancement and Infusion Examples
    • Key Items
    • Spells
      • Overview
      • Sorcery
      • Pyromancy
      • Miracles
  • Equipment
    • Melee Weapons
      • Overview
      • Daggers
      • Straight Swords
      • Greatswords
      • Ultra Greatswords
      • Curved Swords
      • Curved Greatswords
      • Thrusting Swords
      • Katanas
      • Axes
      • Greataxes
      • Hammers
      • Great Hammers
      • Spears
      • Pikes
      • Halberds
      • Reapers
      • Whips
      • Fists
      • Claws
    • Ranged Weapons
      • Overview
      • Bows
      • Greatbows
      • Crossbows
    • Catalysts
      • Overview
      • Staffs
      • Pyromancy Flame
      • Talismans
    • Shields
      • Overview
      • Small Shields
      • Shields
      • Greatshields
    • Armor
      • Overview
      • Pharis’s Set
      • Hard Leather Set
      • Brigand Set
      • Lucatiel Set
      • Chain Set
      • Northern Set
      • Creighton Set
      • Iron Set
      • Sellsword Set
      • Drang Set
      • Undead Legion Set
      • Herald Set
      • Knight Set
      • Nameless Knight Set
      • Fallen Knight Set
      • Elite Knight Set
      • Alva Set
      • Drakeblood Set
      • Faraam Set
      • Sunset Set
      • Sunless Set
      • Brass Set
      • Favor Set
      • Eastern Set
      • Thorn Set
      • Catarina Set
      • Morne Set
      • Lothric Knight Set
      • Cathedral Knight Set
      • Winged Set
      • Outrider Knight Set
      • Pontiff Knight Set
      • Fire Witch Set
      • Dancer Set
      • Dark Set
      • Black Knight Set
      • Silver Knight Set
      • Dragonslayer Set
      • Wolf Knight Set
      • Smough Set
      • Lorian Set
      • Golden Set
      • Firelink Set
      • Black Iron Set
      • Executioner Set
      • Exile Set
      • Gundyr Set
      • Havel Set
      • Assassin Set
      • Black Hand Set
      • Black Leather Set
      • Shadow Set
      • Leonhard Set
      • Pale Shade Set
      • Black Set
      • Painting Guardian Set
      • Sorcerer Set
      • Clandestine Set
      • Old Sorcerer Set
      • Court Sorcerer Set
      • Karla Set
      • Dusk Set
      • Xanthous Set
      • Scholar Set
      • Sage Set
      • Pyromancer Set
      • Cornyx Set
      • Conjurator Set
      • Cleric Series
      • Maiden Set
      • Evangelist Set
      • Deacon Set
      • Archdeacon Set
      • Jailer Set
      • Prayer Set
      • Fire Keeper Set
      • Ragged Set
      • Worker Set
      • Grave Warden Set
      • Soldier Set
      • Thrall Set
      • Wolnir Set
      • Avarice Set
      • Dragon Set
    • Rings
    • Arrows & Bolts
      • Overview
      • Arrows
      • GreatArrows
      • Bolts
  • The Bestiary
    • Overview
    • Cemetery of Ash
    • High Wall of Lothric
    • Undead Settlement
    • Road of Sacrifices
    • Farron Keep
    • Cathedral of the Deep
    • Catacombs of Carthus
    • Smouldering Lake
    • Irithyll of the Boreal Valley
    • Irithyll Dungeon
    • Profaned Capital
    • Anor Londo
    • Consumed King’s Garden
    • Untended Graves
    • Lothric Castle
    • Grand Archives
    • Archdragon Peak
    • Dark Spirits
    • NPCs
  • NPC Questlines
    • Overview
    • Andre the Blacksmith
    • Anri and Horace
    • Cornyx the Pyromancer
    • Greirat
    • Hawkwood the Deserter
    • Irina of Carim
    • Eygon of Carim
    • Karla the Witch
    • Leonhard, The Ringfinger
    • Ludleth of Courtland
    • Holy Knight Hodrick
    • Orbeck of Vinheim
    • Shrine Handmaid
    • Unbreakable Patches
    • Rosaria
    • Siegward of Catarina
    • Sirris of the Sunless Realms
    • The Fire Keeper
    • The Giant of the Undead Settlement
    • The Nestling of Firelink Shrine (Snuggly the Crow)
    • Yoel of Londor
    • Yorshka
    • Yuria of Londor
  • Trophies and Achievements
    • Achievements
    • Gestures
  • Videos
    • Iudex Gundyr
    • Dancer of the Boreal Valley
    • Vordt of the Boreal Valley
    • Abyss Watchers
    • Deacons of the Deep
    • High Lord Wolnir
    • Pontiff Sulyvahn
    • Yhorm the Giant
    • Oceiros, the Consumed King
    • Dragonslayer Armour
  • Maps
    • Illustrated World Map
    • Cemetery of Ash
    • High Wall of Lothric
    • Undead Settlement
    • Road of Sacrifices
    • Farron Keep
    • Cathedral of the Deep
    • Catacombs of Carthus
    • Smouldering Lake
    • Irithyll of the Boreal Valley
    • Irithyll Dungeon
    • Profaned Capital
    • Anor Londo
    • Consumed King's Garden
    • Untended Graves
    • Lothric Castle
    • Grand Archives
    • Archdragon Peak
  • Artbook
    • NPCs
    • Enemies
    • Bosses
  • Credits
    • Legal

Dark Souls III Guide (Steam) › Walkthrough

Boss: Yhorm the Giant

Though Yhorm has two stages (like many bosses), they aren’t that relevant once you understand the mechanics of the battle. Storm Ruler is the key to everything. You can’t deal real damage without it, and even its regular attacks aren’t of any substantial value.

Instead, you charge the weapon (see the Controlling the Game chapter for details). Wait until the wind around the blade starts to burst with energy. Then, use your charged heavy attack to bring Yhorm the Giant to his knees. It only takes a few swings like that to silence him forever.
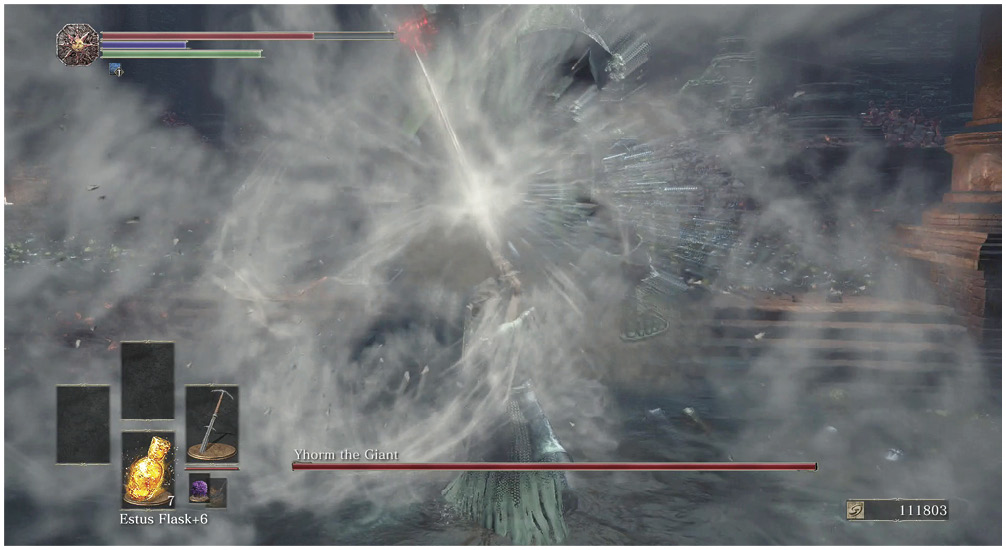
That’s the short version.

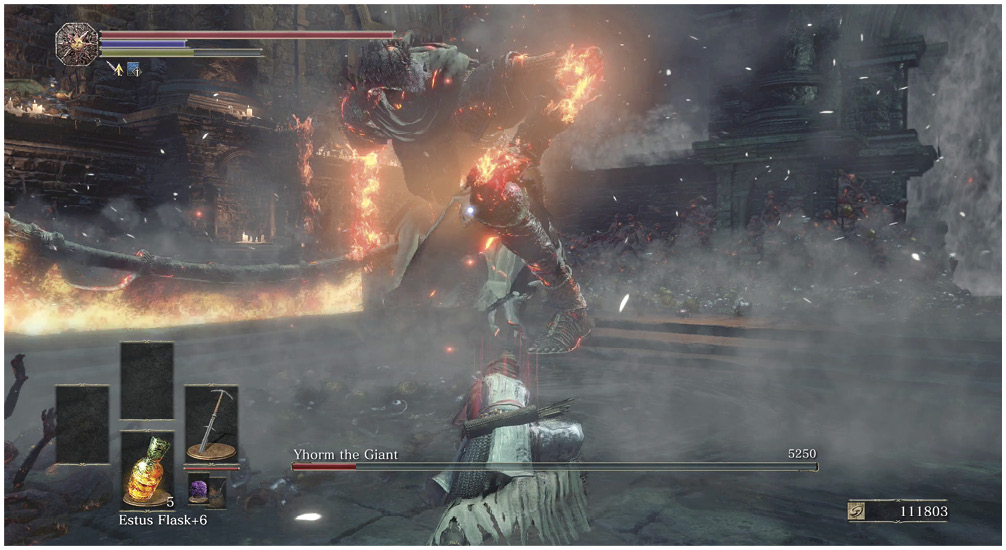
But Yhorm won’t take this lying down. He’ll still try to rip you in half with his humongous blade. He can destroy the pillars in the room, so you can’t count on them for cover. It’s safer to stand in the open and use dodge to get out of the way at the last minute. Yhorm telegraphs his attacks from across the room, so you always know when one of them is coming.

It’s okay to interrupt your Storm Ruler charging to dodge. In fact, it would be foolish not to. Yhorm has a long recovery time from his attacks, and he’ll be very vulnerable after each one. Don’t rush! This is a quick fight, even if you’re defensive.
With Yhorm dead, you’ve finished with the Profaned Capital (and the entire Irithyll Dungeon section of the game). You should now look into Anor Londo, at the far end of Irithyll. Or, you can start clearing out Lothric Castle, which is discussed in its own chapter.

Poison Abounds

You should watch the statues throughout the cathedral carefully. Many of them dispense poison that lingers in the area for a few moments. Sprint through these clouds to minimize your exposure.

Treasure That Bites

If you try to open this chest, it attacks you and deals high damage. This foe is a Mimic. Swing at the chest to damage it and get the drop on the nasty creature.

The Pilgrim

If you’ve been following Anri’s questline carefully up to this point, you can meet the mysterious Londor Pilgrim down the steps here, and your bride (or groom!) to be farther down the hall.

Keep reading with a free account

The first 3 sections of Dark Souls III eGuide (Steam) are open to everyone. An account opens the rest of it, and every other guide in the archive. It's free, and there's nothing to buy.

Bought guides on the old Prima Games site? Your account and every guide you own moved here, so there's nothing to buy again. Sign in.

Create a free account Or browse our free guides

PreviousProfaned Capital NextAnor Londo