
Dark Souls III Guide (Steam) The Bestiary
Undead Settlement
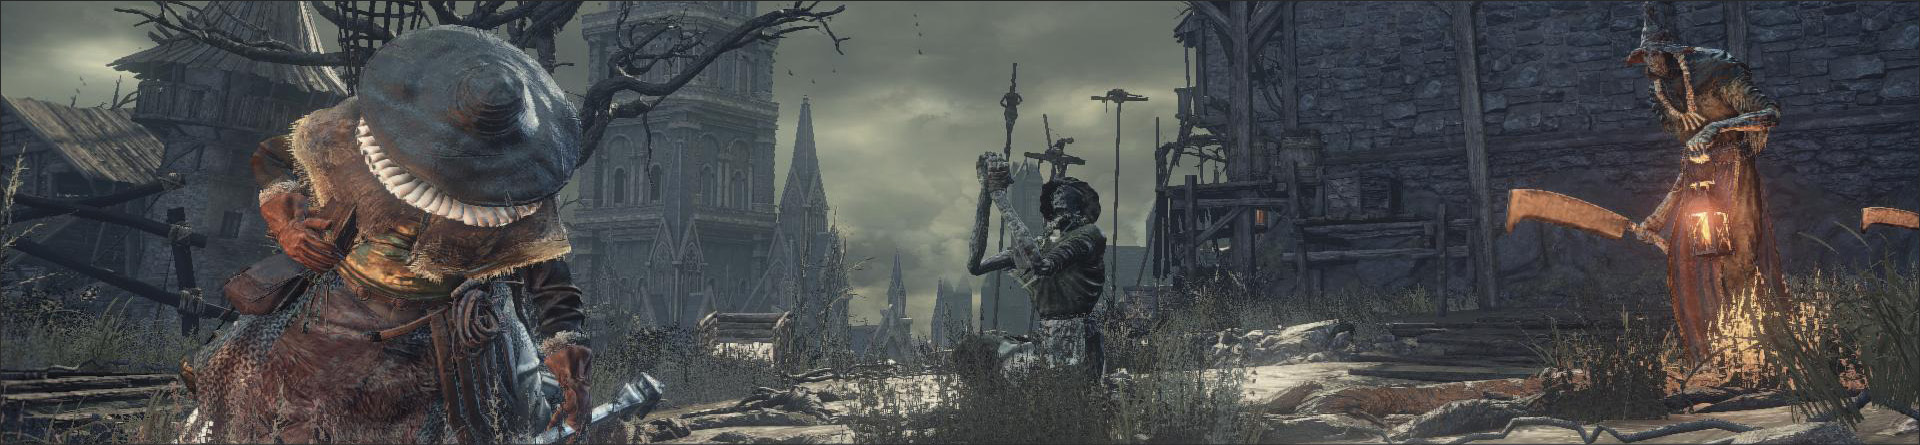
Enemy Data
| Name | HP | Souls | Item Drop | Special Ability | Weakness | Resistant to | Ineffective | Type & Effective Items |
|---|---|---|---|---|---|---|---|---|
| Undead Settlement Skeleton | 148 | 50 | Scimitar or Falchion/Human Pine Resin | None | Strike | Thrust/Lightning/Dark | Poison & Toxic/Bleed/Frost | Reanimated |
| Hollow | 78 | 0 | None | None | Poison & Toxic | None | None | Hollow/Alluring Skull/Rapport |
| Hollow Slave | 144 | 80 | Thrall Axe or Flamberge/Thrall Hood/Titanite Shard | None | Poison & Toxic | None | None | Hollow/Alluring Skull/Rapport |
| Cathedral Evangelist | 657 | 380 | Spiked Mace/Evangelist Hat/Evangelist Robe/Evangelist Gloves/Evangelist Trousers/Titanite Shard/Blessed Gem | Elemental Attack (Fire) | Thrust | Fire | None | Hollow/Alluring Skull/Rapport |
| Peasant Hollow | 153 | 60 | Harpe or Great Wooden Hammer or Four-Pronged Plow/Worker Hat/Worker Garb/Worker Gloves/Worker Trousers/Firebomb/Charcoal Pine Resin/Fire Gem/Rubbish | Elemental Attack (Fire) | Poison & Toxic | None | None | Hollow/Alluring Skull/Rapport |
| Hollow Manservant | 551 | 320 | Great Machete/Titanite Shard/Rubbish | Ailment (Bleed) | None | None | None | Hollow/Alluring Skull/Rapport |
| Boreal Outrider Knight | 654 | 1600 | Irithyll Straight Sword | Ailment (Frost) | Dark | Bleed | Poison & Toxic/Frost | None |
| Starved Hound | 167 | 40 | None | None | Fire | None | None | Hollow/Alluring Skull |
| Hound-rat | 111 | 30 | Soul of a Deserted Corpse | None | Slash/Fire | Poison & Toxic | None | Alluring Skull |
| Crystal Lizard | 79 | 0 | Sharp Gem(Fixed)/ Heavy Gem(Fixed) | None | None | Magic | Poison & Toxic/Bleed/Frost | None |
| Hound-rat (Large) | 334 | 450 | Bloodbite Ring(Fixed when defeated for the first time)/Large soul of a Deserted Corpse | None | Slash/Fire | Poison & Toxic | None | Alluring Skull |
| Giant Slave | 348 | 1000 | None | None | None | Slash/Thrust/Fire/Lightning | Poison & Toxic/Bleed/Frost | None |
| Demon | 1390 | 5000 | Fire Gem(Fixed) | Elemental Attack (Fire) | None | Fire/Poison & Toxic | Bleed/Frost | Demon/Alluring Skull/Rapport |
| Cage Spider | 135 | 40 | Fading Soul | None | Thrust/Lightning | Slash | None | Hollow/Alluring Skull/Rapport |
| Curse-rotted Greatwood | 5405 | 7000 | Soul of the Rotted Greatwood(Fixed)/Transposing Kiln(Fixed) | None | Slash/Thrust/Fire | None | Poison & Toxic/Bleed/Frost | Alluring Skull |
Peasant Hollow
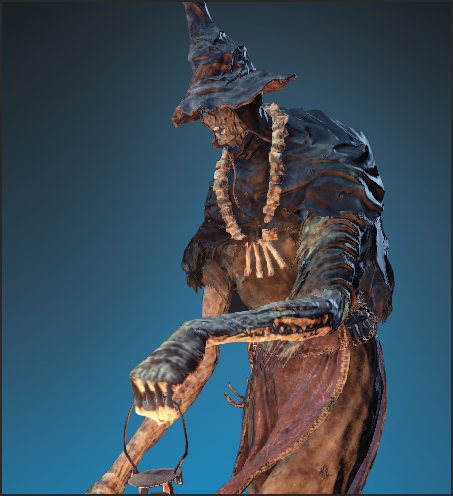
The main “citizens” of the Undead Settlement. These enemies are slow to attack, so you gain a great deal by seizing initiative against them. Move forward and attack before they’re ready to strike. You can engage them with a combo that is likely to score a kill without needing to dodge or block.
However, Peasant Hollows don’t come alone. They’re usually in small groups, but can appear in very large numbers in a few areas of the Undead Settlement. This is especially bad if they’re following a Cathedral Evangelist!
Always rush to thin the Peasant Hollows numbers. Attack around the periphery of the group, get a kill or two, and fade back to regain your Stamina while any survivors start to gather. Lure solo targets away with ranged weapons, and kill them on their own if you’re worried about being overwhelmed.
Cathedral Evangelist
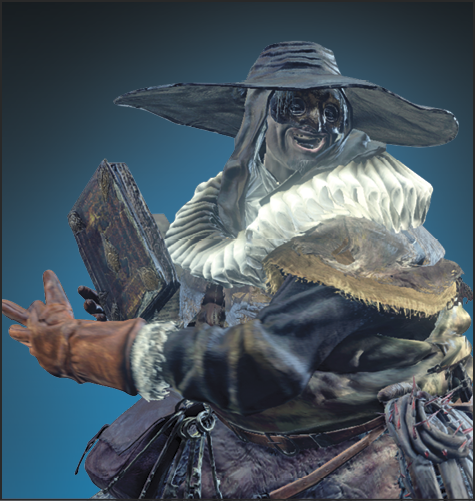
Cathedral Evangelists are religious leaders of the Undead Settlement. They have ranged magic and wide, sweeping melee attacks. Avoid their ranged attacks by dodging forward; the attacks track, but they can’t turn around to hit you. As long as you roll away, but toward them, you’re likely to avoid all of the damage.
The melee attacks are trickier. Alhough you see them from a mile away, it’s still intimidating to dodge through these huge swings. One trick to help with this is to back away, bait the Cathedral Evangelist’s spells, and then rush forward to get a free attack or two before they recover and go into melee mode.
Don’t try to burn these heavier enemies down in a single go. Kill any support they have before you try to do any damage against the bigger threat, and then use hit and run combos to get free hits without exposing yourself.
Hollow Slave
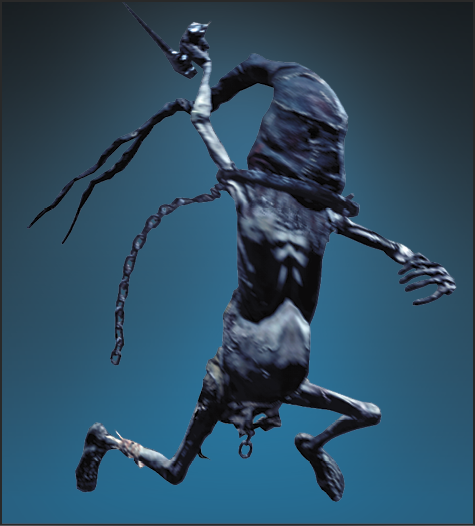
Hollow Slaves would be comical if they weren’t so dangerous. Tiny undead wearing masks, they lunge from the shadows with a range of weaponry, from tiny harvesting blades to massive over-large swords.
Hollow Slaves are weak defensively; their main threat comes from surprise, much like the Hollow Assassins of the High Wall. You can block their attacks fairly easily and dispatch them quickly, just be careful not to get surrounded in a confined space. Like packs of Starved Hounds, they are most dangerous in numbers and on unfavorable terrain.
At a distance, they can needle you with dart shots, which are annoying and fairly low damage, but can get you in trouble in a hurry if you’re trying to fight other enemies nearby. You can block these projectiles, or sprint past them if you’re far enough away.
Cage Spider
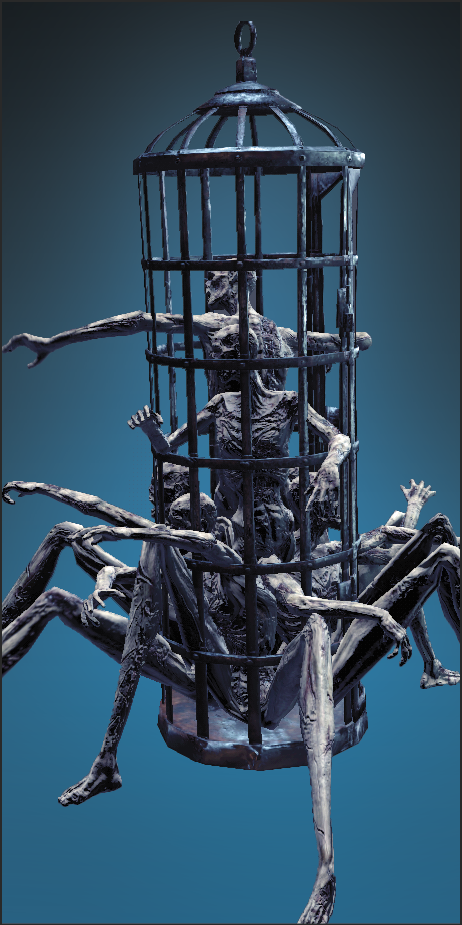
A horrific mix of undead bodies left imprisoned in a cage. The limbs dangling between the bars are used for locomotion and violent attacks.
These Cage Spiders are rarely threatening unless they manage to surprise you, since they move slowly and can be taken down quickly. Dispatch them safely from a distance, or strike with a few hard swings and back off before the monster can retaliate.
One trick to watch out for, the Cage Spiders often appear near other ”dead” cages, just look at their coloration and the legs sticking out to spot the real ones, or use target-lock to acquire a target.
Hollow Manservant
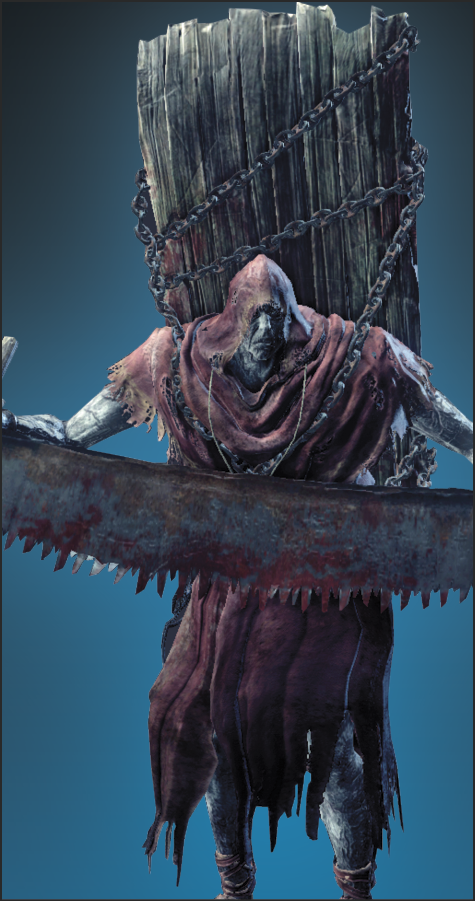
Hollow Manservants are large and mean. They either attack with their heavy saws or use clay pots. Both have the ability to knock down your character, leaving you exposed to additional strikes if you don’t get up with a fast roll.
Always be cautious against Hollow Manservants. Bait their combos and punish them with two hits while they’re recovering from their repeated strikes. It’s better to retreat early, because these foes do massive damage and can kill you very quickly if you try to trade blows with them.
If any other targets are near a Hollow Manservant, make sure to lure them away with ranged attacks. You never want to fight these enemies while anything else is around to distract you.
Hound-rat
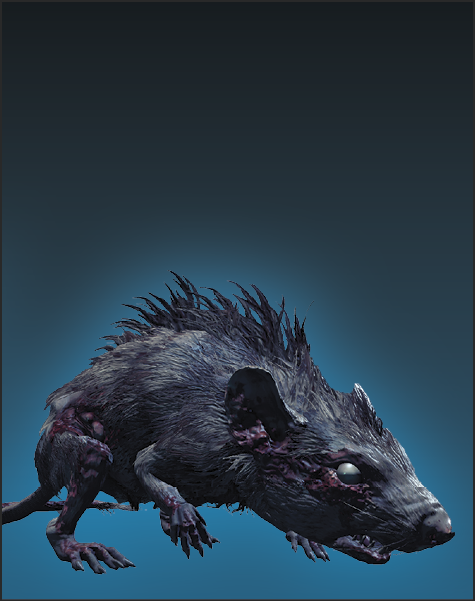
Hound-rats are a trivial threat. They have speed on their side, and usually attack in small packs, but you can destroy their groups easily with even minor damage. Wide, sweeping weapons are very good against them. Anything with range is also quite powerful.
If a Hound-rat pack starts to surround you, roll back, and then sprint away. Once a pack has good positioning, they can disrupt you again and again while you try to get even a single strike back against them.
Also, keep a shield out when you’re dealing with Hound-rats. They have a leaping charge that is hard to avoid unless you already have a shield held high.
Large Hound-rat
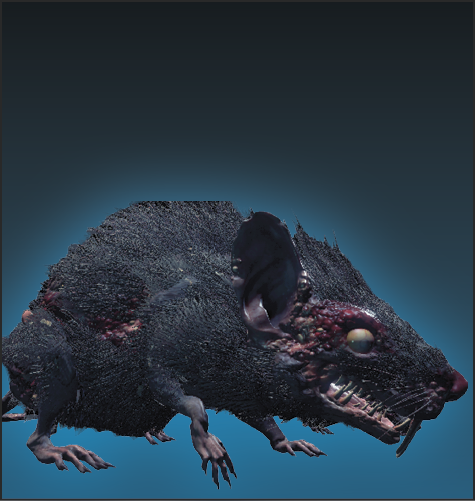
Large Hound-rats are much worse than their smaller companions. They have higher health and give you plenty of Bleed damage if you aren’t careful. You can always put on items to increase your Bleed Resistance, but that’s not actually necessary. You’re better off ambushing and killing Large Hound-rats before they’re able to get many attacks against you. One extended combo is usually enough to get the job done.
Skeleton
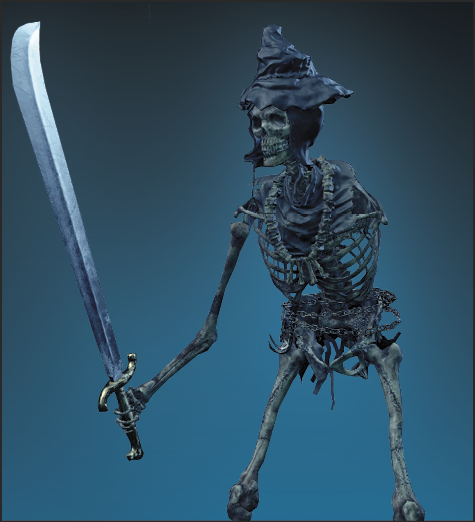
Skeletons are seen several times throughout the game. They’re weaker targets, on their own, but tend to appear in clusters. They attack with short-range melee weaponry unless you’re dealing with ones that spawn with bows. These archer Skeletons are always in the same locations, so you’re able to learn where they are each time you enter a new region.
For melee Skeletons you want to back up until you find a chokepoint. Let a group of these creatures file into a bottleneck, and then you should hit them with a combo to kill the entire group simultaneously.
When there are mixed groups of ranged and melee Skeletons, look for columns or other types of cover that break line of sight. Hide and pull the melee Skeletons over to your location.
Demon
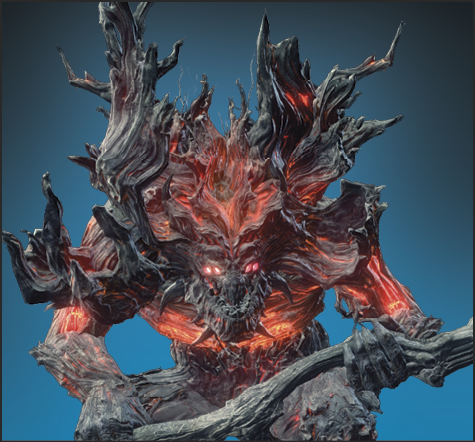
The Demon in the Undead Settlement is another unique enemy. As long as Siegward is alive, he’ll come down the hill to assist you in your battle against this mini-boss, but it’ll be a dangerous fight regardless.
You don’t need to dodge often against the Demon, but you can’t afford to miss the mark when you do! This enemy has slow, heavy attacks that lay people out. Roll multiple times if you dodge too early, and hope that the timing works out well enough for the second dodge to avoid the hits.
You can get fairly greedy with your return combos after the Demon misses. Keep enough Stamina free to roll away from it, but otherwise go to town and get heavy damage while you can.
Boreal Outrider Knight
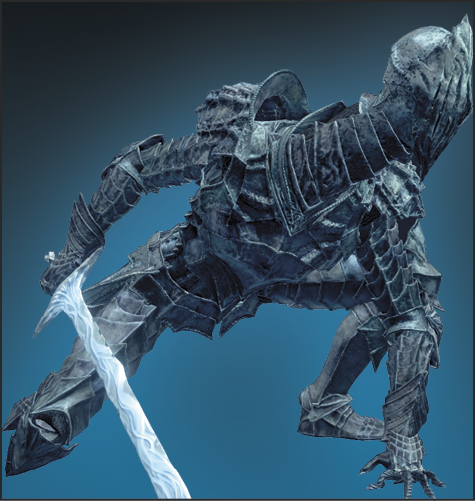
Boreal Outrider Knights are uncommon enemies. You find them in a few locations throughout Dark Souls III, and they’re always intended to be vicious combatants. In fact, they are unique targets that only need to be killed once per playthrough, so put everything into your skirmishes against them.
Boreal Outrider Knights have Frost effects on all of their attacks, which make it very difficult to stay mobile in longer fights. You’re especially in bad shape if you try to engage in longer combos against them. Spells and ranged weapons are preferable.
Until you have the Boreal Outrider Knight at low health, keep defense as your primary focus. It’s possible to be taken out from 100% health if you are hit by their combos, so only trade attacks if you’re almost at the end of the fight and just need another hit or two for the kill.
If you’re really having problems, use a few ranged attacks, pull the Boreal Outrider Knight back through cleared territory, and wait for them to give up the chase. Then, follow them and repeat this slow but effective tactic.