
Call of Duty: Infinite Warfare Guide Multiplayer Scorestreaks
Streaks
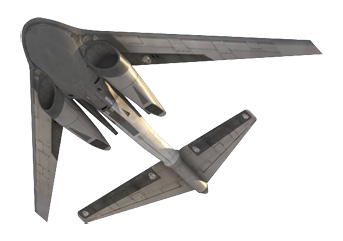
UAV
Score: 400
UAV Recon ship that reveals enemy locations on the map.
While active, the UAV provides radar sweeps on your minimap for your entire team, revealing enemy positions.
Enemies with the Ghost perk are hidden from sweeps, and enemies with the Recon perk can tap into your UAVs, so be aware of both risks when you use the UAV.
UAVs are extremely powerful, and despite their low cost, this should be considered one of your ‘default’ streaks for almost any game mode you play.
UAVs can pave the road to higher streaks, both earning you support points for teammate kills while it is active, and giving you the positional intel needed to stay alive long enough to earn them.
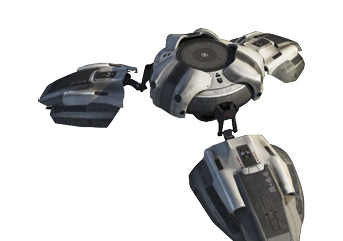
Scarab
Score: 450
A remote hover device that .releases highly volatile fragments upon detonation.
A remotely controlled explosive hover drone, the Scarab can be used to chase down and eliminate targets while you are safely hidden in a dark corner.
You can jump and boost while controlling the Scarab, giving you .the ability to cross gaps and perform a final speedy lunge to reach your target.
The Scarab can be destroyed, so try to avoid moving across large stretches of open ground. Stick to confined spaces with a lot of cover and you can close on your target before they are aware of the threat.
Because the Scarab takes you out of combat, time your usage of it carefully. In objective modes, taking yourself out of action in a time sensitive situation is a bad idea.
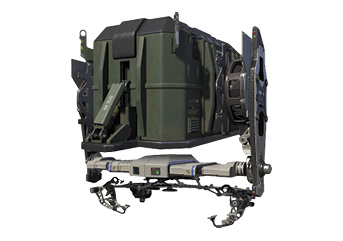
Drone Package
Score: 550
Automated drone that will deliver a random care package to your location.
The Drone Package calls in a care package containing a .random scorestreak.
Amusingly, the Drone Package is a polite delivery service that will bring your package anywhere on a map, even indoors. Once deployed, it lands and then flies automatically to the area you targeted as the DZ.
Note that while it is quite helpful that the Drone Package can deliver your package right to you, enemies can and will track and follow the package, so be careful if you’re using it near the front lines!
You can easily use packages as bait. Place them in exposed areas and let enemies try to steal them. Then pick them off when they do. Free points and a package is even better than a package alone.
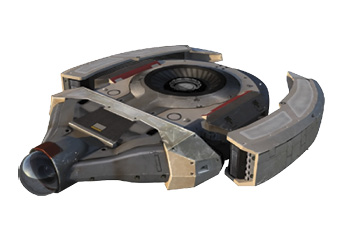
Counter UAV
Score: 600
Emits a jamming signal that disables the enemy minimap.
A very useful counterintel streak, the Counter UAV shuts off enemy radar for players without the Hardwired perk.
This gives you the ability to shut down enemy UAV usage, and it can be used as a sort of makeshift Ghost and Suppressor in one package, shutting down the ability for the enemy to locate you or your teammates with their radar.
Taking UAV and Counter UAV both is an excellent setup for supporting your team.
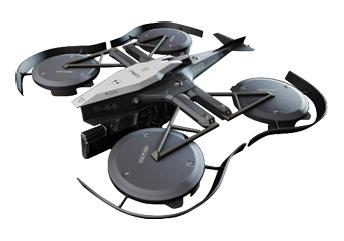
Vulture
Score: 700
A companion drone that protects .your six.
The Vulture is an automated combat drone that automatically targets and fires at any nearby enemies with its guns.
It takes a brief moment for the Vulture to track and lock on to enemies, so don’t rely on the Vulture to protect you from fast moving ambushes, but it can both warn and defend you against enemies that you don’t spot.
The Vulture is relatively fragile; it can be destroyed with basic weapons fire fairly easily.
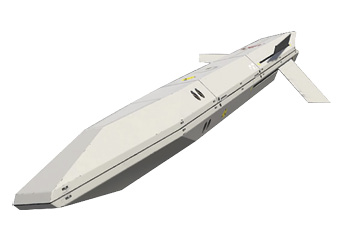
Trinity Rocket
Score: 750
A large orbital cruise missile with boost capabilities that houses two additional projectiles.
A triple-firing missile that you can manually guide from above. The two extra missiles can be fired as you guide the primary down to the ground, and they automatically track and target enemy players who lack the Blind Eye perk.
You can activate the thrusters on the primary missile to speed its descent to the ground, a good idea to do immediately after you launch your first two missiles.
If you are playing on a map with a lot of cover, you may want to slow your descent and pick your targets more carefully, to avoid sending all three missiles harmlessly into rooftops.
It’s possible to kill targets indoors by landing the last missile directly outside a door or window. The resulting blast can eliminate nearby targets, and if you’re very precise, you can even steer it just inside a door.
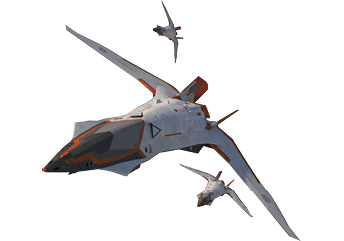
Scorchers
Score: 800
Call in three prototype Scorcher jets for a laser strafing run.locations on the map.
Activating the Scorchers streak gives you a targeting view of the map, and you can choose a target for the strafing run, as well as the angle from which the Scorchers attack.
Try to line up the Scorchers so they cover the most open ground possible, with as little of the run targeting inaccessible areas of the map or rooftops as possible.
Once targeted, the Scorchers arrive extremely quickly and lay down a devastating wall of laser fire, eliminating any targets caught in the open.
Scorchers work best on open terrain, and particularly on objectives in the open. Clearing out a targeted area so teammates can move in to secure an objective works well, but keep in mind the effectiveness of the Scorchers is going to vary, depending on the map and the mode.
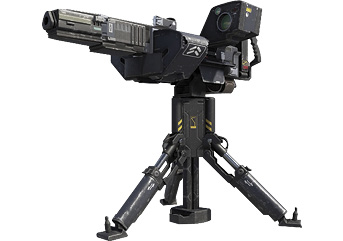
Shock Sentry
Score: 900
Turret fires electrically charged rounds, inflicting damage to the target and nearby enemies.
A powerful automated turret, the Shock Sentry can completely lock down an area of the map for an extended period of time.
Once placed, the sentry automatically aims and fires at any enemy in a very wide frontal arc, though it won’t target players with Blind Eye or in smoke.
The sentry’s shots also arc electricity to other enemies near the target, granting it the ability to cook groups of players who are incautious and move as a group near an active Shock Sentry.
If you know an enemy sentry is covering an area, don’t stand near teammates who are near its line of sight, even if you are out of view in cover, you can get killed!
Use the sentry to cover objective areas or block off flanking routes. Carefully placed, a sentry is very difficult to remove without the Blind Eye perk—and if you’re actively protecting your sentry, even then.
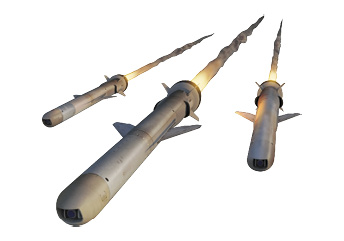
Bombardment
Score: 850
Weapons satellite bombardment.
Bombardment calls down a massive satellite strike on three targeted areas. You can target all three in close proximity to each other to saturate one part of the map, or spread them around to pinpoint different open areas of the map.
The bombardment strike triggers highly visible targeting circles on the ground, so alert enemies can react and get out of range in time to avoid the blast.
The trick is to target the bombardment in areas where the enemy cannot avoid the blast—either by spreading the three target zones next to each other in a narrow lane so there’s no way to escape the blast, or targeting them over a critical objective, leaving your opponents with the choice of leaving the objective or dying to the bombardment.
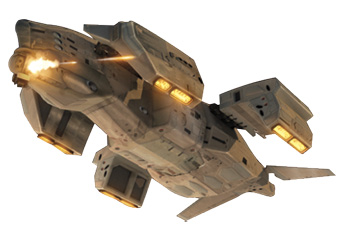
Warden
Score: 1100
Call in an escort dropship with two firing modes.
The Warden is a hovering support combat ship, automatically targeting hostile players below and eliminating them quickly.
The Warden can be set to either patrol the map, following you as you move, or set to guard a specific area.
Setting the Warden on guard over an objective can be effective, but keep in mind that setting the Warden to stationary does make it a slightly easier target for hostile anti-vehicle launchers.
The Warden works best in open terrain. When there is a lot of overhead cover, players can hide out from its seeking turrets.
Because players tend to naturally seek out interior areas to hide from the Warden when it is called in, making a push into those areas to flush them out and score kills can be effective.
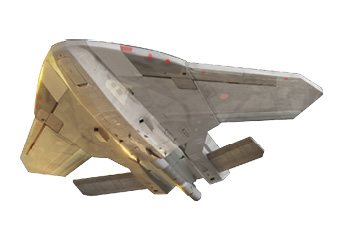
Advanced UAV
Score: 1250
Orbital UAV that reveals the enemy’s direction on the minimap.
An upgraded UAV, the AUAV provides perfect positional and directional information on all enemy players. You can see not just their location, but exactly where they are facing, making it incredibly easy for you and your team to get the drop on enemy players.
The AUAV is an extremely strong streak, and while active, it’s not uncommon to go on a run against the enemy team, generating more scorestreaks for everyone on your team.
You can shut down the AUAV with a Counter UAV, or it can be destroyed, but taking it down with launchers requires you to begin locking on and firing on it almost immediately after it is called in, due its speed and the number of shots it takes to destroy it.
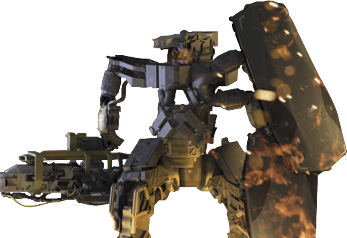
R-C8
Score: 1450
Heavily armored C8 with auto and manual control capabilities.
The massive R-C8 is a combat robot, built for destruction. Once deployed (after a spectacular arrival from orbit), it can either be left on automatic, or you can take full manual control.
The R-C8 is armed with a powerful energy weapon and a shield that .can be used to block incoming fire.
Manually controlled, it is extremely lethal, but if you are focused on objectives, you can also leave it on automatic and let it roam on .its own.
Another option is to use it on auto, but follow it closely, picking off players that try to fight it. This is a good way to protect the R-C8 from Blind Eye-equipped players, though of course you can deal with them yourself if you’re piloting the robot.
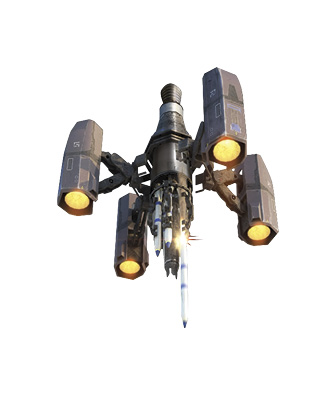
T.H.O.R.
Score: 1300
Tactical High Output Response .missile system with rapid .launching capabilities.
The T.H.O.R. is a powerful orbiting missile platform that gives you direct control and allows you to launch missiles in two different patterns.
The first is a guide barrage of five missiles that follows your target reticle. You can use this to saturate an area with explosions, and track targets as they flee or try to move into interior areas.
The second allows you to launch the missiles individually and unguided. This launch method potentially allows more kills, as you can split up the rockets and target more enemies, but because you are firing them unguided, scoring kills on maps with a lot of cover can be tricky.
Switch modes depending on the map and the angle that the T.H.O.R. is orbiting at the moment. You can also hold the Grenade Toss button to cause the T.H.O.R. to speed up its orbit, getting you into position to bombard your enemies more effectively.
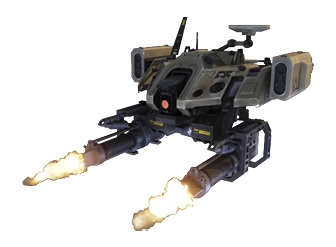
AP-3X
Score: 1550
A remotely controlled antipersonnel experimental drone.
The AP-3X is a hovering antipersonnel drone that can be manually controlled. While piloting the Apex, you can float up or down, allowing you to make use of cover around the map to protect yourself from enemy players.
The AP-3X is armed with missiles and rapid fire guns, and it .can eliminate enemy players and even destroy other streaks extremely quickly.
As the AP-3X is both sturdy and ferociously powerful with its cannons and missiles, if you are careful and use terrain well to avoid taking excessive damage, you can go on long killstreaks with it.
Avoid hovering high above the map or floating out into the open because, while the AP-3X is tough and deadly, it can be taken down by combined small arms fire, so try to avoid exposing your position while piloting it.
If you are confronted with an enemy AP-3X, using offensive Rig supers that deal good damage against scorestreaks is your best option for eliminating it swiftly. Failing that, a loadout with an FMJ or Ram Servo LMG and a launcher can also work, but you usually need more time on target to destroy it.