Call of Duty: Infinite Warfare Guide Call of Duty 4: Modern Warfare Multiplayer Map Tactics
Countdown
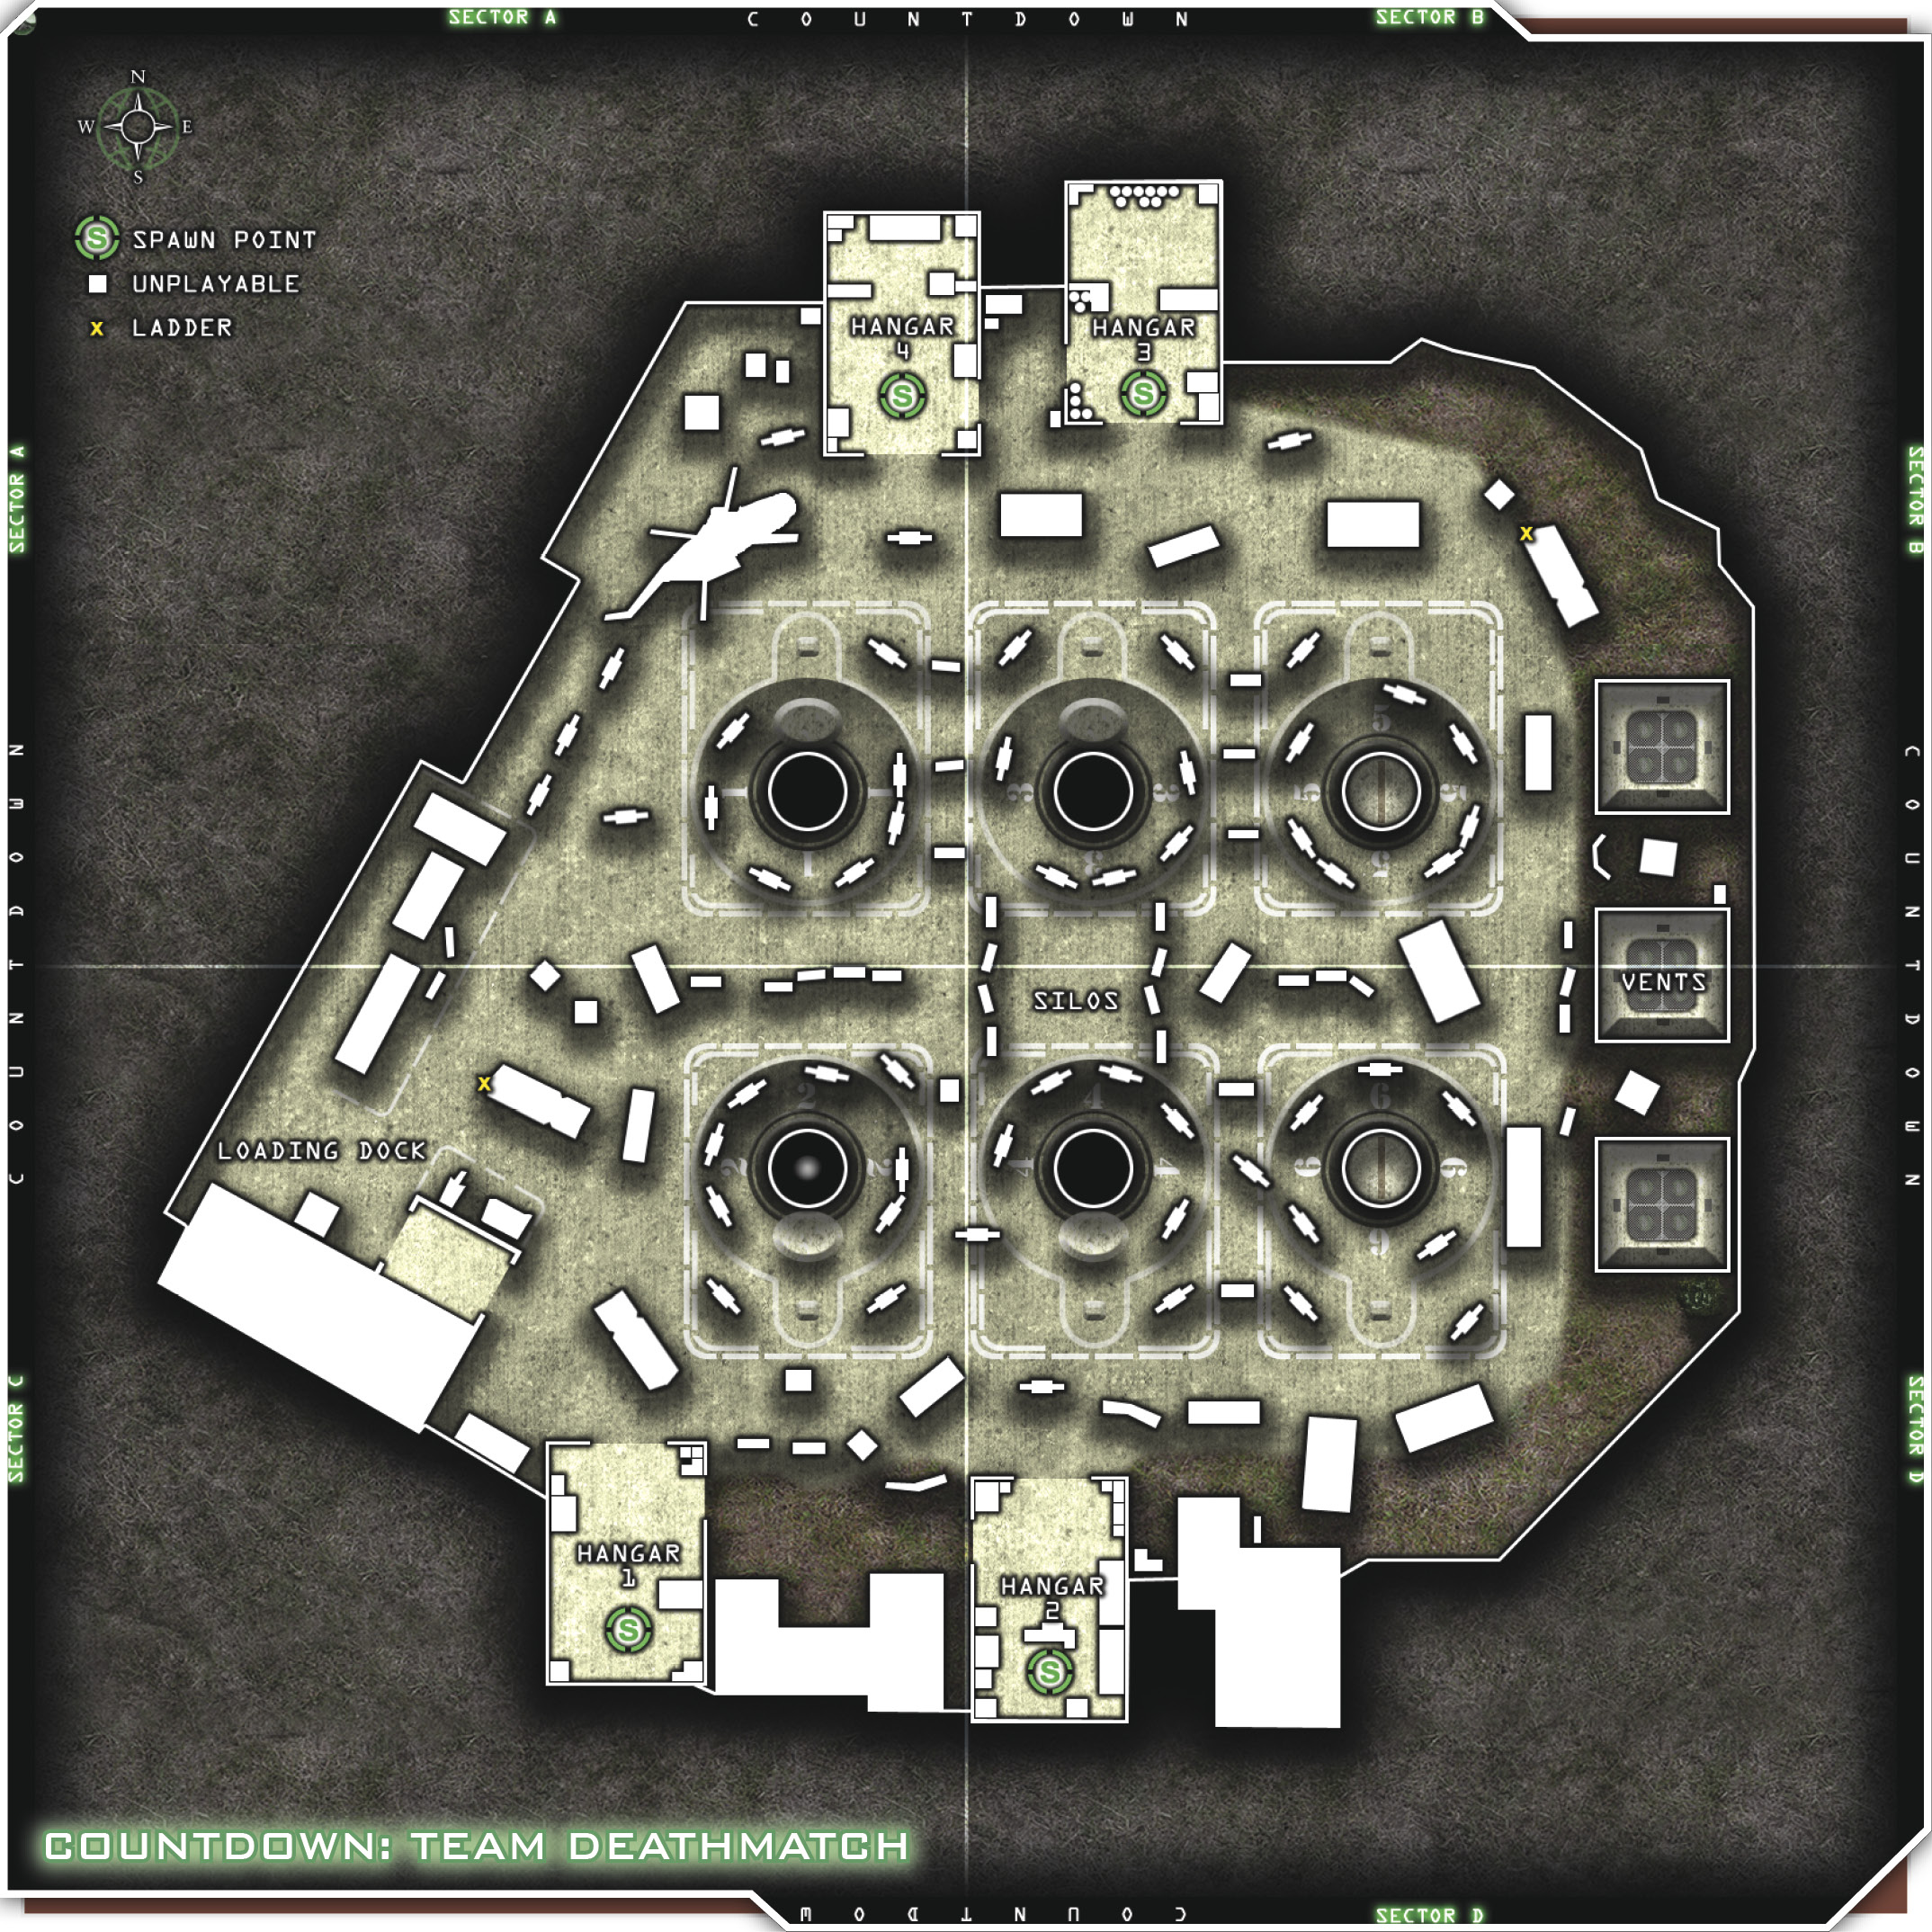
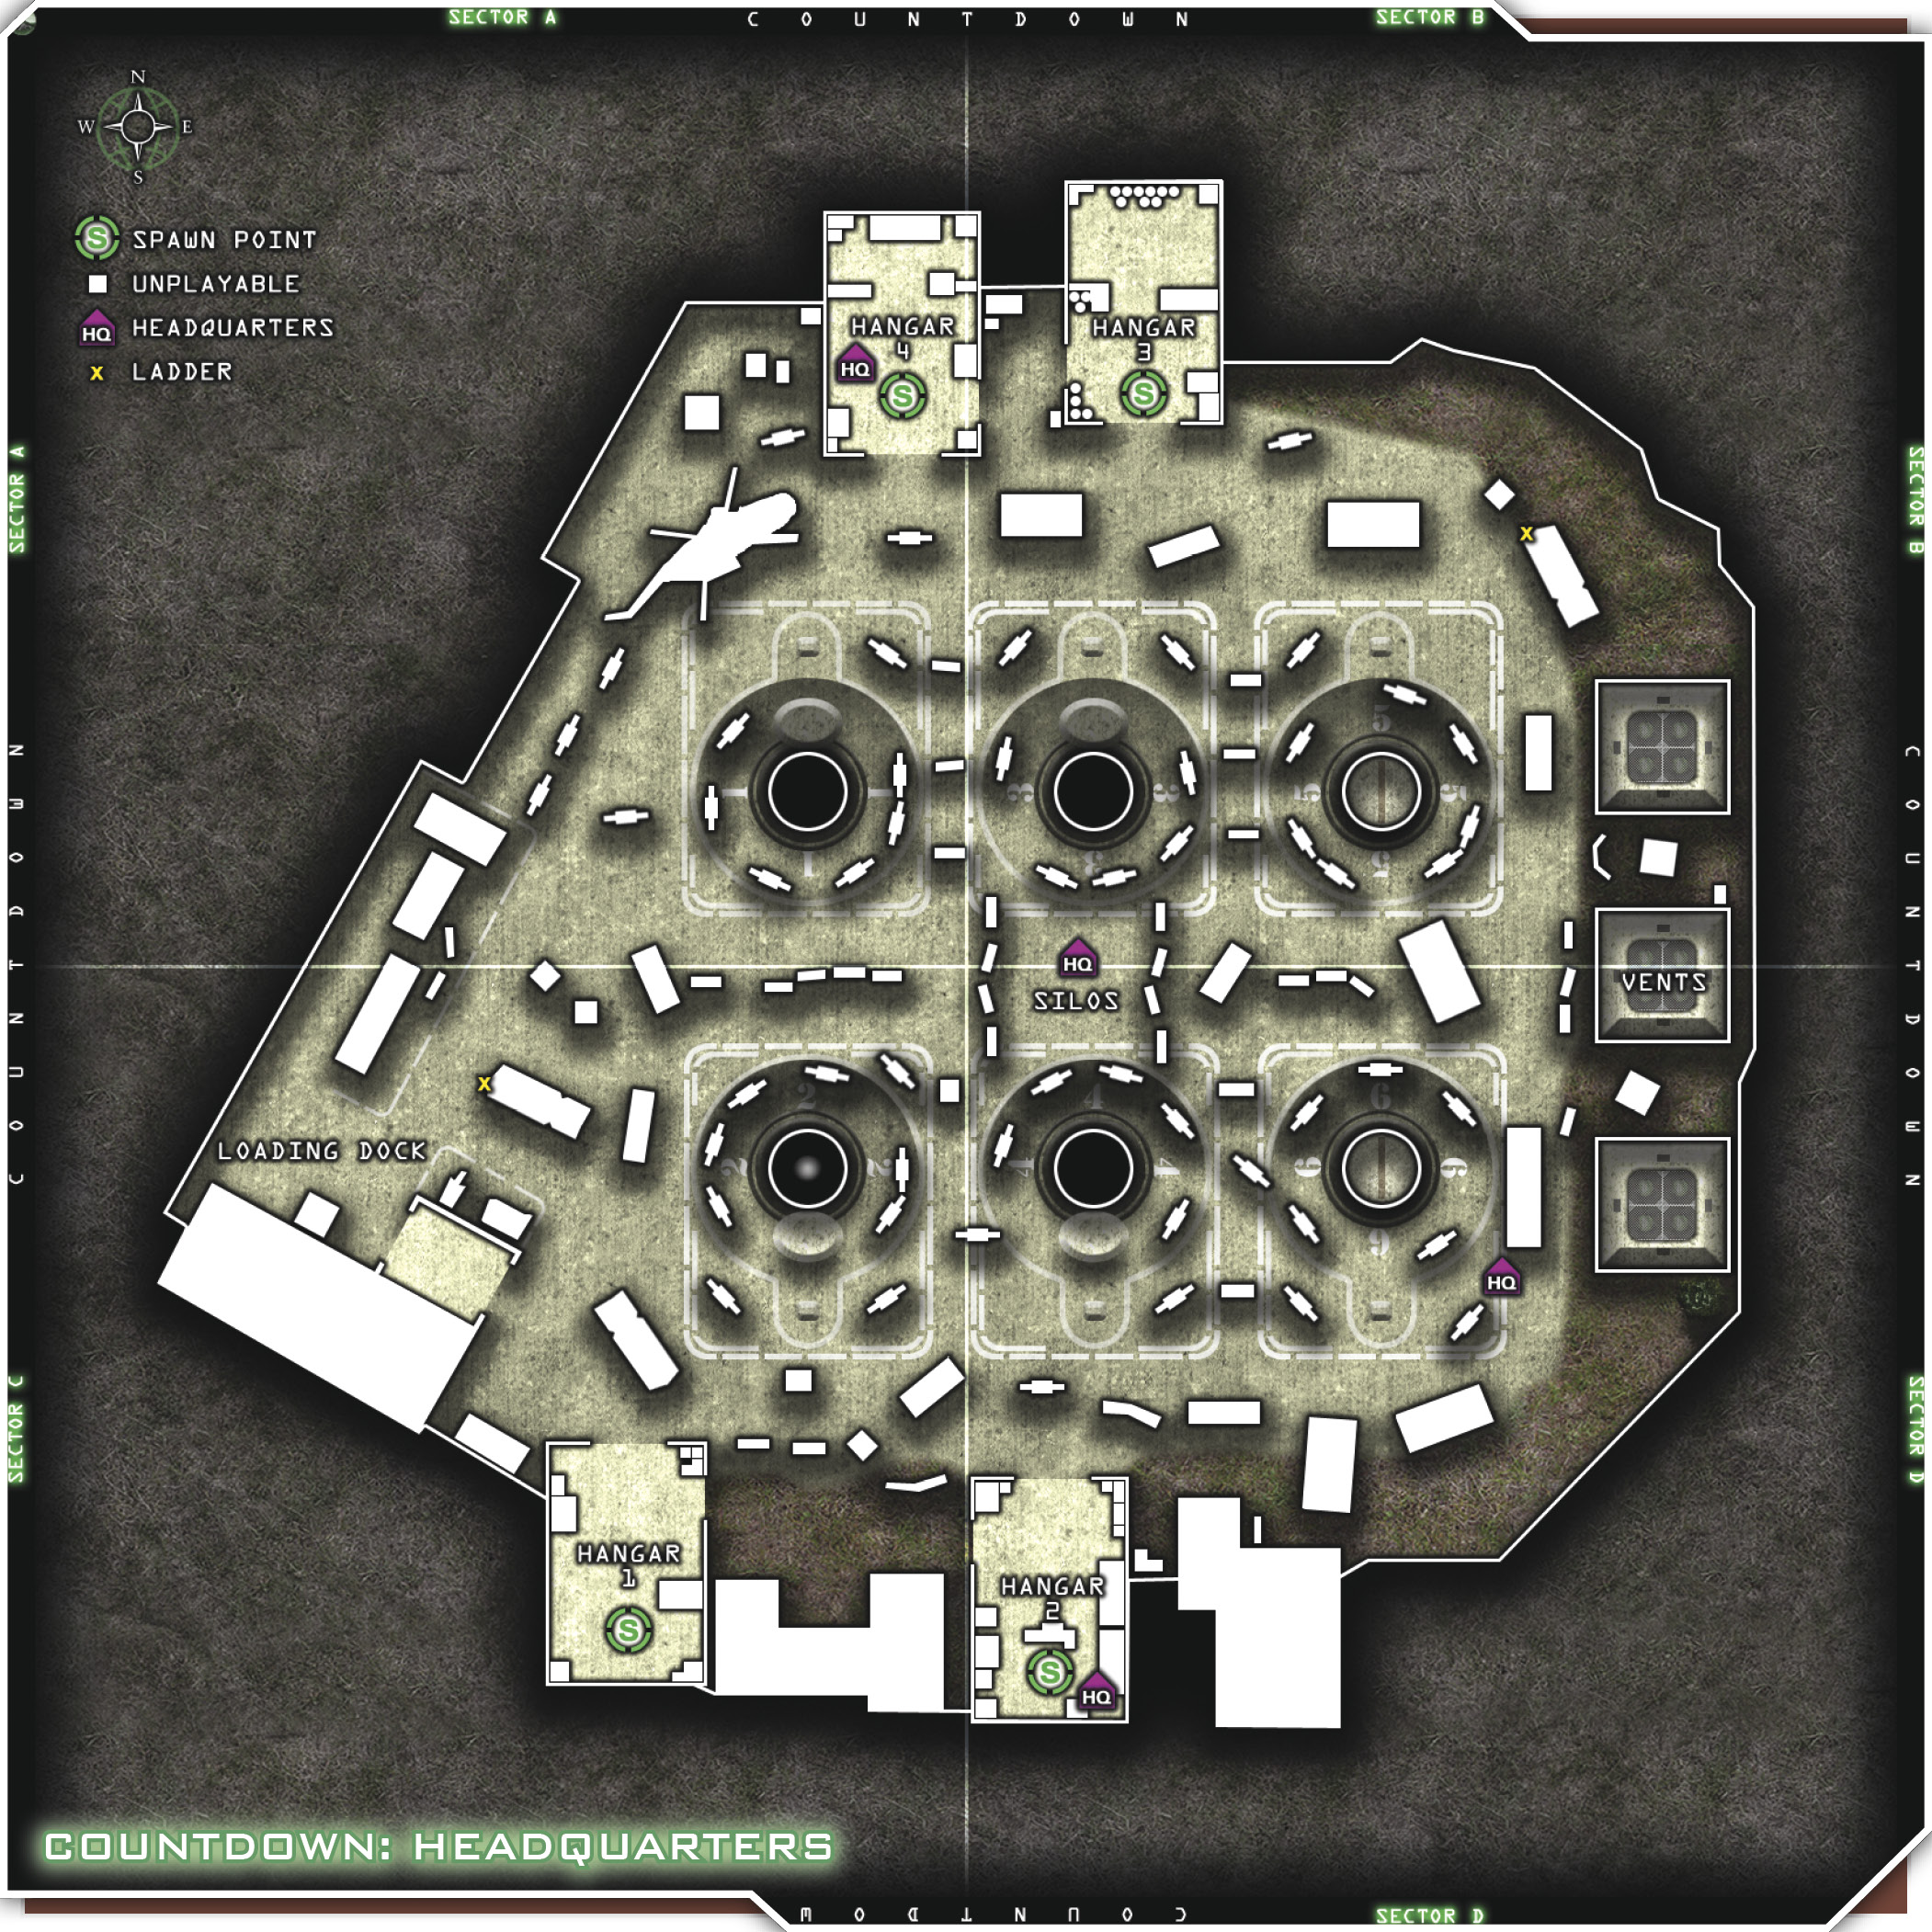
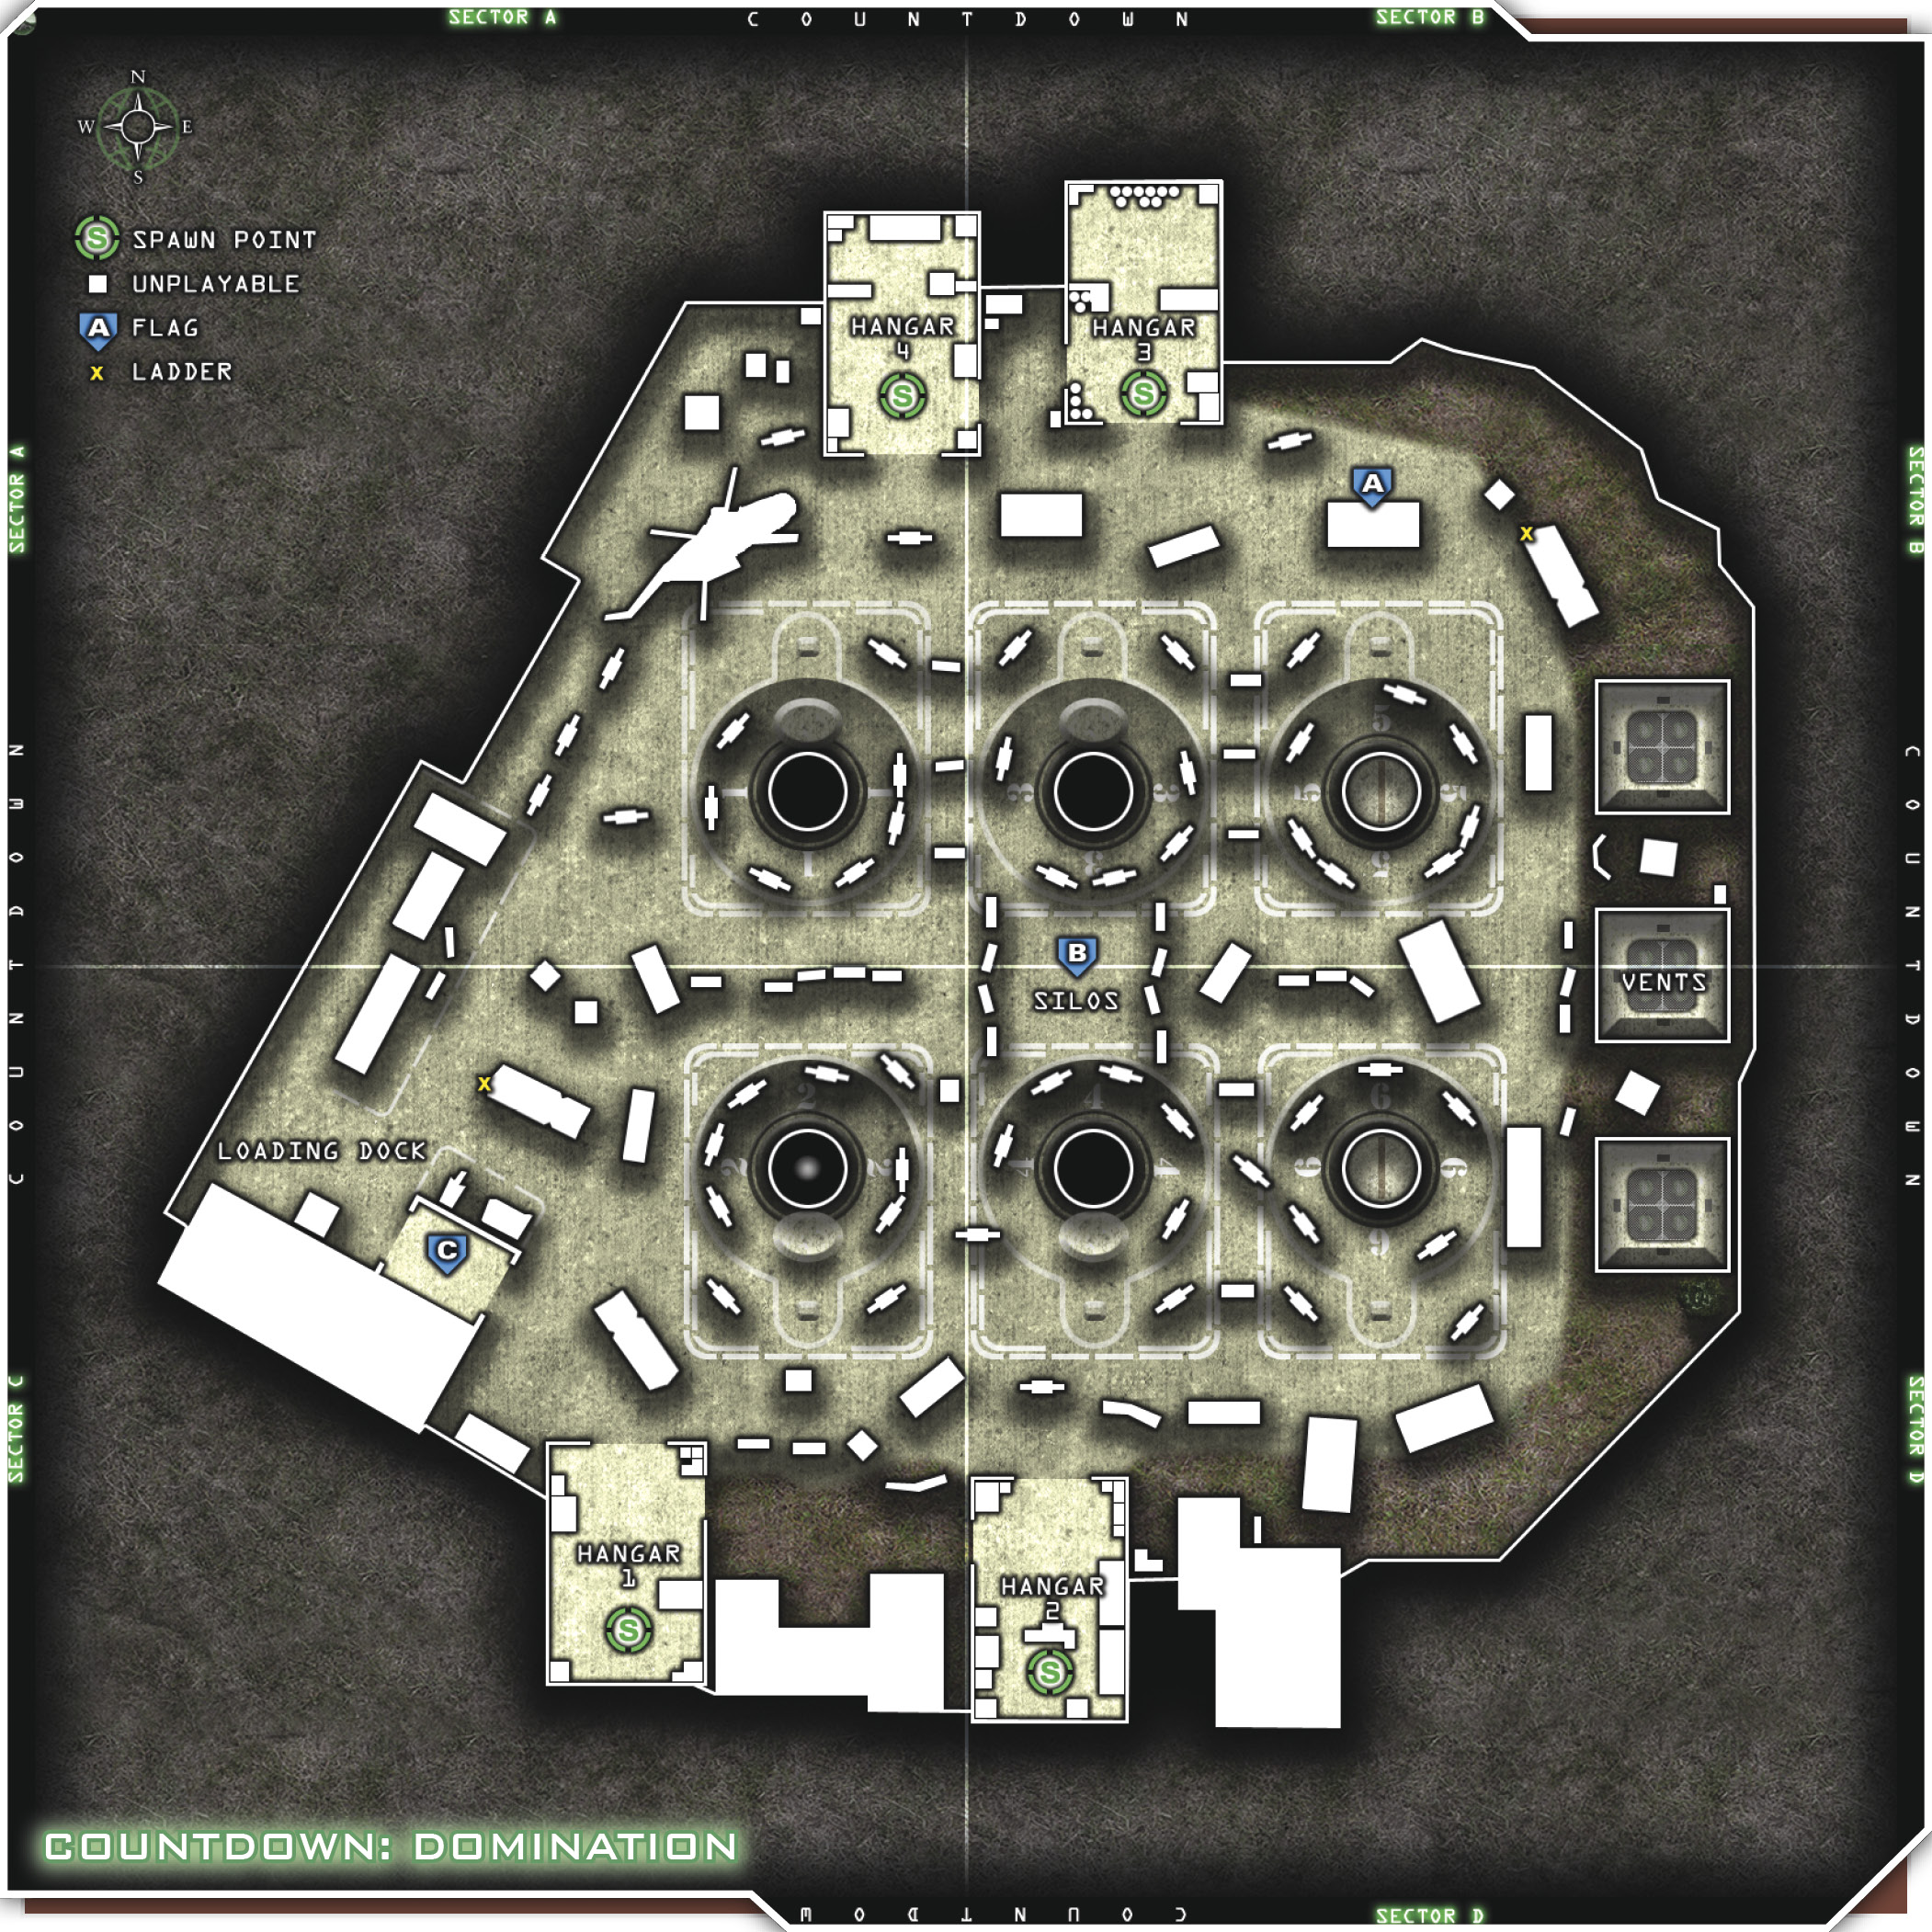
U.S. Forces vs. OpFor. A freshly used missile launch site, Countdown has six underground missile Silos dead center on the map. There are three launch doors open (you can fall to your death) and one with a missile ready to launch. The smoke and steam coming off these Silos is great cover. There are two large Hangars on the north and south sides of the level that can provide good cover as well, and two trucks with ladders for sniping.
These loadouts are just a couple of choices you have on this map. Deep Impact combined with Stopping Power will allow you to eliminate enemies even behind the many concrete barriers on this map. Use frags to get rid of any pesky enemies that you can’t get a bead on.
The Sniper kit should be used by more advanced snipers, because you’ll need patience and good timing. Climb up the trucks to get some elevation, or tuck into the Hangars while surrounding yourself with your Claymores. Extreme Conditioning will allow you to move from cover to cover with the help of your smoke grenades.
Suggested Loadouts
Long-Range Assault
| Slot | Name |
|---|---|
| Primary Weapon | MP44 |
| Notes/Attachment | ACOG Scope |
| Side Arm | M9 |
| Special Grenade | Smoke |
| Perk 1 | Frag x3 |
| Perk 2 | Stopping Power |
| Perk 3 | Deep Impact |
Sniper
| Slot | Name |
|---|---|
| Primary Weapon | Barrett .50 cal |
| Side Arm | M1911 |
| Special Grenade | Smoke |
| Perk 1 | Claymore x2 |
| Perk 2 | Stopping Power |
| Perk 3 | Extreme Conditioning |
Tips & Locations
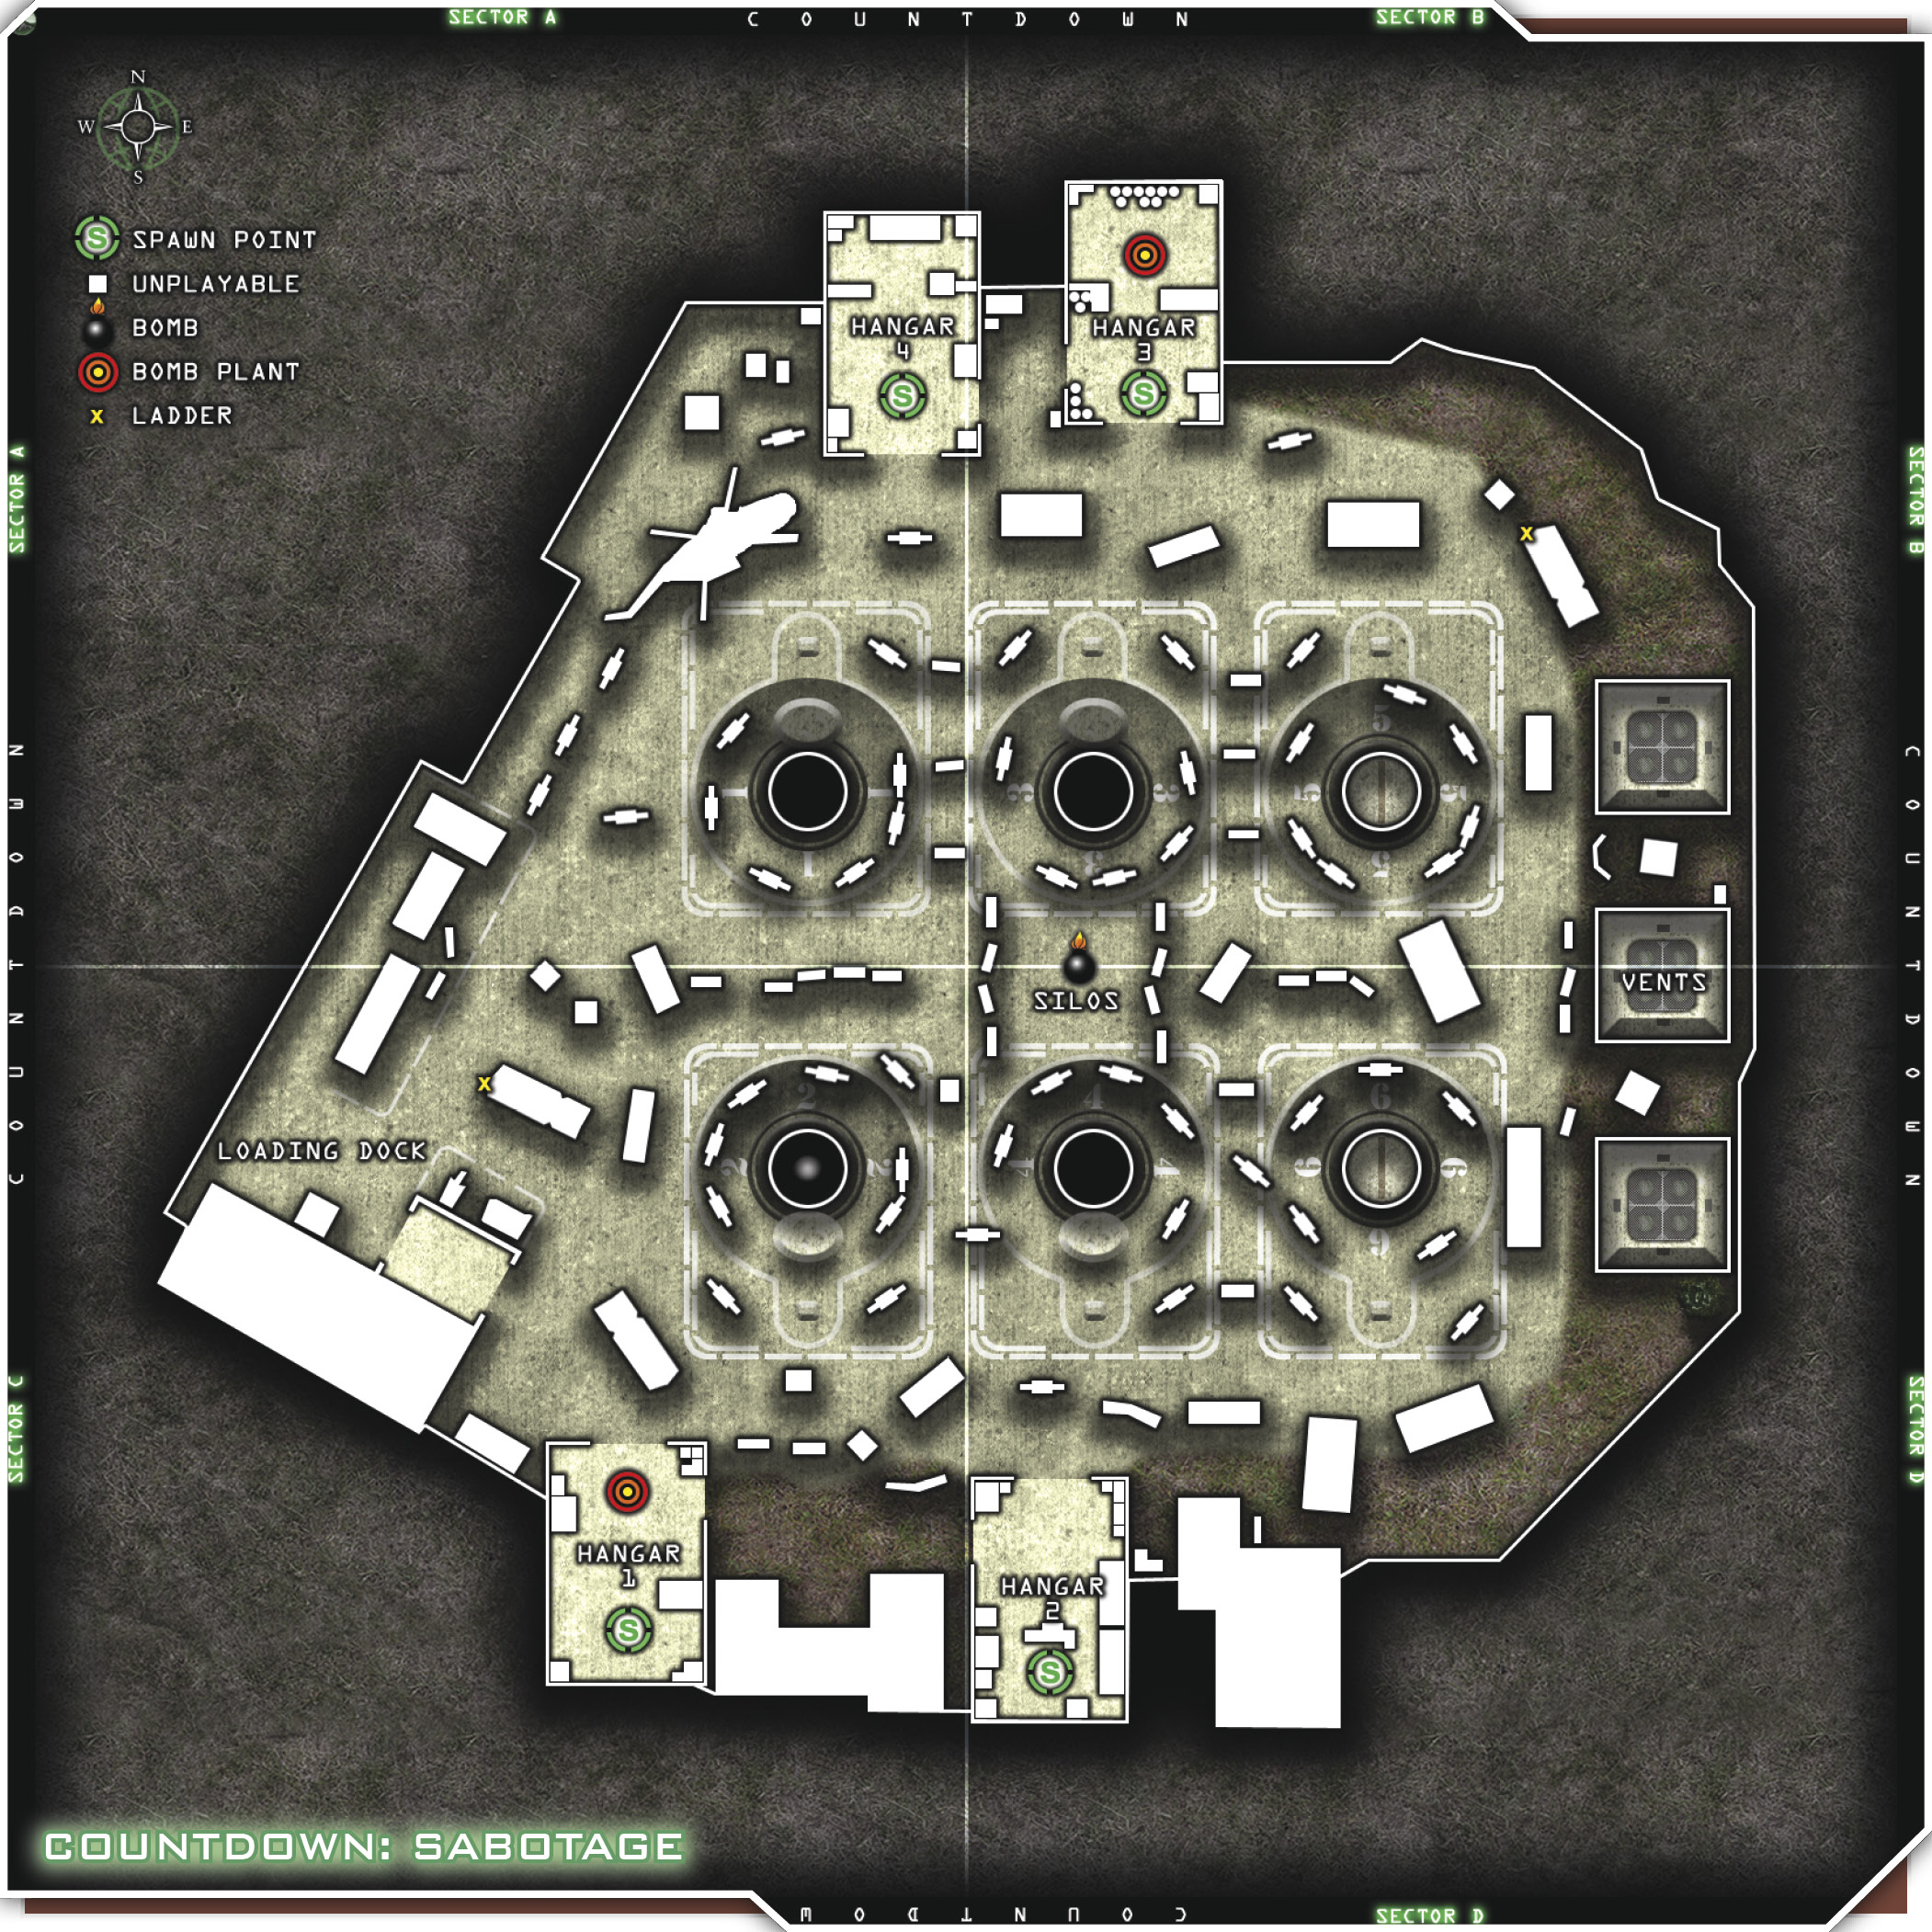
Both teams spawn in the Hangars on the north and south sides of the map. Of course, a lot of action takes place around the Silos in the center, but a good deal happens over by the Loading Dock area and the area between Hangar 1 and Hangar 4. Use the smoke from the missile Silos as cover to reposition yourself, but be careful not to fall in or you’ll die. The downed chopper offers some good cover, as do the Hangars. The chopper is a good place to hide, because you can crouch or go prone near it and disguise yourself as a piece of rubble. Each Silo is bordered by several blast shields (concrete barriers) that you can use as cover. There are many lanes of fire on this map, so assume someone’s always got a bead on you.
When shooting at someone from long distance on this map, it’s good idea to crouch down behind the concrete barriers and stand up to shoot. Find your target, pop up and squeeze off a couple of rounds, and then crouch back behind cover. When you crouch back down, try to stay in one spot so that when you stand back up to fire, your crosshairs will be right on your target.
There are two trucks on this map, one just north of the Loading Dock and one just north of the Vent shafts. Both of these trucks have ladders you can climb to get a great vantage point, or you can go prone and snipe from them. Bear in mind that this map doesn’t have any second-story levels, so you’ll be spotted fairly quickly. Use these trucks with caution. The only other places for a bit of elevation are the Vent shafts. They’re slightly raised and provide good cover for snipers to go prone.
Use the Hangars to your advantage. These are the only buildings accessible on this map. You can fall back to them, camp out in them, or even snipe from them. You can tuck yourself behind various pieces of cover in each Hangar, and place some explosives to block the side entrances in case someone comes up on your blind side. Remember that due to all the concrete barriers and various other pieces of cover scattered throughout the map, you’ll have to find a clear line of sight to your target.
Just northwest of the Hangars is the Loading Dock. The overhang area also sees quite a bit of action. Watch it from behind cover, such as one of the cargo containers, and wait for an enemy to run through it.
Team Tactics
You might benefit from running with just a couple of snipers on this map. The rest of your team should be long-range riflemen moving in small wingman teams. While your snipers are getting set up, pop some smoke to give them cover and find a good line of sight to their targets. Take your remaining wingman teams out around the perimeter of the map, and try to flank your enemy.
Wingman work will be a little different on this map, due to its open nature and lots of cover. Practice letting the lead man run from one piece of cover to the next. When he gets there, have him turn toward the enemy and send some cover fire downrange as you bounce from where you are to where he is. Continue to move in this fashion until you make it around behind the enemy. Always use frags, smoke, and grenade launchers to move from one side of this map to another.
Remember that your grenades have to be fairly precise. Although this map is very open, it also has a lot of things to hide behind. Make sure you aim your grenades correctly, because if they fall short, they’ll hit the concrete barriers that the enemy may be hiding behind. If you throw them too far, they won’t do enough damage to be worth throwing in the first place. Use the barriers and other cover to bank grenades into areas that aren’t easily accessible. While your wingman teams are hopping from cover to cover to get behind the enemy, your snipers should be looking for counter-snipers and trying to clear a path in front of you. One sniper should watch each team.
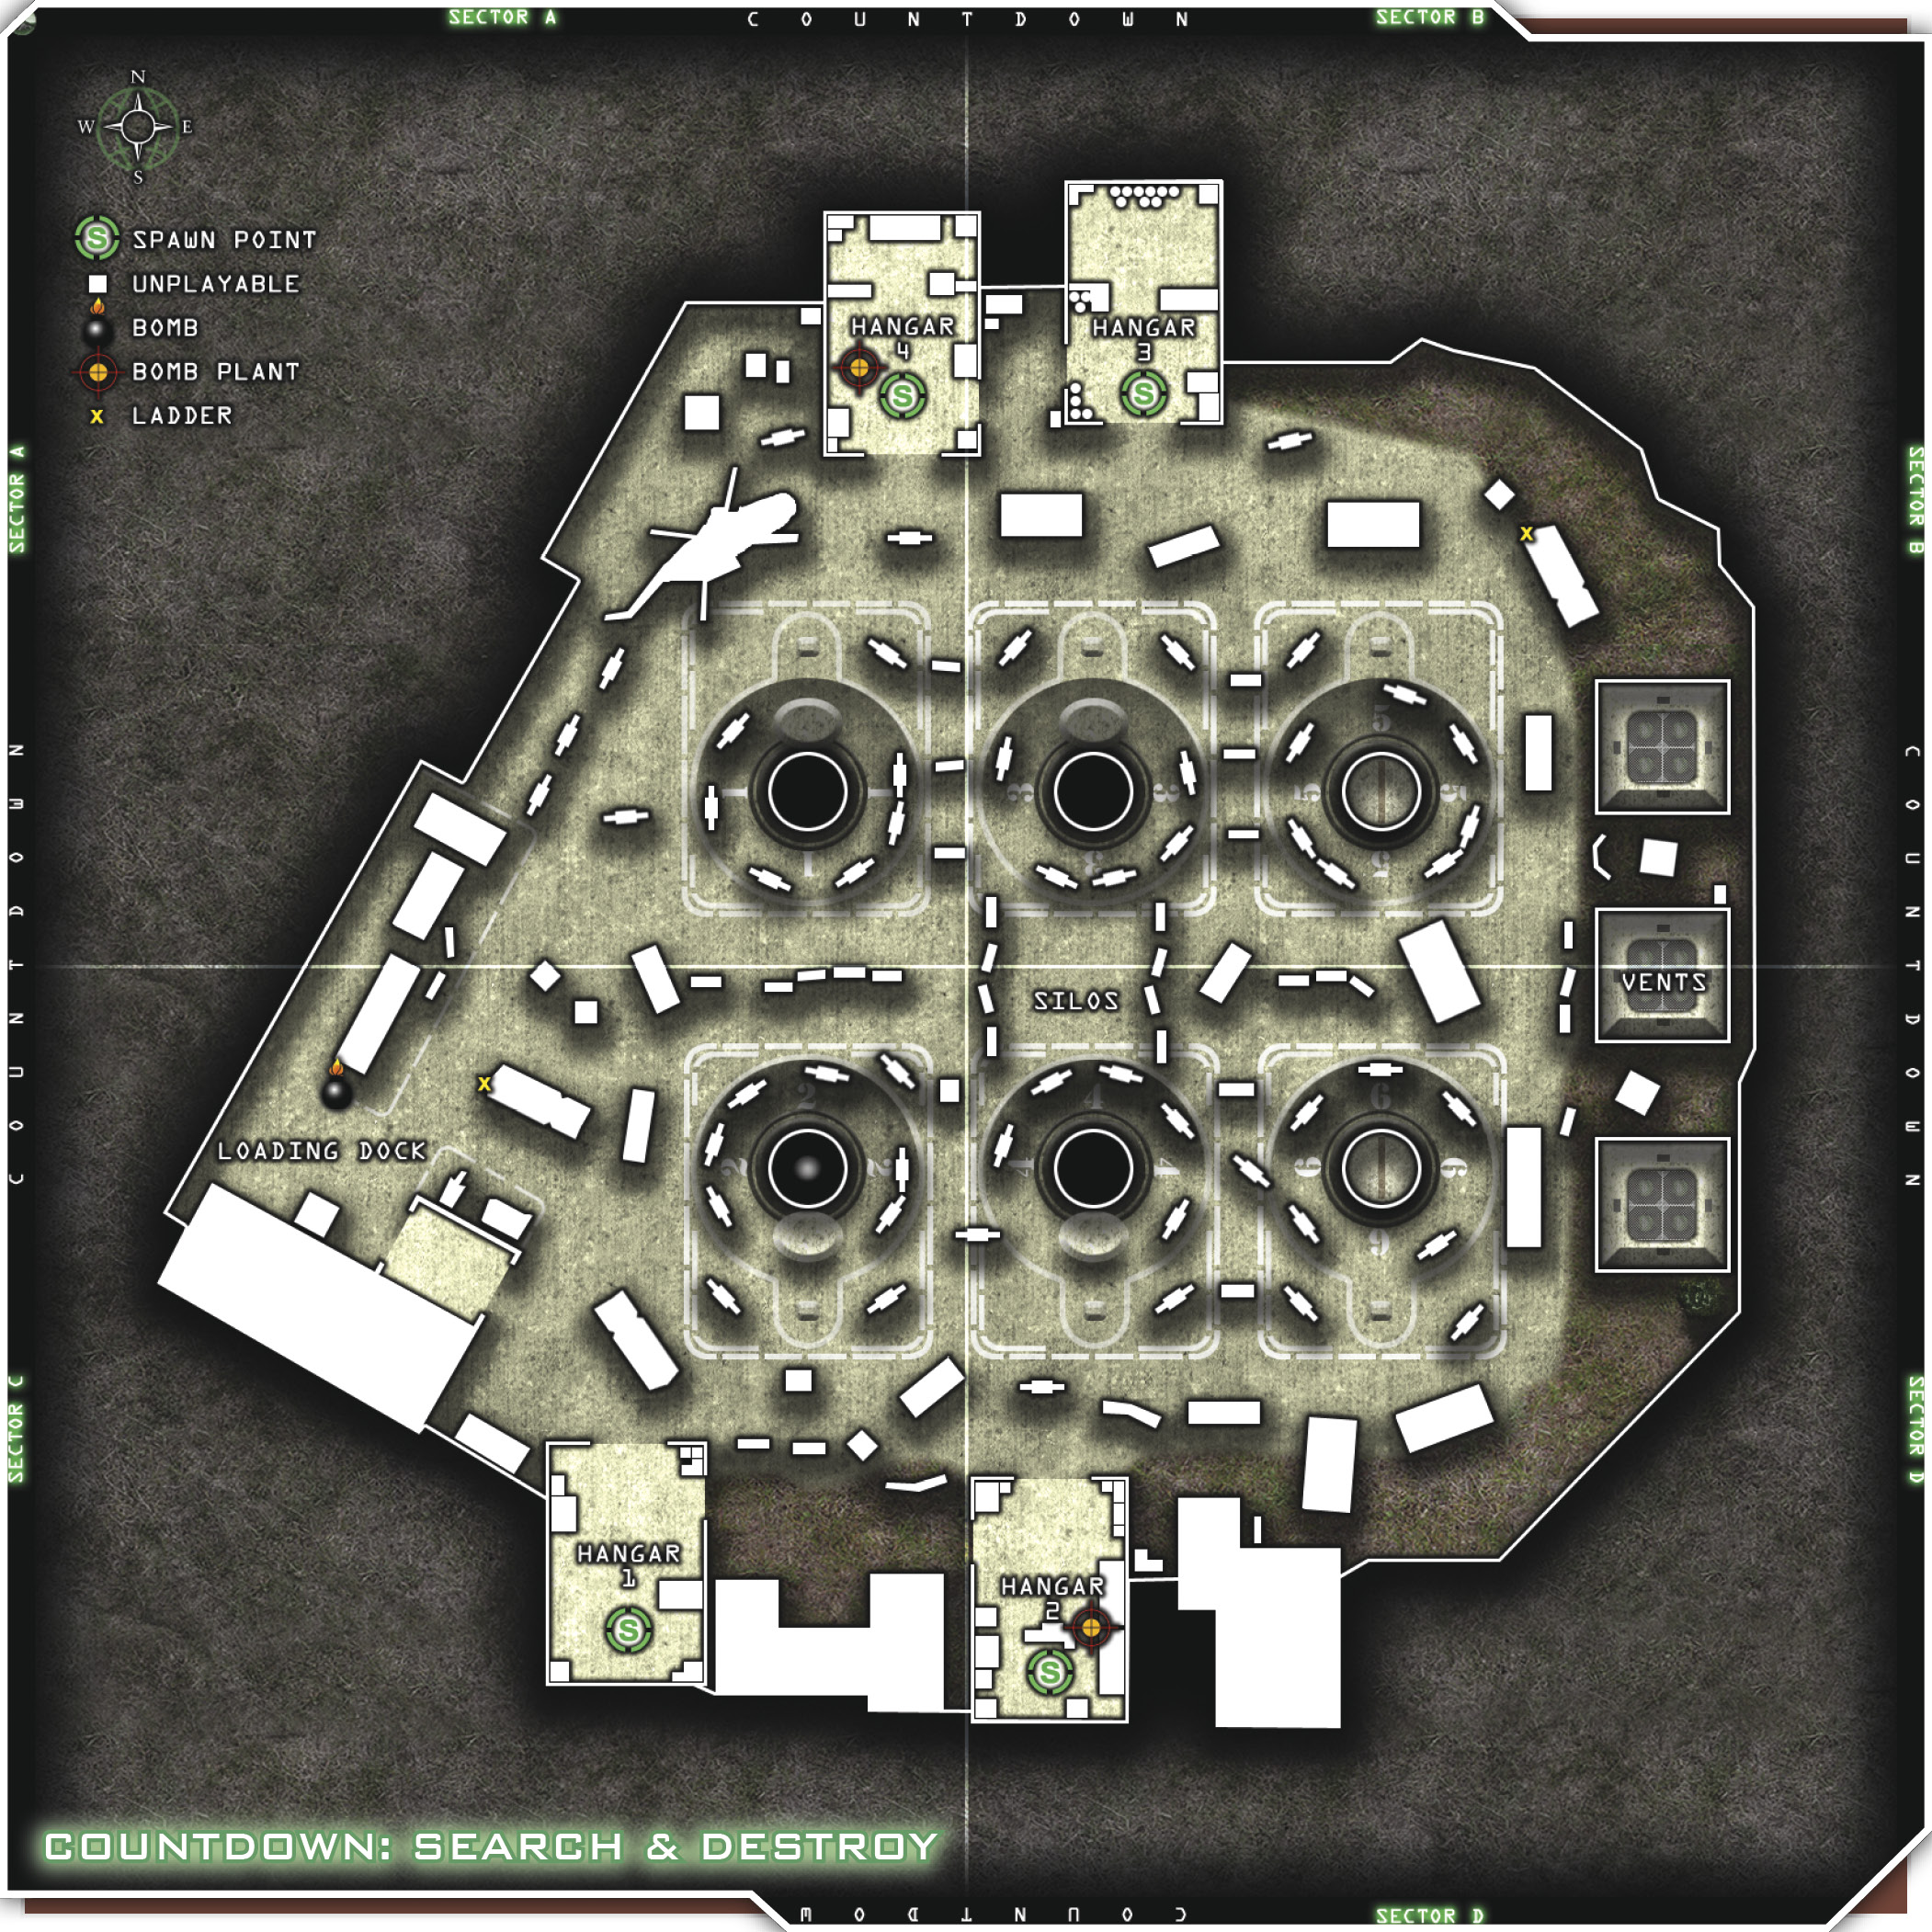
The north and south sides of this map both contain two Hangars that you and your team can use as ambush locations. Create two teams of equal numbers, select UAV Jammers, and equip silencers on your primary weapons and side arms. Place one team in each Hangar and take cover, remembering not to move too much, because enemy snipers will be looking for movement. Set up your Claymores and C-4 at any entrances to your new fortress, and wait for the enemy to ring the bell. If youo have a couple of snipers camping in there with you, consider loadout alterations such as LMGs, Double Tap, Sleight of Hand, Bandolier, Steady Aim, or Iron Lung.
Always try to rack up as many kills as possible, of course, and this map in particular will give you a huge bonus if you can call in an airstrike. Since most of the map is wide open, once the strike comes in, there’s no way the enemy can make it to shelter before the bombs start dropping. If you’re camping in either Hangar 1 or Hangar 4, you should be able to get a clear line of sight to the other Hangar. Tell your snipers so they can eliminate as many long-range threats as possible. Always be ready to move out from your position and relocate. The best way of doing this is to use smoke as cover. There’s no thermal view in Call of Duty 4: Modern Warfare, so you’ll have some great cover to reposition yourself and your team.