
Call of Duty: Infinite Warfare Guide Call of Duty 4: Modern Warfare Multiplayer Map Tactics
Showdown
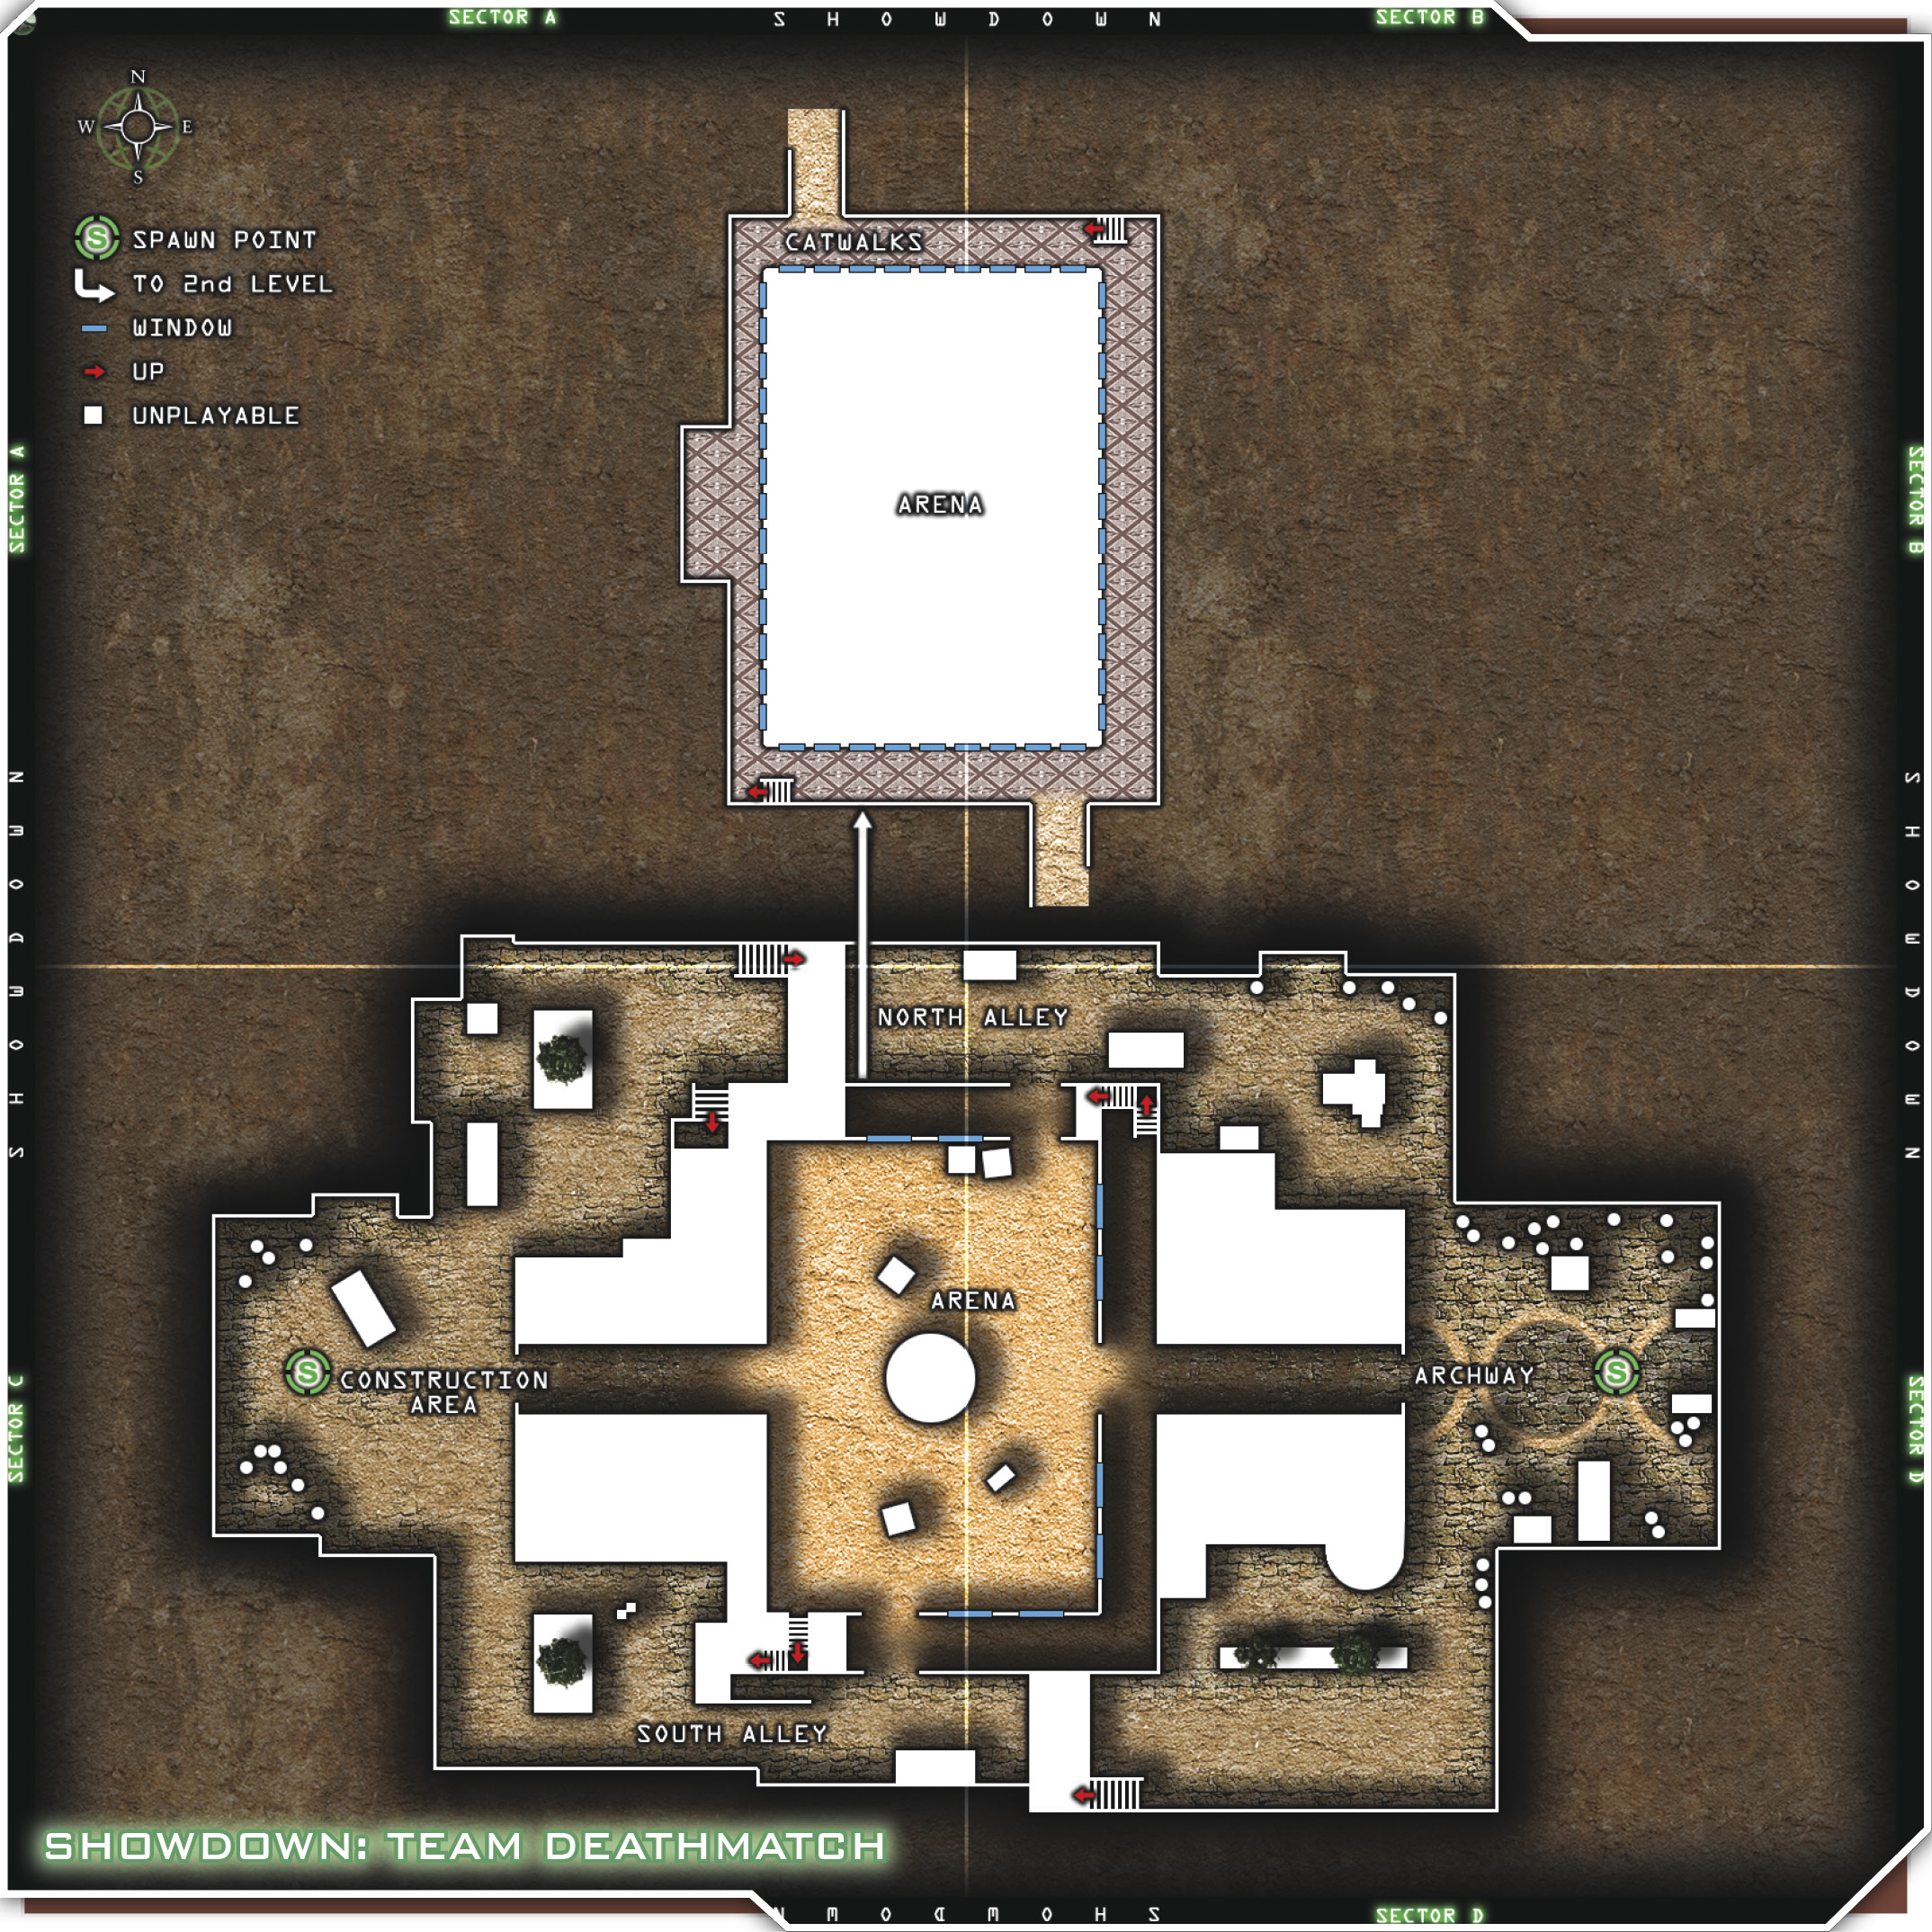
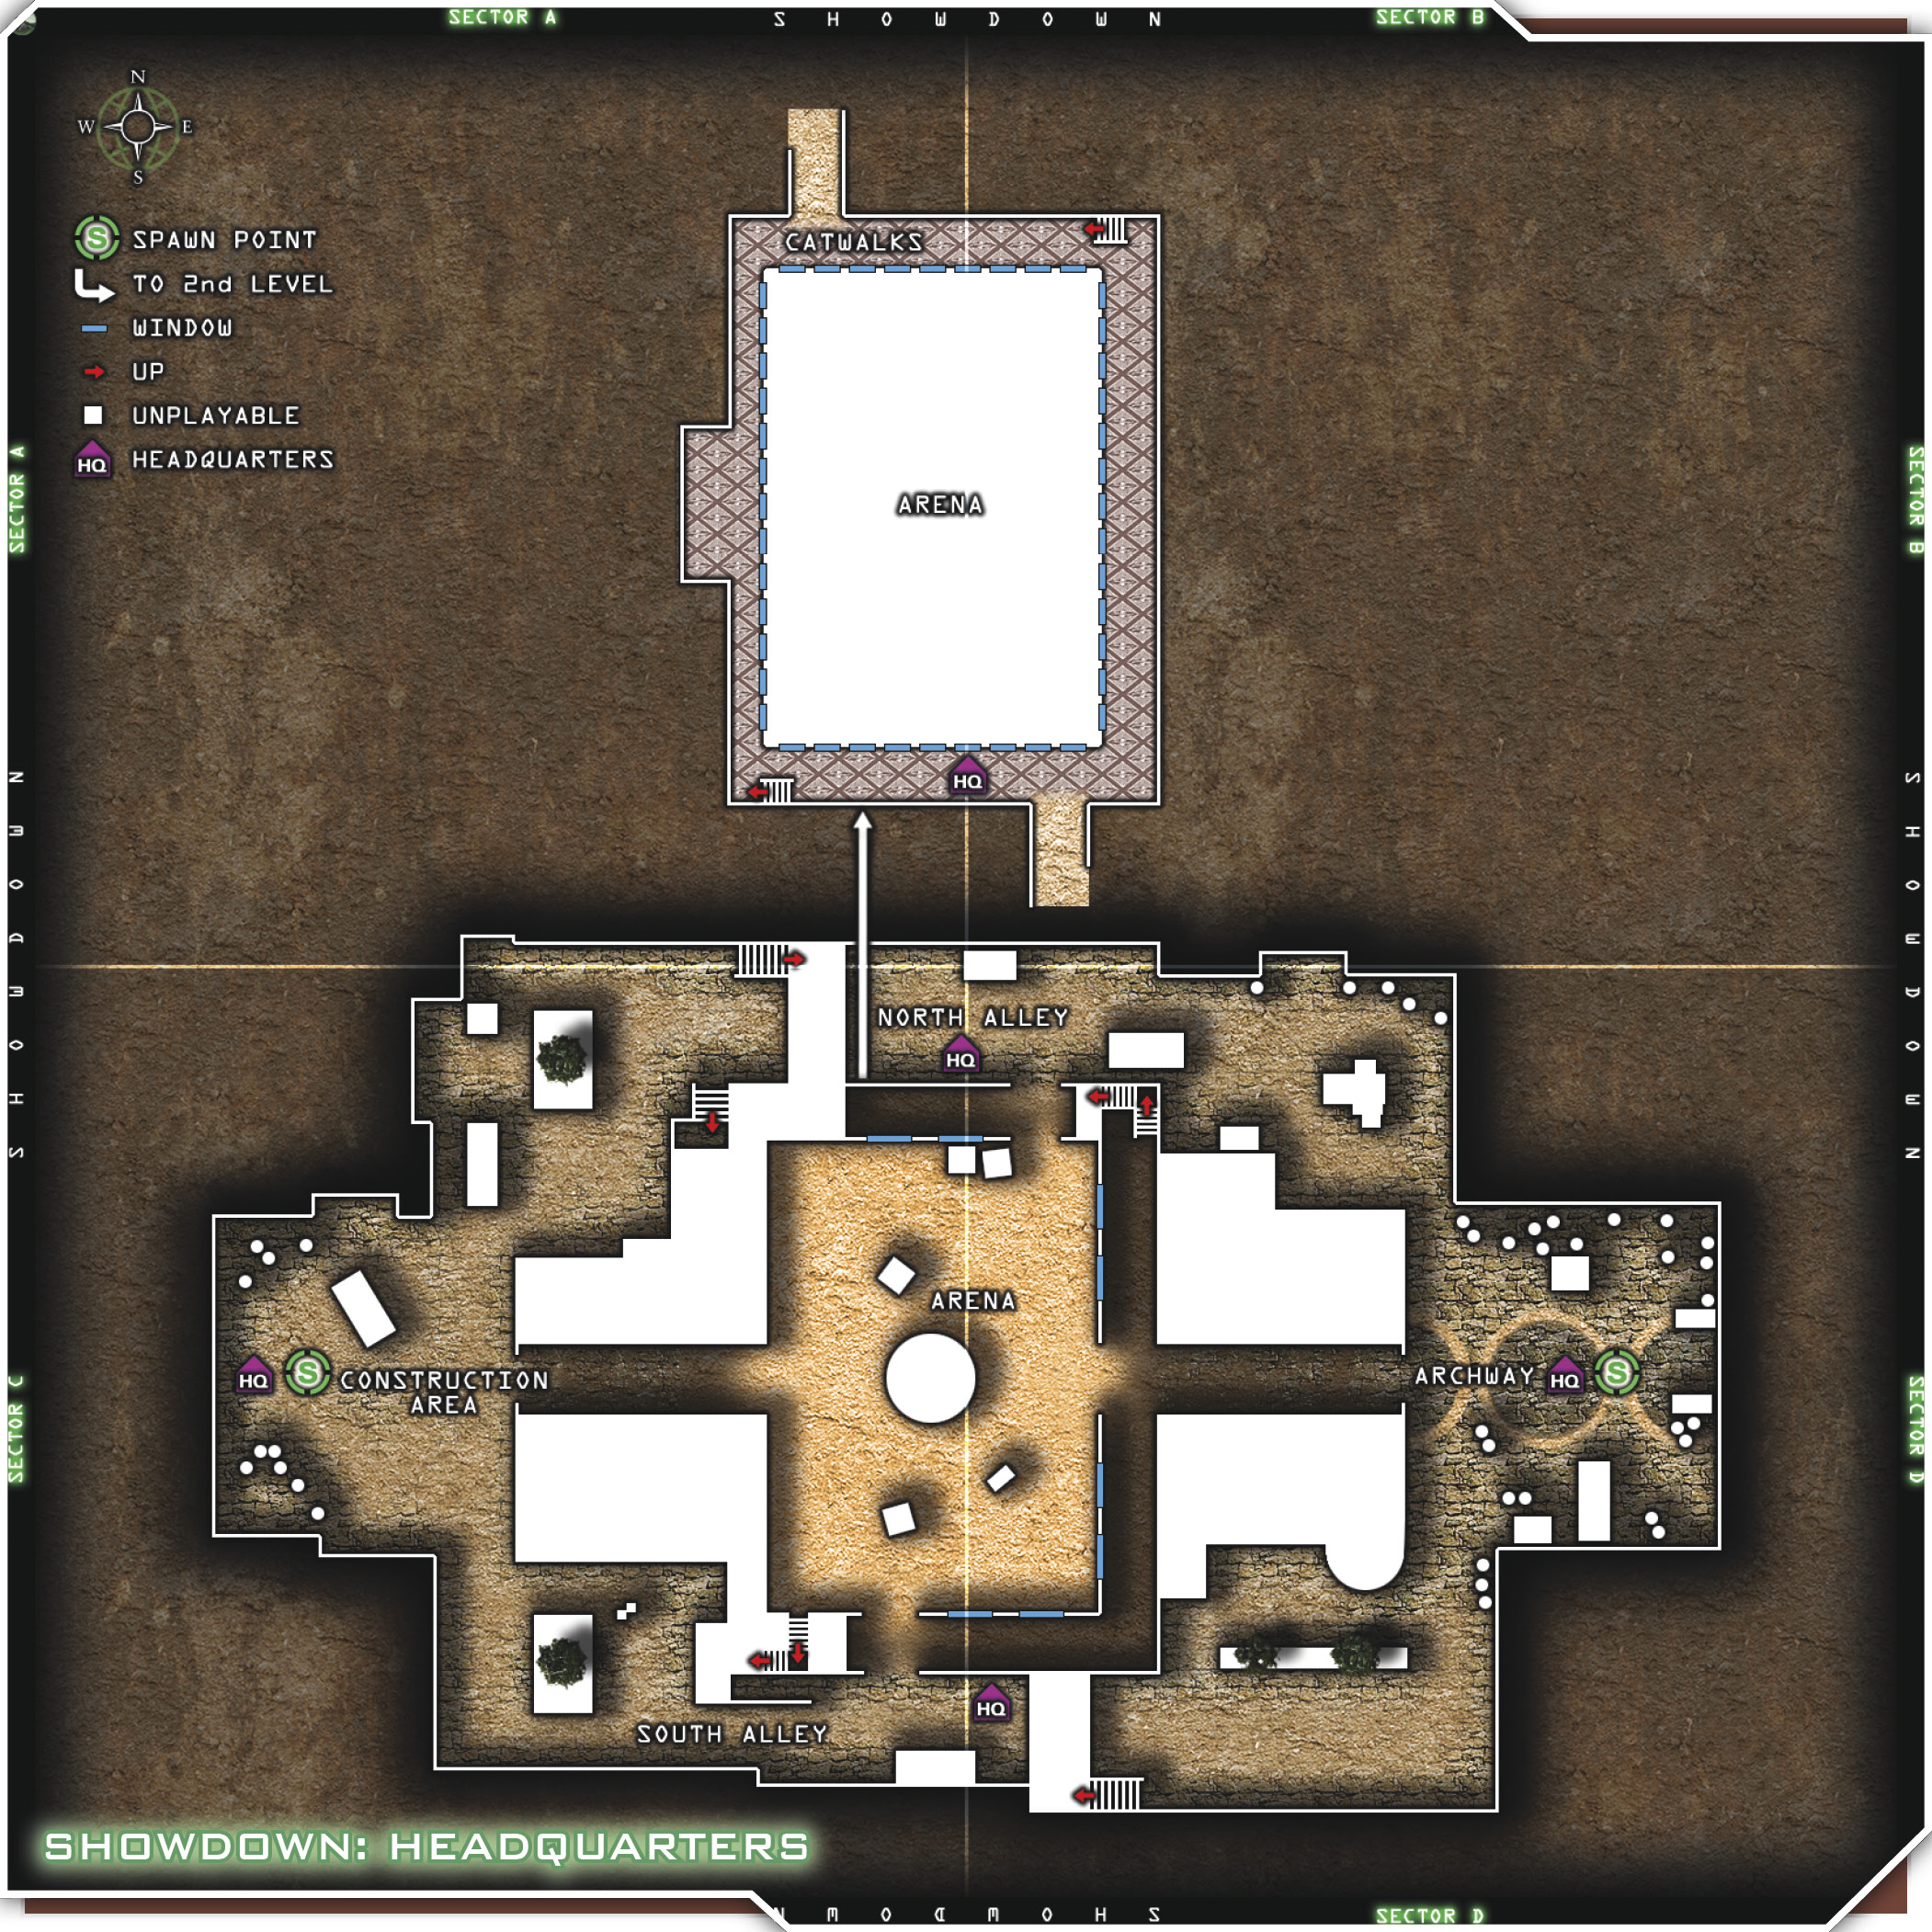
U.S. Forces vs. OpFor. The setting is a desert palace complex at the end of the day. It’s currently under construction, with a construction site on the west side of the palace and a central courtyard with an enormous statue at its center. There are passages from both spawn points to the courtyard and to an interior second-level Catwalk.
These two loadouts are centered around explosives. The Lobster loadout with the grenade launcher is ideal for making your way up to the second level and lobbing grenades down on enemies who are trying to get through the underpass into the courtyard. The Sonic Boom perk increases the damage you can do. Use the Last Stand perk to get revenge on the guy who thought he got a lucky shot on you.
The LMG class is a great way to keep on the move. Choose either the RPGs or the Frag x3, and combine them with Sonic Boom to increase the damage of all explosives. Steady Aim will keep your RPD in check too.
Suggested Loadouts
Lobster
| Slot | Name |
|---|---|
| Primary Weapon | G36c |
| Notes/Attachment | Grenade Launcher |
| Side Arm | M1911 |
| Special Grenade | Stun |
| Perk 1 | Disabled |
| Perk 2 | Sonic Boom |
| Perk 3 | Last Stand |
Light Machine Gunner
| Slot | Name |
|---|---|
| Primary Weapon | RPD |
| Side Arm | USP .45 |
| Special Grenade | Flash |
| Perk 1 | RPG-7 x2 or Frag x3 |
| Perk 2 | Sonic Boom |
| Perk 3 | Steady Aim |
Tips & Locations
This map is almost identical on both sides, but flipped. There are stairs on the North and South Alleyways, underpasses leading from both initial spawn points to the central courtyard, and a two-level ring around the courtyard itself. If you must go through the underpasses, do it quickly, because they’re a target of choice for grenadiers and quick rushers. The outside stairs are a much safer way. From there, you can move down and inside, or out through the opposite underpass.
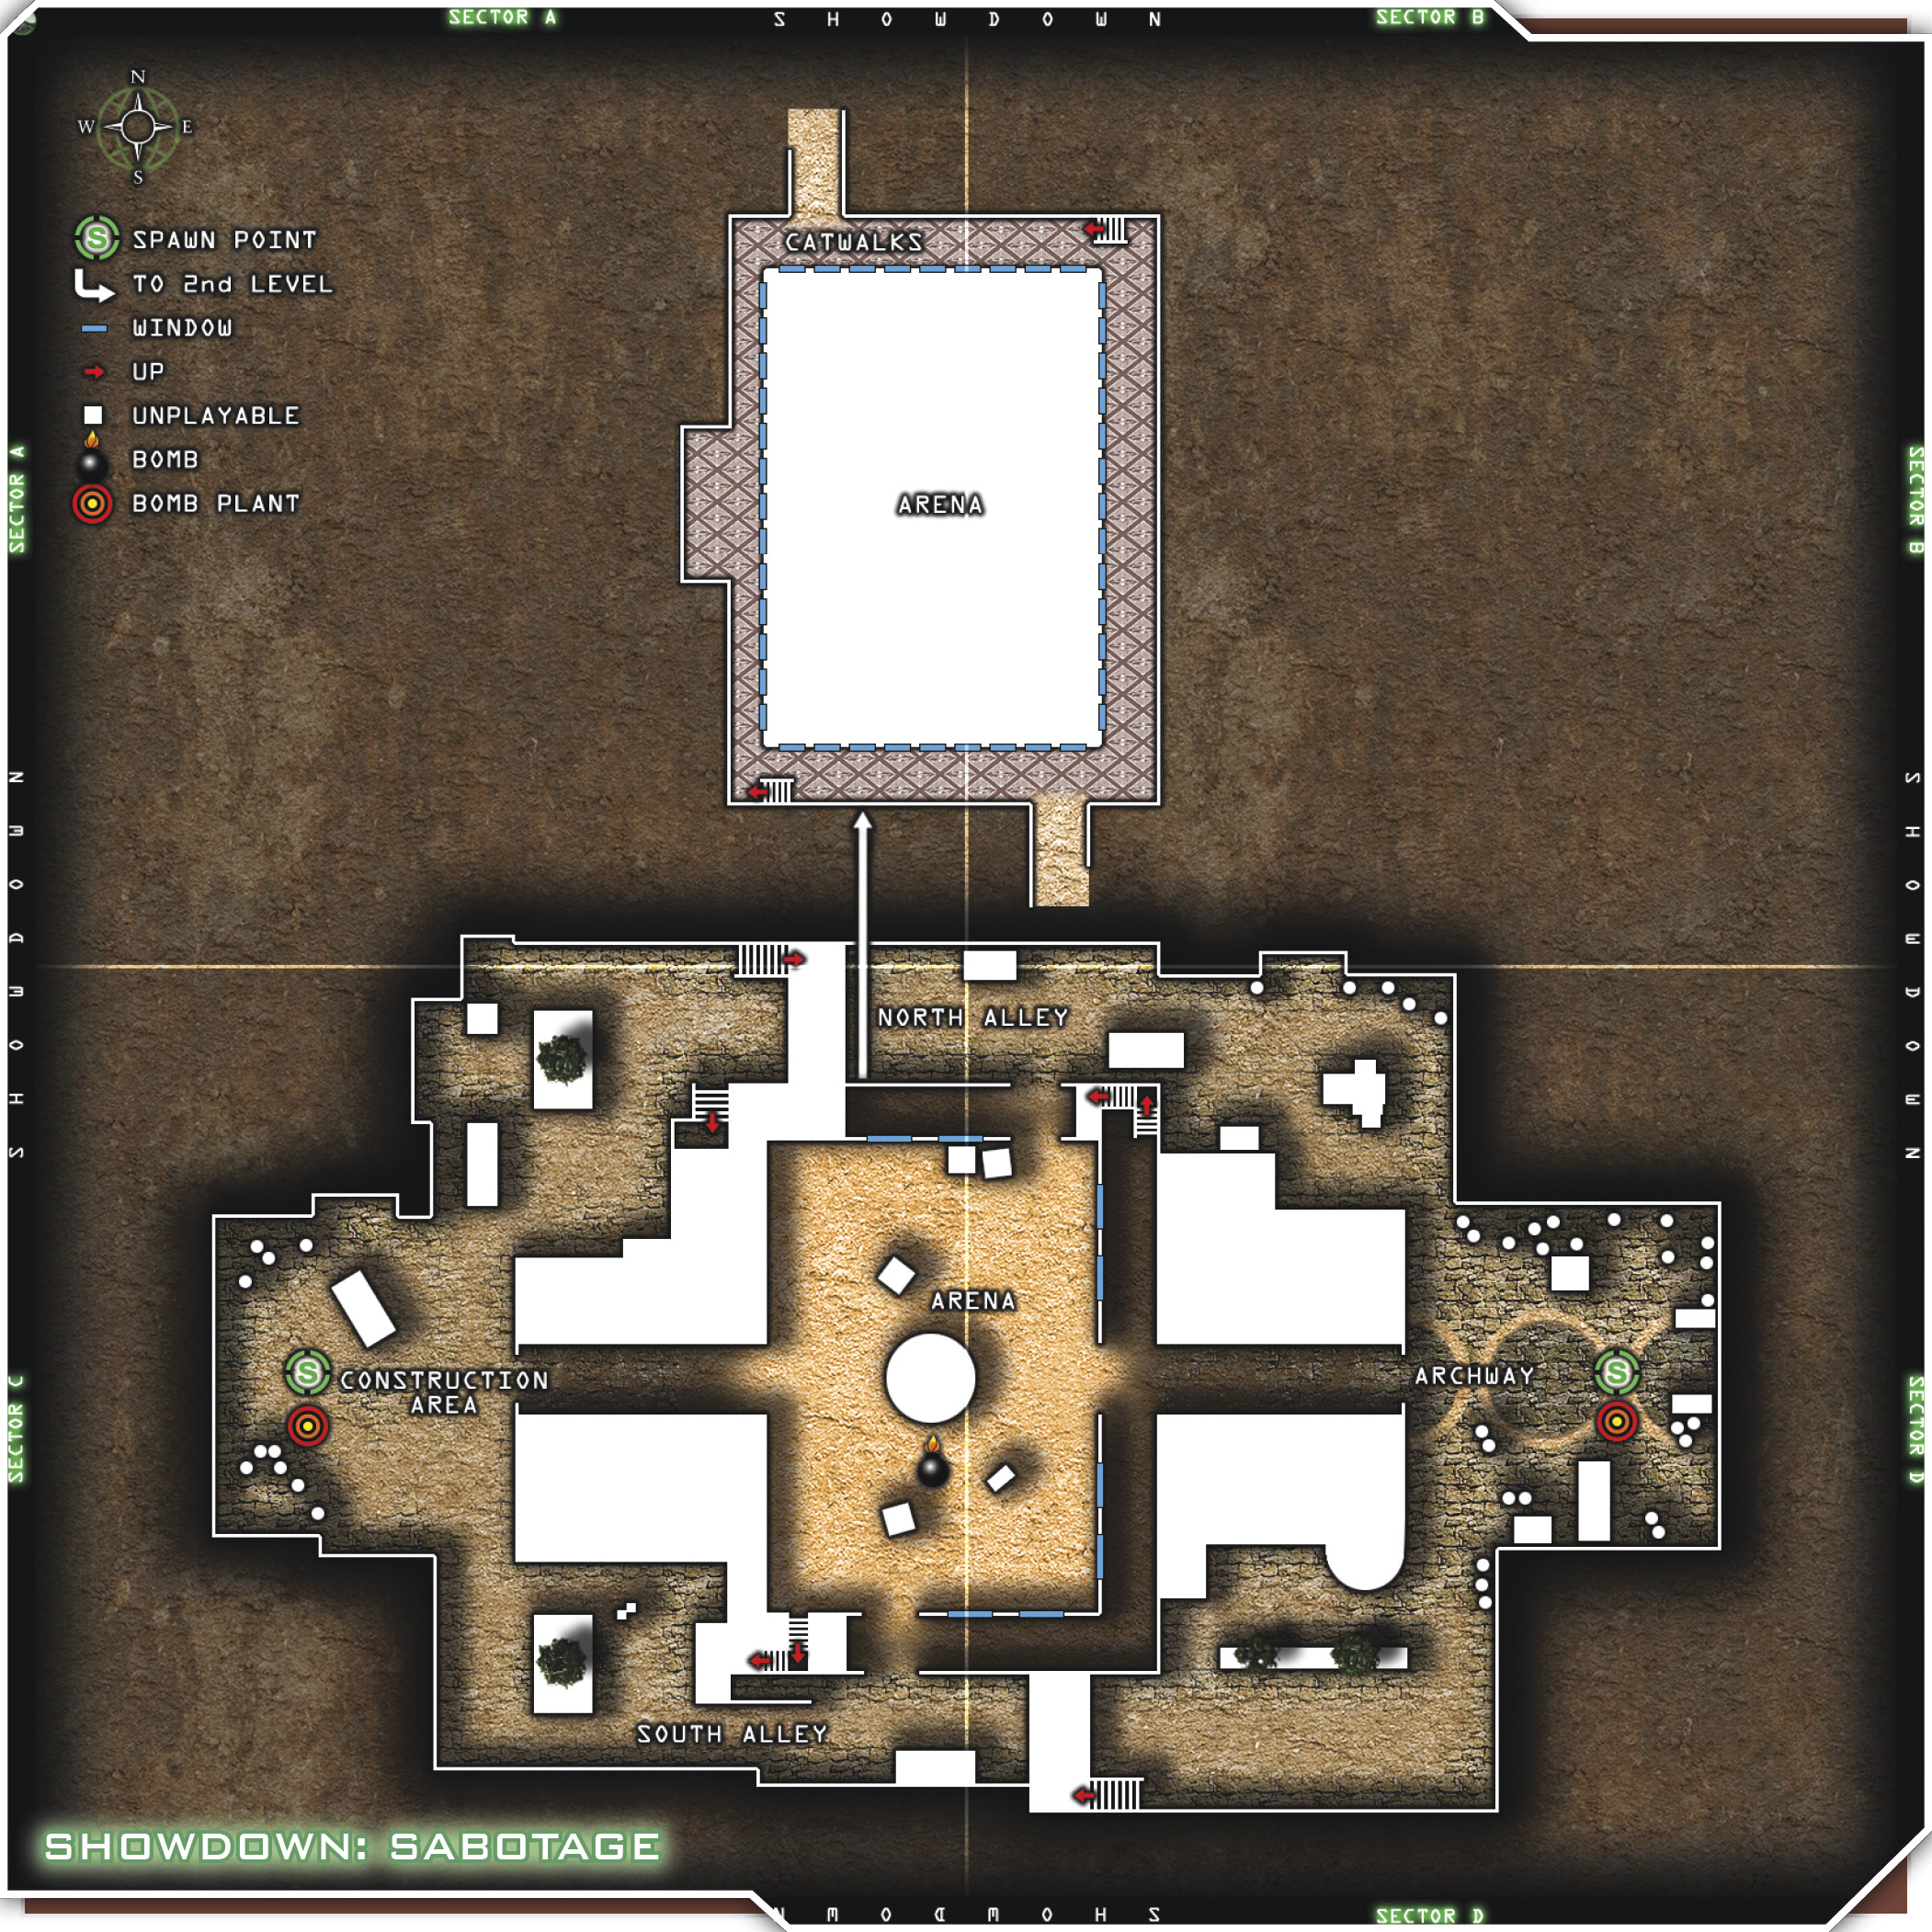
Use the cover of the underpasses to avoid grenades and launch your own. Set up on the second level with your RPG or grenade launcher, and fire away at the enemy underpass. As soon as each team gets into the courtyard, they can immediately turn right and head up the internal stairs to the upper-level Catwalk. From there, they can shoot down on enemies or maneuver around the outside. There are some places to hide or shoot from, such as the planters near the interior stairs and the scaffolding around the perimeter of the complex.
Snipers aren’t very useful on this map. You’re better off taking something like an assault rifle with an ACOG instead. Shotguns are a good choice here, combined with perks like Double Tap, Sleight of Hand, or Bandolier. Assault classes and even submachine guns will also work well on this map. Choose your poison and consider the precious Juggernaut as well. It’s nice to stay alive.
Team Tactics
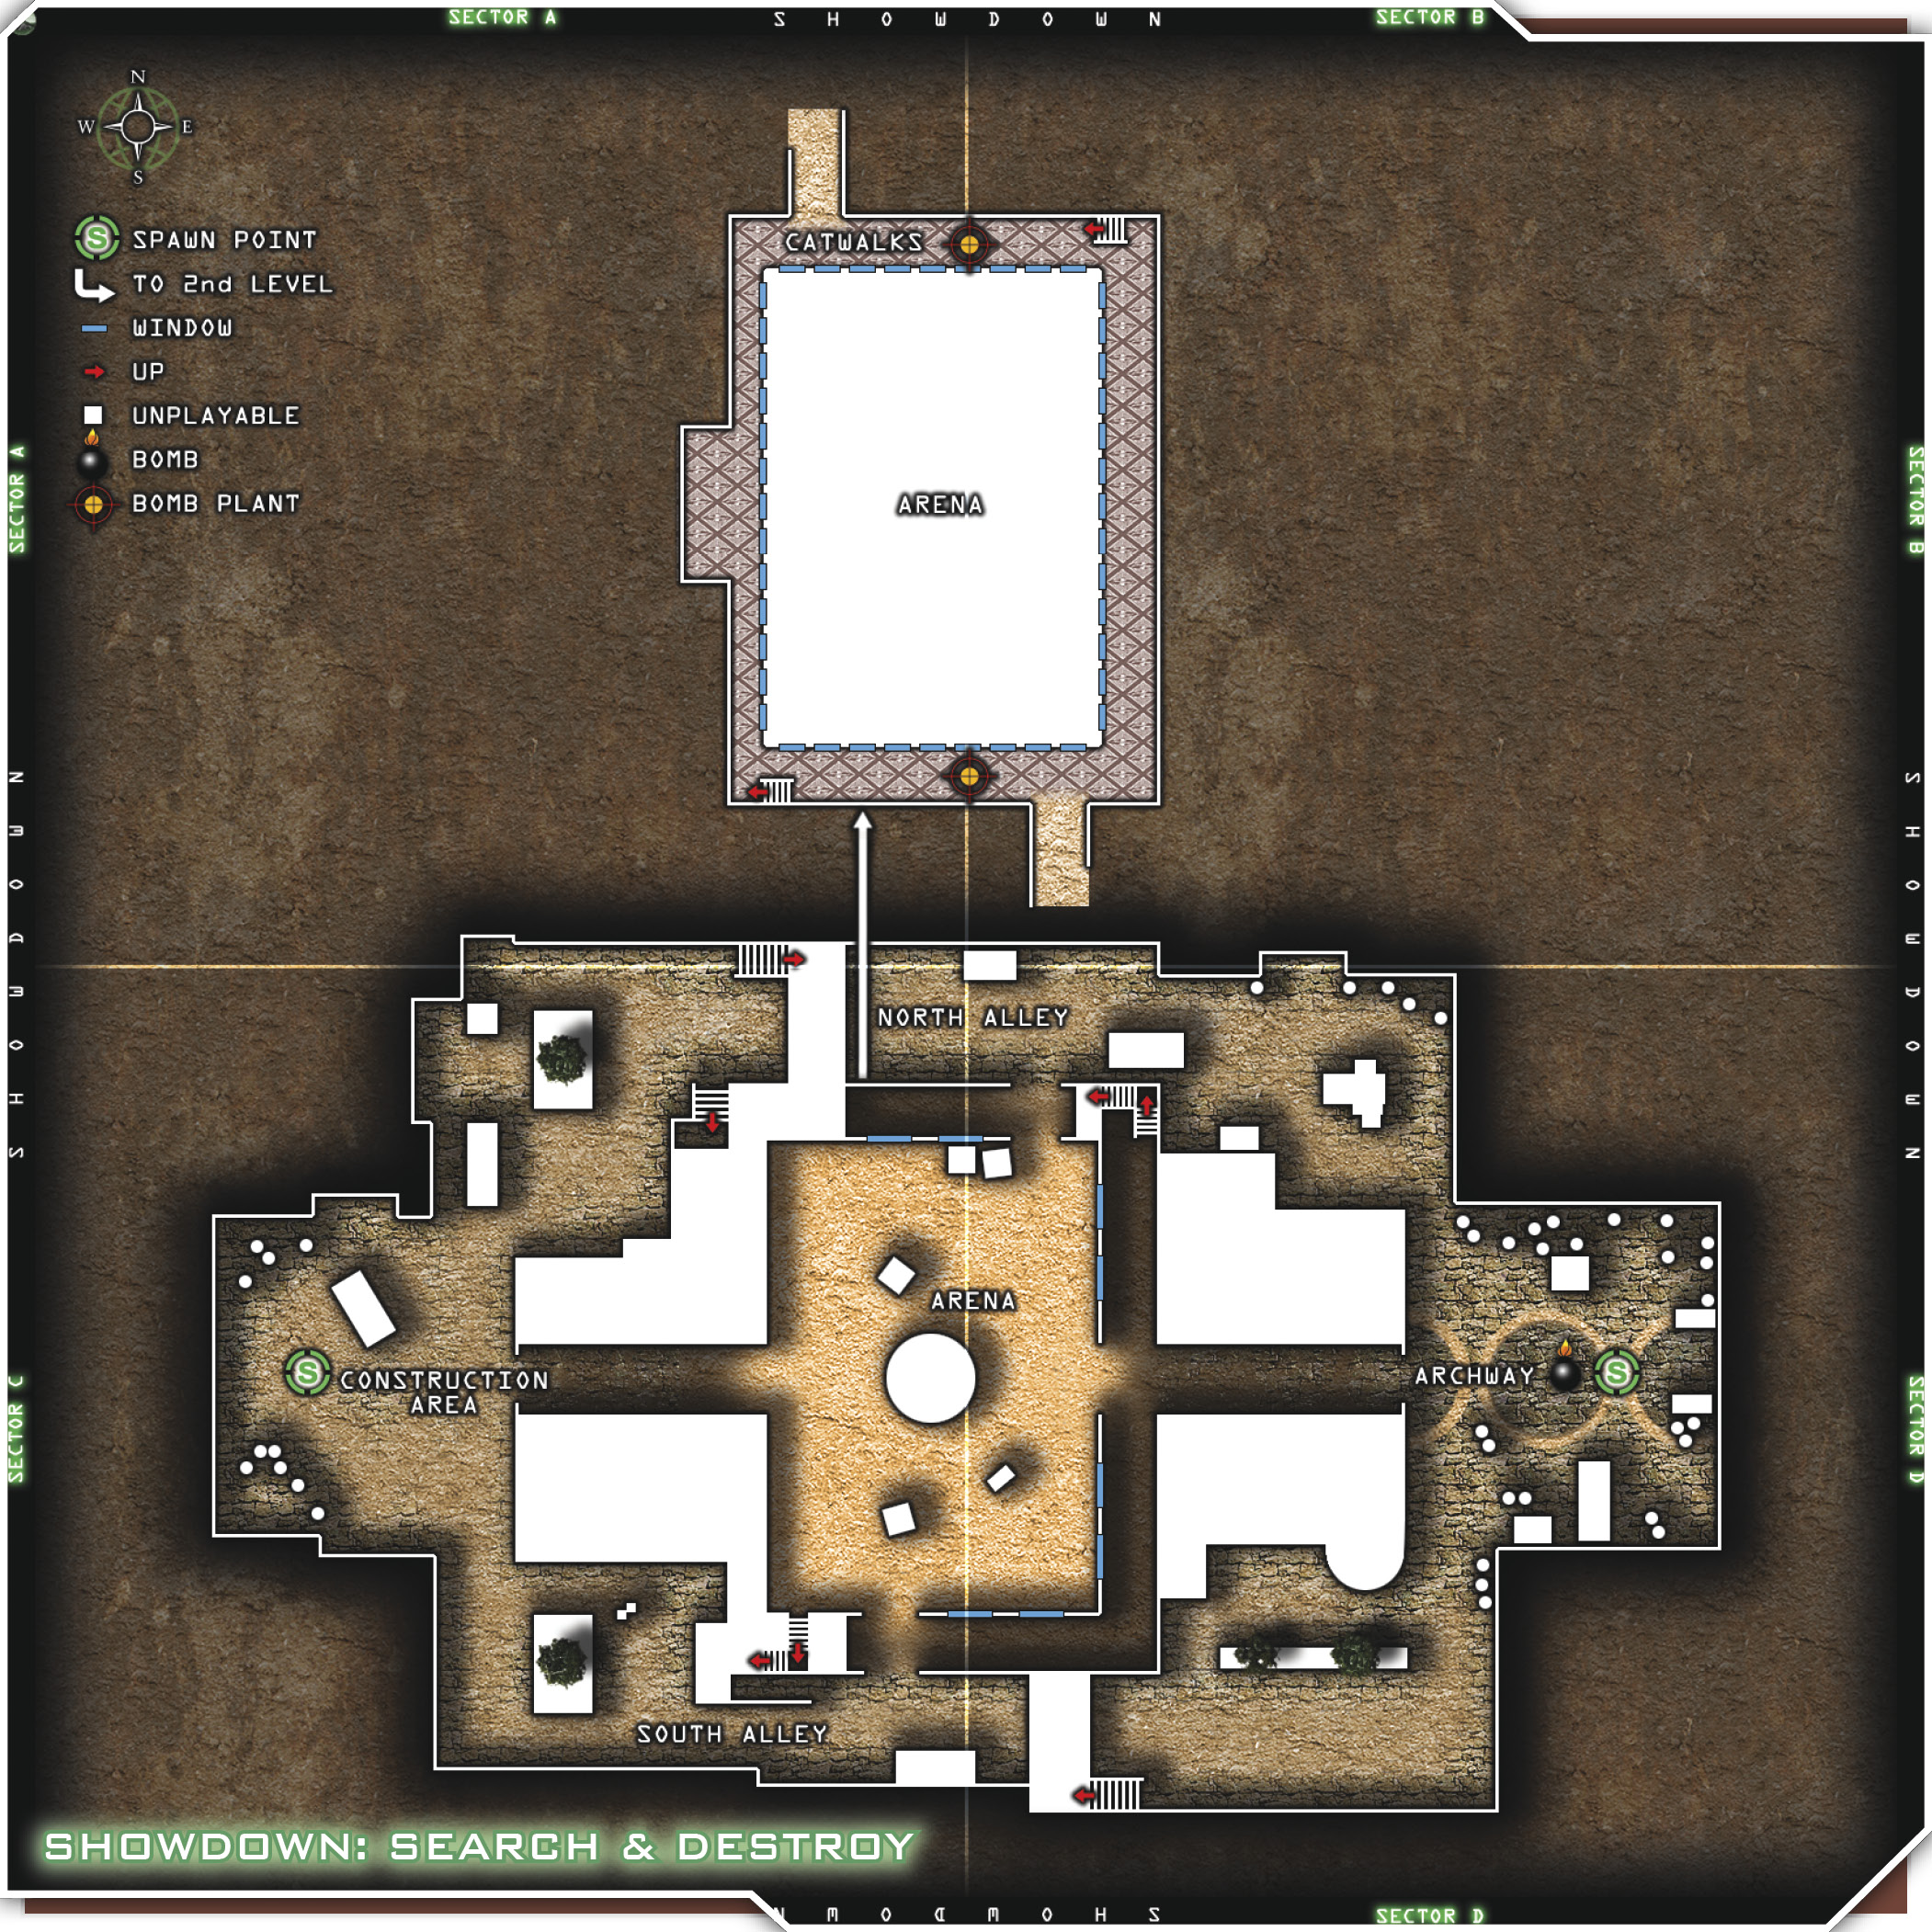
Take over the courtyard. You should split into two teams, a ground-floor team and a Catwalk team. The ground-floor team should head straight through the underpass and set up around the interior. They will have to throw or launch grenades as soon as they get clear of the statue in the center, which will block most grenades. Try to stagger your ground-floor team’s grenades so that they land in the opposite underpass at different distances. Set up a triangle formation, with two players at the back corners and one up near the exit of the enemy underpass. That should be enough firepower to push back the enemy advance. This will hopefully eliminate a good chunk of enemies while your Catwalk team gets set upstairs.
The Catwalk team should move into position by way of the alleyway staircases. They should take up positions that give them a clear shot with their RPGs and grenades or grenade launchers. Once you’ve got your team upstairs, they can help make sure that no one sneaks up behind them or the ground team. Be sure to keep an eye on the underpass that you came through and the stairs you came up, because the enemy may be able to get around you through one of the alleyways. You should station a player to watch those areas.
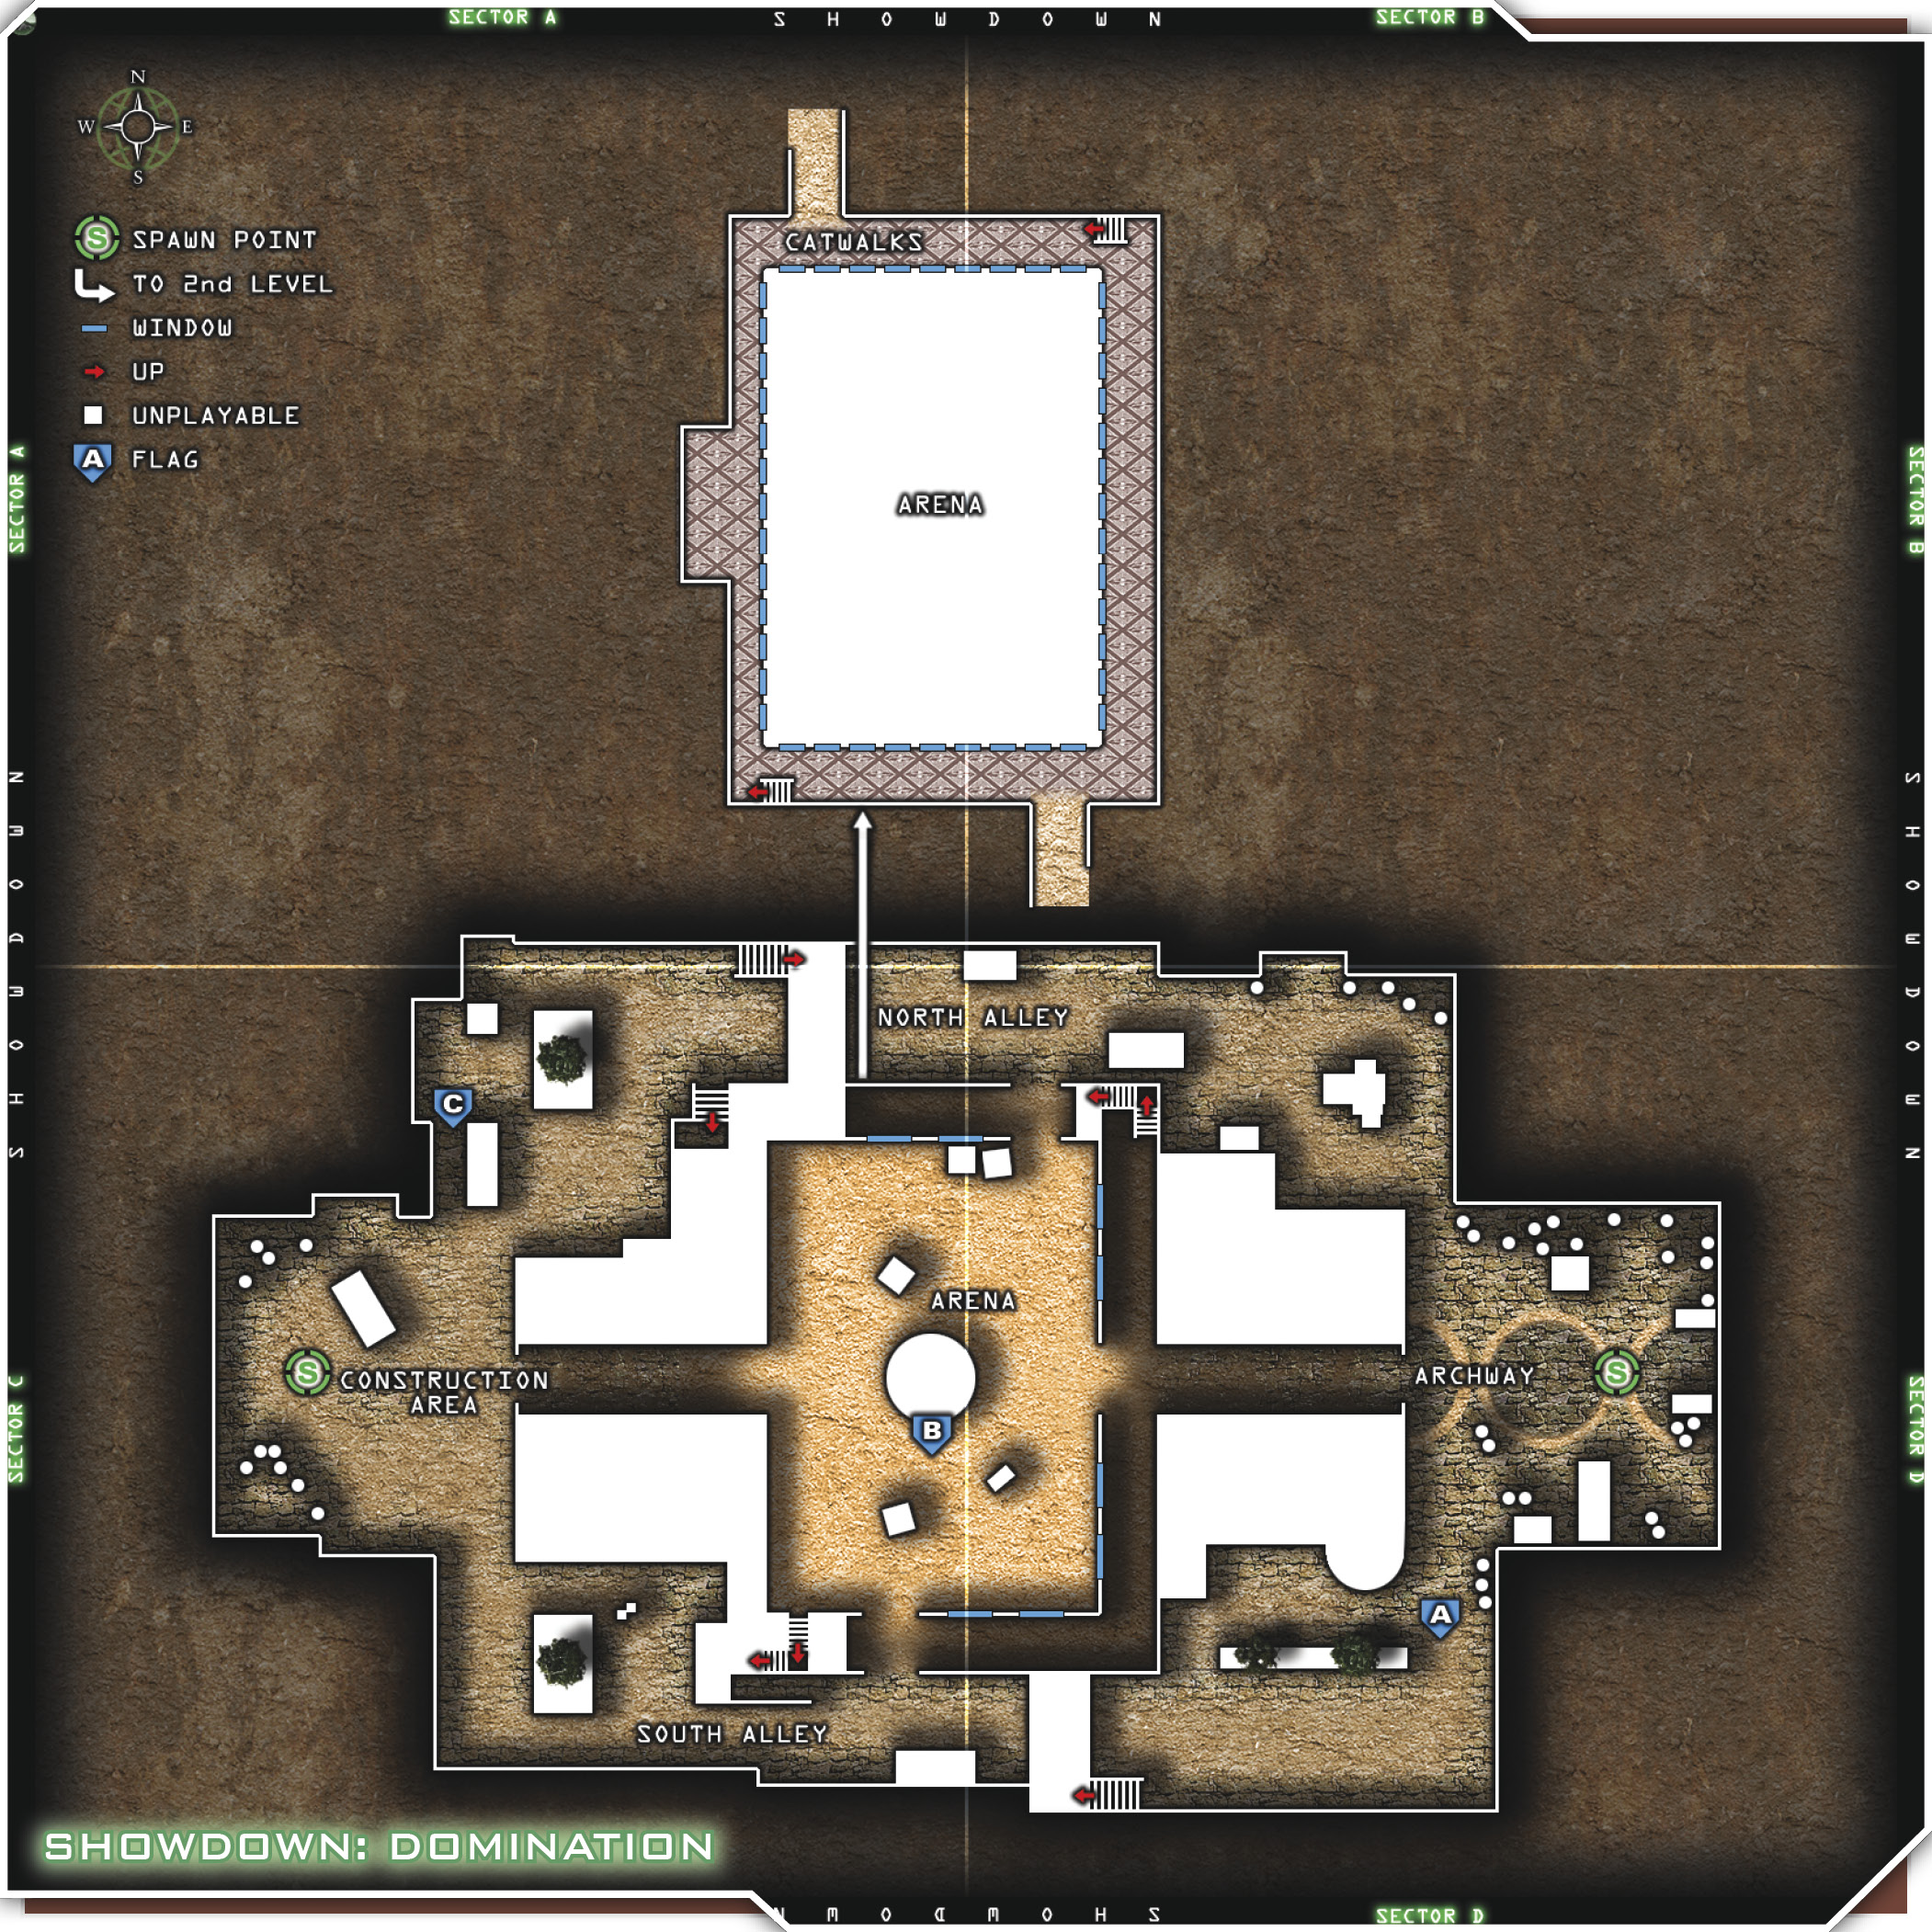
Flanking is such an important part of your success in this game. Let’s walk you through running a flank when spawning on the east side of the map.
Take your entire team south through the alley and up the stairs. When you get to the top of the staircase, leave one man with a scope or grenade launcher to cover your team as they proceed over the wall and continue down the South Alleyway. The first man to the ramp on the right side of the alley heads up to the top of it and stands watch, while the player who stood guard over your team from the stairs regroups with the team. Once everyone’s back together, have the ramp watcher jump down and follow. The entire team moves around the back of the enemy spawn point and splits into two teams. One team of four breaks back into the courtyard by way of the enemy underpass. The remaining wingman team heads to the northern alleyway to check for enemies, and then heads up to the Catwalk.
You’ll probably run into enemies at their spawn point and on the Catwalk, so be ready for engagement. Have your knives ready when you break back into the underpass, and the courtyard too. If you get pinned down, don’t panic. Just smoke and flash your way out and relocate. Always notify your team that you’re going to pop smoke or flash, because it will affect everyone. Sometimes a sniper may be ready to scope someone in, and if you throw smoke you’ll ruin his shot. Just make sure you call where and when you’re going to throw it.