Call of Duty: Infinite Warfare Guide Call of Duty 4: Modern Warfare Multiplayer Map Tactics
Wet Work
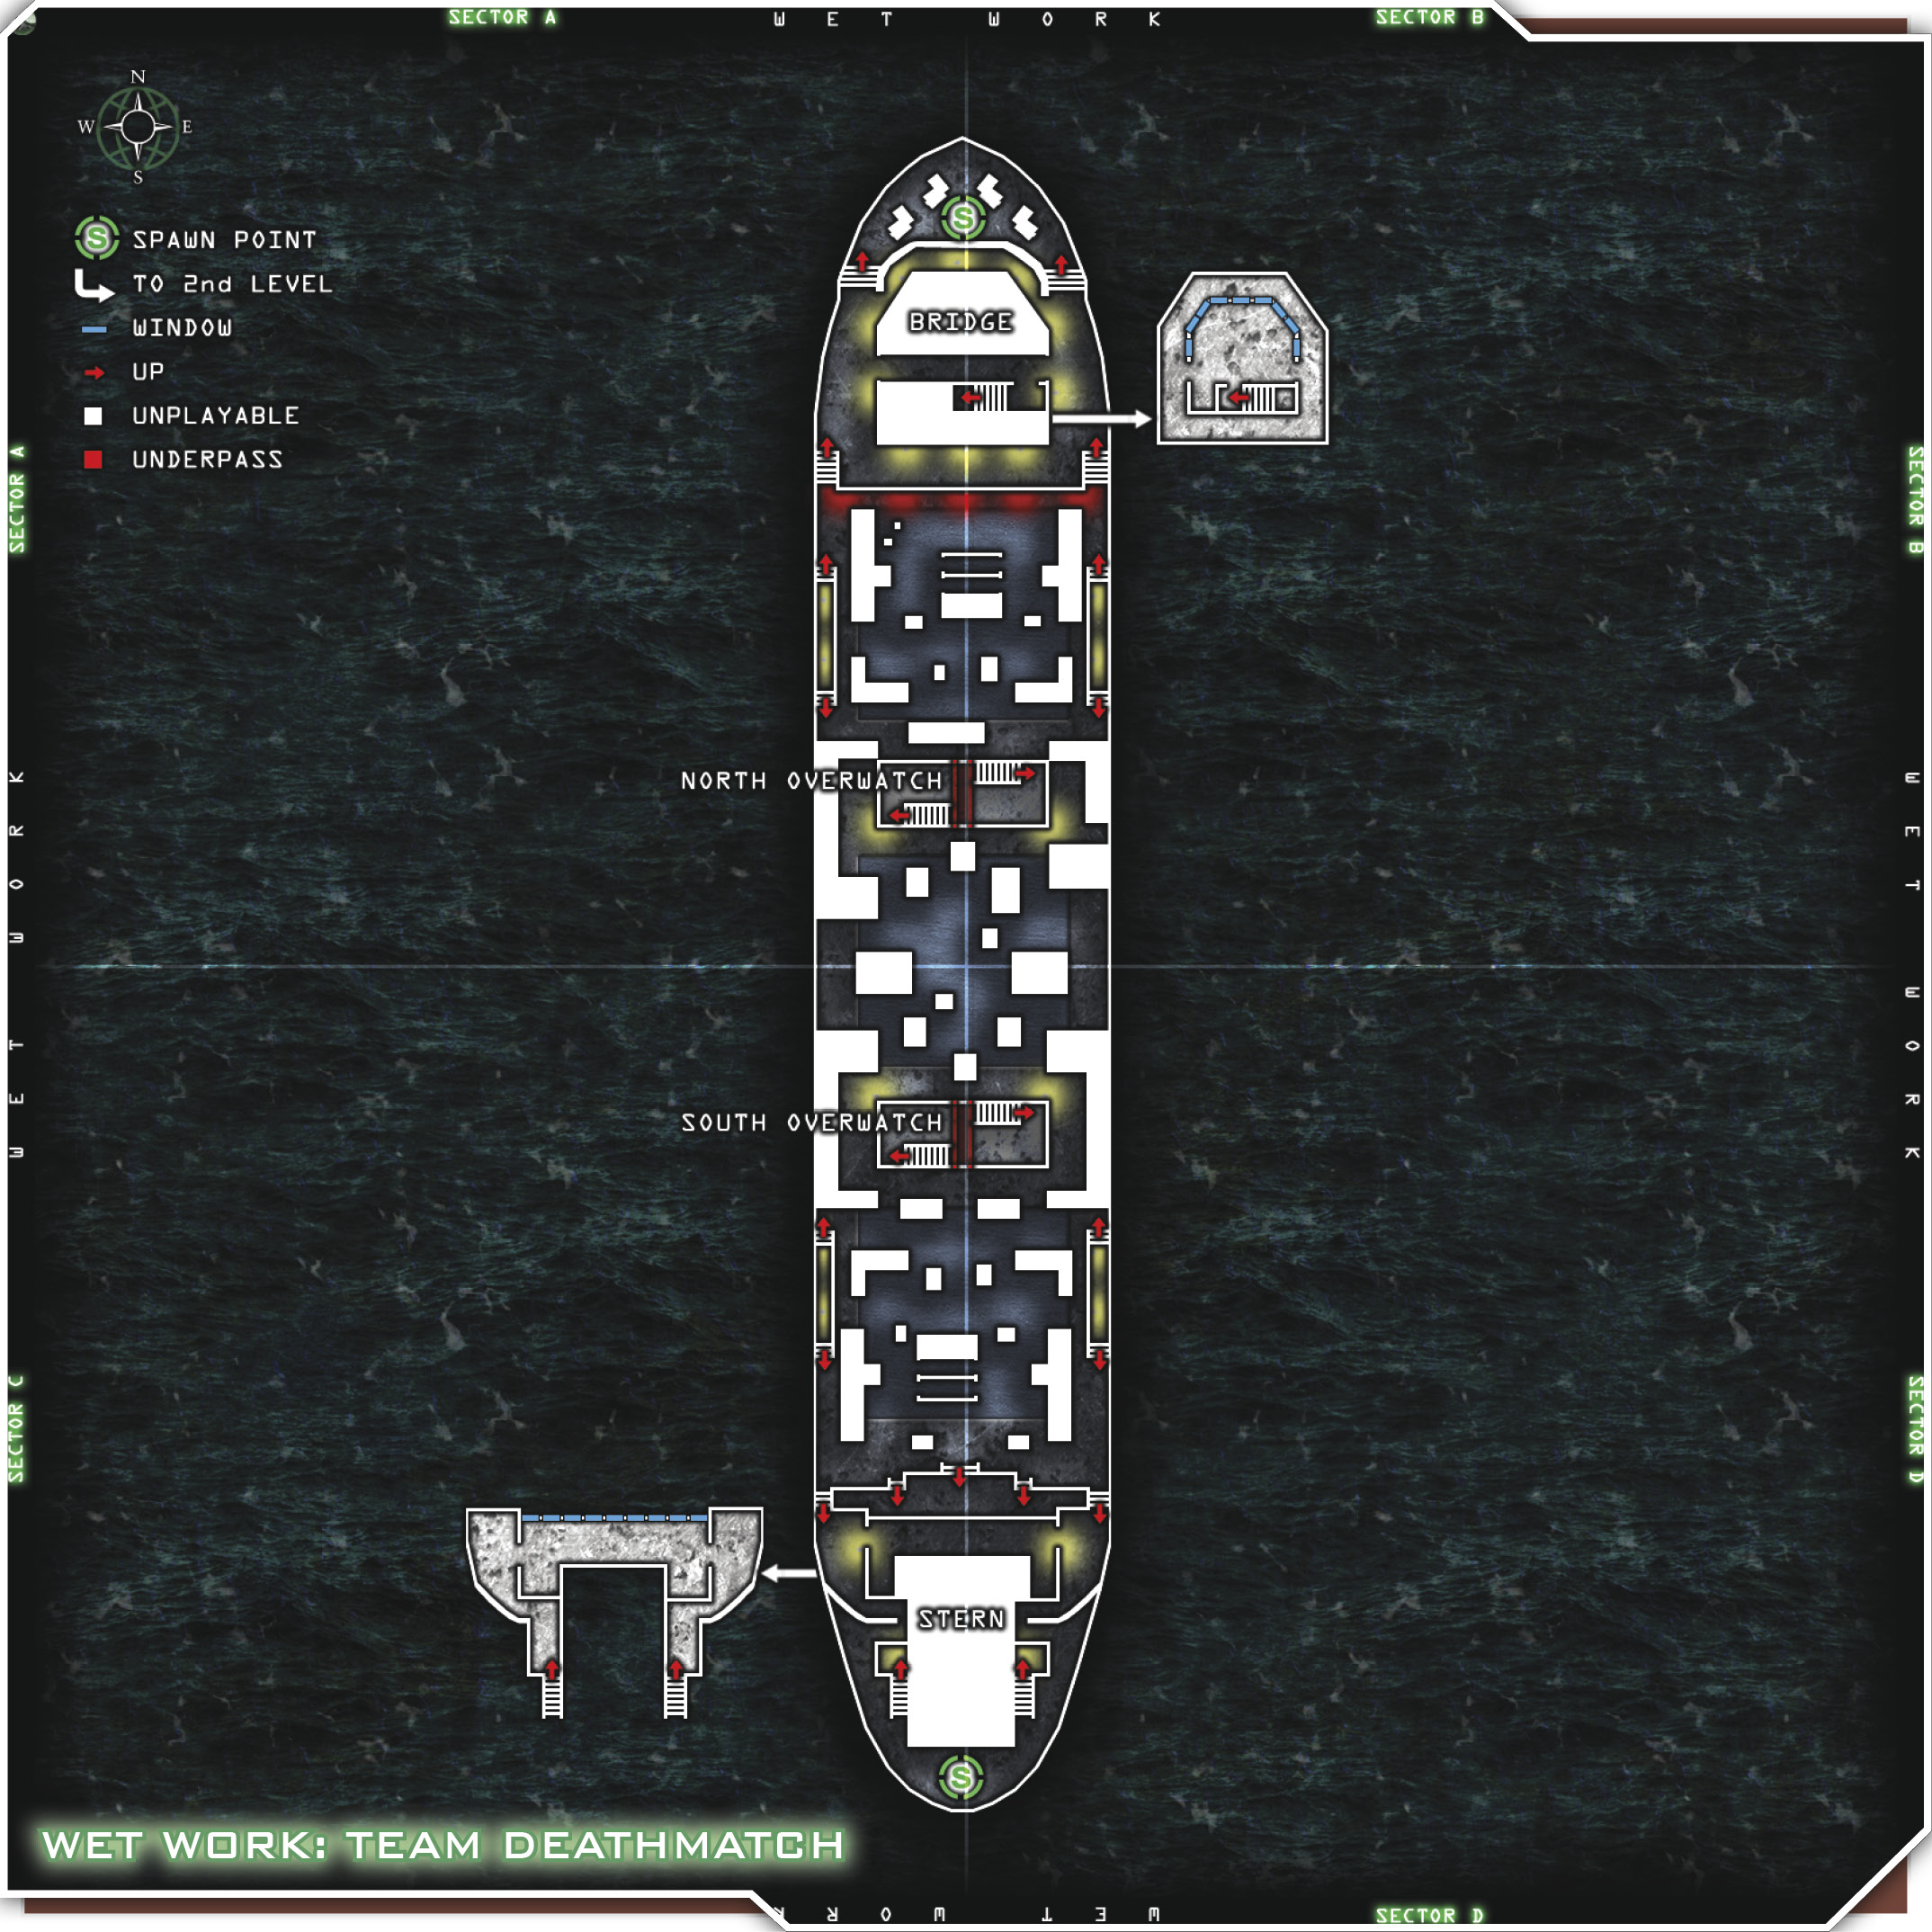
U.S. Forces vs. OpFor. This map takes place on a cargo ship out at sea. It’s night, but visibility is still good. Night vision helps quite a bit on this level, but it can be disorienting in close quarters. There are only two indoor areas, located at each end of the ship. There are two raised platforms for snipers as well.
These loadouts work well in a team or if you’re going solo. The Grenadier/Assault class is great for deck battles. With the grenade launcher, you’ll get a lot of unexploded shell kills. (Watch for the icon when you kill someone that way!) Use smoke to get through the tough areas. The Double Tap perk is ideal for the killer on the go, because you’ll want to fire off as many rounds as possible when you see an enemy. Extreme Conditioning will help you make it from one side of the ship to the other quickly.
The Sniper kit should be used by experienced snipers who can set up on one of the overwatch platforms and pick off enemies trying to breach through the center arena. Outfitted with Frag x3, the sniper can also defend himself if enemies move too close. Juggernaut lets you get into sniper battles with enemies shooting from the opposite platform, and Iron Lung will help steady your hand for longer periods of time.
Suggested Loadouts
Grenadier/Assault
| Slot | Name |
|---|---|
| Primary Weapon | AK-47 |
| Notes/Attachment | Grenade launcher |
| Side Arm | Desert Eagle |
| Special Grenade | Smoke |
| Perk 1 | Disabled |
| Perk 2 | Double Tap |
| Perk 3 | Extreme Conditioning |
Sniper
| Slot | Name |
|---|---|
| Primary Weapon | SVD |
| Side Arm | M1911 |
| Notes/Attachment | Silencer |
| Special Grenade | Smoke |
| Perk 1 | Frag x3 or Claymore x2 |
| Perk 2 | Juggernaut |
| Perk 3 | Iron Lung |
Tips & Locations
The two overwatch platforms are great places to snipe, but be careful that you don’t get stabbed. This is a great place to put Claymores. Put them at the top of each staircase leading up to each platform, and rest easy.
Most of the battle will occur in the center of the ship, with teams constantly flowing in and out from the underpasses below each overwatch platform. Watch for the occasional straggler who thinks he’s smart and tries to maneuver around the sides of the underpass. A few grenades will teach him.
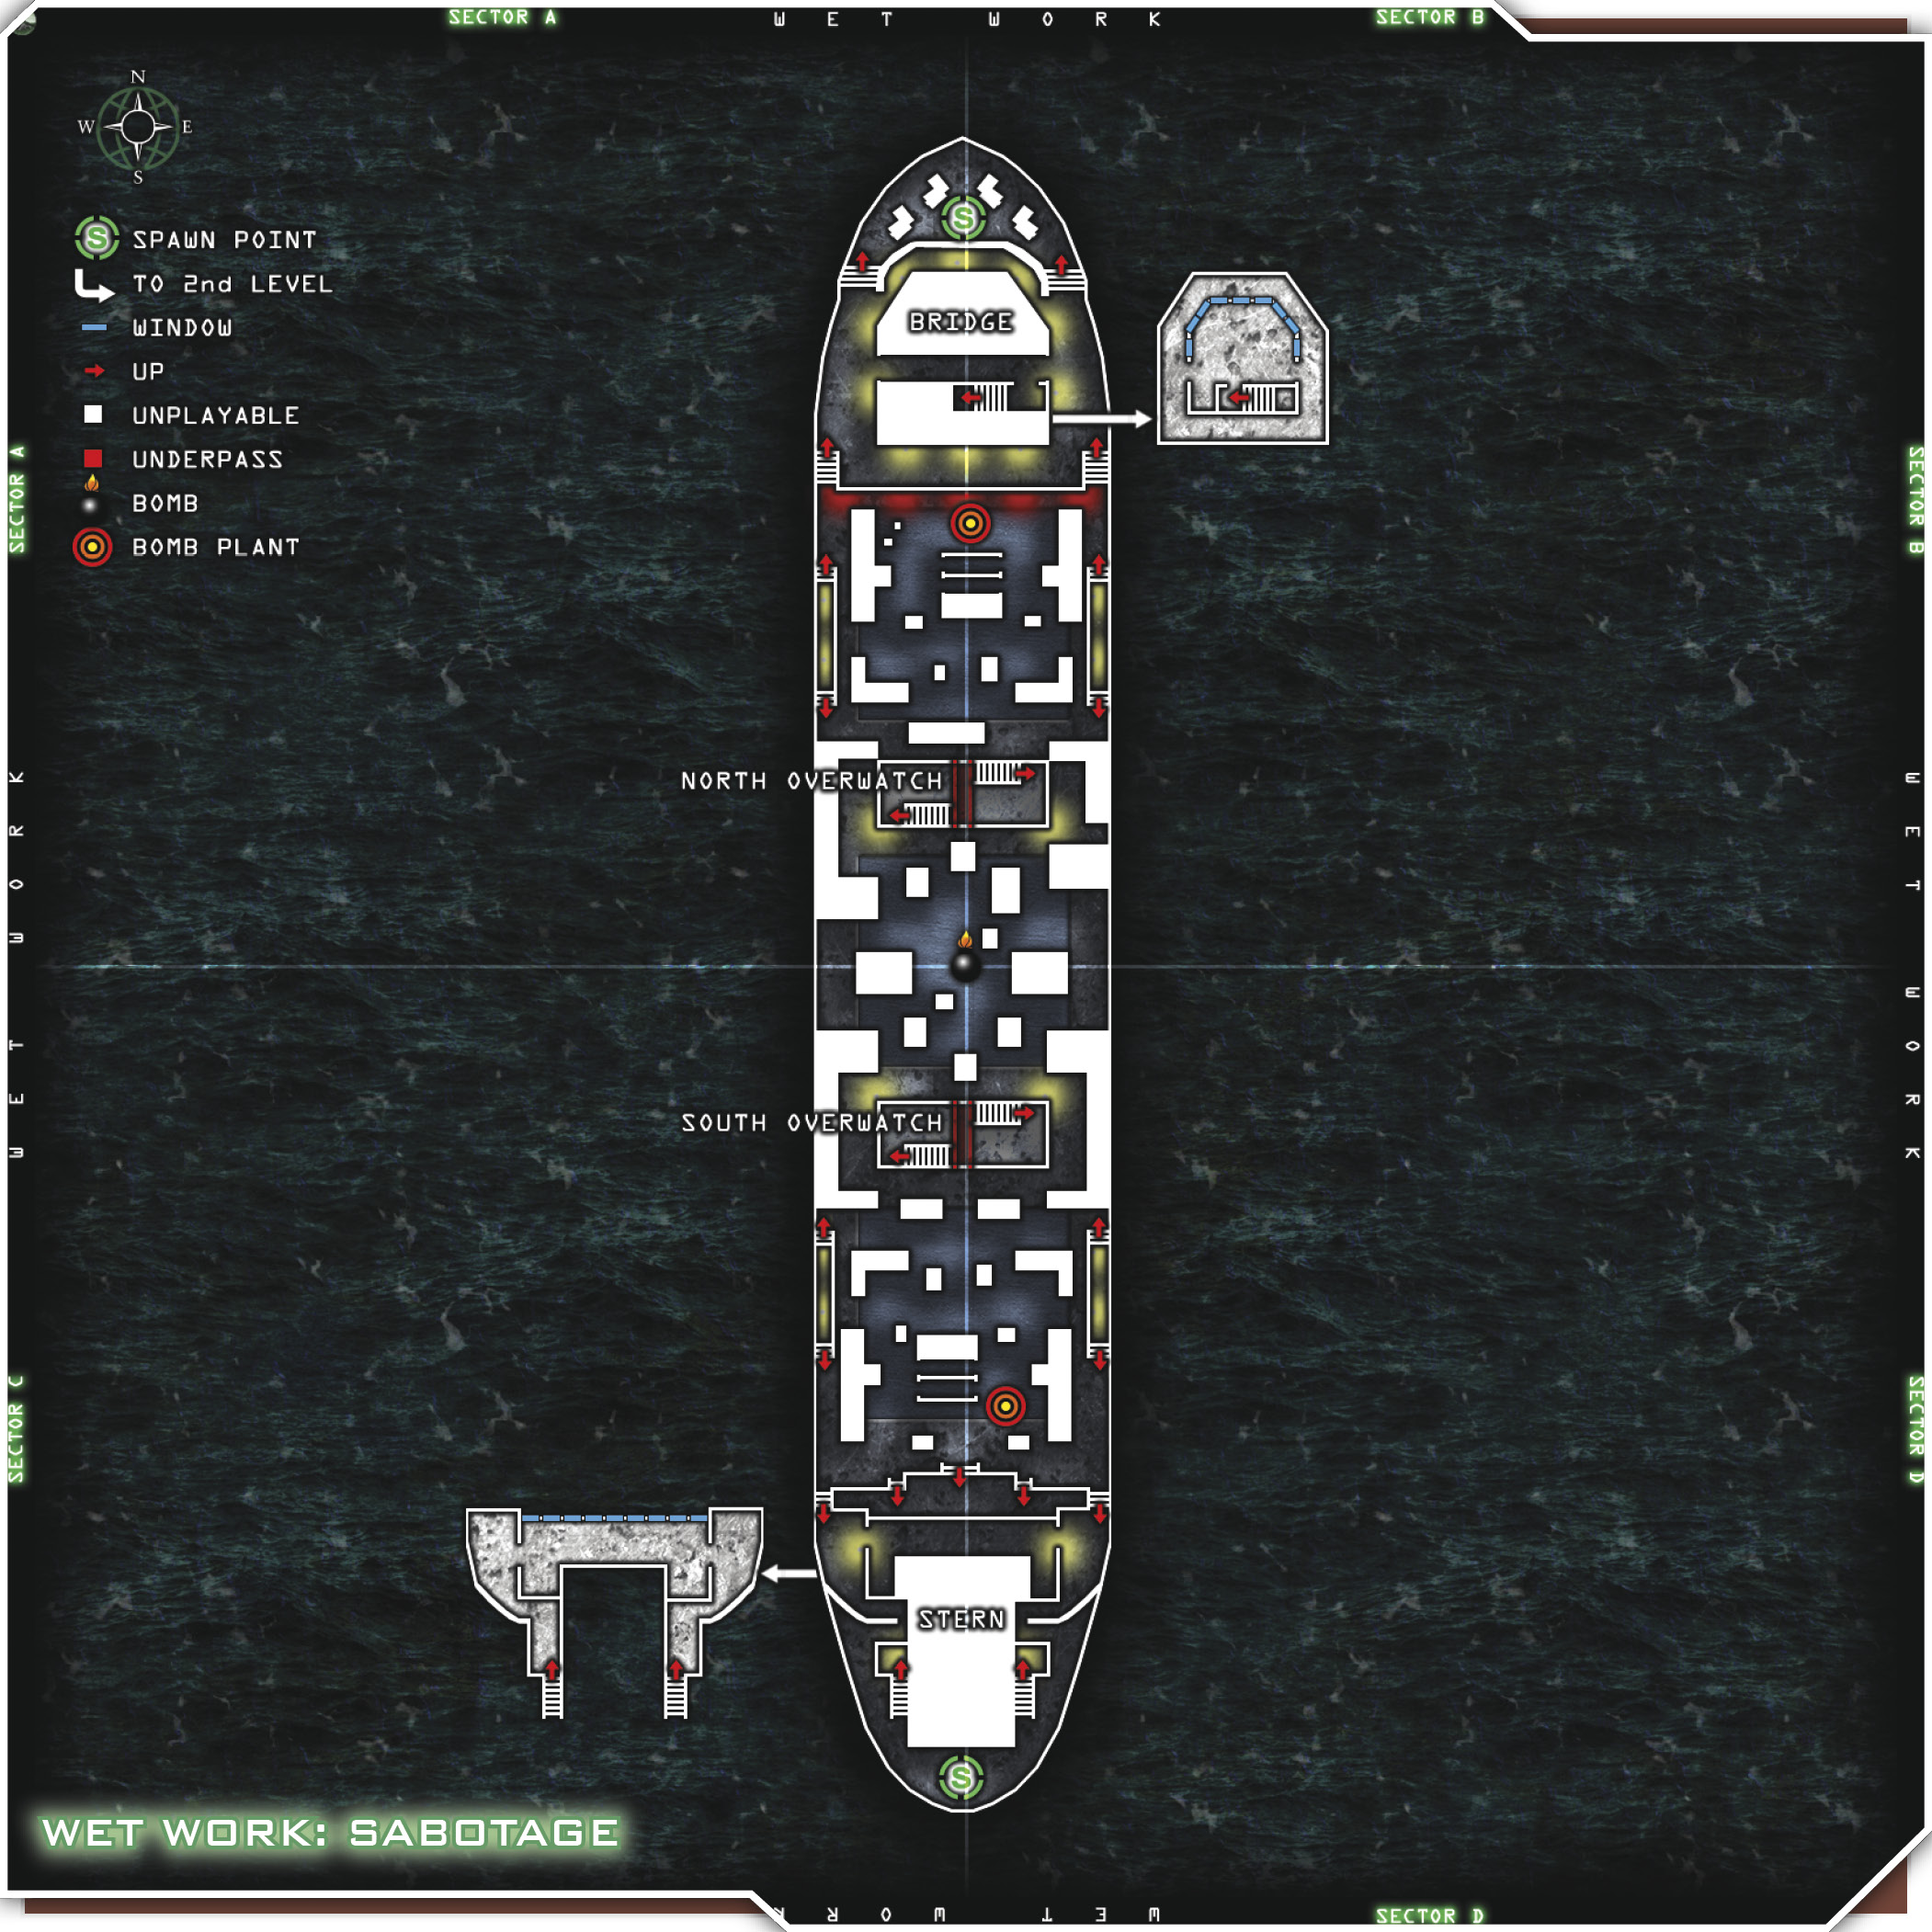
Stick to the sides of the ship as often as possible, because there’s more cover from the plentiful incoming grenades. You’ll be able to pop from cover to cover pretty well by using the cargo containers scattered along the rails. Be ready to stab around every corner, because many players will try to rush to your end of the boat. If you end up getting pushed back to your spawn point, don’t worry. There are plenty of places to hole up in there. Each spawn point offers an elevated second level, which is great for snipers. It’s always better to shoot down on enemies than to shoot up, so take advantage of this if you get pushed back. Snipers might want to set up here on the second level initially, if they can get a decent line of sight to the action.
The center of the ship is where almost all the magic happens. Teams will continue to pour through the underpasses and around the sides. Sitting back a bit and letting them come through might be a good trick once in a while. Try setting Claymores where they won’t expect them, and have some of your snipers take care of the more difficult enemies. Be ready for some close-quarters combat on the ship. Snipers should always be ready to pop on their night vision and grab a pistol to plink away at any close-talkers.
Team Tactics
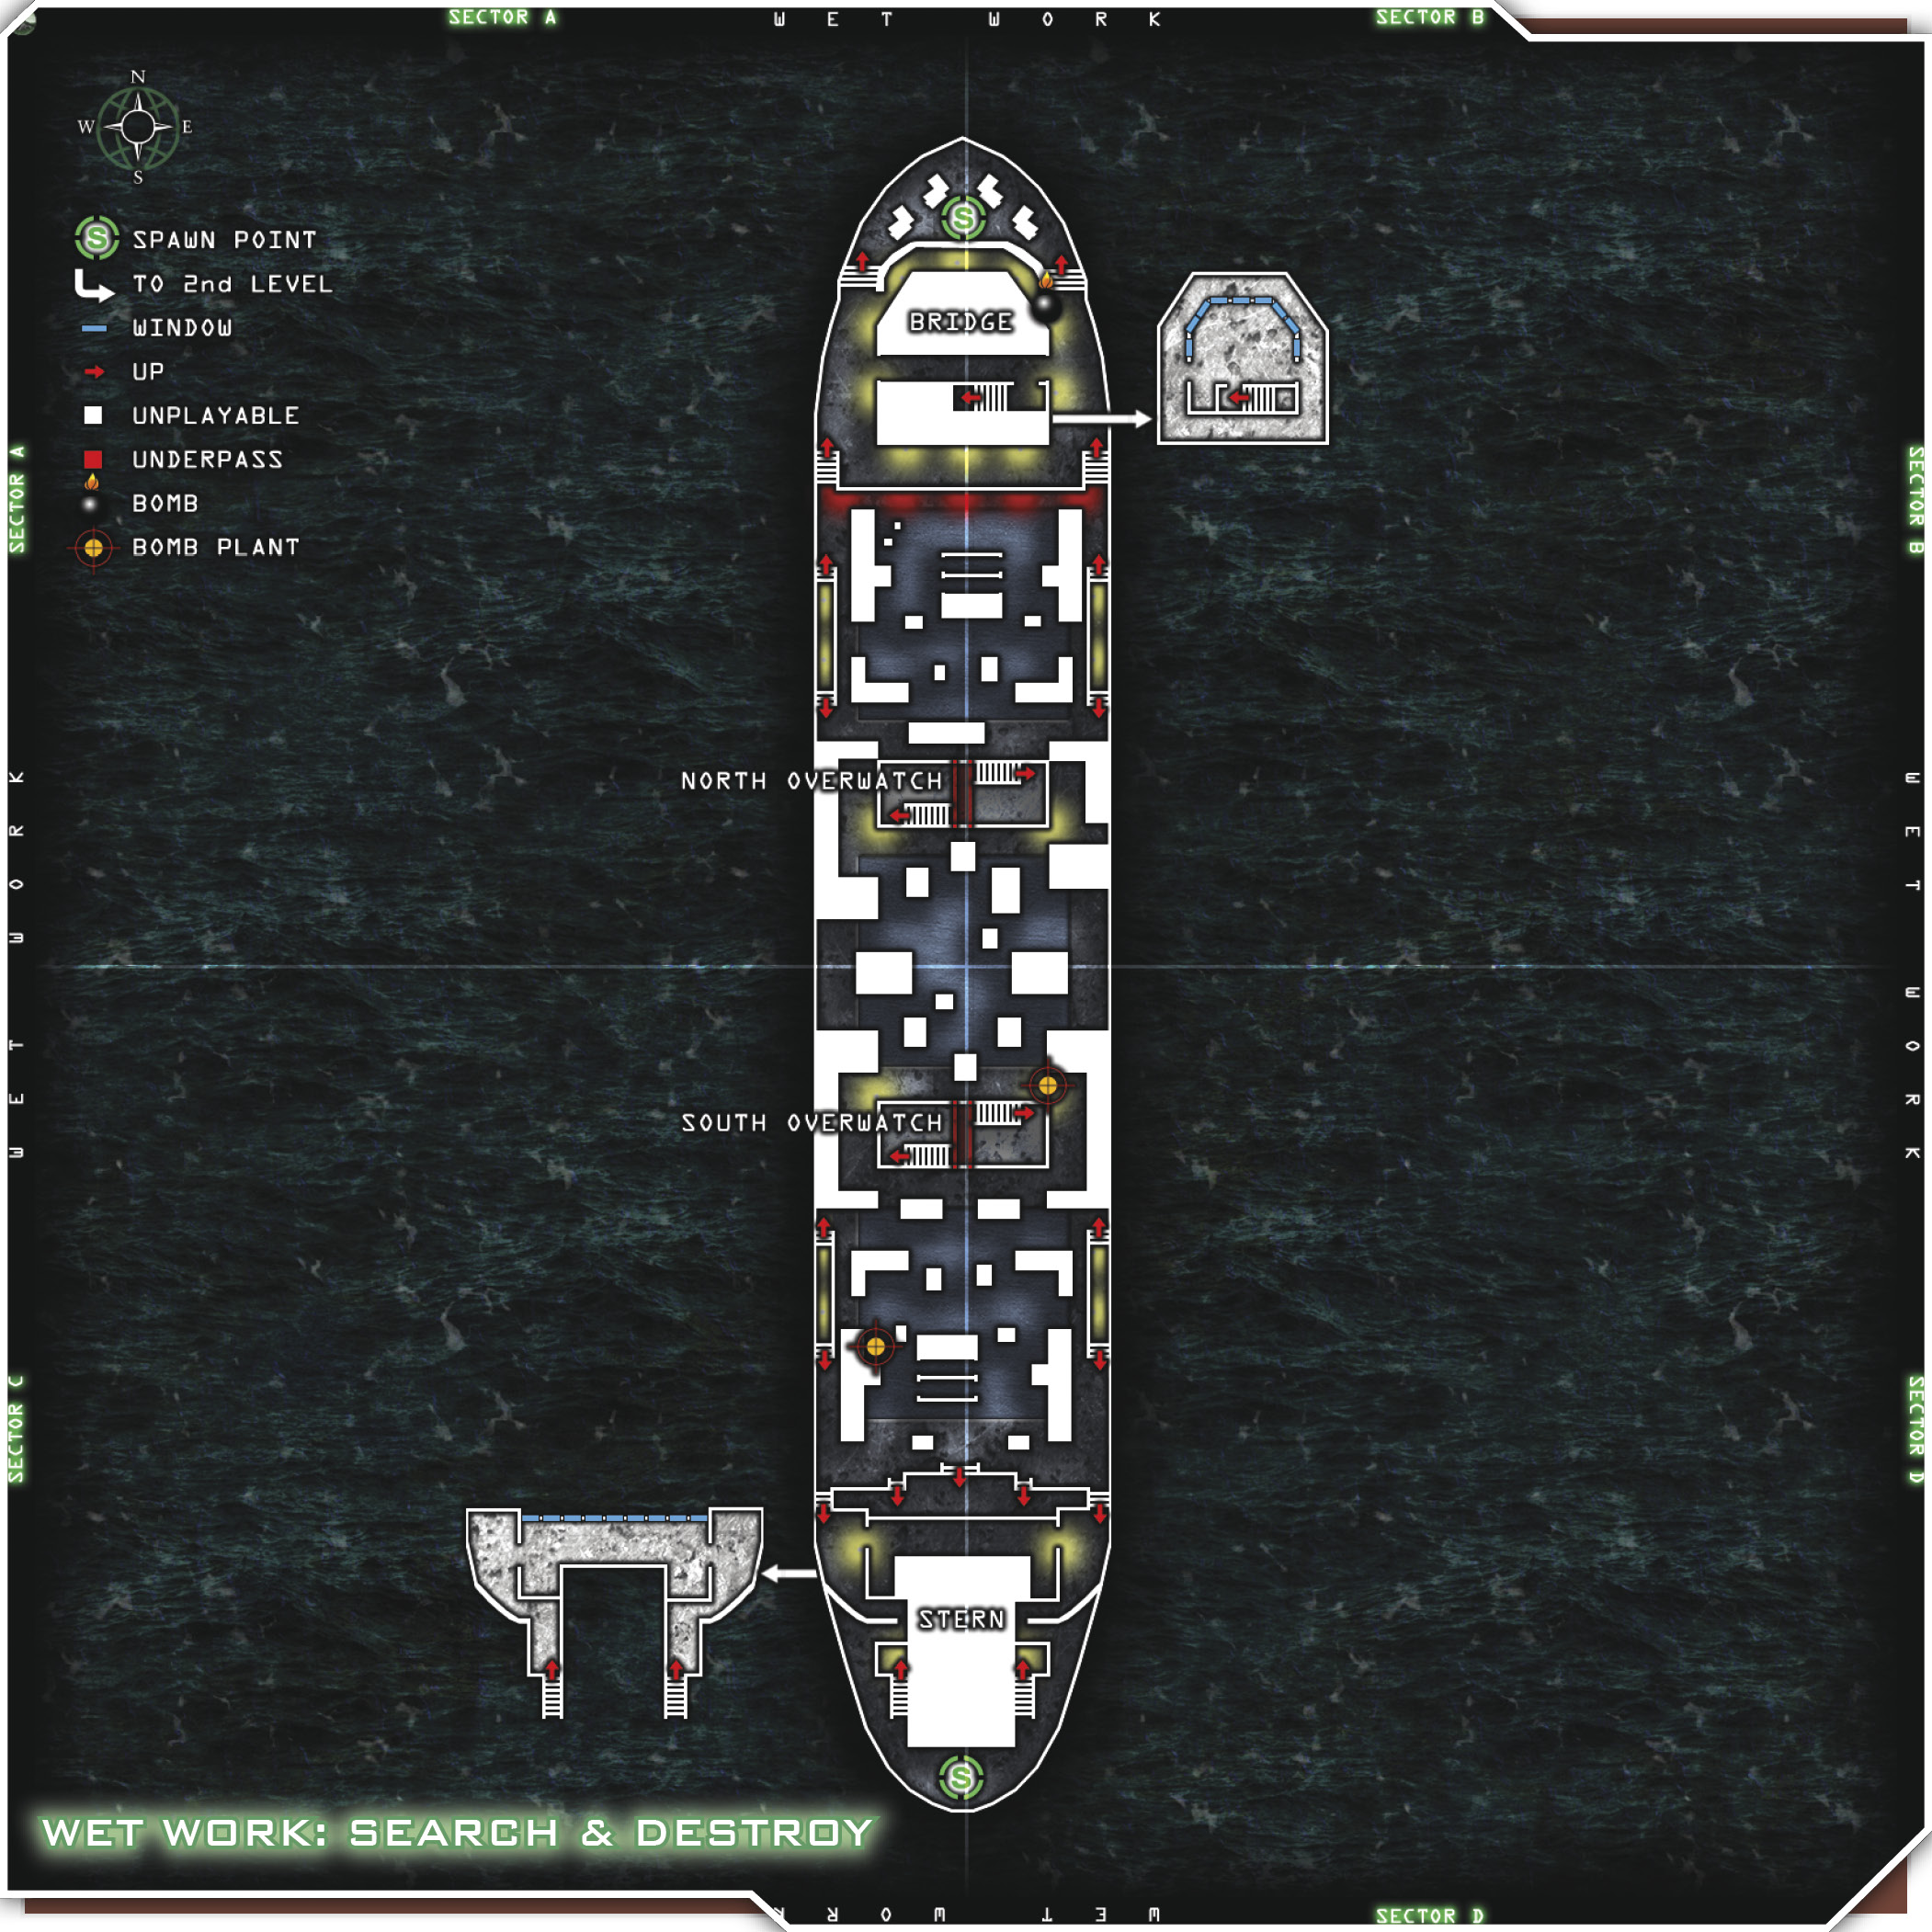
Take a conservative approach on this map to start. Let’s kick off from the south side of the ship. From there, put one sniper out on the second-story balcony right away. The rest of the team moves into position just south of the South Overwatch platform. They escort your second sniper to that platform until he gets set up with Claymores. The ground crew also plants a mix of Claymores and C-4 packs at the south underpass, and then pulls back between the south platform and your spawn point. Your forward sniper will no doubt be screaming over the mic that “they’re coming,” so your secondary sniper can start shooting and your ground team can prepare for carnage.
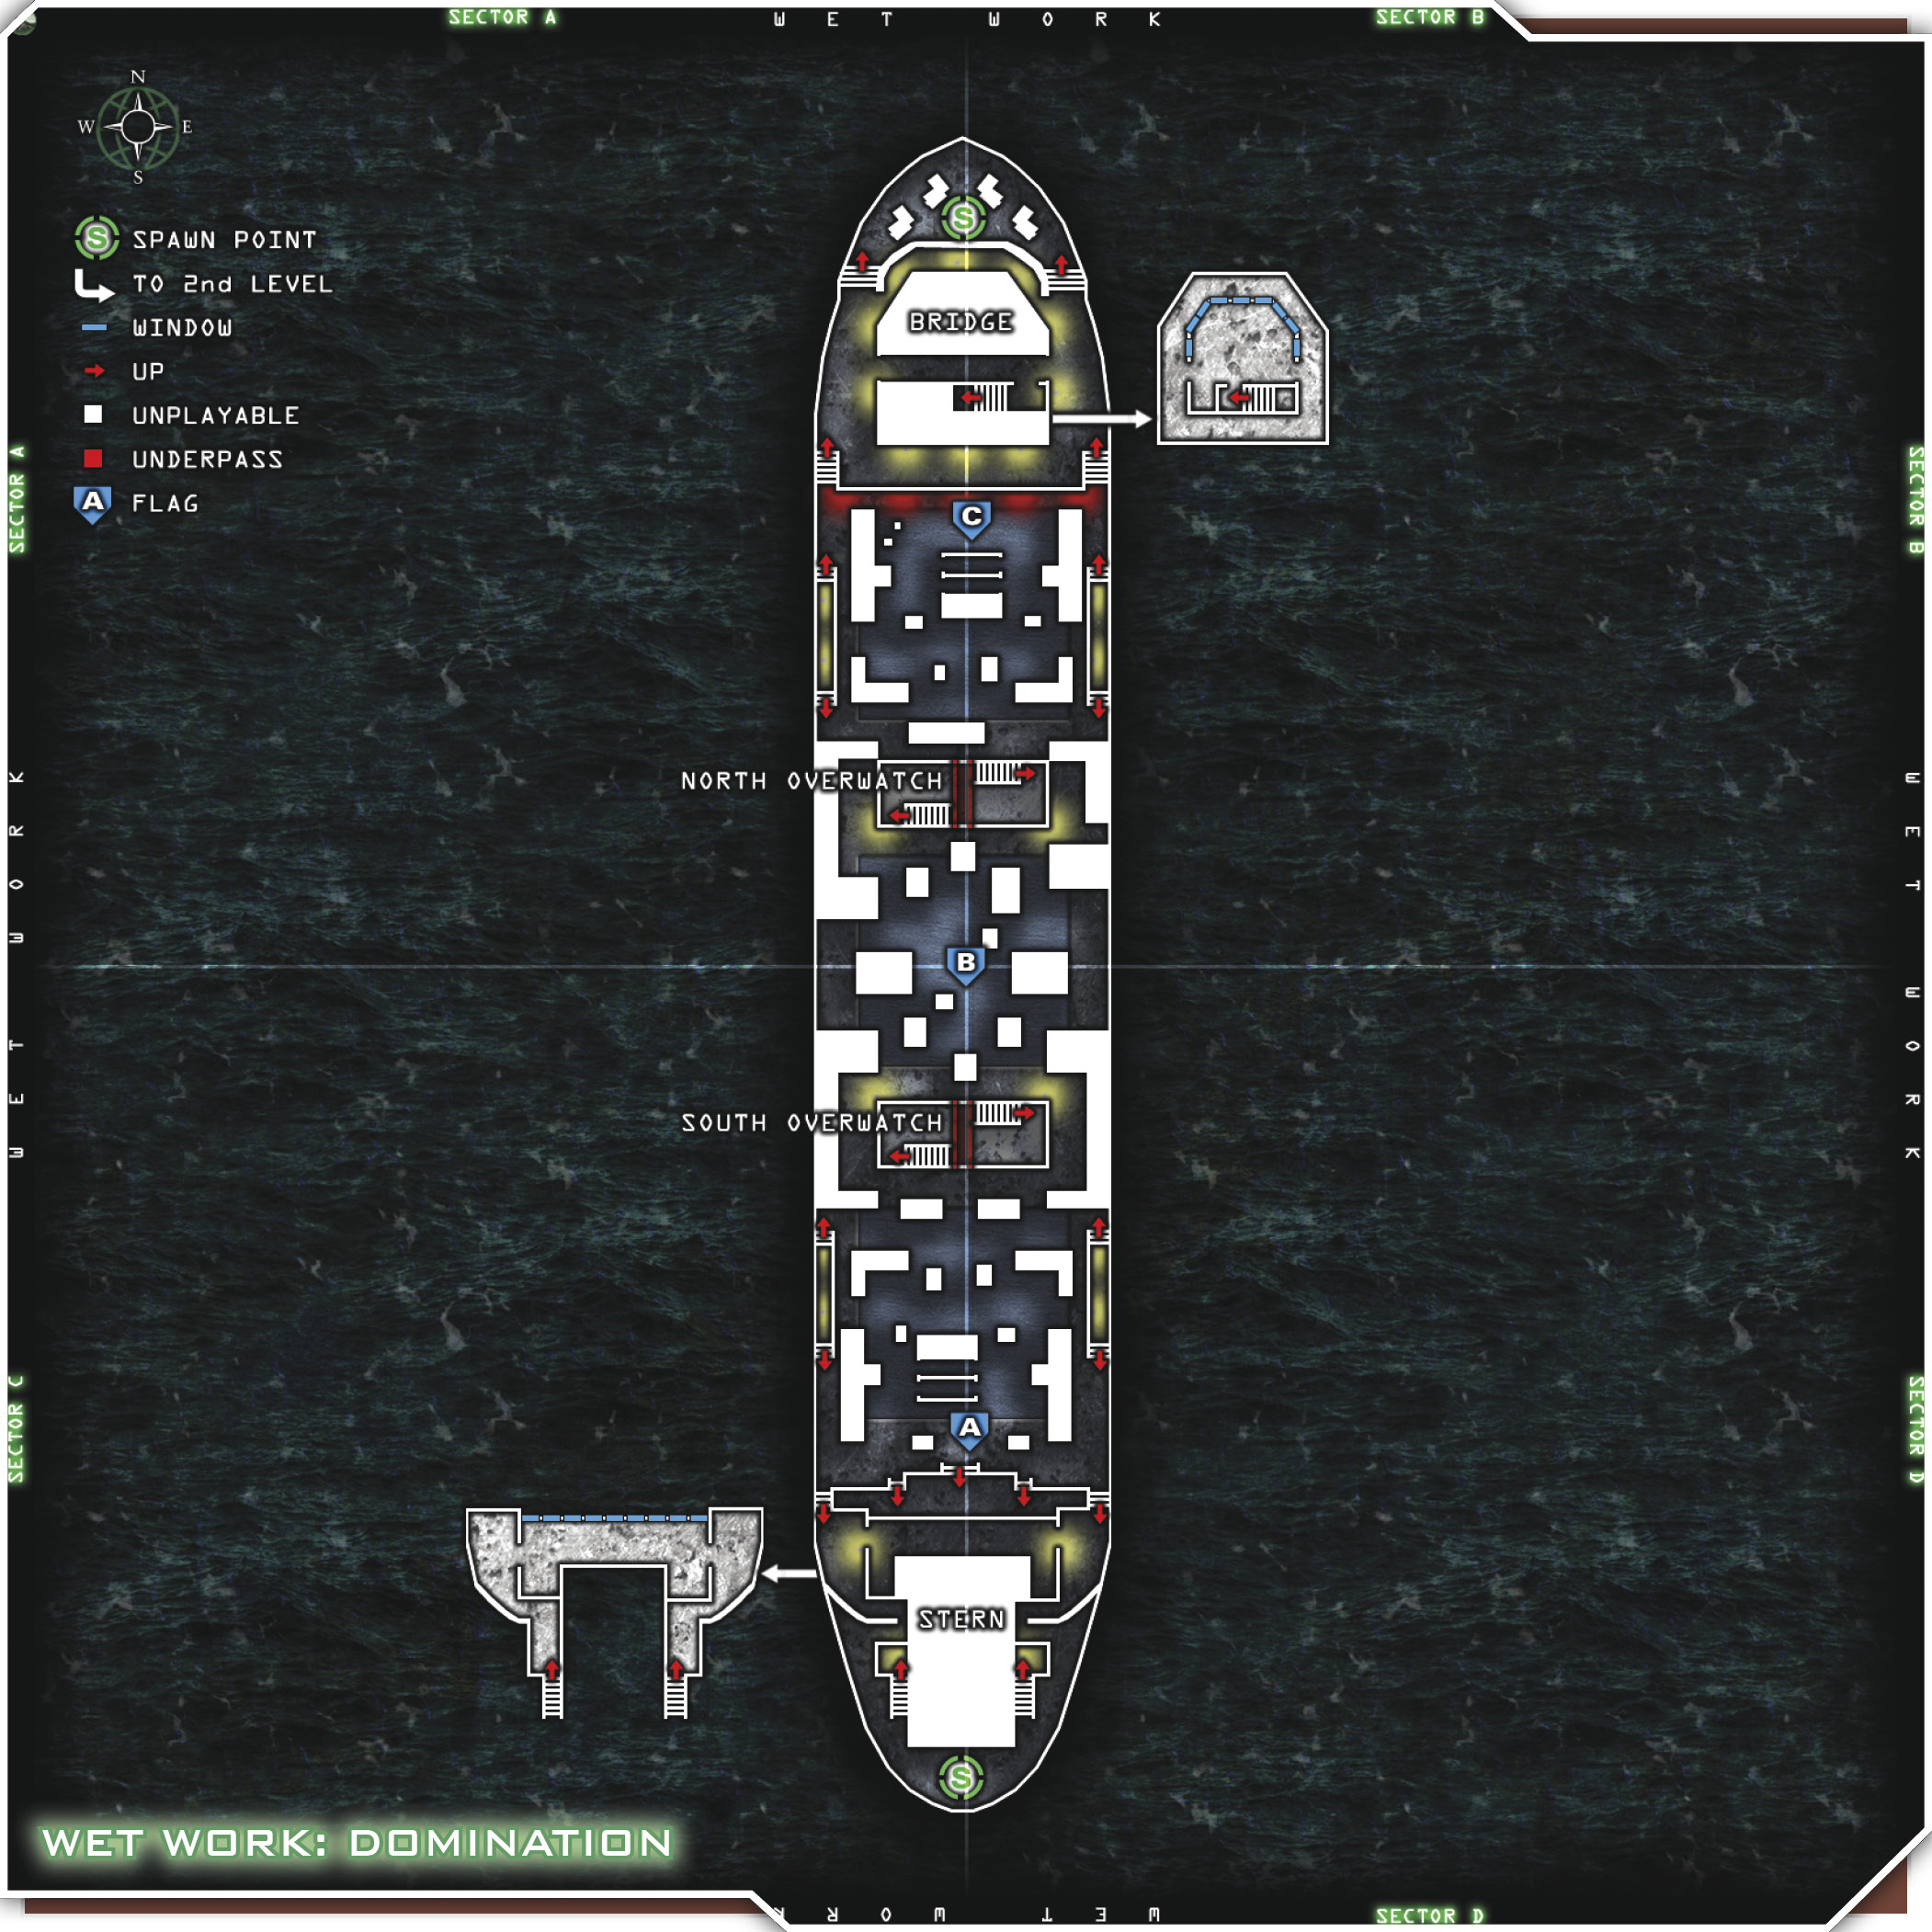
Your forward sniper relays enemy positions and approximates their projected path. Most teams won’t be used to not meeting enemies in the center of the map, and hopefully they’ll have depleted their explosives by now. This leaves your ground team free to lock down the three chokepoints. There’s the underpass, and then the west and east sides of the southern platform, which should all be decorated with Claymores or C-4.
Depending on your teammates’ skills, consider setting up two more snipers. Put a set of two snipers on the south platform and two more on the second story of the spawn point. Your remaining two players should run light, with either submachine guns or assault rifles and Extreme Conditioning. Have them move as quickly as possible to the kill zone, which is the center of the map between the two overwatch platforms. They should set up as quickly as they can and start fending off the sides of the northern platform, while your snipers take aim at the underpass and work on funeral arrangements for any counter-snipers. You may want to alter the configuration a bit, depending on your snipers’ skills or the need to have more boots on the ground. The choice is yours, but putting two snipers on the overwatch platform and just one on the second-level balcony, while the new assault boots help out in the kill zone, is a good plan.
As a last resort or just to change things up a bit, you can keep your team together, spaced loosely to avoid grenades, and move up one side of the ship to get behind the enemy. Of course, make sure to smoke all avenues of possible approach, to disorient the enemy and surprise them when you come through one of the smoke clouds they didn’t expect. Keep making your way forward, shooting down enemies as you go, and if you lose a man, take cover and wait for him to rejoin the team. Then proceed forward. Continue to caterpillar your way up the side of the ship until you reach the enemy spawn point. Then you can commandeer their base and hold it down until they realize what’s happened, or you can regroup and head back through the center or the other side of the ship. It’s up to you. This is a very fun level and can be played tactically.