
Call of Duty: Infinite Warfare Guide Call of Duty 4: Modern Warfare Multiplayer Map Tactics
Pipeline
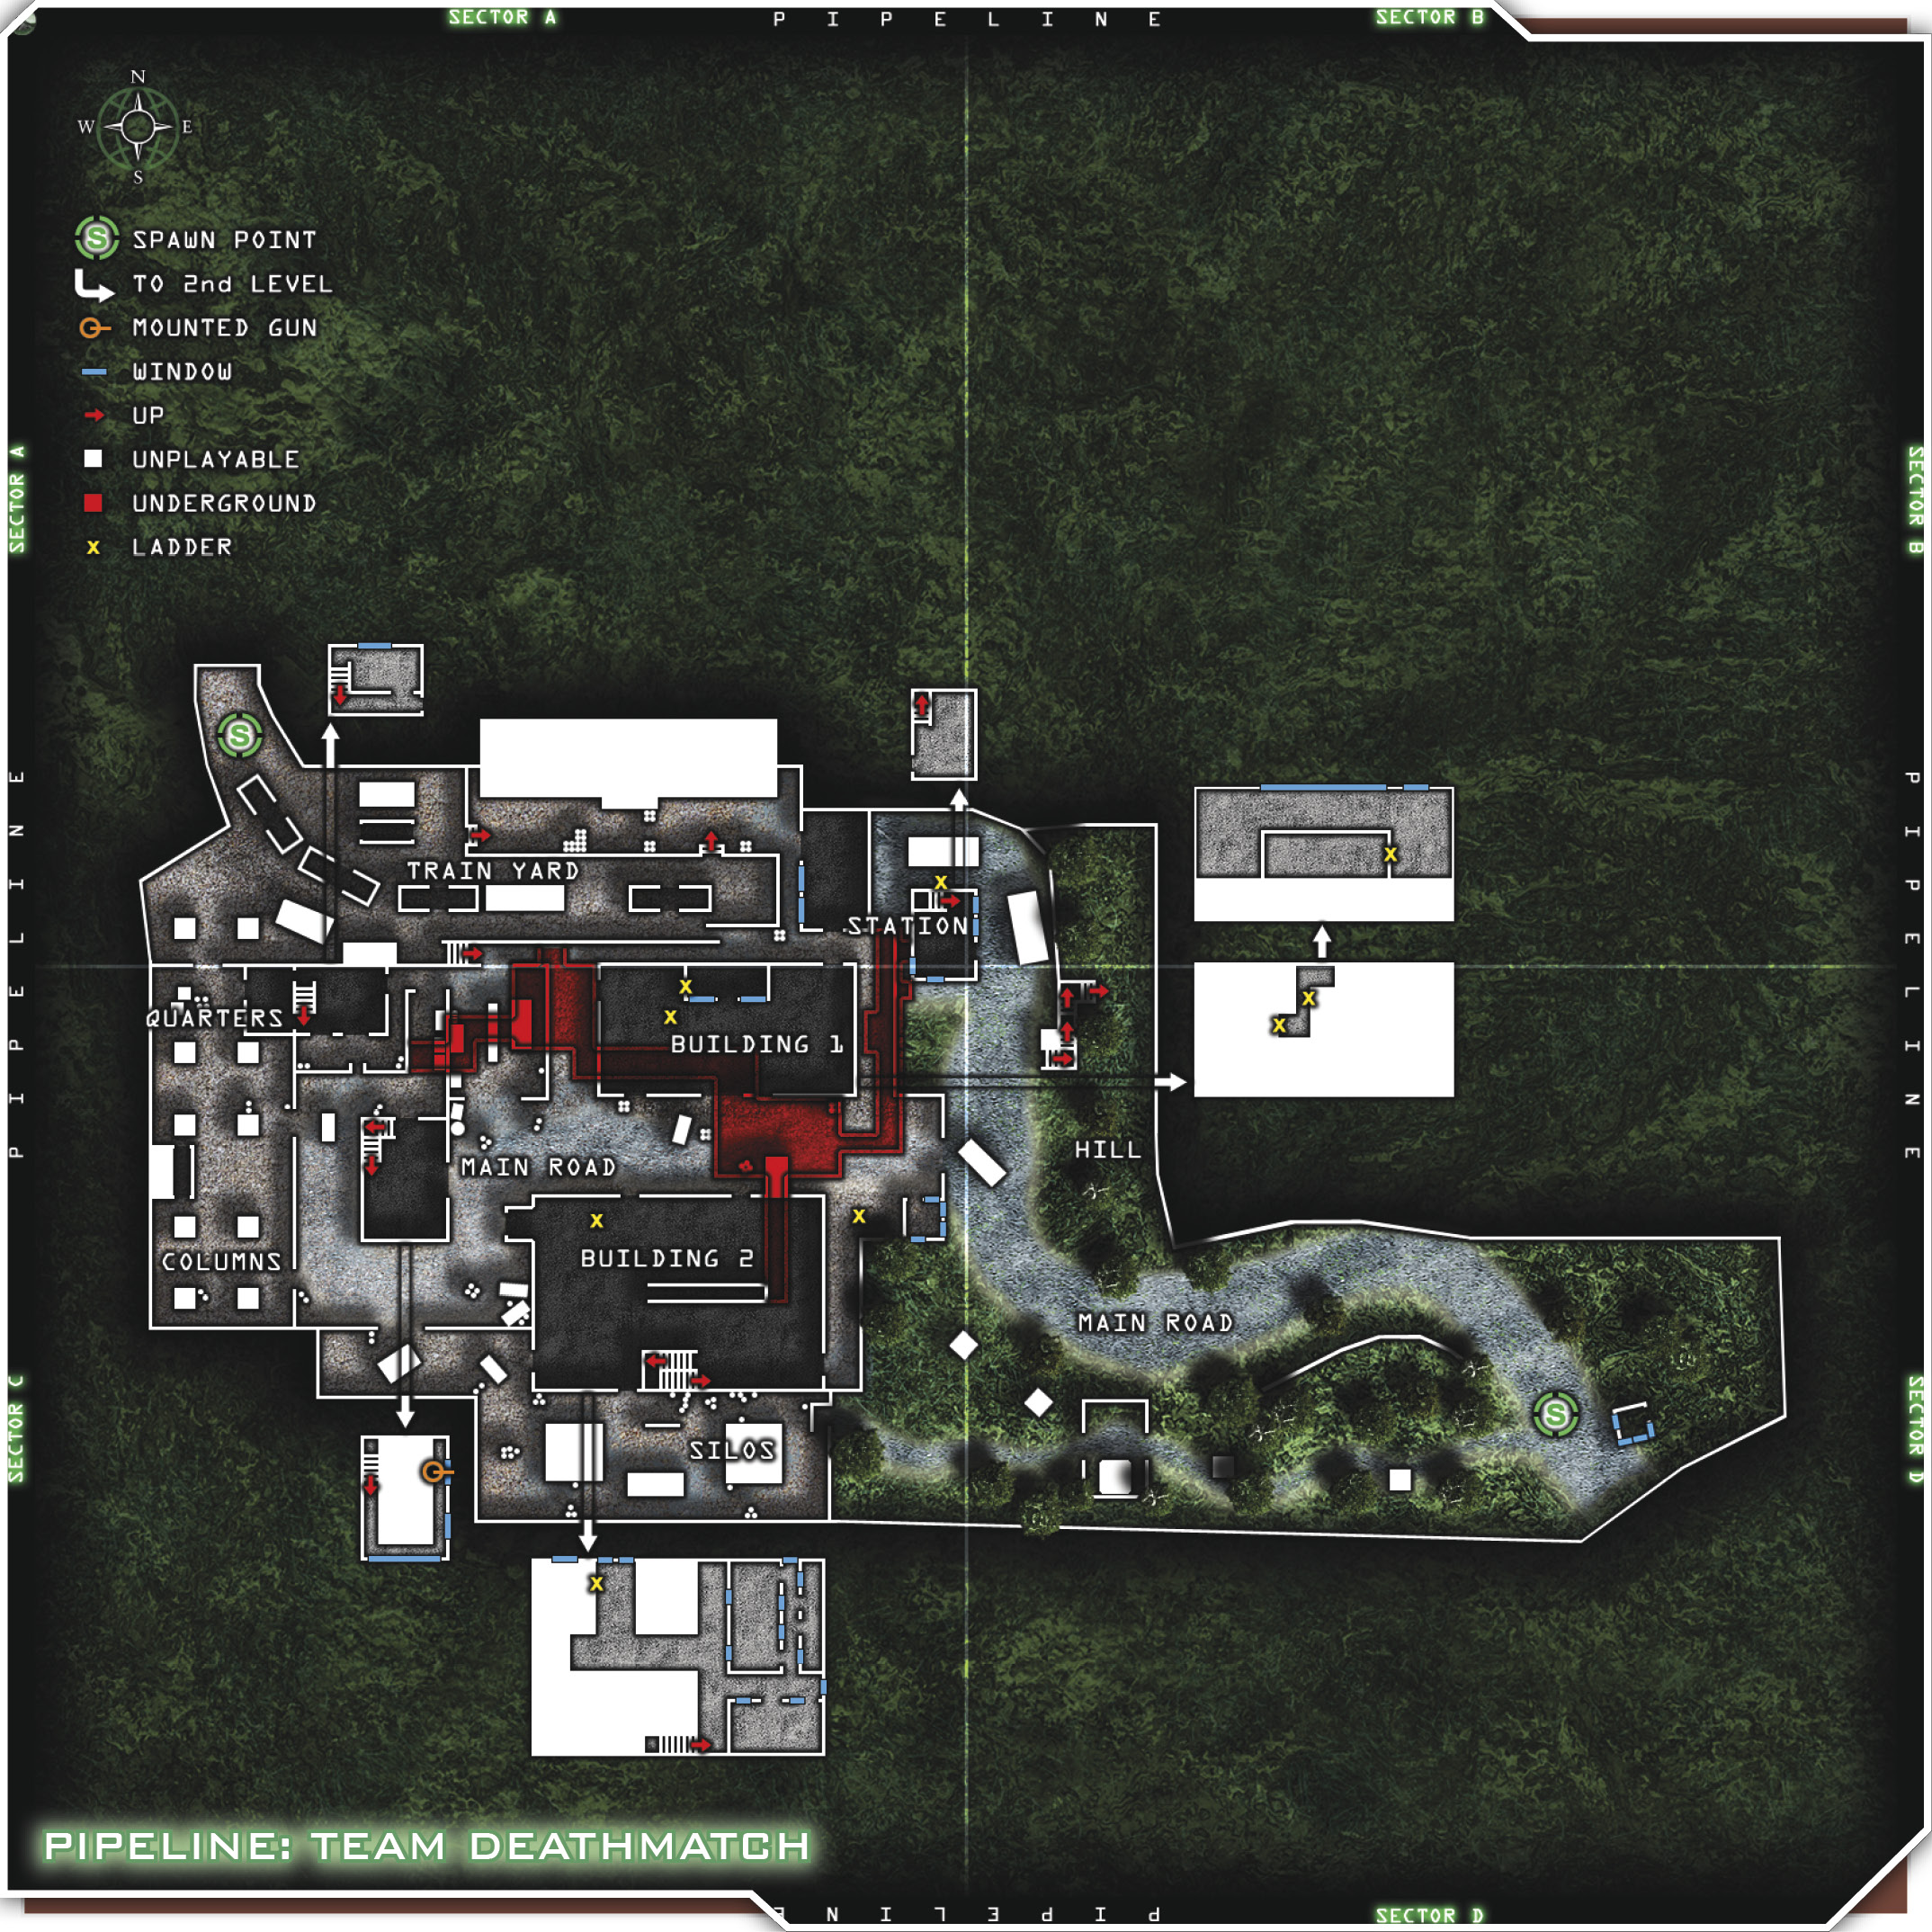
Spec Ops vs. Spetsnaz. Morning on a gloomy day at an abandoned oil refinery is the setting for this map. A winding road spills into the center of the plant, with Silos to the south and a Train Yard to the north. Two large warehouse buildings face each other in the center of the map, and an underground network of tunnels leads from the Crew Quarters to the Station House and Building Two.
These loadouts give you two options: to snipe, or to just kind of snipe. The Rifleman class is set up so that you can scope in for good medium-range shots, while still being able to shoot from the hip due to the Steady Aim perk. Since your kit is geared toward ground-pounding, take the Frag x3 perk and Juggernaut. They’ll help keep you alive.
The Sniper kit is a basic loadout, including Claymores to fortify your position, Sleight of Hand to decrease reload times (sniper rifles take a bit longer to reload), and Iron Lung to hold your breath longer while sniping. You’ll need a good combination of these two kits to work well as a team, so make sure you don’t overload on sniper classes before the round begins.
Suggested Loadouts
Sniper
| Slot | Name |
|---|---|
| Primary Weapon | M21 |
| Side Arm | M1911 |
| Notes/Attachment | Silencer |
| Special Grenade | Smoke |
| Perk 1 | Claymore x2 |
| Perk 2 | Sleight of Hand |
| Perk 3 | Iron Lung |
Rifleman
| Slot | Name |
|---|---|
| Primary Weapon | M16A4 |
| Notes/Attachment | ACOG Scope |
| Side Arm | USP .45 |
| Special Grenade | Smoke |
| Perk 1 | Frag x3 |
| Perk 2 | Juggernaut |
| Perk 3 | Steady Aim |
Tips & Locations
Most battles occur at the main meeting point on the map, which is the Main Road running east to west between Buildings One and Two, and also in the Train Yard. Be ready to launch an attack almost as soon as you get to any of those locations. The Train Yard offers several train cars where you can take cover, but be careful, because one well-placed grenade can make you a permanent resident. Get some medium-range gunners to set up quickly and lay down some covering fire so the rest of your team can advance.
The Crew Quarters offer access to the underground tunnel system and will let you out either in Building Two or the Station House. If you get pinned down at the Train Yard, use these tunnels to outflank the enemy. Be ready for a fight down there, because the enemy team can also access these tunnels from their side of the Train Yard through the Station House.
Building One has three levels. The ground floor is fairly open, with entrances on all sides except the east, and the second level (technically the third level) offers an expanse of windows to shoot through on the south side. Since it’s only accessible by ladder, use Claymores at the top of the ladder to cover your back. There are also windows facing the north side of the map, which can be used to watch over the Train Yard.
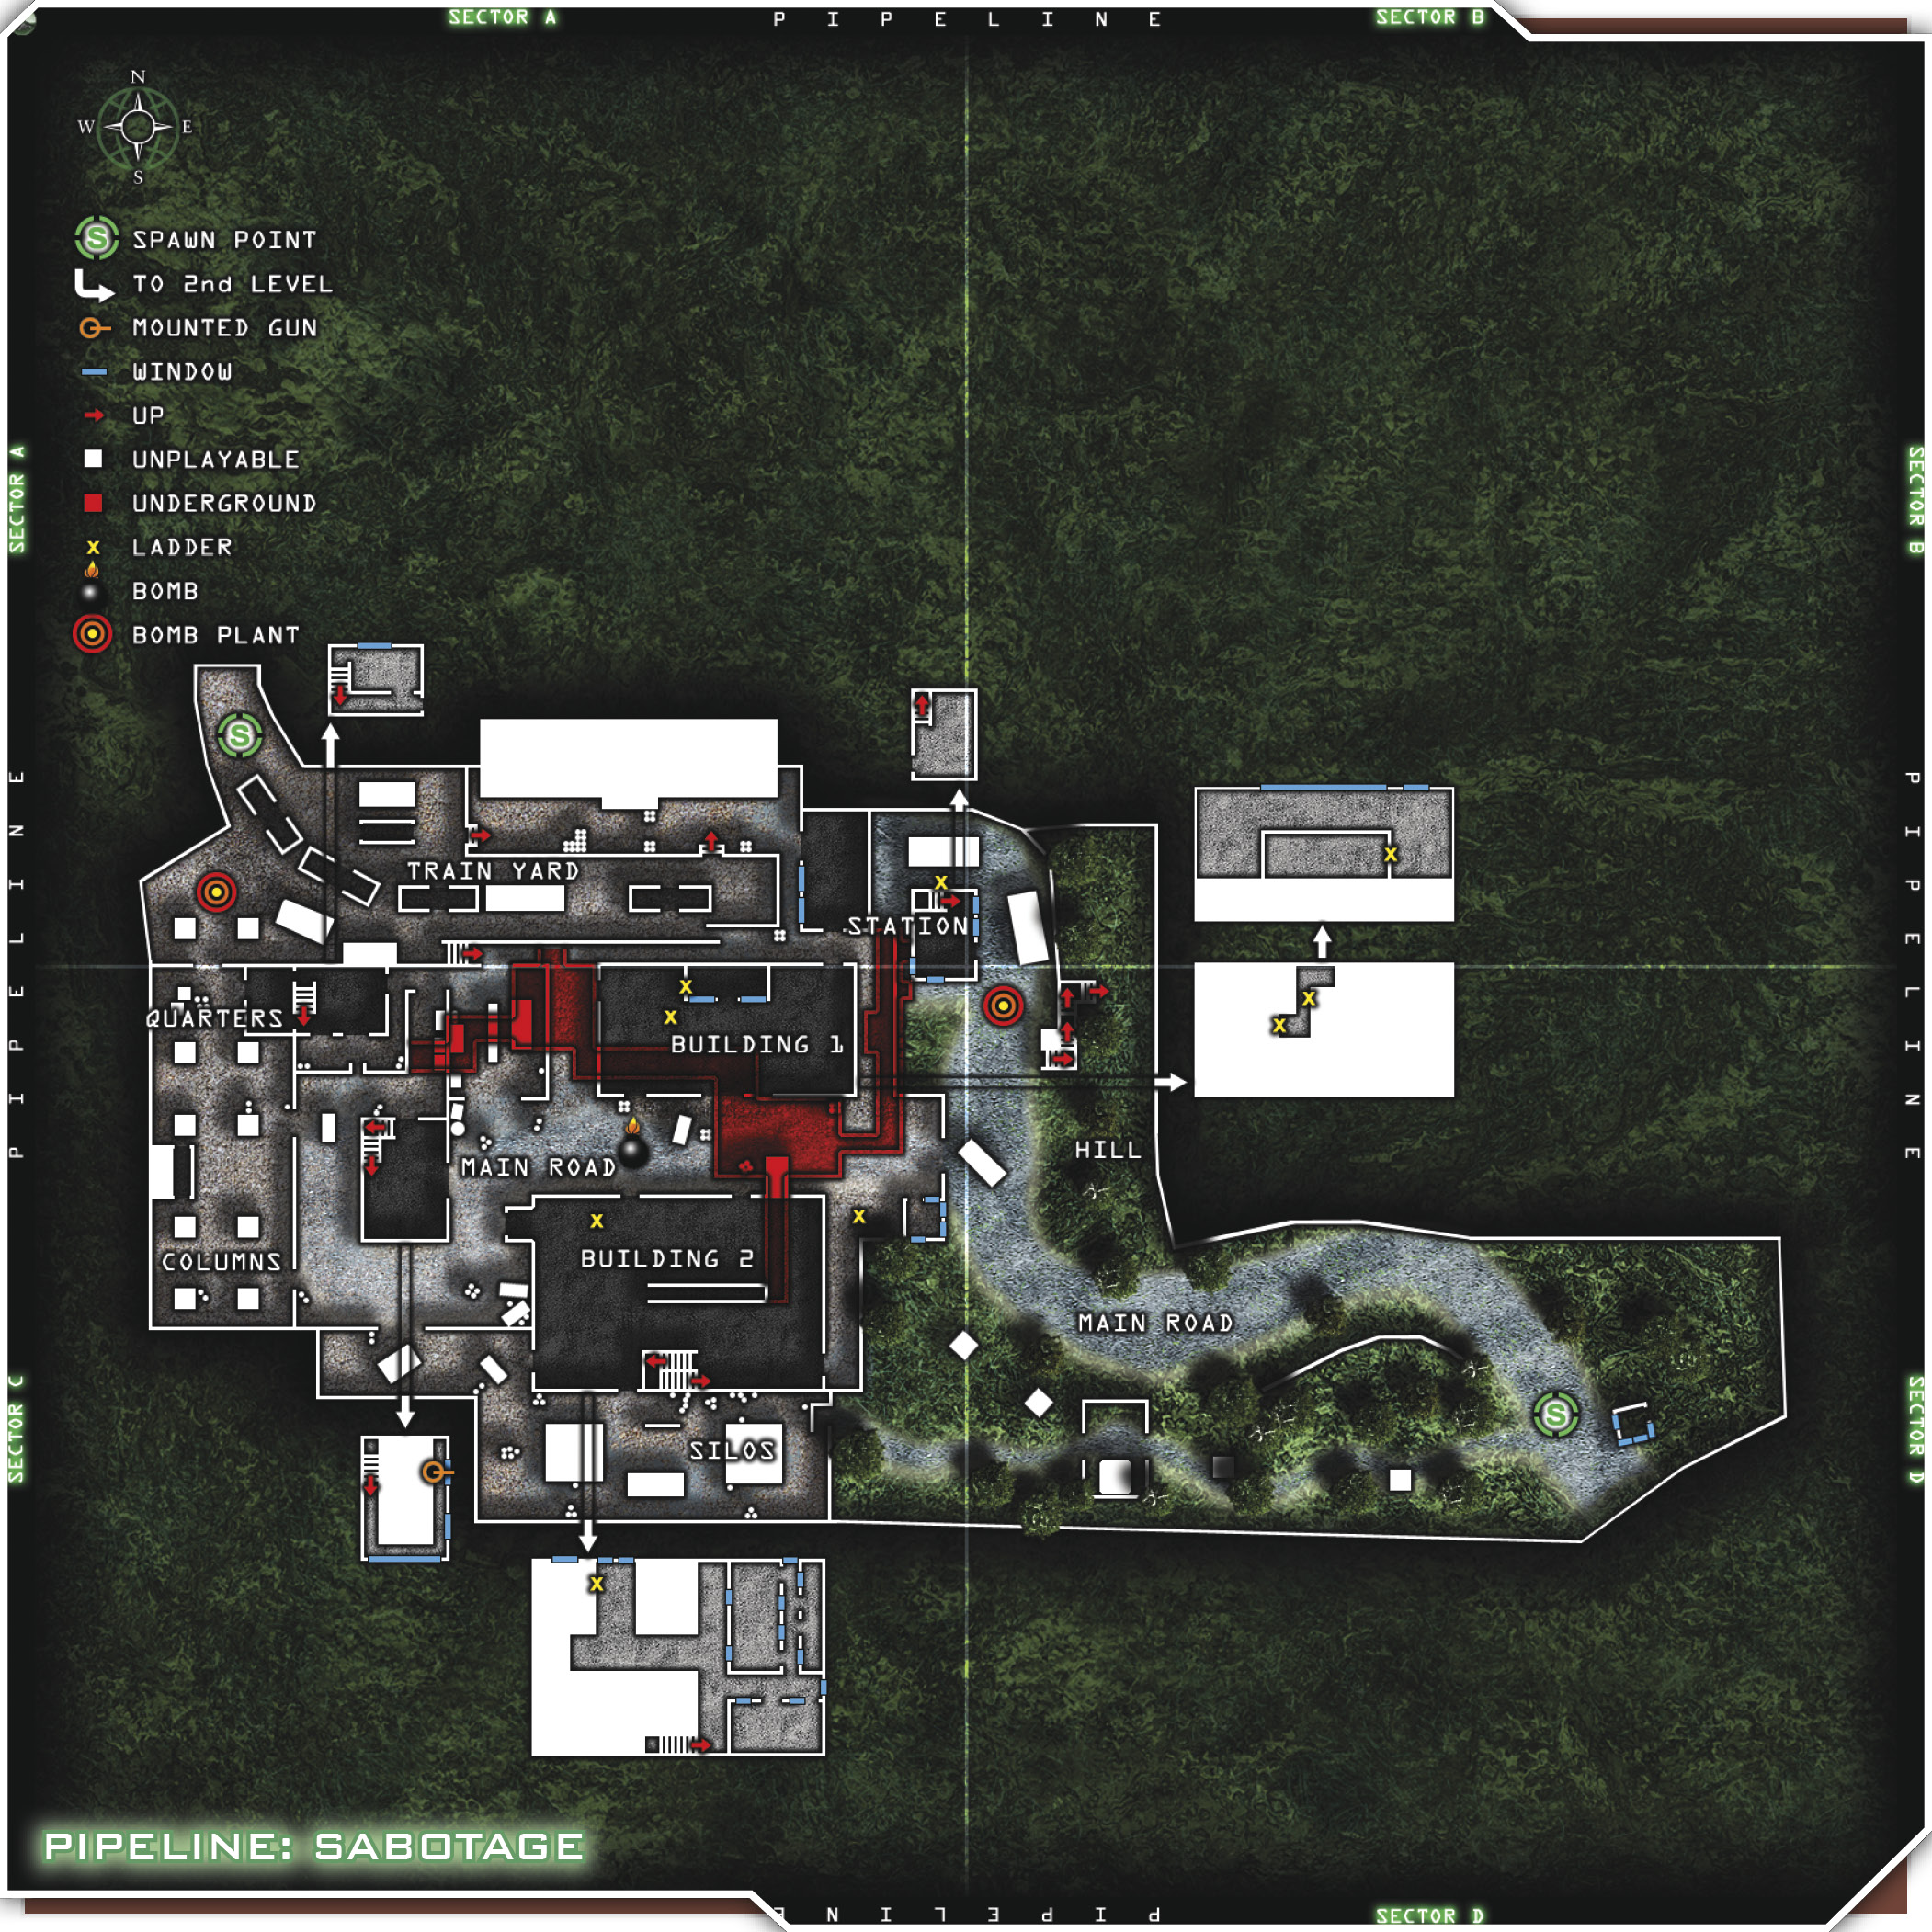
Building Two contains a much larger ground level, with entrances on all sides. From the ground floor, you can access either the underground tunnel system or the catwalks and the offices, which are great for shooting down on people. The second-level offices offer some great cover, as well as a handful of north-facing windows for counter-sniping enemies in Building One.
The MG Building just west of the two main buildings offers both a lower and upper level. The second story has a great view of both main buildings and could be a great spot for snipers to pick off enemies who are sniping from them. There are two small shacks just east of Building Two. They don’t offer much cover, but they’ll do in a pinch. At the east end of the Train Yard, there’s a small building that also provides some cover. It has two windows and a door facing west down the length of the Train Yard, and an additional entrance on the south side. There’s also a cargo container on the far west side of the map that can be used for hiding or relocation.
The Hill, adjacent to the Roadway, is an ideal spot for snipers. It’s fairly expansive and offers tons of vegetation for cover. Ghillie suits work great here. Try to position yourself near a tree or some tall grass to eliminate enemies on the Main Road, and even down toward the Train Yard. Be careful, because this is a well-known spot to most snipers. They’ll probably try to knife you, or snipe you from a distance, and take your spot. Plant Claymores in key locations en route to your position to cover your back.
The Roadway just southeast of the Hill won’t see too much action, so you shouldn’t have to worry about that side while you’re scoped in. Don’t leave it unguarded, though. Somebody might try to maneuver up behind you via the Roadway.
Team Tactics
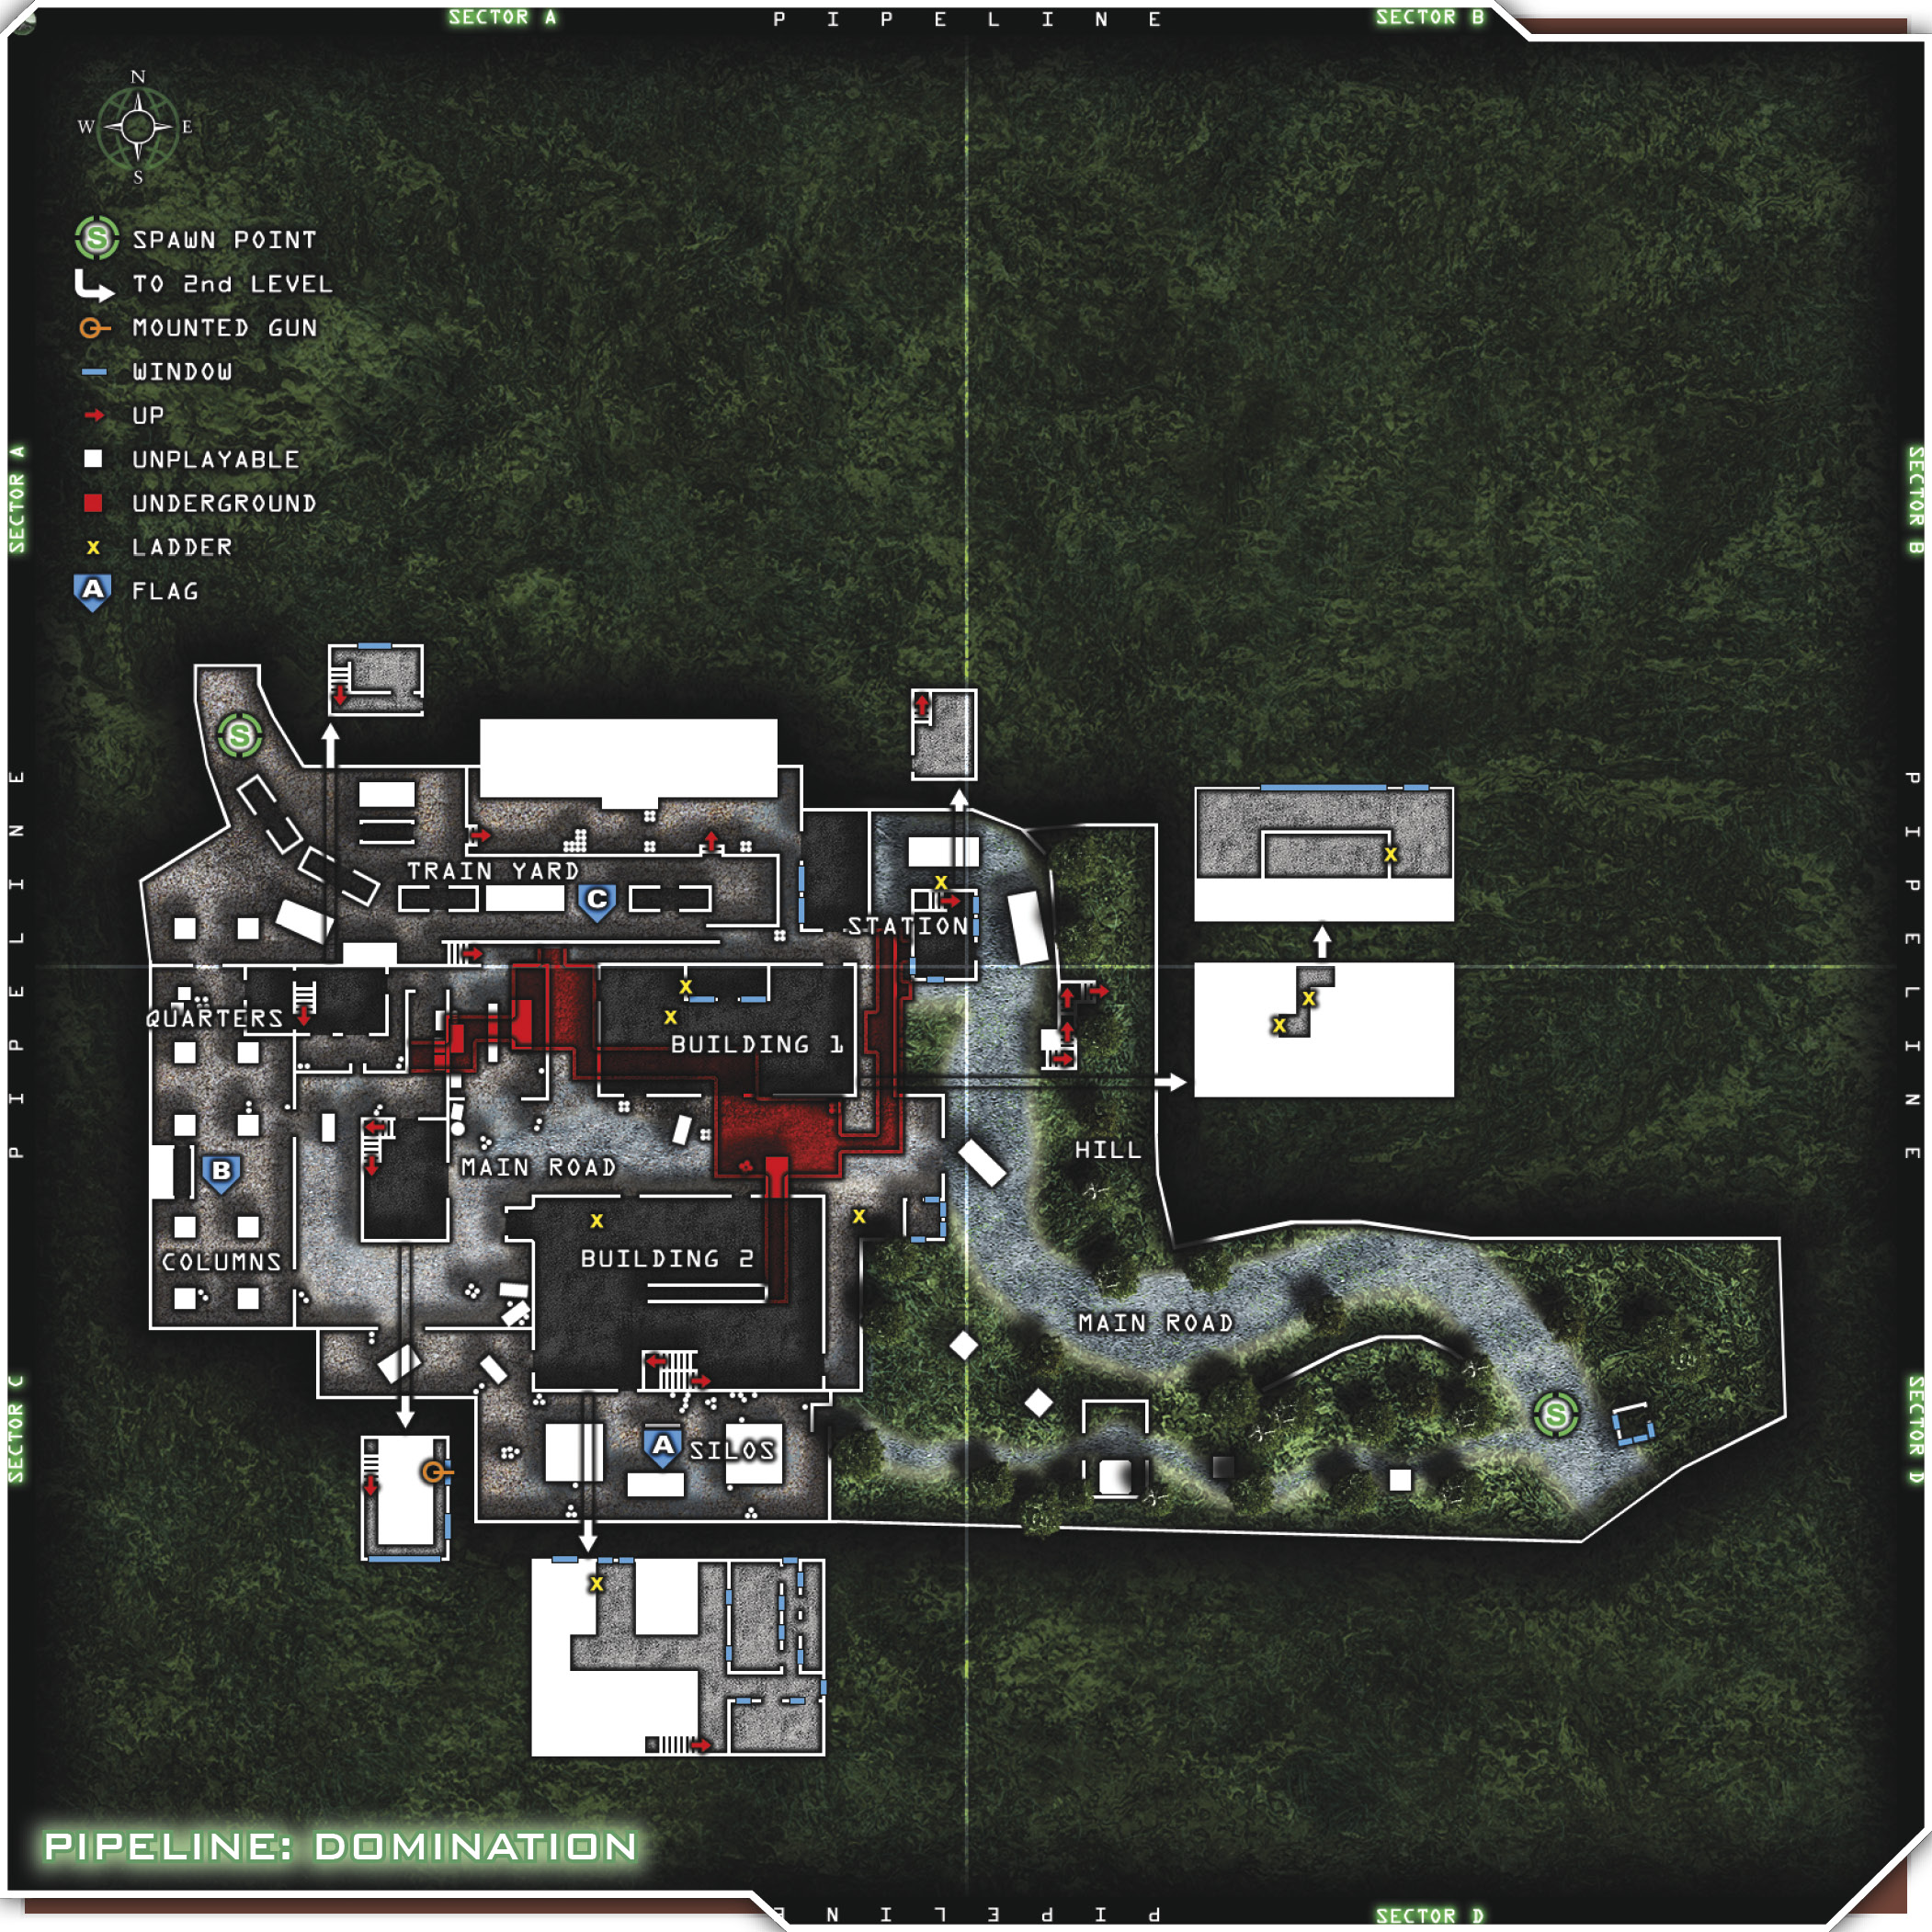
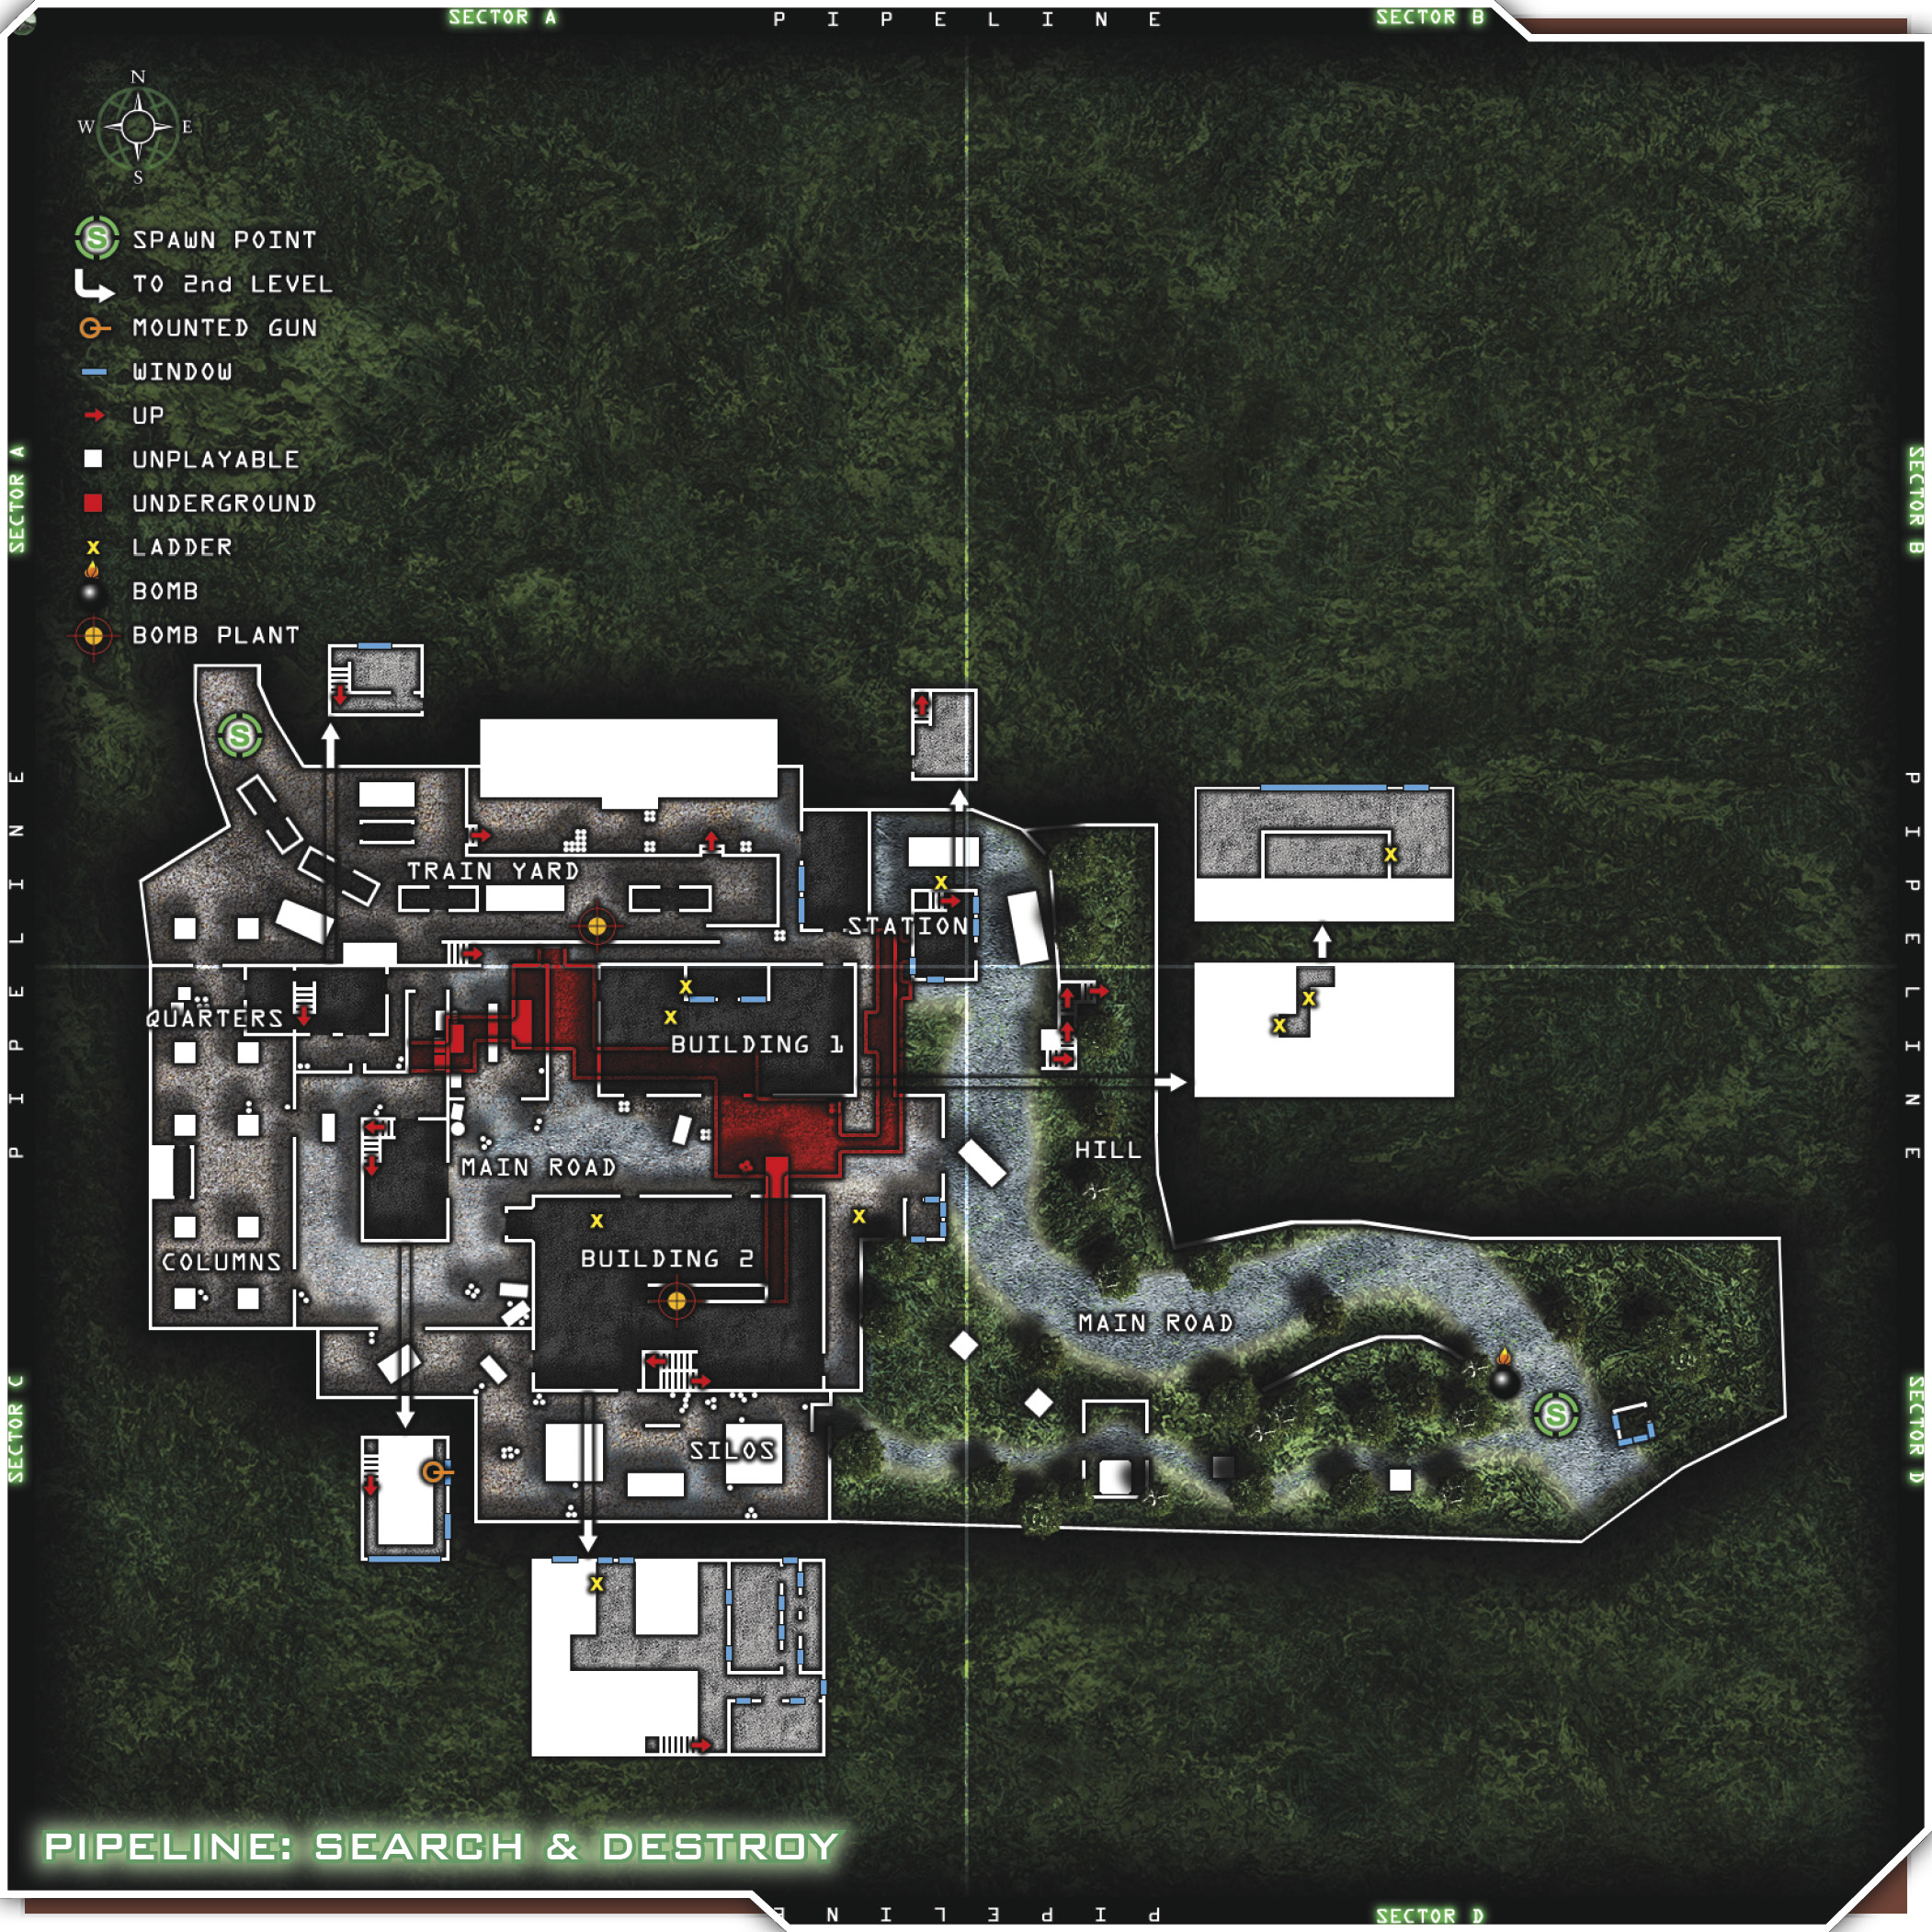
For this tactic, start at the northwestern spawn point and tactically flank the enemy team. You’ll need a couple of light machine gunners for this one. Attach a front grip to steady your aim, and remember that the grip will disable perk 1. Make your way southeast through the Train Yard to the corner of the bend, where it starts to straighten out. Pop smoke and have your light machine gunners start firing eastward down the tracks, while the rest of your team (mostly loaded out as assault classes and maybe one sniper) heads as quickly as possible to the Crew Quarters and through the underground tunnels. The light machine gunners should be loud enough to draw the attention of the enemy, and the smoke will cover the team’s descent into the tunnels. The gunners should also consider replacing the front grip with the Bandolier perk, because they’ll be chewing through some ammo.
Once the bulk of the team has made it about three-quarters of the way through the tunnels, they should call in the two light machine gunners to regroup with them. The base team should exit the tunnels at the Station and come up behind the enemy. You may suffer some casualties in the flanking process, but by the time it starts to get hairy, your two light machine gunners should have made it to the Station to help out. Once you’ve eliminated the threat at the Train Yard, you can move into either Building One or Building Two. Secure the area and begin target practice.
Another flanking tactic is similar but splits your team in two. Take the team, via smoke cover, from the western spawn (Train Yard) south through the Columns. When you reach the southwestern corner of Building Two, split your team in half. Send one half through Building Two and into the tunnel system, and the other half around the building, through the Silos, and up to the Hill. Both teams should maneuver as quickly as possible and try to sandwich the enemy between the Hill and the Station House. Be sure to use good communication so that you can time your attacks and relay intel on enemy locations. Let the tunnel team know that your team is “50 yards from the Hill,” and have them relay their position back to you. This will help you time a great surprise attack and catch the enemy off-guard.
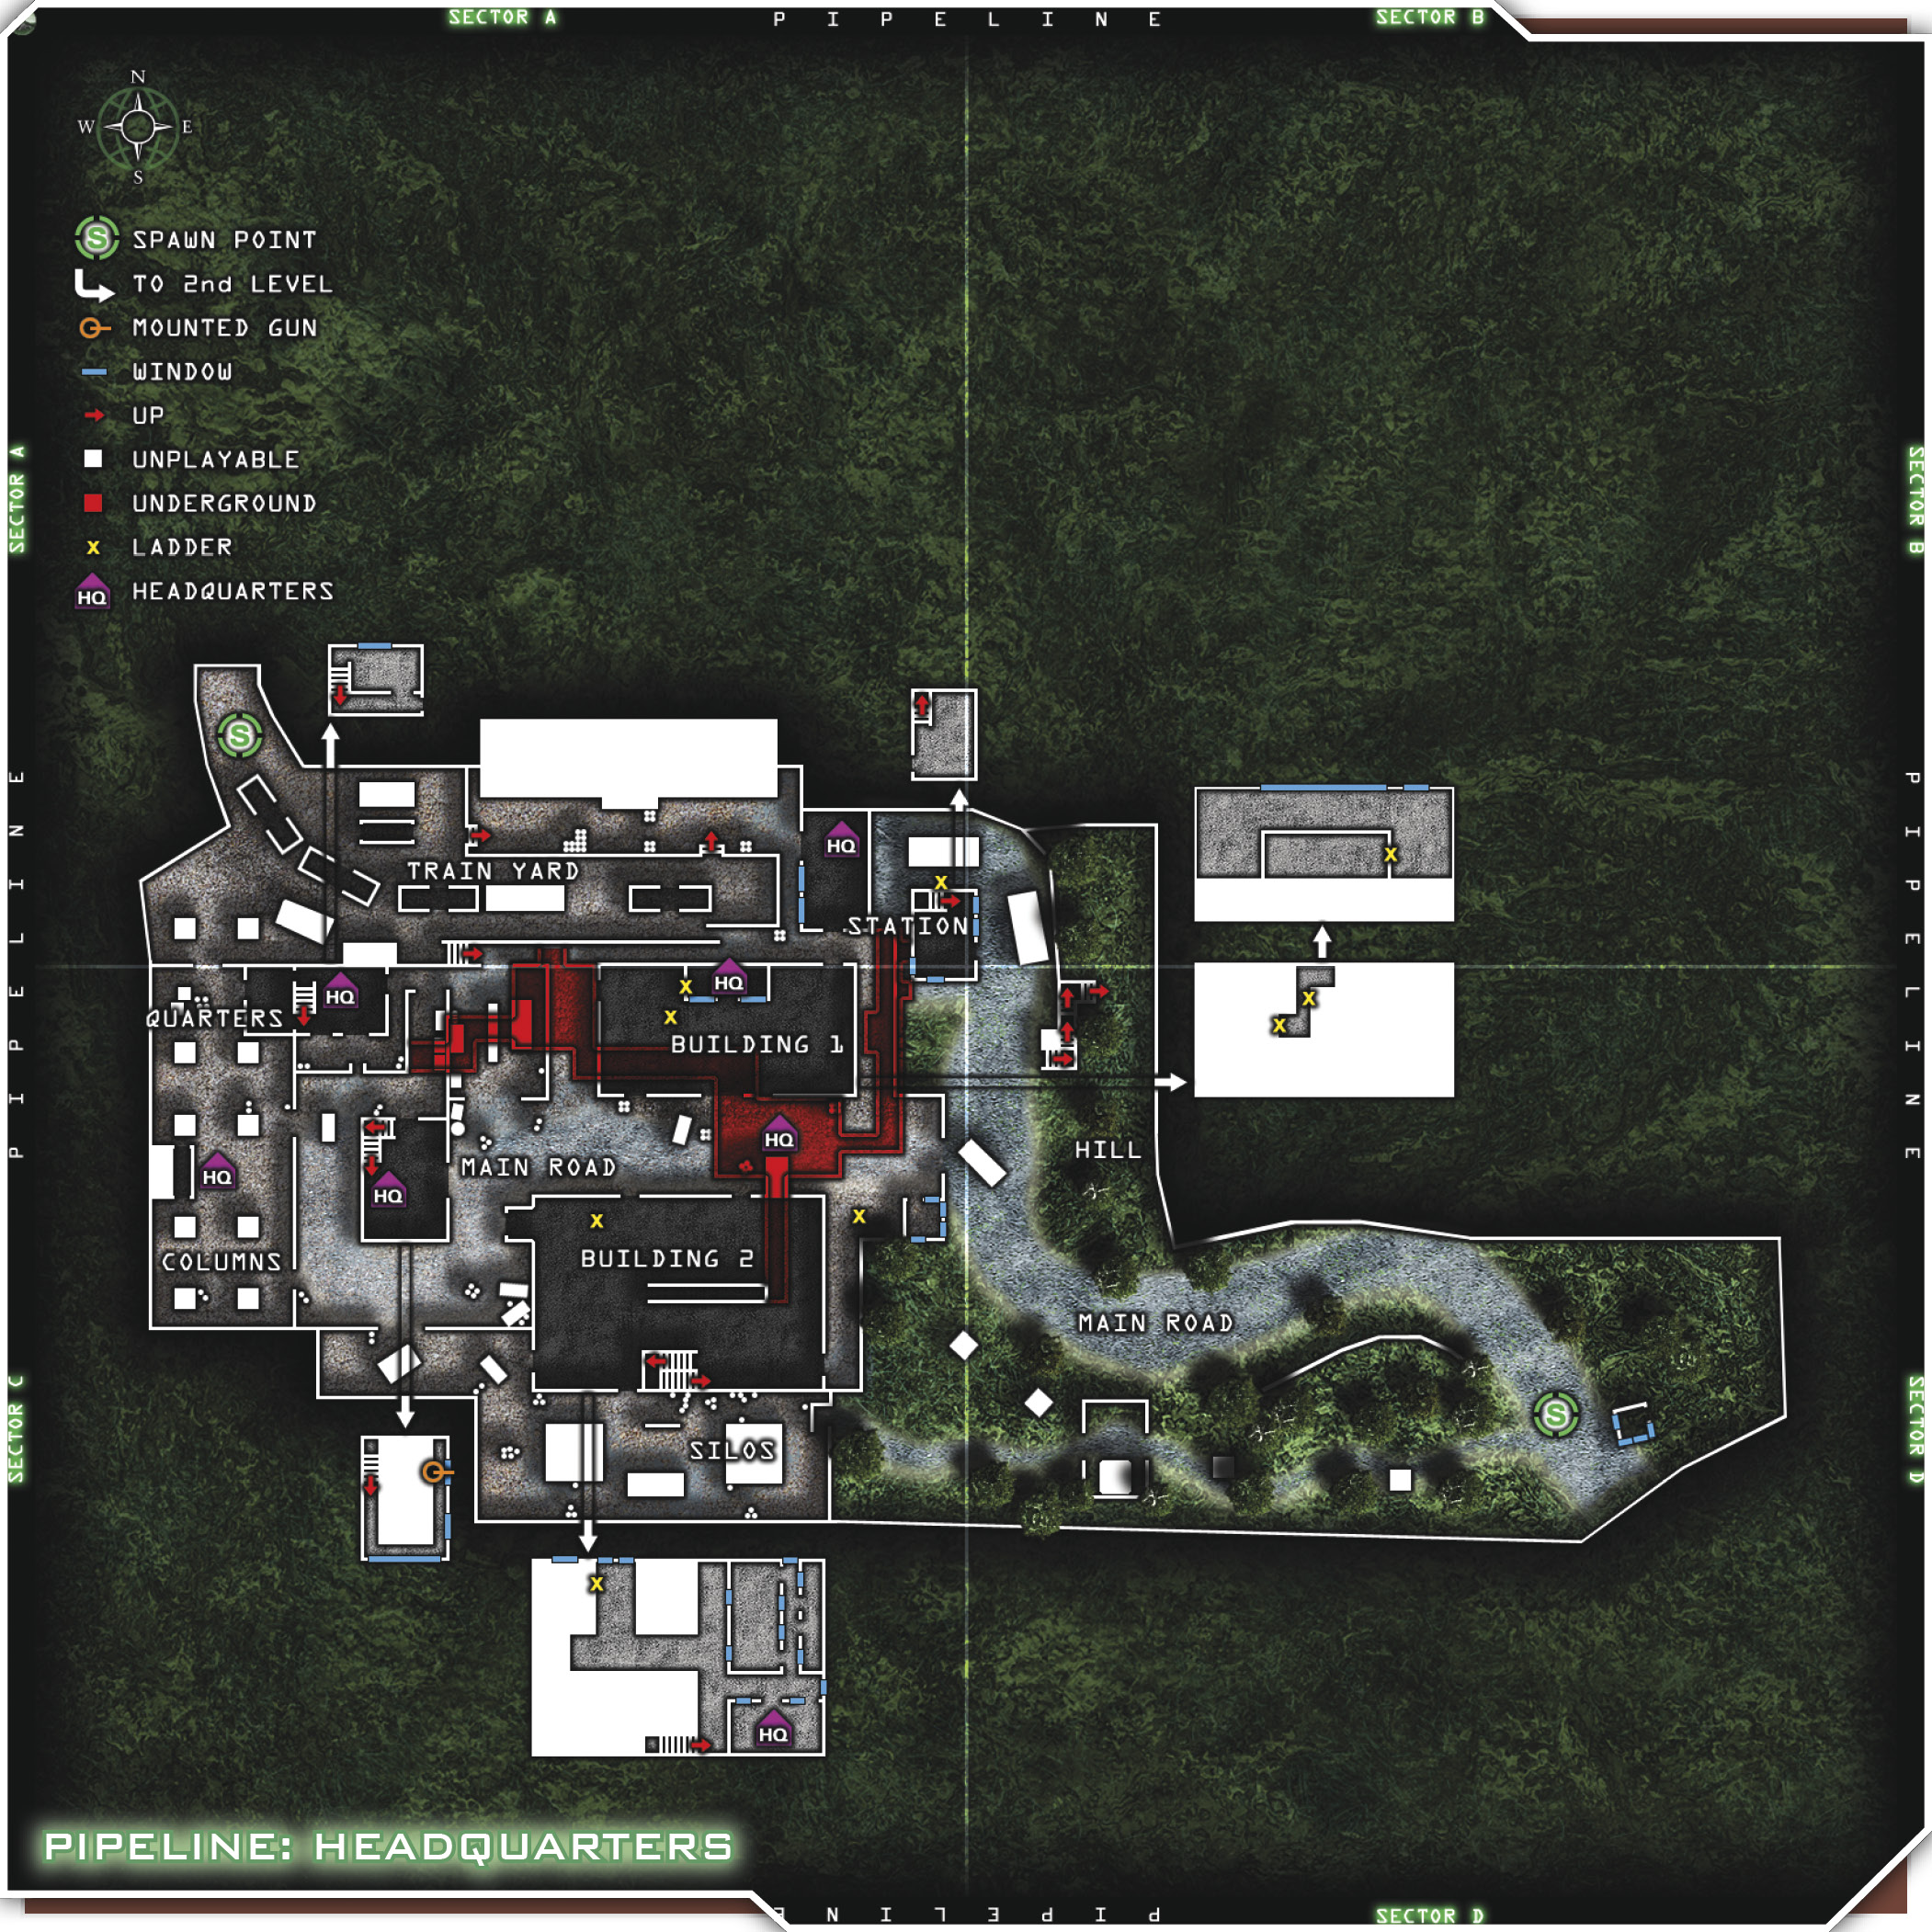
A lot of the fighting will take place on the Main Road, the Hill area, and the Train Yard, so you should always be ready for those encounters. You may have to deal with these incursions on your way to the site of our next plan, which is to move into the two main buildings and secure them.
Start out at the western spawn point again, and go southeast through the center of the map. Split your team into two squads and make for Buildings One and Two. There are western entrances to both buildings, so you should be able to enter unmolested. Once inside, send one player upstairs to start sniping from the windows. The remaining players should find a comfortable spot to camp, and place Claymores at any entrances that cannot be guarded simultaneously. There are six entrances on the first floor of Building Two, and five on Building One. Find a good elevated position, with your Claymores on the ground floor. When you’ve set up your defense, your sniper can concentrate on picking off any free-roaming floaters and trying to get you an airstrike, or better yet, some chopper support. It shouldn’t be too hard, because he’ll have clear vantage points of the roadway, the Hill, the Station, and almost the entire map. Try to take out as many enemies as you can via air support, and rely on your Claymores and snipers to do the rest of the damage.