Call of Duty: Infinite Warfare Guide Call of Duty 4: Modern Warfare Multiplayer Map Tactics
Bloc
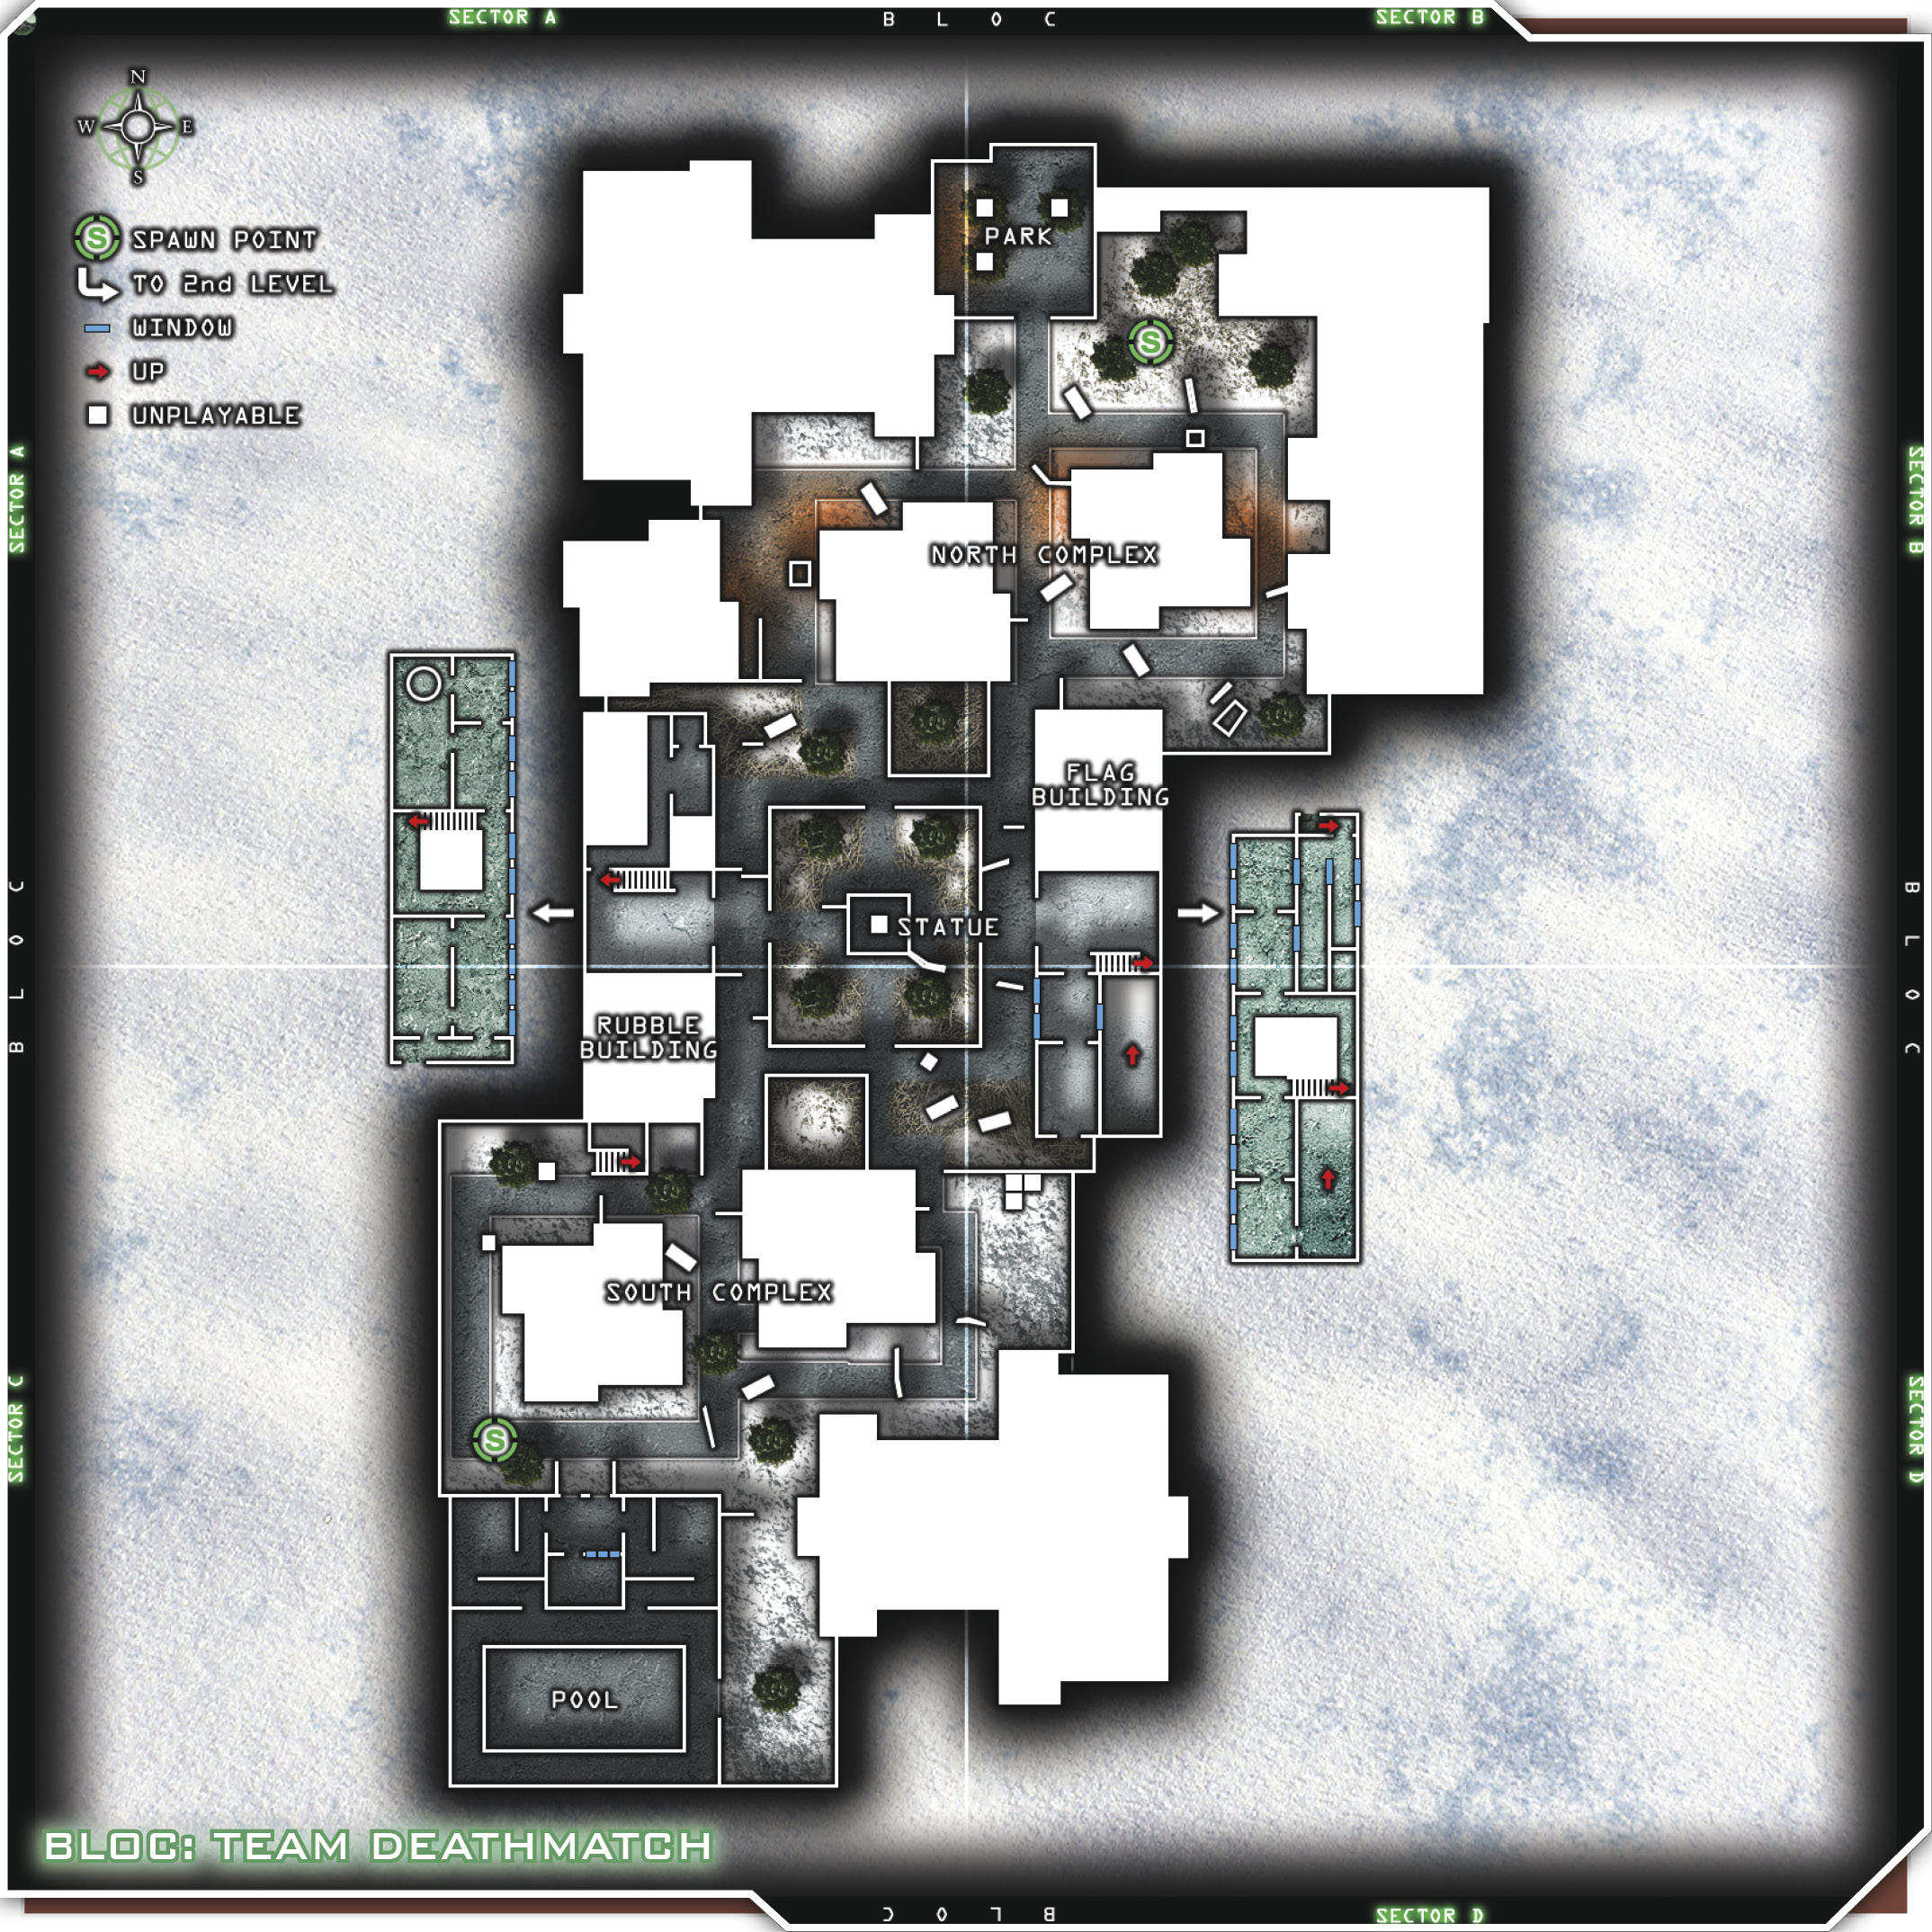
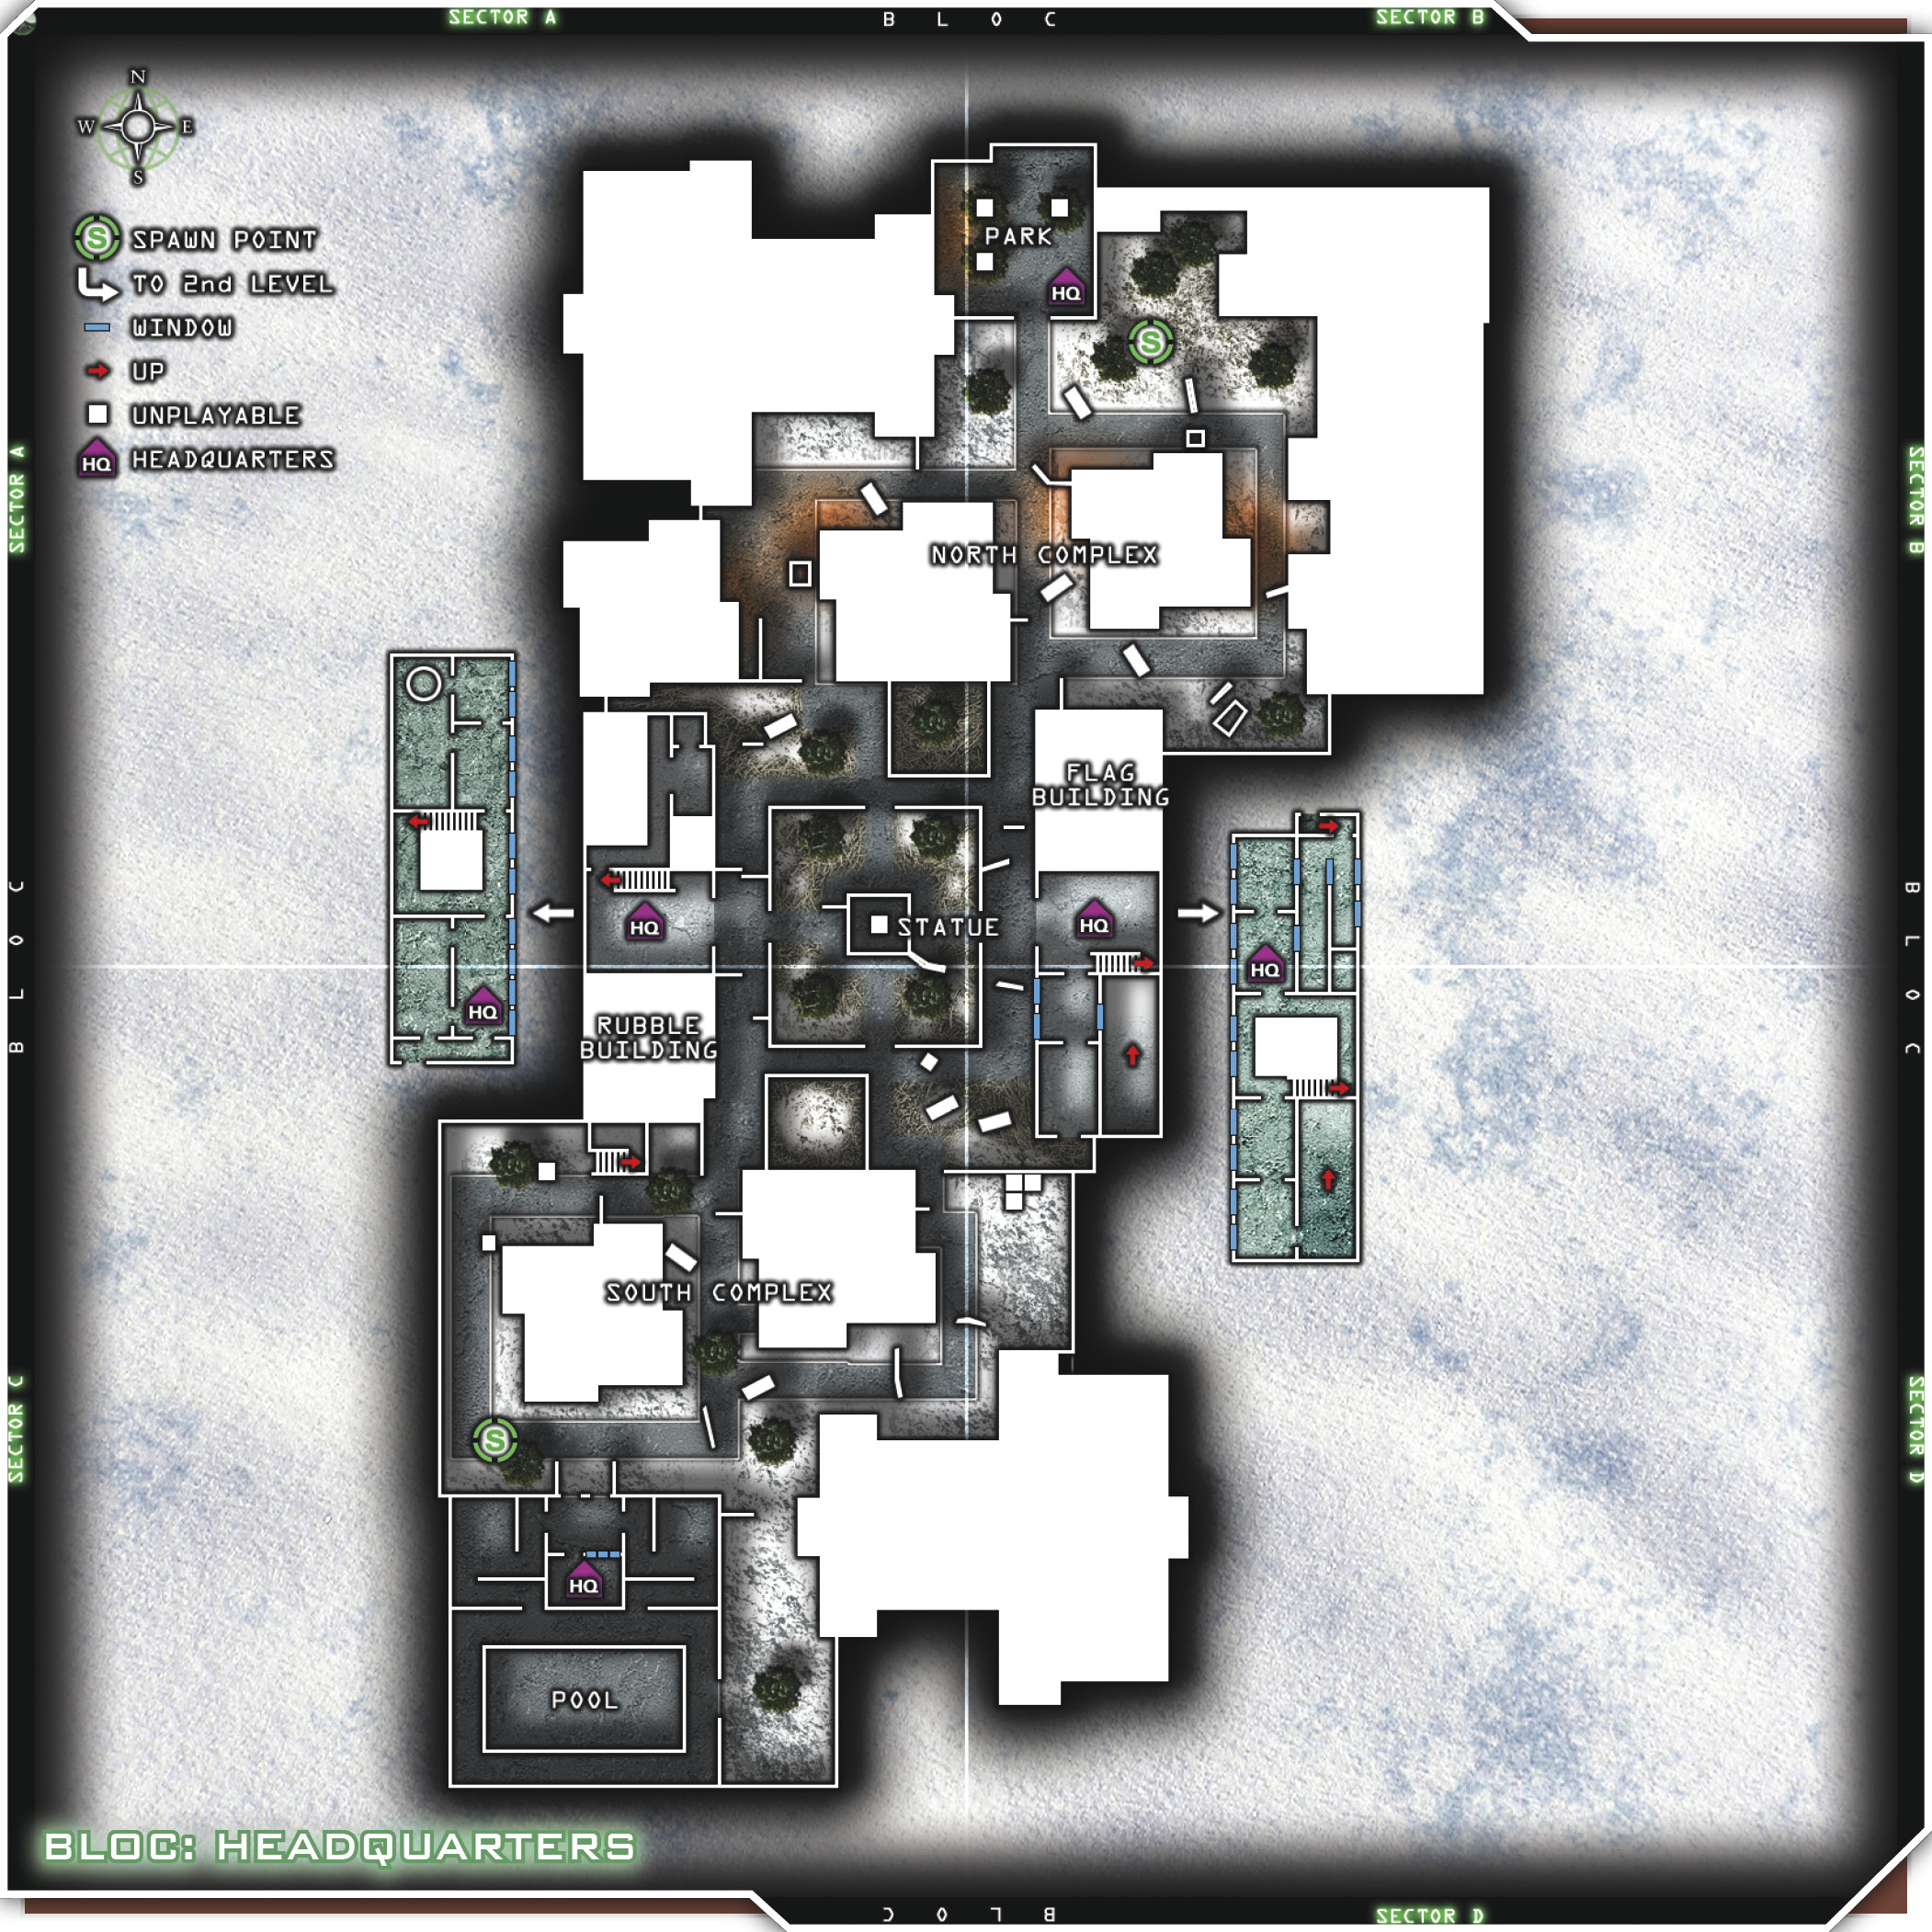
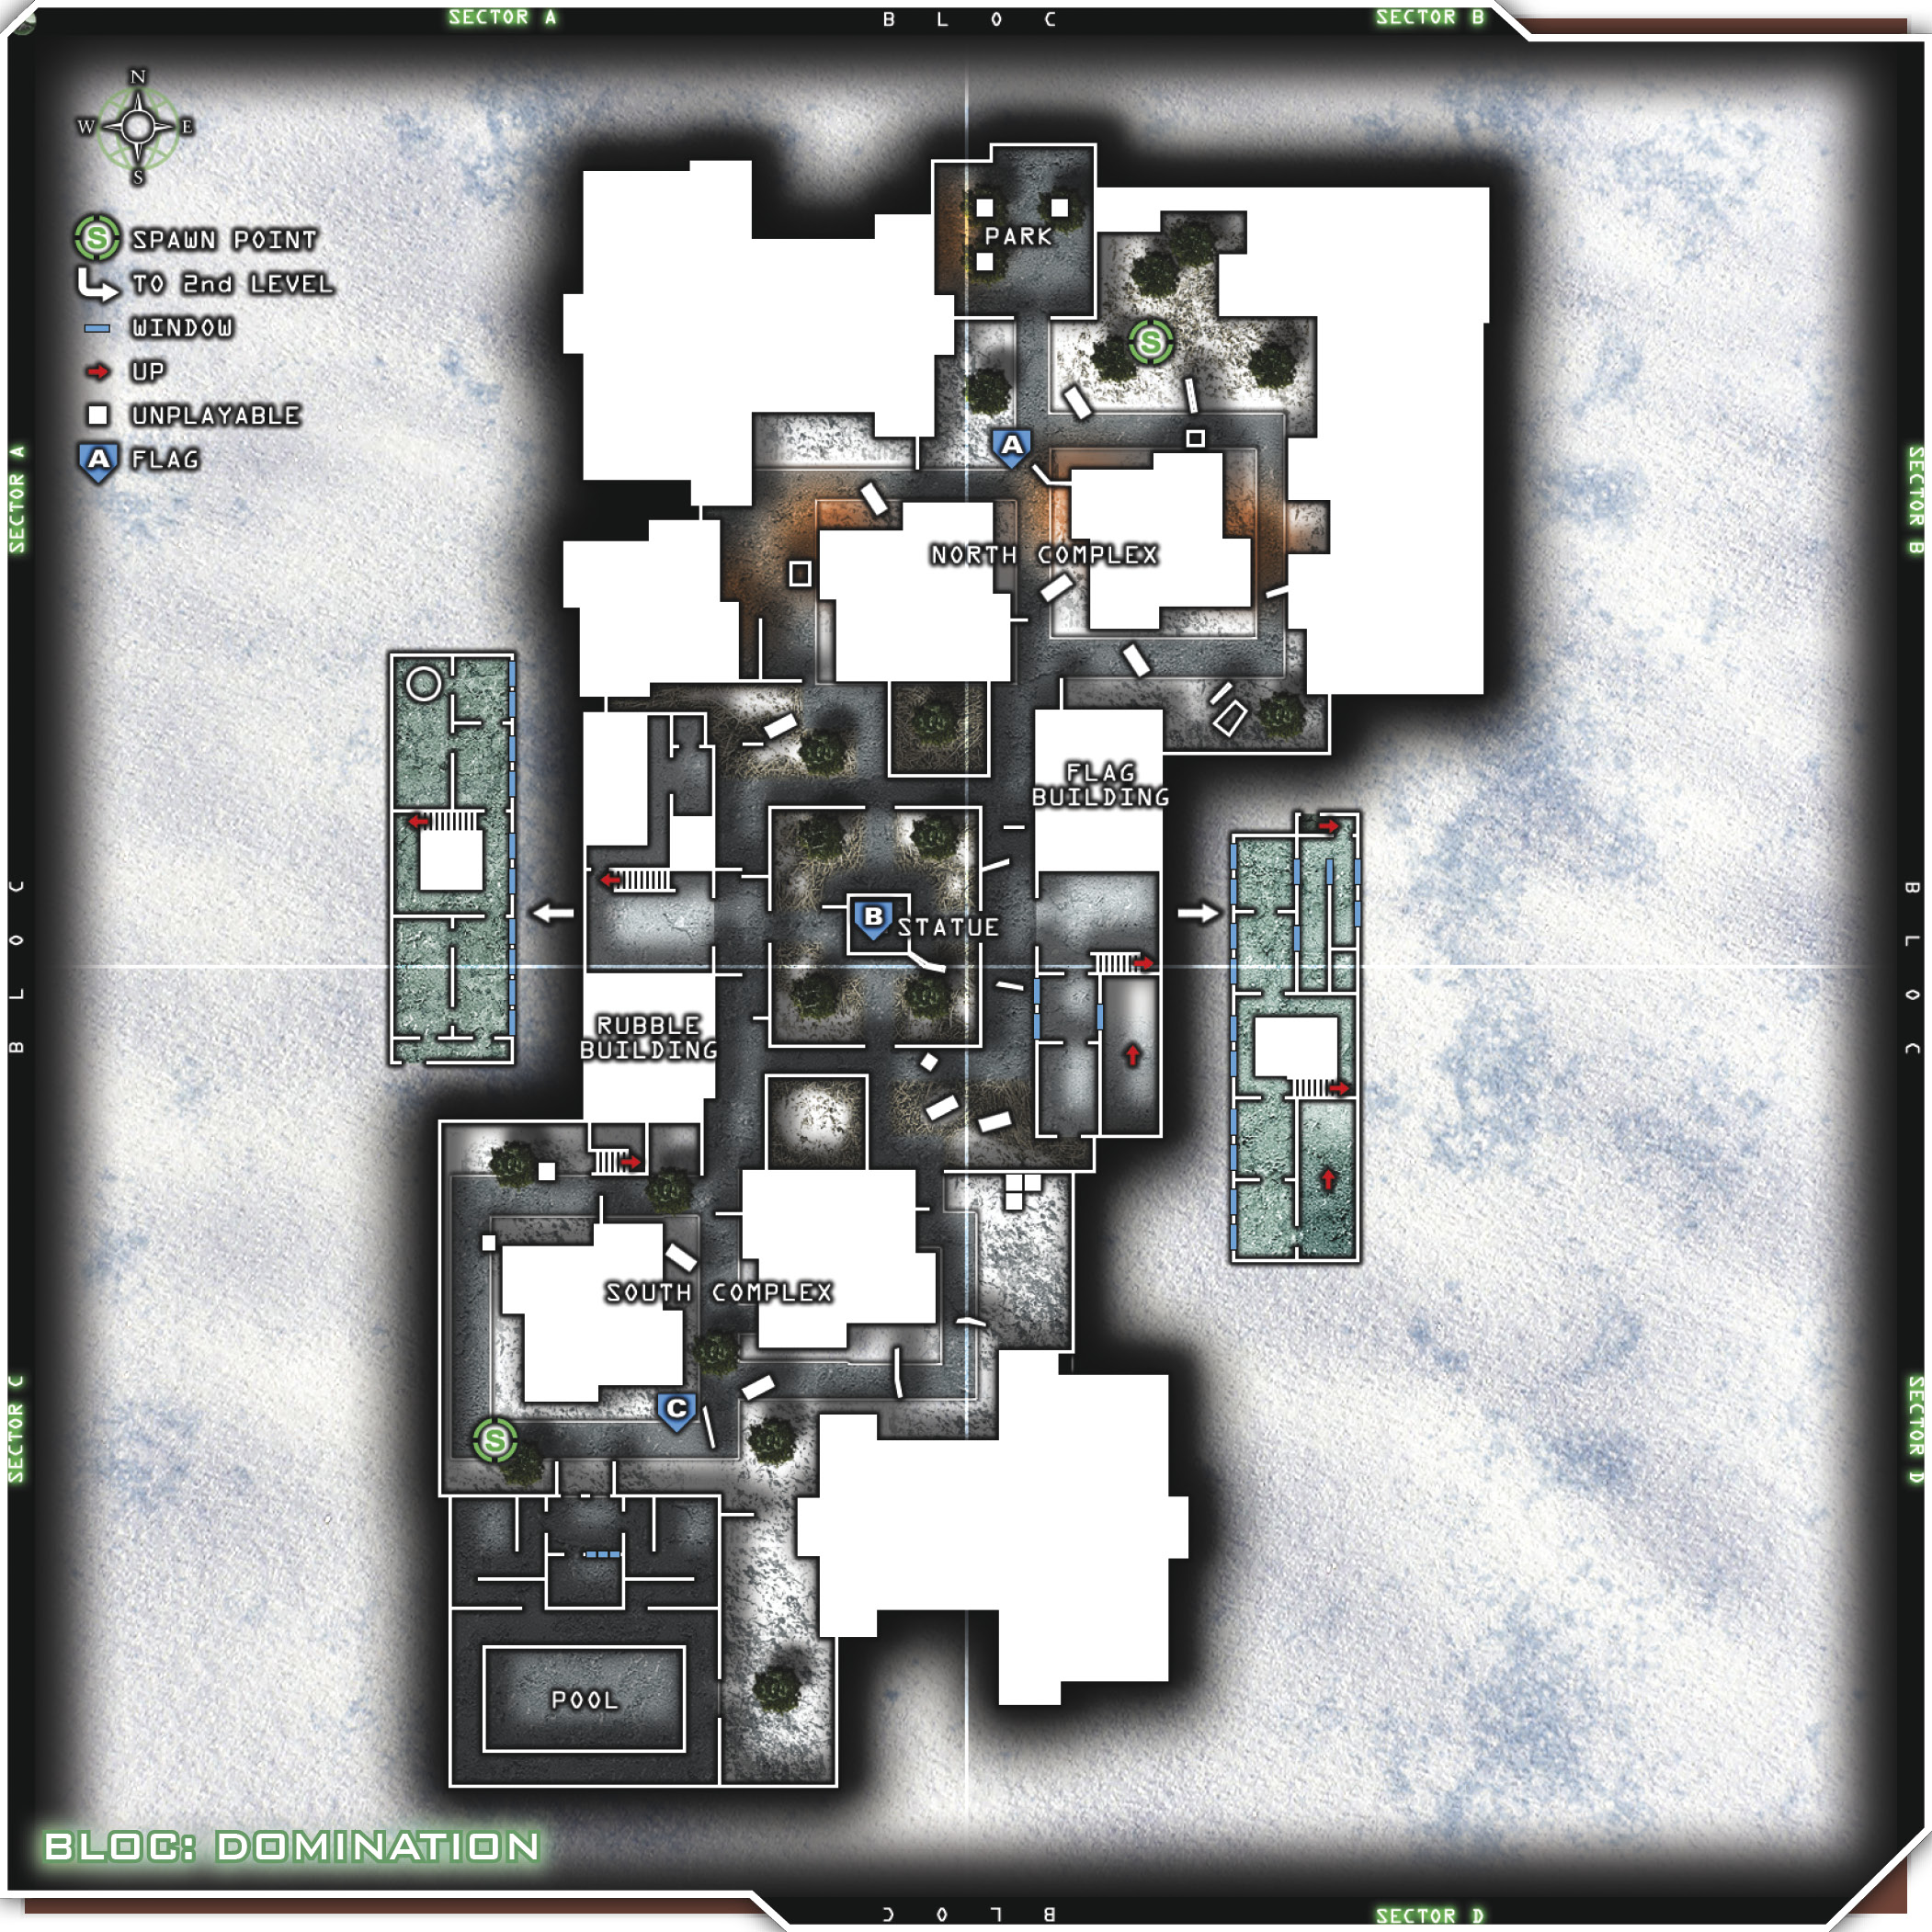
Spec Ops vs. Spetsnaz. This is a snowy, low-visibility complex of apartment buildings. A central courtyard with low walls slows your advance from building to building. Definitely a sniper’s map. There are some great stairwells that you can use, and of course a host of windows and other openings to snipe through. Most of the action takes place in the two facing apartment buildings, which both have upper and lower levels.
These loadouts serve two purposes. With the Basic Assault class, you can use Overkill to carry a medium-to-long range weapon and a close-quarters weapon for internal close-quarters fighting. There will be quite a bit of indoor fighting, so Deep Impact will let you keep firing even if your enemy ducks behind a wall or runs into another room. Both classes can and should use smoke grenades to relocate or get themselves out of pinned-down positions.
The Sniper class is set up for a pure sniper. Since most of the fighting is either very long-range or medium-to-short range, you’ll have to make a choice. If you choose this class, right off the bat you can set up at the main roads across from the statue and start sniping. Once you get into one of the buildings or find a nice spot on the ground somewhere, you should set up your Claymores to watch your back. Choose either the UAV Jammer or Stopping Power, depending on whether you want to be invisible or more powerful. If you think you’ll need a few more seconds of steady aim, pick Iron Lung to hold your breath a little longer during sniping. Or choose Deep Impact to finish off a counter-sniper who’s ducked behind a wall.
Suggested Loadouts
Basic Assault
| Slot | Name |
|---|---|
| Primary Weapon | G3 |
| Notes/Attachment | ACOG Scope |
| Secondary Weapon | MP5 |
| Notes/Attachment | Red Dot |
| Side Arm | Desert Eagle |
| Special Grenade | Smoke |
| Perk 1 | Frag x3 |
| Perk 2 | Overkill |
| Perk 3 | Deep Impact |
Sniper
| Slot | Name |
|---|---|
| Primary Weapon | Barrett .50 cal |
| Notes/Attachment | Silencer (M1911) |
| Side Arm | M1911 |
| Special Grenade | Smoke |
| Perk 1 | Claymore x2 |
| Perk 2 | UAV Jammer or Stopping Power |
| Perk 3 | Iron Lung or Deep Impact |
Tips & Locations
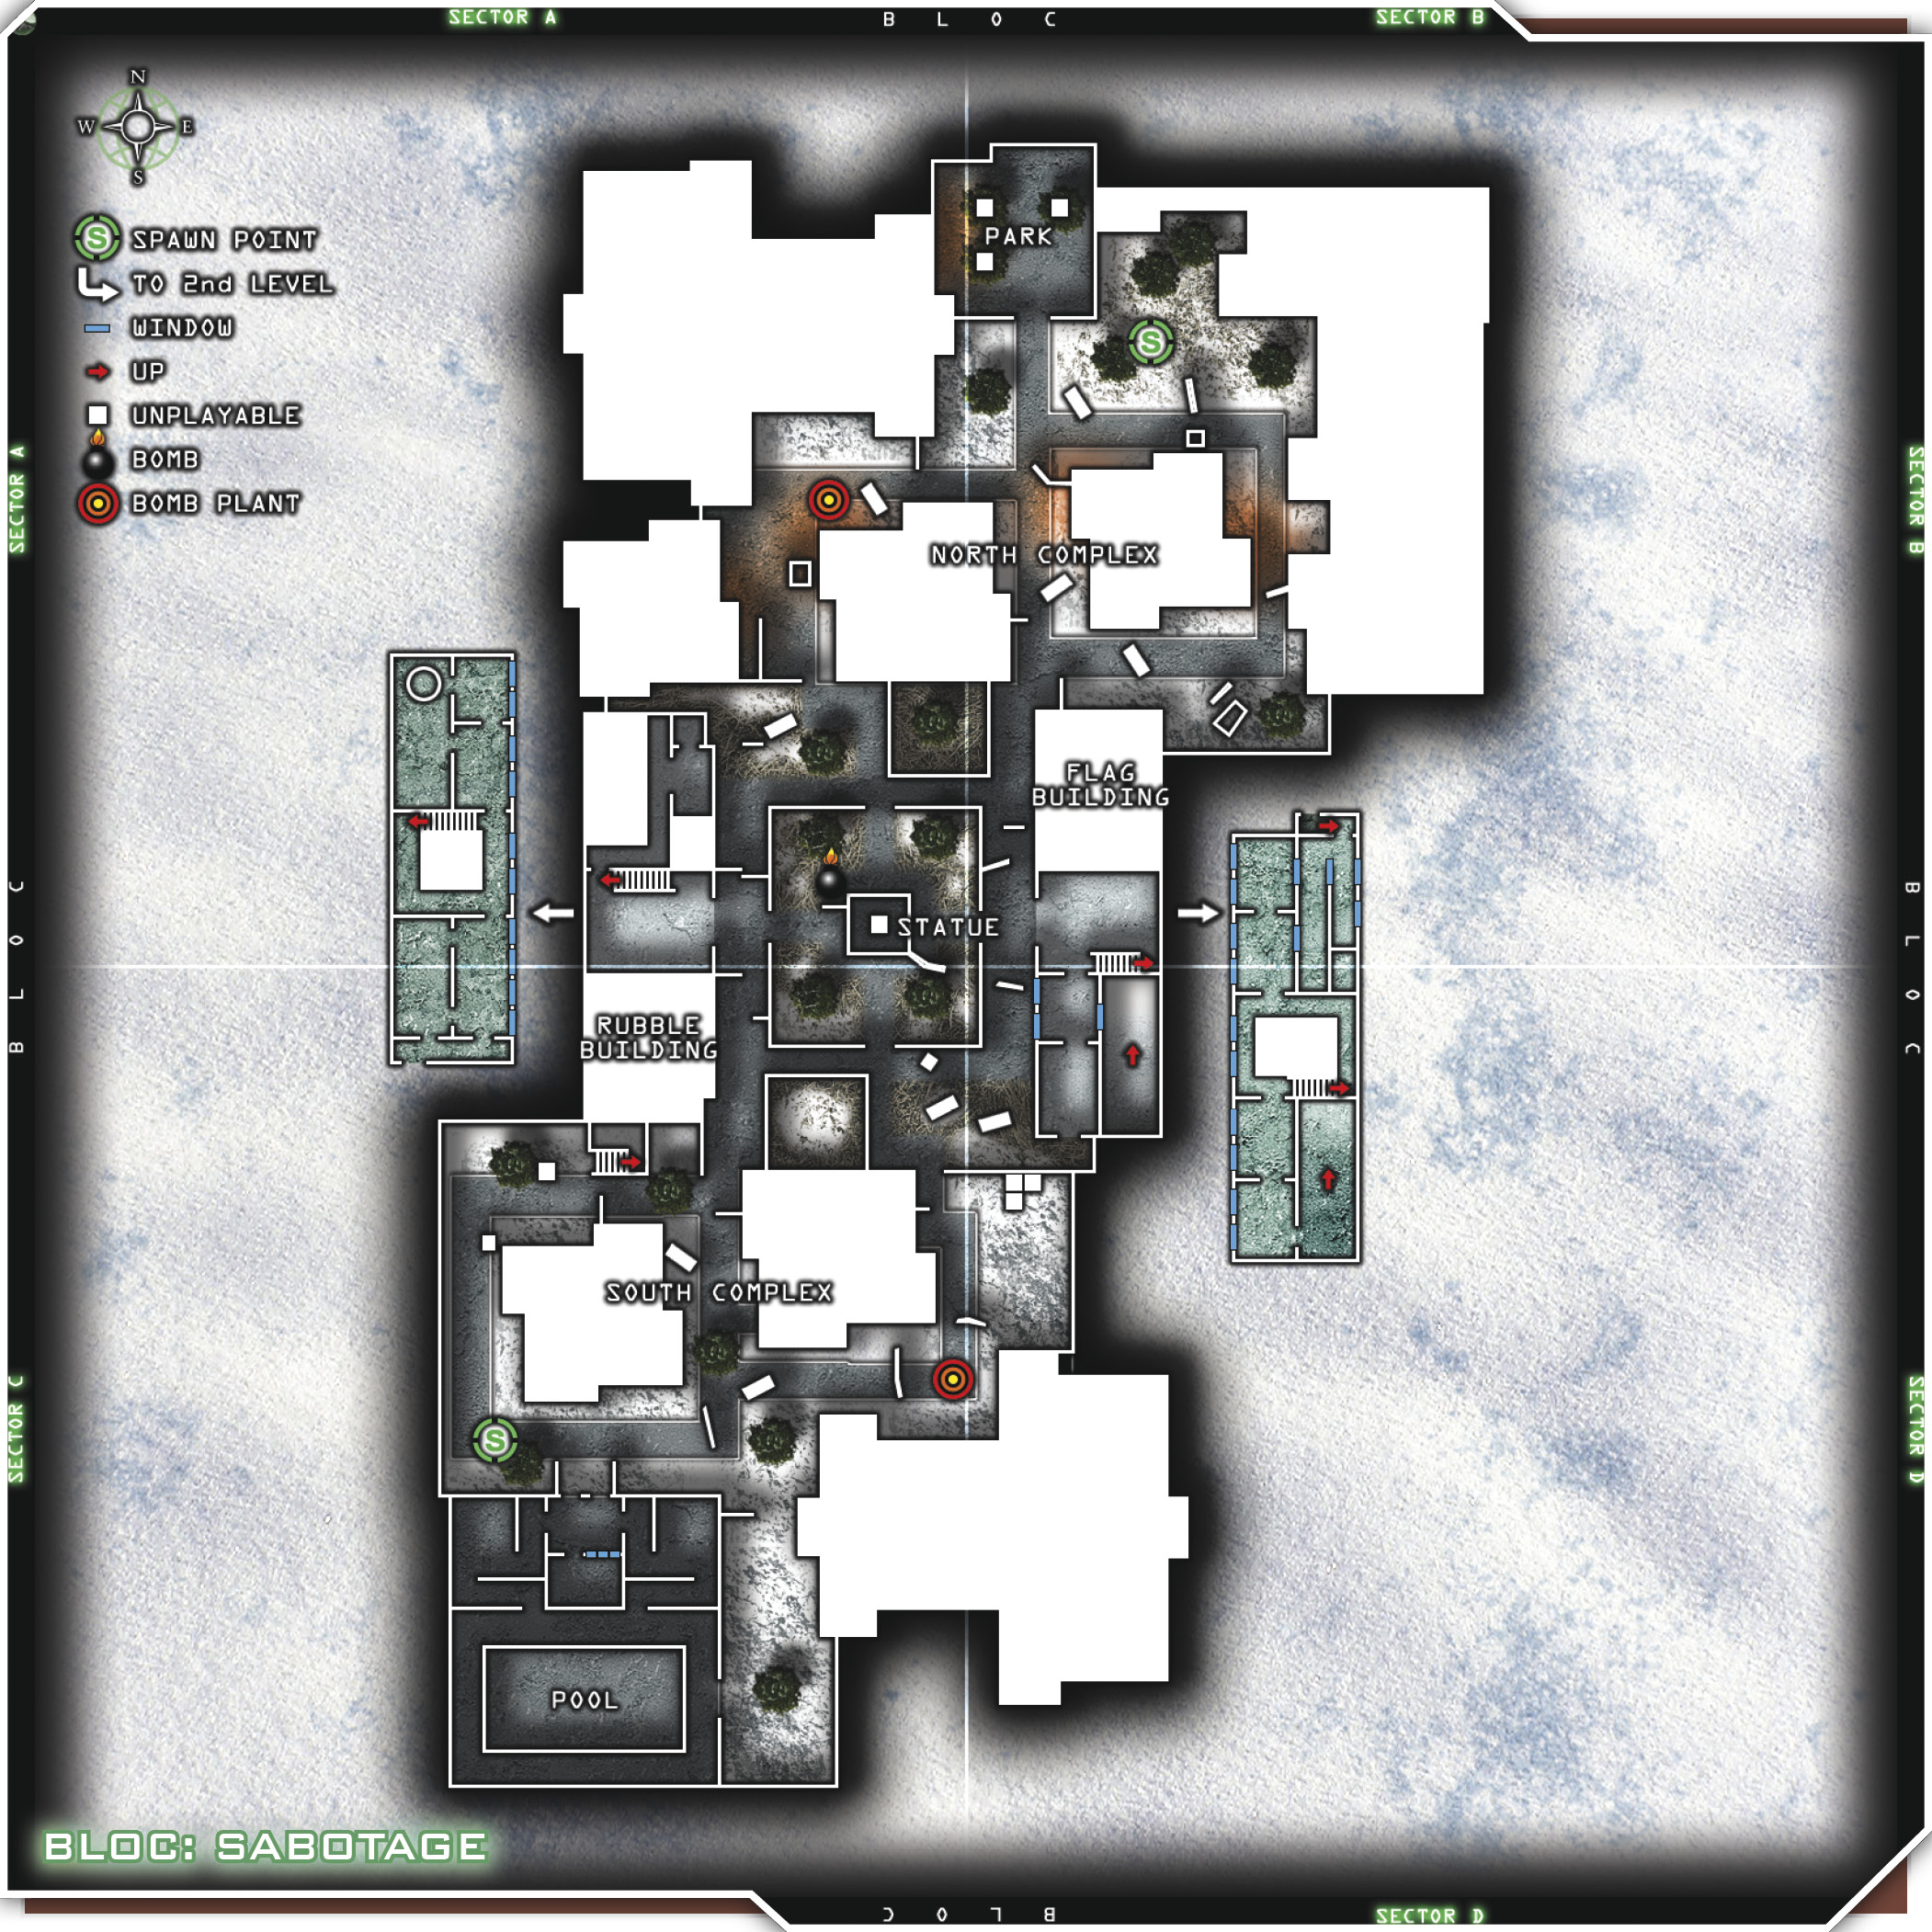
As a sniper, always carry some C-4 or Claymores to cover your back. Claymores are great on this map regardless. Just set them up at the entrances to the two main buildings and forget about them. Look for rocks, walls, stairways, and other cover, and pop off a few shots from across the map. Sometimes you may not kill the enemy, but your sniper buddy will be zoomed in on him too, and you may do enough damage to allow him to pick off the enemy with another shot.
The dynamic of this map is threefold, really. There are the obvious sniper battles between the two main apartment buildings (east and west, or the Rubble Building and the Flag Building), the mid-range battles across the courtyard, and all of the internal close-quarters battles on the only two main interiors in the Rubble and Flag Buildings. There’s a pool in the southwest corner of the map with a small interior adjacent, but it rarely sees combat. Both teams’ initial spawn points are in the northeast and southwest corners of the map, so watch those locations for a nice stream of enemies to shoot.
The two small windows on the second floors of both apartment building are great to snipe from. They’re small, but you can stand far enough back from them to make yourself a very difficult target to hit. The upper levels of both apartment buildings are great for sniping, but you should remain mobile if you can. Enemy snipers will notice movement, so make sure you have an escape route if you need to relocate. Always have smoke handy for the same reason. Lower levels span only half the length of the upper levels and aren’t easy to camp or defend. The upper levels are easier to hold onto, but counter-snipers can easily pick off stationary targets such as campers.
A lot of longer-range battles occur between the northeast corner of the pool in the southern sector and the northwest corner of the Flag Building. This Bermuda diagonal is ongoing, and poor stragglers who try to make it from one apartment building to the other inevitably get picked off in the crossfire. Your snipers should thin the herd so you can set up in a concealed position and snipe back. Or pop smoke, get out of there, and try to get around them via the apartment buildings.
The close-quarters battles inside the apartment buildings get intense as well. Take the Deep Impact perk to shoot through walls so that your enemy doesn’t get away. Indoors, Deep Impact combined with a shotgun can be a lethal combination. You’ll always need to adapt on this map, because the dynamics can change at any moment. Be ready to grab a shotgun, an SMG, an assault rifle, or a sniper rifle. Just grab the Overkill perk and carry one long-range weapon and one CQC weapon. This is probably your best solution, but you’ll have to give up your precious Juggernaut.
Team Tactics
It’s good to have a handful of tactics to rotate through on any given map at any time. One of these could be a split squad of four and two, where the two-man squad is made up of snipers. As soon as they spawn, they make their way to one of the apartment buildings. Once inside, they set up Claymores to cover their own butts. The four-man team is on the ground, looking to capture and secure the second apartment building. Once inside and secure, they send one man back over to the sniper’s building to assist in flanking attacks.
Now that you control both apartment buildings, keep tabs on where the enemy is spawning, and relay the data to all of your team members so everyone knows what’s going on and where. Holding both of these buildings won’t be easy, but you can keep the other team pinned down if you concentrate and load out correctly. Try grabbing a grenade launcher to lob ordnance into their spawn point and finish them off as quickly as possible. Overwhelm them with fire and explosives, and seal the deal with an airstrike and some chopper support. If you can take the two buildings and hold them, you should have an easy win.
Another tactic to confuse your enemies is to use two squads of three, one of which is loaded out with long-range equipment (ACOGs or sniper rifles) and the other with close-quarters weapons (shotguns and SMGs, Deep Impact and Double Tap). As a team, rush for the closest apartment building and commandeer it as quickly as possible. Your close-quarters team should be on guard, watching all entrances to your building, while your long-range squad works from the windows. When you have everyone in the same building, fallen teammates should respawn very close to your group. Be wary of grenades and RPGs being launched into your apartment complex. When you run this tactic, you’re more than likely to nab at least a UAV. Use these scans not to run after your enemy, but to show your long-rangers where to look. Once you dig into the apartment building, you should stay there as long as possible.
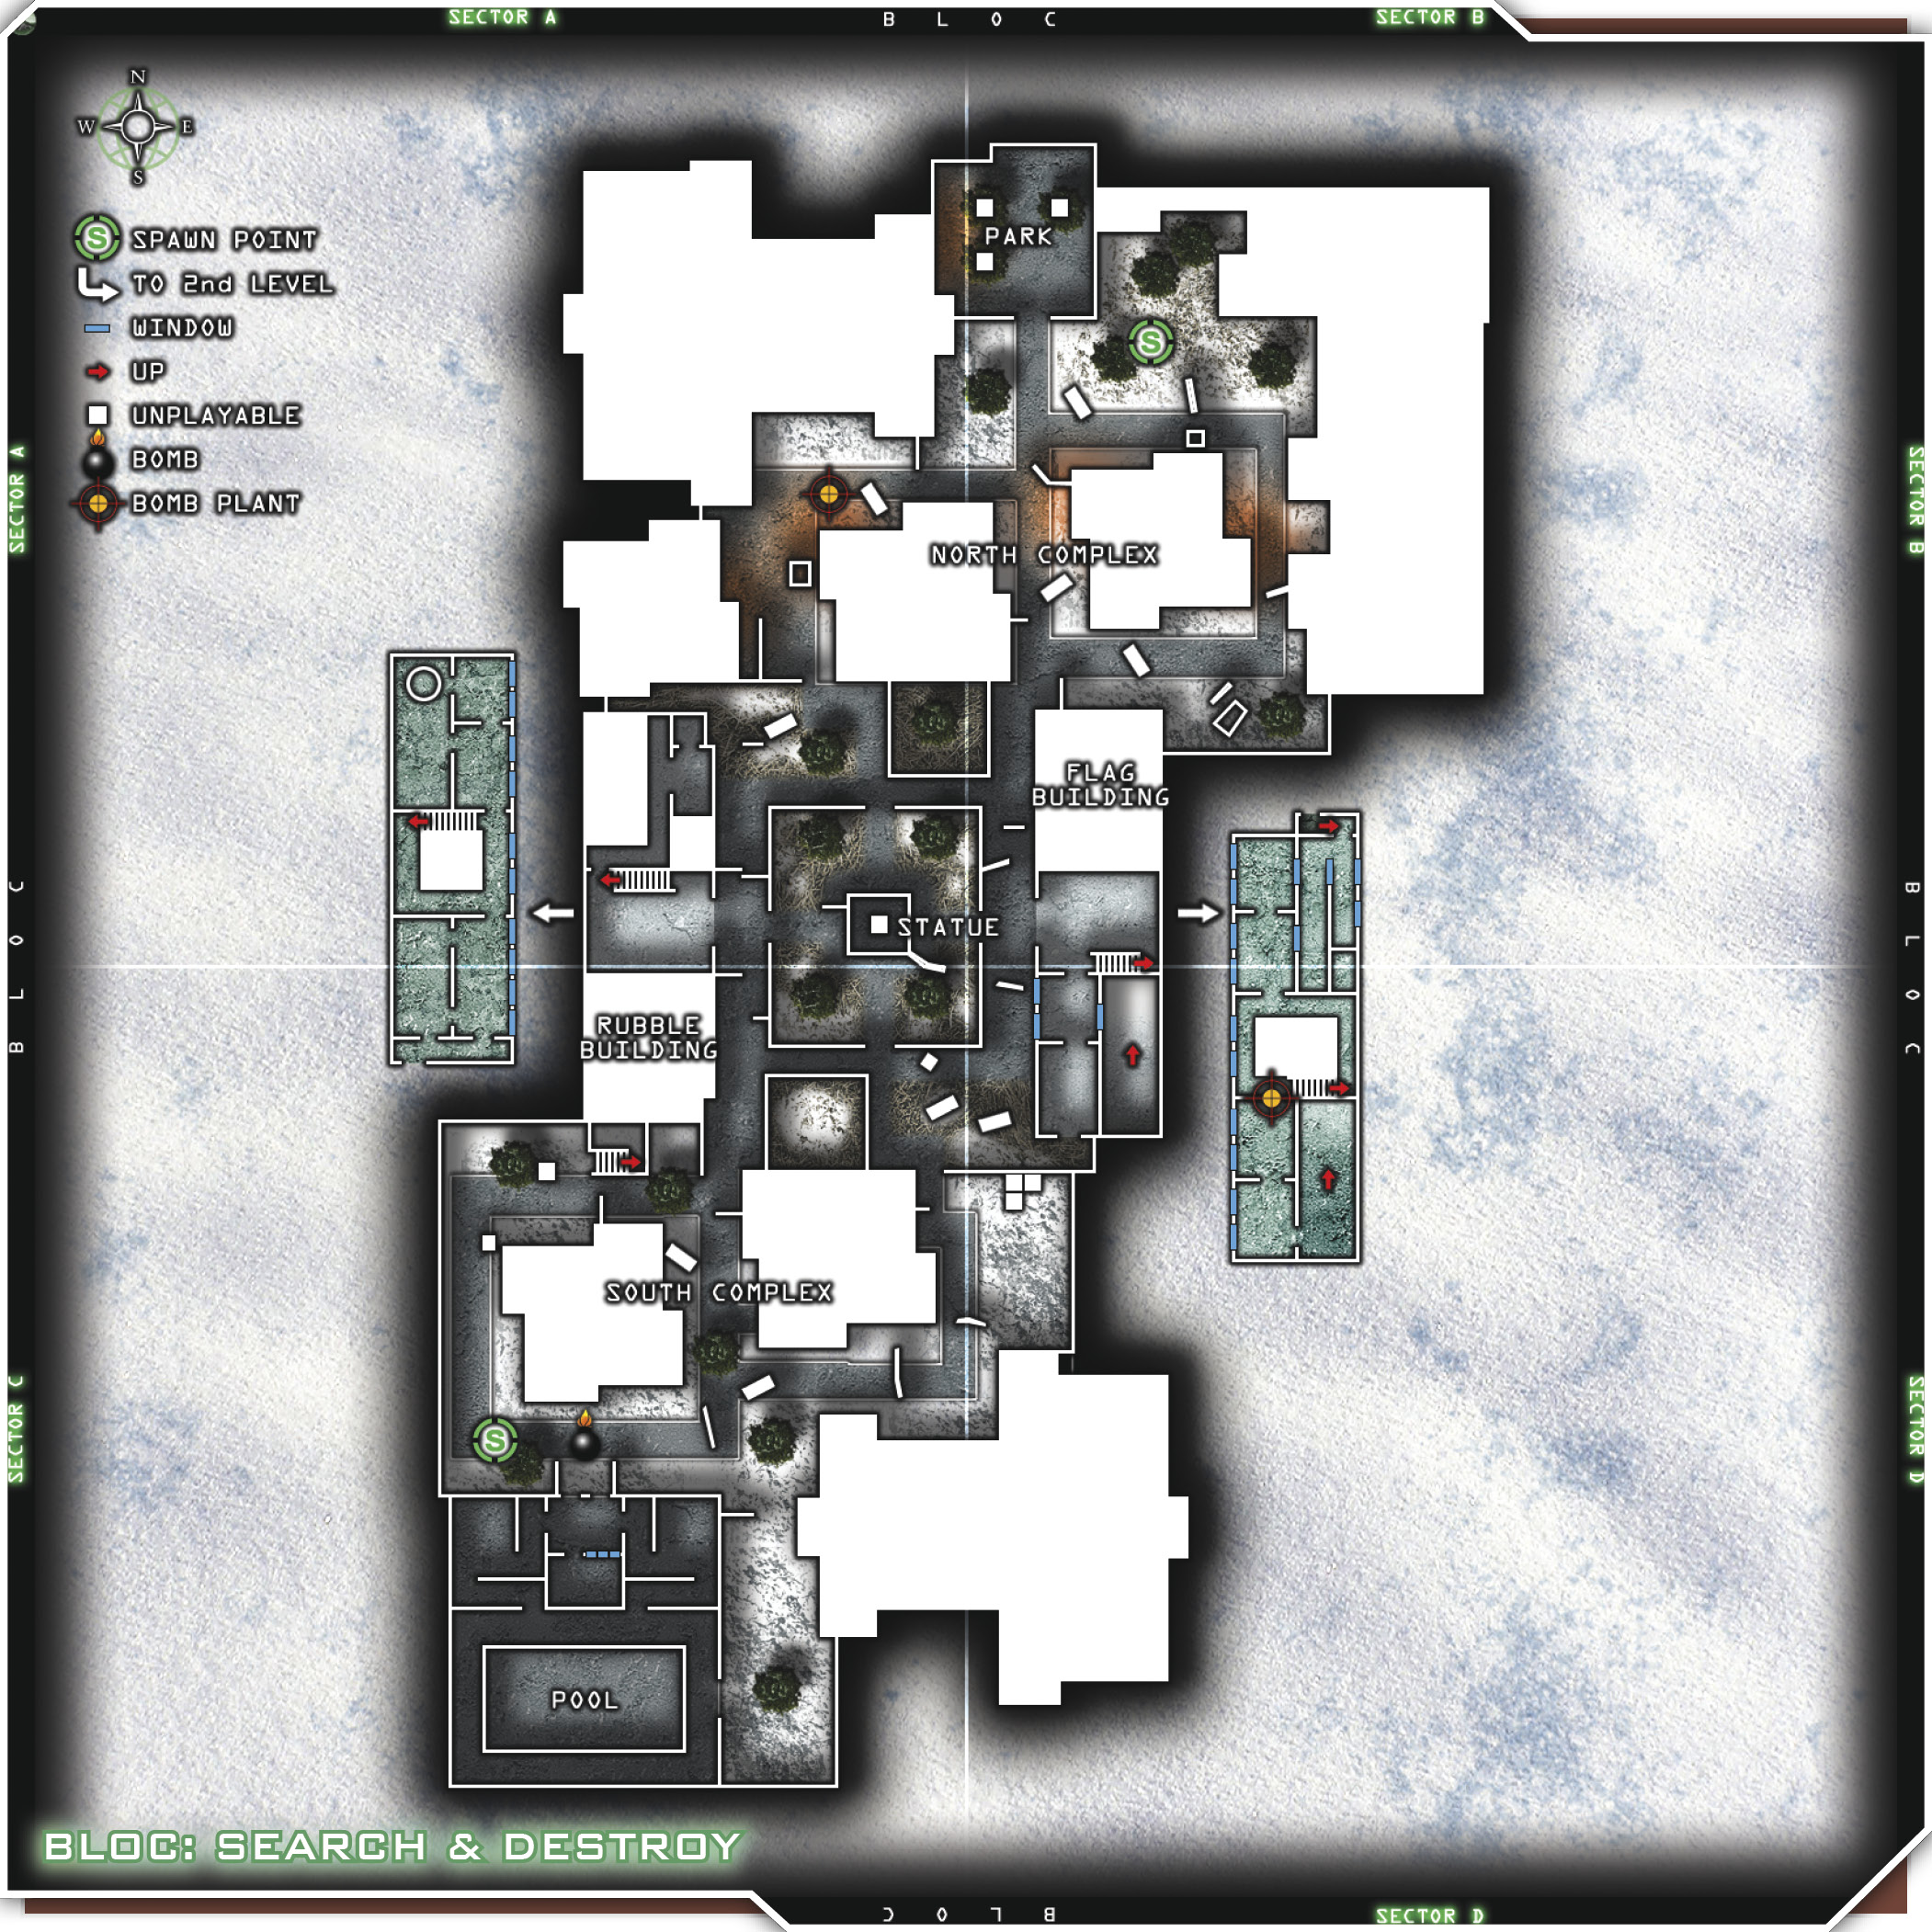
Another great place to camp out is the pool corner in the southwest sector of the map. Camping the pool will allow you to put your back against a wall so you know it’s covered. There are only two entrances to the pool: the front doors on the north side of the pool building, and the door on the east side. Split your team in two. Half of them should watch the front door, and half should watch the side. You can set up a sniper in the alley just east of the pool building, and even put a guy in the pool itself if you want to surprise them. The other team should be set up inside the front door, where there are plenty of angles to get the drop on enemies. Set up your Claymores at the front and side doors. Don’t select the UAV Jammer, because you want them to come to you. Don’t attach silencers either. In fact, pop off a shot in the air once in a while to draw the enemy toward you.