Prima Games eGuides
primagames.com Browse Redeem a code Help
Left 4 Dead 2 eGuide
Sign in My Guides

Sign in or create an account

We'll email you a link. No password needed, and if you don't have an account yet, the link makes one.

By creating an account or signing in, you agree to our Terms of Service and Privacy Policy.

Have a password?

Had an account on the old eGuides site, or a code from a printed guide? Help and troubleshooting

Sign in with a password

By signing in, you agree to our Terms of Service and Privacy Policy.

Check your email

A sign-in link is on its way. It works once and expires in 15 minutes. Open it and you're in, with an account if you didn't already have one.

Contents

  • Essentials
    • Display
      • The Screen
    • Game Modes
      • Introduction
      • Campaign
      • Realism
      • Versus
      • Survival
      • Scavenge
      • Single-Player
    • The A.I. Director
      • How It Works
    • Game Difficulty
      • About
    • Movement and Combat
      • On Maneuvers
      • Taking a Stance
      • Ranged Combat
      • Melee Combat
      • Health and Life
      • The Environment
    • Survival Tips and Tricks
      • Survivor General Tips
      • Infected General Tips
    • Survivors
      • The Cast
    • The Infected
      • Common Infected
      • Uncommon Infected
      • The Boomer
      • The Charger
      • The Hunter
      • The Jockey
      • The Smoker
      • The Spitter
      • The Tank
      • The Witch
    • Weapons and Equipment
      • Primary Weapons
      • Secondary Weapons
      • Mounted Weapons
      • Projectile Weapons (Belt Items)
      • Weapon Enhancements (Backpack Items)
      • Explosive Objects (Carry Only)
      • First Aid (Backpack Items)
      • Health Enhancements (Belt Items)
    • Achievements Appendix
      • Achievements
  • Walkthrough
    • Campaign Introduction
      • Looking 4 Guidance?
    • Dead Center
      • Dead Center Overview
      • Vannah Hotel Floor 8
      • Vannah Hotel Floor 7
      • Vannah Hotel Lobby
      • CEDA Quarantine & Overpass
      • Walkway To Whitaker’s
      • Maul Near Liberty Mall
      • Mall: Kappel’s and Middle Mezzanine
      • Mezzanine Mayhem
      • Security and Safe Rooms
      • Filling Up the Blue 22
    • Dark Carnival
      • Dark Carnival Overview
      • Highway & Off-Ramp
      • Whispering Oaks Ravine
      • Fairground Entrance
      • Chaos in Kiddieland
      • Murder at the Merry-Go-Round
      • Tunnel of Love
      • The Screaming Oak
      • The Barns
      • Barn Storming
      • The Concert
    • Swamp Fever
      • Swamp Fever Overview
      • Plank Country
      • Alligator Sanctuary
      • Rudimentary Pathways
      • Waterlogged Wade to Crash Site
      • Tracks Past the Shacks
      • Shanty Town Center
      • Shanty Town Bridge and Outskirts
      • Plantation Village
      • Plantation Mansion
    • Hard Rain
      • Hard Rain Overview
      • Burger Tank
      • Streets of Rage
      • Entrance and Refinery 1
      • Refinery 2, Plant Ruins, and Cane Field
      • Backtrack through Field, Plant, and Refinery
      • Retreat to the Safe Room
      • To the Safe Room on Second Street
      • Town Escape
    • The Parish
      • The Parish Overview
      • Bienville District
      • Bienville Park
      • Bedlam at the Bus Depot
      • Urban Flight
      • Sam’s Hot Impound Lot
      • The Cemetery of Saint Roche
      • One-Way Street and Jazz Club
      • Slaughter in the Quarter
      • Mayhem on the Mean Streets
      • A Bridge Too Far
      • Attack at the Military Evac
    • Scavenge Mode
      • Scavenge Mode: Basics
      • Dead Center: Atrium
      • Dark Carnival: Motel
      • Swamp Fever: Plank Country
      • Hard Rain: Milltown
      • Hard Rain: Sugar Mill
      • The Parish: Park
    • Survival Mode
      • Survival mode: Basics
      • Dead Center: Atrium
      • Dark Carnival: Motel
      • Dark Carnival: Stadium Gate
      • Dark Carnival: Concert
      • Swamp Fever: Plank Country
      • Swamp Fever: Plantation
      • Hard Rain: Burger Tank
      • Hard Rain: Sugar Mill
      • The Parish: Bus Depot
      • The Parish: Bridge
  • DLC
    • The Passing
      • New Features
      • Campaign: The Riverfront
      • Campaign: Streets & Alleyway
      • Campaign: The Park
      • Campaign: Pool Hall
      • Campaign: Pipe works
      • Campaign: River Tour
      • Campaign: The Sewers
      • Campaign: The Port
      • Scavenge Maps
      • Survival Maps
  • Video
    • The Basics: Top Ten Tips
    • Know Your Enemy (Part 1)
    • Know Your Enemy (Part 2)
    • Leave Them Dead: Weapons Detail
    • Tips Scavenge and Survival Modes
    • Campaign Tactics: Dead Center
    • Campaign Tactics: Dark Carnival
    • Campaign Tactics: Swamp Fever
    • Campaign Tactics: Hard Rain
    • Campaign Tactics: The Parish

Left 4 Dead 2 Guide › Walkthrough › The Parish

Sam’s Hot Impound Lot

A.I. Director's Box

Vehicles parked in the impound lot are most definitely alarmed, so look for warning information and avoid them accordingly.

A Hard Landing

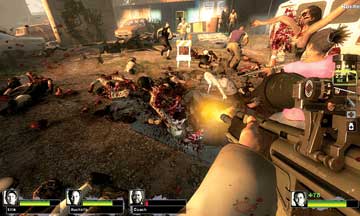
Jump from the hole in the building to the top of the white trailer, which you can stand on and snipe foes before they climb up to claw you, or else land on the ground and massacre them (picture 1).
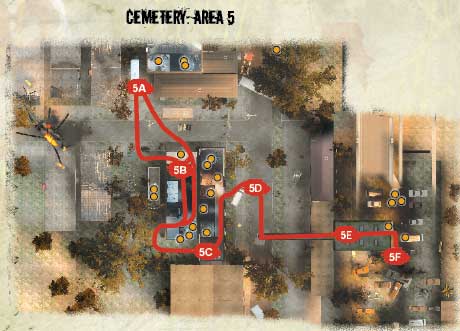
5A

Even a cursory inspection of the area reveals a variety of fences and three houses burned to the ground after a military helicopter crash-landed and took out an electrical pole. The fires are mostly out, but there are still items to locate, including inside the mostly intact building at the far end of the street (to the right of Location 5B on the guide map).

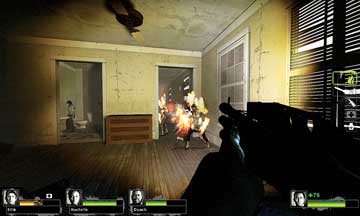
Back in the street, locate the half-burned building (5B) and access it via either doorway. Step inside, optionally checking the staircase to the upper floor, before heading down the hallway.
5B

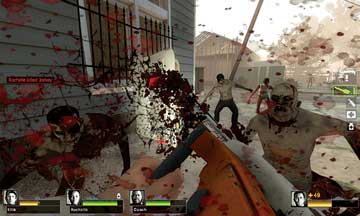
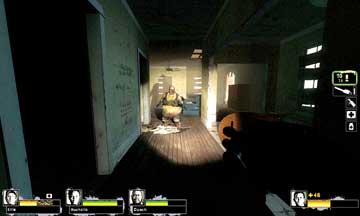
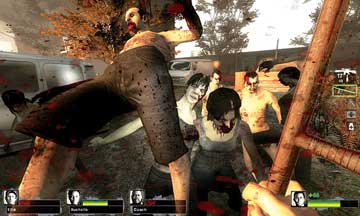
Prepare for a possible ambush (picture 2), especially from foes dropping down from upstairs, and demolish all entities before stepping through the hole in the outer wall. Outside (picture 3), you should definitely check the white trailer with the ladder propped against it. Items are on the roof.
Hunting for a Hole

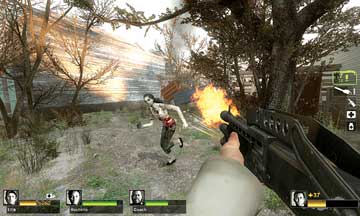
Move left around the corner and pass between two small sections of green fencing, into a hole leading to an adjacent house (5C). This grassy area is narrow, so watch for a possible Charger attack. Move into the shotgun house (picture 1), and bring down the entities inside.
5C

Work your way methodically through each room, grabbing items and dealing with foes as you go. Grab any items in the kitchen before leaving via the hole in the right wall.

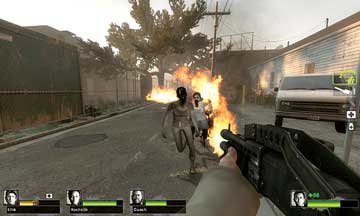
You step out into a road with a white van parked nearby. Swing around and target any nearby enemies (picture 2), and always watch for rear charges from multiple foes. Once everyone has gathered together, move down the road.
5D

There’s an impound lot with a sign on the roof about car auctions. The only way to reach this location is to find the sewer hole, which is surrounded by construction cones. Verbally announce when you’re about to drop down, and then have all team members do so at exactly the same time, with each facing a different direction so you can abort the drop if Special Infected attack. Ready? “1, 2, 3 … drop!”

Caution

This sewer drop is one-way; you can’t rescue friends still stuck on the surface!

Tip

If any of your team are armed with Pistols instead of Melee Weapons, it’s a good idea to have everyone switch to Melee. That impound lot is full of alarmed vehicles!

Going Underground

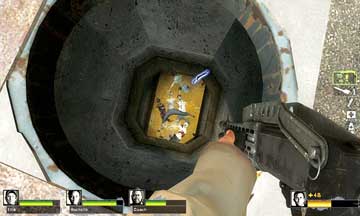
Drop down into the sewer (picture 1) and check the grating behind you for a slumped corpse and possible weapons. Then forge ahead, keeping to one side so more than one of your team can fire on any foes. This unpleasant, watery passage soon opens up into a larger, earthen chamber with zombies aplenty. Locate the ladder and head up to emerge right in the middle of the impound lot.
5E

Creeping through the Car Lot

Change your weapons so that you’re all carrying Melee Weapons and stop as soon as you emerge from the sewer hole. If you’re interested in the Violence in Silence Achievement (and, to a lesser extent, survival in general), you’ll want to put away all firearms during your walk out of this car lot.

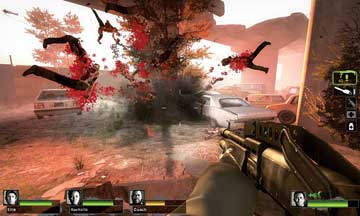
Every single vehicle is alarmed, and touching, shooting, or jumping on any vehicle summons the Horde! The associated pictures show the legions of foes that will be summoned if you ignore this sage advice...
5F

If one of the alarms goes off, you’re in trouble. Because the Horde continuously appears, you should never stand and fight. The attacks will continue until the alarm switches off, but this usually takes a while, and the Infected tend to scramble over other alarmed vehicles, perpetuating this problem.

Instead, you can create a distraction, such as by lobbing a Pipe Bomb (picture 1) and fleeing the scene to the base of the freeway ladder (Location 6A). If the Horde is approaching, a great many of them may ascend up the sewer hole, so this is a good place to aim and cut them down before they can attack you (picture 2).
However, at some stage (sooner rather than later), you need to get moving. Don’t head off in the wrong direction; the correct way out of the impound lot can be discerned by looking for the sun. It should be on the left side of your vision. Now that you’re heading in the correct direction, you might as well try to leap from vehicle to vehicle as you battle your way out.
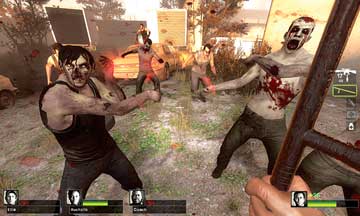
Melee Weapons are still advisable, as well as Melee Strikes (pictures 3 and 4), but eventually, you’re going to need to run. Leap across the cars and head toward the ladder to the freeway, but don’t think you’re safe now. There may be a Witch (picture 5) or other Special Infected to avoid or terminate. Let’s hope there’s First Aid on the freeway if you failed at keeping quiet.
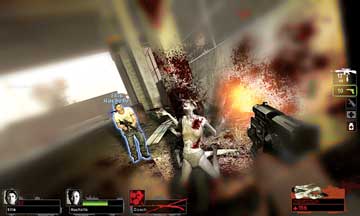
Caution

Special Infected, in particular during Versus matches, absolutely love this area as it’s easy to steer, Charge, or nudge you into a vehicle. Keep this in mind and make your escape quick.

Tip

Head out of the hole, sheath all ranged weapons, and then head down the middle of the impound lot to the exit: safe, simple, and you’ve saved ammunition, too!

Effective Infected

There are three general zones in this area where you should make a concentrated effort to stall and savage the Survivors. The first is inside the half-burned house (5B): The upstairs area offers a drop down into the living room, so position a fellow Special Infected on the ground floor, one to the side in the living room, and one above to thoroughly decimate the humans in this enclosed area. Mix it up a bit by switching this location with the outside trailer: Prowl on the roof or send a Charger in between the green fences (picture 1), even if you’re set on fire by incendiary bullets.

The third key position to cause a problem for the humans is the drop into the sewer. Hide in the nearby house or tree, then emerge and grab the last couple of Survivors to split them from the group and beat them to death. This way your foes are softened up for the major attack at the impound lot (picture 2), where it is imperative you cause a car alarm to activate. After that, attack the foes, belching Spitter vomit into the escape path, steering foes into the sewer hole, and generally savaging your enemies while the Common Infected back you up.

Keep reading with a free account

The first 3 sections of Left 4 Dead 2 are open to everyone. An account opens the rest of it, and every other guide in the archive. It's free, and there's nothing to buy.

Bought guides on the old Prima Games site? Your account and every guide you own moved here, so there's nothing to buy again. Sign in.

Create a free account Or browse our free guides

PreviousUrban Flight NextThe Cemetery of Saint Roche