
Left 4 Dead 2 Guide Walkthrough Dead Center
Filling Up the Blue 22
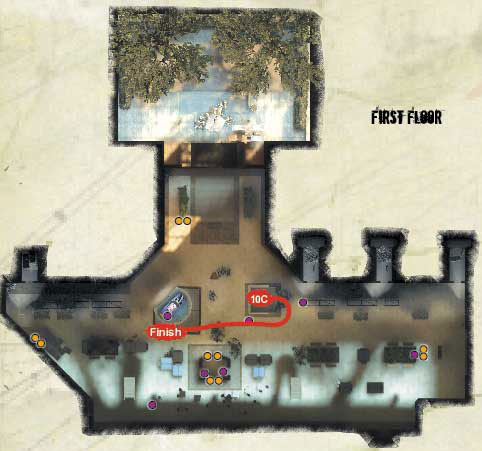
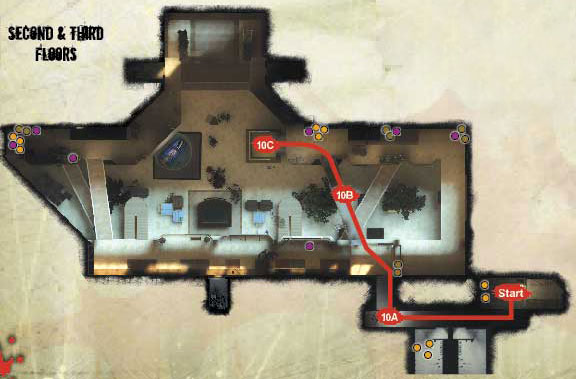
Grabbing Gibbs’s Gasoline: Atrium Overview
Jimmy Gibbs Jr. was an accomplished racing driver, although he’s probably watching his next human target through cold, dead eyes.
His vehicle was the real star of the show anyway, and Ellis reckons it’s the perfect vehicle to escape in.
This scheme becomes a reality as you enter the atrium (Area 10), which has a number of Fuel Cans scattered about its three floors.
A final, frenzy of Fuel Can collecting and zombie decapitating is all that stands between you and freedom at the atrium!
+ This can be straightforward if you work together. Learn that you can push foes away while carrying Fuel Cans.
+ Teamwork is rewarded; throw Fuel Cans down to teammates so that filling up is faster and far Fuel Cans can be grabbed quickly.
+ The Information kiosk has a mass of weapons and items; don’t overlook the kiosk when you’re rushing for your next Fuel Can.
- Some Fuel Cans are far away, and the Infected appear from closets after each refill; choose your Fuel Can wisely!
- In Versus mode, Spitters can ruin your “stockpile” plan, so shelve this idea for Campaign, Realism, and Single Play.
- Special Infected can be a horrific nuisance and Common Infected are numerous. This is about fueling, not fighting.
Entering the Atrium
10A
After reading the graffiti and confirming your predicament, spend a few moments congratulating each other on making it this far while you patch yourself up with First Aid and grab your favored firearms, Melee Weapons, Belt Items, and ammunition.
For the final part of your trek through Liberty Mall, you may want to arm two of your three team members with close-combat weapons such as Autoshotguns, with one or two using scoped range guns.
Don’t worry if you can’t arm up yet; there’s an information kiosk in the atrium with a full complement of hardware.
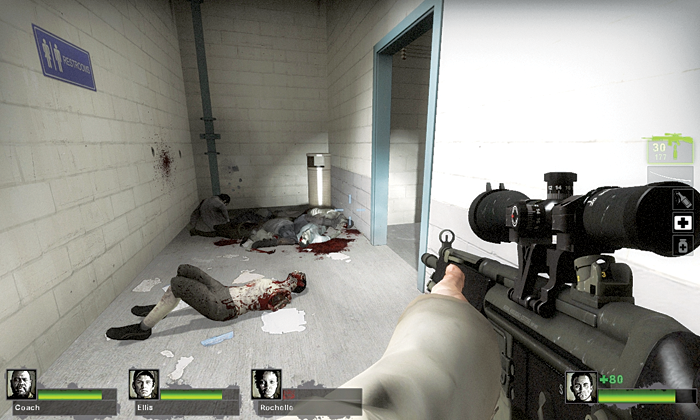
Exit the Safe Room, heading along the narrow corridor with restrooms on your left. Check the areas for Infected stragglers, then move to the exit doorway, and move into the mall atrium, entering via a third-floor bridge that’s under construction.
10B
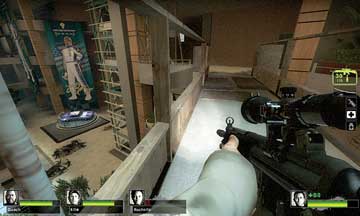
Your combat is likely to be limited as you cross. Look left and down at the giant wall poster of Jimmy Gibbs Jr. and his race car, the Blue 22. Ellis seems to be very excited about it.
Ellis’s Excitement
Step into the elevator and ride it down to the ground floor while Ellis explains the prowess that is (or more likely, was) Jimmy Gibbs Jr.
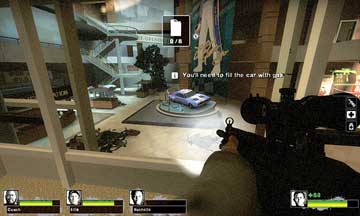
10C
As you descend, check out the car through the glass; you’re about to attempt a two-part, crazy scheme to flee the mall once and for all: you need to fill the car with gas.
Step 1 is to find a Fuel Can, and Step 2 is to bring the Fuel Can to the car. Simple enough, but expect mass Infected attacks as each Fuel Can is grabbed.
Refueling the Blue 22
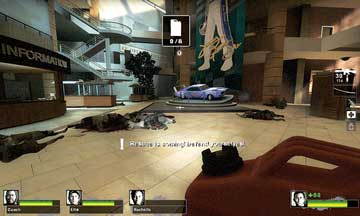
While you’re en route to the elevator and riding it down, figure out roles for every person in your team.
The initial stages of your Fuel Can search are straightforward enough, though; the moment the elevator door opens, rush and grab the Fuel Can directly ahead of you, then spin right, sprint past the Information kiosk, and pour fuel into the vehicle on the podium.
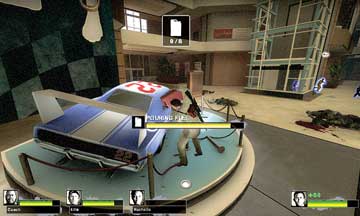
That’s one gallon already! Now, there are multiple points to remember:
1: A Can-Do Attitude
It is wise to have two pairs of your team, or everyone en masse concentrating on grabbing Cans.
Then, a single person taking the can and bringing it back, using the Can to swipe at any Infected instead of dropping it and switching to a weapon (this is useful when only a few Infected are attacking).
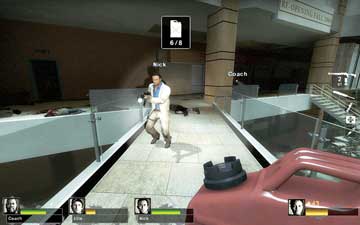
The rest of your team is responsible for keeping the carrier not only alive, but also with a clear path to the car.
Or, you can all rampage toward the same area, such as up the set of steps to the second floor under the bridge you appeared from (as shown; 10B), and when you reach an area with a number of Cans, you can quickly split up, each grab a Can, and sprint back toward the car as quickly as you can.
Have one or two of your team ready to drop their Can at the first sign of Infected charges, so they can chaperone the others.
2: Airborne at Altitude
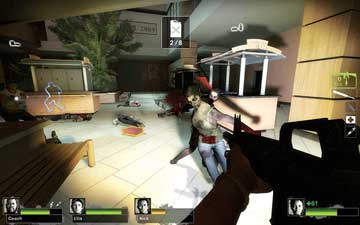
Unless you’re playing in Versus mode, where Spitters have the nasty tendency to set fire to dropped Fuel Cans, it is incredibly efficient and helpful for two of your team to work in unison to quicken the filling pace.
The first player scales the stairs, grabs a Can, and instead of returning it to the car with intermittent Can-dropping and combat, they throw the Can down to their colleague on the ground, either at the car or (as shown) under one of the bridges. That teammate moves to the Blue 22 and fills the Tank immediately.
This is not only a swift and relatively safer method, but also it frees up the Fuel Can gatherer to stay on upper balconies to find more Cans before throwing them down.
An alternate to this plan is to work as a team of four instead of two, with one pair grabbing cans and watching each other’s backs, while the other two guard the Information kiosk and car, and empty the Cans into the Tank after they fall.
A final, not-quite-as-good plan is to gather Cans and drop them independent of your teammates, which usually occurs if your friends are novices, annoying, or computer-controlled.
3: A Shortcut Above the Rest
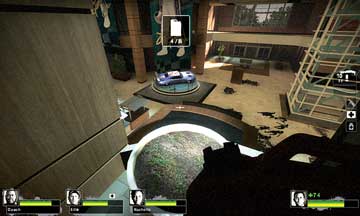
Study the guide maps of the atrium to learn some important, and exceedingly useful shortcuts. First, the glass floors on the upper walkways can be shot and dropped through, which is useful for dodging foes while carrying a Can.
Another shortcut is the white circular planter (pictured) along the balcony. You can leap onto it, leap off the balcony, and land on the roof of the information kiosk. Try finding other shortcuts like this when returning to the vehicle.
4: Single-Player Planning
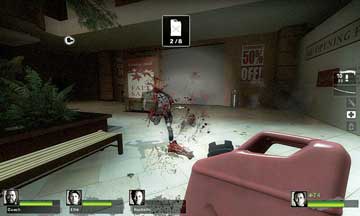
If you’re playing with computer-controlled Survivors, you’re the lead in Fuel Can gathering, so don’t expect too much tactical help (this is offset by having fewer Fuel Cans to collect).
It’s usually better to grab Fuel Cans on the ground floor, pushing foes back (as shown), ignoring teammates that need to be helped up (the other computer players do this job), and then heading upstairs to grab more Cans.
Throwing Cans down isn’t as helpful because you need to retrace your steps to pick them up again instead of handing them down to a friend, but it’s still advantageous compared to battling enemies while carrying one.
Use the shortcuts and shrug off a few foes; only resort to violence when you can dodge or Melee your way through the Infected.
Mall Escape
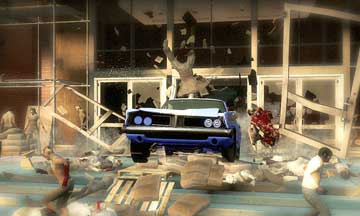
When the prerequisite number of Fuel Cans have been used to fill up the Tank of the Blue 22, your entire team needs to converge on the vehicle.
Retreat from any combat into the large open area near the car (which is useful to try when the final Can is being carried back to the car), and then step into the designated area.
The car roars to life, smashes through the atrium doors, and you flee the scene with your appendages (and sanity) mostly intact.