
Prima Games eGuides
primagames.com Browse Redeem a code Help
Left 4 Dead 2 eGuide
Sign in My Guides

Sign in or create an account

We'll email you a link. No password needed, and if you don't have an account yet, the link makes one.

By creating an account or signing in, you agree to our Terms of Service and Privacy Policy.

Have a password?

Had an account on the old eGuides site, or a code from a printed guide? Help and troubleshooting

Sign in with a password

By signing in, you agree to our Terms of Service and Privacy Policy.

Check your email

A sign-in link is on its way. It works once and expires in 15 minutes. Open it and you're in, with an account if you didn't already have one.

Contents

  • Essentials
    • Display
      • The Screen
    • Game Modes
      • Introduction
      • Campaign
      • Realism
      • Versus
      • Survival
      • Scavenge
      • Single-Player
    • The A.I. Director
      • How It Works
    • Game Difficulty
      • About
    • Movement and Combat
      • On Maneuvers
      • Taking a Stance
      • Ranged Combat
      • Melee Combat
      • Health and Life
      • The Environment
    • Survival Tips and Tricks
      • Survivor General Tips
      • Infected General Tips
    • Survivors
      • The Cast
    • The Infected
      • Common Infected
      • Uncommon Infected
      • The Boomer
      • The Charger
      • The Hunter
      • The Jockey
      • The Smoker
      • The Spitter
      • The Tank
      • The Witch
    • Weapons and Equipment
      • Primary Weapons
      • Secondary Weapons
      • Mounted Weapons
      • Projectile Weapons (Belt Items)
      • Weapon Enhancements (Backpack Items)
      • Explosive Objects (Carry Only)
      • First Aid (Backpack Items)
      • Health Enhancements (Belt Items)
    • Achievements Appendix
      • Achievements
  • Walkthrough
    • Campaign Introduction
      • Looking 4 Guidance?
    • Dead Center
      • Dead Center Overview
      • Vannah Hotel Floor 8
      • Vannah Hotel Floor 7
      • Vannah Hotel Lobby
      • CEDA Quarantine & Overpass
      • Walkway To Whitaker’s
      • Maul Near Liberty Mall
      • Mall: Kappel’s and Middle Mezzanine
      • Mezzanine Mayhem
      • Security and Safe Rooms
      • Filling Up the Blue 22
    • Dark Carnival
      • Dark Carnival Overview
      • Highway & Off-Ramp
      • Whispering Oaks Ravine
      • Fairground Entrance
      • Chaos in Kiddieland
      • Murder at the Merry-Go-Round
      • Tunnel of Love
      • The Screaming Oak
      • The Barns
      • Barn Storming
      • The Concert
    • Swamp Fever
      • Swamp Fever Overview
      • Plank Country
      • Alligator Sanctuary
      • Rudimentary Pathways
      • Waterlogged Wade to Crash Site
      • Tracks Past the Shacks
      • Shanty Town Center
      • Shanty Town Bridge and Outskirts
      • Plantation Village
      • Plantation Mansion
    • Hard Rain
      • Hard Rain Overview
      • Burger Tank
      • Streets of Rage
      • Entrance and Refinery 1
      • Refinery 2, Plant Ruins, and Cane Field
      • Backtrack through Field, Plant, and Refinery
      • Retreat to the Safe Room
      • To the Safe Room on Second Street
      • Town Escape
    • The Parish
      • The Parish Overview
      • Bienville District
      • Bienville Park
      • Bedlam at the Bus Depot
      • Urban Flight
      • Sam’s Hot Impound Lot
      • The Cemetery of Saint Roche
      • One-Way Street and Jazz Club
      • Slaughter in the Quarter
      • Mayhem on the Mean Streets
      • A Bridge Too Far
      • Attack at the Military Evac
    • Scavenge Mode
      • Scavenge Mode: Basics
      • Dead Center: Atrium
      • Dark Carnival: Motel
      • Swamp Fever: Plank Country
      • Hard Rain: Milltown
      • Hard Rain: Sugar Mill
      • The Parish: Park
    • Survival Mode
      • Survival mode: Basics
      • Dead Center: Atrium
      • Dark Carnival: Motel
      • Dark Carnival: Stadium Gate
      • Dark Carnival: Concert
      • Swamp Fever: Plank Country
      • Swamp Fever: Plantation
      • Hard Rain: Burger Tank
      • Hard Rain: Sugar Mill
      • The Parish: Bus Depot
      • The Parish: Bridge
  • DLC
    • The Passing
      • New Features
      • Campaign: The Riverfront
      • Campaign: Streets & Alleyway
      • Campaign: The Park
      • Campaign: Pool Hall
      • Campaign: Pipe works
      • Campaign: River Tour
      • Campaign: The Sewers
      • Campaign: The Port
      • Scavenge Maps
      • Survival Maps
  • Video
    • The Basics: Top Ten Tips
    • Know Your Enemy (Part 1)
    • Know Your Enemy (Part 2)
    • Leave Them Dead: Weapons Detail
    • Tips Scavenge and Survival Modes
    • Campaign Tactics: Dead Center
    • Campaign Tactics: Dark Carnival
    • Campaign Tactics: Swamp Fever
    • Campaign Tactics: Hard Rain
    • Campaign Tactics: The Parish

Left 4 Dead 2 Guide › DLC › The Passing

Campaign: Pipe works

5A: Under Construction

5A

The only way onward is downward. Drop down from one of the Pool Hall windows (or the end of the first street, if you didn’t access the hall or fled from it) into the brown gunk and sizable pipe works.

The muddy effluent slows you down, making you a sitting target for enemies such as a Horde, Hunter, or other dangerous foes. As a last resort, you can crouch and enter one of the pipes, and then have two teammates defend either end until the bodies are piling up outside.

Alternatively, it is better to remain on top of the pipes, jump to the digging machine, and then leap across to the sidewalk, or scrambling up to the tarmac where you have height advantage over the incessant clawing attacks.

The digging machine has a ladder you can climb, too, which minimizes the time you should be spending in the mud. Finally, try to drop down to the left of the section of tarmac in the middle of the construction zone that hasn’t been excavated yet, or you’ll have to crawl through the middle tube, which slows you down and exposes you further.

Tip

Finding the muddy ground hard going? Then use Adrenaline and run through the mire without slowing.

Tip

All aboard the Midnight Express! The Midnight Riders’ tour bus is leaving town, and unfortunately, you’re not on the guest list!

If you’re quick and have navigated the sewage construction and clambered up the other side, you have a chance to see the tour bus zoom past you, presumably to the Whispering Oaks Amusement Park. You’re behind the mesh fence, standing near the cement mixer, though, and can’t hitch a ride.

5B and 5C: Fight through Red Flight Bar Cafe

5B

There are two ways to dash into the Red Flight Bar Cafe, which is your next port of call after scrambling to the other side of the construction zone. The first is down the steps to the front entrance.

The second is to head down the alley steps and enter the building from the small courtyard side entrance, which brings you into the pool table room and toilets, both of which have a copious amount of graffiti and items to inspect (remember to read it all).

Take what you need, and then prepare to head up two floors to the third landing, through the tenement apartments directly above the bar area.

5C

Along the way, there’s the small matter of the enclosed space, and the constant threat of Special (and regular) Infected attacks.

Attempt “professional” sweeps of each new room using the technique you’ve learned during previous outings: Have a teammate swing left, another right, and a third move ahead into a chamber while the fourth periodically checks to make sure you aren’t being stalked from behind.

Aside from a suitcase full of cash in one of the rooms, which prompts some pretty interesting responses from some of the Survivors, there’s little to worry you if you stick together. Until you reach the plank, that is.

5D and 5E: Courtyard Creep to the Jazz Club

5D

Remember you can exit the tenement building on the second floor, and move up the fire escape to the top floor where the plank is located, but if you do you’re just asking to be attacked by Special Infected.

Instead, stay inside the building until you’ve rushed across the landing corridor, checked the small, darkened bedrooms on your left, and reached the larger living room with the open windows leading onto the fire escape.

You can elect to dash outside and cross the plank, but a far better plan is to stick together, fire at all foes you can see from the windows inside the tenement, and then exit and cross the plank.
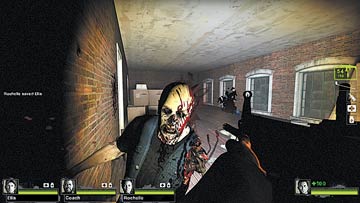
Caution

The plank is a location where Special Infected will attempt to waylay you. They will charge, strangle, or push you off the fire escape or plank to cause havoc among your team and split you up. This is the most dangerous part of this trek so far, so stay alert and together!

The first couple of Survivors crossing the plank should clear the initial corridor inside the next structure, then turn and let the remaining two friends know that the coast is clear, and provide covering fire for them.

Once all four of you are safely across, you can begin to descend through the next, half-finished tenement block to a courtyard below.

There are two floors, each with a large, open-plan room, the lower of which should be checked for equipment and the final possible Foot Locker. Three floors of steps on the right side of this building lead down onto the courtyard.

5E

You may elect to dash down onto the courtyard, but a better plan is to check every corner, watching you don’t fall through some of the holes in the floor and then methodically descend, cutting down any foes (including Special Infected hiding in the darkened corners).

Also beware of holes in the walls, which allow a stream of enemies to clamber up from the alleyway you just came from. Assuming you haven’t been swarmed, drop from the middle floor window, or head down the stairs and outside into the courtyard. You should have culled any foes you spotted from inside the building before you get here (5E).

Caution

Remember which floor you’re on! If you try leaping out of the upper room window, you’ll either dangle precariously or land with a wincing crunch; either way, you’re

Tip

If the Foot Locker is here, use the contents and then come back for more; there’s a limitless supply!

Follow the tried and trusted rules for fighting in larger environments, which favor circle-strafing. Use the scenery (the chemical toilets and cars to stand on and fire from, and the trees to circle around to dodge attacks) as you cross diagonally.

Look for the bright blue neon Jazz Club sign. The entrance is easy to spot. Clamber over the pair of broken doors just to the right of the red-lit, barred windows. Work your way across to this point as a team, watching and defeating foes coming in from the different directions. There’s little point in waiting around. Get inside that Jazz Club!

Keep reading with a free account

The first 3 sections of Left 4 Dead 2 are open to everyone. An account opens the rest of it, and every other guide in the archive. It's free, and there's nothing to buy.

Bought guides on the old Prima Games site? Your account and every guide you own moved here, so there's nothing to buy again. Sign in.

Create a free account Or browse our free guides

PreviousCampaign: Pool Hall NextCampaign: River Tour