
Prima Games eGuides
primagames.com Browse Redeem a code Help
Left 4 Dead 2 eGuide
Sign in My Guides

Sign in or create an account

We'll email you a link. No password needed, and if you don't have an account yet, the link makes one.

By creating an account or signing in, you agree to our Terms of Service and Privacy Policy.

Have a password?

Had an account on the old eGuides site, or a code from a printed guide? Help and troubleshooting

Sign in with a password

By signing in, you agree to our Terms of Service and Privacy Policy.

Check your email

A sign-in link is on its way. It works once and expires in 15 minutes. Open it and you're in, with an account if you didn't already have one.

Contents

  • Essentials
    • Display
      • The Screen
    • Game Modes
      • Introduction
      • Campaign
      • Realism
      • Versus
      • Survival
      • Scavenge
      • Single-Player
    • The A.I. Director
      • How It Works
    • Game Difficulty
      • About
    • Movement and Combat
      • On Maneuvers
      • Taking a Stance
      • Ranged Combat
      • Melee Combat
      • Health and Life
      • The Environment
    • Survival Tips and Tricks
      • Survivor General Tips
      • Infected General Tips
    • Survivors
      • The Cast
    • The Infected
      • Common Infected
      • Uncommon Infected
      • The Boomer
      • The Charger
      • The Hunter
      • The Jockey
      • The Smoker
      • The Spitter
      • The Tank
      • The Witch
    • Weapons and Equipment
      • Primary Weapons
      • Secondary Weapons
      • Mounted Weapons
      • Projectile Weapons (Belt Items)
      • Weapon Enhancements (Backpack Items)
      • Explosive Objects (Carry Only)
      • First Aid (Backpack Items)
      • Health Enhancements (Belt Items)
    • Achievements Appendix
      • Achievements
  • Walkthrough
    • Campaign Introduction
      • Looking 4 Guidance?
    • Dead Center
      • Dead Center Overview
      • Vannah Hotel Floor 8
      • Vannah Hotel Floor 7
      • Vannah Hotel Lobby
      • CEDA Quarantine & Overpass
      • Walkway To Whitaker’s
      • Maul Near Liberty Mall
      • Mall: Kappel’s and Middle Mezzanine
      • Mezzanine Mayhem
      • Security and Safe Rooms
      • Filling Up the Blue 22
    • Dark Carnival
      • Dark Carnival Overview
      • Highway & Off-Ramp
      • Whispering Oaks Ravine
      • Fairground Entrance
      • Chaos in Kiddieland
      • Murder at the Merry-Go-Round
      • Tunnel of Love
      • The Screaming Oak
      • The Barns
      • Barn Storming
      • The Concert
    • Swamp Fever
      • Swamp Fever Overview
      • Plank Country
      • Alligator Sanctuary
      • Rudimentary Pathways
      • Waterlogged Wade to Crash Site
      • Tracks Past the Shacks
      • Shanty Town Center
      • Shanty Town Bridge and Outskirts
      • Plantation Village
      • Plantation Mansion
    • Hard Rain
      • Hard Rain Overview
      • Burger Tank
      • Streets of Rage
      • Entrance and Refinery 1
      • Refinery 2, Plant Ruins, and Cane Field
      • Backtrack through Field, Plant, and Refinery
      • Retreat to the Safe Room
      • To the Safe Room on Second Street
      • Town Escape
    • The Parish
      • The Parish Overview
      • Bienville District
      • Bienville Park
      • Bedlam at the Bus Depot
      • Urban Flight
      • Sam’s Hot Impound Lot
      • The Cemetery of Saint Roche
      • One-Way Street and Jazz Club
      • Slaughter in the Quarter
      • Mayhem on the Mean Streets
      • A Bridge Too Far
      • Attack at the Military Evac
    • Scavenge Mode
      • Scavenge Mode: Basics
      • Dead Center: Atrium
      • Dark Carnival: Motel
      • Swamp Fever: Plank Country
      • Hard Rain: Milltown
      • Hard Rain: Sugar Mill
      • The Parish: Park
    • Survival Mode
      • Survival mode: Basics
      • Dead Center: Atrium
      • Dark Carnival: Motel
      • Dark Carnival: Stadium Gate
      • Dark Carnival: Concert
      • Swamp Fever: Plank Country
      • Swamp Fever: Plantation
      • Hard Rain: Burger Tank
      • Hard Rain: Sugar Mill
      • The Parish: Bus Depot
      • The Parish: Bridge
  • DLC
    • The Passing
      • New Features
      • Campaign: The Riverfront
      • Campaign: Streets & Alleyway
      • Campaign: The Park
      • Campaign: Pool Hall
      • Campaign: Pipe works
      • Campaign: River Tour
      • Campaign: The Sewers
      • Campaign: The Port
      • Scavenge Maps
      • Survival Maps
  • Video
    • The Basics: Top Ten Tips
    • Know Your Enemy (Part 1)
    • Know Your Enemy (Part 2)
    • Leave Them Dead: Weapons Detail
    • Tips Scavenge and Survival Modes
    • Campaign Tactics: Dead Center
    • Campaign Tactics: Dark Carnival
    • Campaign Tactics: Swamp Fever
    • Campaign Tactics: Hard Rain
    • Campaign Tactics: The Parish

Left 4 Dead 2 Guide › Walkthrough › Hard Rain

Retreat to the Safe Room

A.I. Director's Cut

The Director dynamically controls the stormy weather throughout this stage. Particularly powerful storms dull the “glows” around your teammates and summon a Horde. Seek shelter each time a squall hits.

Let There Be Light

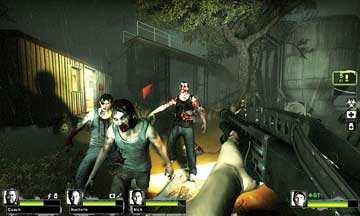
Having some degree of familiarity with the layout of the sugar mill, you should find your exit to be more adept and quicker than your entrance. You begin in the alleyway between refineries, so race along the ground toward the floodlight (picture 1) and then turn the corner, facing the ruins of Refinery 1.

6A

To your left is a cabin, which hopefully contains Adrenaline and other goodies you can use. Flee the scene, or stay and systematically drop those who seek to destroy you (picture 2).
6B

Tip

The ground is rugged and the threats, constant, so bunch together as best you can. Know exactly the route you’re about to take. Let one teammate shout directions for everyone, and the rest follow.

Let There Be Fright

Move to the middle of the refinery, which can be accomplished on either an upper catwalk, or a lower watery wade. (It’s at this point, or just after you pass Location 6B, that you should think about employing Adrenaline and racing all the way to the Safe Room.)

6C

Expect more Common Infected on the ground, usually with Special Infected lurking and ready to pounce, spit, or claw. Just to the right of the doorway (shown) is a ladder (not shown), which allows you to get up to a pipe and the continuation of a catwalk leading into the upper floor of the mill office (6E).

The Long and the Short of It

6D

If you had to abandon the upper route into the mill office (due to rescuing a teammate, or someone losing their way), the next best route is through the garage and out into an extremely soggy lawn area with the cylinders and container trucks. Rush around this location and into the office without delay.

Seeking the Soggy Safe Room

6E

Whether you arrive at the mill office via the upper floor or the side doorway from Location 6D, you are just steps away from the Safe Room, but you aren’t safe yet! Sheet lightning (picture 1) illuminates the sky briefly, but that won’t show the Special Infected that are likely to be waiting in this vicinity.

Beware of attacks from either side of the road, and even in the darkened rooms inside the building that houses the Safe Room!

Effective Infected

The first refinery has a good deal of dark corners to hide in, including the side of the cabin and under or atop the catwalks. The water and slow-moving wading the Survivors must attempt if they aren’t using the catwalks is obviously beneficial to your cause, so strike here or congregate outside the sugar mill entrance.

There’s nothing better than lassoing a human (as shown) when they thought they were only steps away from safety! Use rooftops, bushes, vehicles, and other hidey-holes from which to make your move. In one particularly impressive strike, a Charger managed to run over three humans inside the building in the dark room adjacent to the Safe Room itself. Multiple, relentless attacks can really demoralize your foes.

Keep reading with a free account

The first 3 sections of Left 4 Dead 2 are open to everyone. An account opens the rest of it, and every other guide in the archive. It's free, and there's nothing to buy.

Bought guides on the old Prima Games site? Your account and every guide you own moved here, so there's nothing to buy again. Sign in.

Create a free account Or browse our free guides

PreviousBacktrack through Field, Plant, and Refinery NextTo the Safe Room on Second Street