Prima Games eGuides
primagames.com Browse Redeem a code Help
Left 4 Dead 2 eGuide
Sign in My Guides

Sign in or create an account

We'll email you a link. No password needed, and if you don't have an account yet, the link makes one.

By creating an account or signing in, you agree to our Terms of Service and Privacy Policy.

Have a password?

Had an account on the old eGuides site, or a code from a printed guide? Help and troubleshooting

Sign in with a password

By signing in, you agree to our Terms of Service and Privacy Policy.

Check your email

A sign-in link is on its way. It works once and expires in 15 minutes. Open it and you're in, with an account if you didn't already have one.

Contents

  • Essentials
    • Display
      • The Screen
    • Game Modes
      • Introduction
      • Campaign
      • Realism
      • Versus
      • Survival
      • Scavenge
      • Single-Player
    • The A.I. Director
      • How It Works
    • Game Difficulty
      • About
    • Movement and Combat
      • On Maneuvers
      • Taking a Stance
      • Ranged Combat
      • Melee Combat
      • Health and Life
      • The Environment
    • Survival Tips and Tricks
      • Survivor General Tips
      • Infected General Tips
    • Survivors
      • The Cast
    • The Infected
      • Common Infected
      • Uncommon Infected
      • The Boomer
      • The Charger
      • The Hunter
      • The Jockey
      • The Smoker
      • The Spitter
      • The Tank
      • The Witch
    • Weapons and Equipment
      • Primary Weapons
      • Secondary Weapons
      • Mounted Weapons
      • Projectile Weapons (Belt Items)
      • Weapon Enhancements (Backpack Items)
      • Explosive Objects (Carry Only)
      • First Aid (Backpack Items)
      • Health Enhancements (Belt Items)
    • Achievements Appendix
      • Achievements
  • Walkthrough
    • Campaign Introduction
      • Looking 4 Guidance?
    • Dead Center
      • Dead Center Overview
      • Vannah Hotel Floor 8
      • Vannah Hotel Floor 7
      • Vannah Hotel Lobby
      • CEDA Quarantine & Overpass
      • Walkway To Whitaker’s
      • Maul Near Liberty Mall
      • Mall: Kappel’s and Middle Mezzanine
      • Mezzanine Mayhem
      • Security and Safe Rooms
      • Filling Up the Blue 22
    • Dark Carnival
      • Dark Carnival Overview
      • Highway & Off-Ramp
      • Whispering Oaks Ravine
      • Fairground Entrance
      • Chaos in Kiddieland
      • Murder at the Merry-Go-Round
      • Tunnel of Love
      • The Screaming Oak
      • The Barns
      • Barn Storming
      • The Concert
    • Swamp Fever
      • Swamp Fever Overview
      • Plank Country
      • Alligator Sanctuary
      • Rudimentary Pathways
      • Waterlogged Wade to Crash Site
      • Tracks Past the Shacks
      • Shanty Town Center
      • Shanty Town Bridge and Outskirts
      • Plantation Village
      • Plantation Mansion
    • Hard Rain
      • Hard Rain Overview
      • Burger Tank
      • Streets of Rage
      • Entrance and Refinery 1
      • Refinery 2, Plant Ruins, and Cane Field
      • Backtrack through Field, Plant, and Refinery
      • Retreat to the Safe Room
      • To the Safe Room on Second Street
      • Town Escape
    • The Parish
      • The Parish Overview
      • Bienville District
      • Bienville Park
      • Bedlam at the Bus Depot
      • Urban Flight
      • Sam’s Hot Impound Lot
      • The Cemetery of Saint Roche
      • One-Way Street and Jazz Club
      • Slaughter in the Quarter
      • Mayhem on the Mean Streets
      • A Bridge Too Far
      • Attack at the Military Evac
    • Scavenge Mode
      • Scavenge Mode: Basics
      • Dead Center: Atrium
      • Dark Carnival: Motel
      • Swamp Fever: Plank Country
      • Hard Rain: Milltown
      • Hard Rain: Sugar Mill
      • The Parish: Park
    • Survival Mode
      • Survival mode: Basics
      • Dead Center: Atrium
      • Dark Carnival: Motel
      • Dark Carnival: Stadium Gate
      • Dark Carnival: Concert
      • Swamp Fever: Plank Country
      • Swamp Fever: Plantation
      • Hard Rain: Burger Tank
      • Hard Rain: Sugar Mill
      • The Parish: Bus Depot
      • The Parish: Bridge
  • DLC
    • The Passing
      • New Features
      • Campaign: The Riverfront
      • Campaign: Streets & Alleyway
      • Campaign: The Park
      • Campaign: Pool Hall
      • Campaign: Pipe works
      • Campaign: River Tour
      • Campaign: The Sewers
      • Campaign: The Port
      • Scavenge Maps
      • Survival Maps
  • Video
    • The Basics: Top Ten Tips
    • Know Your Enemy (Part 1)
    • Know Your Enemy (Part 2)
    • Leave Them Dead: Weapons Detail
    • Tips Scavenge and Survival Modes
    • Campaign Tactics: Dead Center
    • Campaign Tactics: Dark Carnival
    • Campaign Tactics: Swamp Fever
    • Campaign Tactics: Hard Rain
    • Campaign Tactics: The Parish

Left 4 Dead 2 Guide › Essentials › Movement and Combat

On Maneuvers

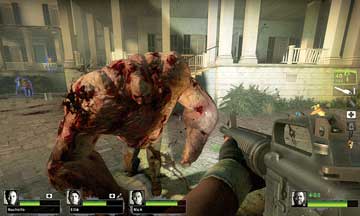
Circling a foe while demolishing them with ordnance is both entertaining and imperative. Be mobile and agile.

With vehicular infrastructure at a complete standstill—freeways are blocked, bridges are collapsing under the weight of abandoned vehicles, and streets are littered with obstacles—moving on foot is the only way to get across a stage. This means walking and running.

Walking and Running: Walking is slower (you’re more easily caught by an ambush from behind) but stealthier (you usually avoid more foes, see enemies quicker, and shoot them more accurately).

Running is faster (you can outrun foes chasing you and reach Safe Rooms quickly) but less stealthy (meaning Survivors in a rush usually fire on Witches or alarmed cars with greater frequency).

Crouching and Shuffling: Mastered the fine art of walking? Then make sure you know how to crouch.

This allows even more stealthy maneuvers through an area, which usually results in fewer enemies seeing you (unless you’re in Versus mode, where humans playing Special Infected make this technique useless).

Crouching is good for avoiding Witches and also helps when aiming at foes with ranged (and scoped) weapons.

Looking: Yes, looking is simple enough, but make sure you’re gazing everywhere you can.

Checking to the left and right as you go allows you to see possible ambushes to the sides.

Looking above is particularly helpful, as there are many places the Special Infected can stand (such as rooftops and balconies) that you can’t reach. If you look up you can spot a potential target before they move in for the kill.

Jumping: A movement used frequently, and is incredibly useful. Jump to access areas above you, such as the hood or trunk of a car you want to stand on, so you have an elevated view for targeting foes.

Strafing: Side movement is the next technique to master. Moving left and right while keeping your target reticle focused on the same enemy, or strafing, allows you to move and fire.

You’ll drop many more foes this way. It is imperative that you master this strafing technique because as you can step out from corners, from behind your friends’ heads, or avoid thrown objects while still tackling a troublesome foe or group of enemies.

Circle-Strafing: The ultimate form of strafing (which involves moving left and right but aiming at a target constantly) is to maneuver up to 360 degrees around that target—a process known as circle-strafing.

Practice this by picking an object or teammate and maneuvering around them. Then do the same, but constantly change targets. Perfect this so that you’re mobile (and harder to strike at) and aggressive, culling foes while on the move.

Tip

If you’re playing on the Xbox 360, perfect the art of the 180-degree spin. With a press of a button you rapidly turn completely around to engage ambush threats from behind.

Keep reading with a free account

The first 3 sections of Left 4 Dead 2 are open to everyone. An account opens the rest of it, and every other guide in the archive. It's free, and there's nothing to buy.

Bought guides on the old Prima Games site? Your account and every guide you own moved here, so there's nothing to buy again. Sign in.

Create a free account Or browse our free guides

PreviousAbout NextTaking a Stance