
Skylanders Trap Team Signature Series Strategy Guide Arena
Arena Challenges
Brock is back again and is excited about the Rumble Club that is filled with new Arena challenges. There are six brand new Arenas with four challenges each. All of the challenges have three stages and, as you would imagine, each stage and each Arena is progressively harder. As you complete a challenge, you unlock the next one in that set. However, to unlock Brock’s Rumble Clubhouse you must first go to Auric’s Store, after returning from Chapter 13: The Future of Skylands, and fund its construction for 1200 gold. To directly access the Arenas from the Main Menu, select the option on the right of the screen. They can also be found in game at the Academy by going through the double doors to the Main Hall and looking for Brock on the left.
Rewards
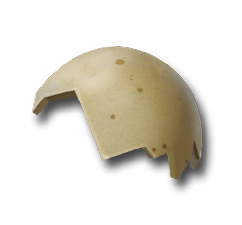
Beside the fun and pure challenge of the Arenas, there is a lot of incentive to go through the entire series. There are 30 Stars to earn and that can really raise your Portal Master level and earn you lots of rewards. The first three challenges earn one Star and the final one of each set is worth two Stars. There is also a decent amount of gold to earn, as shown in the following chart, as well as six powerful exclusive Hats. Last but not least, Arena Challenges are one of the best ways to level up a Skylander due to the quick and constant battles.
Arena Challenges Rewards
|
Arena Name |
Match |
Stage 1 Loot |
Stage 2 Loot |
Stage 3 Loot (first win) |
|---|---|---|---|---|
| Phoenix Nest | 1 | 50 | 100 | 500 |
| Phoenix Nest | 2 | 50 | 100 | 600 |
| Phoenix Nest | 3 | 50 | 100 | 700 |
| Phoenix Nest | 4 | 50 | 100 | 1000 + Eggshell Hat |
| Dream Quake | 1 | 100 | 150 | 800 |
| Dream Quake | 2 | 100 | 150 | 900 |
| Dream Quake | 3 | 100 | 150 | 1000 |
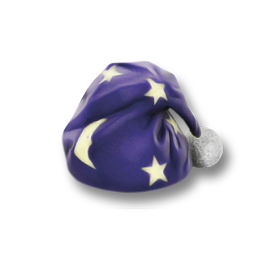
| Dream Quake | 4 | 100 | 150 | 1500 + Night Cap |
| Drain of Sorrows | 1 | 100 | 150 | 1100 |
| Drain of Sorrows | 2 | 100 | 150 | 1200 |
| Drain of Sorrows | 3 | 100 | 150 | 1300 |
| Drain of Sorrows | 4 | 100 | 150 | 2000 + Candle Hat |
| Exhaust Junction | 1 | 150 | 250 | 1500 |
| Exhaust Junction | 2 | 150 | 250 | 1700 |
| Exhaust Junction | 3 | 150 | 250 | 1900 |
| Exhaust Junction | 4 | 150 | 250 | 3000 + Planet Hat |
| Quicksand Coliseum | 1 | 150 | 250 | 2500 |
| Quicksand Coliseum | 2 | 150 | 250 | 2700 |
| Quicksand Coliseum | 3 | 150 | 250 | 2900 |
| Quicksand Coliseum | 4 | 150 | 250 | 5000 + Pyramid Hat |
| Brock’s Rumble Clubhouse | 1 | 200 | 300 | 4000 |
| Brock’s Rumble Clubhouse | 2 | 200 | 300 | 4500 |
| Brock’s Rumble Clubhouse | 3 | 200 | 300 | 5000 |
| Brock’s Rumble Clubhouse | 4 | 200 | 300 | 25000 + Wizard Hat(7000 second time) |
Survival Tips
Each challenge has it’s own set of rules along with unique trials. Here are some general guidelines that can help you get through the daunting task of trying to complete them all.
• Save food and use it only when you need it. It can be a lifesaver when you’re running really low.
• Magic Beans (medicine from Brock) cure Skylanders and enemies, which mean foes will seek them out as well. Also, even if you are not sick, pick them up to restore some health.
• If a enemy is sick it infects any Skylander it hits, so go for the cure quickly.
• Allow weak enemies to step into the cloning circle to occupy it and prevent bigger foes from duplicating.
• Sheep grow back their wool over time so don’t give up on them.
• If a challenge seems too tough, level up the Skylander and try again later.
• Difficulty affects enemy health and the damage they do as well as the amount of health restored by food.
• Use traps and hazards to your advantage to block enemies or lure them in.
• Lure enemies to toss their projectiles near other foes, damaging their buddies.
• Broccoli Guy can be frustrating when it heals its friends but it is the only captured Villain that can heal ally Skylanders.
 Phoenix Nest
A huge nest is the perfect place for an arena challenge. However, there are three areas where pink baby birds can pop out and peck at anyone who gets close. The birds do very little damage but they can be really distracting. When they peek out they raise the platform above them, which provides a great vantage point to hit enemies below. Also the raised platforms can be used to hide behind to recover in the heat of battle.
Artillery Attack
|
Stage |
Enemies |
Reward |
|---|---|---|
| Stage 1 | Tussle Sprout, Buzzer Beak, Plant Warrior, Chill Bill, Broccoli Guy, Slobber Trap, Lob Goblin, Bruiser Cruiser | 50 Gold |
| Stage 2 | Lob Goblin, Bruiser Cruiser, Chill Bill, Plant Warrior | 100 Gold |
| Stage 3 | Tussle Sprout, Chill Bill, Broccoli Guy, Lob Goblin, Bruiser Cruiser | 500 Gold |
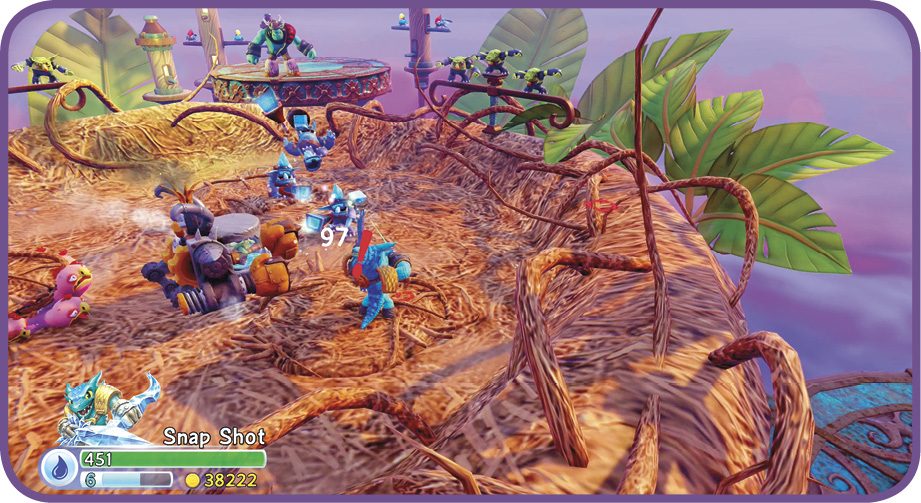
The nest is under siege by pirates and bombs are falling from the sky. The bombs drop in a long straight pattern and the best way to avoid them is to stay on the move. Wipe out the freezing foes and bomb-tossing enemies first to reduce the amount of flying objects. Stay towards the center to see the incoming artillery (as red circles on the floor) and quickly move towards the nearest group of enemies attacking as you move. The exception is the charging Bruiser Cruiser that needs to be avoided and attacked from the side or rear.
Nest Ball
|
Stage |
Enemies |
Reward |
|---|---|---|
| Stage 1 | Chompy, Troll Warrior, Eggsecutioner, Broccoli Guy, Lob Goblin, Chill Bill, Cuckoo Clocker | 50 Gold |
| Stage 2 | Chompy, Troll Warrior, Eggsecutioner, Broccoli Guy, Lob Goblin, Chill Bill, Shrednaught | 100 Gold |
| Stage 3 | Chompy, Troll Warrior, Eggsecutioner, Broccoli Guy, Lob Goblin, Chill Bill, Cuckoo Clocker, Shrednaught | 600 Gold |
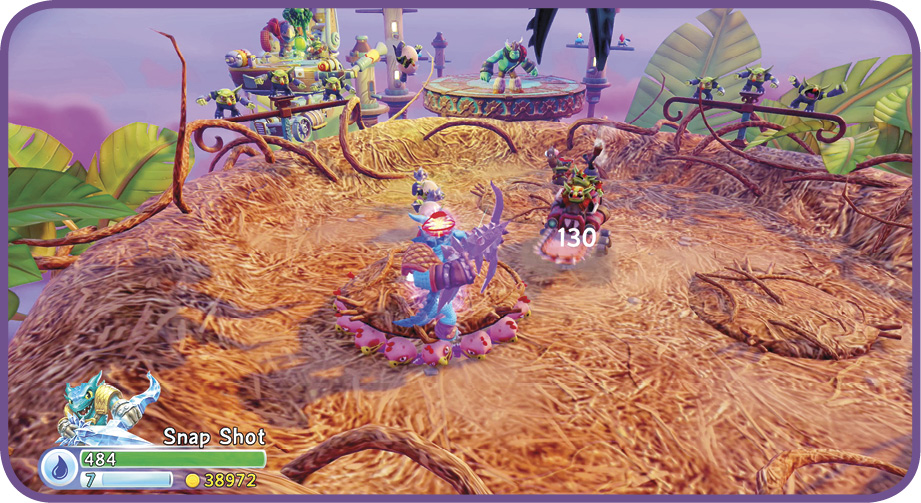
Whoever is in possession of the magic football moves faster and does more damage. Try to keep possession of the ball as much as possible to gain a huge advantage. Any single hit causes a fumble and retrieving the ball is essential due to the boosts it provides to you or an enemy. Stand on one of the circular platforms and wait for the birds to pop up to get a lofty place to damage enemies below. Used range attacks as much as possible to avoid getting hit in order to hold on to the ball.
Birdy Bombs
|
Stage |
Enemies |
Reward |
|---|---|---|
| Stage 1 | Chompy, Troll Warrior, Eggsecutioner, En Fuego Chompy, Buzzer Beak, Lob Goblin, Cuckoo Clocker, Chill Bill | 50 Gold |
| Stage 2 | Troll Warrior, Eggsecutioner, En Fuego Chompy, Buzzer Beak, Lob Goblin, Cuckoo Clocker | 100 Gold |
| Stage 3 | Troll Warrior, Eggsecutioner, Broccoli Guy, Lob Goblin, Chill Bill, Cuckoo Clocker, Shrednaught | 700 Gold |
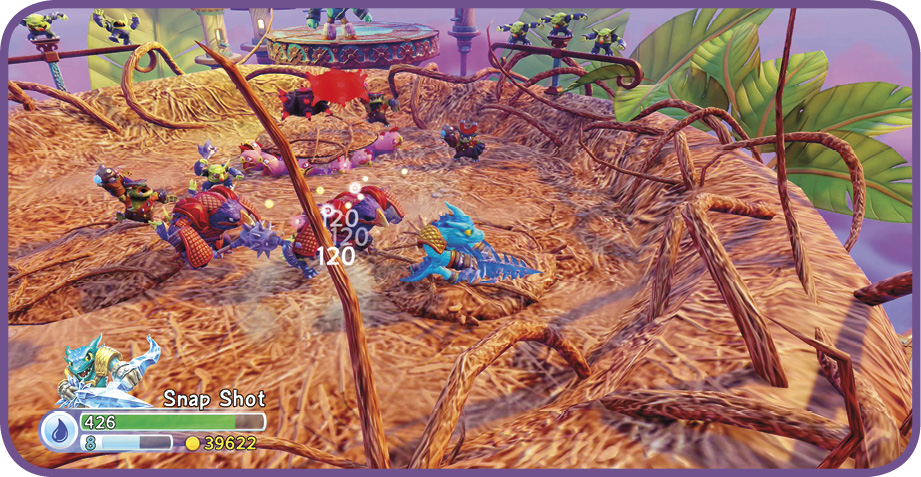
All the enemies are carrying mines and when they are knocked out they drop the mine behind. Use a Skylander’s long range attacks to wipe out enemies from afar and the mines fall where they are and assist in knocking out the survivors. When using melee attacks, apply a hit and run strategy. Knock out several at a time and back up out of the range of the bombs, allowing the explosives to hit other enemies that chase after you.
Perilous Perch Skirmish
|
Stage |
Enemies |
Reward |
|---|---|---|
| Stage 1 | Chompy, Tussle Sprouts, Troll Warrior Melee, Eggsecutioner, Lob Goblin, Cuckoo Clocker, Chill Bill | 50 Gold |
| Stage 2 | Chompy, Tussle Sprouts, Troll Warrior Melee, Eggsecutioner, Lob Goblin, Cuckoo Clocker, Chill Bill, Broccoli Guy, Bruiser Cruiser | 100 Gold |
| Stage 3 | Chompy, Tussle Sprouts, Troll Warrior Melee, Eggsecutioner, Lob Goblin, Cuckoo Clocker, Chill Bill, Broccoli Guy, Bruiser Cruiser, Shrednaught | 1000 Gold |
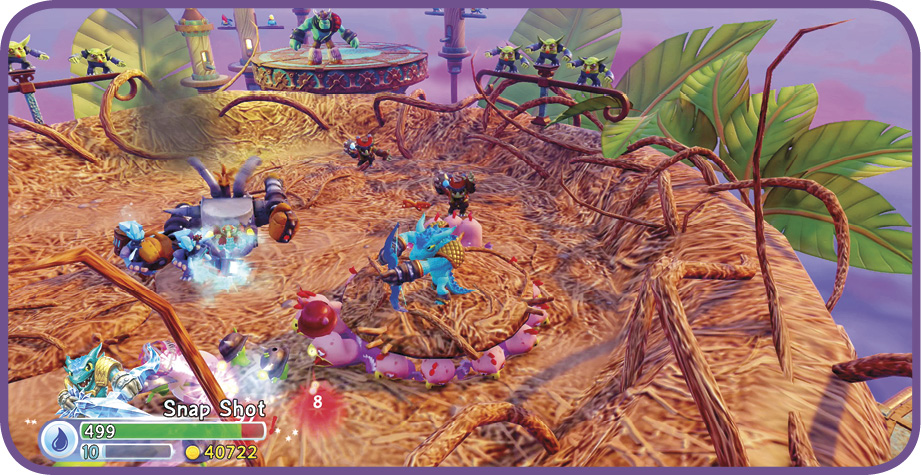
The final challenge has elements of the previous levels. It starts out with falling bombs that keep you on the move. The next stage adds the magic football and keeping possession of the ball is the best way to get through the round quickly. Finally, the last stage adds mines from fallen enemies and the magic football is still in play. Hold onto the ball and try to use long-range attacks to create clusters of bombs that enemies have to travel through before they can reach you.
 Dream Quake
This dreamscape is a floating cobblestone platform that separates into sections during the challenges. When the main section splits, it creates gaps that can be jumped by Skylanders, but it can also be used to separate enemies. Foes appear from the floating houses surrounding the main platform and in bubbles that float through the dreamscape. The space between sections is a great way to control the flow of enemies or to retreat to recoup. Also, keep in mind that falling does not cause any damage.
Monster Multiplier
|
Stage |
Enemies |
Reward |
|---|---|---|
| Stage 1 | Chompy, Brawlrus, Cross Crow, Lob Goblin, Bruiser Cruiser | 100 Gold |
| Stage 2 | Chompy, Cross Crow, Lob Goblin, Brawl and Chain, Broccoli Guy | 150 Gold |
| Stage 3 | Chompy, Brawlrus, Cross Crow, Lob Goblin, Bruiser Cruiser, Brawl and Chain | 800 Gold |
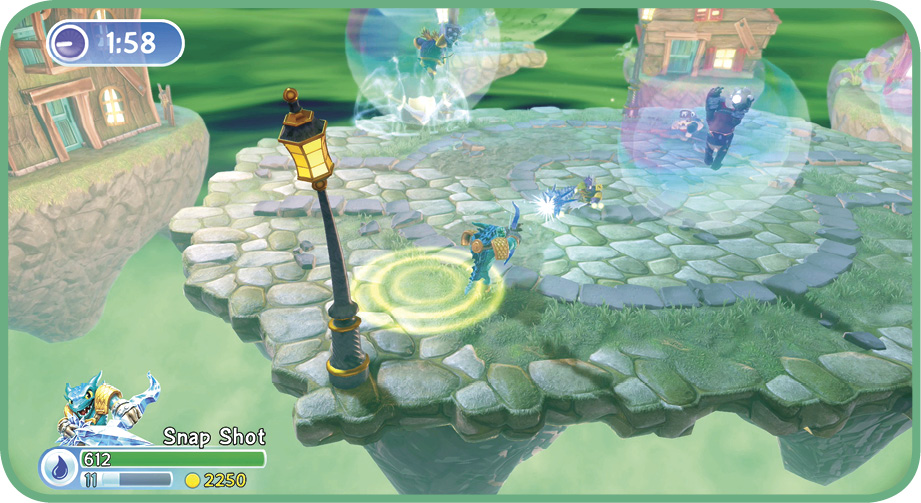
The series of green rings marks a cloning spot that can duplicate enemies. This isn’t too much of a problem for smaller foes but it can be a big issue if a really tough enemy starts to mass-produce. Stand near or on this spot to keep enemies away. This is especially true when the Brawl and Chain arrive since they are tough and take a while to defeat. Keep on eye on the clock and wipe out the enemies quickly or the time bomb will explode!
Flag, You’re It
|
Stage |
Enemies |
Reward |
|---|---|---|
| Stage 1 | En Fuego Chompy, Chill Bill, Lob Goblin, Cuckoo Clocker, Pirate Henchman | 100 Gold |
| Stage 2 | En Fuego Chompy, Lob Goblin, Broccoli Guy, Brawl and Chain, Pirate Henchman | 150 Gold |
| Stage 3 | En Fuego Chompy, Chill Bill, Lob Goblin, Cuckoo Clocker, Brawl and Chain, Broccoli Guy, Pirate Henchman | 900 Gold |
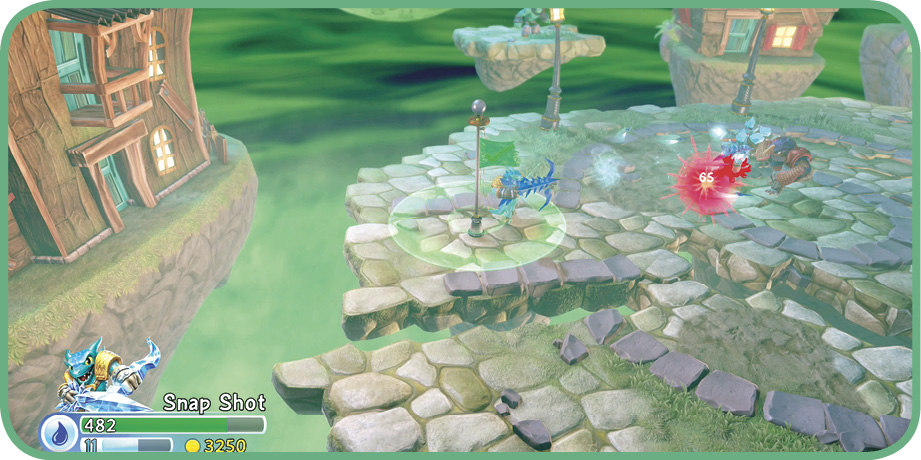
Stand near the flagpoles and raise your flag to send out a green damaging shockwave. However enemies can do the same thing and even take over your flagpoles. It’s very difficult to take over and maintain more than one pole so pick one and camp out protecting it from enemies. Fire at foes while staying close to the flagpole and only leave if the area is overrun or to deal with long range bad guys like Lob Goblins or Chill Bills. Note that the shockwave from the opposite flagpole does not reach across to the other side of the platform.
Counting Sheep
|
Stage |
Enemies |
Reward |
|---|---|---|
| Stage 1 | En Fuego Chompy, Plant Warrior, Oogler, Eye Five, Bomb Shell | 100 Gold |
| Stage 2 | En Fuego Chompy, Bomb Shell, Chill Bill, Plant Warrior, Oogler, Cuckoo Clocker | 150 Gold |
| Stage 3 | Plant Warrior, Chill Bill, Oogler, Eye Five, Bomb Shell, Cuckoo Clocker | 1000 Gold |
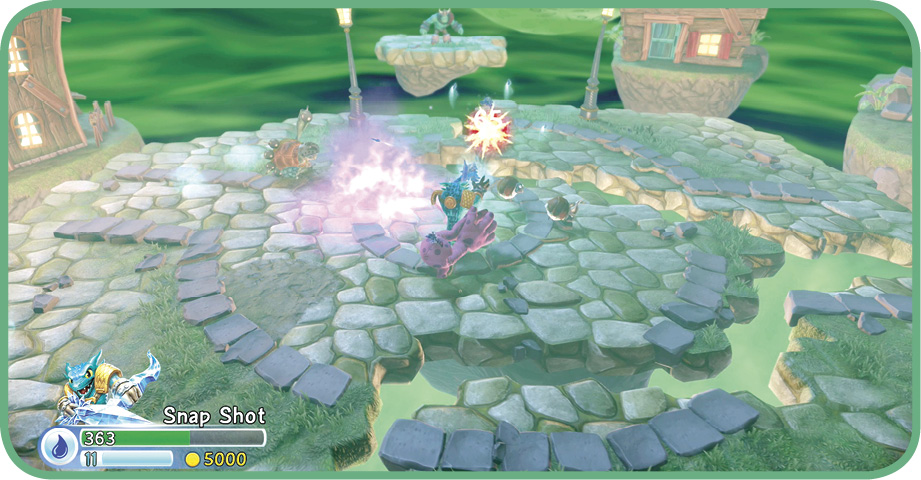
Nobody knows how the sheep made it into the Arena but you have to protect the flock. Be a good shepherd and stay close to the flock to prevent them from getting swarmed by smaller foes. Target the heavy damage enemies that use projectiles but always return to the flock. Be sure to stay close to the flock when you notice a powerful foe like the Eye Five. When a sheep takes damage its white skin is exposed, indicating it has little health left. Try to protect all three sheep but note that, to succeed, only one needs to make it through the challenge.
Bad Dream Brawl
|
Stage |
Enemies |
Reward |
|---|---|---|
| Stage 1 | Brawlrus, Eye Scream Cuddles, Broccoli Guy, Bomb Shell, Bruiser Cruiser, Eye Scream | 100 Gold |
| Stage 2 | Brawlrus, Lob Goblin, Cuddles, Broccoli Guy, Bruiser Cruiser, Slobber Trap | 150 Gold |
| Stage 3 | Bomb Shell, Lob Goblin, Broccoli Guy, Cuddles, Eye Scream, Bruiser Cruiser, Brawl and Chain | 1500 Gold |
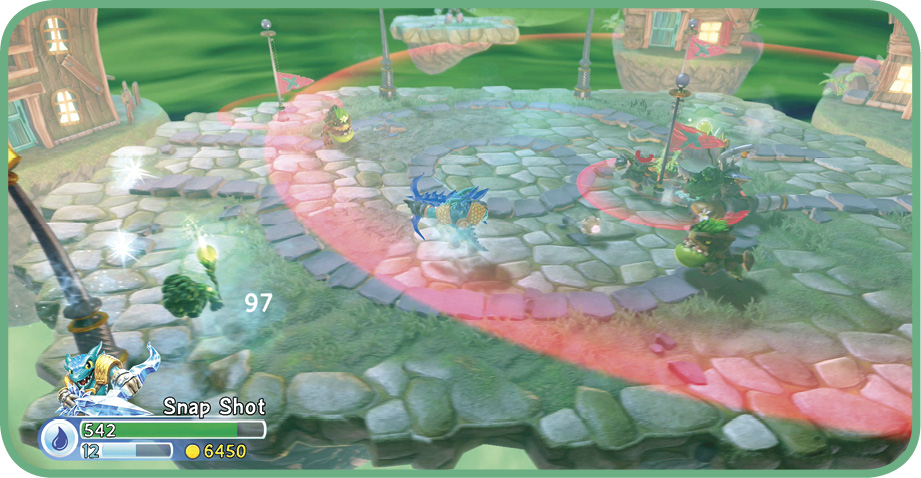
This challenge kicks off with the Super Damage Football. Quickly grab the ball and use its power boost to hunt down the enemies. The next stage adds three flagpoles and it gets hectic to try to maintain one. If you can’t hold one, keep moving and jump the red shockwaves when they get close. The final stage adds the cloning circle and time bomb. Try to keep the big enemies out of the cloning circle and clear out the Broccoli Guys that keep helping their allies.
 Drain of Sorrows
Brock booted the fishy owner and took over the endless good pond. Combat takes place on a raft that is floating on a toxic pool. Many of the enemies are sick and if they touch your Skylander it becomes ill as well. Brook throws out medicine from time-to-time and it is essential to cure your sickness or your health steadily drops. Watch out for the giant slug that coats a large section in green slime. Standing in those poison trails reduces your health but can also damage enemies and be used to lure them to their doom. The slime trails do not make anyone sick.
Germ Wars
|
Stage |
Enemies |
Reward |
|---|---|---|
| Stage 1 | En Fuego Chompy, Cross Crow, Oogler, Broccoli Guy | 100 Gold |
| Stage 2 | En Fuego Chompy, Cross Crow, Lob Goblin, Oogler, Broccoli Guy, Krankenstein | 150 Gold |
| Stage 3 | En Fuego Chompy, Cross Crow, Lob Goblin, Oogler, Broccoli Guy, Krankenstein | 1100 Gold |
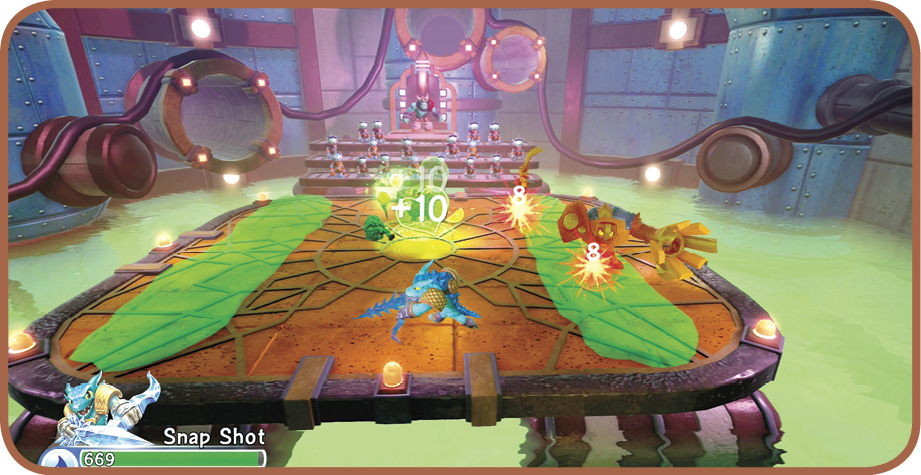
Getting sick from an enemy is not the end of the world but walking into the large slime trails can compound the problem. Once the raft is slimed, stay away from the green goo and let the enemies come to you. The big threat in this challenge is Krankenstein. It has a very long sweeping attack that can hit and make you sick if it touches you. The big damage from this foe and its long reach make it very hard to deal with if you get stuck in a corner. Attack it from long range and keep your distance even if it means treading through some slime.
Sheep Flush
|
Stage |
Enemies |
Reward |
|---|---|---|
| Stage 1 | Troll Warrior, Evilikin Cannon, Shield Shredder, Bomb Shell, Masker Mind | 100 Gold |
| Stage 2 | Troll Warrior Melee, Evilikin Cannon, Chompy, Brawlrus, Bomb Shell, Shield Shredder, Masker Mind | 150 Gold |
| Stage 3 | Troll Warrior Melee, Evilikin Cannon, Shrednaught, Masker Mind, Brawlrus, Bomb Shell | 1200 Gold |
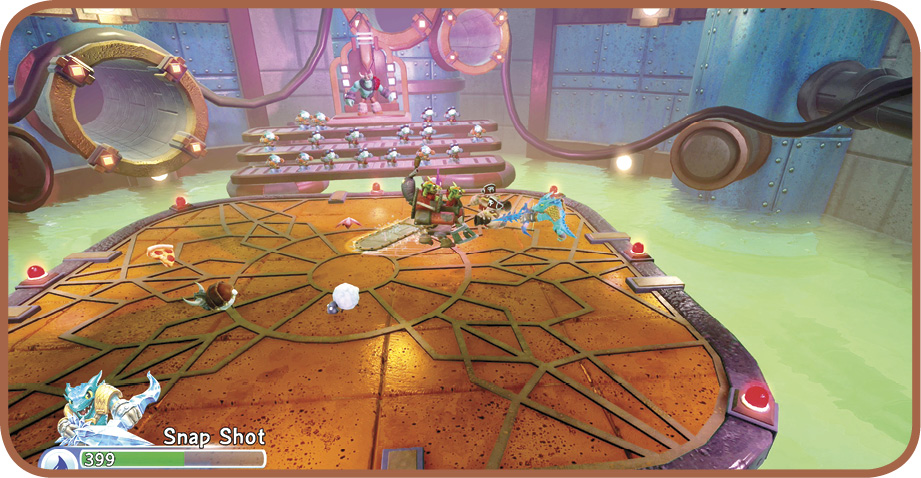
Three silly sheep made there way down to this goo pond and they must be protected. Fortutnely they are smart enough not to wander into the sickening streaks. The challenge becomes increasingly difficult when the slime trails start closing off large sections of the raft. Stay by the sheep and draw their attention. Also chase down the long-range foes to stop their bombardment. Hold your ground against the Shrednaught, even if it cost HP, to avoid letting it deal a ton of damage to the helpless sheep.
Sewer-Ball
|
Stage |
Enemies |
Reward |
|---|---|---|
| Stage 1 | Grinnade, Cuddles, Fisticuffs, Chill Bill, Slobber Trap | 100 Gold |
| Stage 2 | Grinnade, Fisticuffs, Bomb Shell, Slobber Trap, Broccoli Guy, Brawl and Chain | 150 Gold |
| Stage 3 | Cuddles, Bomb Shell, Fisticuffs, Broccoli Guy, Slobber Trap, Chill Bill, Brawl and Chain | 1300 Gold |
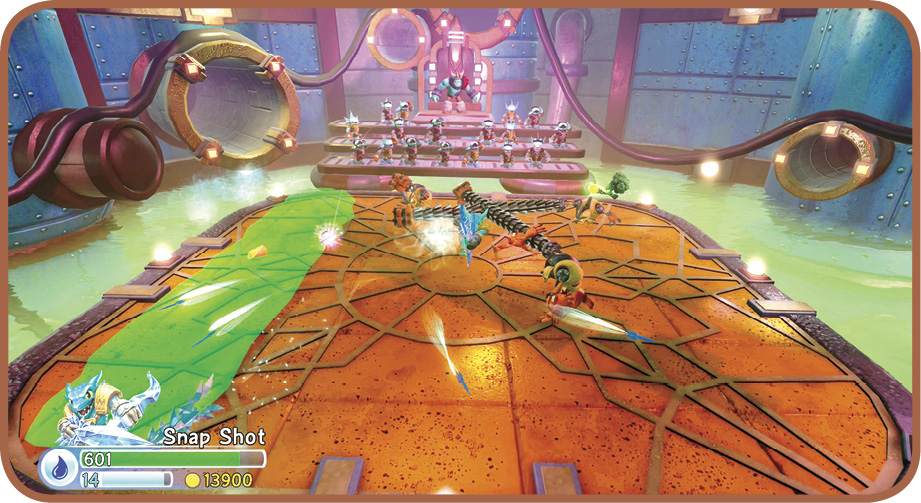
This is a combined challenge that has a cloning ring and the magic football. Keep possession of the ball to grant extra speed to chase after foes trying to create a clone and to dodge bombs from the Bomb Shells. Also, the extra damage from the football adds a lot of power for long range attacks. Lure enemies into the slime while using long range attacks. However close in on the Fisticuffs to prevent them from using their extended reach.
Slime Time Tournament
|
Stage |
Enemies |
Reward |
|---|---|---|
| Stage 1 | Pirate Henchman, Lob Goblin, Eye Scream, Evilikin Cannon, Broccoli Guy | 100 Gold |
| Stage 2 | Lob Goblin, Cuckoo Clocker, Pain-Yatta, Evilikin Cannon | 150 Gold |
| Stage 3 | Lob Goblin, Evilikin Cannon, Cuckoo Clocker, Eye Scream, Broccoli Guy, Pain-Yatta | 2000 Gold |
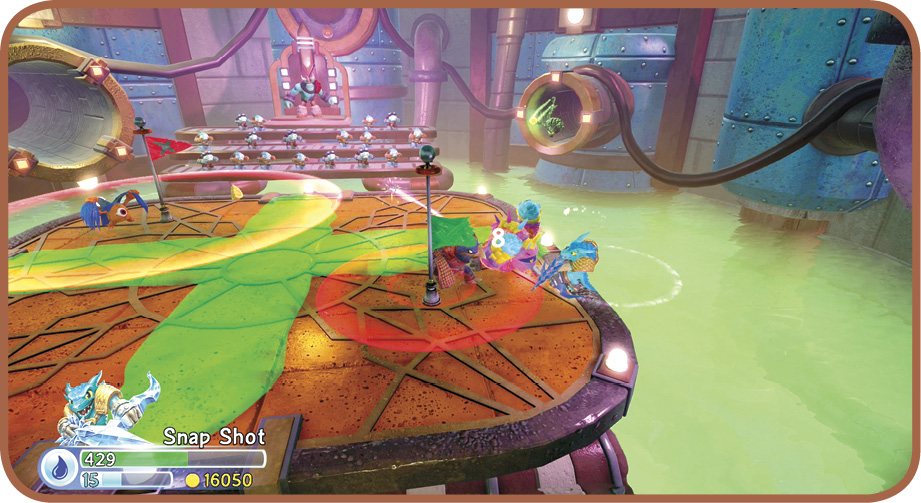
Enemies carry mines and drop them when defeated. This becomes a problem when your mobility is restricted by slime trails and there are big foes like the Pain-Yattas. Try to lure foes into the slime and use hit and run tactics. The last stage adds flagpoles and Super Damage Football. Hold on to the ball as long as possible and try to take over one flag pole to gain the damage boost while preventing the enemies from controlling the entire raft.
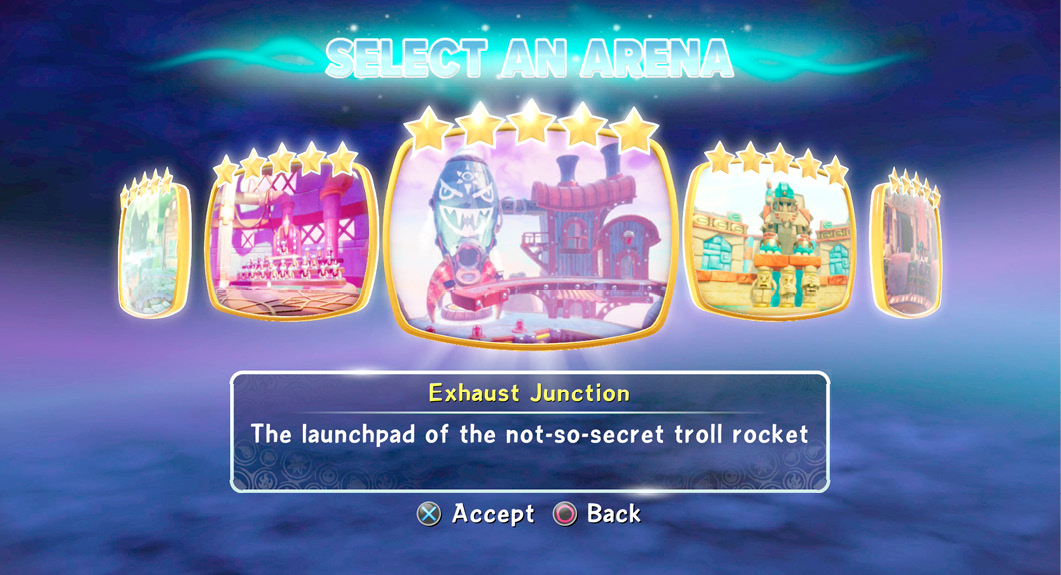
 Exhaust Junction
The Trolls have been kicked out but their rocket remains and Brock thinks he knows how to operate it. Unfortunately, as he fiddles with the controls the exhaust from the rocket shoots fire through any of the four chutes below. Needless to say, the large walls of fire must be avoided and your best bet is to keep an eye on the floor to lookout for the arrow pattern. The yellow arrows mark the lanes that will soon be filled with a column of fire. Stand between them to lure enemies to their doom. There is also a ledge on the far left where enemies can hide.
You’re MINE
|
Stage |
Enemies |
Reward |
|---|---|---|
| Stage 1 | Buzz Beak, Plant Warrior, Oogler, Blaster-Tron | 150 Gold |
| Stage 2 | Plant Warrior, Raven Lobber, Buzz Beak, Hood Sickle, Broccoli Guy, Oogler | 250 Gold |
| Stage 3 | Plant Warrior, Raven Lobber, Blaster-Tron, Broccoli Guy, Oogler, Hood Sickle, Buzz Beak | 1500 Gold |
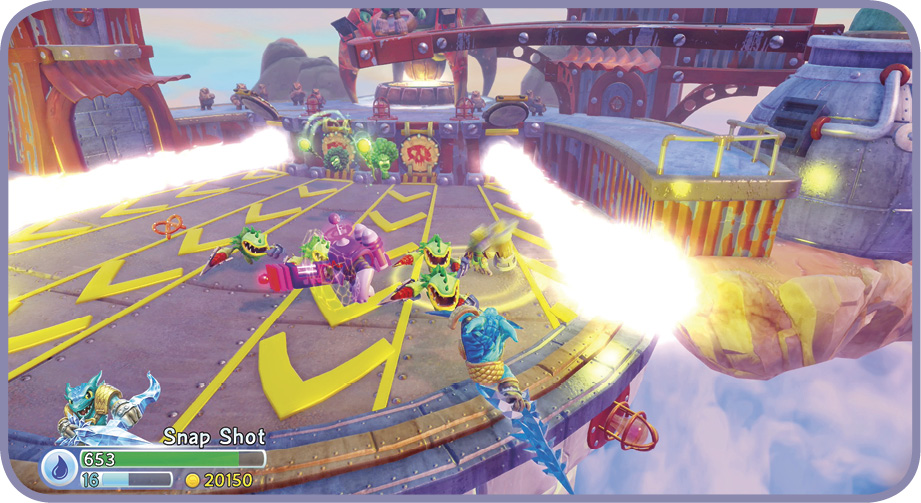
A cloning spell and mine carrying enemies make this challenge tricky. Try to keep the big bad guys like the Blaster-Trons out of the cloning ring and let the smaller foes occupy it. Stay in the safe lanes and use long-range attack to let enemies wander through the fire and trip on mines dropped by their fallen comrades. The Blaster-Trons are the biggest problem due to their shields and projectiles. Circle around back to attack them but stay clear of the fire lanes.
Artillery 2: With a Vengeance
| Stage | Enemies | |
| Stage 1 | Pirate Henchman, Evilikin Cannon, Shield Shredder, Bomb Shell, Pain-Yatta | 150 Gold |
| Stage 2 | Pirate Henchman, Cross Crow, Scrap Shooter, Bomb Shell, Shield Shredder, Evilikin Cannon, Mega Chompy | 250 Gold |
| Stage 3 | Pirate Henchman, Bomb Shell, Shield Shredder, Evilikin Cannon, Cross Crow, Scrap Shooter | 1700 Gold |
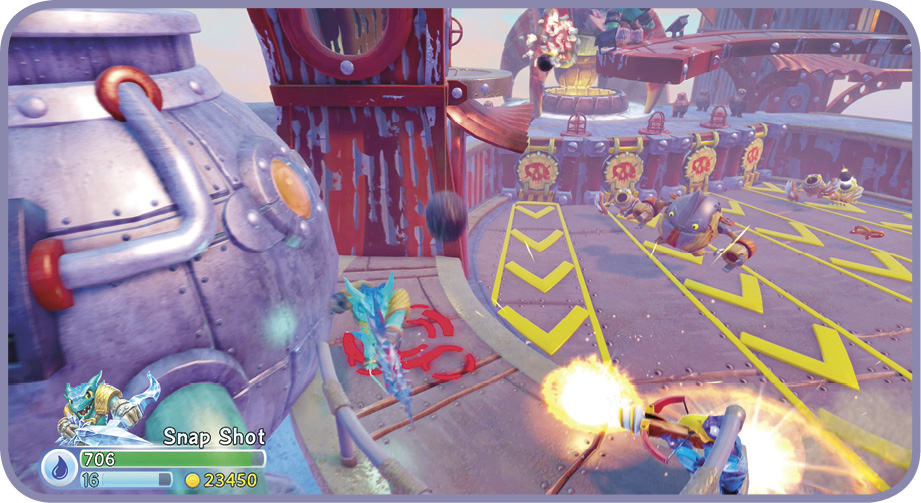
Pirate artillery rains down, making it really hazardous to maneuver. The arena can quickly become cluttered with barrels, bombs, and arrows. Use long range attacks while in a safe lane but it wont be possible or practical to just sit still. When there is a break in the flames, wipe out the big bad guys with your most powerful attacks to clear the arena and reduce the amount of projectiles to dodge. Also, look out for lurking foes on the far left ledge.
Don’t Get Hit
|
Stage |
Enemies |
Reward |
|---|---|---|
| Stage 1 | En Fuego Chompy, Pirate Henchman, Oogler, Pain-Yatta | 150 Gold |
| Stage 2 | En Fuego Chompy, Bomb Shell, Pirate Henchman, Oogler, Pain-Yatta, Raven Lobber | 250 Gold |
| Stage 3 | Pirate Henchman, Oogler, Grinnade, Shreadnaught, Bomb Shell, Pain-Yatta | 1900 Gold |
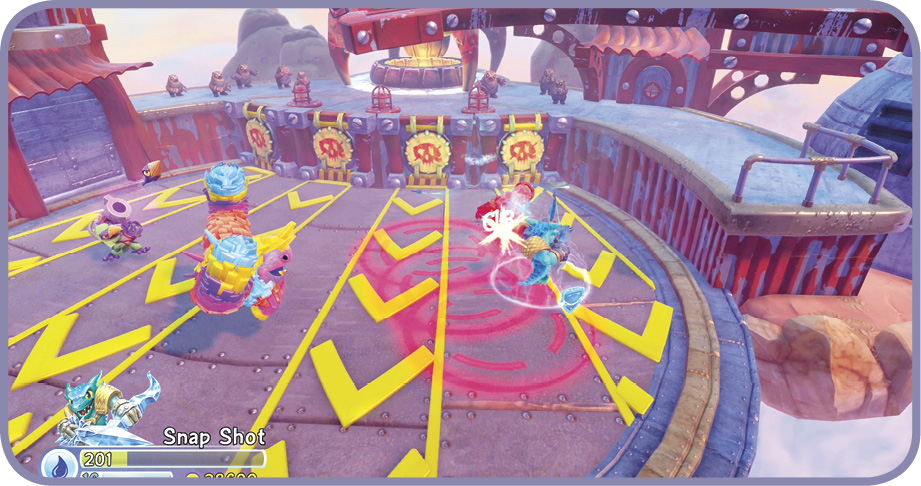
This is a true test of skill as Brock reduces your health to 1. It’s really tough not to get hit but grabbing a Shield power-up provides one hit protection. Ignore the food and try to use long-range attacks to avoid too much direct contact. The big bad guys are a problem but can be dealt with using hit and run tactics. The Bomb Shells and rocket launchers are your worst enemies and should be wiped out quickly to prevent your tripping on their explosives.
Flaming Flag Finale
|
Stage |
Enemies |
Reward |
|---|---|---|
| Stage 1 | Chompy, Bad Juju, Cross Crow, Fisticuffs, Goo Chompy | 150 Gold |
| Stage 2 | Chompy, Bad Juju, Cross Crow, Fisticuffs, Goo Chompy | 250 Gold |
| Stage 3 | Chompy, Goo Chompy, Cross Crow, Fisticuffs, Bomb Shell, Scrap Shooter | 3000 Gold |
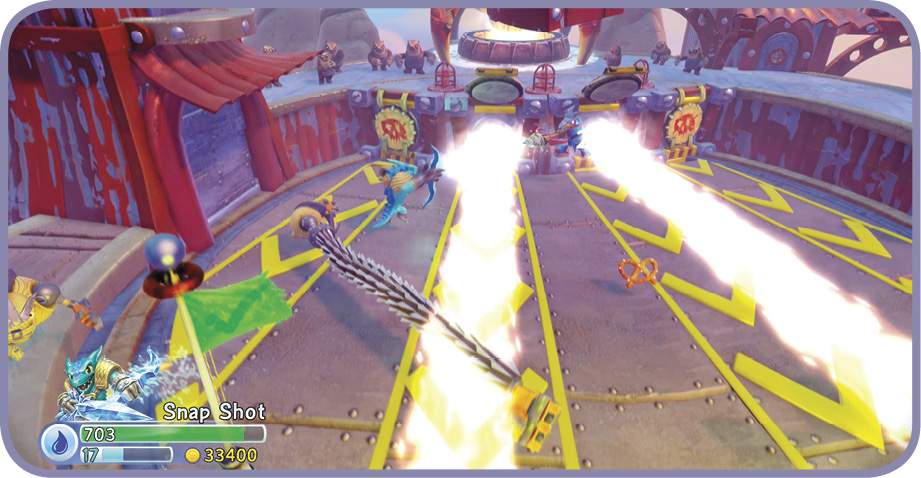
Start out by taking over the center spot and raise the flag. The second stage adds pirate artillery and it becomes increasingly hard to protect the flagpole. Finally, you are reduced to 1 HP in the last stage. It is really tough not to get hit and the Shield power-up is critical. If it gets too hard to hold the flag pole, move down the center lane and remember that dropping of the edge does not cause damage even at 1 HP. Look out for the Goo Chompies that leave a deadly pool behind!
 Quicksand Coliseum
This deadly arena features several unique challenges. The first is the namesake of the level, a quicksand pit with a giant Chompy in the center. When the pit is active, stick to the outside edge to avoid getting pulled in and lure enemies into the center. The other hazard to deal with is the laser eye statue. Look out when the eyes begin to glow because it shoots a damaging beam that leaves a fiery trail behind. The laser can damage enemies as well but it is more critical to avoid during Super Damage Football and Don’t Get Hit.
MightyBall Bombardment
|
Stage |
Enemies |
Reward |
|---|---|---|
| Stage 1 | Bone Chompy, Plant Warrior, Tussle Sprout, Lob Goblin, Hood Sickle | 150 Gold |
| Stage 2 | Bone Chompy, Lob Goblin, Tussle Sprout, Broccoli Guy, Eye Five | 250 Gold |
| Stage 3 | Bone Chompy, Tussle Sprout Hood Sickle, Shield Skeleton, Eye Five, Broccoli Guy, Blaster-Tron | 2500 Gold |
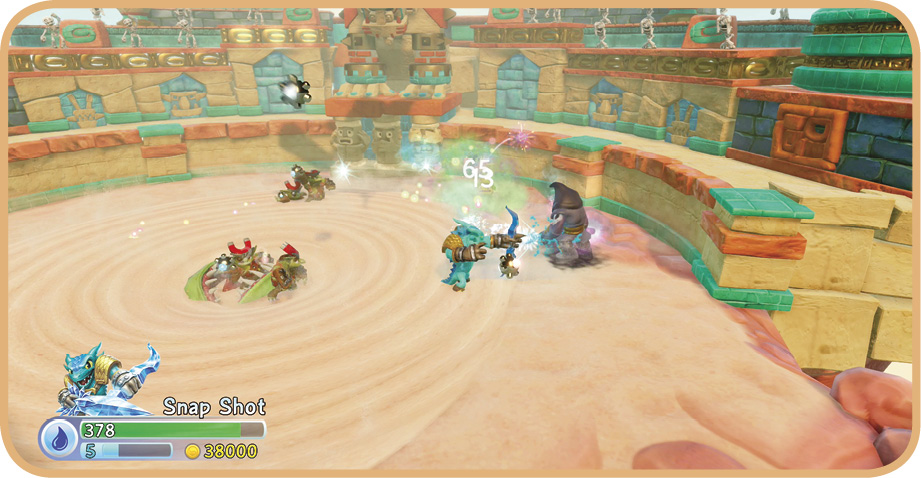
Combine pirate cannonballs with Super Damage Football and you’ve got an intense challenge. Grab the ball and stay on the move to dodge falling bombs and enemy attacks. Staying on the move helps you avoid the teleporting Hood Sickles as well. Run around the outer edge to stay away from the giant Chompy in the center and use hit and run tactics. The extra speed and damage from the football should allow you to dominate enemies but be careful of Eye Five and tons of bombs from the Lob Goblins.
Multiplication Fever
|
Stage |
Enemies |
Reward |
|---|---|---|
| Stage 1 | Brawlrus, Pirate Chompy, Pirate Henchman, Slobber Trap | 150 Gold |
| Stage 2 | Pirate Chompy, Evilikin Cannon, Slobber Trap, Broccoli Guy, Eye Five | 250 Gold |
| Stage 3 | Brawlrus, Evilikin Cannon, Broccoli Guy, Pirate Henchman, Tussle Sprout, Eye Five, Slobber Trap | 2700 Gold |
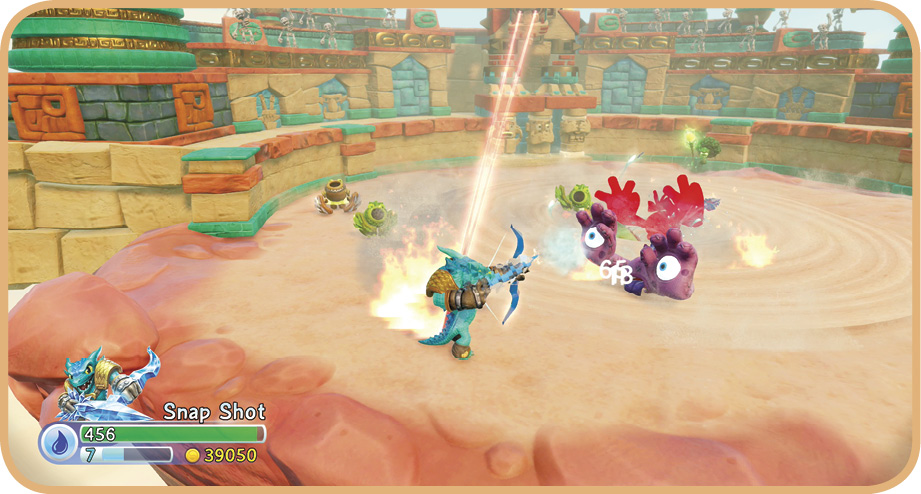
The big Chompy in the center appears a lot in this challenge so stay close to the outside of the arena. Enemies are sick and eager to pass along their disease. Avoid them as much as possible by using long range attacks and if you get sick quickly chase down some medicine from Brock. As you run around fighting and fleeing the sick foes, keep an eye on the cloning circle. Don’t worry about smaller foes occupying the ring but it can be a big problem if Eye Fives cluster around it. Immediately chase them down and wipe they out before you are overrun by a horde of them.
Flames and Flags Forever
|
Stage |
Enemies |
Reward |
|---|---|---|
| Stage 1 | En Feugo Chompy, Shield Skeleton, Lob Goblin, Scrap Shooter | 150 Gold |
| Stage 2 | En Feugo Chompy, Shield Skeleton, Bad Juju, Scrap Shooter. Lob Goblin, Blaster-Tron | 250 Gold |
| Stage 3 | Transformed Barrel, Shield Skeleton, Scrap Shooter, En Feugo Chompy, Lob Goblin, Bad Juju, Blaster Tron | 2900 Gold |
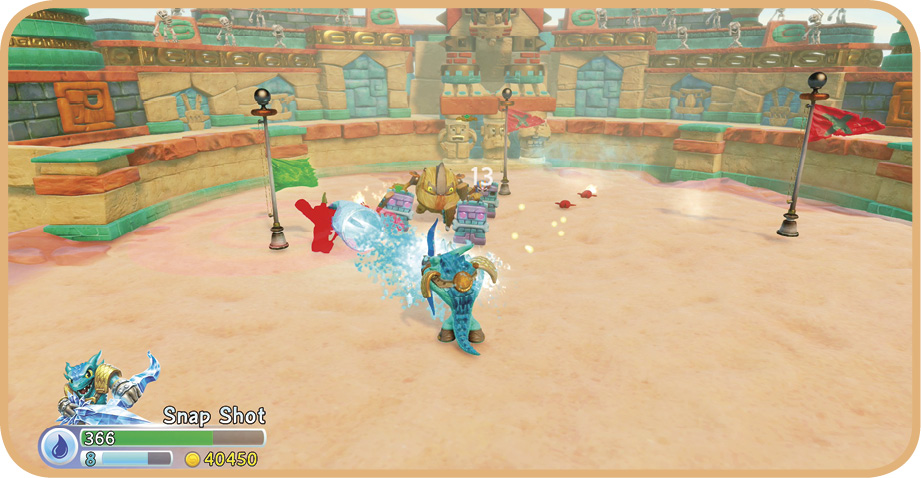
Each stage increases the number of flagpoles. It’s possible to secure one flag but don’t expect to be able to secure two or three. There are far too many tough enemies to stay in one spot and the barrels and bombs flying around ensure you have to keep on the move. Watch the ground to jump the red shockwaves and focus on taking out the enemies camping by the poles. Try to stand your ground and attempt to take over one flag or go to the back of the area to get a better view of all the foes and upcoming shockwaves.
Scorched Sand Showdown
|
Stage |
Enemies |
Reward |
|---|---|---|
| Stage 1 | Bone Chompy, Shield Skeleton, Oogler, Lob Goblin, Grave Clobber | 150 Gold |
| Stage 2 | Bone Chompy, Shield Skeleton, Pain-Yatta, Oogler, Lob Goblin | 250 Gold |
| Stage 3 | Bone Chompy, Oogler, Lob Goblin, Shield Skeleton, Eye Five, Grave Clobber, Pain-Yatta, Rage Mage | 5000 Gold |
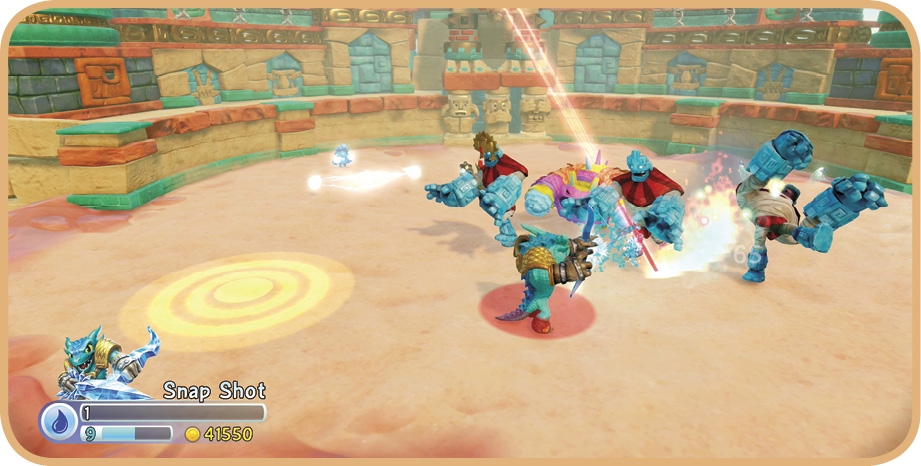
This challenge starts with a time bomb and enemy mines. Take on the enemies quickly, even if it means losing some health, to avoid setting off the bomb and failing the challenge. Stage two has a cloning spell with the quicksand Chompy. Stick to the outer rim and keep the Pain-Yatta out of the cloning circle! Stage three is a one-touch challenge so don’t get hit! Grab the Shield power to gain an extra hit. This is very tough and the only way to get through it is to hit and run while avoiding enemies’ attacks and the laser eye statue.
 Brock’s Rumble Clubhouse
Welcome to Brock’s state of the art arena. This round ring has pinball bumpers, lasers, cannonballs, and lots and lots of fire! The outer perimeter lights on fire to keep Skylanders from trying to run from the action. However, the real threats are the flamethrower and laser turrets that pop up from the square floor panels. These can be pointed in any direction so pay close attention and use them to lure enemies to their doom. The enemies and traps are the toughest in the series; enter this arena with a fully upgraded Skylander that has leveled up a lot!
The Flame Game
|
Stage |
Enemies |
Reward |
|---|---|---|
| Stage 1 | En Fuego Chompy, Raven, Evilikin Cannon, Bomb Shell, Trolling Thunder | 200 Gold |
| Stage 2 | En Fuego Chompy, Raven, Evilikin Cannon, Threatpack, Scrap Shooter, Trolling Thunder, Smoke Scream | 300 Gold |
| Stage 3 | En Fuego Chompy, Raven, Transformed Barrel, Bomb Shell, Evilikin Cannon, Threatpack, Trolling Thunder, Scrap Shooter, Raven Lobber, Smoke Scream | 4000 Gold |
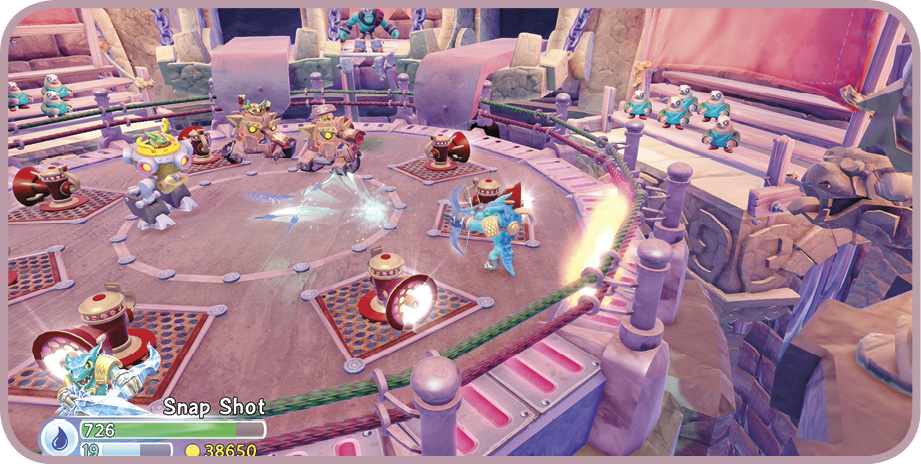
Watch the flamethrowers when they appear and move to a favorable position before the enemies arrive. If they flames point outward take over the center of the arena and if they aim in at each other go to a safe edge avoiding the outmost ring. The flames cut off a lot of the battleground, which makes it difficult to maneuver. Use long range attacks and lure enemies into the flames. If there is nowhere to run, charge in and try to take out projectile foes fast.
Combusti-Ball
|
Stage |
Enemies |
Reward |
|---|---|---|
| Stage 1 | Chill Bill, Threatpack, Cuddles, Eye Scream, Grave Clobber, Shield Shredder, Eye Hive, Broccoli Guy, Chompy | 200 Gold |
| Stage 2 | Raven Lobber, Chompy, Shield Shredder, Chill Bill, Cuddles, Grave Clobber, Broccoli Guy, Threatpack, Cyclops Dragon | 300 Gold |
| Stage 3 | Cuckoo Clocker, Cross Crow, Chompy, Shield Shredder, Grave Clobber, Broccoli Guy, Eye Scream, Eye Hive, Threatpack, Cyclops Dragon | 4500 Gold |
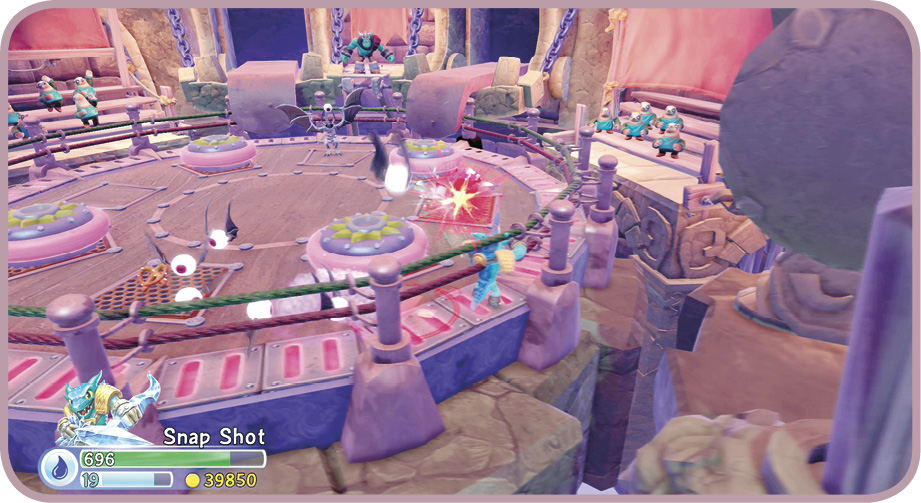
Pinball bumpers seem like a harmless hazard but with all the projectiles flying around they add a ricochet effect that makes the arena filled with mayhem. The outer ring is safe in this challenge so use it to hide behind the bumpers and circle around to take out the long-range foes first. The big bumpers can be used as limited protection and they can very useful to dodge attacks especially from the dangerous and resilient Cyclops Dragon.
Laser Invader
|
Stage |
Enemies |
Reward |
|---|---|---|
| Stage 1 | Buzzer Beak, Grinnade, Cuddles, Lob Goblin, Brawl and Chain, Pirate Chompy, Tae Kwon Crow | 200 Gold |
| Stage 2 | Grinnade, Lob Goblin, Shreadnaught, Oogler, Eye Five, Bomb Shell, Grave Clobber, Pirate Chompy | 300 Gold |
| Stage 3 | Cuddles Cuckoo Clocker, Buzzer Beak, Pain-Yatta, Oogler, Grinnade, Cyclops Dragon | 5000 Gold |
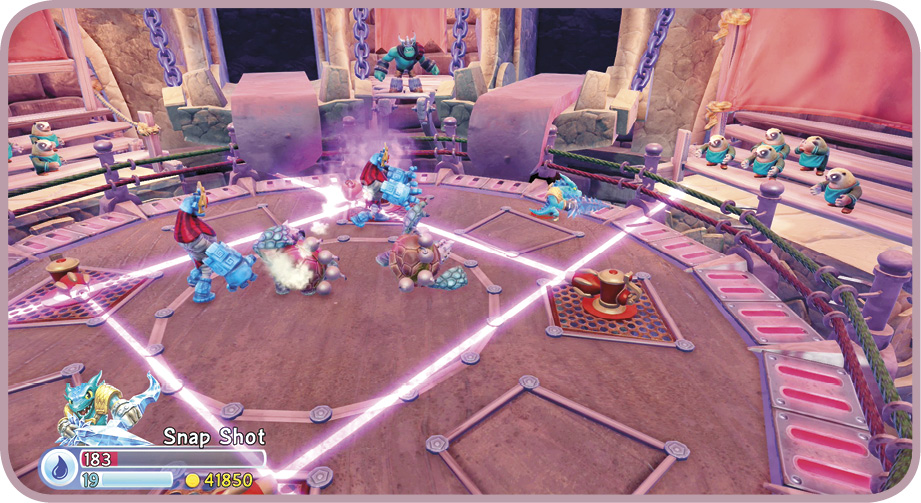
Rotating laser turrets can be an ally or a real burning pain! The key to dealing with the lasers is to follow the patter and move with them, jumping only when necessary. This should allow you to avoid getting hit while the beams cut up the enemies. It is tricky to shoot and run/jump and often it is best to wait for an opening to attack the bad guys. Many of the foes in this challenge are tough, so don’t expect to take them out too quickly. Let the lasers soften them up and then finish them off.
A Fight to Remember
|
Stage |
Enemies |
Reward |
|---|---|---|
| Stage 1 | Chompy, Shield Skeleton, Eggesecutioner, Mega Chompy, Evilikin Spinner, Bruiser Cruiser, Cuckoo Clocker, Scrap Shooter, Transformed Barrel, Chomp Chest, Sheep Creep | 200 Gold |
| Stage 2 | Evilikin Spinner, Chompy, Raven Lobber, Eggesecutioner, Bad Juju, Trolling Thunder, Shield Skeleton, Bruiser Cruiser, Transformed Barrel, Cuckoo Clocker, Cyclops Dragon, Chomp Chest, Sheep Creep | 300 Gold |
| Stage 3 | Chompy, Bad Juju, Mega Chompy, Raven Lobber, Transformed Barrel, Trolling Thunder, Scrap Shooter, Cuckoo Clocker, Bruiser Cruiser, Sheep Creep, Cyclops Dragon, Chomp Chest | 25000 Gold |
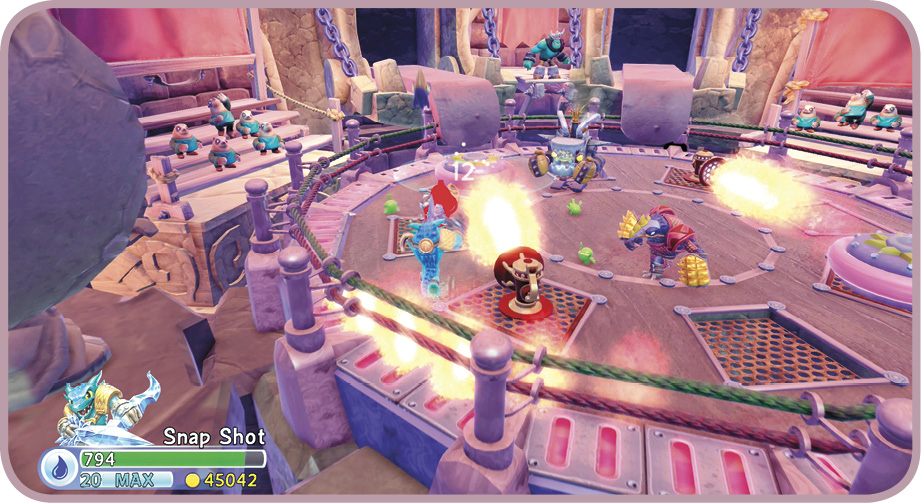
This challenge has it all; fire ring, pinball bumpers, flamethrowers, lasers, etc. It also showcases just about every foe you’ve battled before. Each stage is long and filled with a wide array of enemies. No single trick or tactic will work, you have to check out the traps and adjust your game plan when they change. Stay calm and use the same techniques from the previous challenges to use the traps to your advantage. Remember these are long battles so save food for when it is really needed.