Prima Games eGuides
primagames.com Browse Redeem a code Help
The Legend of Zelda Majora's Mask 3D eGuide
Sign in My Guides

Sign in or create an account

We'll email you a link. No password needed, and if you don't have an account yet, the link makes one.

By creating an account or signing in, you agree to our Terms of Service and Privacy Policy.

Have a password?

Had an account on the old eGuides site, or a code from a printed guide? Help and troubleshooting

Sign in with a password

By signing in, you agree to our Terms of Service and Privacy Policy.

Check your email

A sign-in link is on its way. It works once and expires in 15 minutes. Open it and you're in, with an account if you didn't already have one.

Contents

  • Items and Gear
    • Gear
    • Quest Items
    • Equippable Items
    • Rupees and Field Items
    • Bottle Items
    • Dungeon Items
    • Masks
  • Walkthrough
    • Chapter 1: The Mischievous Skull Kid
      • Lost Woods
      • Clock Town
      • Boss Battle: Skull Kid
    • Chapter 2: Clock Town Tour
      • Clock Town
    • Chapter 3: Termina Field and the Southern Swamp
      • Clock Town
      • Termina Field
      • Swamp Trail
      • Southern Swamp
      • Woods of Mystery
      • Southern Swamp (Revisited) 1
      • Deku Palace
      • Southern Swamp (Revisited) 2
      • Woodfall
      • Southern Swamp (Revisited) 3
      • Milk Road
      • Romani Ranch
    • Chapter 4: Woodfalls Woes
      • Clock Town
      • Woodfall 1
      • Woodfall Temple
      • Boss Battle: Odolwa, Masked Jungle Warrior
      • Woodfall 2
      • Deku Palace
      • Deku Shrine
      • Swamp Trail
    • Chapter 5: Into the Mountains
      • Clock Town
      • Termina Field
      • Mountain Trail
      • Mountain Village
      • Road to Goron Village
      • Goron Village
      • Road to Goron Village (Revisited)
      • Mountain Village (Revisited)
      • Road to Goron Village (Third Visit)
      • Goron Village (Revisited)
      • Mountain Village (Third Visit)
      • Snowhead Trail
      • Snowhead
    • Chapter 6: Saving Snowhead
      • Snowhead
      • Snowhead Temple
      • Boss Battle: Goht, Masked Mechanical Monster
      • Mountain Village
      • Goron Village
      • Road to Goron Village (Revisited)
      • Goron Village (Revisited)
    • Chapter 7: Fair Weather Explorations
      • Clock Town
      • Milk Road
      • Romani Ranch
      • Snowhead Temple (Revisited)
      • Mountain Village
      • Road to Goron Village
      • Gorman Track
      • Romani Ranch (Revisited)
      • Mountain Village (Revisited)
      • Termina Field
      • Great Bay Coast
      • Termina Field (Revisited)
      • Road to Goron Village (Revisited)
      • Romani Ranch (Third Visit)
      • Mountain Village (Third Visit)
      • Great Bay Coast (Revisited)
      • Pirates Fortress
      • Snowhead Trail
    • Chapter 8: Hookshot Heroics
      • Clock Town
      • Southern Swamp
      • Swamp Spider House
      • Clock Town (Revisited)
      • Romani Ranch
      • Clock Town (Third Visit)
      • Ikana Road
      • Ikana Graveyard
      • Beneath the Graveyard
      • Clock Town (Fourth Visit)
      • Southern Swamp (Revisited)
      • Great Bay Coast
      • Zora Cape
      • Waterfall Rapids
      • Ikana Graveyard (Revisited)
      • Beneath the Graveyard (Revisited)
      • Zora Cape (Revisited)
      • Zora Hall
      • Zora Cape (Third Visit)
      • Ikana Graveyard (Third Visit)
      • Beneath the Graveyard (Third Visit)
      • Clock Town (Fifth Visit)
      • Great Bay Coast (Revisited)
      • Oceanside Spider House
      • Clock Town (Sixth Visit)
      • Great Bay Coast (Third Visit)
      • Pirates Fortress (Second Visit)
      • Great Bay Coast (Fourth Visit)
      • Pinnacle Rock
      • Great Bay Coast (Fifth Visit)
    • Chapter 9: Saving the Great Bay
      • Southern Swamp
      • Zora Cape
      • Great Bay Temple
      • Room 3: Main Chamber (Sixth Visit)
      • Boss Battle: Gyorg, Gargantuan Masked Fish
      • Zora Cape (Revisited)
      • Great Bay Coast
      • The Frogs Song
    • Chapter 10: Eastern Explorations
      • Exploration Preparation
      • Ikana Road
      • Ikana Canyon
      • Beneath the Well
      • Ancient Castle of Ikana
      • Stone Tower
    • Chapter 11: Storming the Stone Tower
      • Stone Tower
      • Stone Tower Temple
      • Boss Battle: Twinmold, Giant Masked Insect
      • Ikana Canyon
    • Chapter 12: Love and Marriage
      • Clock Town
      • Sakons Hideout
    • Chapter 13: To the Moon
      • Clock Town
      • Inside the Moon
      • Odolwa Kids Playground
      • Goht Kids Playground
      • Gyorg Kids Playground
      • Twinmold Kids Playground
      • Final Boss: Majoras Mask
  • Monsters and Enemies
    • Minions
    • Mini-Bosses
    • Dungeon Bosses
    • Boss Battle: Gyorg, Gargantuan Masked Fish
    • Boss Battle: Twinmold, Giant Masked Insect
  • Introduction
    • Cast of Characters
  • How to Play
    • Game Screens
    • Touch Screen
    • Timing is Everything
    • Saving Your Game
    • Game Over
    • Basic Actions
    • Combat
    • Links Forms
  • Legendary Checklists
    • Fishing Hole Fish
    • Pieces of Heart
    • Masks
    • Songs
    • Gear
    • Quest Items
    • Equippable Items
    • Other Items
    • Bombers Notebook

The Legend of Zelda Majora's Mask 3D Guide › Walkthrough › Chapter 8: Hookshot Heroics

Zora Cape (Third Visit)

Zora Cape Owl Statue
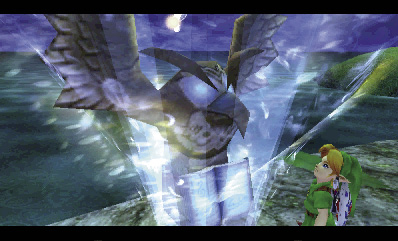
Exit Zora Hall via the east passage to return to Zora Cape. Inspect the owl statue here to save your game and unlock another Song of Soaring warp point.

Meeting Lulu
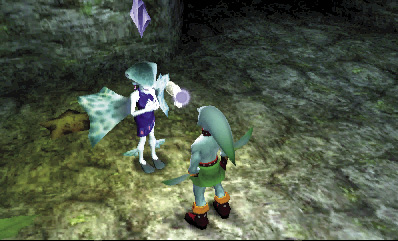
The Zora girl that everyone’s been talking about stands nearby. Her name is Lulu, and she’s the lead singer of the Zora band. Put on the Zora Mask, and speak to Lulu if you like. Sadly, she’s too distraught over the loss of her eggs to chat. Not even the Song of Healing can heal her woes.

Let There be Light
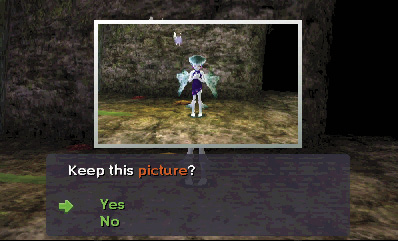
You have to find those Zora Eggs. But since you’re already here at Zora Hall, you should accomplish a few more worthy tasks. Take a nice full-body pictograph of Lulu, then reenter Zora Hall and go up the winding ramp to reach the balcony.

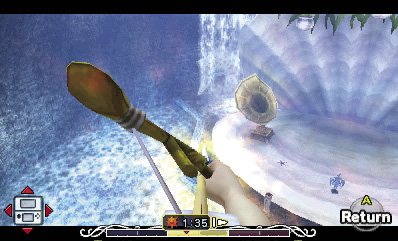
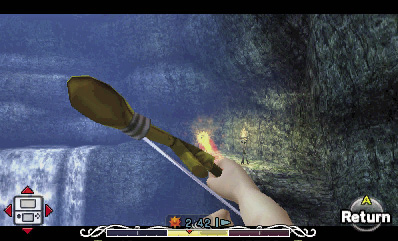
A Zora up on the balcony mentions that the stage lights aren’t lit. Try as you might, you can’t seem to light the stage’s torches with Fire Arrows from up there.
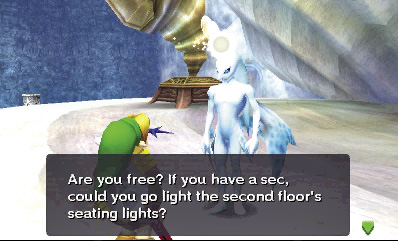
Dive down into the water, and swim up to the stage. Climb out, and speak to the Zora near the torches. He says that the stage lights won’t go on until the second floor’s seating lights are lit. So that’s the problem!

Run back around the hall, and scale the slope to return to the second-floor balcony. This time, shoot Fire Arrows and light the four torches on the second-floor ledges. There are two torches on the east ledge and two more on the west ledge. Quickly light all four before any of them goes out.
Ammo Up

Smash the jars near the Zora Cape owl statue to find more arrows and Magic Jars.

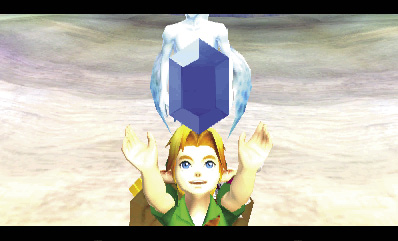
Lighting all four second-floor torches causes the stage lights to come on. You did it! Dive back into the pool, and swim to the stage. Speak to the Zora on the stage again to receive your reward: a Blue Rupee. You also get a new stamp added to your Bombers’ Notebook.

Playing Paparazzi
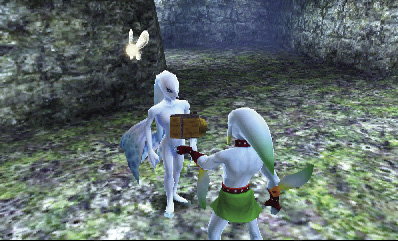
You’re probably wondering why you took that pictograph of Lulu. You’re about to find out. Return to Zora Hall’s second-floor balcony, put on the Zora Mask, and speak to the Zora that you’ve met up there as Zora Link. Mistaking you for Mikau, the Zora asks if you can show him a picture of Lulu. Show him your exclusive pictograph to receive a Red Rupee, along with another Bombers’ Notebook stamp of approval.

Keep reading with a free account

The first 3 sections of The Legend of Zelda Majora's Mask 3D are open to everyone. An account opens the rest of it, and every other guide in the archive. It's free, and there's nothing to buy.

Bought guides on the old Prima Games site? Your account and every guide you own moved here, so there's nothing to buy again. Sign in.

Create a free account Or browse our free guides

PreviousZora Hall NextIkana Graveyard (Third Visit)