
The Legend of Zelda Majora's Mask 3D Guide Monsters and Enemies
Minions
With terrible fiends lurking around every corner, Link must always be prepared for battle. This chapter helps him do exactly that. Here, you’ll learn how to defeat every enemy that Link faces throughout his entire adventure.
Minions come in all different shapes and sizes. Some are as small as a bird, while others are as big as a house. Still, all minions share a common bond: they aren’t bosses. These are the frontline foes that Link must battle at many points during his quest.
Armos
Damage: 1/2 Heart
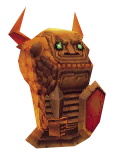
These stalwart statues seem harmless until they’re struck, but then they become hopping mad. Once awoken, Armos hop after Link, harming the hero if they slam into him. It’s usually best to leave Armos be, but you can also place a bomb near them and blast them to bits with minimal risk.
Bad Bat
Damage: 1/4 Heart

Heads up! Bad Bats circle the skies, swooping down at Link without warning. They inflict little damage and are easily slain with a single swipe of Link’s blade, making Bad Bats easy prey. In a pinch, lock on and use a ranged attack to blast them from the sky.
Beamos
Damage: 1/2 Heart
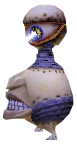
These statue-like baddies sport a revolving eye that emits a powerful laser beam when Link moves into sight. Beamos can’t move, but they commonly stand watch over vital areas. Keep out of a Beamos’ sight, and use a bomb (or the Blast Mask) to blast a Beamos to bits. Beware, though: a Beamos’ eye also goes boom shortly after you blast its body.
Big Octo
Damage: 1/4 Heart

These monstrous aquatic foes reside in deep water. They emerge whenever Link draws near and attempt to suck him into their powerful snouts. If Link gets too close, he’ll be sucked in and then blown backward for damage. You can only best Big Octos by ranged attacks… or perhaps by ramming into them with even bigger objects.
Bio Deku Baba
Damage: 1/2 Heart

These bad plants reside in deep water and often hang down from long stalks attached to the bottoms of lily pads. Like regular Deku Babas, they strike out at Link whenever he approaches, and they’re easy prey for the Hero’s Bow. However, once struck by an arrow, Bio Deku Babas are cut from their lily pads and begin to stalk the sea floor, becoming mobile and even more dangerous. Hit Bio Deku Babas with a second ranged attack for good measure.
Black Boe
Damage: 1/4 Heart

Often attacking in swarms, Black Boes slink about the floor and then leap at Link, ramming into him for damage. Lock on and back away to avoid being surrounded, and block to avoid damage. When you see an opening, unleash the full fury of Link’s blade or Deku Link’s spin attack.
Blue Bubble
Damage: 1/2 Heart

These foul, flying skulls are engulfed in an eerie blue flame. Blue Bubbles chase after Link and curse him if they bump into him. Once cursed, Link cannot use his sword for quite some time (about a minute of real-world time). Blue Bubbles are best avoided, but ranged attacks can take them out from a safe distance. You can also block them, and then defeat them with Link’s blade.
Blue Tektite
Damage: 1/2 Heart

Blue Tektites bounce all about, aiming to get the jump on Link. Lock on to these agile foes, and raise Link’s shield to block their bounce attacks. After blocking, counter with a few sword strikes to cut them down. Blue Tektites occasionally drop useful Deku Sticks when defeated.
Chuchu (Red/Green/Yellow/Blue)
Damage: 1/4 Heart

These big blobs come in different colors, but they all attack by bouncing toward Link, hoping to batter him with their bulk. Most Chuchus carry useful items in their gelatinous bellies, and a single swipe of Link’s sword easily defeats them. Block a Chuchu’s bounces with Link’s shield, and then counter with cold steel!
Death Armos
Damage: 1 Heart

Death Armos are silent stone sentries that stalk the Stone Tower Temple. They float on high and slam down near intruders with great impact, creating a bomb-like quake. To defeat them, strike the emblem on their chest with a Light Arrow to make them flip around, then lure them into slamming down on you. They’ll end up smashing their heads and defeating themselves. Just be sure to defend or flee, for like regular Armos, these guys go boom after they’ve been slain.
Deku Baba
Damage: 1/2 Heart

These big-mouthed plants pop up from tall grass, hoping to make a meal out of Link. Evade a Deku Baba’s lunging attacks with Link’s shield causing it to miss Link completely, and then strike it with Link’s sword as it chomps at nothing to make it stand straight up. Strike a standing Deku Baba with Link’s sword again to slay it and make it drop a valuable Deku Stick. If you slay a Deku Baba while it isn’t standing straight up, it drops a Deku Nut instead.
Desbreko
Damage: 1/4 Heart

Desbrekos are larger Skullfish with powerful jaws. Schools of little Skullfish commonly follow these dangerous nautical monsters, making them formidable adversaries. Whenever possible, use ranged attacks from land to slay Desbrekos without putting yourself at risk. If you must battle one in the water, use Zora Link’s magical barrier by holding  +
+  while swimming (or by holding
  +
+  while walking on the sea floor) to damage them when they draw near.
Dexihand
Damage: None
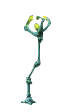
Dexihands are found underwater, usually in confined spaces such as tunnels or passages. They try to grab Link and throw him for a loop if he moves too close. Dexihands can’t actually harm Link; they’re just obstacles that you must slay in order for Link to progress. Ranged attacks are best, though Zora Link can also defeat them easily with his magic field (hold  +
+  while swimming, or hold
  +
+  while walking).
Dinolfos
Damage: 1/4 Heart (sword); 1/2 Heart (fire breath)
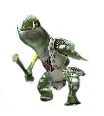
Dinolfos are dangerous, fire-breathing lizards armed with swords. They attack aggressively, so keep Link’s shield up to block their vicious sword strikes. When you’re ready, interrupt the Dinolfos’ attacks by striking just as it rears back to swing its sword. Interrupt its attacks with those of your own, then dodge to avoid being burned by the Dinolfos’ fire breath—an attack that you can’t block. Strike a Dinolfos four times with Link’s blade to slay it.
Dodongo
Damage: 1 Heart
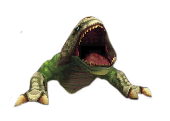
These large lizards are covered in thick scales that deflect Link’s attacks. Dodongos breathe searing fire that you can’t block, making them dangerous to approach from the front. Keep your distance, and toss bombs at Dodongos to blast them from afar instead.
If bombs aren’t an option, exploit a Dodongo’s slow movements by circling around the monster as it begins to breathe fire. Once you’re behind a Dodongo, strike its vulnerable tail only once, and then immediately raise Link’s shield to block the monster’s tail-whip counterattack. Keep it up until the great lizard finally falls.
Dodongos commonly leave precious Rupees behind, making them worthy (albeit dangerous) prey.
Dragonfly
Damage: 1/4 Heart
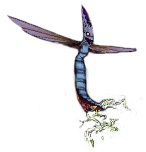
These overgrown insects buzz about the skies, aiming to zap Link with their electric stingers. Block their attacks, and then counter with Link’s blade (jump attacks work well) or a ranged attack (a safer option).
Eeno
Damage: 1 Heart (Big Eeno), 1/4 Heart (Small Eeno)

Take care when you notice snow shifting about, for a dangerous Eeno is likely lurking beneath the powder. Lock on to these frosty foes, and block the snowballs that they throw. Link’s sword can cut Eenos down to size, but only after they’ve emerged from the white. Avoid these dangerous foes until you obtain a long-range weapon—preferably one with some sizzle, like the Fire Arrow!
Eyegore
Damage: 1/2 Heart

Eyegores are big and mean, and they have only one weakness: their giant eyeballs. Lock on and approach an Eyegore to make it spring to life, then back away from its crushing blows, and quickly shoot its eye with an arrow after you make the monster miss. You may catch some shrapnel produced by the Eyegore’s powerful impact, but don’t let that deter you. Keep dodging and shooting that big ugly eye until you finally beat the beast.
Fire Keese
Damage: 1/2 Heart

This brand of Keese flies about aflame, aiming to swoop down and scorch an unsuspecting Link. Like Ice Keese, Fire Keese lose their flame after they hit Link, reverting to normal Keese. However, Fire Keese can fly through open flame sources, such as lit torches, to reclaim their flames and burn Link once more. Slay these troublesome foes with Link’s sword as they swoop close, or pick them off with arrows or the Hookshot from afar.
Floormaster
Damage: 1/2 Heart

Akin to Wallmasters, Floormasters are giant hands that crawl along the floor seeking prey. They leap at Link when they see him, and they can’t be harmed when they turn green, so play defense until they return to their normal color. Damage a Floormaster to reduce it to three smaller Floormasters that try to grab Link and damage him. Mash buttons to break free of a smaller Floormaster’s grip, and chop them all down quickly with Link’s sword before they reform.
Freezard
Damage: Varies

Freezards are immobile ice statues that regularly emit powerful gusts of chilling wind. These gusts can freeze Link solid, inflicting steady damage until he breaks free. If you manage to get close to a Freezard, you can defeat it with a few blows. Fire Arrows work much better, though.
Giant Bee
Damage: 1/4 Heart

Knocking down beehives is fun and profitable, but some hives are home to Giant Bees. These bite-sized buzzers don’t take kindly to having their homes destroyed and quickly chase after Link, aiming to give him the business end of their sharp stingers. Quickly squish any Giant Bee that emerges from a beehive; this only takes one hit.
Gibdo
Damage: Varies
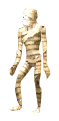
These mummy-like monsters move very slowly until they manage to freeze Link with their terrifying gaze. Once Link has been frozen in fear, a Gibdo quickly leaps onto his back, biting him for damage. Mash buttons to break free of a Gibdo’s grasp, and use arrows or bombs to defeat Gibdos from a safe range. (Don’t use the Hookshot, or you’ll be pulled toward these heavy foes!) The Stone Mask is not effective at fooling Gibdos. If you set a Gibdo ablaze with a Fire Arrow, its cloth wrapping burns away, changing the Gibdo into a similar enemy called a ReDead.
Guay
Damage: 1/2 Heart
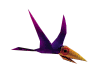
Like Bad Bats, Guays circle the skies and swoop down on Link, aiming to peck him with their big orange beaks. Block their swoop attacks, or simply cut them down with a well-timed sword strike as they dive close. You can also shoot Guays from the sky with the Hero’s Bow.
Hiploop
Damage: 1/4 Heart
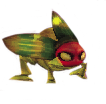
Hiploops are hot-headed insects that charge at Link once they catch sight of him. Block their charges, and then counter. Alternately, simply lock on to the pests and pick them off with ranged attacks from a safe distance.
Ice Keese
Damage: Varies

Beware of these flying foes, for their frosty aura freezes Link solid when they touch him. Lock on to them, and pick them off with the Hero’s Bow from a safe range.
Iron Knuckle
Damage: 4 Hearts
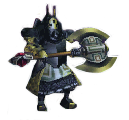
Beware these armored warriors, for the heavy axes that they wield inflict tremendous damage. Lock on and bait an Iron Knuckle into striking at you, then quickly backflip away. After dodging, strike the Iron Knuckle with Link’s blade, then leap back out of range again. Repeat this until you shatter the Iron Knuckle’s armor. At this point, the villain becomes faster and even more dangerous. Roll around to make the armorless Iron Knuckle miss you, then lock on again and resume dodging and countering until the menace finally falls. Bombs are also effective against Iron Knuckles, but they can be dangerous to use, especially after an Iron Knuckle has lost its armor. Light Arrows can make short work of Iron Knuckles after they’ve shed their armor.
Leever
Damage: 1/4 Heart

Take care when moving across sand, for Termina’s dunes are home to dangerous Leevers. These swift foes pop up from sandy areas and speed after Link, aiming to ram him for damage. Leevers can’t take much punishment, so block them with Link’s shield, and then counter with the Hero’s Bow or Link’s blade.
Like Like
Damage: 1 Heart
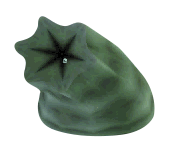
Like Likes are always hungry for items and can devour just about anything Link might be carrying, including his shield. Avoiding these aquatic monsters is best, but Zora Link can defeat Like Likes if you… um, like. Just hold  +
+  while swimming or
  +
+  while walking to bring up his magic barrier, which makes short work of Like Likes. You can also hold
  and toss Zora Link’s fins to stun a Like Like, letting you close in for a quick fin strike. Slay a Like Like to reclaim any items it may have stolen. When battled on the surface, Link can defeat Like Likes more easily with bombs or the Hero’s Bow.
Mad Scrub
Damage: 1/4 Heart

These dangerous Dekus emerge from their flowers and spit Deku Nuts at Link from afar. Avoid them, or block their nutty projectiles and look for a chance to close in and defeat them. If you prefer to keep your distance, try locking on to a Mad Scrub from afar and defeating it with a ranged attack.
Mini Baba
Damage: 1/4 Heart

These bite-sized Babas are too young to lunge at Link. They pose little threat, unless Link stumbles into their ever-chopping jaws. Get close—but not too close—and slice up Mini Babas with a swing of Link’s sword. Like Deku Babas, Mini Babas often drop useful Deku Nuts.
Nejiron
Damage: 1/4 Heart

Beware these rolling foes! Though easily defeated, Nejirons give off a big blast when beaten, harming Link if he’s too close. The Hookshot can set off Nejirons from a safe distance, but they’re best left alone unless you’re in need of bombs, which these volatile villains commonly drop. If you prefer, simply put on the Stone Mask to avoid Nejirons.
Octorok
Damage: 1/4 Heart

A classic Legend of Zelda baddie, Octoroks live on the surface of water in Majora’s Mask 3D and pop up to spit rocks at Link. Defeating these immobile foes couldn’t be easier; just lock on, and raise your shield to knock their rocks back at them.
Peahat
Damage: 1 Heart

These giant fliers remain burrowed in the ground until Link approaches, then they burst up and pursue him with their razor-sharp propellers. A Peahat’s only weakness is the small root on its bottom. Use Link’s shield to block the Peahat’s whirling propellers as you seek to strike its vulnerable root. Peahats can take a lot of punishment, so don’t give up the fight!
Poe
Damage: 1/2 Heart
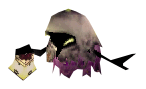
Poes are lowly ghosts that float about, looking for people to pester. They vanish if you  -Target them, making them troublesome foes. Don’t lock on to Poes, but simply cut them down with Link’s blade whenever they draw near. If you like, scoop up their souls into Empty Bottles—you can sell Poes’ souls to the man at the Curiosity Shop in Clock Town during the evenings after 10 p.m.
Real Bombchu
Damage: 1/2 Heart

Although you can buy imitation Bombchus at the Trading Post in West Clock Town, these ones are the real deal. These crazy rats carry bombs and race toward Link, aiming to blow him to heroic bits. Bombchus can be tough to defeat before they go boom, so simply block their charge with Link’s shield to avoid taking damage as they self-destruct.
Red Bubble
Damage: Varies

Beware of lava pools, for they’re often home to dangerous Red Bubbles. These blazing baddies bound up from lava and begin to bounce around, aiming to bump Link and burn him up. If a Red Bubble touches Link, he’ll be set ablaze and burned for damage over time. Keep your shield up to block their attacks, and roll to put out the flames and save Link from damage while he’s burning. Getting close to Red Bubbles is unwise, so lock on, and use the Hero’s Bow to pick them off from a safe range.
ReDead
Damage: Varies
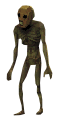
Burn away a Gibdo’s bandages with a Fire Arrow, and you’ll transform the sluggish mummy into a zombie-like ReDead. A ReDead is exactly the same as a Gibdo, only more frightening to behold. It paralyzes Link with its terrifying glare if he gets too close, then it leaps onto Link’s back and bites him for damage. Mash buttons to break free of a ReDead’s clutches, then use ranged weapons, such as bombs or arrows, to slay them from range. Avoid using the Hookshot against ReDeads, which draws you toward them. The Stone Mask won’t fool these keen-eyed monsters.
Shell Blade
Damage: 1/2 Heart
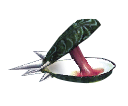
These clam-like enemies reside deep underwater and are surrounded by sharp spikes. They move with surprising speed and are totally protected by their hard, spike-covered shells. Their only weakness is the ligament that lies inside the shell, but it’s only visible when the Shell Blade’s “mouth” is open. Any attack can harm the ligament, but Zora Link’s magic field ( +
+  while swimming or
  +
+  while walking) is the easiest method.
Skullfish
Damage: 1/4 Heart
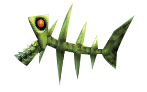
These freaky fish inhabit areas of deep water where Link can swim. Once they spot Link, they race toward him, aiming to take a bite out of his hide. Zora Link can slay them quite easily by holding  +
+  while swimming or
  +
+  while walking to raise his magic shield. To conserve magic power, sink to the sea floor, and then use Zora Link’s normal fin attacks to defeat Skullfish that draw near.
Skulltula
Damage: 1/2 Heart
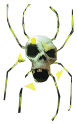
These giant spiders descend suddenly from their webs, trying to get the drop on Link. Their hard shells are tough to penetrate, but their soft stomachs are totally vulnerable. Strike a Skulltula’s soft side after it spins around, or shoot its belly or shell with an arrow to slay it from afar.
Snapper
Damage: 1/4 Heart
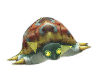
These tough-shelled tortoises move very slowly until they spot Link. At that point, they tuck into their shells and begin to spin around, chasing Link down. Snappers are immune to Link’s blade until he blasts them with a bomb. This flips Snappers over onto their backs, letting Link lay into them with his sword.
Stalchild
Damage: 1/4 Heart
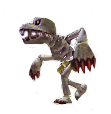
The Kingdom of Ikana’s fallen soldiers have been cursed to roam their homeland for all time. They shuffle around the landscape and take out their rage on anyone foolish enough to approach. Like their claw swipe attacks, the bones of Stalchildren are weak, and Link’s blade easily shatters them.
Takkuri
Damage: 1/4 Heart
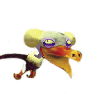
Hold fast your valuables! These big, bad birds swoop down on Link, aiming to steal his precious items. Takkuris will pluck up Link’s bombs, Arrows, and even his Rupees! You can attack a Takkuri to make it drop whatever it has stolen, but if you don’t flee the scene quickly, a Takkuri may even manage to make off with your Empty Bottle. Takkuris can withstand a lot of damage, so battling them is quite risky. It’s best to run away from these flying fiends before you suffer an unfortunate loss—although rumor has it that slaying a Takkuri can lead to vast riches.
Wallmaster
Damage: 1 Heart
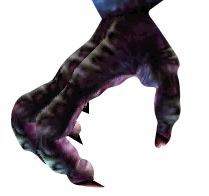
This devious enemy’s name is misleading, for Wallmasters actually drop from the ceiling, aiming to snatch Link up and return him to the entrance of the current cave or dungeon. A telltale sound and a shadow that grows on the ground beneath Link betray their arrival. Run and roll to dodge the Wallmaster’s drop, then defeat the fiend before it flees. Slaying a Wallmaster prevents it from reappearing for quite some time.
White Boe
Damage: 1/4 Heart

These little fluff balls are just like the Black Boes encountered in Woodfall Temple. Though weak, they travel in packs and attempt to overwhelm Link with their numbers. Spin attacks are most effective at clearing them out.
White Wolfos
Damage: 1 Heart

Cousins to the Wolfos encountered around the Southern Swamp, White Wolfos reside in the snowy reaches of Snowhead Mountain. Lock on and dodge their claw swipes, then counter by striking their vulnerable tails. Or, make things easier on yourself by picking them off from afar with your Hero’s Bow.
Wolfos
Damage: 1/2 Heart
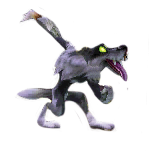
These wild wolves only come out at night. They spring up from the ground in ambush, circling around Link and swiping at him with their razor-sharp claws. Make a Wolfos miss, and it spins around, exposing its vulnerable tail. Strike the tail twice with Link’s sword to send the Wolfos howling away in defeat. You can also interrupt a Wolfos’ attack by striking just before it does, but it takes more hits to defeat them this way.