
Playing With Super Power: Nintendo Super NES Classics Guide Star Fox
Confidential Information
Speedrunner fling84
World Records Held: Warpless (22m 42s), Level 2 – Warps (16m 50s), Level 2 – Warpless (21m 28s), Level 3 – Warps (23m 13s), Level 3 – Warpless (28m 57s)
fling84 develops web applications for the healthcare industry by day. By night, he sits in front of a 14-inch CRT television—quite similar to what many Super NES players likely played on back in 1994. But unlike us mere mortals, fling84’s retro fascination has earned him various world records across Star Fox’s three courses (often referred to as “levels”).
fling84 explains that Star Fox speedruns revolve largely around reducing lag caused by the graphics putting strain on the hardware: “I’ve actually done some sessions where I took a few hours and did nothing more than repeatedly fly through the same sections of levels in subtly different ways to see what (if anything) made a difference in terms of lag. In some cases, I found non-obvious things like flying through a certain stretch of Sector Z on the very left edge of the screen instead of the very right made a difference of about one to two seconds even though the same number and types of objects were visible throughout the entire stretch on both sides. In the same level I also found that in one section, holding Down to fly through a section at the very bottom edge of the screen actually made that section a little bit slower (though, again a difference of only one to two seconds).”
“This kind of testing has really shown me the sheer number of possible route improvements that are left to find in this game,” says fling84. “Things that I tried thinking logically as a software developer myself about how the game engine probably works turned out not to be true in some cases. When working on further optimizing runs of this game, you really need to think outside the box.”
For potential runners, casual players, and intrigued spectators, fling84 shares a variety of techniques that help ensure Andross is always defeated as quickly as possible.
Basic
Boosting
Boosting is very, very, very important! When you press Boost, you get a temporary speed bonus and your Arwing speeds up ahead a little bit until your boost meter is used up. Then you must wait for the boost meter to refill before you can boost again. You want to boost at every single opportunity. Over the course of an entire speedrun, all of these boosts make a large difference.
You should even boost as much as possible during boss fights, as the way the game implements some boss animations seems to be based on the speed that the game engine is currently running at. Boosting at least partially seems to speed this up, in effect making some boss animations run a little bit quicker.
For a lot of runners, including myself, boosting constantly throughout an entire run probably requires holding the controller in a sort of claw-grip where the index finger of your right hand is permanently holding down the X button (which is Boost in control type A). This leaves you able to use your thumb to hit the Y, B, and A buttons. This probably means that you will find it very difficult to use the R button, so you’ll be barrel rolling with the L button instead. You want to make sure that you’re comfortable moving your right hand into and out of this kind of grip quickly just for those few spots where you want to use the R button to perform a quick turn.
Quick Boss Kills
This should be fairly obvious, but of course in a Star Fox speedrun, a significant amount of your time savings comes from killing bosses more quickly. Boss fights are probably the one single area in the game where you have the most control over how long or short it takes versus the rest of the game where you have a relatively limited ability to affect the auto-scroll rate that the game moves at. Each boss has different strategies to quickly kill it, and while I cannot possibly cover them all here, I will discuss a few in detail to give you an idea of the types of strategies involved.
Lag Reduction
A lot of lag reduction in Star Fox is pretty situational, and much of it might even seem counter-intuitive at first glance until you really learn the levels (and even then, some of it will probably remain counter-intuitive!). Probably the single most important thing to understand about a Star Fox speedrun is regarding the auto-scroll component in the game. This is the part of the game that moves your Arwing forward automatically without your needing to hold forward or some other “accelerate” type of button on your controller during gameplay. The rate at which the auto-scroll moves at is influenced by the frame rate that the game is running at. Thus, if you are able to reduce lag, you keep the game engine running at a higher frame rate, which means you finish each level quicker! Simple, right?
Lag reduction places a very high emphasis on a runner’s need to get as good as they can at improving their shot accuracy. Both because it reduces the number of projectiles you yourself are adding by shooting more times than necessary, and because it means that enemies are getting killed as quickly as possible (therefore, less lag overall).
Barrel Rolling
How could this not be here? This is the game that meme originated from after all! Barrel rolling is a basic technique that you want to make second nature. It allows you to deflect pretty much any incoming fire except for missiles and things (ships, objects, etc.) physically crashing into you.
It is widely believed in the community that barrel rolling while spam shooting slightly increases the rate that you can shoot. While I’ve not personally seen any concrete evidence or testing of this, it is still worth doing in many situations when you are spam shooting at an enemy. Often that same enemy (or other enemies nearby) are very likely shooting back at you. Barrel rolling continuously allows you to easily deflect the incoming fire and not lose any time for shooting.
Advanced
Optimal Nova Bomb Usage
Nova Bombs are used during pretty much every boss fight to take them out quickly. Many bosses have limited vulnerable sections that you must shoot at to damage them, and often these vulnerable parts are shown only for limited periods of time. This is the case for bosses such as Attack Carrier, Rock Crusher, Galactic Rider, Great Commander, and more.
In these types of situations, you want to either find some visual cue or count for a certain number of seconds to allow you to perfectly time throwing a Nova Bomb in advance of the boss becoming vulnerable to damage so that it explodes at the first frame it becomes vulnerable. For me personally, I tend to use counts of two to three seconds much more often than visual cues, but everyone develops their own method that works best for them.
An example of this is during the Rock Crusher fight. Rock Crusher starts out by rotating one of two different flat sections with four nodes into position to shoot at you. Once it finishes rotating, there is a brief pause and then the nodes open up and begin shooting. It is at this time that they are vulnerable to attack. In a speedrun, you almost certainly want to use a Nova Bomb to quickly take them all out. But you don’t want to wait for them to open before launching a Nova Bomb at them.
Instead, time your Nova Bombs. In this case, you can either launch a Nova Bomb before the four nodes open so that it collides with the boss and explodes just as the nodes open, or launch a Nova Bomb early and be ready to detonate it early (by pressing the button again after it has been launched) as soon as you see the nodes open up. The latter method is probably easiest to do consistently and is what I recommend in most cases, as it can be quite difficult to judge distances accurately.
Taking Out Large Packs of Enemies with Bombs (On-Screen and Off)
The exact situations where this is possible and actually saves you time are few and far between, but when it does come up it’s both helpful and fun. The usual scenarios for this are when a formation of four to six enemy ships (or more!) comes flying in from off-screen and they hang around for a long time if you don’t deal with them quickly. Sometimes they even come in waves, with a first pack of ships, followed a few seconds later by a second pack.
When you find yourself having to deal with larger packs of ships that you find difficult to take out quickly, definitely think about whether a Nova Bomb could be used to speed it up. If it’s one of those cases where there are multiple waves, pay special attention to the timing. You can launch a Nova Bomb to take out the first pack of enemies, but delay launching it just a tad so that when it explodes it takes out the second wave of enemies that may have only just spawned and are still off-screen. This type of setup can offer a nice savings in terms of lag reduction. Be careful about overusing this though, as in most runs the majority of your Nova Bombs should probably be saved for boss fights.
As an example of this in action, in Course 2 Venom Orbit, just after the blue middle ring in the level, one of your teammates flies in calling for help, with an enemy following him. When you save him, he hangs out at the bottom middle of your screen for a short while. At this same time a formation of four gray enemy ships comes in. They can be hard to take out quickly because they’re spaced out kind of far apart. Additionally, they are soon followed by a second wave of ships that comes in from off-screen. In this situation, you can actually throw a Nova Bomb at your teammate (don’t worry, he’ll be fine), and the bomb explodes off of his ship and takes out the four visible enemy ships. Plus, if you hesitated for just the right amount of time, the explosion also takes out the second wave of incoming ships and you’ll never even know they were coming!
Braking Can Help You Aim More Effectively
During some boss fights, you find yourself in a situation with a boss that is flying around the screen and you need to follow it with your aim, spam shooting to kill it as quickly as possible. It can often be difficult to anticipate the direction the boss moves if it’s not a pre-set pattern and you’ll end up with a lot of wasted shots.
In these situations, using brake can help speed things up for you by making it easier to adjust your aim to follow the boss’s movement.
As an example, for the Dancing Insector fight, in one of the later phases when its legs first turn red and it rises up and starts spinning around, you need to shoot at its legs to take them out quickly. The boss spins around the screen moving side to side but also moving in closer to you periodically. When it moves in, it is a perfect time to brake as usually when it comes in close like this it also arcs around in a semi-circle and if you don’t anticipate this movement you can easily lose your aim. By using the brake, you not only back up your Arwing a little bit, you also make it easier to adjust your aim because less time turning is needed to follow along with the boss’s movement due to the fact that you’re temporarily a little bit farther backward. This is a great strategy to consistently save time (originally devised by LowKeeee) for a fight that already seems overly difficult.
Expert

Quick Great Commander Kill
For best results, you want to ensure that you keep the shield upgrade found during the level for this fight. It is possible to pull this quick kill off without the shield upgrade, but it is extremely risky (you are likely to incur wing damage, and possibly even die). Additionally, you will want to come into this fight with all five Nova Bombs just in case you aren’t able to successfully pull off the quick kill.
Once the Great Commander finishes its lengthy intro sequence and is fully assembled, it starts flying forward and heads off the screen behind you. One of its nodes on the right side flips open, so be ready to launch a Nova Bomb directly at the front section of the Great Commander. This should always take out the node. Then the game automatically spins you around to face the boss again, who is now quite a distance away from you.
Barrel roll as needed to deflect its incoming shots so you don’t lose the shield upgrade too soon. After a second or two, you should see multiple nodes open up while it’s still far away. The moment you see this happen, launch another Nova Bomb, making sure to aim it precisely at the boss as you want it to explode as close as possible to make sure it deals the highest amount of damage. Don’t hesitate too long before launching a bomb, otherwise you risk the nodes closing before the bomb explodes. If done properly, this should ideally take out two to three additional nodes.
Now the boss should be getting closer. Look quickly at both sides of nodes and watch for the first set of nodes that open. This usually happens when it’s quite close. The instant you see the first set of nodes open, quickly launch a Nova Bomb at that side, and then immediately turn and align yourself directly in front of the line of nodes on the opposite side of the boss. What you want to do here is crash your Arwing into the boss to destroy the nodes on this side. The game tries to bounce you back out of the boss when you crash into it, so you should hold Down to make sure you stay inside as much as possible.
The hitboxes for these nodes do seem overly finicky and it’s possible there’s some RNG element to it as well, so sometimes you may find this strategy works perfectly, and others it might fail for unknown reasons. If it worked, the boss should now be dead. If not, you should still have two Nova Bombs left over to kill the remaining nodes which shouldn’t be a problem.
Phantron Second Phase Skip
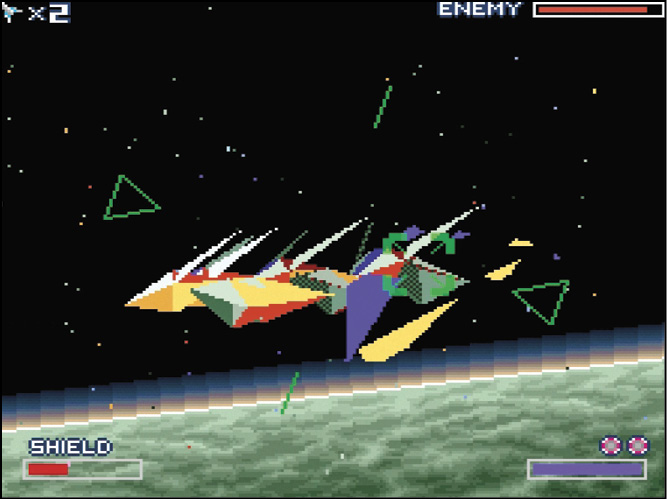
This is a very difficult trick to pull off consistently. The fight starts off with Phantron sitting still and you can shoot at it. When you damage it, it moves off to a new position and you need to follow it with your aim. Keep doing this until you get it to 50% health.
Once you’re at this point you want to quickly try to guess the path it will take to move to its next position when you damage it the next time. Fire a Nova Bomb along this path but aim a little bit closer to the boss, keeping a little bit of distance between where you are aiming the bomb and where the boss is now. You want to hesitate for maybe a second (but no more!) before you switch over to resume shooting at Phantron, else he may start to move too soon. When you shoot him and if you timed everything correctly, Phantron moves into the bomb’s explosion and that takes care of its remaining health, ending the fight.
One-Cycle Cube Andross Tips

In Courses 2 and 3, the Andross fight is a little bit harder and can take longer. This is because in addition to increased damage from Andross, his health pool is also increased. For taking out the eyes during the face phase this is usually not a problem, but for the cube phase this can make the difference between a one-cycle kill or a slower two-cycle kill. The exact strategy needed for each fight differs a bit between Course 2 and 3.
One commonality is the path that the cube takes when it first appears before it finally becomes vulnerable to your attacks. It moves by arcing toward the bottom right, then comes up to the top right/middle before settling back a bit more toward the middle area of the screen. In both Course 2 and 3, you want to launch a Nova Bomb at it such that it explodes the very instant the cube becomes vulnerable to damage, and knowing its movement pattern can help you aim this Nova Bomb better (you definitely want the bomb to explode against the cube for maximum damage).
In Course 2, all that’s left is to spam shots on Cube Andross as fast as possible. Only the initial bomb is needed if you timed it well. When the bomb explodes, you should also see the top/bottom color of the cube change to orange almost immediately. This indicates that Andross is low on health and is a good sign.
However, for Course 3, two Nova Bombs are needed. After the first bomb is launched as explained above and you’ve begun spam shooting, you want to watch the color of the top/bottom parts of the cube closely. A moment after they turn orange, launch a second Nova Bomb directly at the cube. Let it collide with the cube itself so that you can very quickly switch back to spam shooting to get in as much damage as possible.