
Prima Games eGuides
primagames.com Browse Redeem a code Help
Tom Clancy's Ghost Recon Future Soldier eGuide
Sign in My Guides

Sign in or create an account

We'll email you a link. No password needed, and if you don't have an account yet, the link makes one.

By creating an account or signing in, you agree to our Terms of Service and Privacy Policy.

Have a password?

Had an account on the old eGuides site, or a code from a printed guide? Help and troubleshooting

Sign in with a password

By signing in, you agree to our Terms of Service and Privacy Policy.

Check your email

A sign-in link is on its way. It works once and expires in 15 minutes. Open it and you're in, with an account if you didn't already have one.

Contents

  • Essentials
    • Introduction
      • Introduction
      • Ghost Recon: Legacy
      • Ghost Team: Hunter
      • Interface: The Ghost HUD
      • Controls
      • Campaign Scoring and Challenges
    • Weapons
      • Gunsmith
      • Assault Rifles
      • Light Machine Guns (LMGs)
      • Personal Defense Rifles (PDRs)
      • Shotguns
      • Submachine Guns (SMGs)
      • Sniper Rifles
      • Sidearms: Pistols
      • Sidearms: Grenade Launchers
      • Items
      • ULC Weapons
    • Compendium
      • Campaign Challenges
    • Concept Art Gallery
      • Concept Art Gallery
  • Walkthrough
    • Prologue
      • Prologue
    • Nimble Guardian
      • Briefing
      • Secure Gabriel Paez
      • Hold for Extraction
      • Reach Paez’s Hideout
      • Rescue Paez
      • Escort Gabriel Paez to Extraction
    • Subtle Arrow
      • Briefing
      • Reach Observation Point
      • Locate Dede Macaba
      • Follow and Assess Dede Macaba
      • Secure Arms Shipment at the Airstrip
      • Recover the Black Box
      • Recover the Black Box at the Crash Site
    • Noble Tempest
      • Briefing
      • Locate CIA Officer Sykes
      • Secure Officer Sykes
      • Extract Officer Sykes
      • Recover Sykes’s Data
      • Reach Extraction
    • Tiger Dust
      • Briefing
      • Locate Arms Dealer
      • Capture Arms Dealer
      • Destroy Escort Vehicles
      • Secure Arms Dealer
    • Silent Talon
      • Briefing
      • Disrupt Enemy Communications
      • Engage and Destroy Forward Base
      • Locate Weapons Cache
      • Destroy Weapons Cache
    • Firefly Rain
      • Briefing
      • Infiltrate Airport
      • Sabotage the Shipment
      • Leave the Area
      • Proceed to Extraction
    • Ember Hunt
      • Briefing
      • Reach Georgian Unit
      • Locate and Secure Osadze
      • Extract with Osadze
      • Wait for Instructions
    • Deep Fire
      • Briefing
      • Infiltrate Drilling Ship
      • Disable the System
      • Reach the Helipad
      • Secure Second Ship
    • Valiant Hammer
      • Briefing
      • Reach Observation Point
      • Gather Information on Artillery Location
      • Destroy Artillery Units
      • Reach Extraction
      • Eliminate Hostile Reinforcements
    • Gallant Thief
      • Briefing
      • Infiltrate the Prison
      • Enter Security Area
      • Place Four Targeting Beacons for Air Strike
      • Free Volodin
      • Escort Volodin to Extraction
    • Invisible Bear
      • Briefing
      • Protect the Crowd
      • Proceed to General Bukharov's HQ
      • Eliminate Bukharov
    • Shattered Mountain
      • Briefing
      • Enter Compound
      • Eliminate Raven’s Rock Leaders
      • Eliminate the HVTs Before They Escape
      • Epilogue
  • Multiplayer
    • Guerrilla Mode
      • Survival, Tom Clancy-Style
      • Shanty Town
      • Office
      • Airstrip
      • Mansion
    • Adversarial
      • Introduction
      • The Combatants
      • Pipeline
      • Market
      • Overpass
      • Harbor
      • Cargo
      • Rig
      • Sand Storm
      • Underground
      • Mill
      • Alpha

Tom Clancy's Ghost Recon Future Soldier Guide › Walkthrough › Nimble Guardian

Hold for Extraction

Hold for Extraction
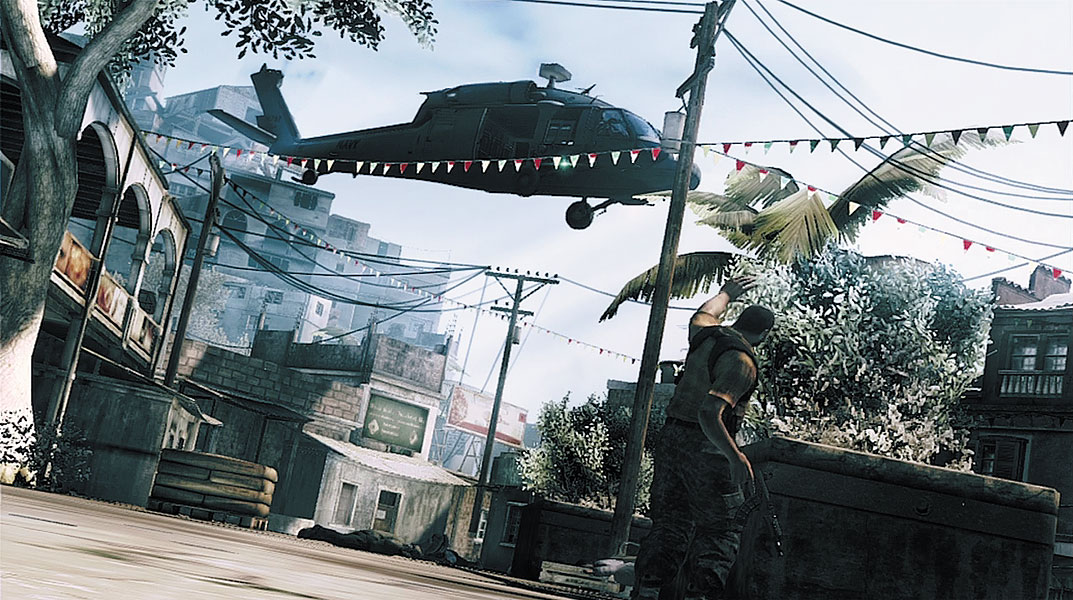
After clearing out all the gunmen in the area, you’re issued an objective update ordering you to hold your current position while awaiting extraction. On cue, a Blackhawk arrives overhead and prepares to extract Paez. But an incoming RPG round forces the chopper to take evasive action. The area is still hot! You need to secure the street ahead before Paez can be extracted.
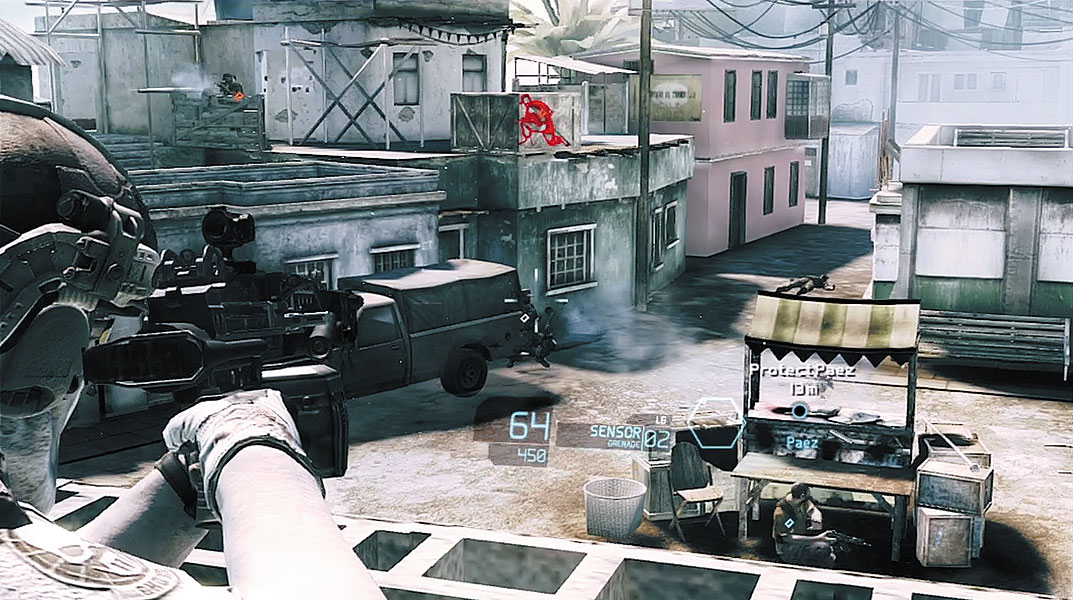
As Paez races down the street, keep up with him, advancing along the high ground. Paez seeks cover near a cog rail station. But the area is surrounded by gunmen. Immediately deploy another Sensor to identify all contacts, then help your team clear out the resistance. During the middle of the fight, a cinematic shows Paez racing toward the train—he says he’s been shot and is bugging out. Apparently the deal is off. Paez is no longer willing to turn himself in. He ignores the Ghosts’ orders, racing to safety aboard the train.
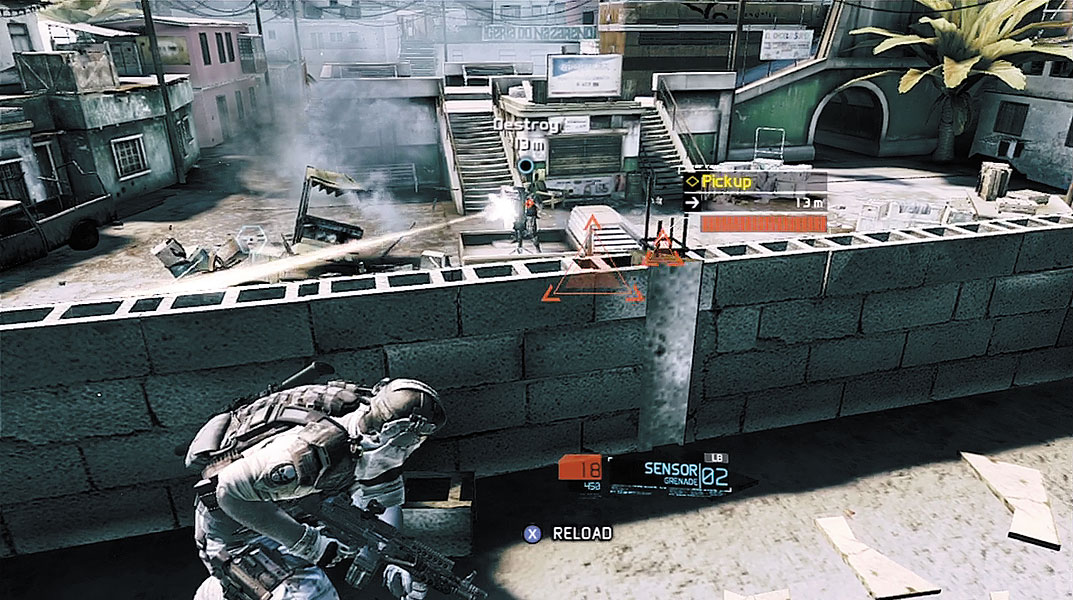
Tip

While engaging hostiles at the cog rail station, notice the ammo crate nearby. Use this to stock up on Sensors and ammo.

Immediately after the cutscene, a pickup truck equipped with a mounted machine gun appears in the street below and opens fire on your team. Make sure you’re behind cover and wait for the opportunity to peek out and take aim at the gunner. The gunner is partially protected by a steel plate fitted to the machine gun. But this steel plate doesn’t protect his whole body. Hit the gunner anywhere you can, even it means hitting him in the shoulder or foot. Inflict as much damage as possible to neutralize the gunner and silence the machine gun. Alternatively, you can focus your fire on the vehicle itself—destroying the pickup truck kills the gunner.

Tactical Challenge: Express Train

Criteria: During the ambush at the cog rail station, kill all soldiers in 60 seconds

When Paez runs toward the cog rail station, you have exactly one minute to eliminate all enemies to complete this tactical challenge. Use a Sensor to identify all the threats, then methodically pick off all the gunmen, including those gathered on the right side of the station. When the pickup truck arrives, immediately take aim at the gunner before he can swing his weapon in your direction. Don’t worry about accuracy. Fire an aggressive automatic burst in his direction to take him down. This is the first of three tactical challenges you can complete in this mission. Complete all three to unlock UBSG underbarrel shotgun attachment.

Enemy Profile: Mounted Machine Gun

Mounted machine guns are heavy, suppressing, medium-range threats. These miniguns are sometimes found in fixed positions, but they’re usually mounted on vehicles. Mounted machine guns should be taken seriously whenever encountered. When the gunner isn’t firing at you, peek out of cover and fire a burst in his direction. Some of these weapons have a front shield, preventing a frontal assault. In that case, try to get around the machine gunner to get a good shot at him, where there is no shield protecting him. Explosive weapons, like grenades, are also effective when engaging these enemies.

Keep reading with a free account

The first 3 sections of Tom Clancy's Ghost Recon Future Soldier are open to everyone. An account opens the rest of it, and every other guide in the archive. It's free, and there's nothing to buy.

Bought guides on the old Prima Games site? Your account and every guide you own moved here, so there's nothing to buy again. Sign in.

Create a free account Or browse our free guides

PreviousSecure Gabriel Paez NextReach Paez’s Hideout