
Tom Clancy's Ghost Recon Future Soldier Guide Multiplayer Adversarial
The Combatants

// The Combatants
Divided into three distinct classes, the combatants on either the Ghost or Bodark teams are not necessarily carbon copies of each other. On the contrary, they have their own weapons, unlock progression, XP levels, and abilities, allowing for full customization of not just a particular style of play per class, but also per round. Learning when you’ll be attacking or defending is key to choosing how you upgrade your characters, and while we won’t tell you how to upgrade, we’ll certainly tell you what types are available for every class on every side. At certain points along the upgrade path, you’ll be forced to make a choice between two equally tempting options. Don’t make those choices lightly; the only way to undo an upgrade choice is to use a Respec Token, which everyone gets at Level 1 and again at Level 50, and can only be used once. Reaching Level 50 with that team’s class will also unlock an additional class-specific character customization slot, allowing you to level up again and choose another set of options.
Be Like Water
One of the most interesting things about Ghost Recon Future Soldier’s Adversarial multiplayer is just how variable each and every match is. Every mode requires a different strategy and squad makeup, and one game will almost never go the same as the next. As a result, being able to quickly adjust to the situation is just as important as the upgrade progression. In the pages to come, you’ll find each of the maps dissected and laid out, as well as tips straight from the testers who have spent hundreds of hours in direct competition. Take their advice to heart and use this information well, for no asset is more valuable when going head-to-head with other living players than intelligence.
Universal - All Classes
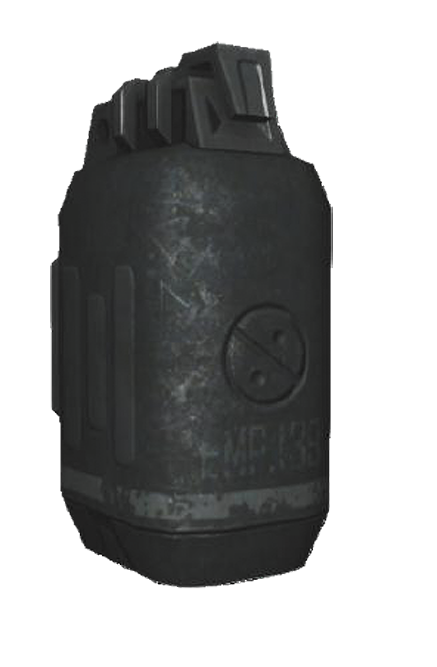
The EMP is an invaluable tool for dealing with emplacements like Turrets, Sensors, and UAVs. Any hostiles that are hit by an EMP will lose the use of any of their electronically-aided equipment, meaning their heads-up display, mini-map, intel, threat indicators and targeting reticule.
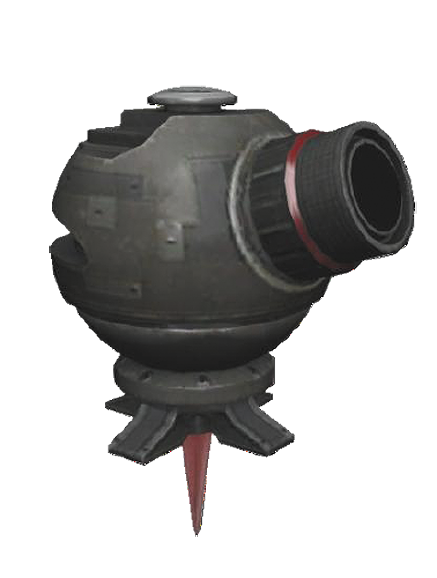
Cameras are one of the most valuable items in any soldier's arsenal, allowing for 360 degree views of the nearby area, tracking threats and exposing them for the entire team. Cameras do have one problem, however: their all-seeing eye is limited to heat-based detection, meaning optical camouflage can mask an approach. Unlike other deployables, cameras are not one-time-use items; they can be retrieved and re-deployed as needed unless destroyed.
Though any soldier can heal a squadmate that is bleeding out, they can do so much faster with a Med Kit. In addition, the Med Kit will raise your downed squadmate with greater health. Better still, those carrying a Medical Kit can revive themselves if they're caught bleeding out, turning a potentially fatal injury into nothing more than a scratch and a chance to seek revenge.
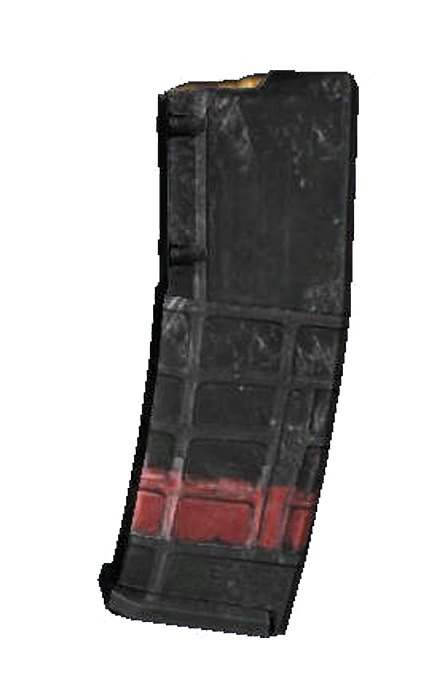
The Rifleman's Interceptor Armor gives him a noticeable advantage when going up against non-armored classes. Equipping Armor Piercing rounds helps even those odds, adding more effectiveness to every shot thrown toward a Rifleman.
Scout-Specific Equipment
So long as a Scout has stopped moving for a few seconds, his Optical Camouflage will kick in, making him far less visible not just to the naked eye, but to all thermal detection equipment (UAV, Camera Sensor, Sentry Turret, OTR Scanner, and NVT Scope). This makes Scouts perfect eyes-on infiltrators, allowing them to hide in plain sight. Just remember, the second you move as a Scout, the effect is broken, and it takes a few more seconds of inactivity to restore the cloak.
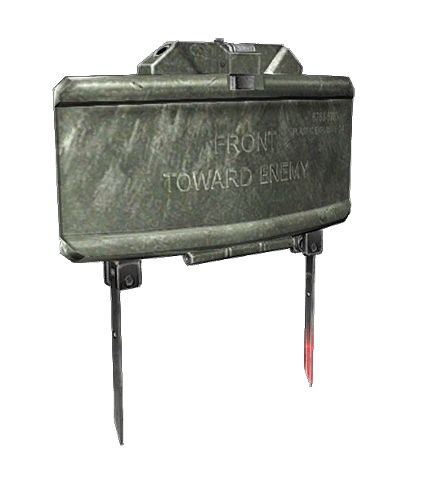
Point a Claymore in the direction of an approaching enemy and get ready for some serious fireworks. Just as effective as a kind of early warning system as they are an explosive deterrent, Claymores are often noticed at the last second—far too late for a hostile to react in time to escape the blast.
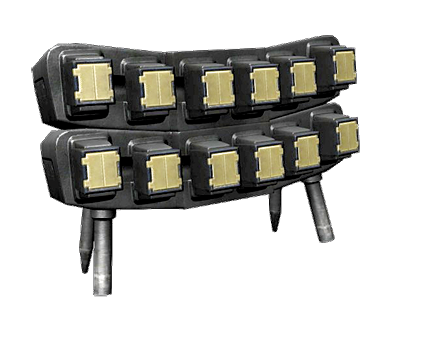
Like the Claymore, a Stun Mine can only trigger in one direction, but the disabling effect can also hit multiple targets. This is one of the only ways short of using a Stun Gun to take out enemies that can then be Data Hacked to reveal the opposing team's position, and the element of surprise means placing a Stun Mine around corners can be a great way to scoop up intel without risking a firefight.
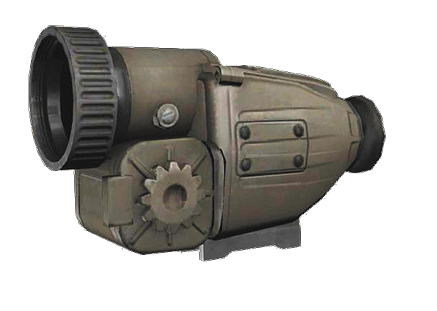
The single greatest advantage of the NVT Scope is its ability to highlight enemies in a thermal view when peering through the optics, though it also adds a modicum of magnification for taking down long-range targets as well.
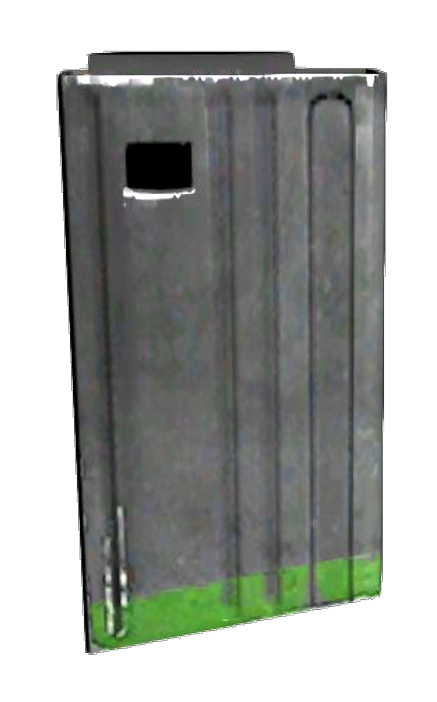
You aren't a Future Solider without gaining access to some seriously cutting-edge tech. Case in point: EXACTO Rounds, which have the ability to lock onto enemies and actually adjust their trajectory mid-flight. You won't be firing around blind corners or anything, but an enemy on the run is no longer a target that will escape just because you were only able to shoot near them. Also if your team has intel on the enemy, you can pre-lock onto them through obstacles. When the targeted enemy enters a clear line of sight, you're immediately ready to fire.
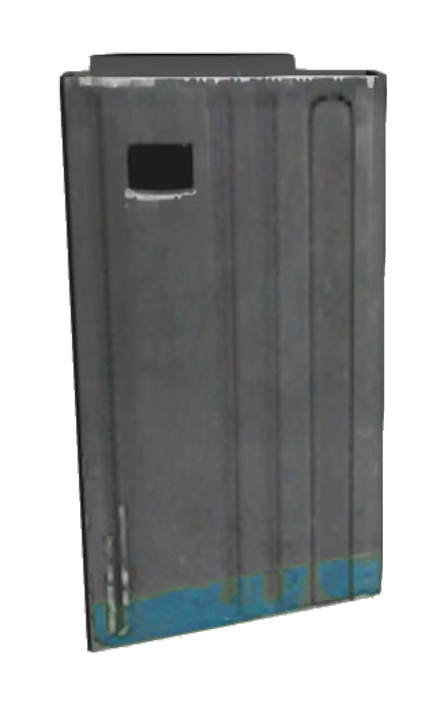
Being a sniper already has its advantages, but adding RAUFOSS Rounds ups a sniper's lethality even more by making each and every shot explosive in addition to packing the normal long-range punch.
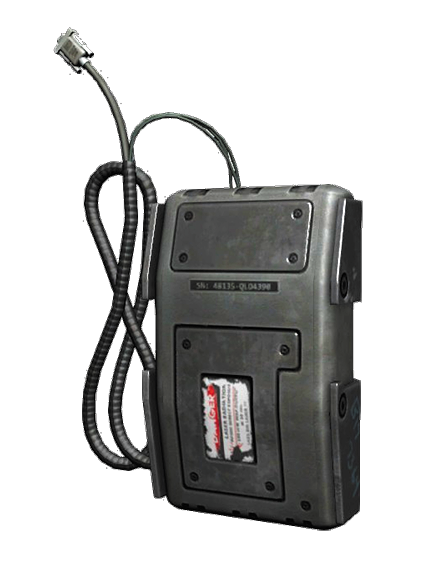
The standard Optical Camo is great for stationary positions, but the second a Scout moves, the effect is disengaged. Not so with the Augmented Camo, which allows for continued cloaking even while moving at a controlled speed. This is a great way to slip by all thermal detection equipment (UAV, Camera Sensor, Sentry Turret, OTR Scanner and NVT Scope). Note that firing, running and rushing will still break the effect.
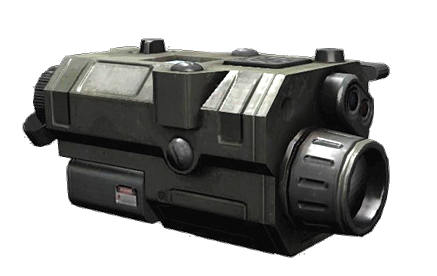
If Intel is the most valuable asset on the battlefield, the OTR Scanner allows for collection and relay of that intel just by observing enemies caught while looking through this side-rail attachment. Note that one must be in a scoped view to actually collect the data, but the limited field of view is more than made up for by the ability to relay any enemy positions to the rest of your squad.
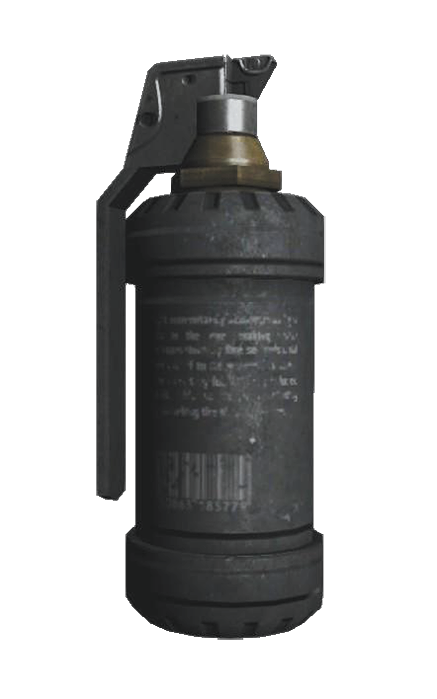
Anyone caught in the blast radius of a Flashbang is rendered completely blind for many seconds. This makes the Scout-only deployable a great means for breaching into a new area or confusing an attacking squad, opening them up to fire from your squadmates before they ever have a chance to return fire or find cover.
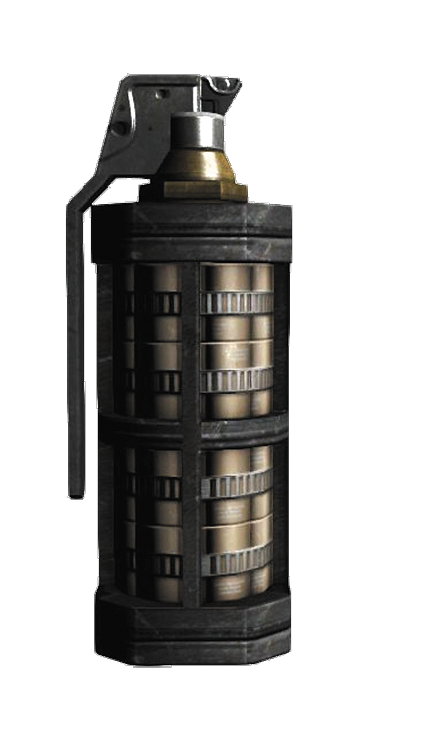
A soldier's HUD delivers tons of tactical data in real time, but it can be fooled. That's precisely what a Decoy Grenade does, spamming an enemy's display with false data, indicating incoming fire from multiple angles and creating the illusion of an intense firefight on their mini-map. Even an enemy's ears are fooled, as the Decoy also confuses with the sounds of scattered gunfire wherever it's been thrown.
Engineer-Specific Equipment
Engineers' ability to gather intel isn't just delivered by way of equipment that must be used, they have the ability to detect when an enemy has scoped in and from what direction. It's not a laser-precise indicator, but no other class has the split-second advantage of knowing incoming fire is about to happen before it actually happens.
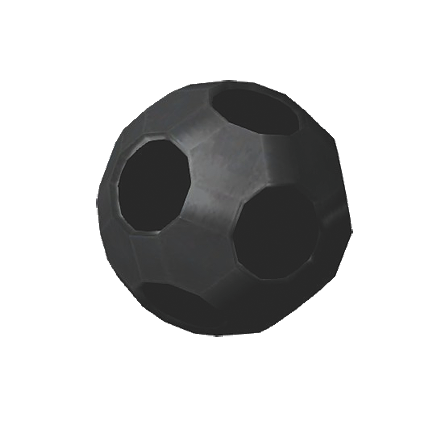
The Engineer is the only class that gains access to Sensors which create a complete bubble of X-Ray-based observation, allowing detection of enemies as they approach. Sensors are absolutely invaluable to providing data on objectives and areas that may be hotly contested, and should be used whenever entering a hot zone for the first time.
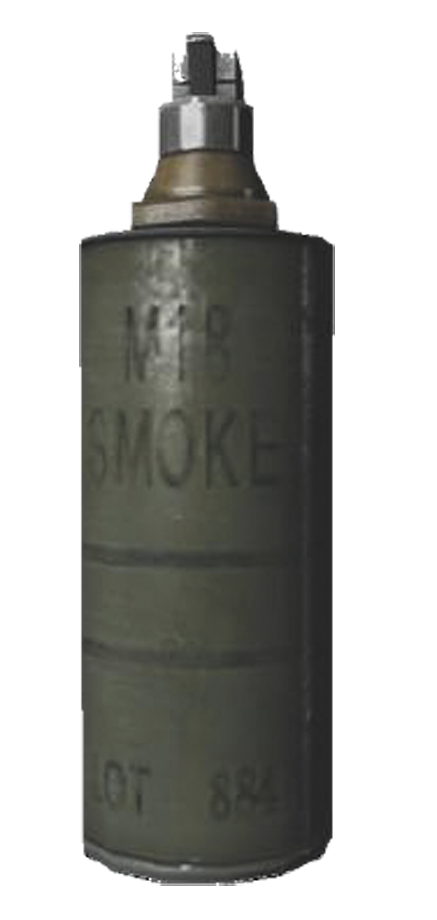
You can't hit what you can't see, and the single best means of obscuring basic vision on the battlefield is with smoke. Thick plumes render anyone or anything inside the field near invisible, with only certain scopes that allow for alternate vision modes to peer through the haze. Smoke grenades work equally well on offense or defense, helping to create cover for advancing attackers or hiding the location of defenders.
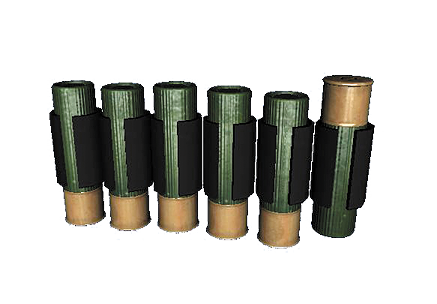
This magnum shotgun round fires a single projectile which increases range over standard buckshot but decreases control.
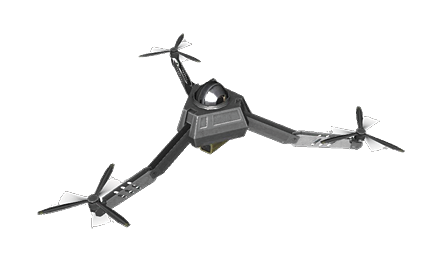
These unmanned aerial vehicles are a great means of peering down onto the battlefield to gather intel without actually needing to be constantly controlled. Park a UAV near an objective with a clear line of sight and any moving, non-cloaked enemies will instantly be painted for your squad to see. An Engineer that knows a level's layout has the ability to detect incoming threats from almost any angle.
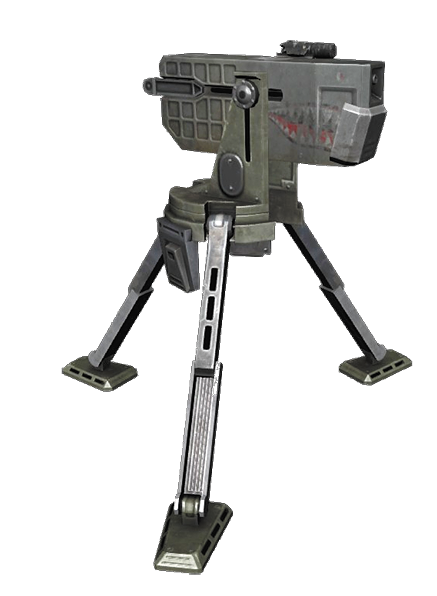
By dropping a Turret, Engineers can single-handedly control and lightly defend an area until reinforcements arrive. Turrets placed in a room's corner, or around a blind turn have an even greater chance of unloading on enemies before they can be disabled with an EMP. They also serve as a warning system, indicating when enemies are drawing near from a direction the Turret is facing and will engage UAVs as well as human targets.
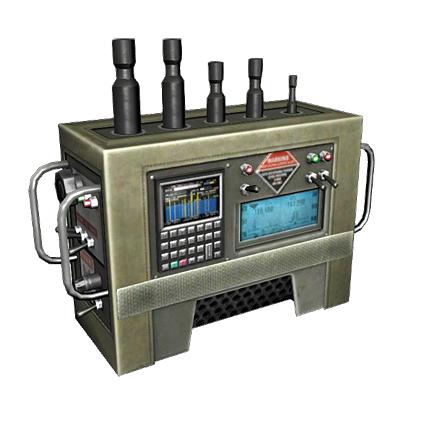
Engineers aren't just gifted at gathering intel, they're equally capable of masking it. When a Jammer is deployed, any allies inside the protective bubble are completely shielded from intel gathering equipment. Useful for not only infiltration, but defense, the Jammer effectively reduces a hostile's ability to acquire a target. In addition, the Jammer will interrupt an enemy's HUD when they're within the bubble.
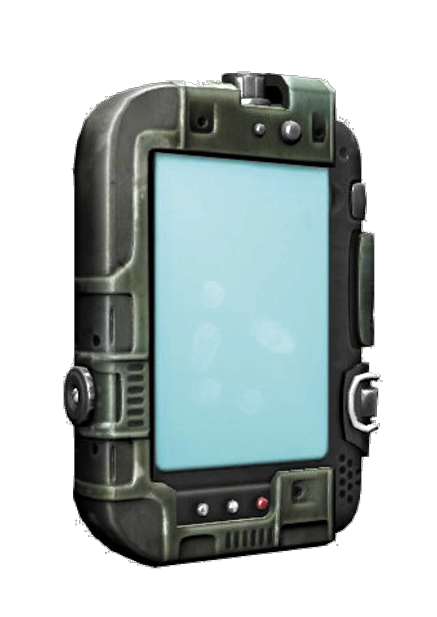
While the Confidence System is the best way to cut down on the time it takes to capture an objective or data hack, the Field Computer can effectively take the place of a teammate by adding an extra pip to a filling objective meter. It's no exaggeration to say that a Field Computer has the potential to completely change momentum in just a few seconds.
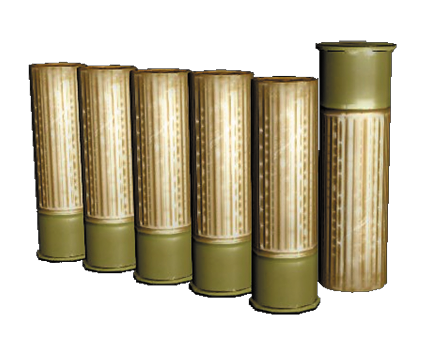
If stunning isn't your thing, there's always the intense heat of Dragon's Breath rounds, which burp fire in a wide cone of effect. Any shots that happen to tag a hostile will continue to damage them, burning for a few seconds after the initial impact. As with all incendiary effects, if you find yourself on fire, go prone and roll by moving left or right to put out the flames.
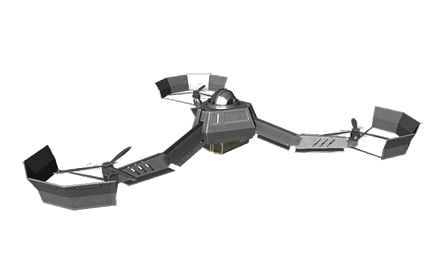
Quite possibly the most potent deployable in an Engineer's arsenal, the UCAV is a UAV packing the ability to fire fairly weak explosives at targets. This makes them a fantastic harassment tool, and should an enemy be slow to react, the UCAV is more than capable of taking them out with a few shots. The potential to sneak in crippling and disorienting shots makes this far more than a simple UAV; it can both gather intel and annoy in equal measure.
Rifleman-Specific Equipment
The always available additional armor that Riflemen carry means they can take more hits and dish it right back out with high rate-of-fire weapons like Assault Rifles and LMGs. Their Interceptor Armor is standard no matter the level, makingRiflemen great at leading a charge into an objective and deadly for other classes trying to win in a one-on-one shootout.
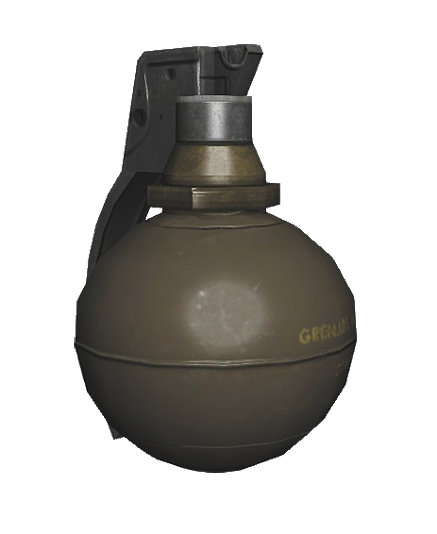
The only ones capable of lobbing high explosive firepower, a Rifleman's frags are, hands-down, one of the most effective deterrents available when trying to quickly stop a hostile from capturing an objective. A relatively short fuse means there's often little to no time to avoid an incoming frag, and when coupled with the blindness of a Smoke or EMP grenade, they're even more effective.
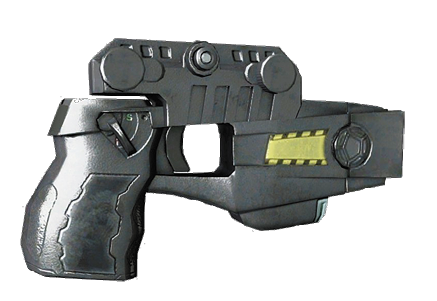
By attaching the Stun Gun not as a secondary weapon, but an underbarrel option for Rifles, a Rifleman gains the ability to administer less-than-lethal attacks without sacrificing the secondary firearm. A stunned enemy is vulnerable to being Data Hacked, turning their team's own shared intel into a liability.
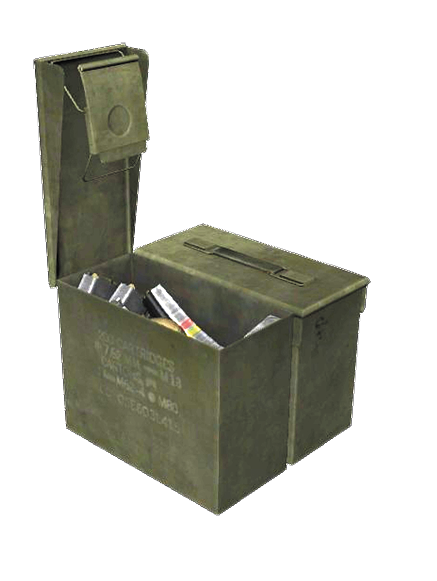
Short of a Resupply Drop objective or looting an enemy's weapon off their dead body, there's no way to stock up without respawning. No way, that is, except for an Ammo Box, which lets teammates load up on both ammo and grenades, and givingthe Rifleman experience for their assistance to boot.
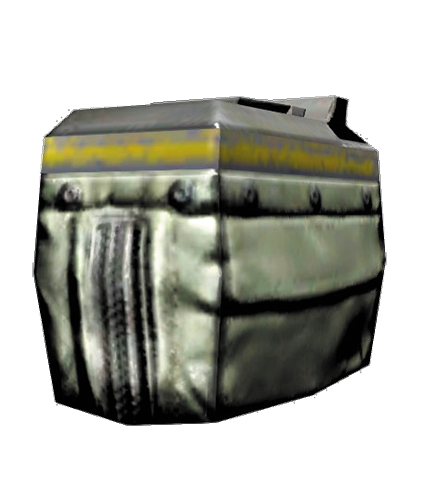
In much the same way Incendiary Grenades can create an area of deterrence, Incendiary Ammo is capable of creating small zones of denial, but they also continue to burn hostiles that have been struck with a round. Even if an enemy happens to make it around a corner, if they've been hit with enough shots and don't have time to go prone and roll, the damage of the ammo burning can finish them off.
40mm Smoke/EMP/HEDP Grenade Launcher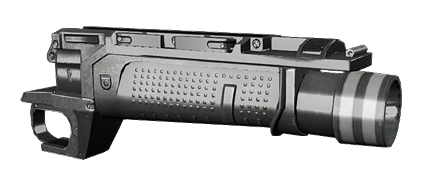
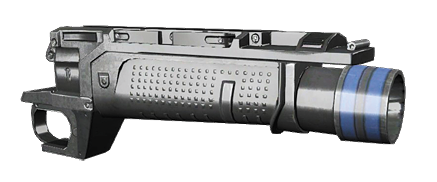
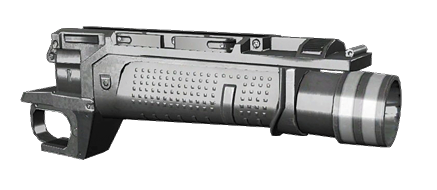
By attaching a grenade specific underbarrel to the Rifleman's assault rifles, he's capable of launching covering smoke or debilitating disruptions much farther than a hand-thrown grenade. Not only that, but grenades shot from a launcher have an area effect, allowing EMPs to take down uavs without actually having to hit them directly.
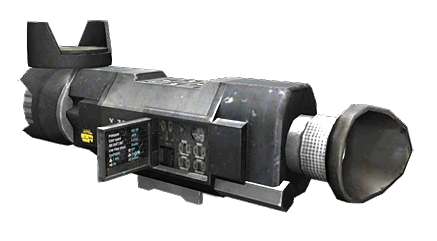
Though the Rifleman is often seen as a heavy weapons/defender class, he's the only one that gains access to the Backscatter scope, allowing for X-ray vision modes revealing both players and equipment through walls. A Scout that would normally be invisible to UAVs and thermal scopes is now lit up as if they were never cloaked to begin with.
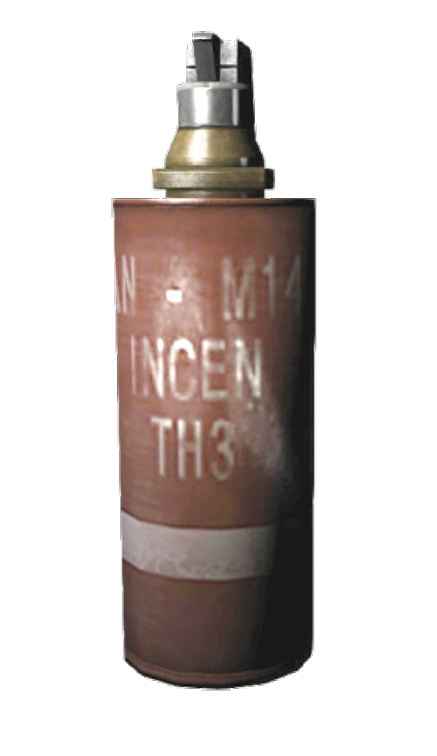
The thermite payload of incendiary deployables creates an area of effect that is deadly to any hostiles attempting to pass through. Best used in choke points to deny access to areas beyond, these grenades will set anyone foolish enough to get close ablaze, allowing for damage over time. The enemy might make it past a burning Incendiary Grenade, but they won't make it far before succumbing to the intense heat unless they can drop, drop, and roll quickly.
The Scout—Weapons: Sniper Rifles, Submachine Guns
Scouts represent a squad’s eyes and ears. They are able to see long distances thanks to their sniper rifles and slip through defenses with Optical Camo. As the only class that can cloak, Scouts excel at seeing without being seen, and their cameras can be deployed and picked up again to create a disc of constant observation. The Optical Camo also hides all Heat signatures, making UAVs, night vision scopes, and Sensors blind to their presence.
// Ghost
Ghost Scout—Starting Gear
| Appearance | Primary Weapons | Secondary Weapons | Grenades | Equipment |
|---|---|---|---|---|
| Watch Cap V1 | M110 | 45T | Flashbang | Camera |
| MP7 | Stun Gun | Smoke | ||
| EMP |
// Progression
| Level | Reward |
|---|---|
| 4 | Thermal Optic OR Custom Sniper Optic |
| 6 | Watch Cap V2 |
| 8 | Med Kit |
| 12 | BLD-3 Flash Bulb |
| 14 | CW Mask V1 |
| 16 | Exacto Ammo OR OTR Scanner |
| 20 | SRR OR P90 |
| 22 | CW Mask V2 |
| 24 | KARD |
| 28 | Stun Mine OR Augmented Camo |
| 30 | CBRN V1 |
| 32 | MSR OR Vector |
| 36 | Armor Piercing Ammo |
| 38 | CBRN V2 |
| 40 | Claymore OR Raufoss Ammo |
| 44 | Hood V1 |
| 50 | Hood V2 |
// Tactical Analysis
The Ghost Scout’s Level 4 choice could largely influence the choices later on. Would you rather be a hang back and be a long-range shooter, using the distraction and cover of the early Decoy Grenades and Optical Camo to snipe from afar, or do you opt for a close-range fighter who can get an early peek through smoke? Use those early levels to feel out both options by changing your loadout every few rounds. If you like the long-range game, there are plenty of options to make you even more effective, and if you like playing closer to the action, the same is true. While you certainly can toe the line between both ranges, the end result will be a Scout that is arguably spread too thin. Instead, decide on one, sniper or scrapper, then commit to that decision, with the respective branching upgrades down the line.
Level 16 offers rounds that can auto-adjust mid-flight at the cost of actual damage (sniper) or an OTR Scanner that can relay spotted enemies to the rest of your squad, while Level 20 gives you yet another sniper rifle (this one has a built-in silencer) or SMG. while Level 20 gives you yet another sniper rifle (one that has a built-in silencer) or SMG. By the time you’ve made it to Level 28, you should absolutely be locked in (save a Respec Token for level 25—if you still don’t feel comfortable in that role, then switch choices), because the Augmented Camo option is best used at a distance. You can move while staying crouched, but that movement will almost certainly give you away to natural eyes (but not auto-turrets or UAVs, making it great for sneaking around to sniping spots), while Stun Mines are a fantastic way to take down enemies (even ones chasing if you’re fast enough) and then hack them to give your team intel on the entire enemy team.
Level 32’s MSR (sniper) or Vector (scrapper) weapon choices should be obvious; the former is a one-hit kill in most instances, while the latter has a blistering 1440 rounds per minute firing rate. Coupled with the Raufoss Ammo found in level 40, very few unarmored opponents could survive unless they get the jump on you, and even then it would be close. Then again, Claymores (also an option at 40) and ladders are one of the most potent combinations of triggers out there, making staking out a sniping spot that much safer. It’s your choice, but make it early to yield the best results.
// Bodark
Bodark Scout—Starting Gear
| Appearance | Primary Weapons | Secondary Weapons | Grenades | Equipment |
|---|---|---|---|---|
| CWH-1 V1 | PSL-54C | GSh-18 | Flashbang | Camera |
| PP2200 | Stun Gun | EMP |
// Progression
| Level | Reward |
|---|---|
| 4 | Thermal Optic OR Custom Sniper Optic |
| 6 | CWH-1 V2 |
| 8 | Med Kit |
| 12 | BLD-3 Flash Bulb |
| 14 | CWM-1 V1 |
| 16 | Exacto Ammo OR OTR Scanner |
| 20 | VSS OR PP19 |
| 22 | CWM-1 V2 |
| 24 | DTS-33 |
| 28 | Stun Mine OR Augmented Camo |
| 30 | MTM-1 V1 |
| 32 | KSVK OR Skorpion |
| 36 | Armor Piercing Ammo |
| 38 | MTM-1 V2 |
| 40 | Claymore OR Raufoss Ammo |
| 44 | CWH-2 V1 |
| 50 | CWH-2 V2 |
// Tactical Analysis
Bodark Scouts should loosely follow the same general mantra as Ghosts, specifically “pick one discipline and stick to it,” but without the same need for stringency, as there is one key difference: at Level 20, you’re given the option to stick with an SMG with a slower rate of fire, but more rounds per clip (14 of them to be precise), or go with a higher powered SRR that can actually spray bullets. While neither the Ghost or Bodark option is explicitly a sniper rifle in the conventional sense, they both offer significant power over traditional SMGs—the only other option for a Scout—yet the Bodark option is fully automatic, meaning the stopping power is both more effective, and the magazine is larger to compensate. Simply put, in a Ghost vs. Bodark showdown of the exact same choices, the Bodark option has the range and the number of rounds to end things faster at distance.
This is the single largest distinction, but it’s one that could pay dividends during the middle XP levels. In contrast, the Ghost SMG option at Level 20 gifts a higher rate of fire with the exact same stats as the Bodark SMG, but with a smaller clip. As a result, Bodark Scouts opting for the sniper route have an easy quick-fire option on both ends of the development spectrum that offer more shots per mag (though a slower fire rate in the SMG department) than Ghosts, meaning regardless of progression path, mid-progression Bodarks can leverage their equipment while staying CQC-ready in a way Ghosts can’t—at least not in terms of sheer mag size.
Where this turns into a liability is at Level 32, where the Bodark SMG option is both plainly slower—just 900 rounds a minute vs. Ghosts’ vastly superior 1440 with the same stats, and the Ghosts’ clip holds eight more rounds. So Bodark tactics should shift toward using that Optical Camo (especially the Advanced version if you’re a scrapper) to get the drop on Ghosts.
// Ghosts vs. Bodark
It’s clear that while most of the progression between the two teams is similar, the late-level unlocks give Ghosts a bit of an advantage. Use of disruptive tactics like Stun Mines can be the turning point, allowing Bodark squads access to Ghost networks to tip the balance, especially because Ghosts end up defending more often than not.
The Engineer—Weapons: Shotguns, Personal Defense Rifles
Neither as stealthy as Scouts, nor as heavily armed as Rifleman, Engineers are the information brokers of the battlefield. They can both hack and observe in equal measure, and have the unique ability to see when enemies have them scoped in, allowing them a split-second opportunity to avoid being gunned down during firefights. Yet they can bring intense firepower into close-range fights. Engineers are the all-seeing eye of the battlefield, able to capture enemy positions from on high with UAVs and Sensors, and hack objectives faster than any other class (with the proper item equipped). Their handiness with electronics means they can just as easily disrupt enemy. When leading a charge into an area, an Engineer is simultaneously the most diverse and specialized part of a squad.
// Ghost
Ghost Engineer - Starting Gear
| Appearance | Primary Weapons | Secondary Weapons | Grenades | Equipment |
|---|---|---|---|---|
| Tac Cap Opt A V1 | Goblin | 45T | Sensor | Camera |
| M590A1 | Stun Gun | Smoke | ||
| EMP |
// Progression
| Level | Reward |
|---|---|
| 4 | UAV OR Field Computer |
| 6 | Tac Cap Opt A V2 |
| 8 | Med Kit |
| 12 | BLD-3 Flash Bulb |
| 14 | Tac Cap Opt B V1 |
| 16 | Decoy OR Dragon’s Breath |
| 20 | M1014 OR PDR-C |
| 22 | Tac Cap Opt B V2 |
| 24 | KARD |
| 28 | Slugs OR Jammer |
| 30 | Tac Cap Opt C V1 |
| 32 | M12 OR L22A2 |
| 36 | Armor Piercing Ammo |
| 38 | Tac Cap Opt C V2 |
| 40 | Sentry Turret OR UCAV |
| 44 | Watch Cap V1 |
| 50 | Watch Cap V2 |
// Tactical Analysis
Unlike the Scout, the Engineer has a bit more leeway in how he want to progress through their unlocks. Level 4 gifts two different but equally useful options: a Field Computer, which allows for not only faster captures of objectives than any other class, effectively making the Engineer point man on any captures, but also lets him data hack faster than others, too. The UAV, on the other hand, is an invaluable tool for gaining intel passively. It relays enemy position data from on high without drawing too much attention. Better still, UAVs are incredibly mobile and can be left “in reserve” while fighting enemies. Park them and peer through them at any time. Both options have serious advantages, making the Engineer’s decisions difficult—and they don’t get easier as the levels go up.
Level 16 is a perfect example because if offers a means of creating cover in the form of Smoke Grenades, something not available to other classes (unless a Rifleman equips an underslung Smoke Grenade Launcher, which still must be unlocked). It’s an extremely effective way to feint an approach from one angle while ambushing from another, or just a great way to create the illusion of activity where there is none. The Dragon’s Breath ammo creates lasting damage over time with each hit, but it sacrifices both range and overall power, so it’s best used with a weapon that can dispense multiple rounds quickly. Fittingly, Level 20 offers a choice between the Engineer’s two weapon disciplines: the M1014 shotgun with fantastic stopping power, or the PDR-C that fires its 20 round mag at 780 rounds per minute. PDRs give you range flexibility, but shotguns, when properly aimed in close quarters, will nearly always win a head-to-head shoot-out. They’re simply more powerful. If you opted to observe from afar with a UAV, PDRs are probably more your style. If you wanted to hack more quickly, however, shotguns are the ultimate repellent against would-be attackers and a great way to overwhelm hostiles trying to capture an objective.
Level 28’s Jammer and Slugs further split the Engineer’s play styles. The latter offers better range for shotgun blasts (at the cost of accuracy), while the former masks approaching allies from all surveillance equipment. Having more shotgun range is nice, but being able to deploy a bubble of electronic (though not visual) invisibility can be a huge asset. Remember that it’s a deployable item, however, so you’ll lose the use of a UAV or other equipment if you elect to use it. Level 32’s shotgun and PDR options are formidable, gifting a shotty with full auto fire for applying a huge amount of damage, though the kick obviously means it’s not exactly precise. The bullpup PDR means quick aiming and a great rate of fire for a 30 round magazine, so if you opted for longer range, definitely give this new toy a try.
When you finally reach Level 40, a unique opportunity presents itself: Do you opt for a Sentry turret that can automatically destroy UAVs (and non-cloaked enemies), or do you go with a UAV that can actually attack? The UCAV is startlingly good at destroying lone hostiles trying to capture an objective, and its nagging ability is fantastic. Opting for the UCAV effectively means you can spot targets and begin engaging them immediately. The vehicle’s agility means shots can be rained down from above and cover is whatever building is nearby. The Sentry turret can be easily taken out with EMPs, which makes the UCAV an even more tempting option.
// Bodark
Bodark Engineer—Starting Gear
| Appearance | Primary Weapons | Secondary Weapons | Grenades | Equipment |
|---|---|---|---|---|
| GFC-1 V1 | AKS-74U | GSh-18 | Sensor | Camera |
| RMB-93 | Stun Gun | Smoke | ||
| EMP |
// Progression
| Level | Reward |
|---|---|
| 4 | UAV OR Field Computer |
| 6 | GFC-1 V2 |
| 8 | Med Kit |
| 12 | BLD-3 Flash Bulb |
| 14 | CWC-1 V1 |
| 16 | Decoy OR Dragon’s Breath |
| 20 | MTs-255 OR SR-3M |
| 22 | CWC-1 V2 |
| 24 | OTS-33 |
| 28 | Slugs OR Jammer |
| 30 | GWC-1 V1 |
| 32 | Saiga 12 OR SA58 OSW |
| 36 | Armor Piercing Ammo |
| 38 | GWC-1 V2 |
| 40 | Sentry Turret OR UCAV |
| 44 | GFC-2 V1 |
| 50 | GFC-2 V2 |
// Tactical Analysis
While the Bodark Engineer doesn’t diverge from his Ghost counterpart until Level 20, the split is interesting. The shotgun is equal to the Ghost version in all stats save for one: It has a three round deficit in capacity, leaving just five shots before a full reload is necessary. By contrast, the PDR sports the same stats as its Ghost doppelganger and has a higher rate of fire. The MTs-225 shotgun has amazing stopping power, but that’s an awfully low number of shots before having to stop to reload. Fortunately, the OTS-33 sidearm offered to Bodark teams is a beast, spitting out 900 rounds a minute—that’s right, it’s a fully automatic pistol. The magazine is three rounds larger to compensate, too, making the Bodark sidearm choice a clear advantage—but only once you get to Level 24.
The Saiga 12 shotgun available at Level 32 helps tip the advantage back toward Team Bodark. It is a little more clunky, but fires 25 percent faster and with a tighter spray. The SA58 OSW PDR, on the other hand, is a quirky thing that offers a two-round burst shot instead of the 1,000+ round per minute stream of the Ghosts’ counterpart. Like the shotgun, the Bodark version of the PDR is a little slower, but it’s also got more punch with those double-tap bursts than the Ghosts’ version. The burst fire will require changing up engagements a little (more aiming at a target first rather than unloading with a hail of gunfire), but it can be a surprisingly effective long-range option the shotguns could never be.
// Ghosts vs. Bodark
In terms of raw power, the Bodark Engineer can outpace the Ghosts’ version, but most of the weapons have a slight maneuverability deficit. This means overall movements are a bit more sluggish, but if they’re able to get the drop on a lone Ghost, the battle will be over before a firefight has a chance to break out. The automatic sidearm in particular is a great tool for CQC, and shouldn’t be forgotten when creating late-level loadouts.
The Rifleman—Weapons: LMGs and Assault Rifles
Because he’s the source of a squad’s heavy firepower, the impact of a Rifleman cannot be ignored. The only unit capable of wielding an LMG and its devastating suppression effect, Riflemen are tasked with providing covering fire, keeping enemies pinned to allow flanking by other squad members, or using underbarrel attachments on their ARs to lob grenades or reveal enemies (even through thin walls) that would be otherwise invisible to Heat-detecting equipment. Riflemen don’t just dish out the heat, they can take more of it, too, thanks to their increased armor over other classes.
// Ghost
Ghost Rifleman—Starting Gear
| Appearance | Primary Weapons | Secondary Weapons | Grenades | Equipment |
|---|---|---|---|---|
| MICH 2015 V1 | ACR | 45T | Frag | Camera |
| Mk48 | Stun Gun | Smoke | ||
| EMP |
// Progression
| Level | Reward |
|---|---|
| 4 | 40mm Smoke Launcher OR UB Stun Gun |
| 6 | MICH 2015 V2 |
| 8 | Med Kit |
| 12 | BLD-3 Flash Bulb |
| 14 | FAST-B Opt A V1 |
| 16 | Ammo Box OR 40mm EMP Launcher |
| 20 | 417 OR Stoner 96 |
| 22 | FAST-B Opt A V2 |
| 24 | KARD |
| 28 | Incendiary Grenade OR 40mm HEDP Launcher |
| 30 | FAST-B Opt B V1 |
| 32 | TAR-21 OR LSAT |
| 36 | Armor Piercing Ammo |
| 38 | FAST-B Opt B V2 |
| 40 | Incendiary Ammo OR Backscatter Optic |
| 44 | IWH-2014 V1 |
| 50 | IWH-2014 V2 |
// Tactical Analysis
A difficult choice should be made early on with the Ghost Rifleman: LMGs or assault rifles? LMGs are essential to suppressing enemies, and their effectiveness is increased even more when a Bipod attachment is added to stabilize while prone or using low cover, but the Assault Rifle’s ability to use underbarrel attachments like grenade launchers or the incredibly useful stun gun makes it formidable as well. The ability to propel grenades (including Frags, which only the Rifleman gets) long distances with an AR means both explosives (or debilitating effects like EMPs) and normal firepower is always at the Rifleman’s fingertips. Conversely, opting for an AR over an LMG means no suppression effect, which is a key component in securing and holding objectives.
Unlocked at Level 4, the underbarrel Stun Gun can be an incredibly effective intel-gathering option. The alternative, a Smoke Grenade Launcher, does have its own advantages in that it can lob smoke over huge distances for both distraction and obstruction of views. Both are AR upgrades, however, so keep that in mind if you’ve chosen the LMG route. At level 16, things get more interesting. Another Grenade Launcher (this time an EMP version) is great for taking out equipment (it will auto-detonate near UAVs, for instance), but the Ammo Box can provide valuable resupplies of not just ammo, but also grenades anywhere in the field for the whole squad. If you’ve chosen the LMG route, the Ammo Box is doubly important because it allows full refills of the large-magazine suppression weapon.
AR users will fall in love with the 417 unlocked at Level 20. Although it’s only a single-fire rifle, the stopping power works wonders even at range. The Stoner 96 is also a beast of an LMG, spraying at 960 rounds a minute with a big, 150 round clip. Accuracy or overwhelming firepower—your choice. Level 28 further cements the underbarrel options for AR users, as it offers a High-Explosive Dual Purpose Grenade Launcher or the lasting effect of an Incendiary Grenade. Again, the Rifleman is the only class that can use these types of grenades.
If you stuck with the LMG, the LSAT that is unlocked at Level 32 offers a tighter cone of fire, which should make up nicely for its lower rate of fire than the Stoner. On the AR side, the TAR-21 adds a three-round burst and ten more rounds per mag than the previous weapon. This comes in handy when it’s coupled with the Incendiary Ammo that is unlocked at Level 40. But the Backscatter Optic (which can attach to both an LMG and AR) offers X-ray detection—something even Scouts can’t hide from. Once again, the Rifleman is the only class that gains access to this scope, so make good use of it in situations where Heat detection isn’t working.
// Bodark
Bodark Rifleman—Starting Gear
| Appearance | Primary Weapons | Secondary Weapons | Grenades | Equipment |
|---|---|---|---|---|
| GPH-3A V1 | AK-200 | GSh--18 | Frag | Camera |
| PKP | Stun Gun | Smoke | ||
| EMP |
// Progression
| Level | Reward |
|---|---|
| 4 | 40mm Smoke Launcher OR UB Stun Gun |
| 6 | GPH-3A V2 |
| 8 | Med Kit |
| 12 | BLD-3 Flash Bulb |
| 14 | GPH-1A V1 |
| 16 | Ammo Box OR 40mm EMP Launcher |
| 20 | AN-94 OR Type 95 |
| 22 | GPH-1A V2 |
| 24 | OTS-33 |
| 28 | Incendiary Grenade OR 40mm HEDP Launcher |
| 30 | GPH-2A V1 |
| 32 | A-91 OR Ultimax Mk.5 |
| 36 | Armor Piercing Ammo |
| 38 | GPH-2A V2 |
| 40 | Incendiary Ammo OR Backscatter Optic |
| 44 | GPH-3B V1 |
| 50 | GPH-3B V2 |
// Tactical Analysis
The Bodark Rifleman’s weaponry differences offer an interesting twist on more than just base stats. In contrast to the Ghosts’ AR option, the AN-94 unlocked at Level 20 offers a two-round burst and ten more rounds per mag, while the LMG is seriously limited. With almost half the firing rate and only 80 rounds per magazine, the Bodark Type 95 LMG is no match in raw output for what the Ghosts have, but its bullpup design means it’s quite a bit more maneuverable to offset the lack of spraying power. Not surprisingly, then, the Level 32 differences even things out a little more. Though the Ultimax Mk.5 LMG still doesn’t have the firing rate to match the Ghosts’ option, like the other Bodark weapon options, it’s more maneuverable and is more in line with the Ghost LMG for this level, with a bigger mag (150 rounds) and a solid 540 RPM firing rate to the Ghosts’ 660. The A-91 Assault Rifle is even more formidable, ratcheting up to 858 rounds a minute (the Ghosts’ AR is a three-round burst) and offering more power without losing that maneuverability.
// Ghosts vs. Bodark
You’ve seen it mentioned more than once, but what the Bodark team lacks in sheer firing speed or capacity, they make up for across all their weapons in maneuverability. Of course, maneuverability can be key when acquiring targets and shooting from the hip. Still, when properly set up, Ghosts have a distinct advantage with their weapons’ base stats. As a result, LMG players may have an easier time on Ghosts, while the augmented abilities and better chance for intel hacking while using an Assault Rifle can help Bodark players be more agile.
Be Like Water
One of the most interesting things about Ghost Recon Future Soldier’s Adversarial multiplayer is just how variable each and every match is. Every mode requires a different strategy and squad makeup, and one game will almost never go the same as the next. As a result, being able to quickly adjust to the situation is just as important as the upgrade progression. In the pages to come, you’ll find each of the maps dissected and laid out, as well as tips straight from the testers who have spent hundreds of hours in direct competition. Take their advice to heart and use this information well, for no asset is more valuable when going head-to-head with other living players than intelligence.