Prima Games eGuides
primagames.com Browse Redeem a code Help
Tom Clancy's Ghost Recon Future Soldier eGuide
Sign in My Guides

Sign in or create an account

We'll email you a link. No password needed, and if you don't have an account yet, the link makes one.

By creating an account or signing in, you agree to our Terms of Service and Privacy Policy.

Have a password?

Had an account on the old eGuides site, or a code from a printed guide? Help and troubleshooting

Sign in with a password

By signing in, you agree to our Terms of Service and Privacy Policy.

Check your email

A sign-in link is on its way. It works once and expires in 15 minutes. Open it and you're in, with an account if you didn't already have one.

Contents

  • Essentials
    • Introduction
      • Introduction
      • Ghost Recon: Legacy
      • Ghost Team: Hunter
      • Interface: The Ghost HUD
      • Controls
      • Campaign Scoring and Challenges
    • Weapons
      • Gunsmith
      • Assault Rifles
      • Light Machine Guns (LMGs)
      • Personal Defense Rifles (PDRs)
      • Shotguns
      • Submachine Guns (SMGs)
      • Sniper Rifles
      • Sidearms: Pistols
      • Sidearms: Grenade Launchers
      • Items
      • ULC Weapons
    • Compendium
      • Campaign Challenges
    • Concept Art Gallery
      • Concept Art Gallery
  • Walkthrough
    • Prologue
      • Prologue
    • Nimble Guardian
      • Briefing
      • Secure Gabriel Paez
      • Hold for Extraction
      • Reach Paez’s Hideout
      • Rescue Paez
      • Escort Gabriel Paez to Extraction
    • Subtle Arrow
      • Briefing
      • Reach Observation Point
      • Locate Dede Macaba
      • Follow and Assess Dede Macaba
      • Secure Arms Shipment at the Airstrip
      • Recover the Black Box
      • Recover the Black Box at the Crash Site
    • Noble Tempest
      • Briefing
      • Locate CIA Officer Sykes
      • Secure Officer Sykes
      • Extract Officer Sykes
      • Recover Sykes’s Data
      • Reach Extraction
    • Tiger Dust
      • Briefing
      • Locate Arms Dealer
      • Capture Arms Dealer
      • Destroy Escort Vehicles
      • Secure Arms Dealer
    • Silent Talon
      • Briefing
      • Disrupt Enemy Communications
      • Engage and Destroy Forward Base
      • Locate Weapons Cache
      • Destroy Weapons Cache
    • Firefly Rain
      • Briefing
      • Infiltrate Airport
      • Sabotage the Shipment
      • Leave the Area
      • Proceed to Extraction
    • Ember Hunt
      • Briefing
      • Reach Georgian Unit
      • Locate and Secure Osadze
      • Extract with Osadze
      • Wait for Instructions
    • Deep Fire
      • Briefing
      • Infiltrate Drilling Ship
      • Disable the System
      • Reach the Helipad
      • Secure Second Ship
    • Valiant Hammer
      • Briefing
      • Reach Observation Point
      • Gather Information on Artillery Location
      • Destroy Artillery Units
      • Reach Extraction
      • Eliminate Hostile Reinforcements
    • Gallant Thief
      • Briefing
      • Infiltrate the Prison
      • Enter Security Area
      • Place Four Targeting Beacons for Air Strike
      • Free Volodin
      • Escort Volodin to Extraction
    • Invisible Bear
      • Briefing
      • Protect the Crowd
      • Proceed to General Bukharov's HQ
      • Eliminate Bukharov
    • Shattered Mountain
      • Briefing
      • Enter Compound
      • Eliminate Raven’s Rock Leaders
      • Eliminate the HVTs Before They Escape
      • Epilogue
  • Multiplayer
    • Guerrilla Mode
      • Survival, Tom Clancy-Style
      • Shanty Town
      • Office
      • Airstrip
      • Mansion
    • Adversarial
      • Introduction
      • The Combatants
      • Pipeline
      • Market
      • Overpass
      • Harbor
      • Cargo
      • Rig
      • Sand Storm
      • Underground
      • Mill
      • Alpha

Tom Clancy's Ghost Recon Future Soldier Guide › Multiplayer › Guerrilla Mode

Mansion

Mansion

Situation Report

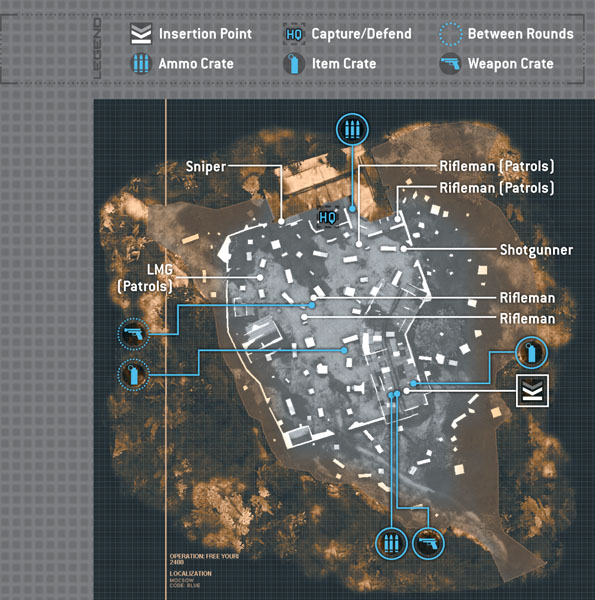
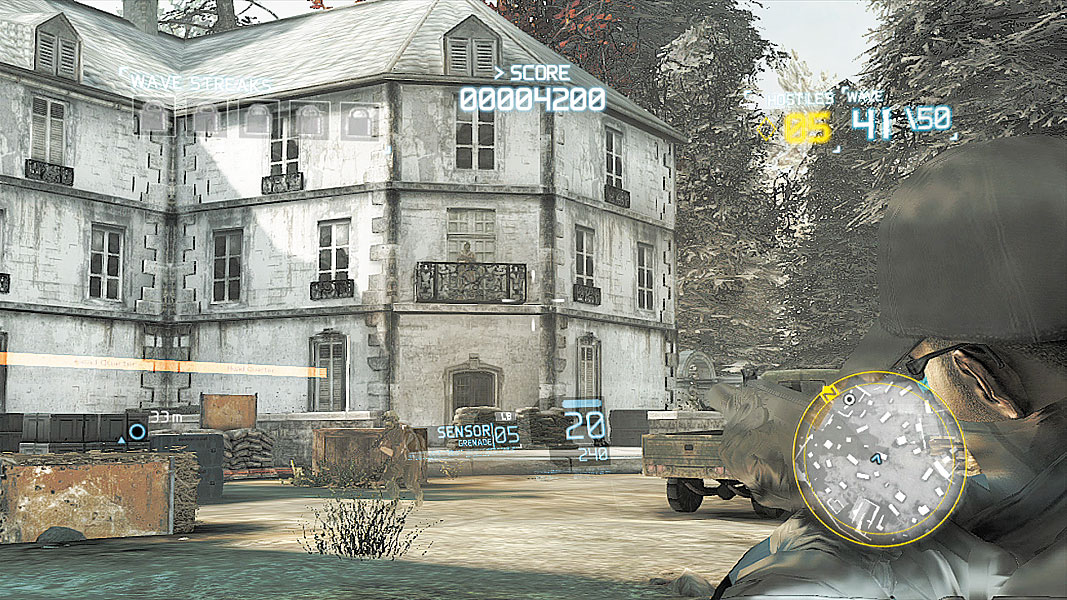
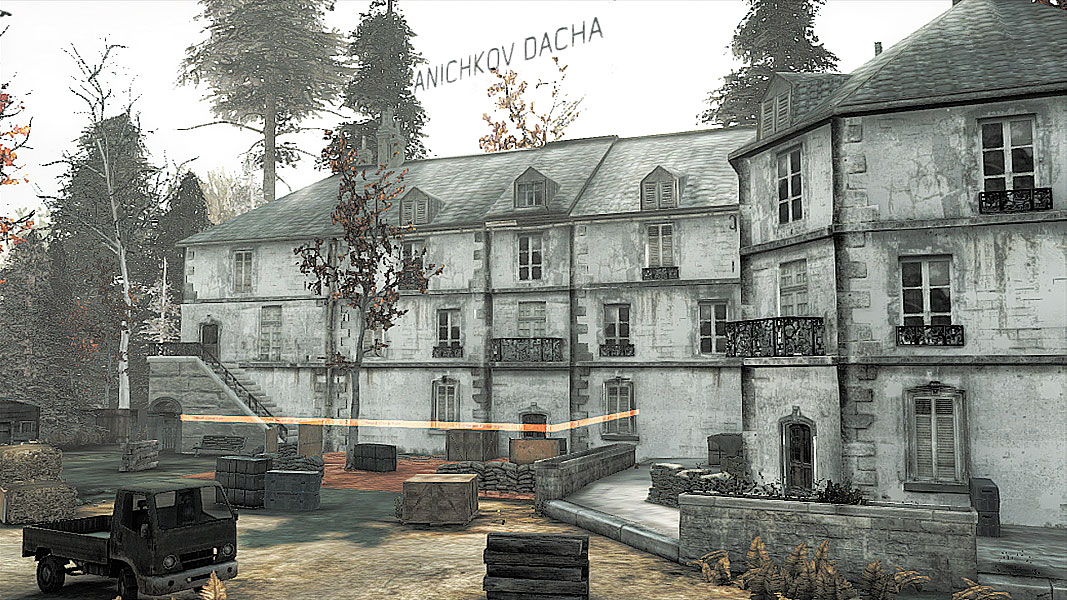
This Russian mansion has seen better days, but that’s not keeping plenty of hostiles from seeing it as a valuable site for occupation. The twin HQs here couldn’t be more different; a barn offers plenty of high cover and multiple routes of entry both high and low, while a wide-open space near the mansion itself offers nothing but low cover and plenty of angles of attack. This is going to be one hell of a battle.

// Phases 1–10

Infiltration

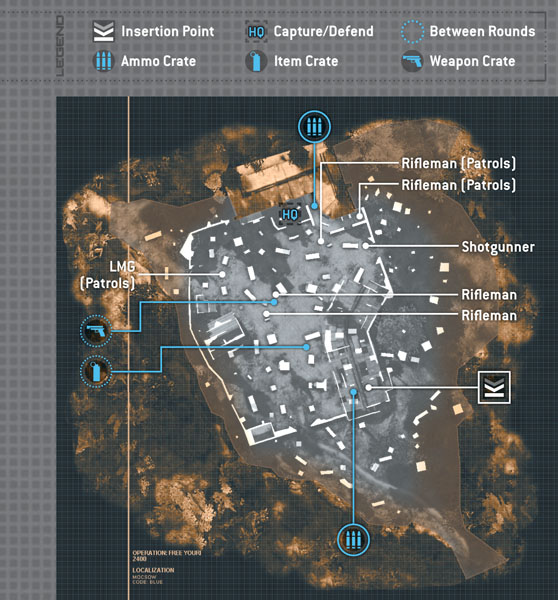
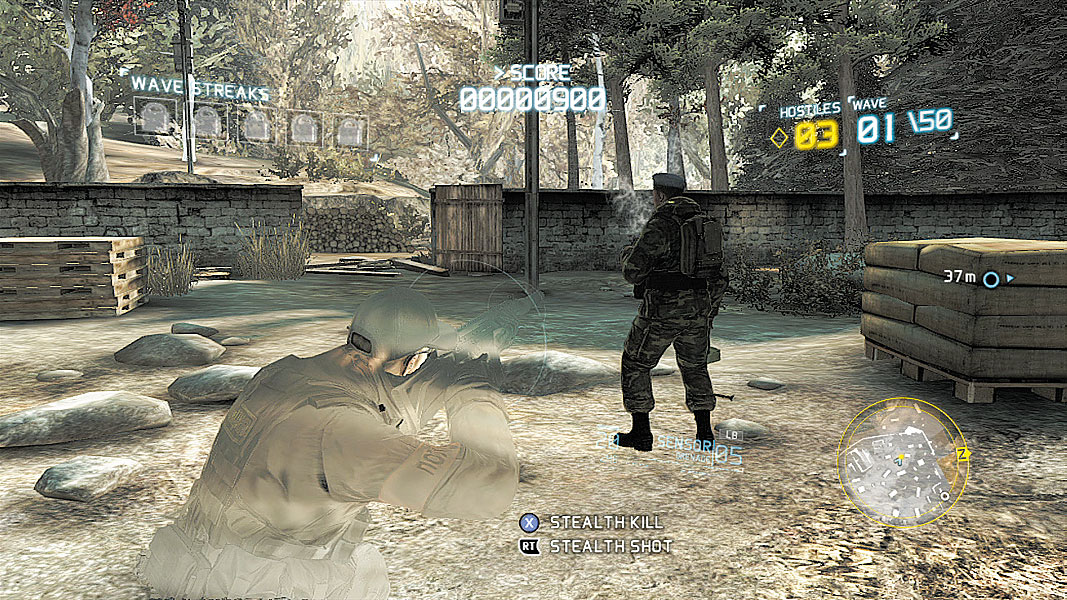
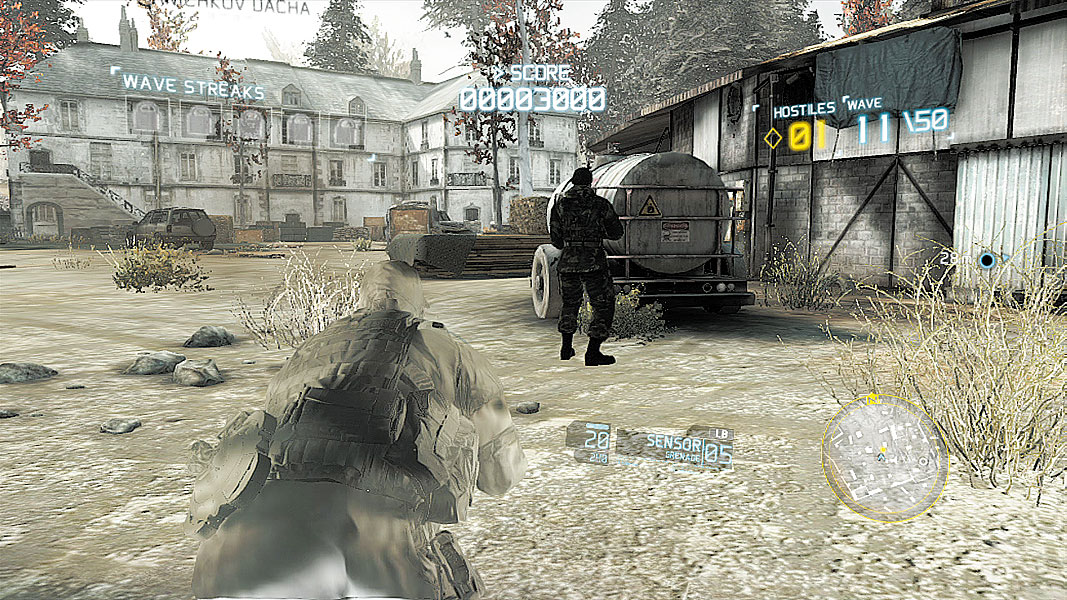
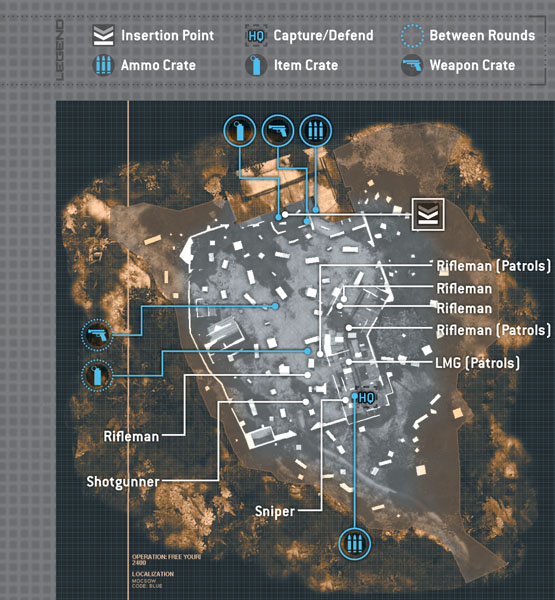
Move quickly downstairs and through the barn where your squad deploys to get the drop on a stationary shotgunner. Initially, his back is turned, but he’ll turn around right when your squad is upon him. By stealthily killing him as soon as you’re in range, you can avoid triggering an alarm. Beyond him patrols a rifleman that should be dispatched as quickly as possible, then double back toward where the shotgunner was and take cover near the truck, allowing another patrolling rifleman to pass before silently dispatching him.

Continue on toward a lone LMG goon smoking a cigarette with his back to the mansion. Deal with him, then double back and move to eliminate a stationary rifleman near a gray car. With him gone, you can take down his friend standing near some low cover to clear the area.

Note

Noteworthy Waves

Wave 5—It doesn’t take long for the forces here to begin deploying LMG fire. Keep an eye out for where they’ve taken up position (a Sensor can help with all the little bits of cover), and dispatch them quickly to avoid having their fire wreck your squad’s ability to return fire with precision.

Wave 7—Those LMGs were a pain (particularly the one firing from the second floor of the barn in Wave 6), so it shouldn’t come as a surprise that shielded enemies decide it’s time to make an appearance, too. The usual strategy of waiting for their approach is still sound, but remember that there’s precious little high cover in the HQ, so if you have to dispatch them with a close-range melee strike, be sure to pop back into cover as soon as possible.

Wave 8—With LMGs and shielded enemies having shown up, it was only a matter of time before snipers did the same, and they make their presence known right off the bat, firing from both the white house far off in the distance and the closer wooden one to the right of the HQ. LMGs make counter-sniping a pain, so deal with them first to smooth out targeting while your fellow ghosts deal with other threats running around the level.

Wave 9—The first rush of this map happens fairly early compared to others. The enemy makes a concerted effort to lob LMG hostiles that shake up the screen, shielded ones that move in slowly, and plenty of ground troops that attempt to overwhelm the HQ. Maintain cover whenever possible, dispatching targets methodically. Marking LMG gunners so that your fellow Ghosts can concentrate fire in that direction will become a tactic you use all throughout successive waves, so get in the habit of doing it as soon as possible.

Wave 10—Snipers, LMGs, shielded enemies, and shotgunners all show up early—and that’s before the steady suppressing fire of two armored vehicles complicate things. Drop in a Missile to remove the vehicular threats when they show up, and deal with LMGs before taking out snipers whenever possible. Keep a clear head and this wave will be over before you know it. Panic, and it could mean defeat before you ever really get started on this level.

Tip

Guided Guidance

The Missile Wave Perk is an incredibly powerful tool, and one that’s absolutely invaluable when it comes to tackling the boss waves’ armored vehicles, whether they are on wheels or in the air. Just a single hit will knock out most targets short of tanks, but actually guiding them can take some getting used to. Because the Missile is literally falling toward the end target, guiding it isn’t as simple as just pointing where one wants to go. Instead, think of the Missile’s movement as operating on a simple vertical trajectory (so up and down should come naturally), but a kind of corkscrew vector for moving laterally. You’ll have to “spin” the Missile into position if you’re trying to reach, say, a corner of the map by holding left or right in the direction counter to the direction you want to move. In other words, to deliver a Missile strike to the bottom-right of the screen, you’d tilt down, then left to spin the Missile toward its destination. It takes a little getting used to, but once you have it down, you’ll never miss a strike.

// Phases 11–20

Infiltration

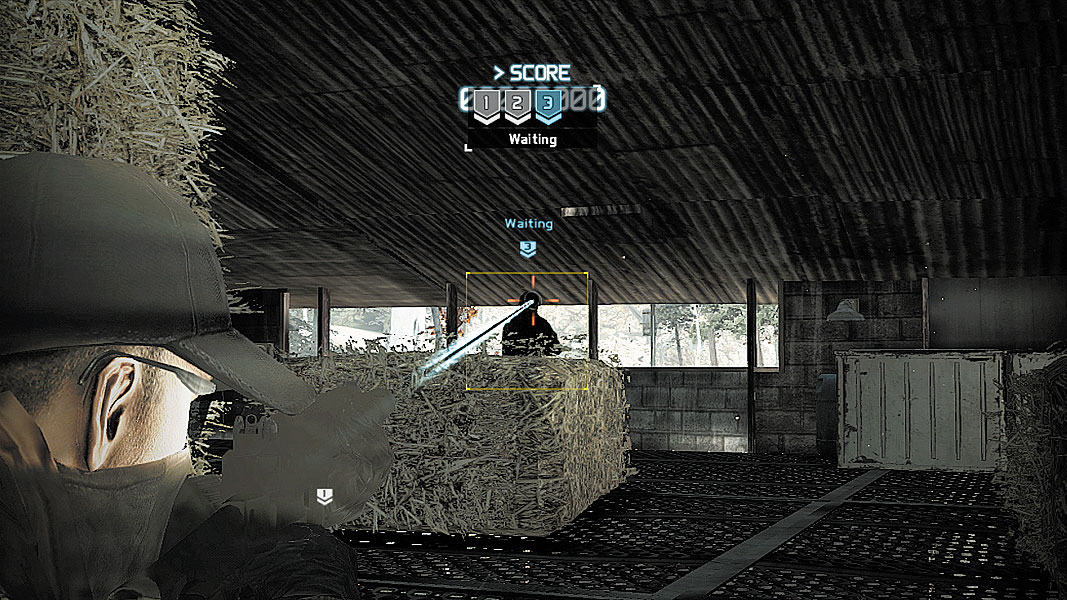
Begin by taking a wide sweep of the barn, approaching from beyond the hay bales set up near one of the entrances. Take out the stationary guard as soon as his back is turned, then quickly move to take out the patrolling rifleman when he pauses with his back turned.

Sneak out of the barn and mark the stationary guard near the fuel tank to make sure you and your squad know what direction he’s facing, then approach cover near the patrolling LMG, marking the sniper just past him on the floor above. When both of the marked targets have their backs turned, pop out and eliminate the LMG, then exit the barn on the left side, climbing the stairs and grabbing cover to wait for the sniper to look back out across the field.

When his back turns, silently kill him, then jump down and, keeping an eye out for the stationary guard near the fuel tank, eliminate the hostile directly in front of you when the tank guard’s back is turned. Sneak up behind that final tank guard and off him to clear the area.

Note

Noteworthy Waves

Wave 17—Up until this wave, guarding this HQ has mostly been remarkable only for how unremarkable the enemy threats have been. Most waves have been protracted, long-range battles, but things start getting closer with the appearance of shielded enemies. They are joined by their LMG brethren, which have been sporadic in previous waves. The multiple routes of entry into the upper floor HQ can mean some nasty surprises. Check those stairs often to avoid getting ambushed.

Wave 18—Snipers finally show up for this phase, taking positions in the white house across from the current HQ and the wooden building closer to the previous HQ, and they can be a nightmare to contain, particularly if other enemies have made it to the top floor. Mark the snipers quickly to make all squadmates aware, but don’t concentrate solely on the sharpshooters. Shotgunners can sneak in and end things with startling speed.

Wave 19—A unified, rushing attack finally breaks up the languid pace of the previous waves with a vengeance. Expect plenty of shielded troops, shotgunners, and LMGs mixed in with the usual riflemen. And they all push hard toward the three staircases leading to the HQ.

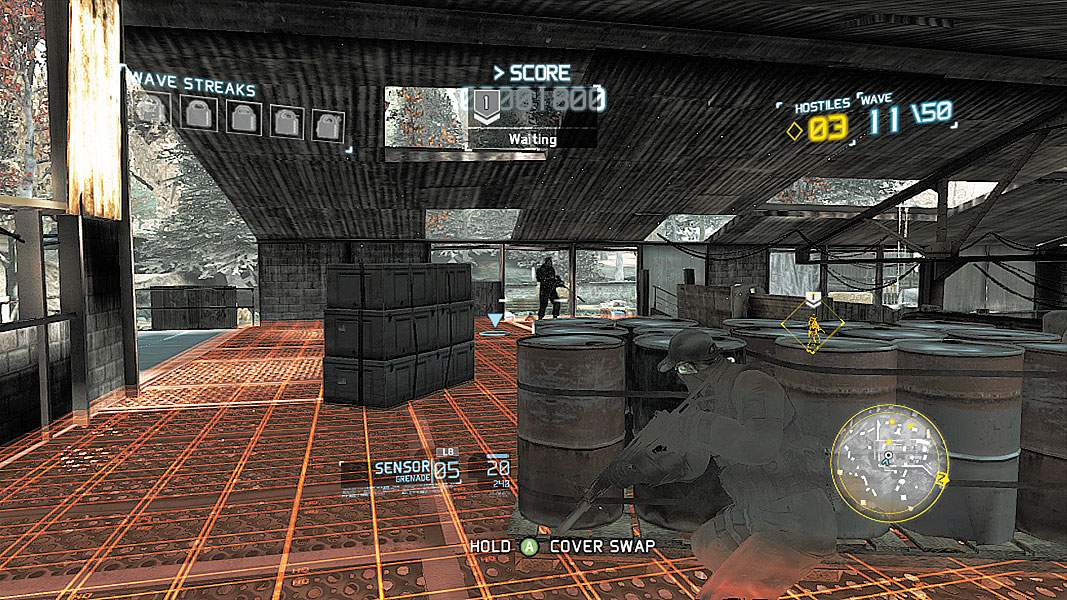
Wave 20—Snipers, LMG fire, shielded foes ... what doesn’t this wave have? Oh, right, a couple of well-armored jeeps. Can’t forget that. The key to making it out of this wave intact is controlling the barrels that serve as cover for the HQ. They’ll protect your squad from sniper fire and the shots from the armored vehicles, but only if the entrances are covered. Make sure there’s always a Ghost trained on the stairs, call down Missiles to eliminate the heavy firepower, and take out the snipers as they appear at either of the usual buildings.

// Phases 21–30

Infiltration

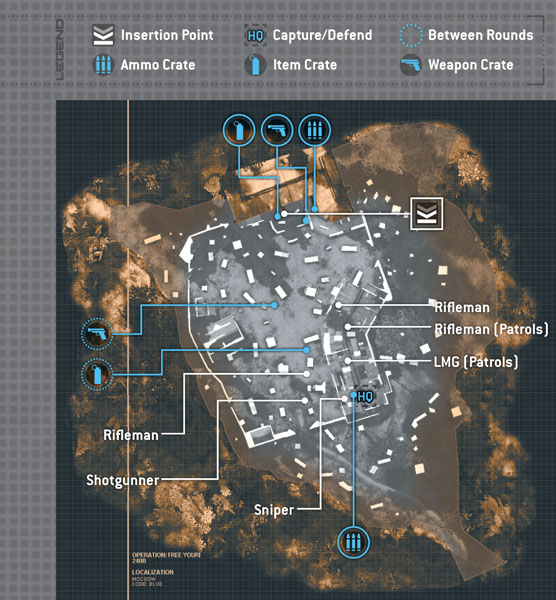
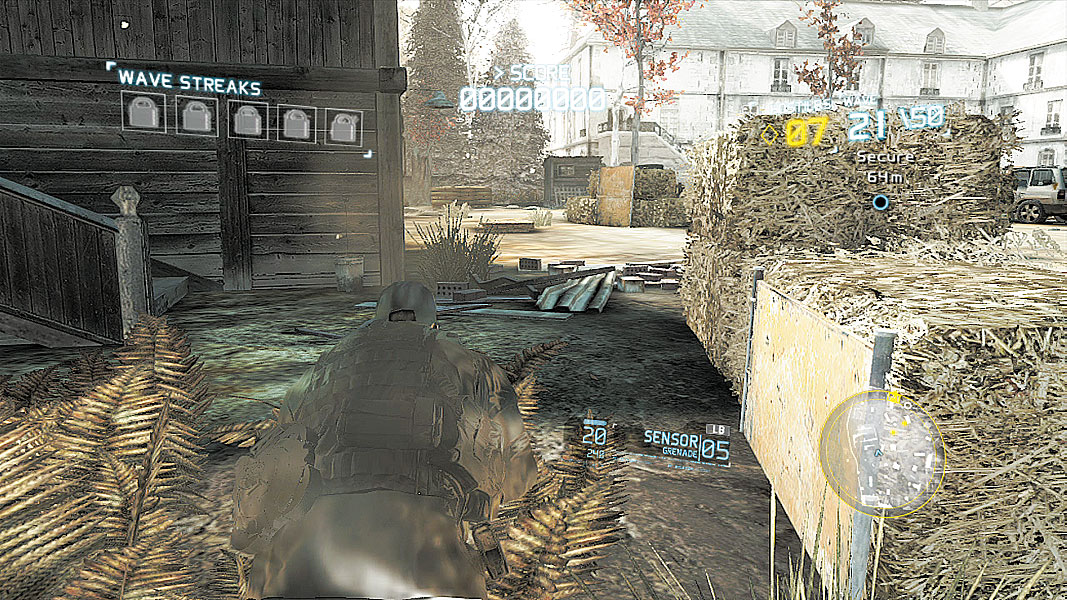
The addition of another patrolling guard means the old route of infiltration isn’t as sound, so a new approach is necessary. Start by sweeping out to the left, moving toward the mansion by skirting the left side of some hay bales near the wooden house. Take cover near more hay bales and wait for the patrolling LMG to pass. Take him out, then return to the hay bales and wait for the stationary guard near the car to turn back toward where you started this infiltration phase. Deal with him silently, then move to his nearby friend, and then return to the car to wait for a patrolling rifleman to turn back toward the other patrolling rifleman and his shotgunner buddy.

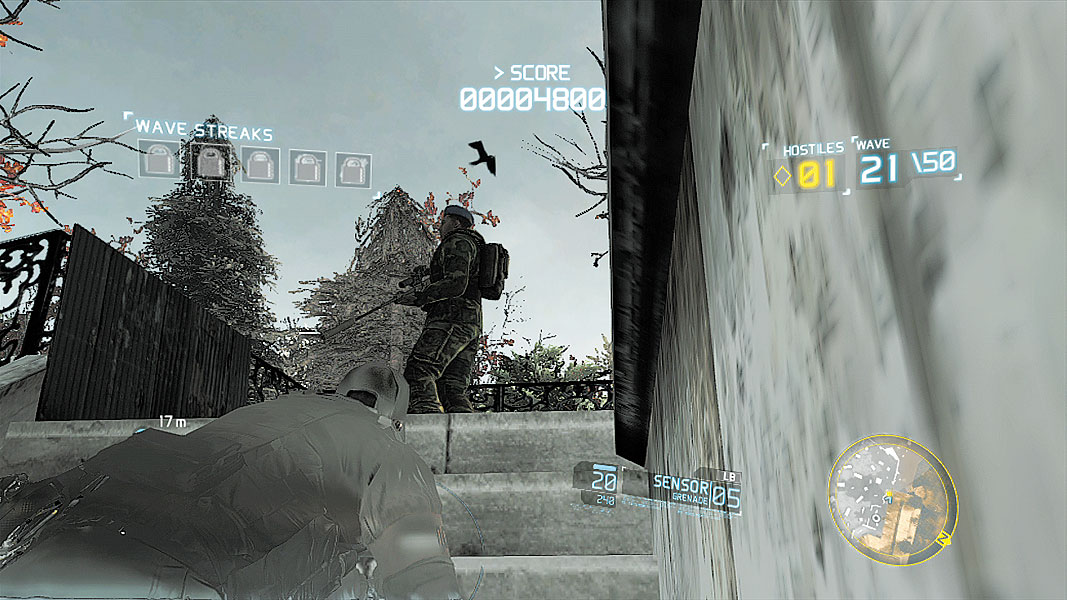
Take out the rifleman as soon as he has fully turned away from the car you’re using for cover, then grab cover near the patrol route of the rifleman by the mansion and wait until the shotgunner turns to look toward the barn. Silence the rifleman, then quickly dispose of the shotgunner while his back is still turned. A final sniper sits stationary, looking out over the whole level. Creep back through the HQ, keeping out of his periphery while heading up the stairs, and finish him off to end this infiltration wave with nary a peep.

Note

Noteworthy Waves

Wave 22—This third phase of the map starts with a heavy rush while a few LMGs provide a bit of suppression. Stay nimble here, sticking to the HQ as much as possible and using the elevated area next to the HQ to take out the LMGs while they fire on your fellow Ghosts defending the HQ.

Wave 25—Although you and your squad had to fight off a combination shotgun rush and LMG suppression effort during the last wave, this one keeps some of the shotgunners, adds more LMGs, and complicates it further with sniper fire to make things tough. As always, take care of the LMGs as early as possible to allow your team access to the snipers unhampered by a wobbly view.

Wave 28—An absolutely ridiculous number of LMGs pour into the level at the start of this wave, and they don’t let up until it’s over. Couple that with snipers looking to pick off Ghosts that pop up for too long and shotgunners that rush in, and you have an extremely difficult combination of attacks happening from multiple ranges. A Turret is a great idea to keep rushers at bay, as is going Invisible for a few seconds to sneak around and flank some of the more pesky LMG troopers. Just be sure to mark them first so the Invisible Ghost can make a beeline for them while still under cover, and then head back to cover before it runs out.

Wave 30—A heaping helping of trouble hits hard right from the outset. They’re the usual cast of annoyances: Shields, LMGs (two of which set up on the second floor of the barn and should be taken out with precision shots as soon as possible), riflemen, and two snipers per roost are all out in force, and that’s before an armored vehicle and APC start spraying their shots. Missile strikes are your friend, of course, but if you’ve been saving up on Airstrikes, one can help take out a few of the LMGs to stop the screen from shaking for two seconds. So long as the vehicles are taken out early and nobody sticks their head up for too long to be targets for the snipers, this battle will be won with patience and quick shooting.

// Phases 31–40

Infiltration

The days of the one-Ghost show are over; there are simply too many hostiles with crossing lines of sight to allow for a completely covert operation at close range. Instead, a set of sync-shots must be orchestrated and timed properly to overcome the eight different targets that must be taken down with precision. The first group waits just inside the barn: a stationary rifleman on the ground floor, another almost directly above, plus a third patrolling rifleman making a circuit near the first wide entryway out of the barn. Line up a sync-shot and take it with suppressed weapons to clear the way for further infiltration.

Sweep outside the barn and wait for a patrolling rifleman to move between the fuel tank and the outside wall of the barn, when he turns to head back, take him out to ensure that the next sync-shot goes off without a hitch. One Ghost should stay in the barn and target the patrolling LMG while the others cross over to the other side of the map and take up a spot to target the two stationary guards below and sniper up above. When the coast is clear, take the combined sync-shot to cleanse this HQ of hostiles.

Note

Noteworthy Waves

Wave 36—Be on the lookout for multiple shotgunners and shielded hostiles making a hard push into the HQ from all three staircases. LMGs (particularly ones firing from the other second floor vantage in the barn) will attempt to disrupt from afar, and more than a few riflemen will make it up to your second-floor abode if you don’t deal with them quickly, too, so be careful.

Wave 38—The rush on the HQ from Wave 36 makes a return, this time aided by snipers. As always, keep an eye out for LMGs and nip them in the bud before they can mess with your squad’s ability to target those snipers. Let one or two Ghosts stick with long-range weapons, while the other two concentrate on repelling the short-range attacks. Shotgunners are going to make a rush toward the HQ, and they can make short work of your team if they get in close. Don’t drop your guard once the wave is over, as another rush quickly resumes at the start of the next wave.

Wave 40—The fourth boss wave doesn’t skimp on threats. In addition to a more aggressive push by shielded and shotgunner troops making their way up the stairs, the usual complement of snipers and LMGs are there to make things difficult, which leads right up to the appearance of an attack helicopter and armored vehicle ready to rain suppression-causing fire upon the entire team. Make sure the heavier threats are dealt with accordingly, then concentrate on thinning out LMG fire before finally taking out the snipers. As with the last wave, split duties between long-range counter-sniping and dealing with the multitudes of shotguns and shields.

// Phases 41–50

Infiltration

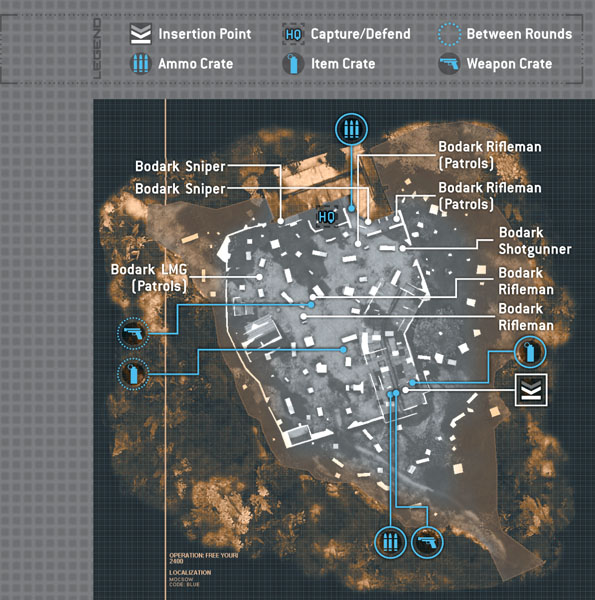
An octet of cloaked threats is no small task, but unlike the last infiltration phase, there’s a bit more room for picking off enemies one by one—if it’s done with stealth and a suppressed weapon. Many of the initial takedowns are done the same way as in the third infiltration. Approach from the far side of the hay bales, wait for the Bodark LMG to pass, take him out and then his buddy by the car, and then another cloaked friend by the low cover. Return to the car and take notice of the Bodark sniper sitting on a balcony overlooking the open area.

Fortunately for your squad, this sniper decides to turn around and stare at the wall from time to time, which gives you room to sneak in and take out both patrolling riflemen. Dispatch the Bodark shotgunner just as you have done in phases before, then grab some cover along the stitch of stone looking toward the sniper. Move to the end, poke out, and, with a silenced weapon, pop him in the head for a silent takedown. Creep up on the sniper at the top of the stairs and get him. You have just completed your last infiltration Mansion had to throw at you. Nice work, Ghosts.

Note

Noteworthy Waves

Wave 42—The Bodark forces waste no time in coordinating a pincer attack that has hostiles, including shield enemies and shotgunners, moving in from the left and right simultaneously. Split your forces, keeping one ghost near the front and two on either side, with some overwatch from the top of the stairs to repel the attack. This is the fewest enemies you’ll come across this phase, so don’t get cocky.

Wave 46—The baleful hiss of an incoming rocket should make it plain that RPGs are going to play a threat in this level, but they’re marginally less troublesome than the sheer numbers of LMGs laying down suppressing fire from seemingly every possible angle. The most annoying of those angles is doubtlessly the covered safety of the barn’s second floor. Unload as quickly as possible on them (and their low cover, which is vulnerable to heavier weapons fire) to get rid of the annoyance as quickly as possible.

Wave 50—This is it, the final push. An all-out assault begins immediately with an HQ rush from shielded hostiles, shotgunners, riflemen, and the odd LMG providing some choppiness to make fending off the close-range fighters tougher. Break up the HQ into three directions and try to cover them as neatly as possible. Have a fourth Ghost provide overwatch from up the stairs. By now, you and your squad probably have a good idea of what to expect; snipers, armored vehicles, and—wait, is that a tank? Yep, so call down the thunder ASAP or risk being pounded into submission with multiple tank rounds while enemies swarm the HQ. If a squadmate is taken out by a tank round, avoid reviving them until they can crawl to solid safety; it’s not worth losing a second Ghost to the same threat. Be accurate, stick to cover, and unleash hell with every Wave Streak you’ve got. This one’s for all the marbles.

Keep reading with a free account

The first 3 sections of Tom Clancy's Ghost Recon Future Soldier are open to everyone. An account opens the rest of it, and every other guide in the archive. It's free, and there's nothing to buy.

Bought guides on the old Prima Games site? Your account and every guide you own moved here, so there's nothing to buy again. Sign in.

Create a free account Or browse our free guides

PreviousAirstrip NextIntroduction