
Dragon Age Inquisition Guide Getting Started
Hero Menu
Whether you need to purchase new abilities, adjust tactics and behaviors, equip new gear, or review codexes and quest information, the radial Hero menu has you covered. The game is paused while the Hero menu is open, giving you ample time to sort through your gear and consider your next move.
Character Record
The Character Record menu is where you can manage your party’s abilities, tactics, and behaviors as well as view their current attributes. This menu cannot be accessed during combat, so make sure you make these adjustments when your character and party aren’t under attack.
Abilities
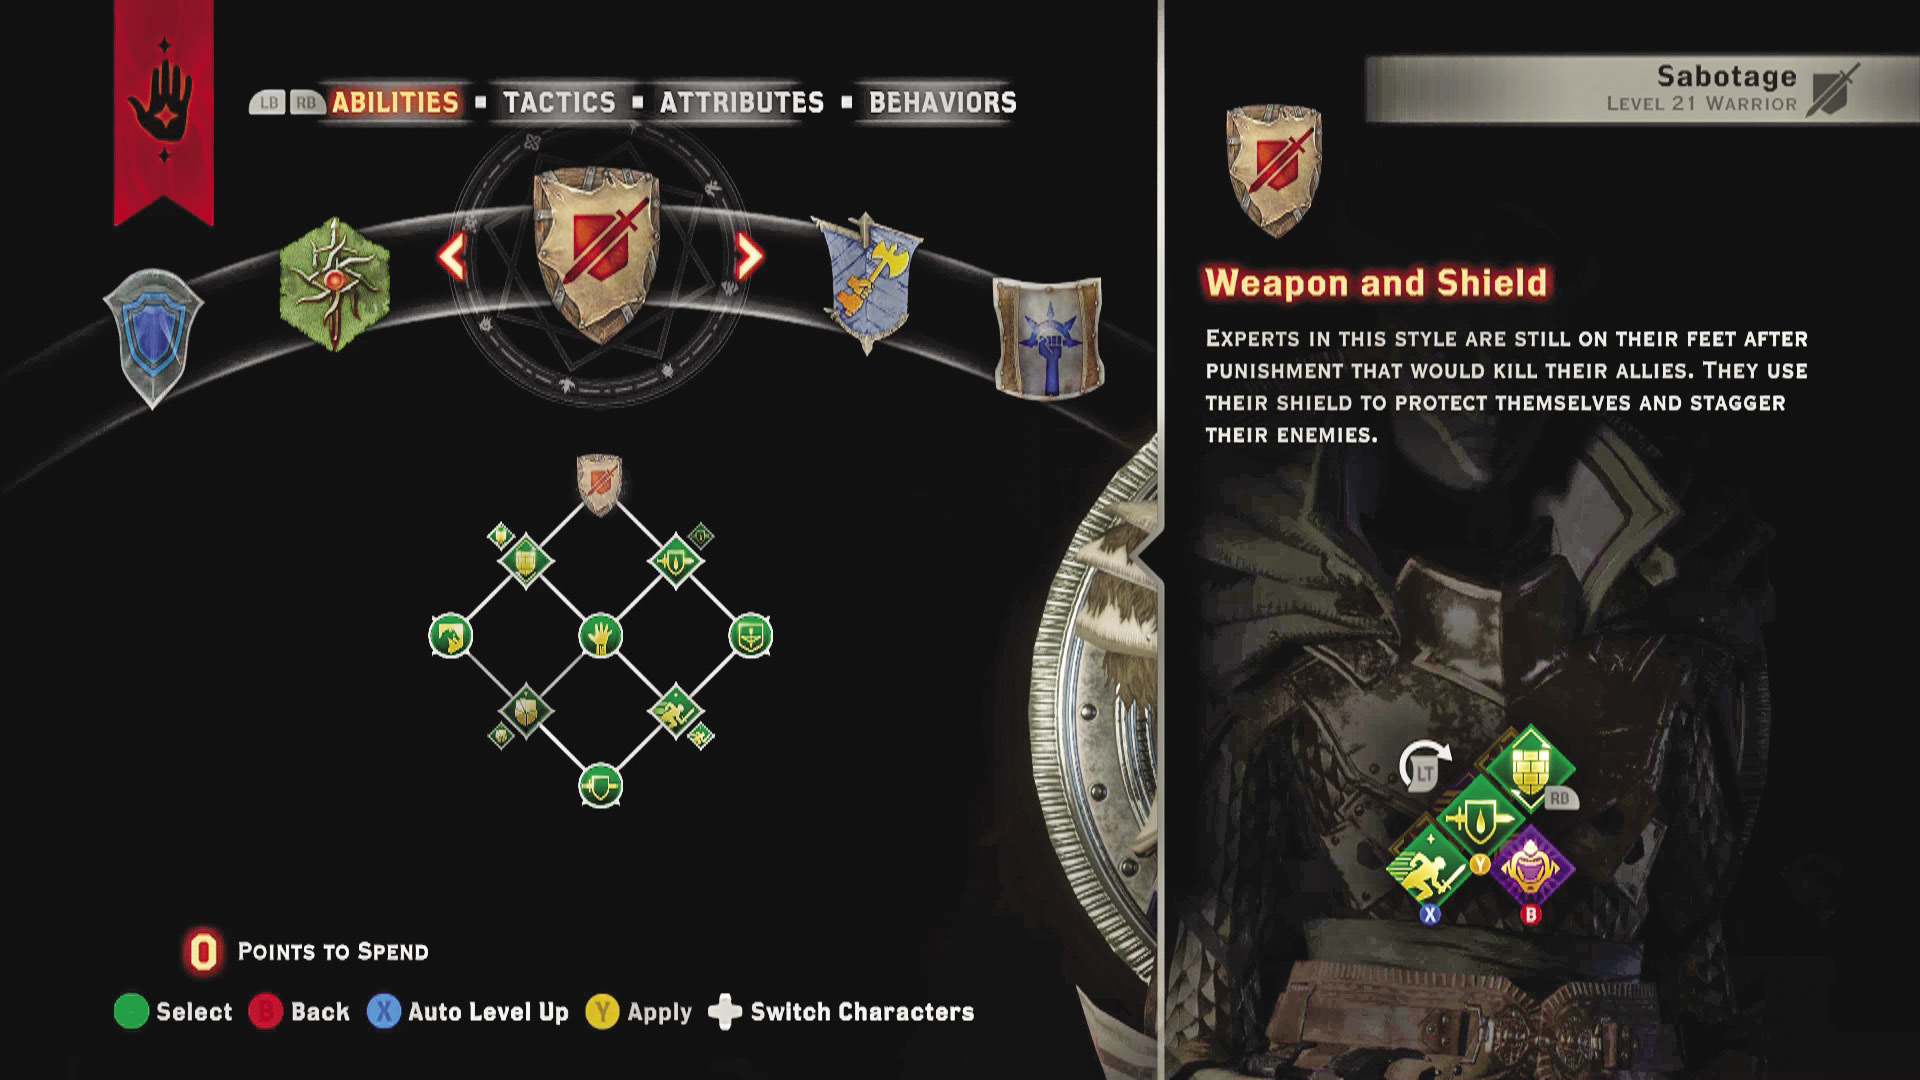
Here’s where you select and map a character’s abilities, accessible from a variety of ability trees. Each ability tree contains active abilities, upgrades, and passive abilities. Active abilities have diamond-shaped icons—you can map up to eight active abilities for quick deployment during combat. Most active abilities can be upgraded, making them stronger and more effective. Upgrades appear as smaller diamond-shaped icons adjacent to a active ability. Passive abilities are represented by circular icons on each tree. When a passive ability is learned, it’s always in play and does not need to be mapped or activated. Some passive abilities also offer permanent bonus attributes when unlocked.
Characters earn one ability point each time they level up. Browse through the available trees and select an ability to learn—it takes one ability point to unlock each ability. You can only learn abilities connected to the root of the ability tree or connected to an ability you’ve already learned. Active abilities are automatically mapped to an empty hot key or button when learned, but you can customize where each ability is mapped through the Apply function—select a learned ability from the tree followed by the Apply function, then press the desired key or button to map it. Since you can only map up to eight abilities at a time, later in the game you may need to revise your mapped abilities, replacing older, weaker abilities with newer, more powerful ones. Reference the Classes and Abilities chapter for a complete rundown of all abilities, including specializations.
Tactics
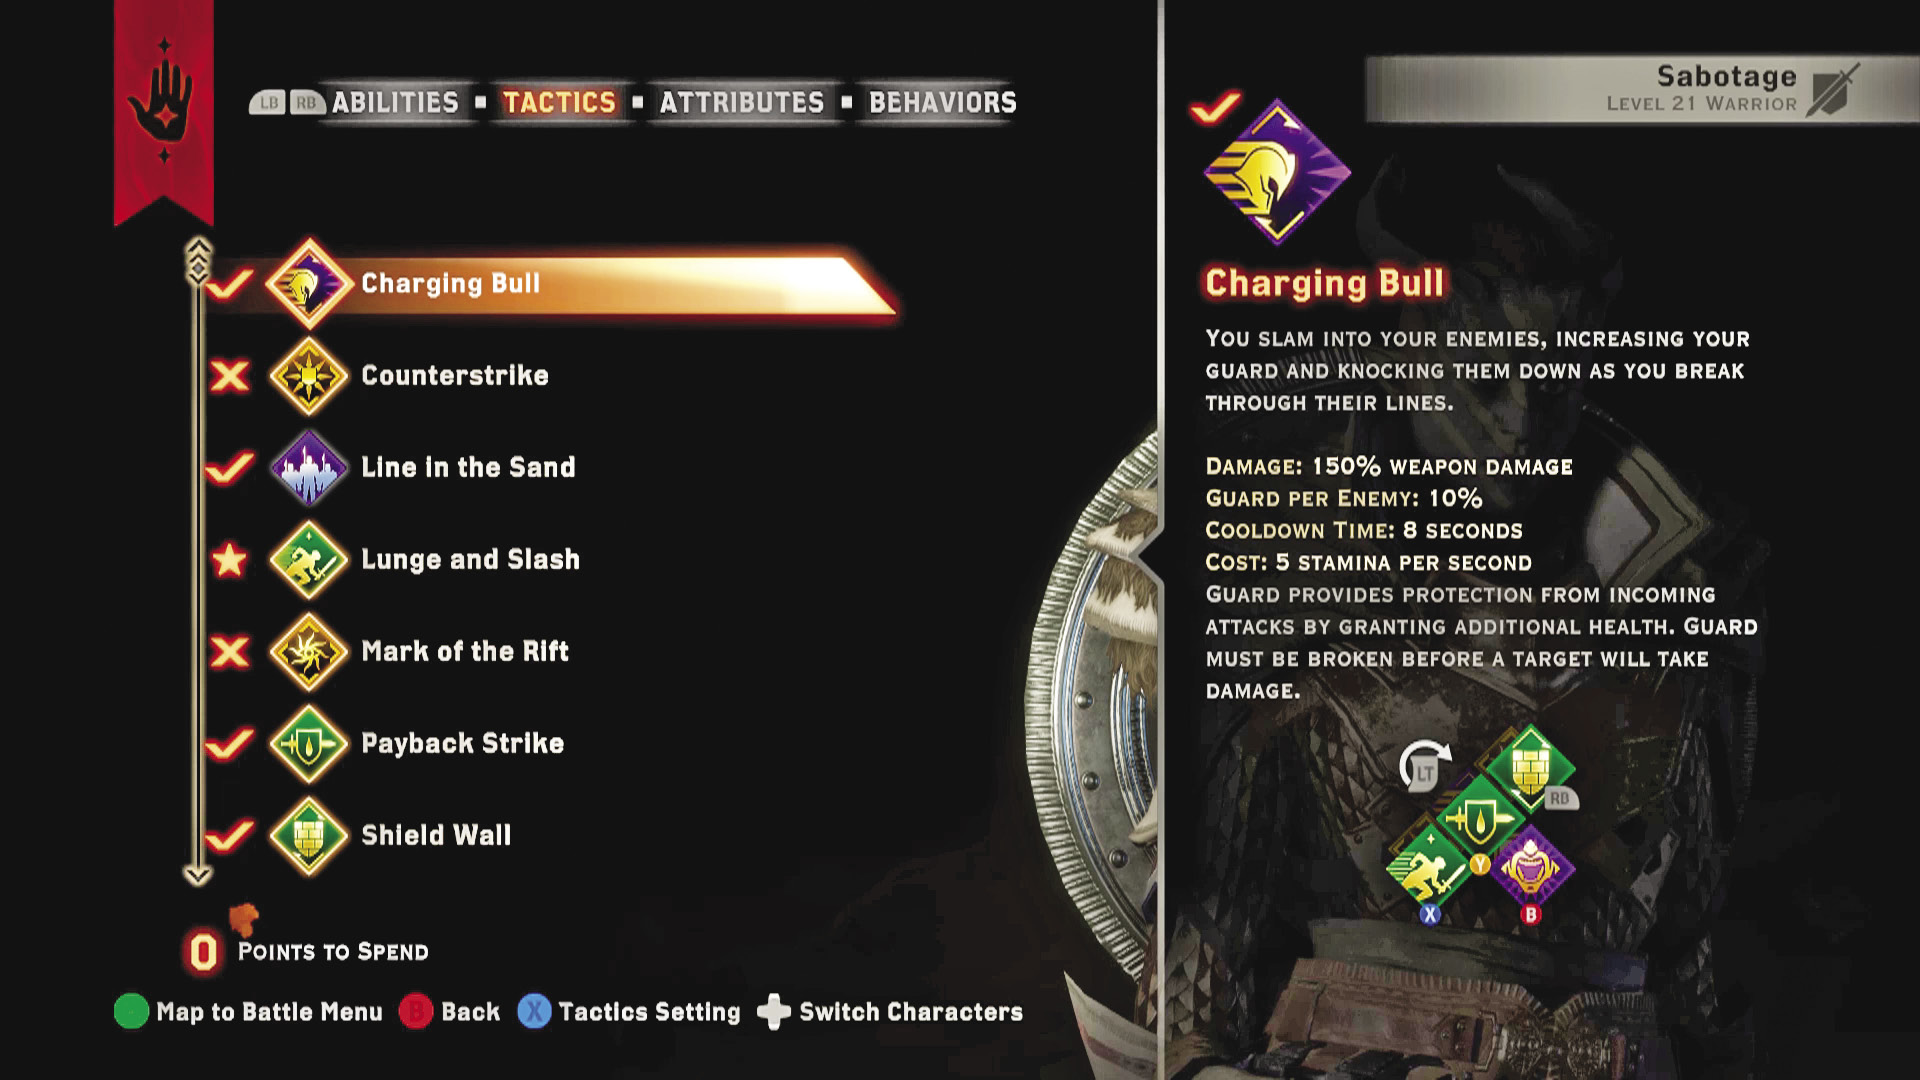
In the Tactics screen you can adjust which abilities your party members use when you’re not in control of them. The interface consists of a list of learned abilities, and mapped abilities have a check mark next to them. When an ability is selected you have the opportunity to enable it, disable it, or prefer it. Preferred abilities are used more frequently and are more favored over enabled abilities when both can be used. So if there’s a particular ability you’d like a character to use with greater frequency, set it to preferred.
Attributes
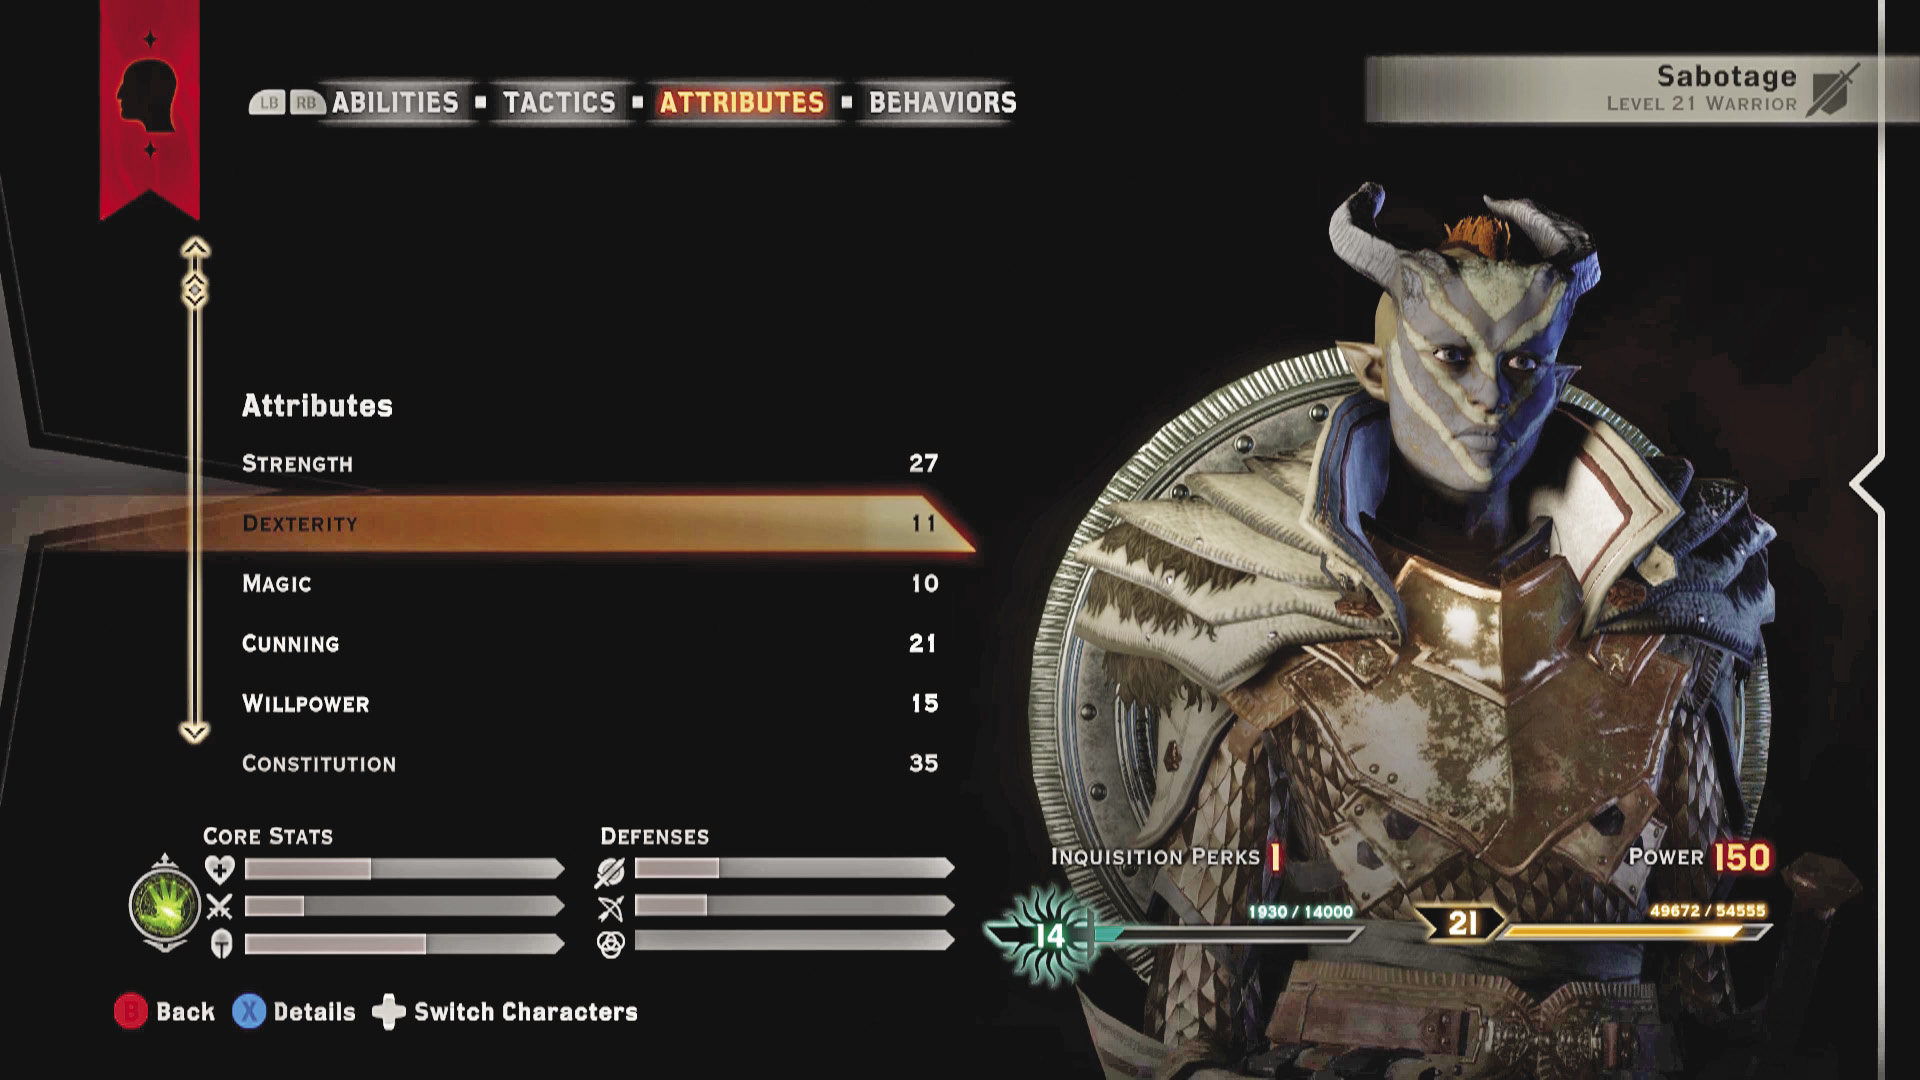
The Attributes screen displays a character’s current stats as well as any offensive and defensive bonuses. These bonuses are often applied by equipping different weapons, armor, and accessories. Here’s a rundown of how each attribute is defined.
Attributes
- Strength: The character’s physical strength and ability. Each point increases attack (warriors only) and guard damage bonus.
- Dexterity: The character’s agility, reflexes, and coordination. Each point increases attack (rogues only) and critical damage bonus.
- Magic: The character’s connection to the Fade and ability to manipulate it. Each point increases attack (mages only) and barrier damage bonus.
- Cunning: The character’s intelligence and deviousness. Each point increases critical chance and ranged defense.
- Willpower: The character’s strength of mind and personality. Each point increases attack and magic defense for all classes.
- Constitution: The character’s physical robustness and endurance. Each point increases health and melee defense.
Offensive
- Attack: The attack stat increases all damage that a character does.
- Guard Damage Bonus: Increases the damage against enemies under the effect of guard.
- Armor Penetration: Each point of armor penetration ignores one point of the target’s armor when inflicting damage.
- Barrier Damage Bonus: Increases the damage against enemies that are under the effect of Barrier.
- Critical Damage Bonus: Increases the extra damage inflicted with a critical hit.
- Critical Chance: The chance to score a critical hit for each attack.
- Main-Hand Damage: How much damage the weapon in the character’s main hand inflicts with each hit.
- Off-Hand Damage: How much damage is inflicted by the character’s off-hand weapon.
- Bleed on Hit: The chance per hit to inflict a bleed effect on the target. The effect lasts a few seconds.
- Stagger on Hit: The chance per hit to stun the target. The effect lasts a few seconds.
- Heal on Kill: Amount of damage to be healed by each killing blow.
- Flanking Damage Bonus: The damage bonus, as a percentage, when attacking a target from the side or behind.
Defensive
- Magic Defense: The percentage of damage resistance to all magical or elemental attacks.
- Melee Defense: The percentage of damage resistance to all melee physical attacks.
- Ranged Defense: The percentage of damage resistance to all ranged physical attacks.
- Cold Resistance: The percentage of damage resistance to cold damage attacks.
- Electrical Resistance: The percentage of damage resistance to electrical damage attacks.
- Fire Resistance: The percentage of damage resistance to fire damage attacks.
- Spirit Resistance: The percentage of damage resistance to spirit damage attacks.
- Guard: Enemies must first damage the character’s guard, if any, before they can damage health.
- Armor Rating: Physical damage is reduced by a character’s armor rating.
- Armor Rating Front: Physical damage inflicted on the character from the front is reduced by armor rating before being applied.
- Health: A character whose health drops to 0 falls unconscious and is unable to attack.
- Maximum Health: The maximum amount of health a character can regain from healing.
- Bleed on Being Hit: The chance per enemy attack on the character that the attack inflicts a bleed effect on the enemy. The effect lasts a few seconds.
- Stagger on Being Hit: The chance per enemy attack on the character that the attack stuns the enemy. The effect lasts a few seconds.
Other
- Focus: Focus is a resource that you gain each time someone in your party deals damage. Each party member has a personal focus meter, but all party members gain focus when a single member deals damage.
- Maximum Focus: The maximum amount of focus this character can generate.
- Focus Gain Bonus: Focus gained from all sources is increased by this percentage amount.
- Mana/Stamina: The current amount of mana/stamina a character has. Use mana/stamina to trigger special abilities.
- Maximum Mana/Stamina: The maximum amount of mana/stamina a character can have.
- Combat Experience Points: The character’s current experience points.
- Level: A character’s current combat level.
- Cooldown Modifier: Reduces the cooldown on all of the character’s abilities.
Behaviors
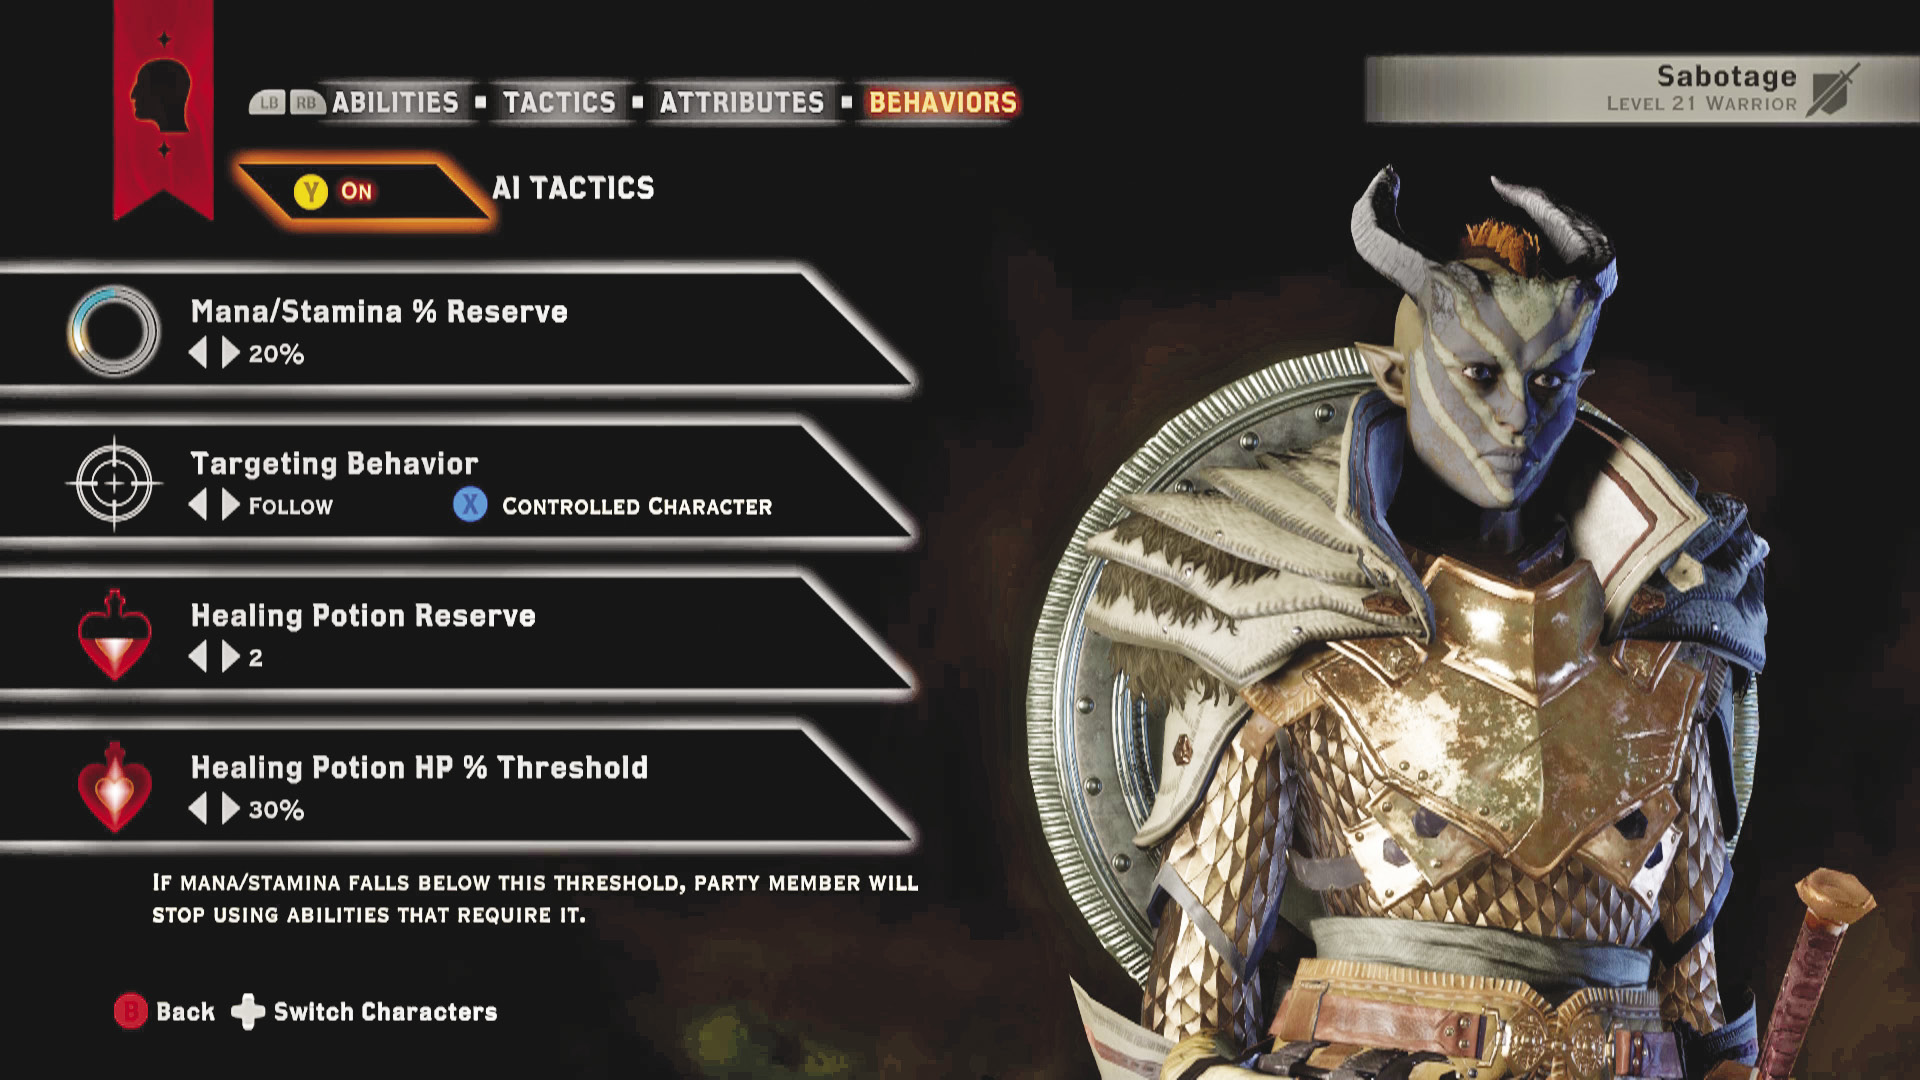
The Behaviors screen allows you to provide instructions to your party on how they should fight, cooperate, and defend themselves in combat. While you can directly control and switch between party members at any time, they will follow these rules when you’re not controlling them. Four AI behaviors can be adjusted:
- Mana/Stamina % Reserve: If mana/stamina falls below this threshold, the party member will stop using abilities that require it.
- Targeting Behavior: Choose targets by following another party member’s target or by prioritizing threats to another party member—use this to make the selected character follow or defend a party member of your choice.
- Healing Potion Reserve: Party member will not use healing potions if this many or fewer remain.
- Healing Potion % Threshold: When the party member’s health falls below this threshold, they will attempt to use a healing potion.
Inventory
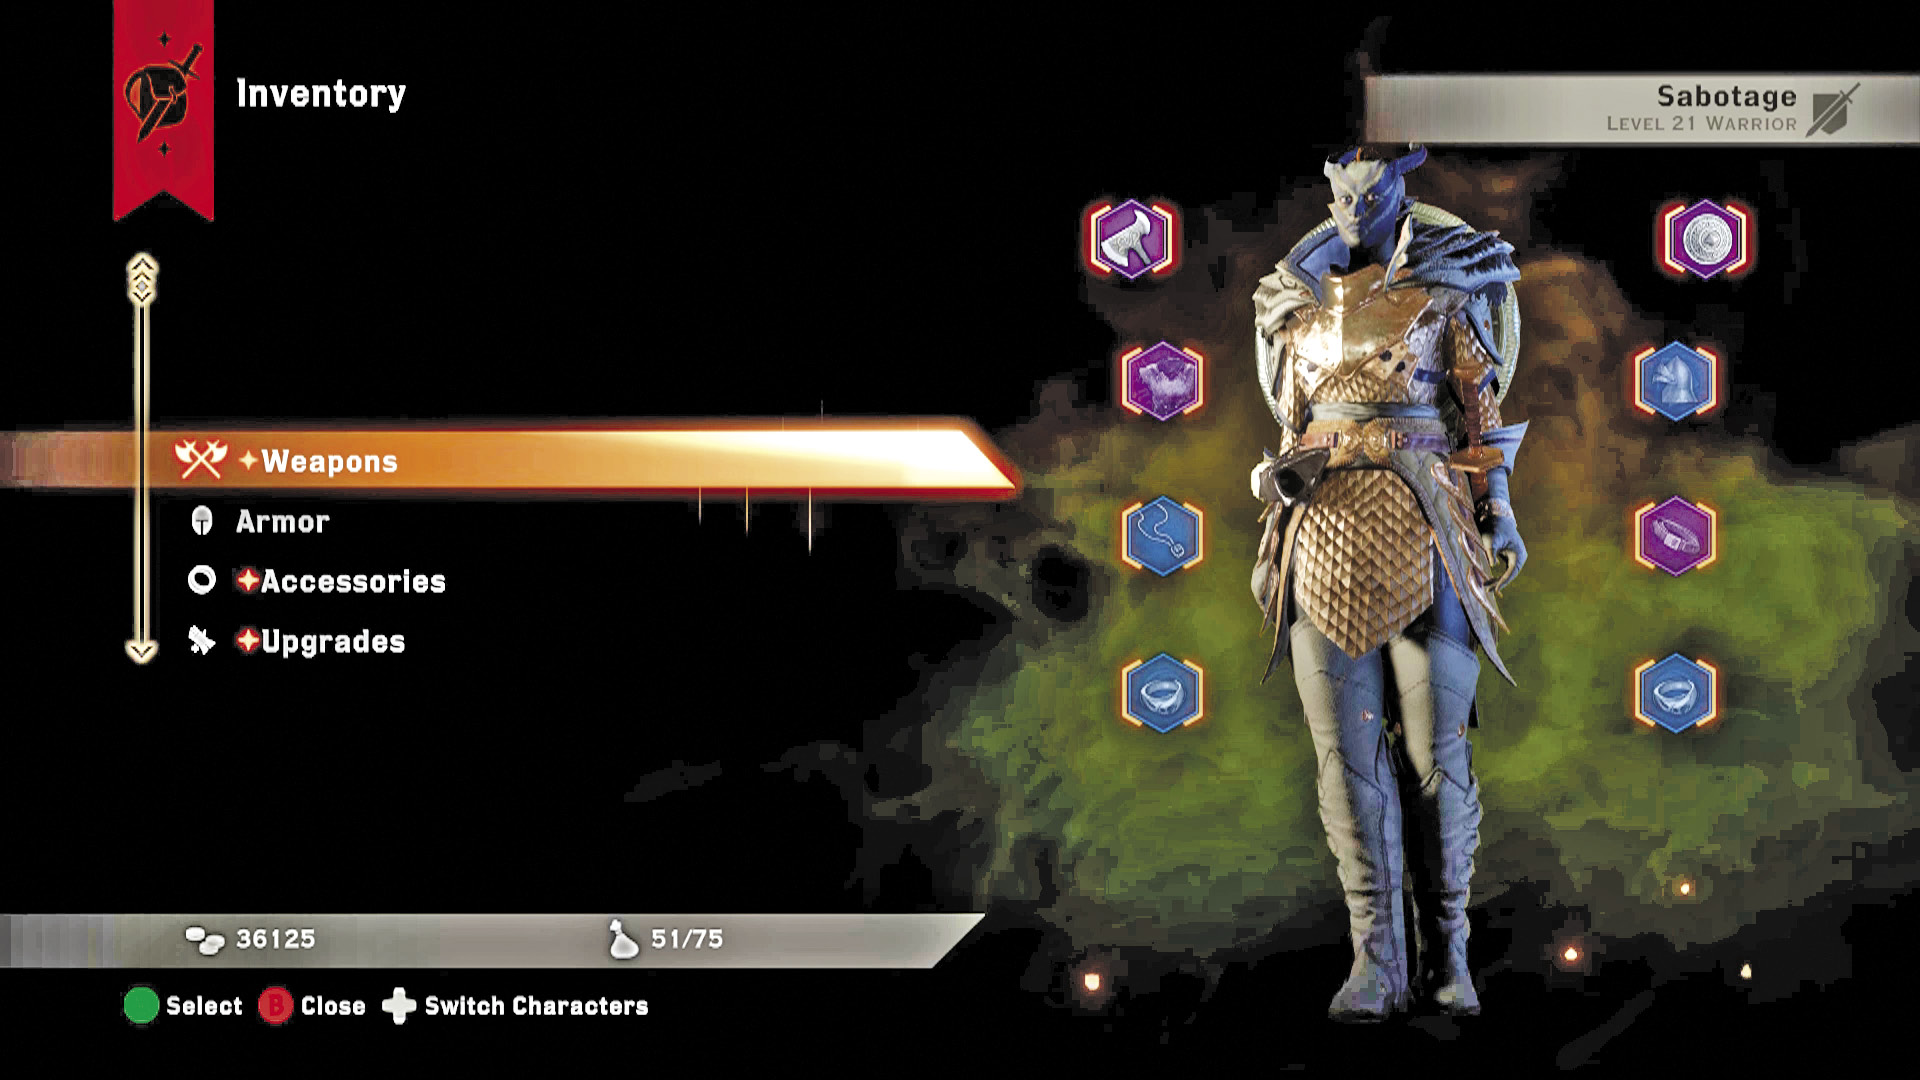
When you acquire new gear, access the Inventory menu to inspect and equip these new items. You can equip weapons, armor, and accessories, applying them to your character or party members. Most equipment is restricted by class and level. So if a character doesn’t meet these requirements, the item cannot be equipped. But think twice before selling or destroying this equipment—a party member may benefit from it. The Inventory menu also details all upgrades, crafting materials, valuables, and schematics carried by your party. Crafting materials and schematics do not occupy space in your inventory, but everything else does. So make a habit of selling off excess equipment whenever you’re near a merchant. Unless related to a quest or research item, valuables can be sold for gold—they serve no other purpose.
When sorting through your items, pay close attention to the rarity. Items with a gray background are common and frequently found in loot drops. Common items aren’t particularly noteworthy and fetch little gold when sold to merchants. Items with blue backgrounds are rare. When possible, equip rare items on your characters, because they’re often enchanted with runes, giving them stat buffs. Rare items also are worth more when sold to merchants. Unique items have a purple background and are one-of-a-kind—these are usually found on bosses. While you can earn quite a bit of gold by selling unique items, it’s better to equip your party members with them. Unique items are often crafted from the best materials and enchanted by runes, giving them a variety of bonuses. Consider holding onto unique items until they’re rendered obsolete by newer, better equipment.
Codex
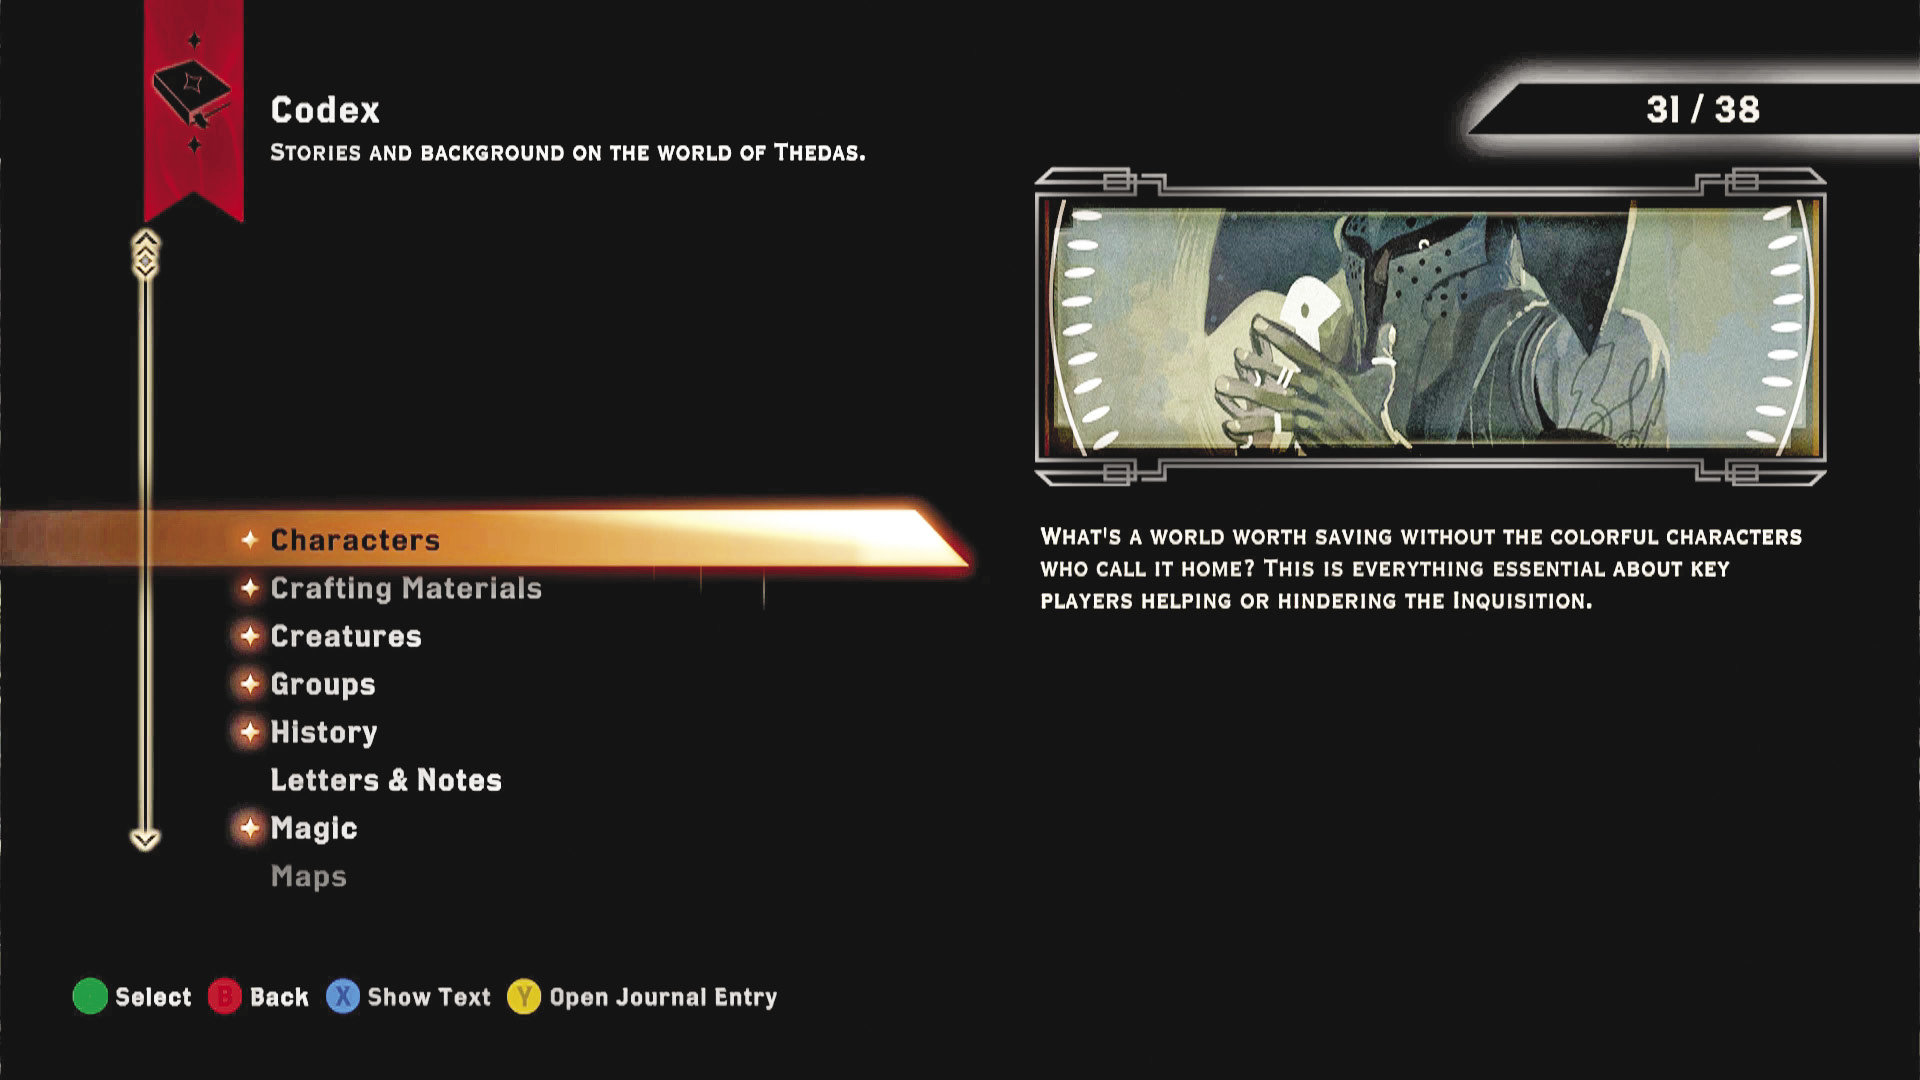
Throughout your adventure you’re likely to uncover codex entries providing detailed information on different subjects. Codex entries can be retrieved manually by interacting with notes or other documents. They can also be retrieved automatically when a topic arises in conversation or whenever you encounter an enemy or character for the first time. All of these entries are collected in the Codex section of the Hero menu. Unlocking a codex entry also unlocks the art associated with its card.
Journal
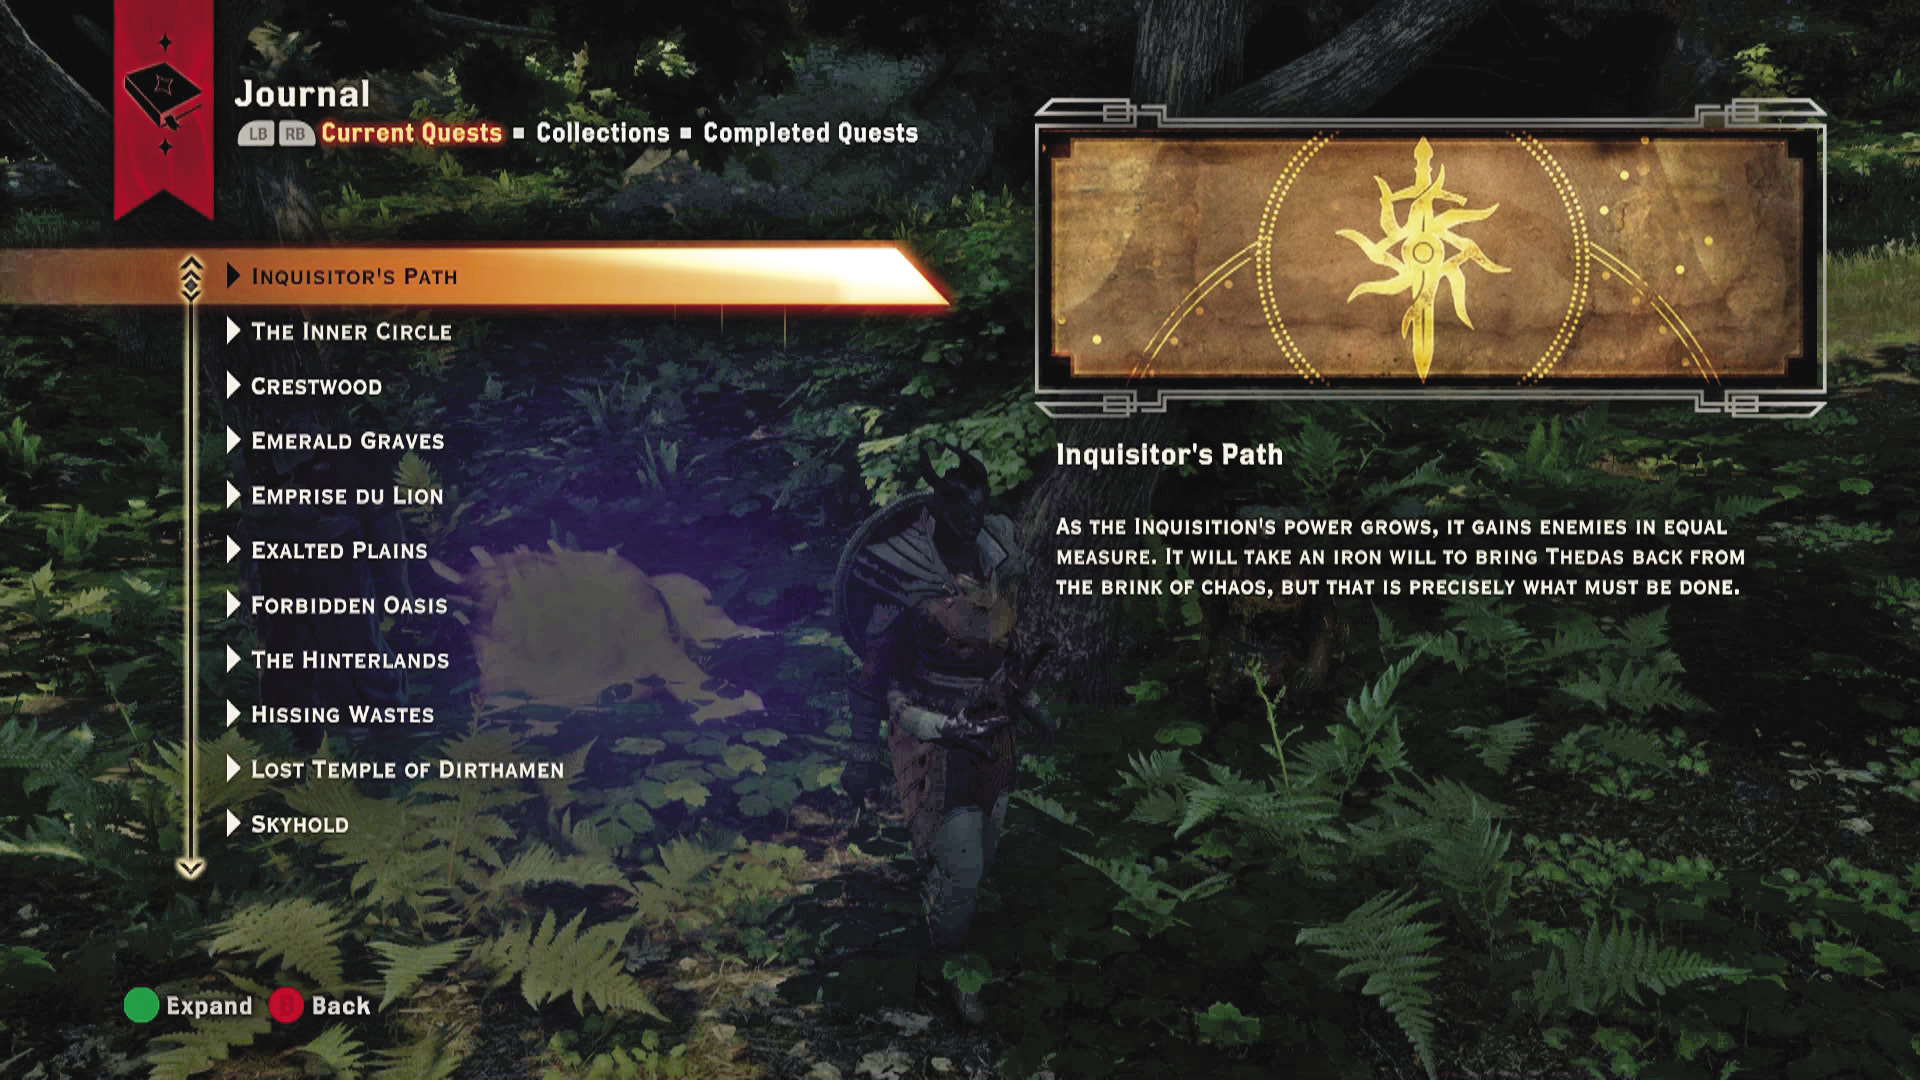
The Journal menu keeps track of all quests you’ve been assigned as well as those you have completed. Each quest entry provides a brief description and lists objectives. Quests are sorted by Inquisitor’s Path (critical path quests), inner circle quests, and locales. When you select a quest from the journal it becomes active, updating icons on the in-game compass and helping you determine where to go next. The Collections tab within the journal keeps track of all the collectibles you’ve found, including items like bottles, mosaics, and song lyrics. For more information on collections, reference the Exploration chapter.