
Ordnance
Rounding out each Pilot’s arsenal is the Ordnance slot, reserved for grenades, mines, and charges. These hand-tossed explosives are effective against Pilots, minions, and even Titans. By default each Pilot can carry two of these explosives, but this can be increased by equipping the Explosives Pack Tier 1 Kit. Complete the challenges associated with each ordnance type to earn bonus XP and Burn Cards.
Frag Grenade

The Frag Grenade is an all-purpose anti-personnel weapon, useful for clearing tight spaces and areas that are out of direct line-of-sight. Its delayed fuse makes it versatile in many combat situations.
Ordnance Unlock: Level 1
Field Notes
- The Frag Grenade is a great ordnance to quickly wipe out minions or clear out Pilots caught in small rooms. Since Pilots will be jumping around the map a lot, you will want to force them in areas that allow the Frag Grenade to apply splash damage, making the enemy weaker for you to pick off. Cooking the grenade is critical; learn the timing to be able to throw it at Pilots who are about to peek out of a window or cover.
Frag Grenade Challenges
 Grenadier
| Tier | Criteria | Reward |
|---|---|---|
| 1 | Kill 10 Enemies | 500 XP |
| 2 | Kill 25 Enemies | 1,000 XP, Bottomless Frags Burn Card |
| 3 | Kill 50 Enemies | 2,500 XP, Bottomless Frags Burn Card |
| 4 | Kill 100 Enemies | 5,000 XP, Bottomless Frags Burn Card |
| 5 | Kill 150 Enemies | 10,000 XP, Bottomless Frags Burn Card |
 No-Hitter
| Tier | Criteria | Reward |
|---|---|---|
| 1 | Kill 5 Pilots | 500 XP |
| 2 | Kill 10 Pilots | 1,000 XP, Bottomless Frags Burn Card |
| 3 | Kill 20 Pilots | 2,500 XP, Bottomless Frags Burn Card |
| 4 | Kill 30 Pilots | 5,000 XP, Bottomless Frags Burn Card |
| 5 | Kill 50 Pilots | 10,000 XP, Bottomless Frags Burn Card |
 Dodge-Ball
| Tier | Criteria | Reward |
|---|---|---|
| 1 | Kill 5 Grunts | 500 XP |
| 2 | Kill 15 Grunts | 1,000 XP, Bottomless Frags Burn Card |
| 3 | Kill 30 Grunts | 2,500 XP, Bottomless Frags Burn Card |
| 4 | Kill 50 Grunts | 5,000 XP, Bottomless Frags Burn Card |
| 5 | Kill 100 Grunts | 10,000 XP, Bottomless Frags Burn Card |
Awarded Burn Card

Bottomless Frags
Arc Grenade

Arc Grenades inflict limited damage compared to Frag Grenades, but heavily distort the vision systems of Titans and Pilots that are caught in the blast radius.
Ordnance Unlock: Level 7
Field Notes
- Arc Grenades are the best ordnance against Titans because they explode on contact and render a Titan useless for a few seconds where you and your team can take down the disoriented Titan. If you don’t have a Suppressor on your primary weapon and want to eliminate a group of AI, this grenade will do the trick without exposing you on the minimap. Lastly, this grenade has a large blast radius, making sure that it will hit your target, even if your aim is slightly off.
Arc Grenade Challenges
 Conductor
| Tier | Criteria | Reward |
|---|---|---|
| 1 | Kill 5 Enemies | 500 XP |
| 2 | Kill 15 Enemies | 1,000 XP, Shock Rocks Burn Card |
| 3 | Kill 30 Enemies | 2,500 XP, Shock Rocks Burn Card |
| 4 | Kill 50 Enemies | 5,000 XP, Shock Rocks Burn Card |
| 5 | Kill 100 Enemies | 10,000 XP, Shock Rocks Burn Card |
 Electrocutioner
| Tier | Criteria | Reward |
|---|---|---|
| 1 | Kill 1 Pilot | 500 XP |
| 2 | Kill 5 Pilots | 1,000 XP, Shock Rocks Burn Card |
| 3 | Kill 10 Pilots | 2,500 XP, Shock Rocks Burn Card |
| 4 | Kill 15 Pilots | 5,000 XP, Shock Rocks Burn Card |
| 5 | Kill 25 Pilots | 10,000 XP, Shock Rocks Burn Card |
 Bug Zapper
| Tier | Criteria | Reward |
|---|---|---|
| 1 | Kill 5 Grunts | 500 XP |
| 2 | Kill 15 Grunts | 1,000 XP, Shock Rocks Burn Card |
| 3 | Kill 30 Grunts | 2,500 XP, Shock Rocks Burn Card |
| 4 | Kill 50 Grunts | 5,000 XP, Shock Rocks Burn Card |
| 5 | Kill 100 Grunts | 10,000 XP, Shock Rocks Burn Card |
 Assault With Battery
| Tier | Criteria | Reward |
|---|---|---|
| 1 | Kill 5 Spectres | 500 XP |
| 2 | Kill 10 Spectres | 1,000 XP, Shock Rocks Burn Card |
| 3 | Kill 20 Spectres | 2,500 XP, Shock Rocks Burn Card |
| 4 | Kill 30 Spectres | 5,000 XP, Shock Rocks Burn Card |
| 5 | Kill 50 Spectres | 10,000 XP, Shock Rocks Burn Card |
Awarded Burn Card

Shock Rocks
Satchel Charge

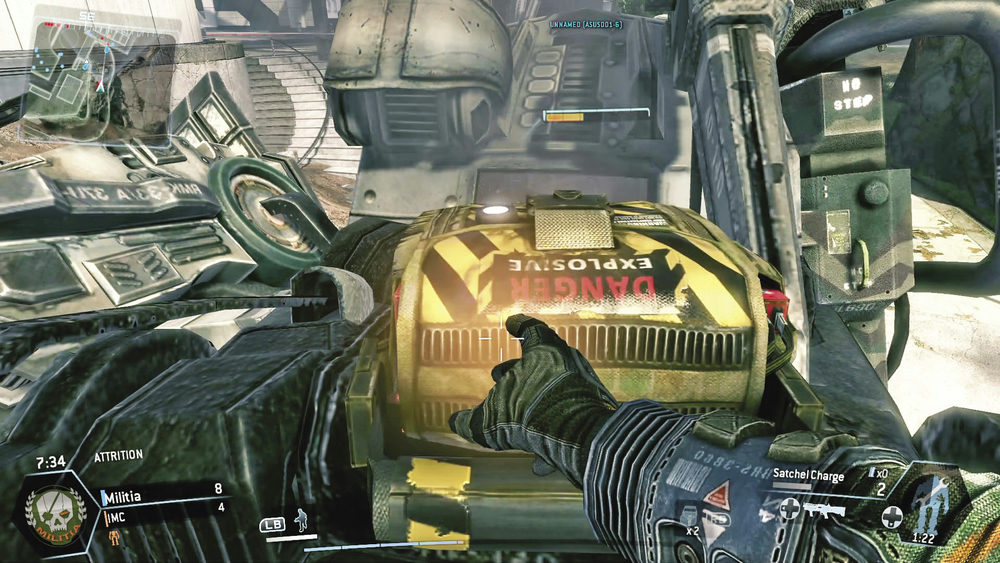
Satchel Charges stick to any surface and are manually detonated, causing massive explosive damage to anything nearby.
Ordnance Unlock: Level 17
Field Notes
- Satchel Charges are great for setting booby traps for Pilots as well as dealing heavy damage to Titans. Drop or place Satchel Charges in high-traffic areas such as near objectives or choke points—placing charges next to Hardpoints and flags may not be sporting, but one can’t deny the effectiveness of such tactics. Once a charge is placed, it must be detonated manually, so it’s best to maintain line of sight with your trap to ensure proper timing. Satchel Charges are extremely effective against Titans when performing rodeo attacks. Stick a few charges to a Titan, then jump off before detonating them. The Dead Man’s Trigger Tier 2 Kit automatically detonates all charges when you die, useful for those times when you’re killed before setting off the charges manually.

Satchel Charge Challenges
 Grenadier
| Tier | Criteria | Reward |
|---|---|---|
| 1 | Kill 10 Enemies | 500 XP |
| 2 | Kill 25 Enemies | 1,000 XP, Surplus Satchels Burn Card |
| 3 | Kill 50 Enemies | 2,500 XP, Surplus Satchels Burn Card |
| 4 | Kill 100 Enemies | 5,000 XP, Surplus Satchels Burn Card |
| 5 | Kill 150 Enemies | 10,000 XP, Surplus Satchels Burn Card |
 No-Hitter
| Tier | Criteria | Reward |
|---|---|---|
| 1 | Kill 1 Pilot | 500 XP |
| 2 | Kill 5 Pilots | 1,000 XP, Surplus Satchels Burn Card |
| 3 | Kill 15 Pilots | 2,500 XP, Surplus Satchels Burn Card |
| 4 | Kill 30 Pilots | 5,000 XP, Surplus Satchels Burn Card |
| 5 | Kill 50 Enemies | 10,000 XP, Surplus Satchels Burn Card |
 Dodge-Ball
| Tier | Criteria | Reward |
|---|---|---|
| 1 | Kill 5 Grunts | 500 XP |
| 2 | Kill 15 Grunts | 1,000 XP, Surplus Satchels Burn Card |
| 3 | Kill 30 Grunts | 2,500 XP, Surplus Satchels Burn Card |
| 4 | Kill 50 Grunts | 5,000 XP, Surplus Satchels Burn Card |
| 5 | Kill 100 Grunts | 10,000 XP, Surplus Satchels Burn Card |
Awarded Burn Card

Surplus Satchels
Arc Mine

The Arc Mine is a proximity-detonated charge that sticks to any surface. In addition to nominal explosive damage, it causes massive interference to nearby Titan and Pilot vision systems on detonation.
Ordnance Unlock: Level 31
Field Notes
- The Arc Mine is similar to the Arc Grenade, but the Arc Mine is placed in a fixed position and activated by enemy movement. This ordnance is not only great for causing massive interference to Titans and Pilots, but by placing two together behind a doorway or on a ceiling near an objective will kill an unsuspecting enemy Pilot.
Arc Mine Challenges
 Blaster
| Tier | Criteria | Reward |
|---|---|---|
| 1 | Kill 10 Enemies | 500 XP |
| 2 | Kill 25 Enemies | 1,000 XP, Personal Alarm System Burn Card |
| 3 | Kill 50 Enemies | 2,500 XP, Personal Alarm System Burn Card |
| 4 | Kill 100 Enemies | 5,000 XP, Personal Alarm System Burn Card |
| 5 | Kill 150 Enemies | 10,000 XP, Personal Alarm System Burn Card |
 Son of A…
| Tier | Criteria | Reward |
|---|---|---|
| 1 | Kill 1 Pilot | 500 XP |
| 2 | Kill 5 Pilots | 1,000 XP, Personal Alarm System Burn Card |
| 3 | Kill 15 Pilots | 2,500 XP, Personal Alarm System Burn Card |
| 4 | Kill 30 Pilots | 5,000 XP, Personal Alarm System Burn Card |
| 5 | Kill 50 Pilots | 10,000 XP, Personal Alarm System Burn Card |
 Gibber
| Tier | Criteria | Reward |
|---|---|---|
| 1 | Kill 5 Grunts | 500 XP |
| 2 | Kill 15 Grunts | 1,000 XP, Personal Alarm System Burn Card |
| 3 | Kill 30 Grunts | 2,500 XP, Personal Alarm System Burn Card |
| 4 | Kill 50 Grunts | 5,000 XP, Personal Alarm System Burn Card |
| 5 | Kill 100 Grunts | 10,000 XP, Personal Alarm System Burn Card |
Awarded Burn Card

Personal Alarm System