Sunset Overdrive Official Strategy Guide Weapons
Weapon Breakdowns
The following list deals with each weapon in roughly the order in which they are received in a strictly single-player game.
Unless otherwise noted, weapon’s range is listed in yards.
All bonuses conveyed at each level for a weapon are cumulative.
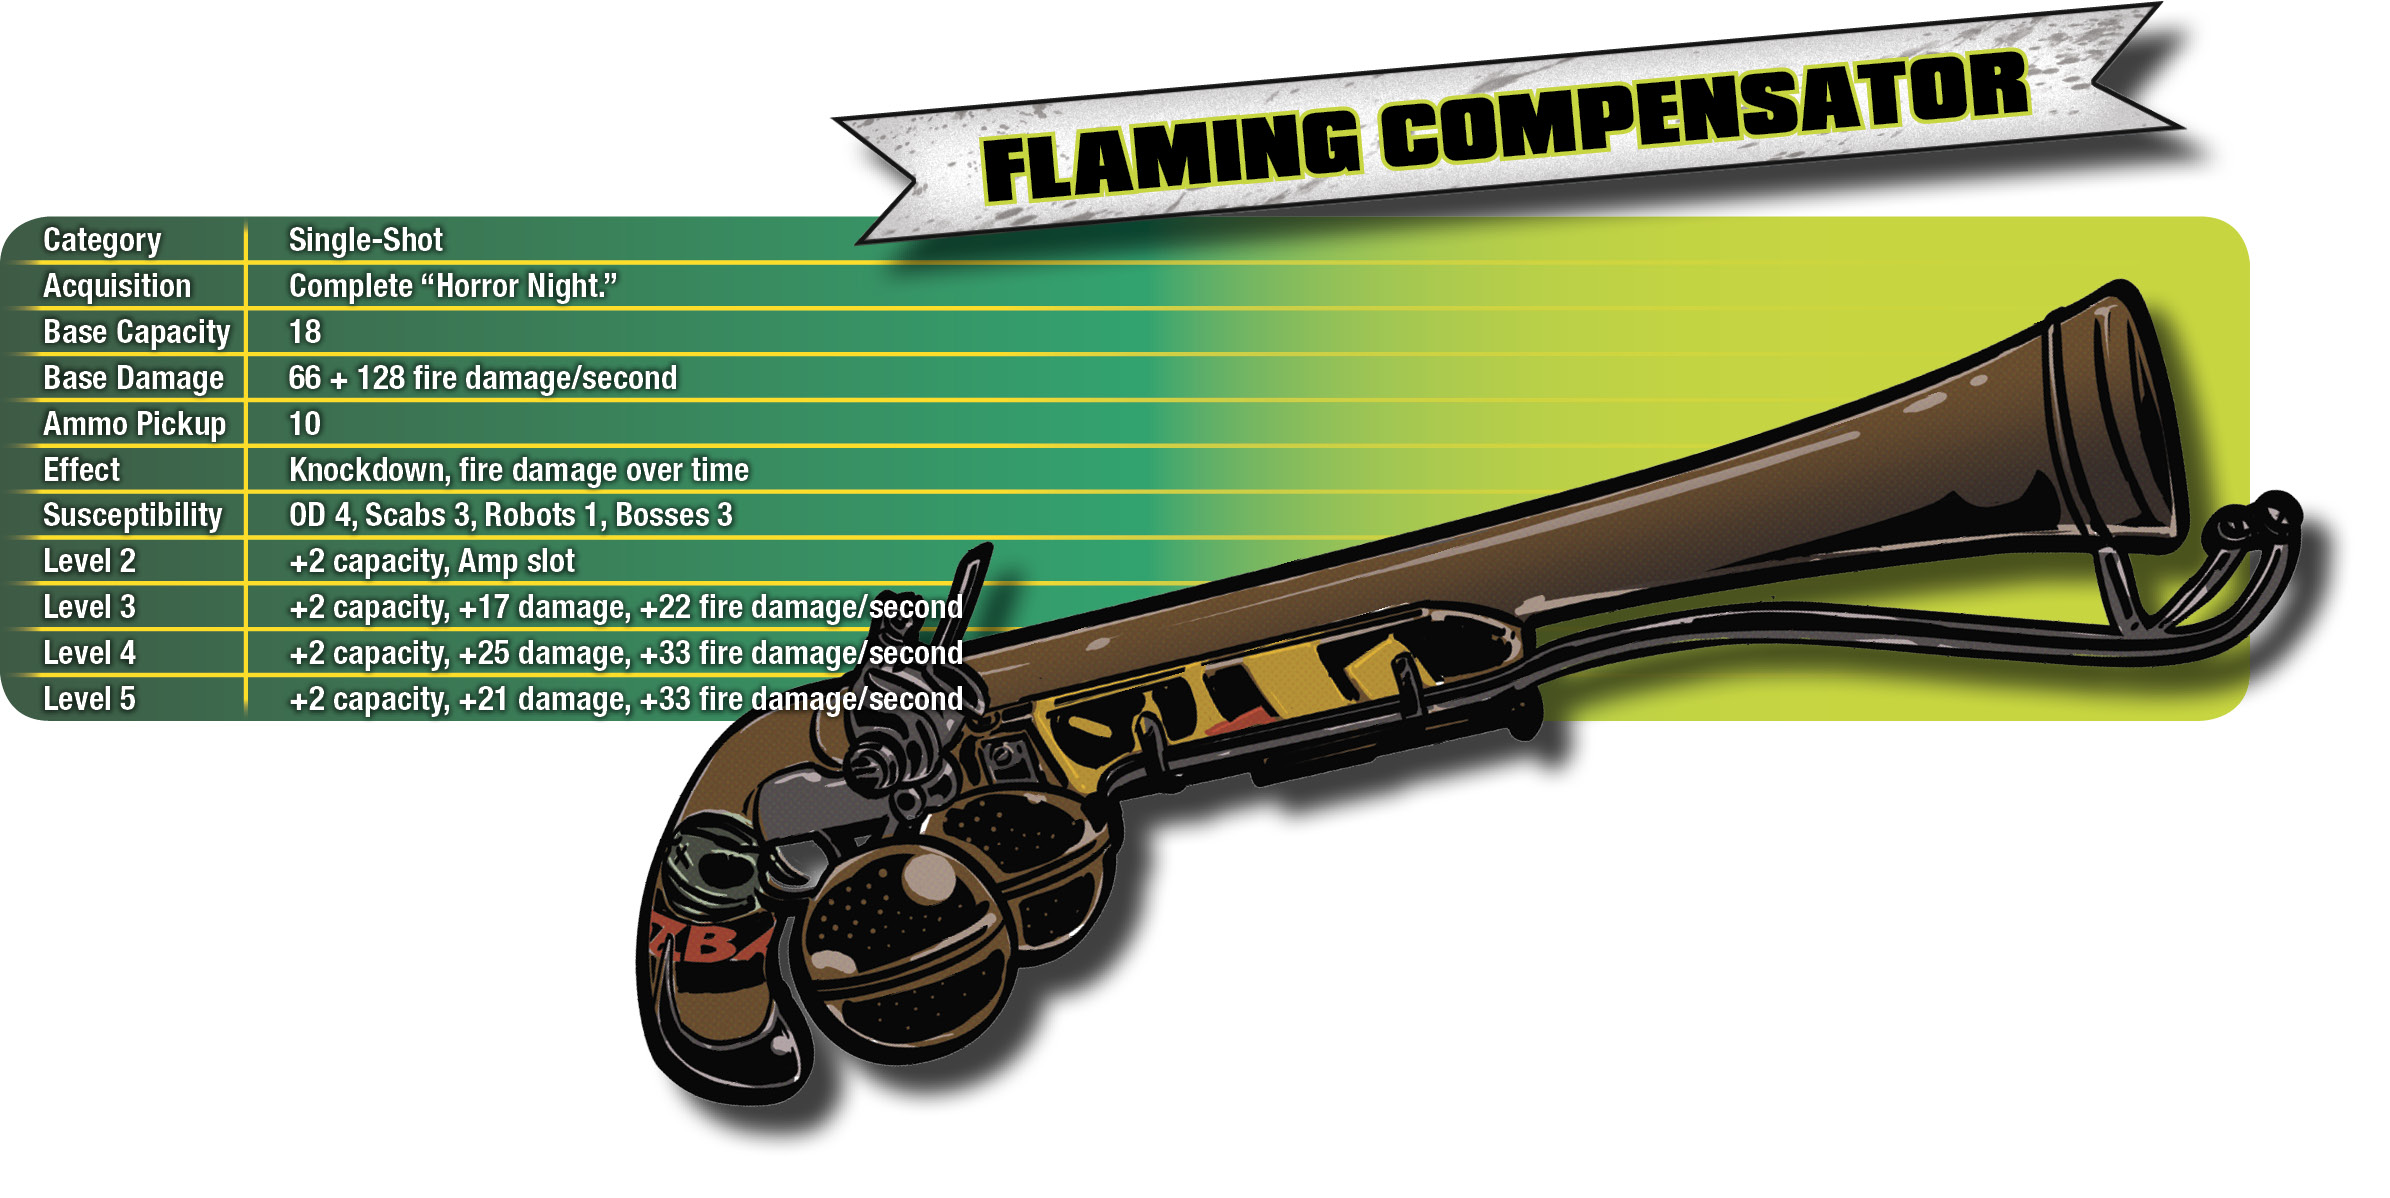
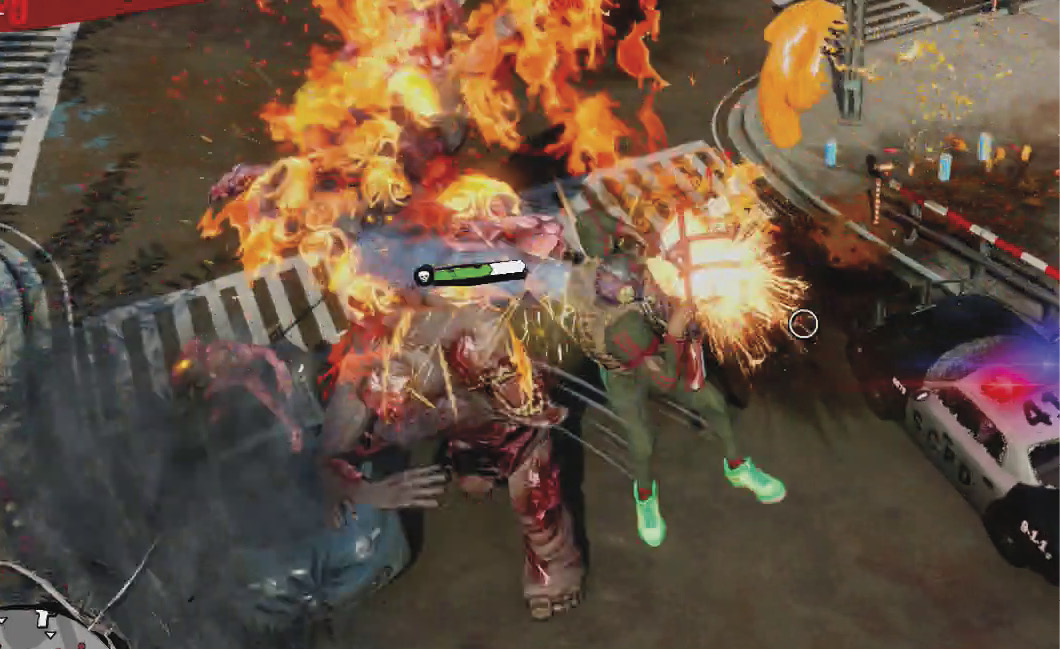
Your first weapon is not merely an extremely obvious metaphor, but it is one of your best all-around weapons in the early game. It has a decent-sized clip, is very effective against the OD, and even though it looks and works a bit like a shotgun, its damage doesn’t fall off as much as you’d expect at medium range.
A hit from the Compensator has a good chance of knocking its target over and/or setting it on fire. In the latter case, the fire effect inflicts a lot more damage than the shot does, which makes it an excellent weapon for “drive-by” attacks on Scabs and OD. The Compensator’s one real weakness is that it’s virtually useless against robots, as are most fire-based weapons, but it never loses its value as an anti-OD street cleaner.
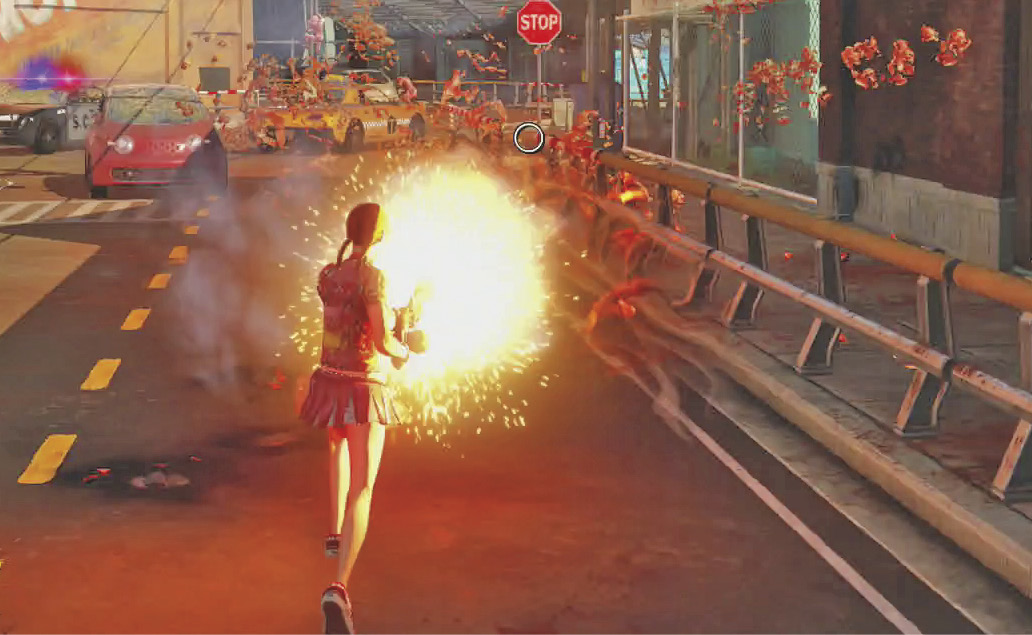
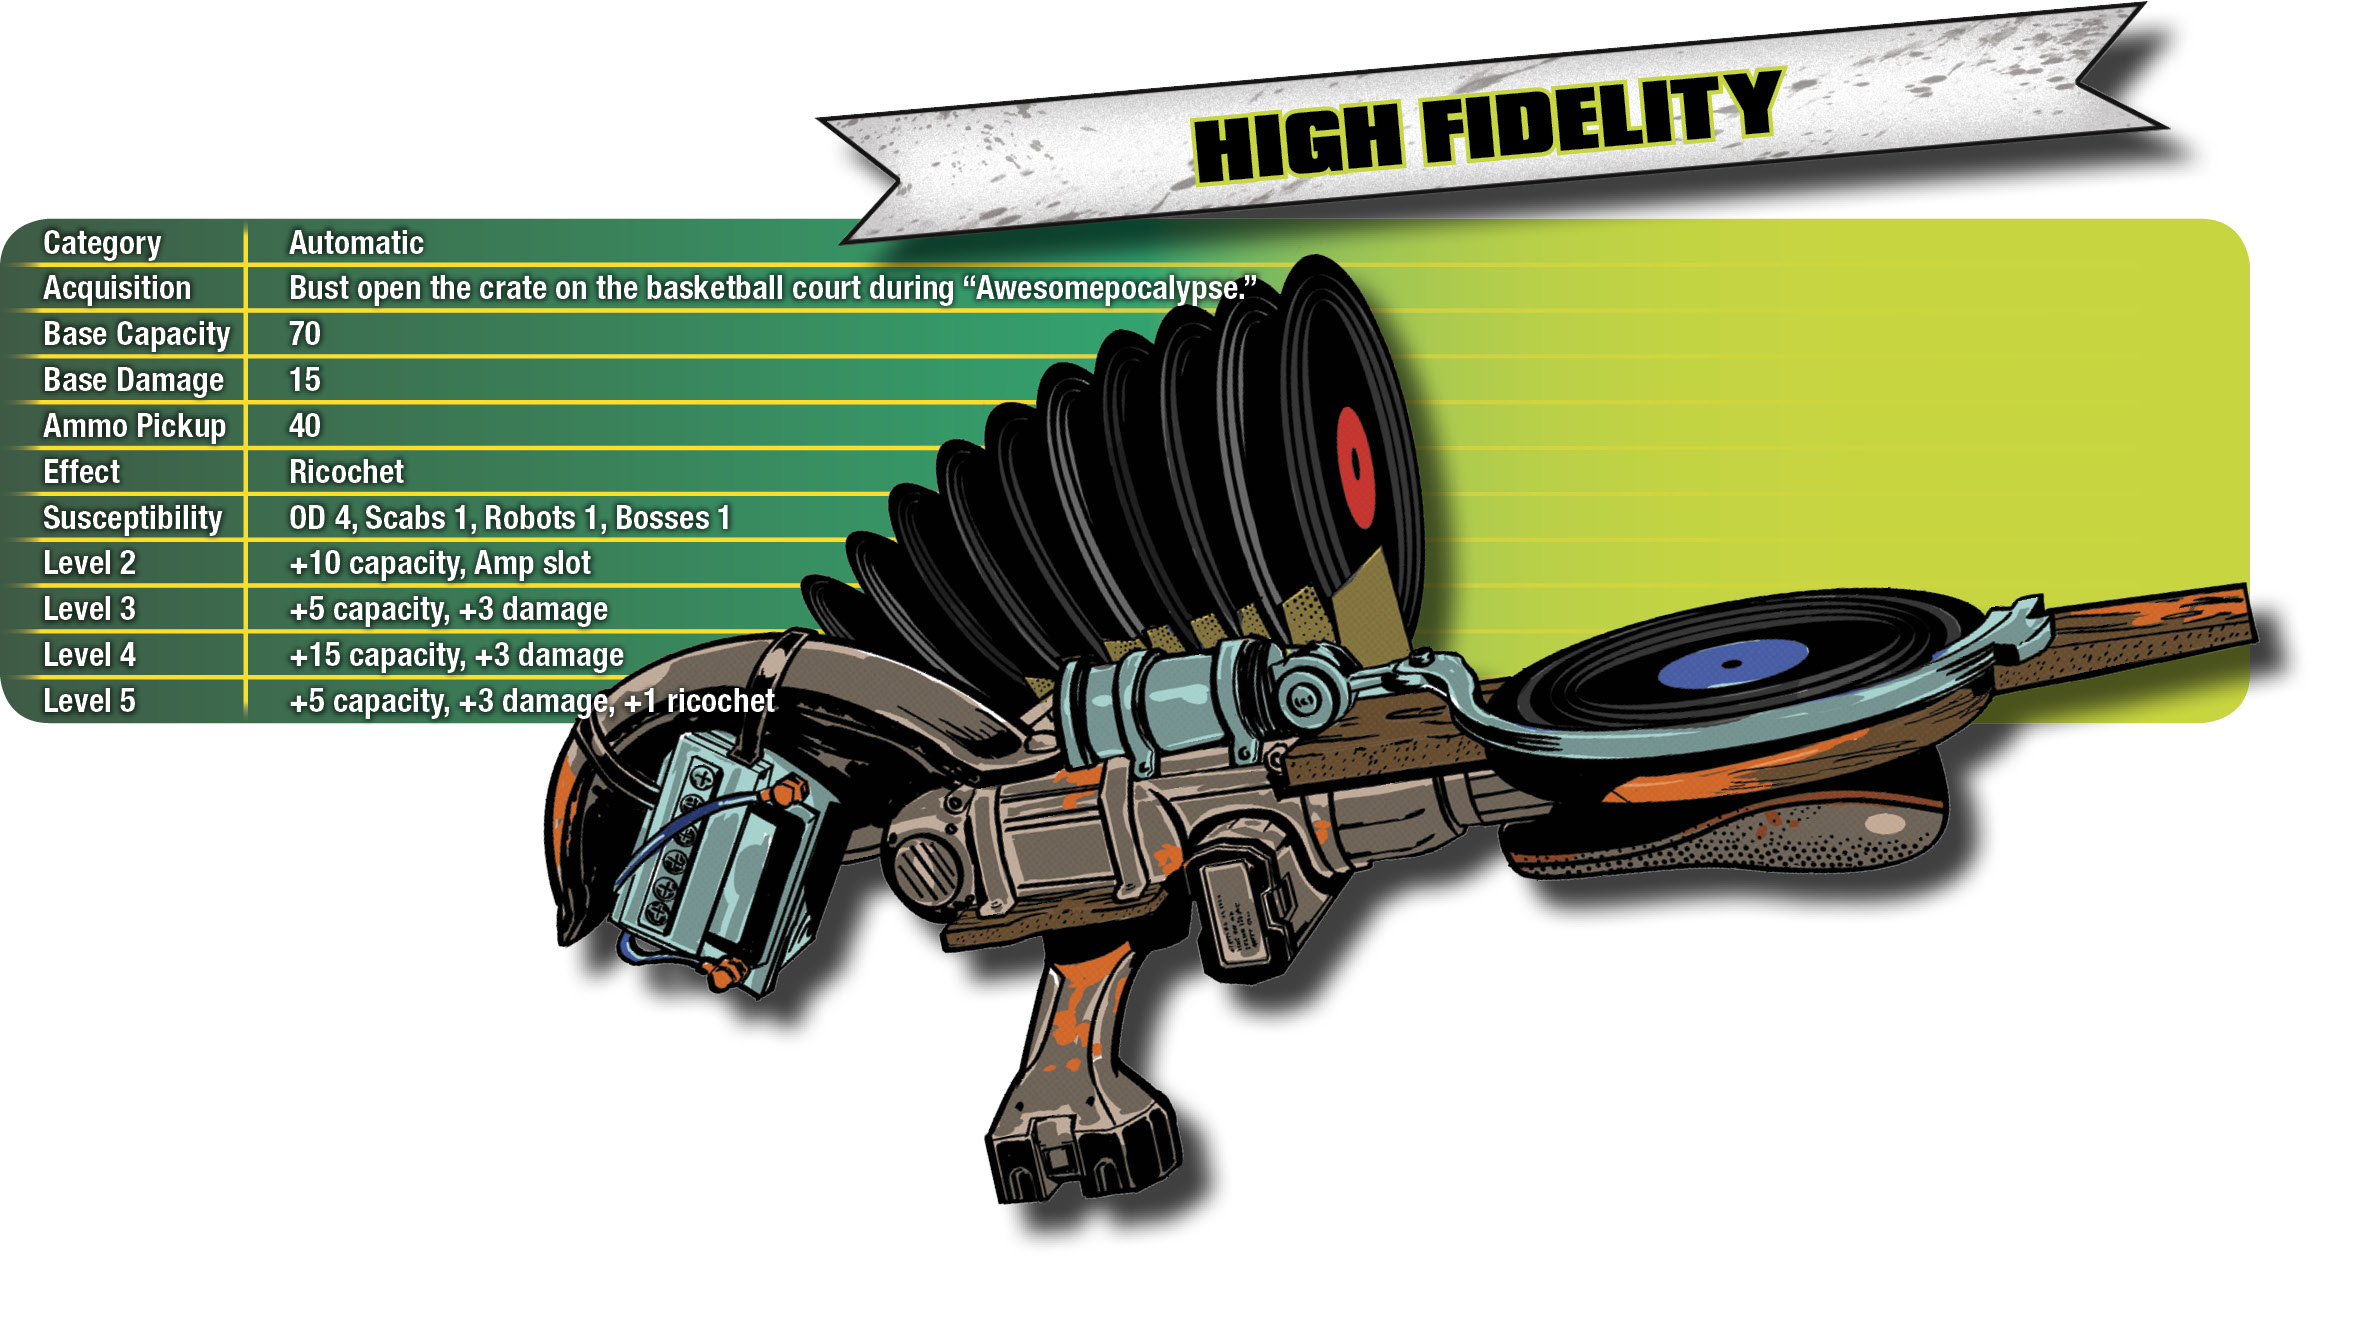
The High Fidelity fires vinyl records on full automatic (pretend they’re all by a band you hate!), each of which can ricochet three times after striking their initial target (and four times when the Fidelity reaches level 5), inflicting slightly higher damage to each subsequent enemy they hit.
An individual record does very little damage, but the Fidelity has the most user-friendly auto-aim of any weapon in the game and a high rate of fire. It’s a good way to clear out oncoming crowds of standard-issue OD and it’s very difficult to miss with it, but against any other kind of opponent, the Fidelity is barely better than harsh language. In short, this is designed to be the gun you use while you’re learning Sunset Overdrive’s particular rhythm, and once you’ve got that down, it’s usually time to trade out the Fidelity for something better.
The High Fidelity does have one other thing going for it, and that’s its potential as a delivery system for Weapon Amps. Since its damage per shot is so low, the Fidelity is an excellent gun to use with “on-hit” Amps such as Hater, Rocket Man, or Stun Rounds. This allows you to enrage, electrify, or explode entire crowds of OD or Scabs with one long burst from the Fidelity, which vastly increases both its utility and potential damage.
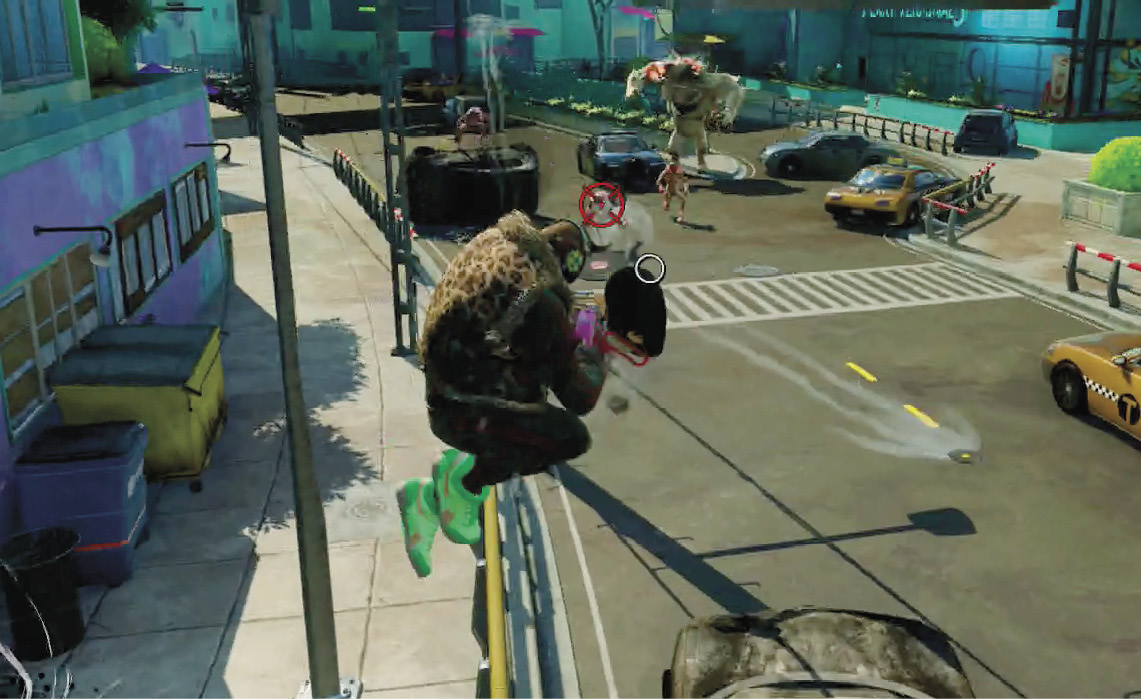
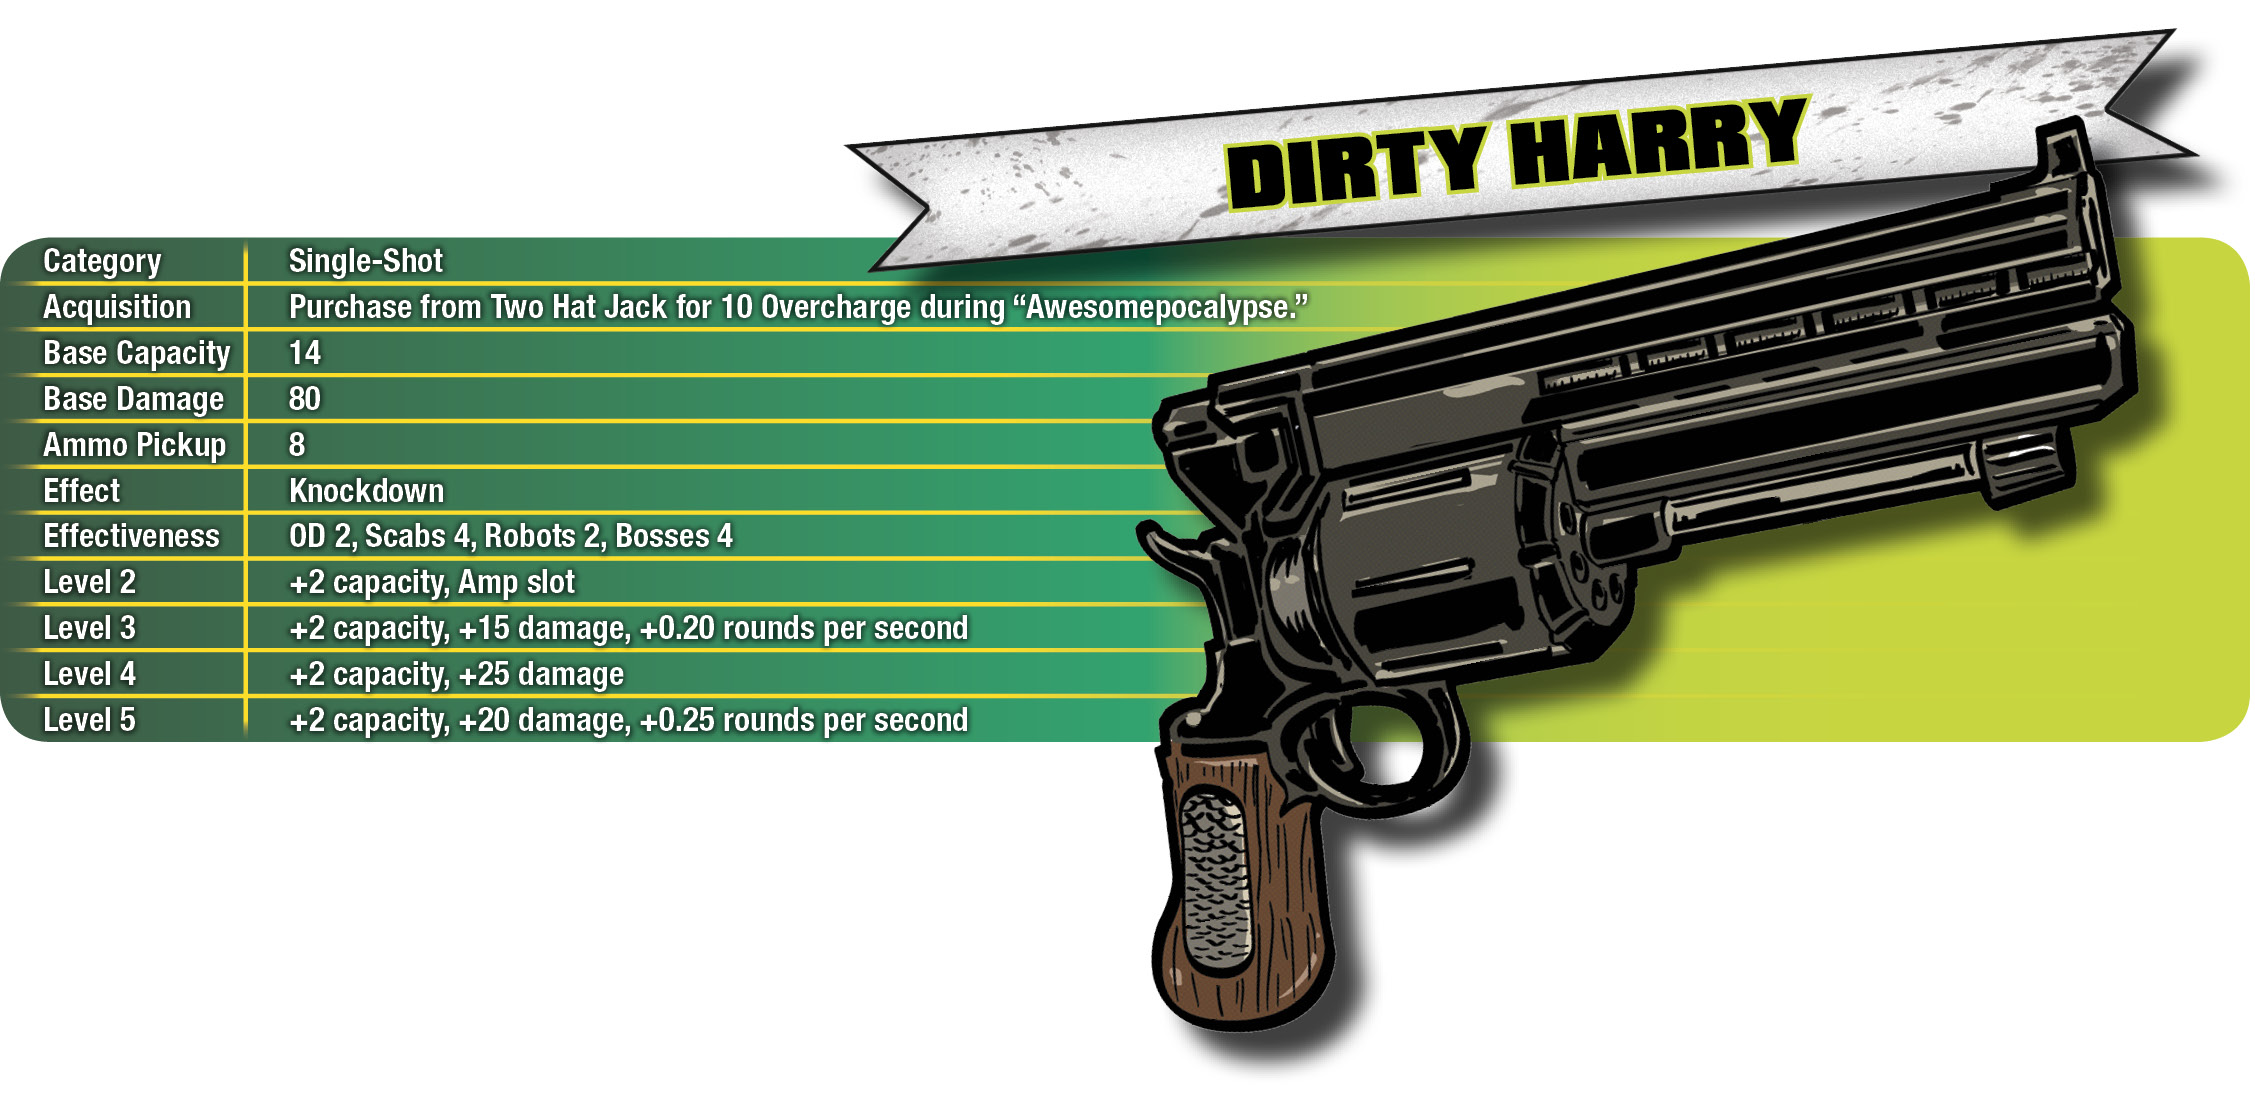
The Dirty Harry is the first weapon you can get that’s an actual gun, rather than some gun-like object made from debris and insanity. It’s a hand cannon, capable of dropping Scab Shooters and Rushers in one hit each, but its low capacity can be a problem.
Like other firearms, the Harry is a “hitscan” weapon: its projectiles have no travel time and thus cannot be avoided by fast-moving opponents. This can be valuable when you’re on the move.
As you progress, the Ahab overtakes the Dirty Harry on pure damage, but the Harry has the edge on rate of fire. It’s a good weapon to unload into a Herker or Spawner you just hit with a Freeze Bomb, or to use against distant Scabs who are firing from rooftops or balconies.
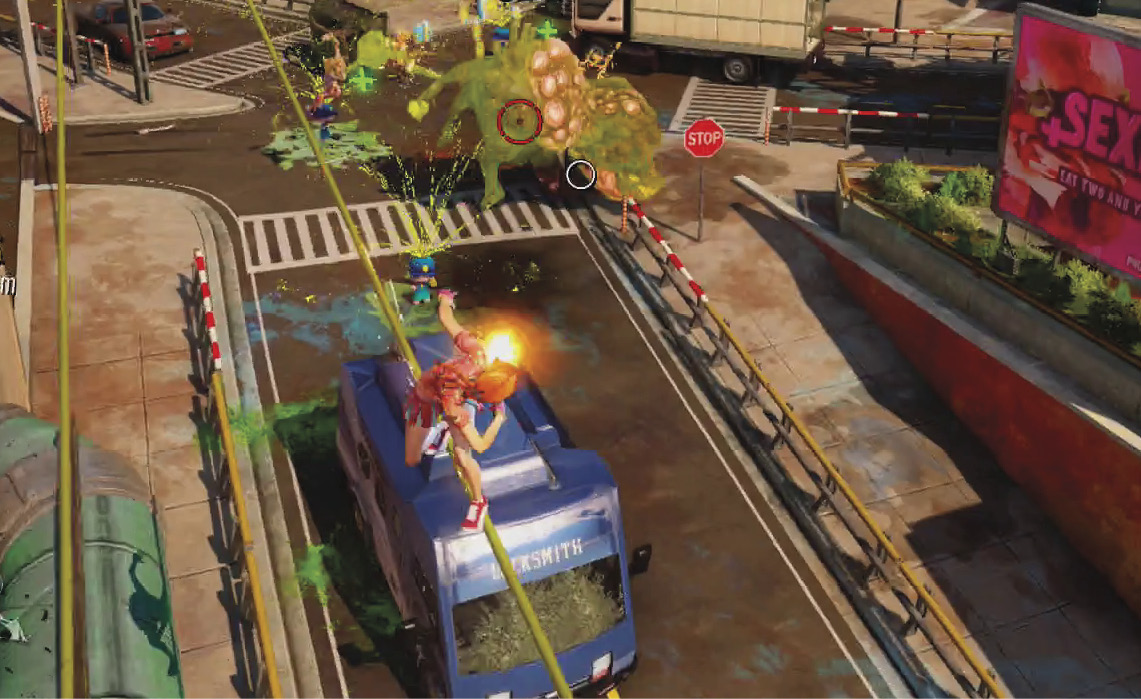
In the hands of lunatics like you, an ordinary Fizzie-brand lawn sprinkler can be made into a twirling fountain of sickly green death. When deployed, an Acid Sprinkler remains in place for up to 20 seconds, soaking anything that strays into its range (4 yards, or 5 yards at level 5) with a coat of acid that inflicts damage over time. There’s no initial burst of damage on application from the Acid Sprinkler, which means an enemy often gets a few seconds to act before the acid takes it down, but the damage is high enough that it isn’t often a problem.
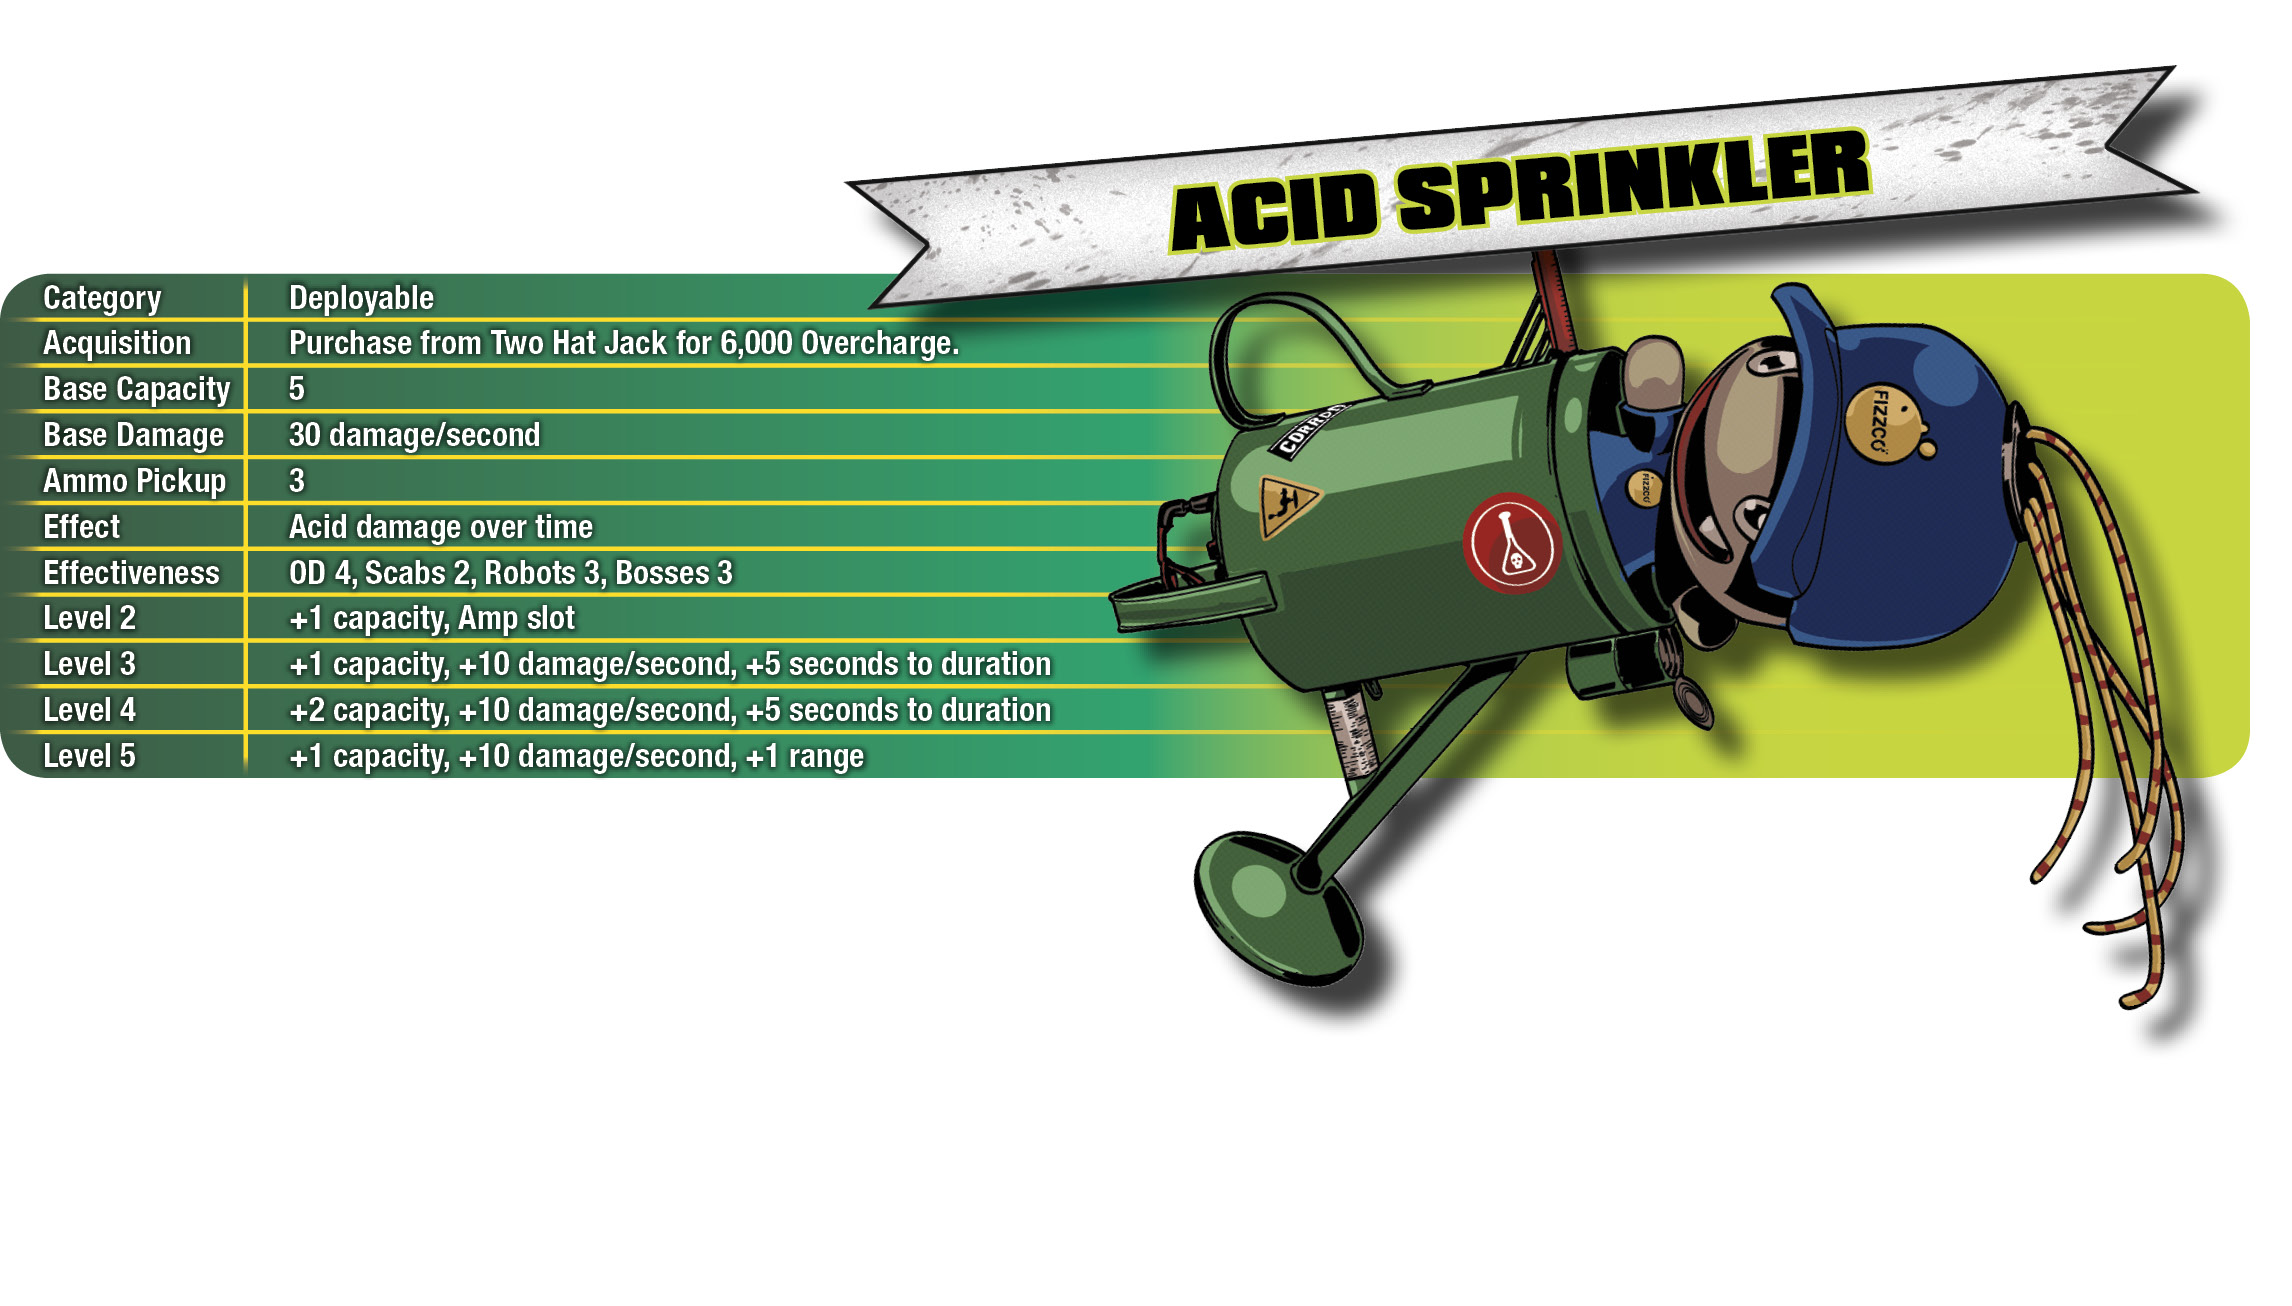
The Acid Sprinkler is excellent for point defense, particularly when you can employ them in a bottleneck (e.g., the bridges before the barricades on the Downtown night defense map), and it’s one of the first weapons you can acquire that deals its full damage against Fizzco Robots.
While the Sprinkler has a few downsides that later deployables don’t—it can’t move once it’s out and it only affects a small area around itself—it’s very useful for clearing rooftops and guarding doorways. You can use it in conjunction with Taunt Bots or other distractions to draw in and slaughter massive crowds of OD.
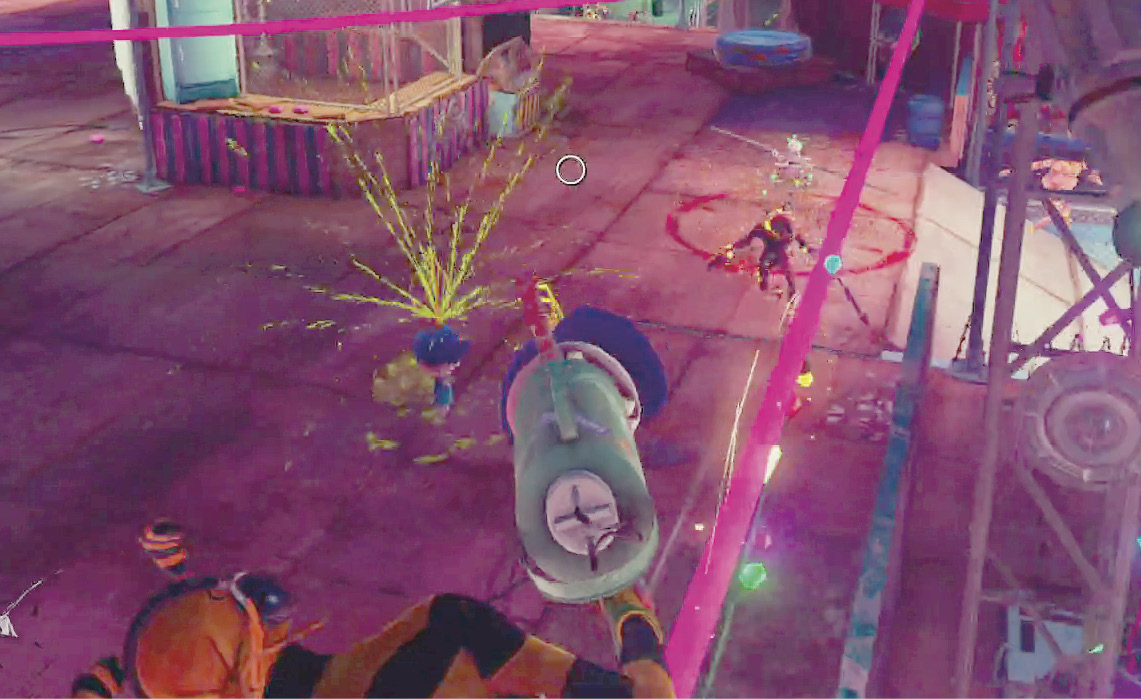
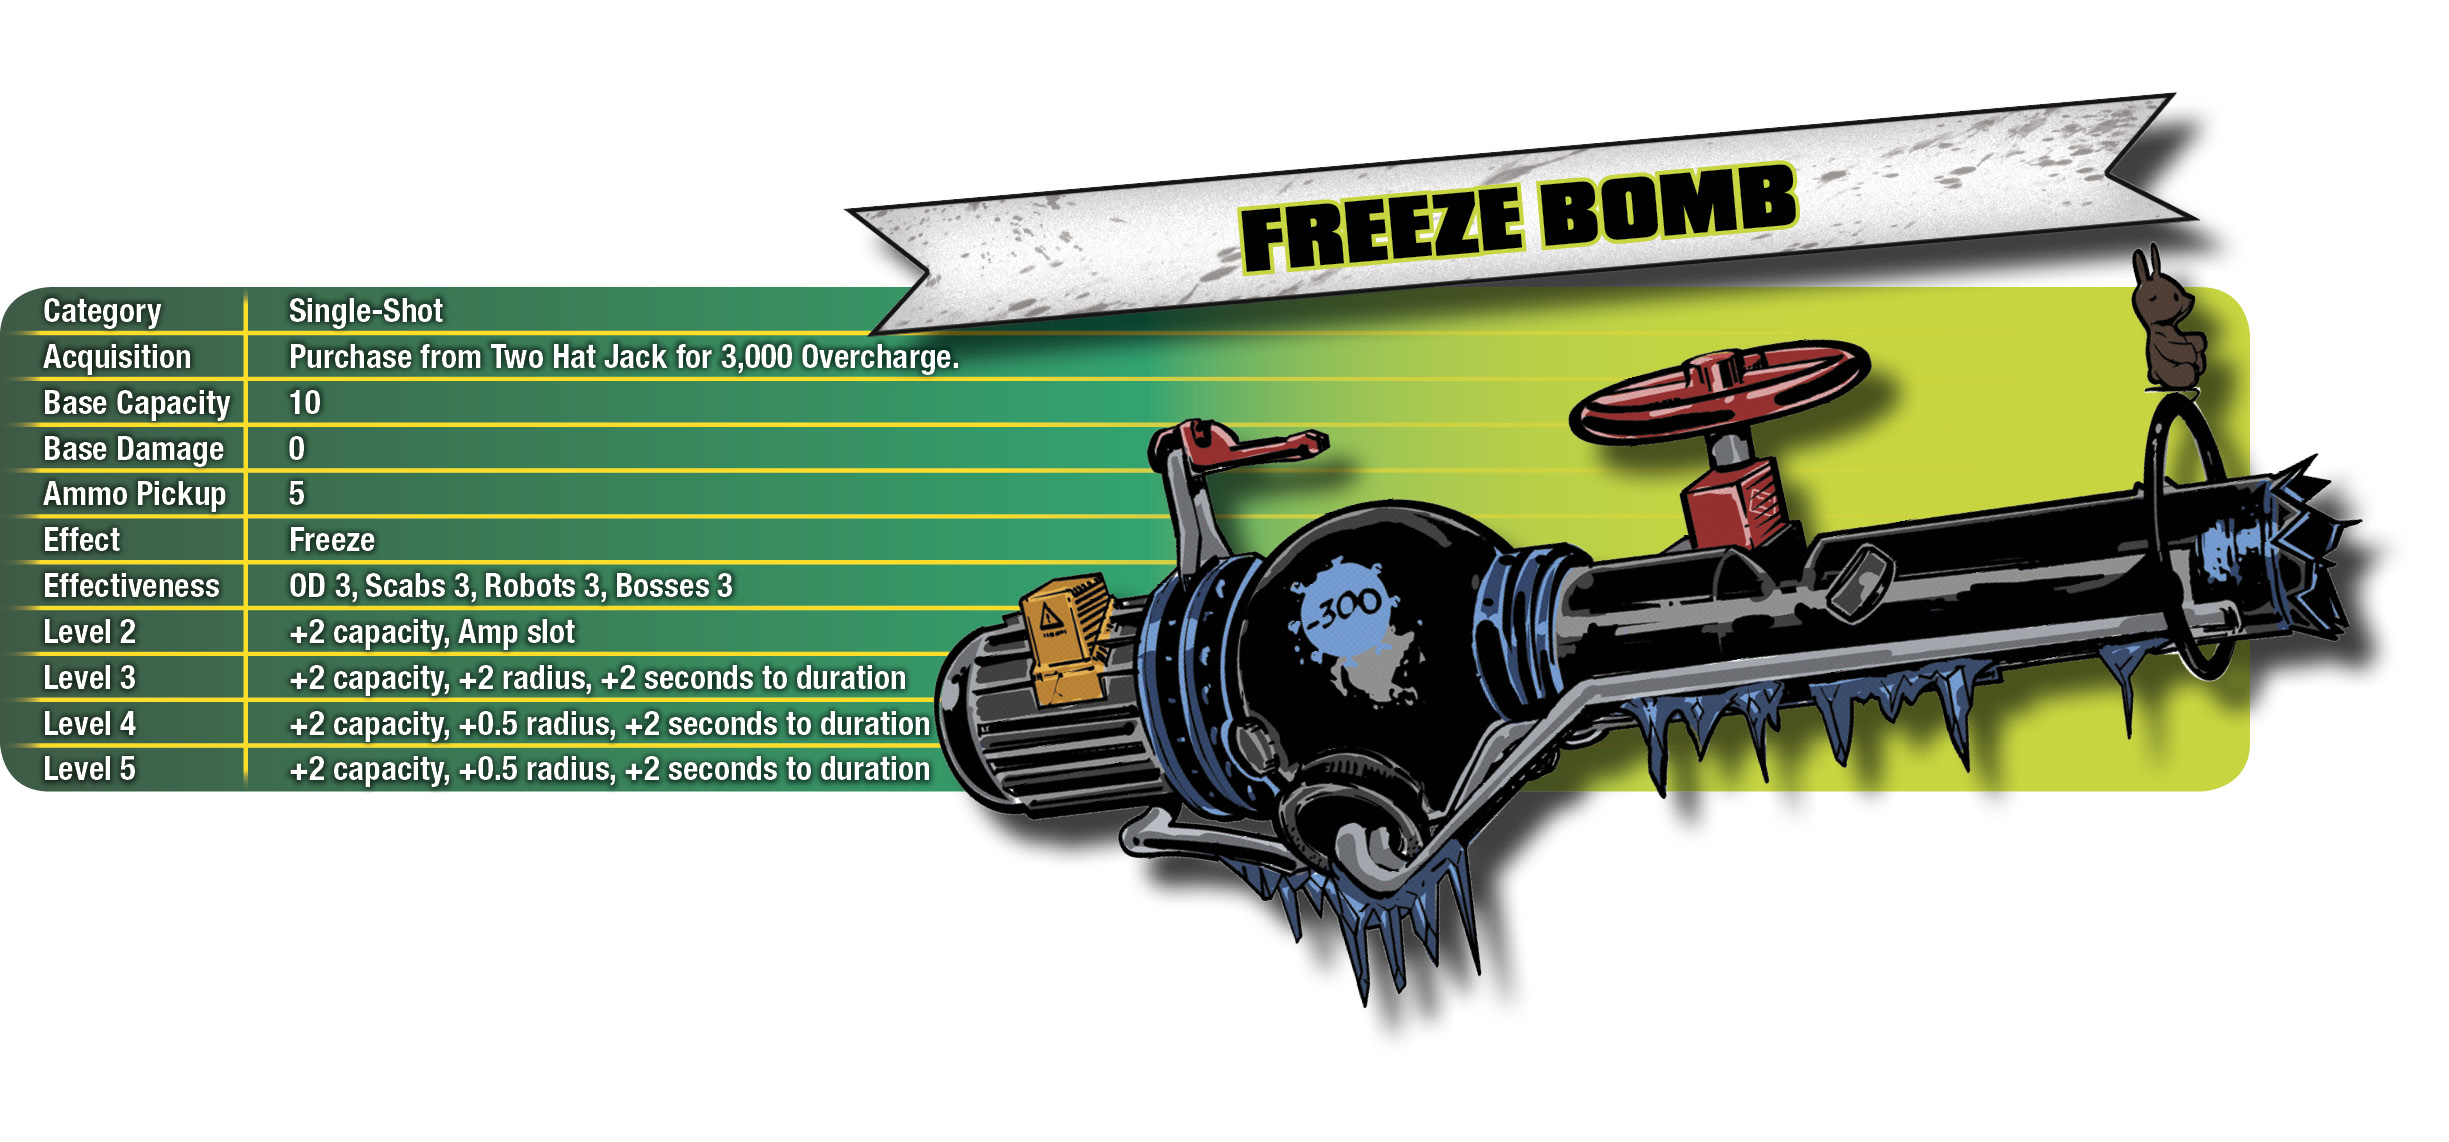
When the Freeze Bomb explodes, it turns enemies into ice sculptures for 6.5 yards in every direction. By itself, this does no damage, and the effect expires after a base duration of 12 seconds. You can shatter frozen enemies with hits from other weapons or a second direct hit from the Freeze Bomb.
Larger opponents, like Herkers, Spawners, or Muggers, require several hits in a row before they freeze up. Against them, the Freeze Bomb is “just” a lengthy stun, which is one of the best ways to deal with them in the early game. You can freeze them with a few Bombs, then switch weapons and unload on them until they drop.
As the game progresses and you accumulate more weaponry, the Freeze Bomb is still one of your best options for pure crowd control. It’s excellent for saving survivors, slowing down a horde of OD in Chaos Squad, or defending your Overcharge vats during night defense.
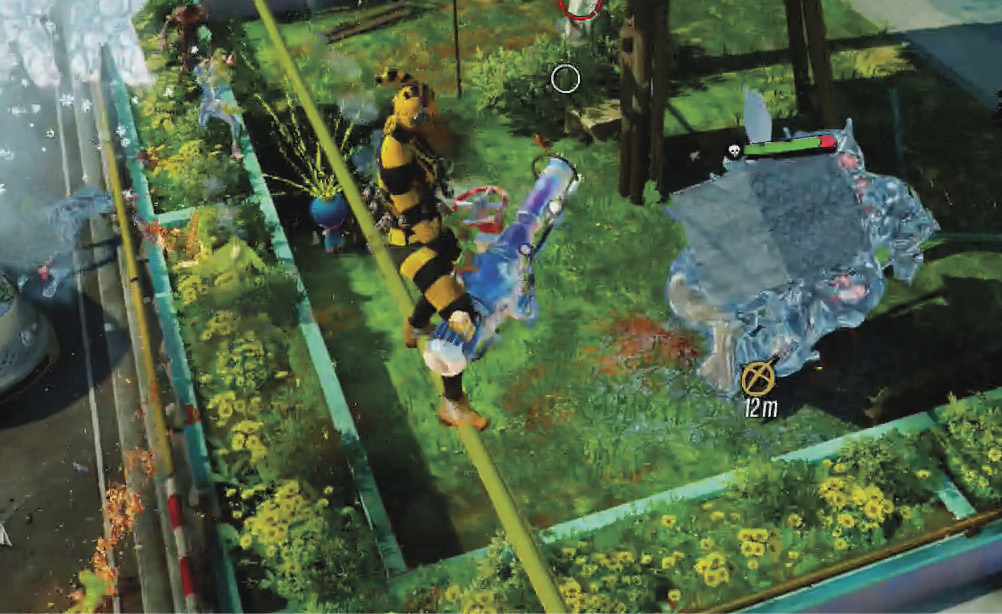
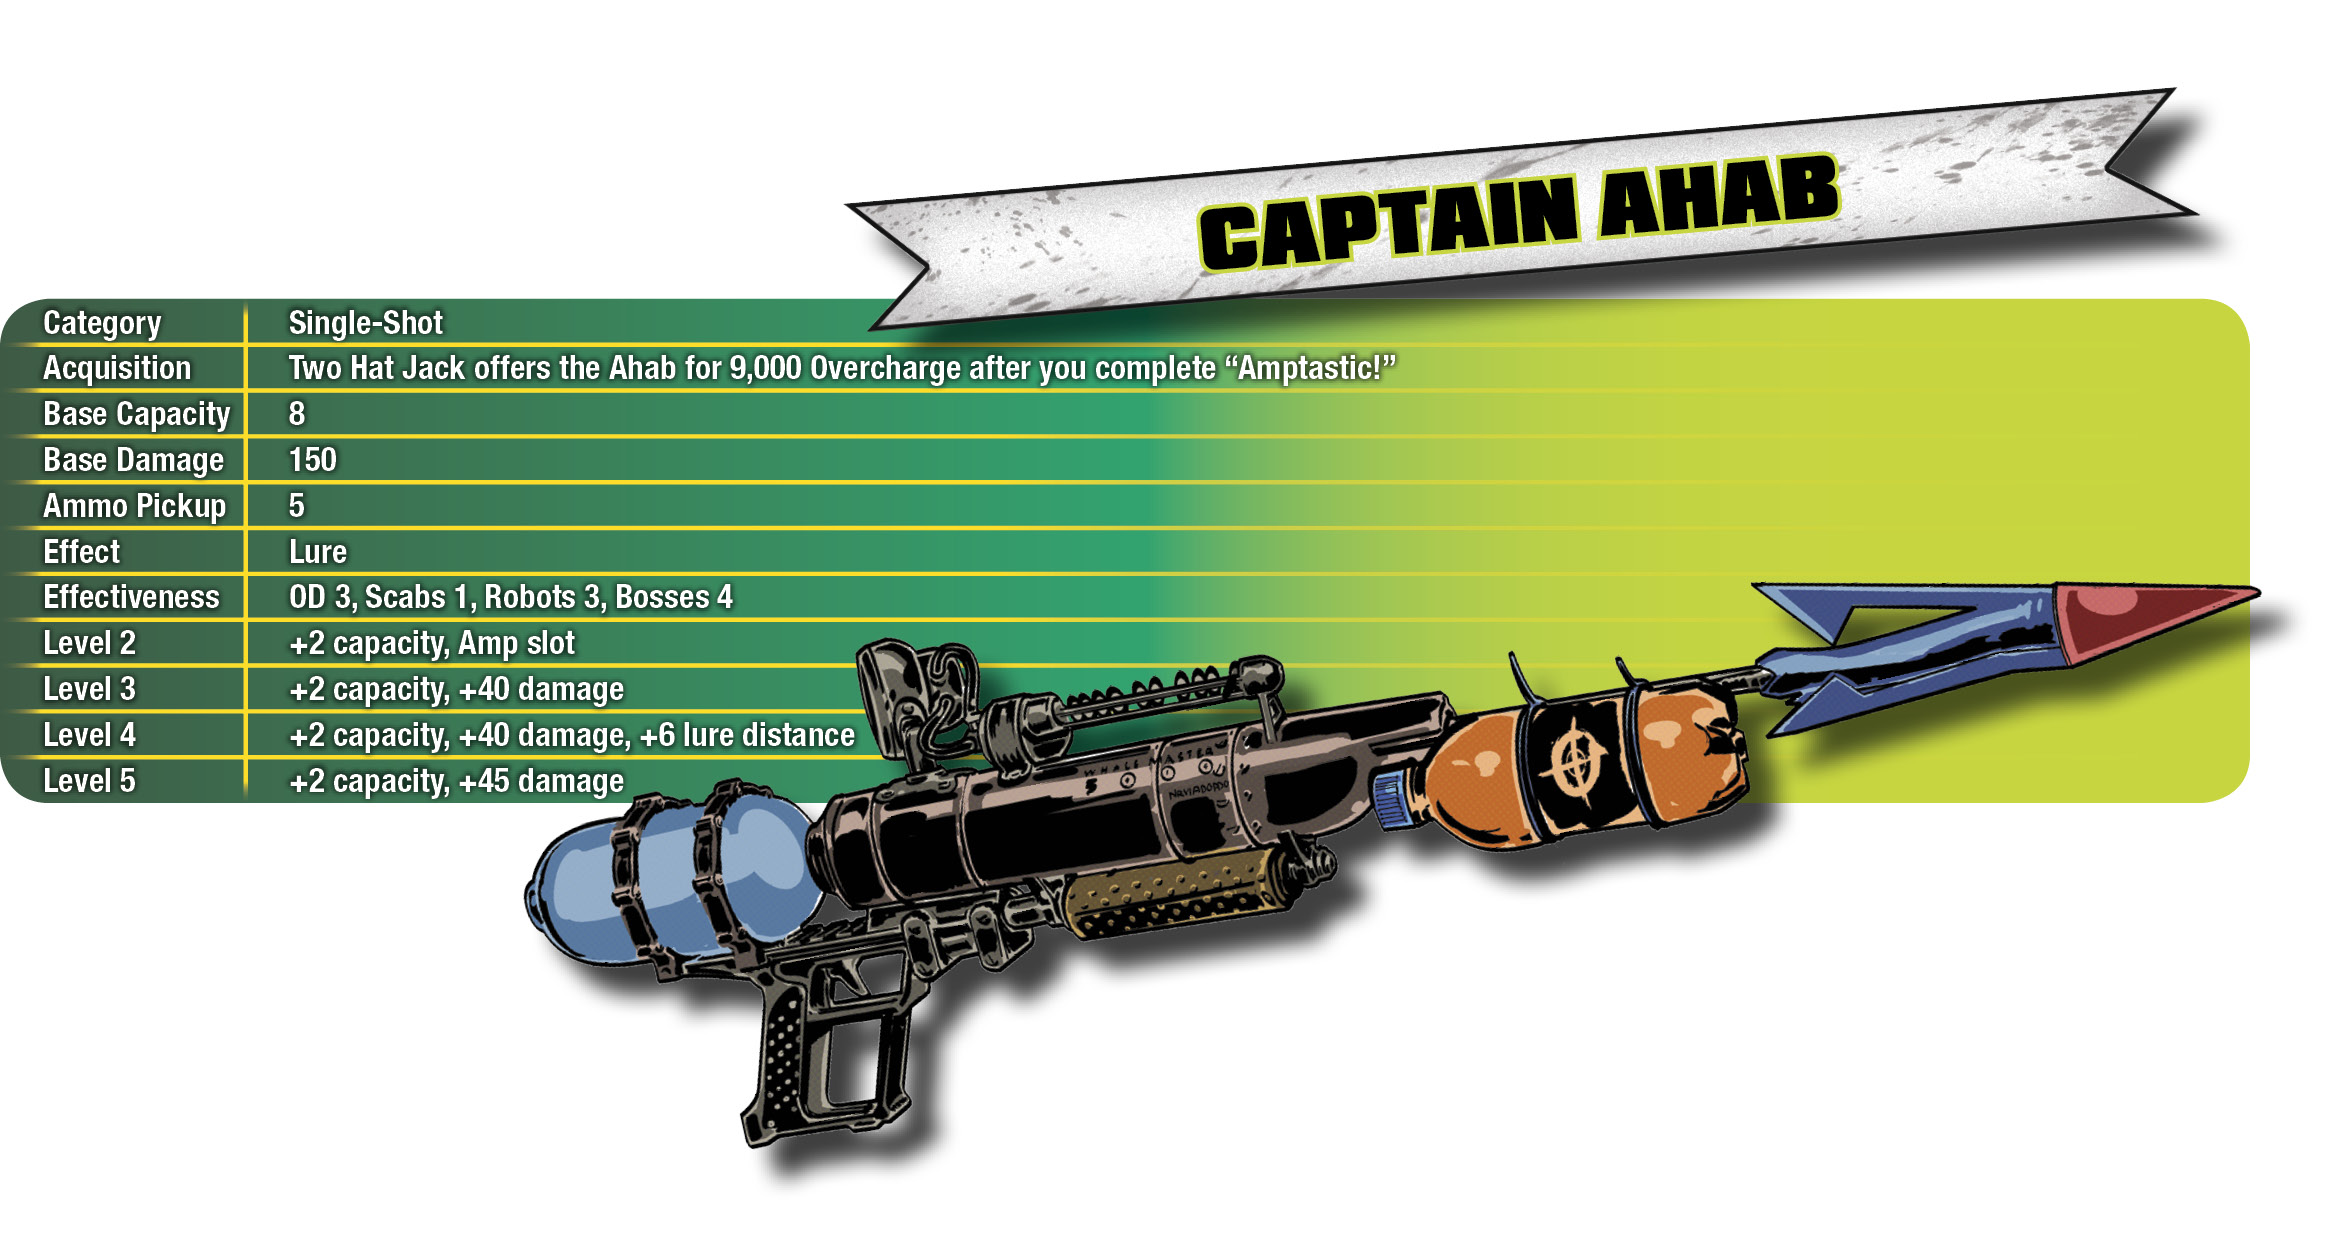
The Ahab does more raw damage than the Dirty Harry, but the Ahab’s harpoons have a slight travel time and it suffers from a low rate of fire. It’s surprisingly great against Wingers, can reliably knock a big chunk of life off of Herkers, and is often a one-hit kill against Rifle or Blade Bots.
As a secondary effect, if the Ahab’s harpoon strikes a wall or floor without hitting an enemy, it ejects a short-lived stream of Overcharge that can form a pool on the ground nearby. (The stream evaporates if there are more than a few yards between it and the ground.) This attracts any nearby OD to come over and start drinking from it, and will at least distract more powerful enemies like Blowers.
The pool of Overcharge from the Ahab lasts 15 seconds and is not capable of forcing OD to mutate into Poppers. You can use the pool to distract hordes of OD during night defense or, more frequently, to lure them into mines, traps, or environmental hazards. It’s particularly fun to shoot a few of the Ahab’s spikes into the train tracks during the first Buck National challenge, then run all the OD down at once with the Pain Train.
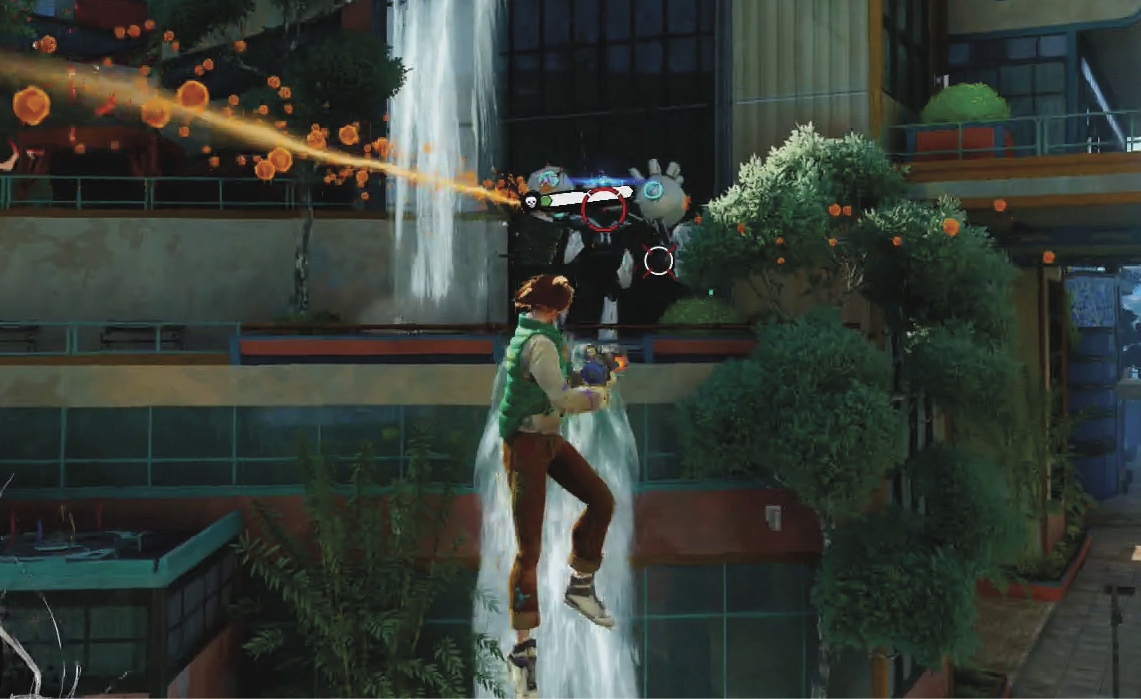
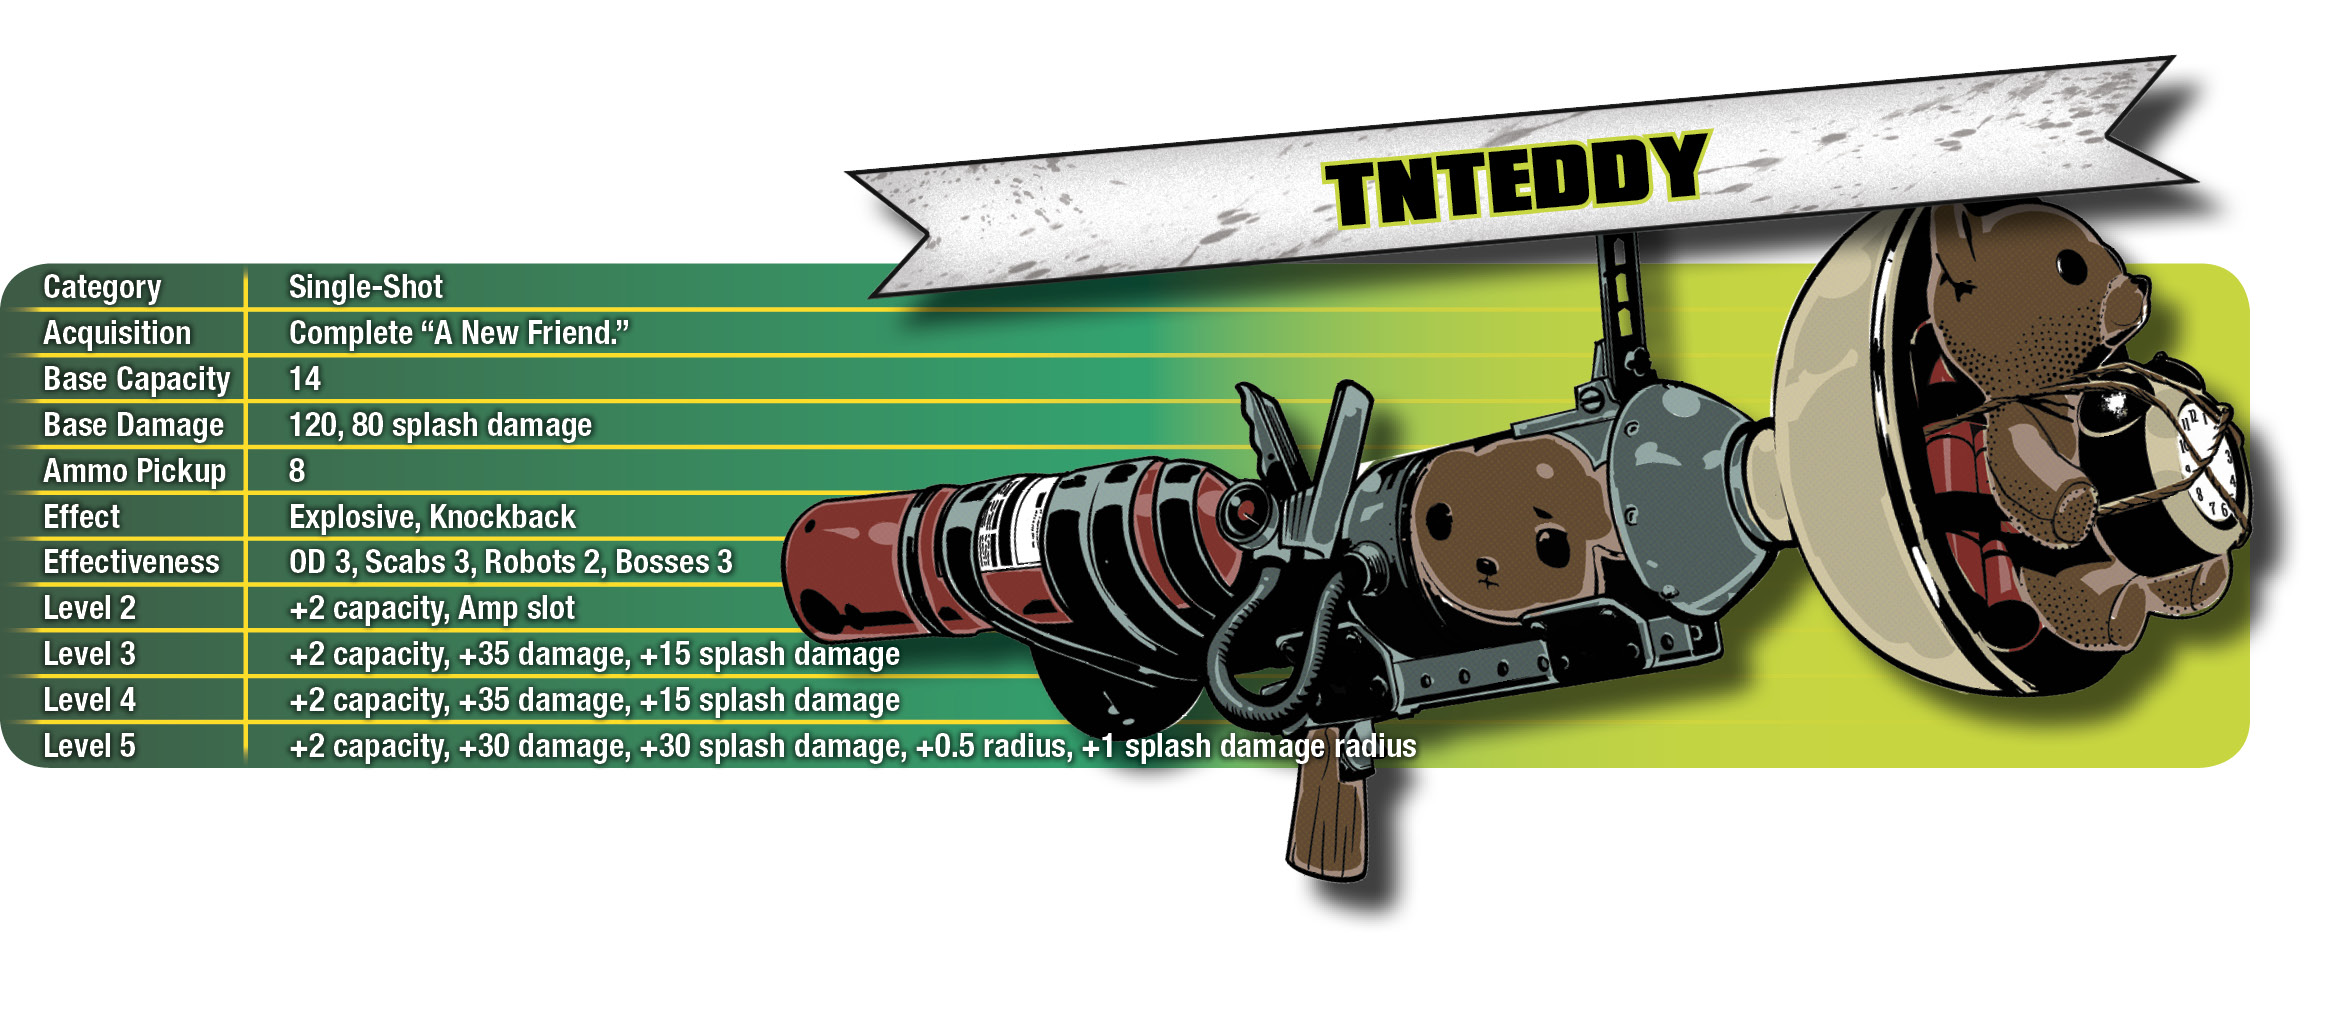
Rated by Lovable Sociopath Monthly as the most adorable way to cause an explosion, the TNTeddy launches impact-fused dynamite-laced stuffed bears along a shallow arc. They detonate on contact with a hostile target or after two seconds, whichever happens first. The target and all enemies within 3.5 yards take full damage, while all enemies within an additional two yards of the explosion take roughly 66% damage.
The TNTeddy’s blast covers less ground than the Hair Spray Bomb and does less damage overall, but the TNTeddy’s detonation does more direct damage to its primary target and inflicts a longer stun/knockdown. This is largely irrelevant in single-player—dead is dead one way or the other—but in Chaos Squad, the TNTeddy is better for crowd control and damage per second. This is useful in high-Chaos defense maps when you’re less interested in a body count than you are in just slowing the enemy down.
Note: TNTeddy’s explosion, like every other AoE attack you have, does not inflict damage to you or any other friendly target. You can use it at point-blank range to clear some space, or send out teddy bears to blow up everything except the survivor you’re trying to rescue.
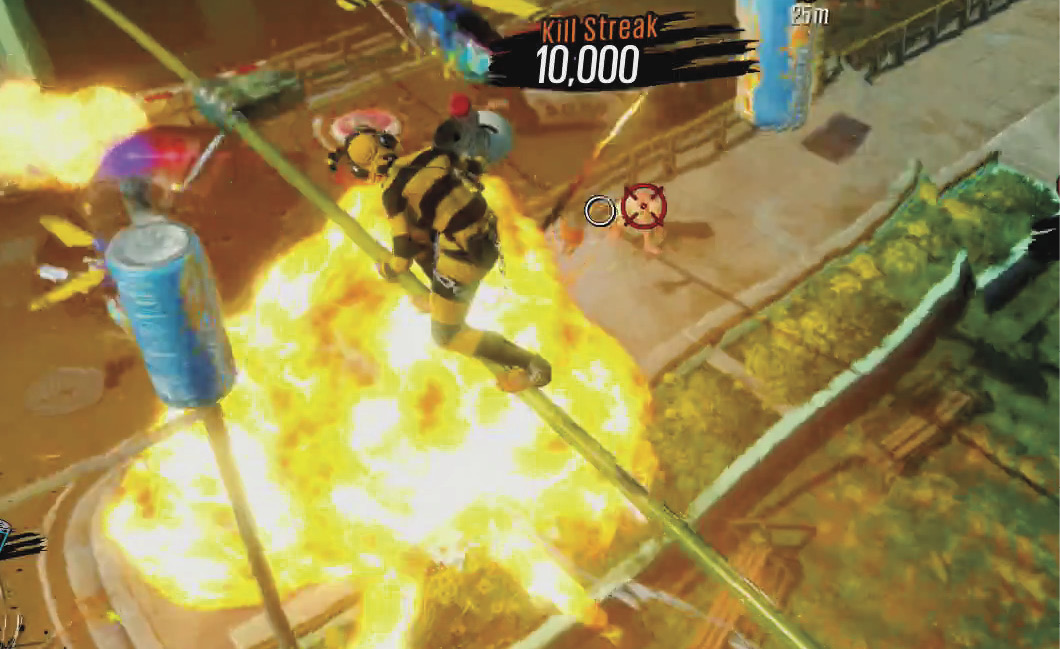
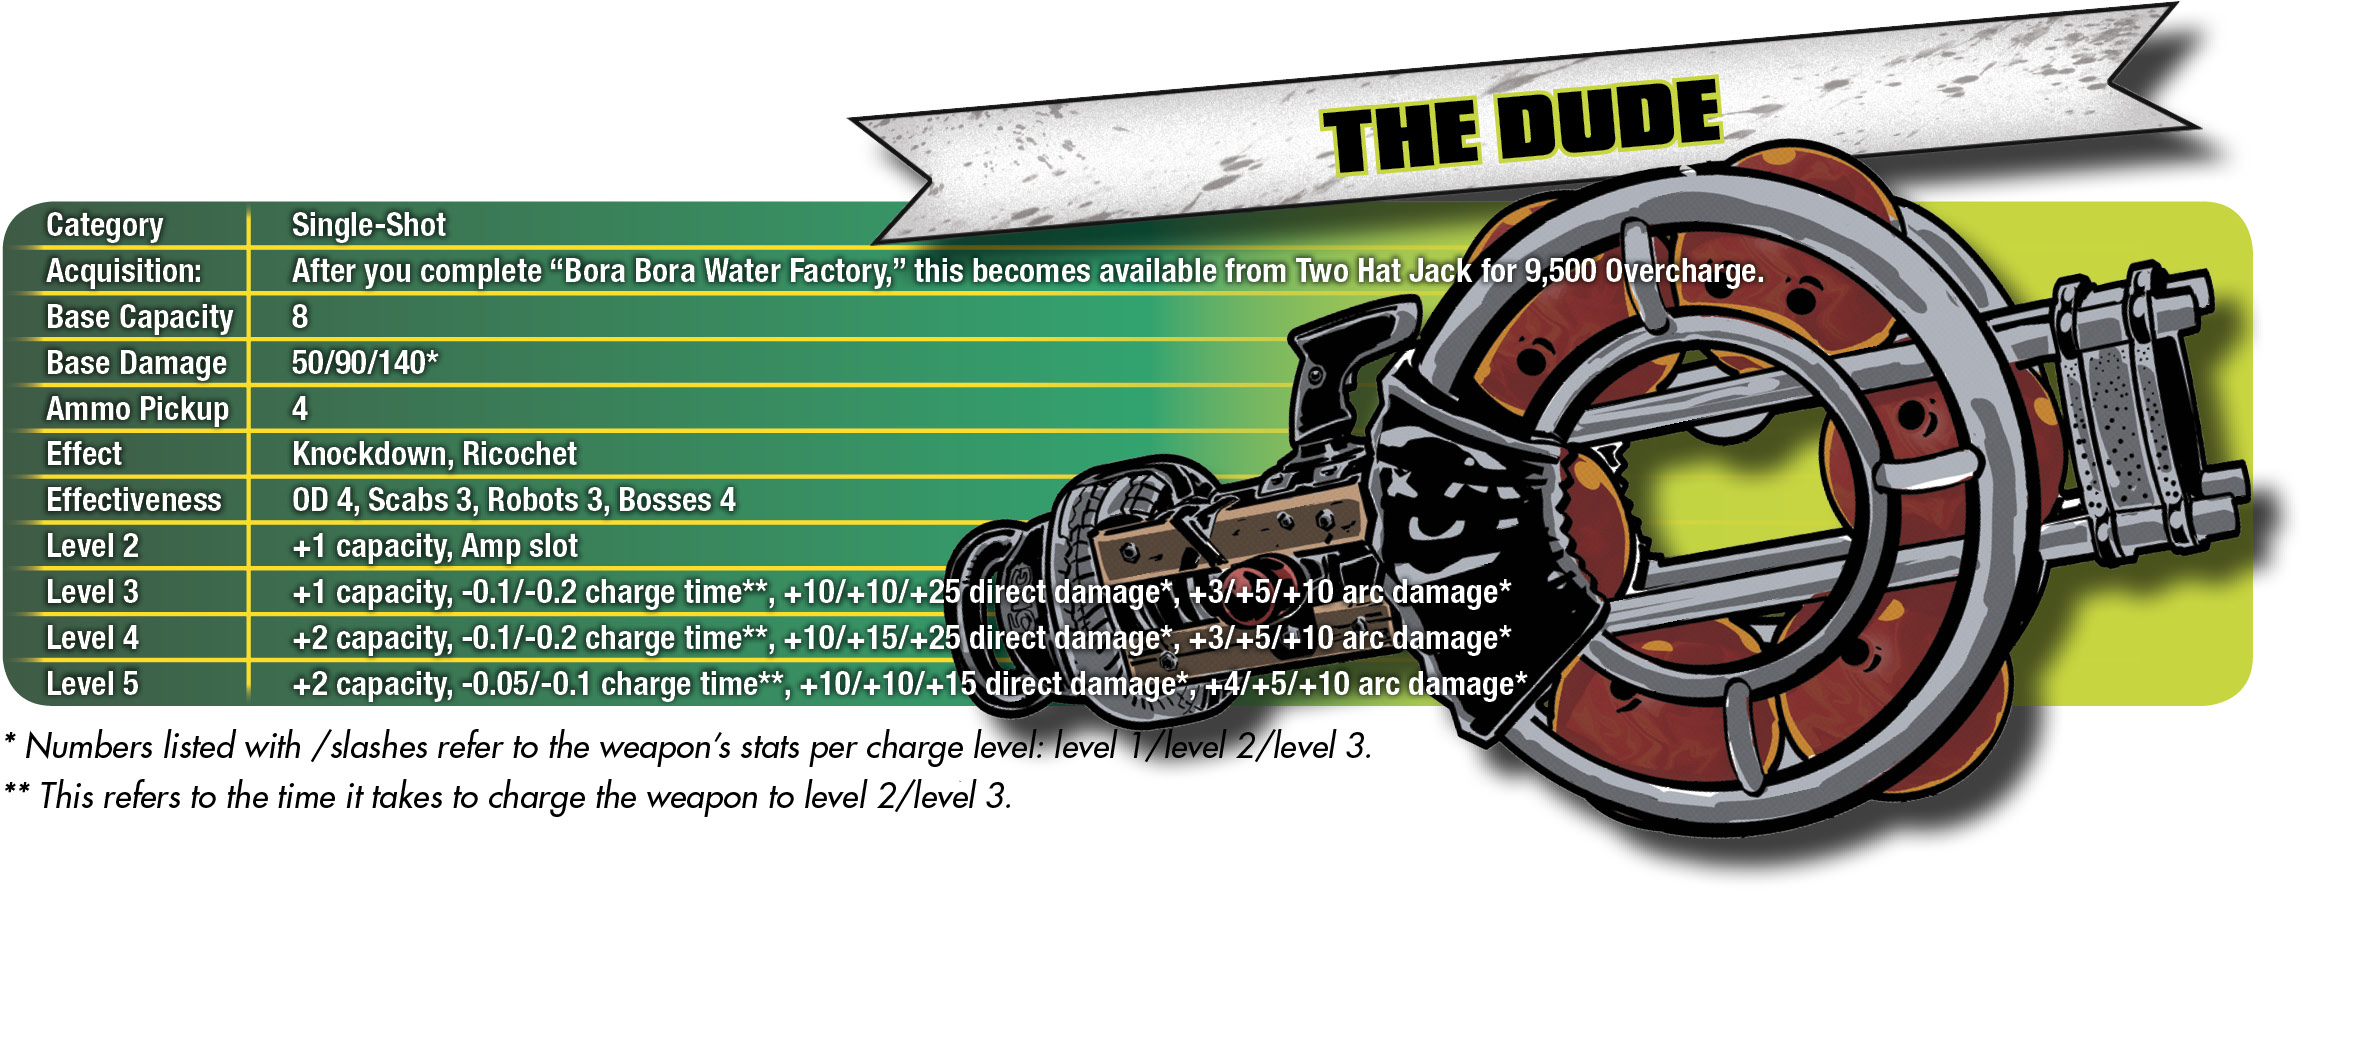
You can charge up the Dude by holding down the fire button for up to 2.5 seconds; at level 5, it takes the weapon less than 2 seconds to produce a full-strength hit. At any level, the Dude fires a slow-moving bowling ball that plows through any target it hits, bouncing off walls and floors it strikes along the way, and doing slight area-of-effect damage as it goes. The longer you charge the shot, the harder the Dude hits. It’s a natural boss killer and can be used to knock down entire crowds of enemies as long as they’re standing relatively close together.
You can really see the Dude’s potential in its Weapon Challenge, as you fire it down the freeway at oncoming hordes of OD, or in night defense missions when enemies are coming at you from down a long corridor. Whenever you have the chance to turn Sunset Overdrive into a bowling simulator, the Dude is the weapon for the job.
You can wring a little bonus damage out of the Dude by tapping the fire button twice when you launch a charged shot. You’ll immediately follow up the charged shot with a weaker one, which can be a useful way to double-tap big enemies like Spawners.
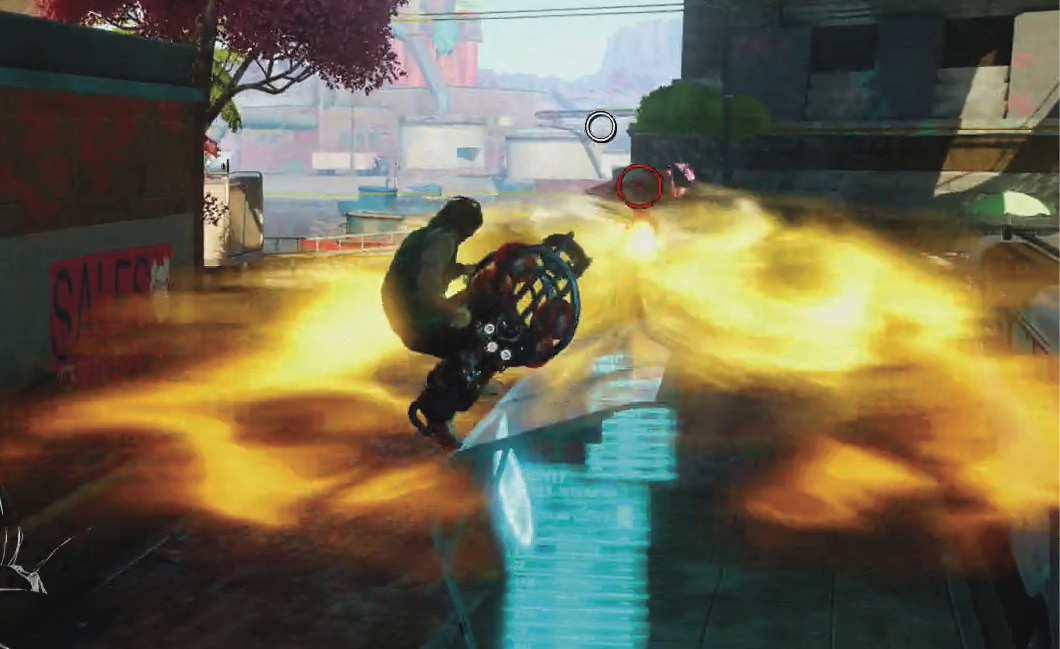
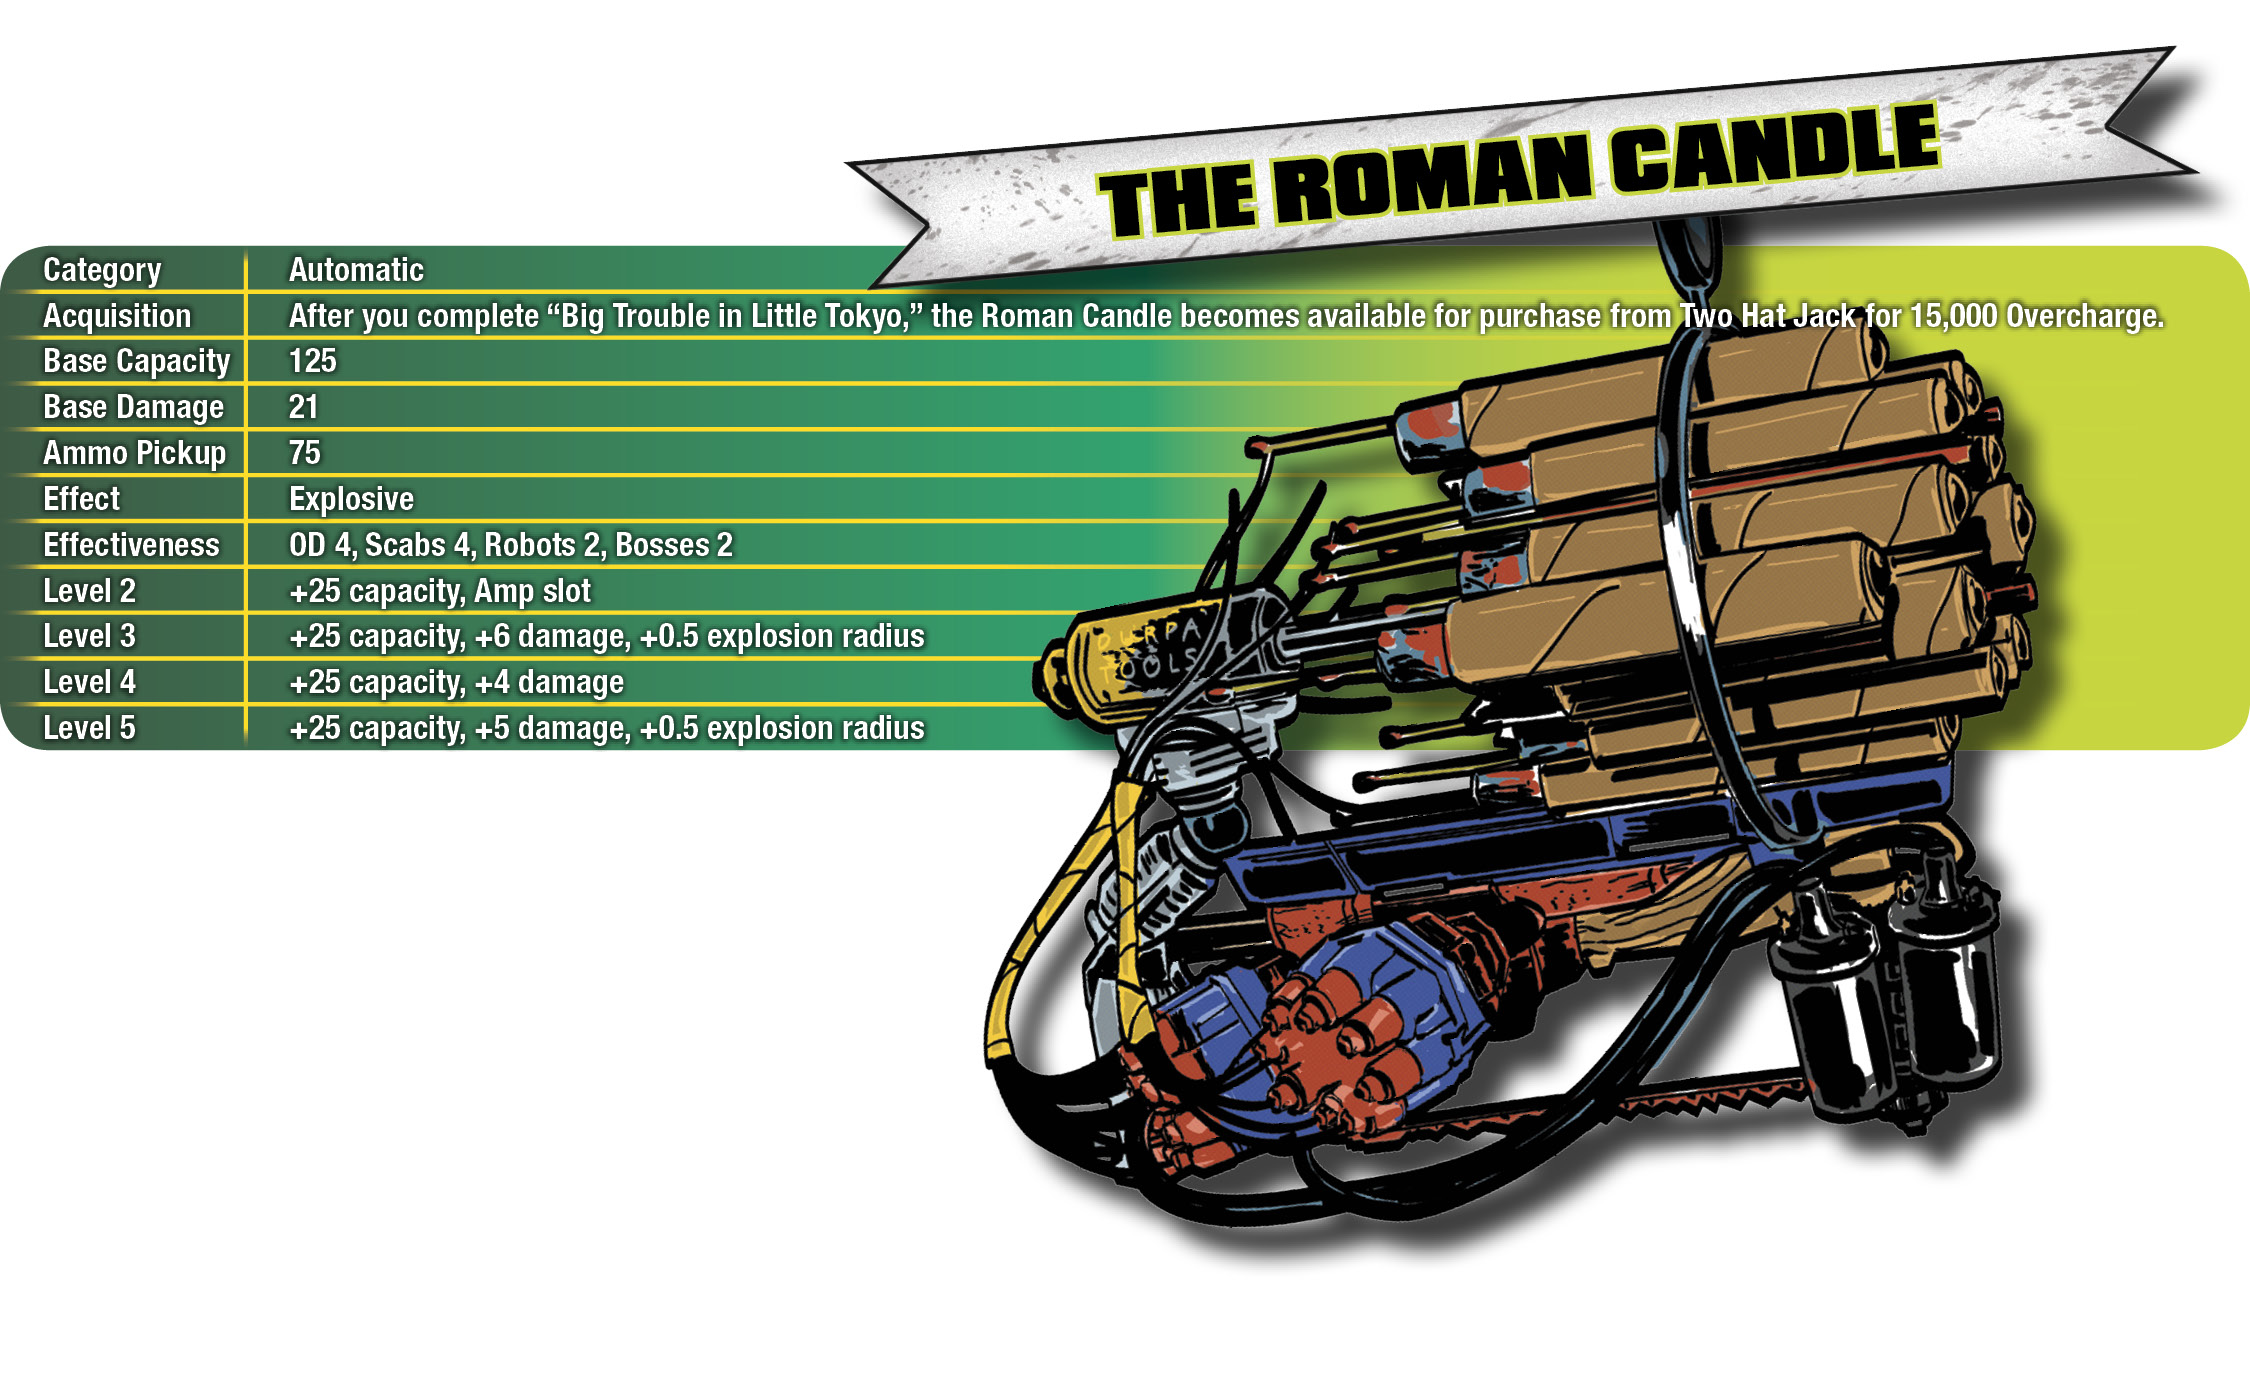
A crowd-pleasing alternative to the High Fidelity, the Roman Candle lets you hose someone down with a constant stream of fireworks that detonate on impact, spreading out the damage in a small area. It’s a great anti-personnel weapon to have on hand as you travel throughout the city, and the explosions make it an excellent way to dispose of a street full of OD.
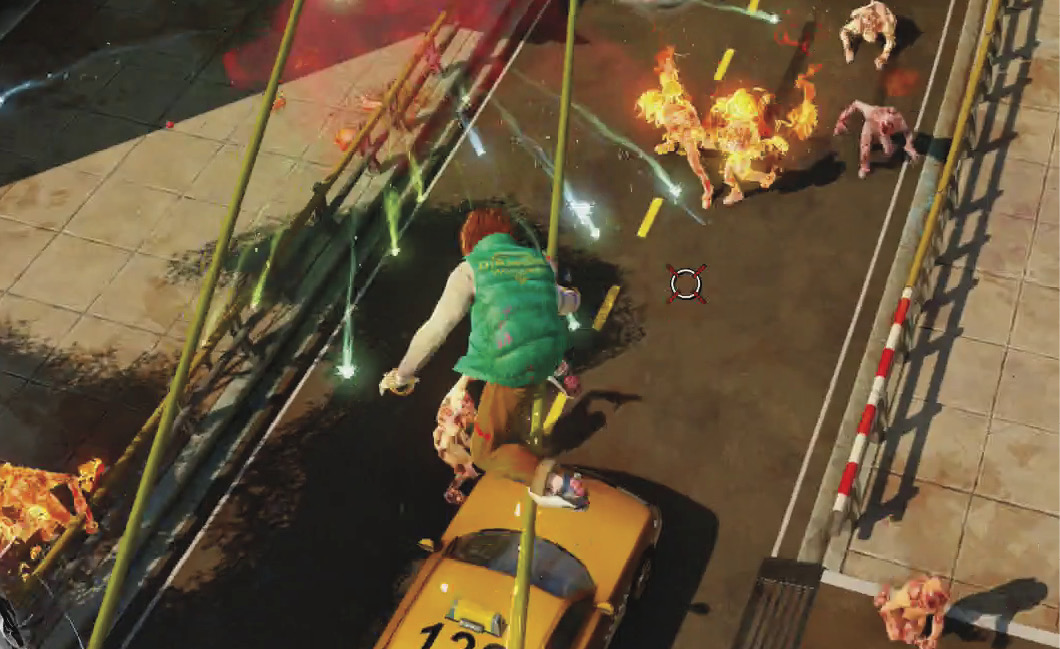
The Turret Copter’s underslung pistol fires at randomly-acquired targets in the area twice per second, inflicting low but steady damage. A single Turret Copter lasts 18 seconds (28 seconds by level 5), and you can deploy up to three Turret Copters simultaneously, with any you fire thereafter automatically replacing the oldest one.
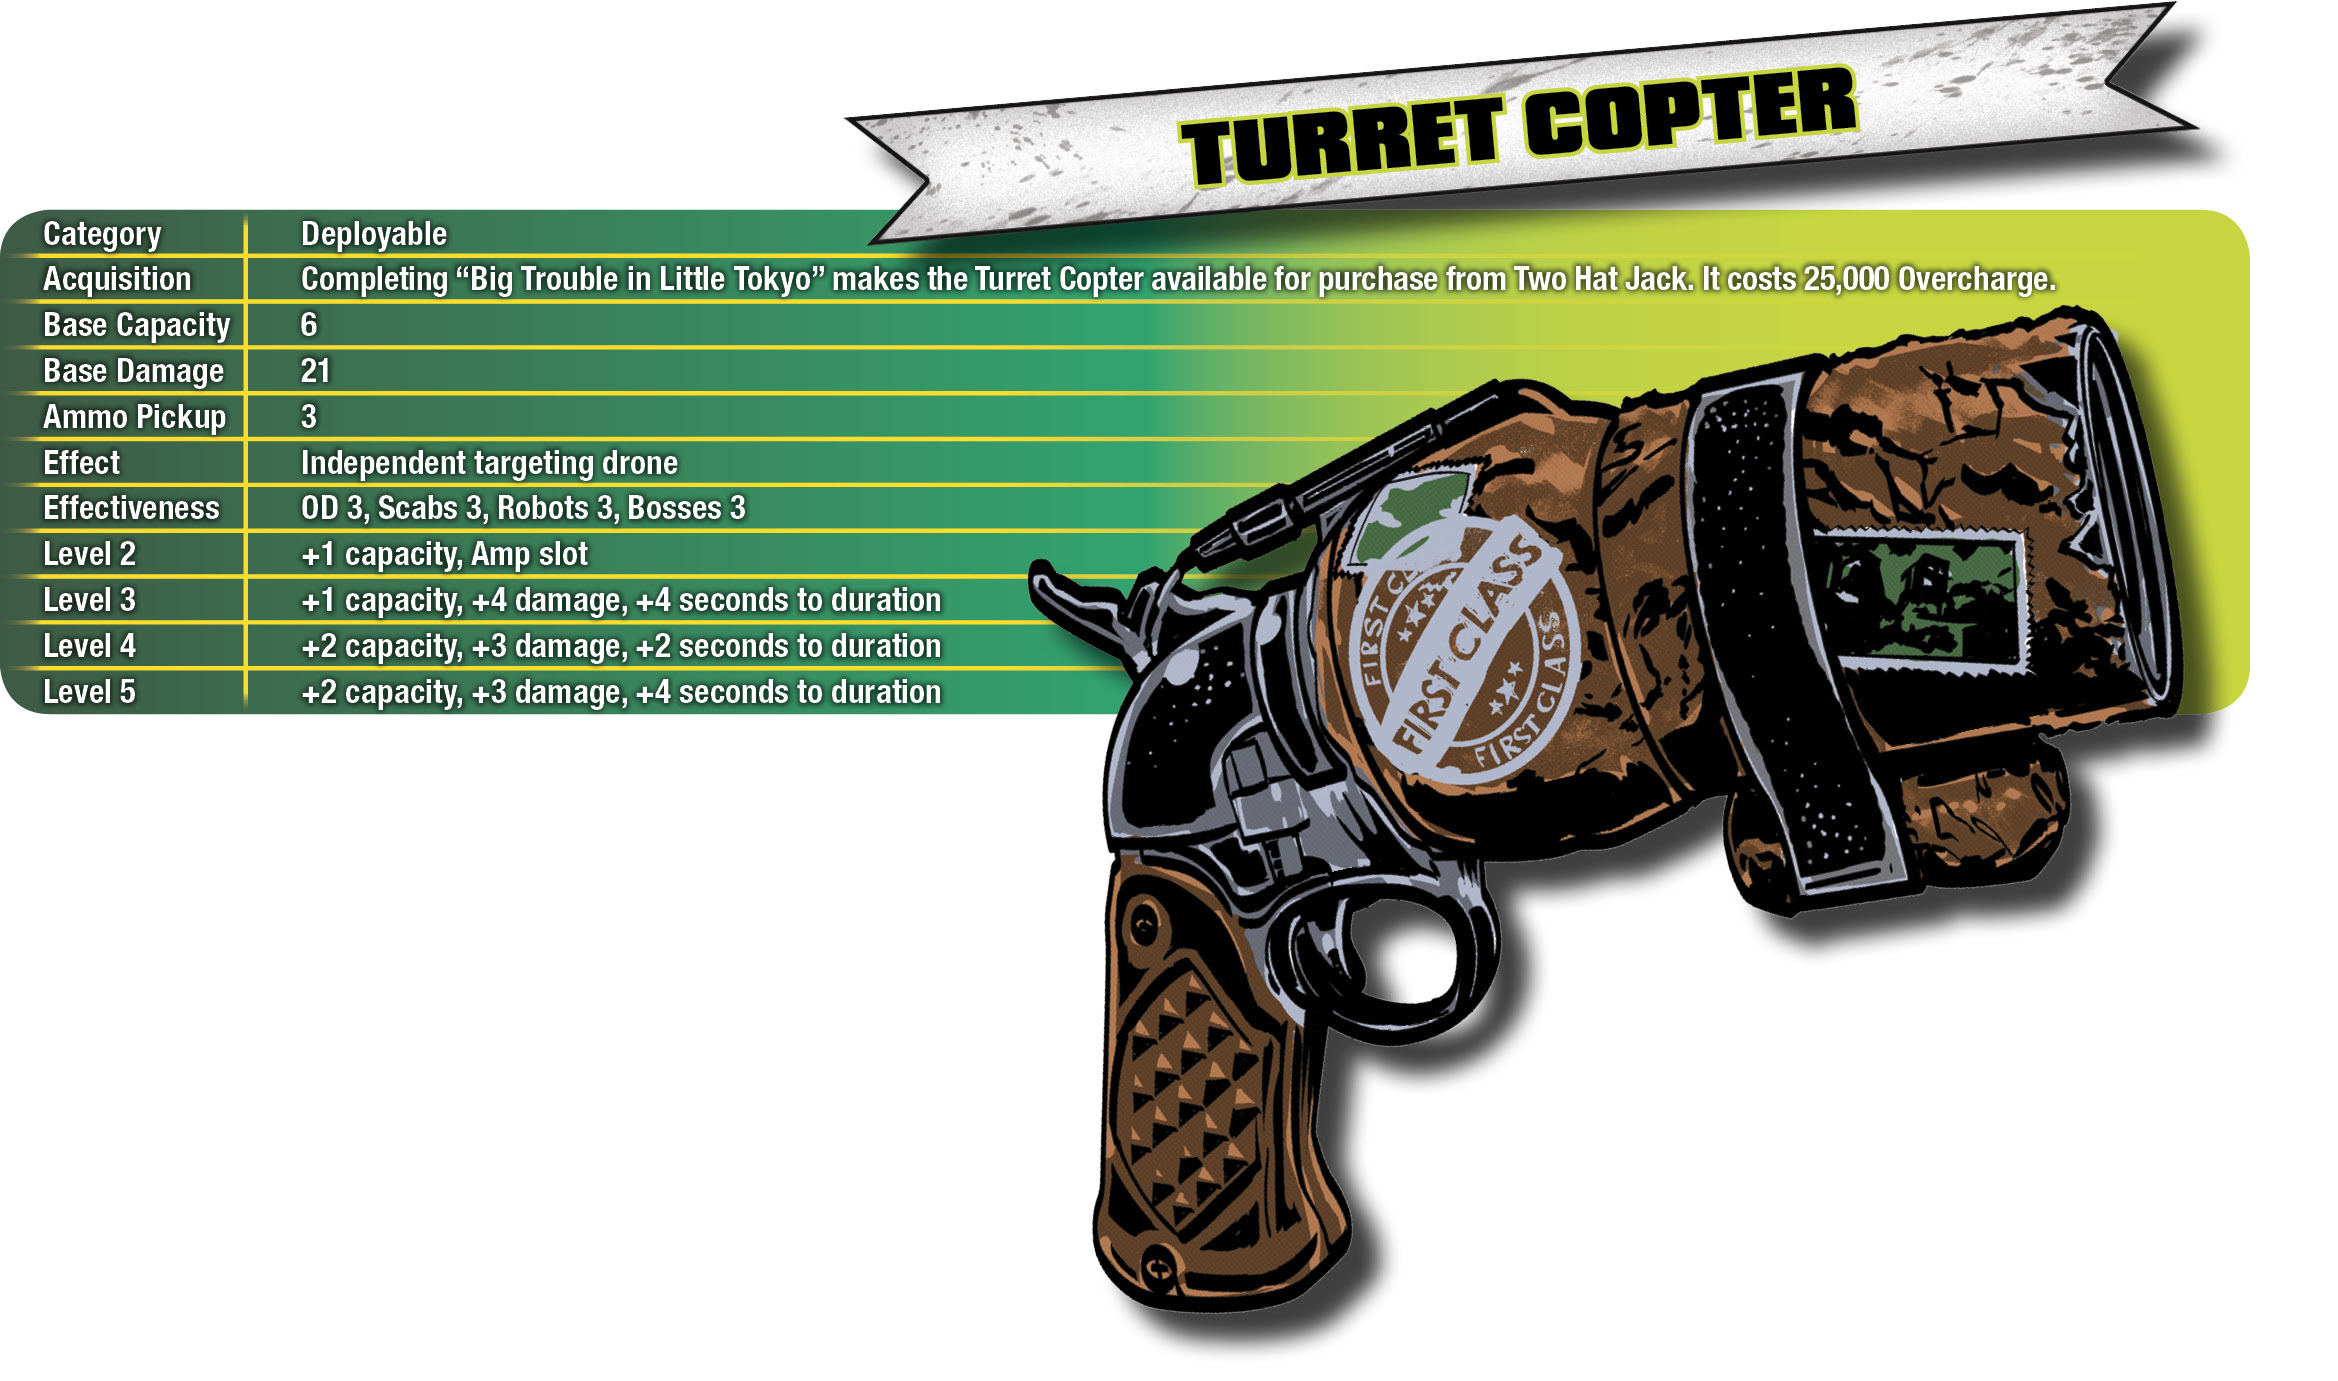
While an individual Turret Copter’s damage isn’t particularly noteworthy by itself, having a few running around at your back can be a noteworthy improvement to your damage output, particularly if you’re trying to avoid return fire at the same time. There aren’t many situations where throwing out a couple of Turret Copters won’t help you, and once you’ve gotten them, it’s worth keeping them on your weapon wheel for the rest of the game.
It’s worth noting that for missions that require you to score a specific kind of kill, such as the various Buck National challenges, deployables like the Turret Copter will count towards that kill as long as you’re carrying out the required sort of motion. For example, an OD that dies to a Turret Copter is considered a Bounce kill as long as you’re bouncing at the time.
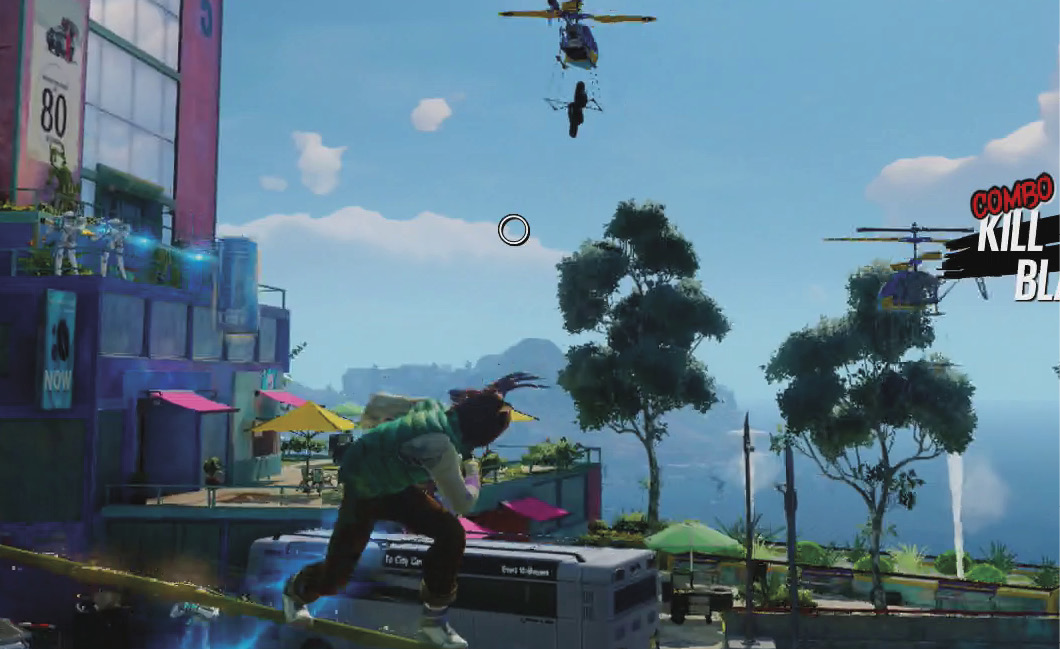
The projectile from the Murderang is almost guaranteed to return to you, thus proving you loved it all along. The rate of fire on the Murderang is slightly higher than the rate at which Murderangs return to you, so you can run out of ammo for it, but that won’t last for more than a couple of seconds. If you equip a Murderang with the Recycler Weapon Amp, its ammo supply is effectively infinite, letting you throw out a constant stream of spinning death boomerangs.
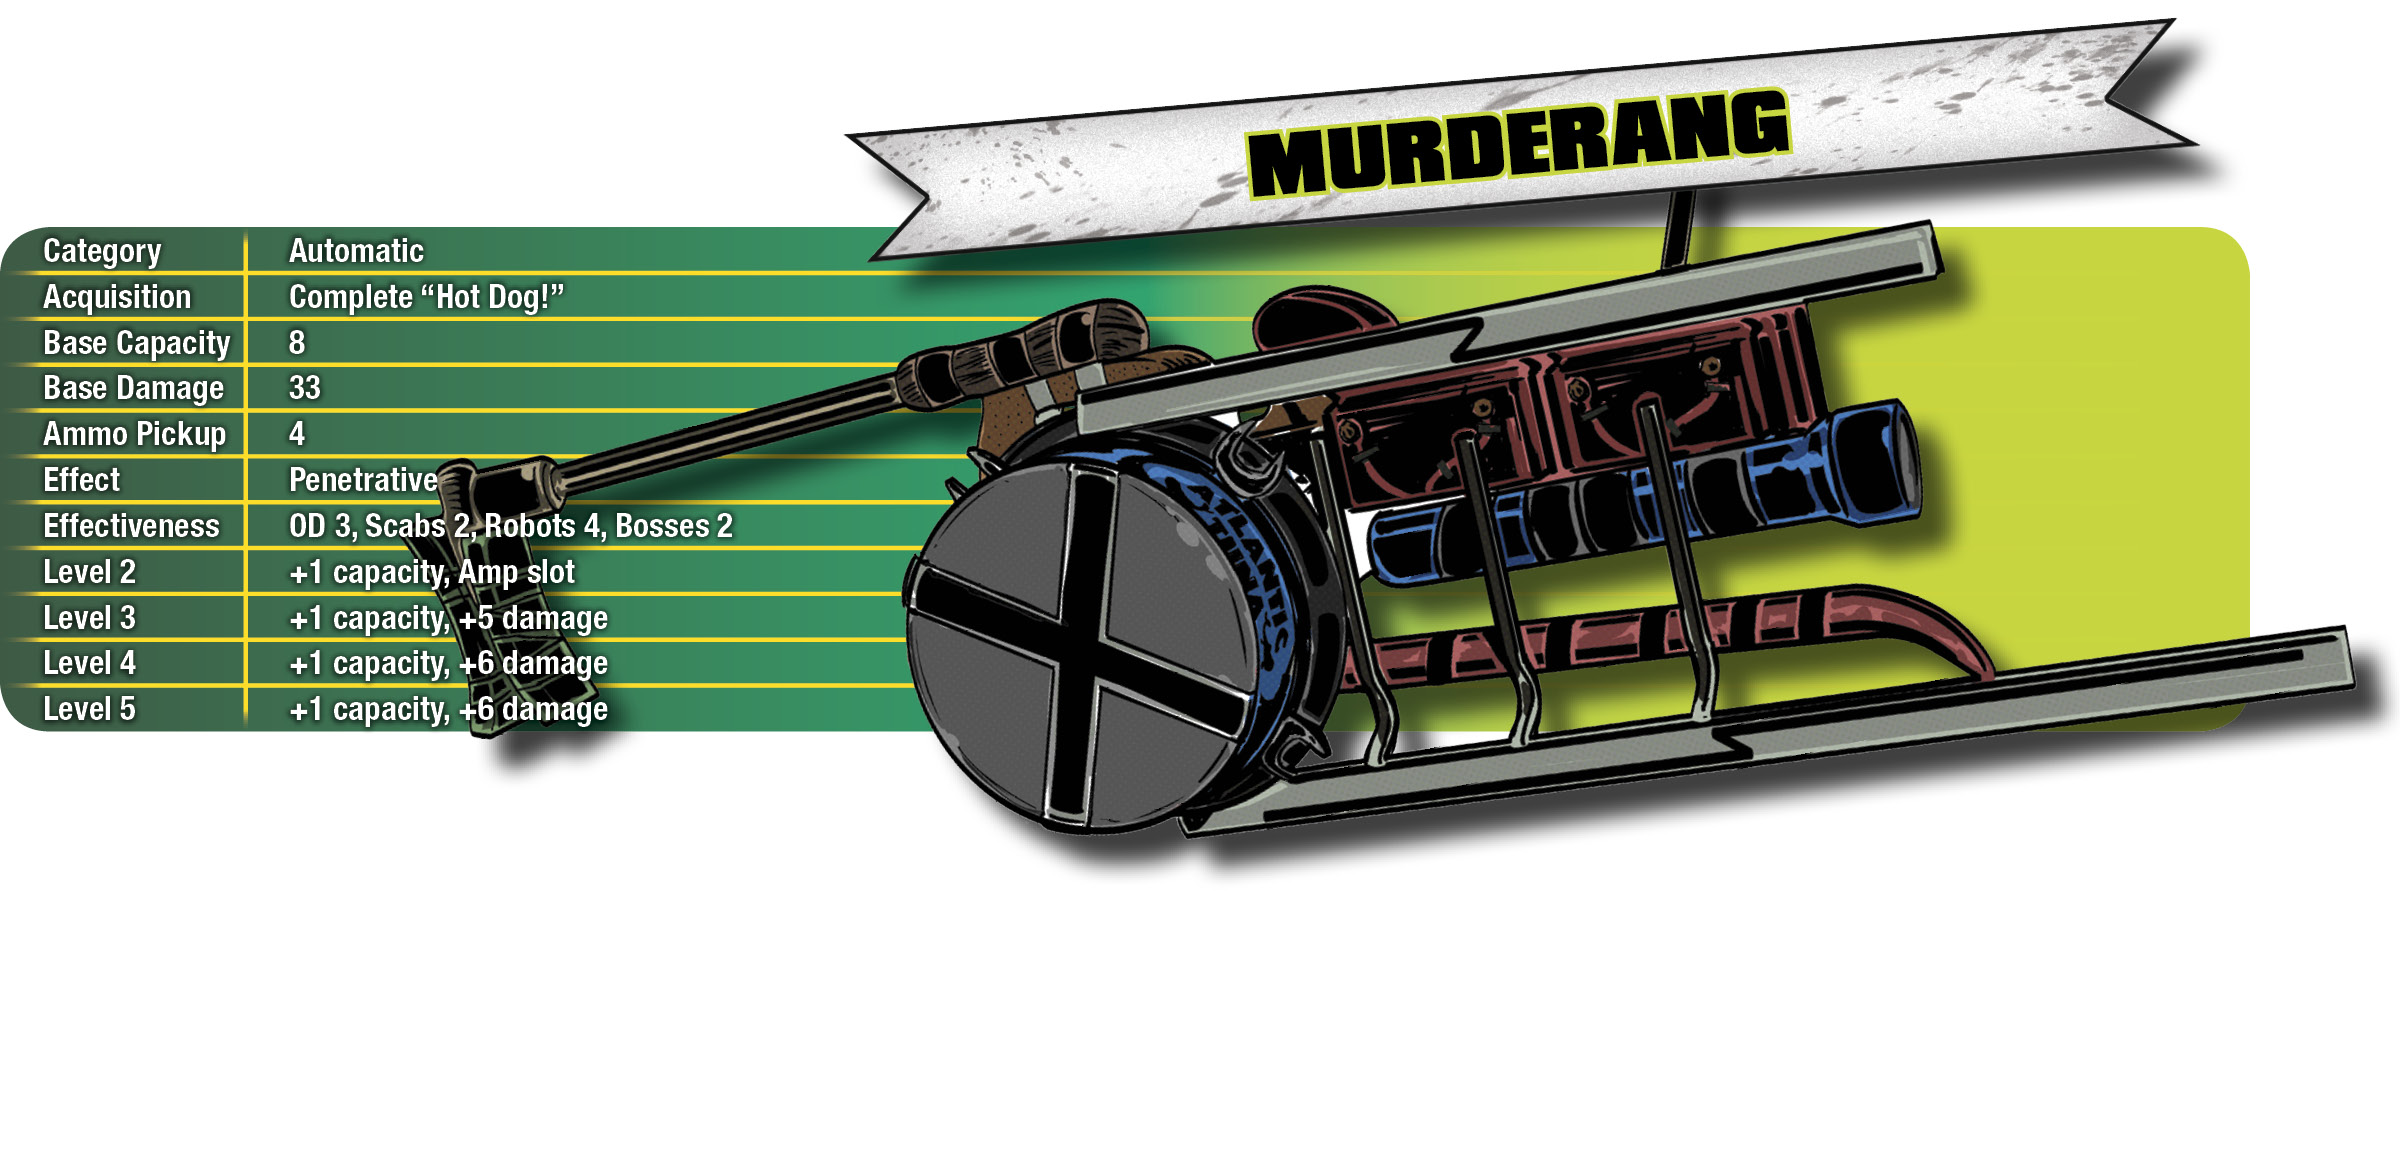
An individual Murderang travels in a straight line away from you towards its target, then describes a slow arc back to you, damaging any enemies it touches along the way. It’s surprisingly effective against robots and its ammo efficiency makes it one of the most consistently reliable weapons in your arsenal, but its low damage per individual hit can be a problem. The Murderang works best when you set it up so it’ll strike a single target multiple times.
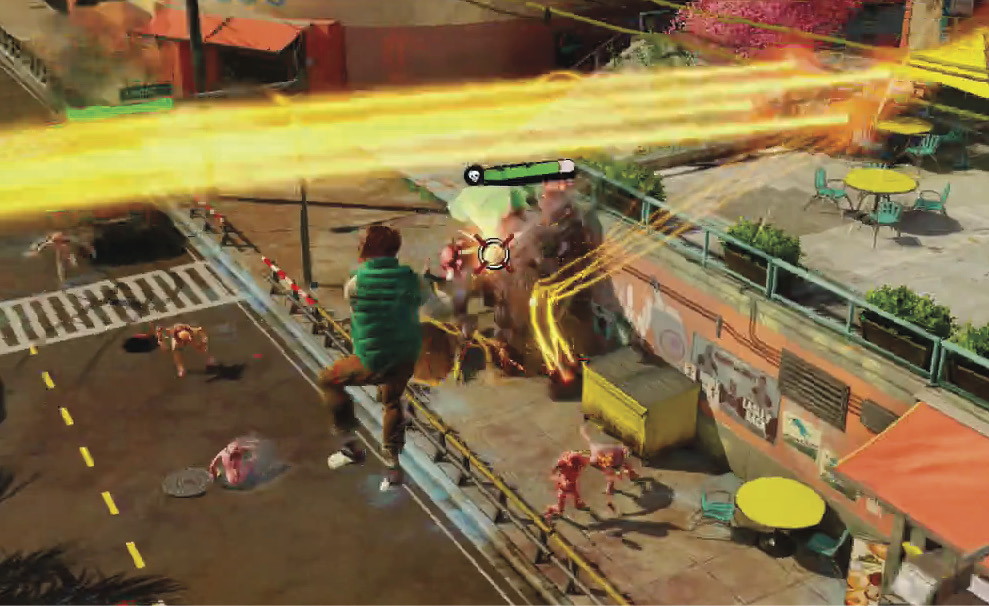
Proximity Mines, when fired, stick to walls, floors, and ceilings. Any hostile opponent that breaches that perimeter gets blown up, consuming the Mine. This doesn’t quite have the tactical options you get from Pulse Mines or Turret Copters, but Proximity Mines make up the difference with sheer offensive punch. There’s no reason not to set a few of them up near Overcharge vats or barricades, or just to use them as improvised grenades as you explore the city.
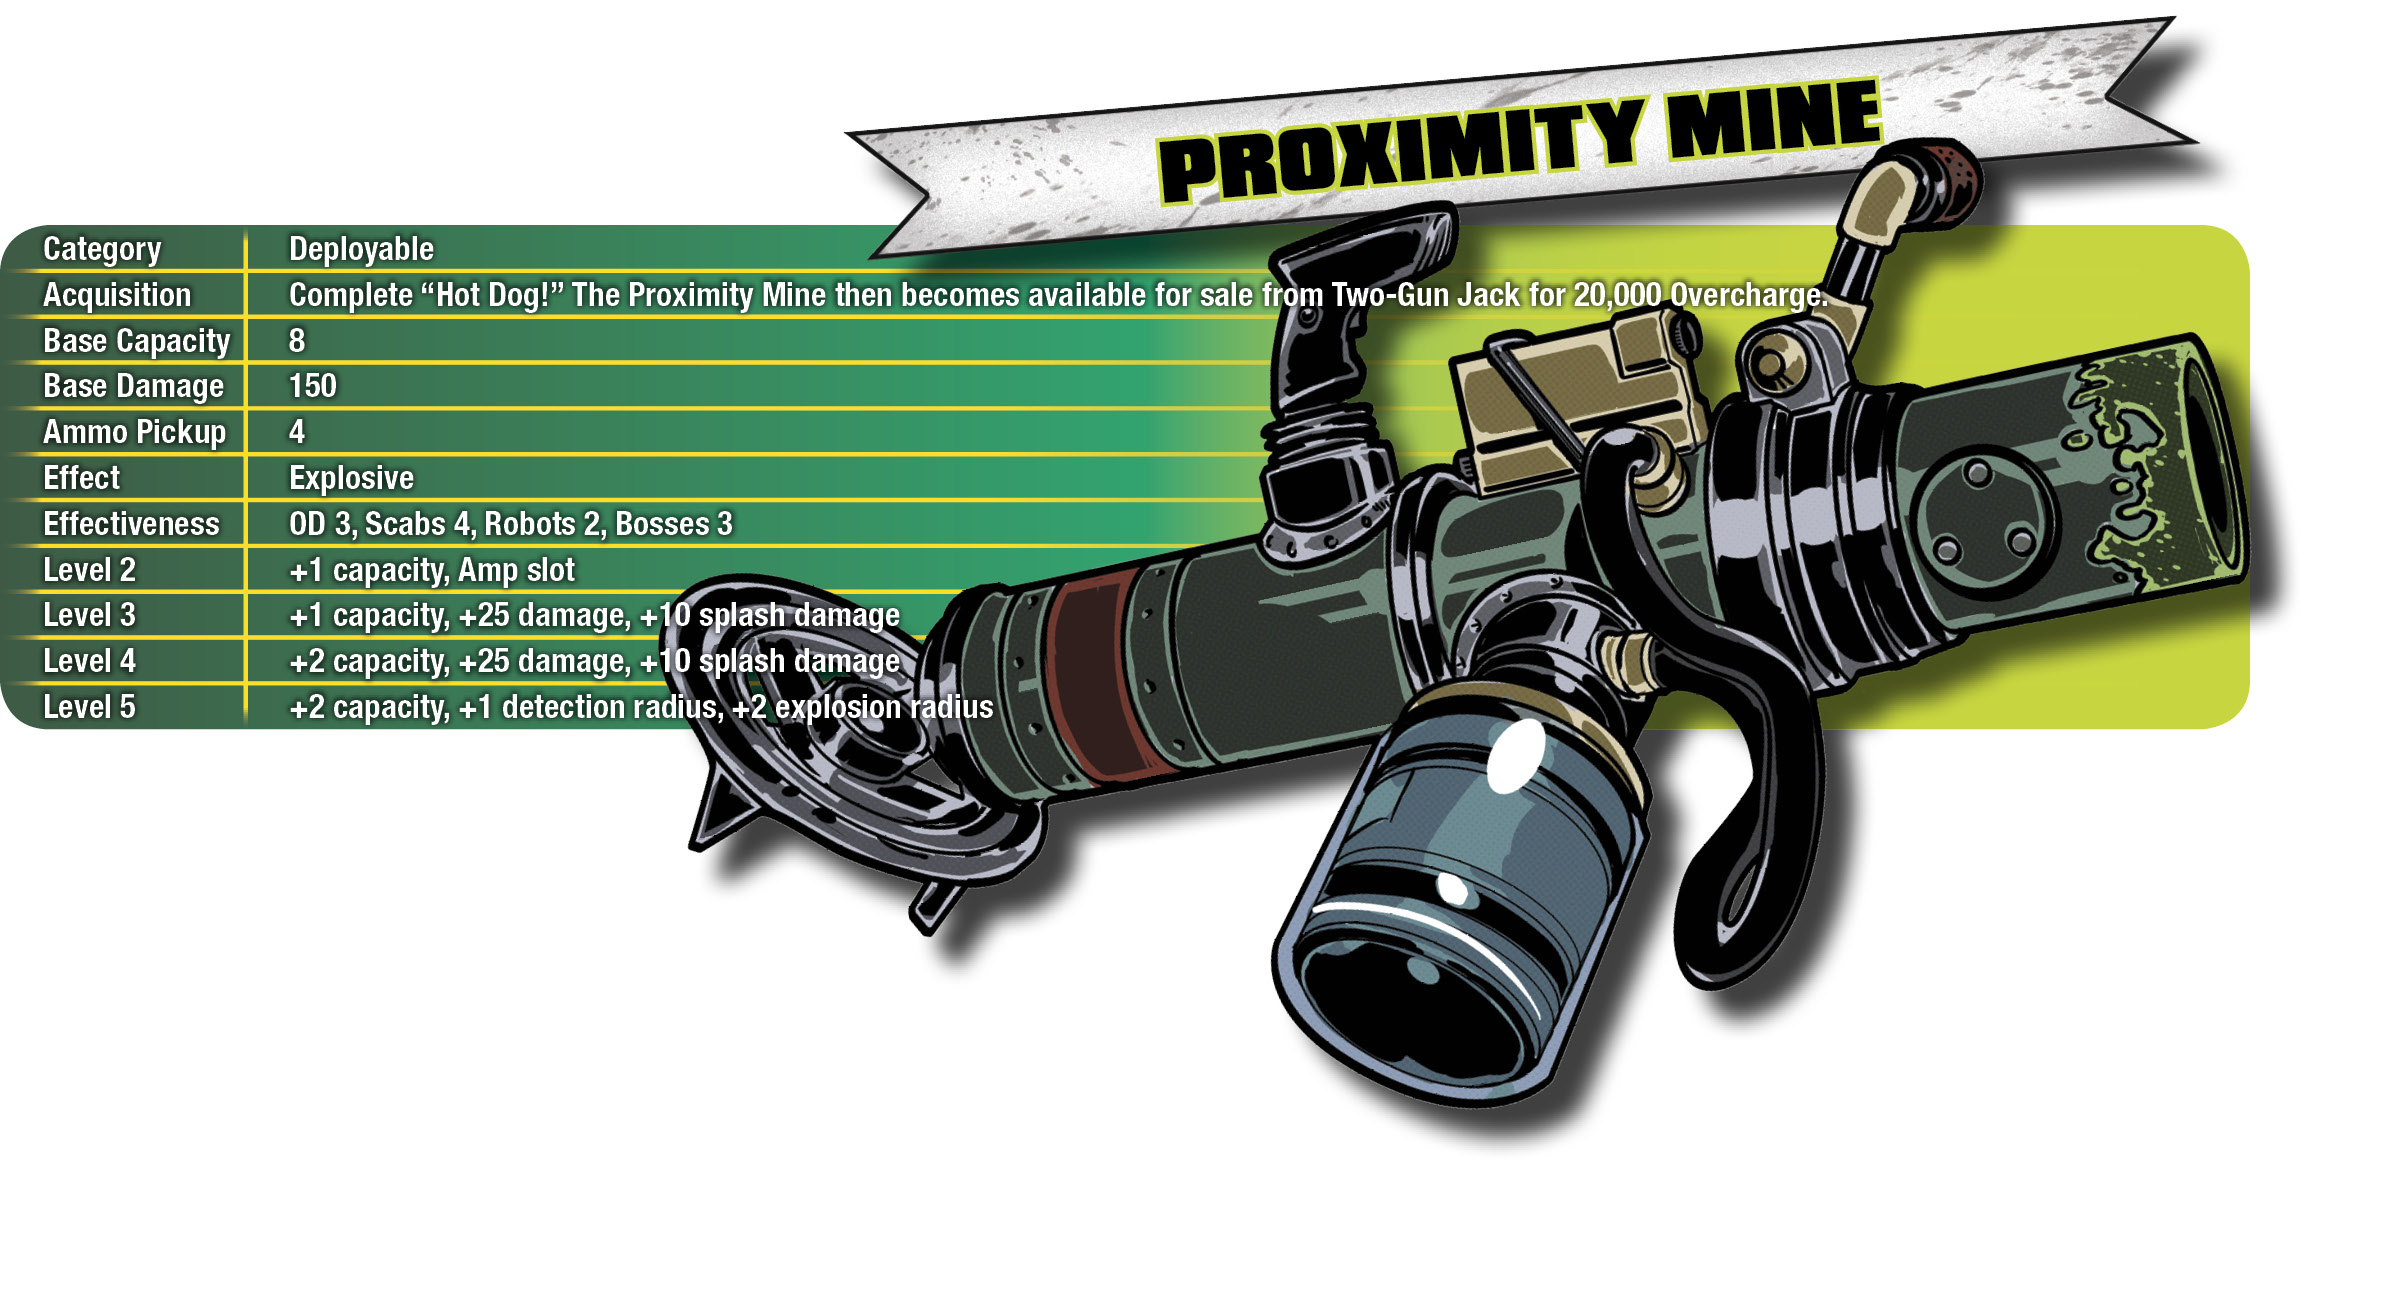
A Proximity Mine that sticks to an enemy will detonate on its own after about two seconds, which will never not be hilarious. Use it on Blowers or Gunkers for petty vengeance!
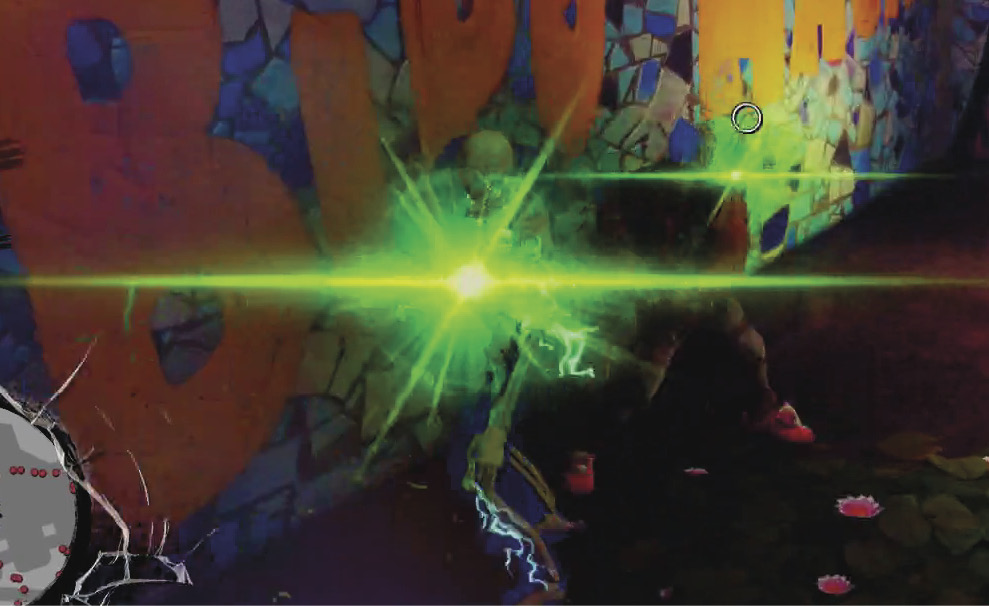
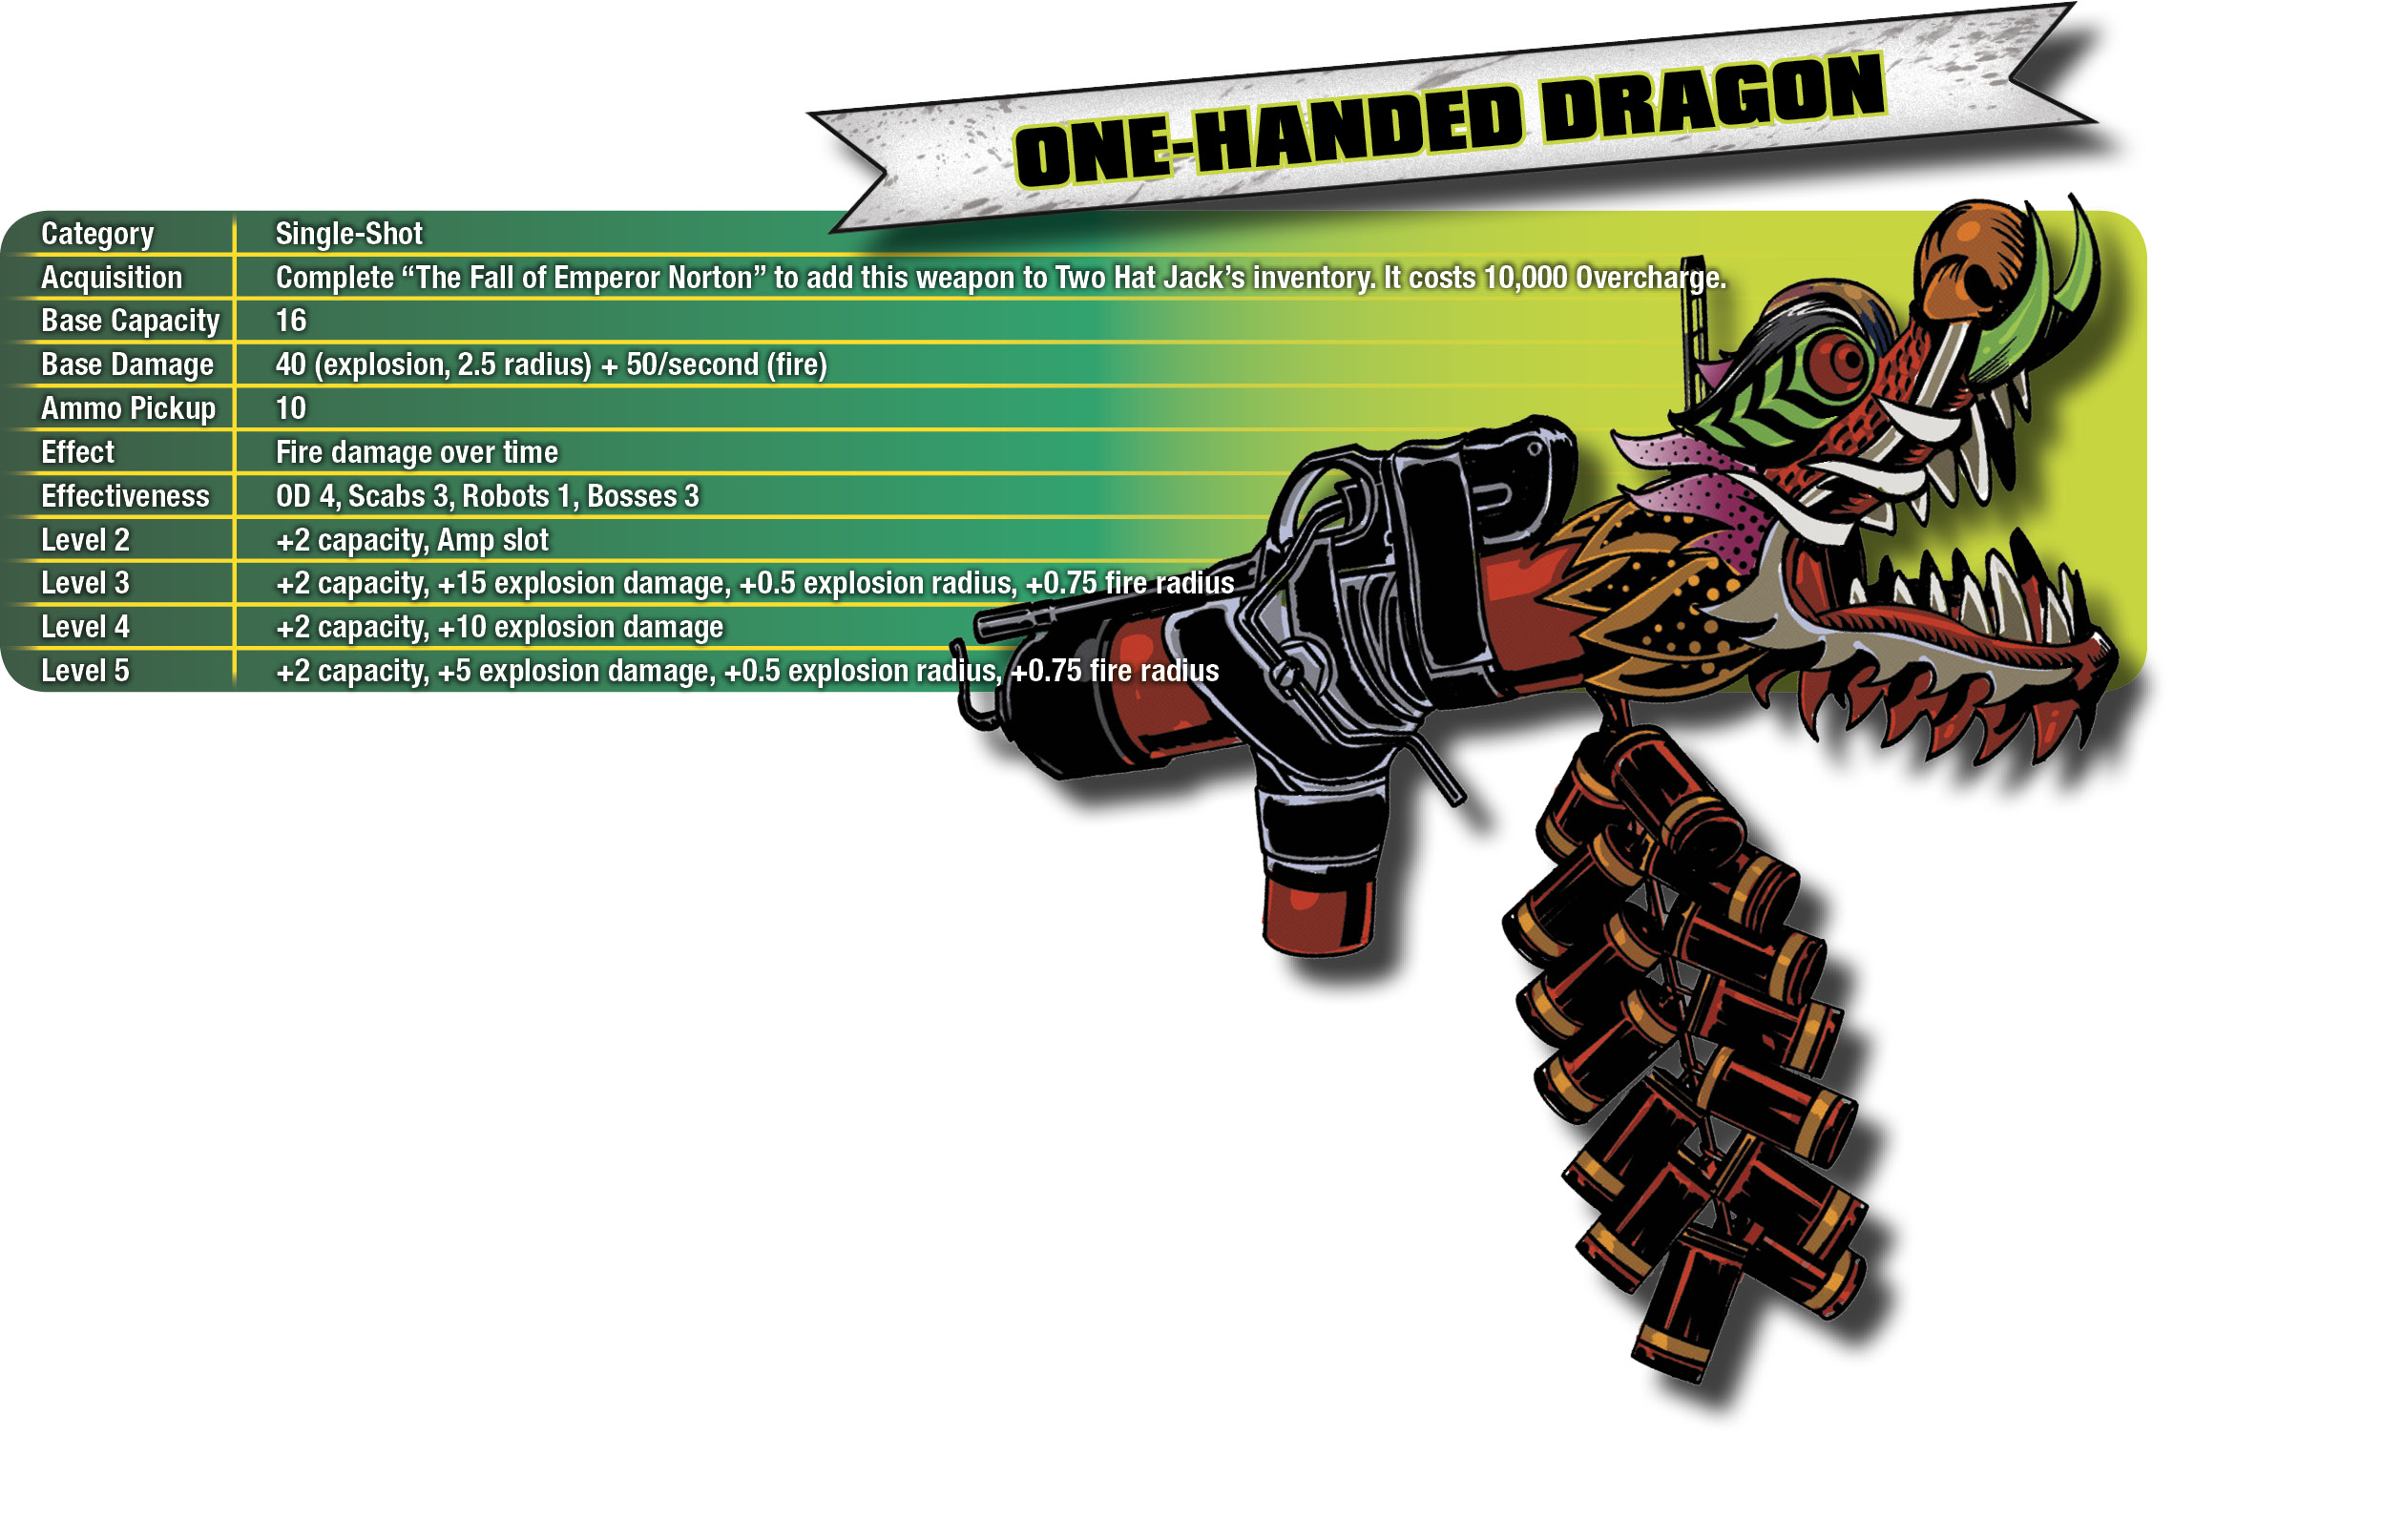
A shot from the Dragon sticks to a target and detonates, inflicting damage and setting the target and any nearby enemies on fire. Its auto-aim and tracking are both surprisingly forgiving, which lets you lob rockets into somebody’s face from long distances. It’s a great weapon against enemies like Blowers, Muggers, or Scab Tossers, which like to play hit-and-run, but it’s nearly useless against Fizzco robots.
You can also deliberately hit walls and floors with the Dragon, creating a short-lived sticky bomb that will ignite anything nearby when it goes off. Unlike the Compensator, the damage from the explosion goes up as the weapon levels, while the fire damage stays roughly the same.
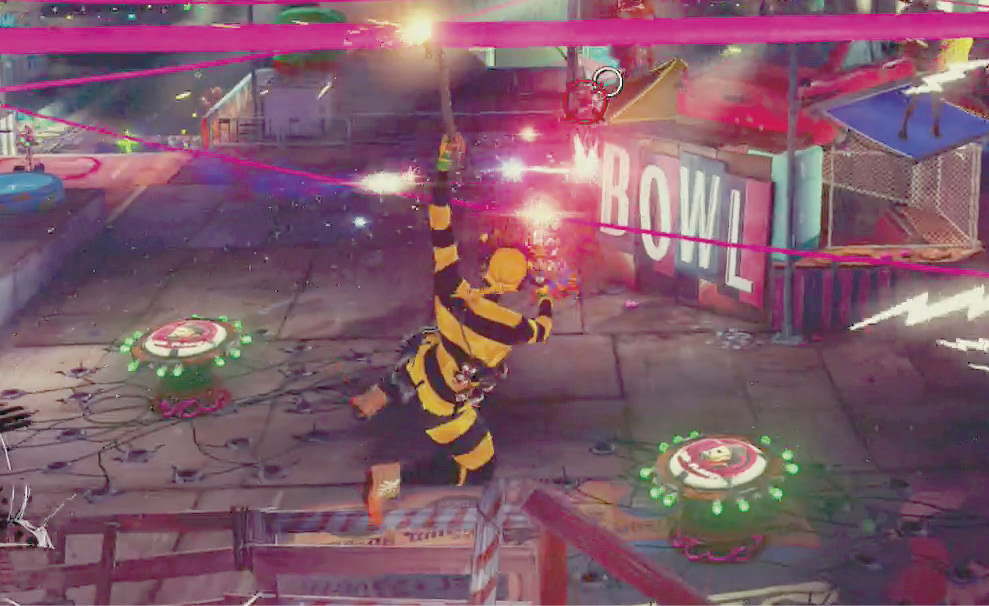
The Fizzbot Rifle is an expensive sidegrade to the AK-FU. Its projectiles have a slight travel time and a lower rate of fire, but against enemy robots, it’s like bug spray: point, shoot, and your problems disappear. It isn’t anywhere near as useful as the AK-FU vs. Scabs, however.
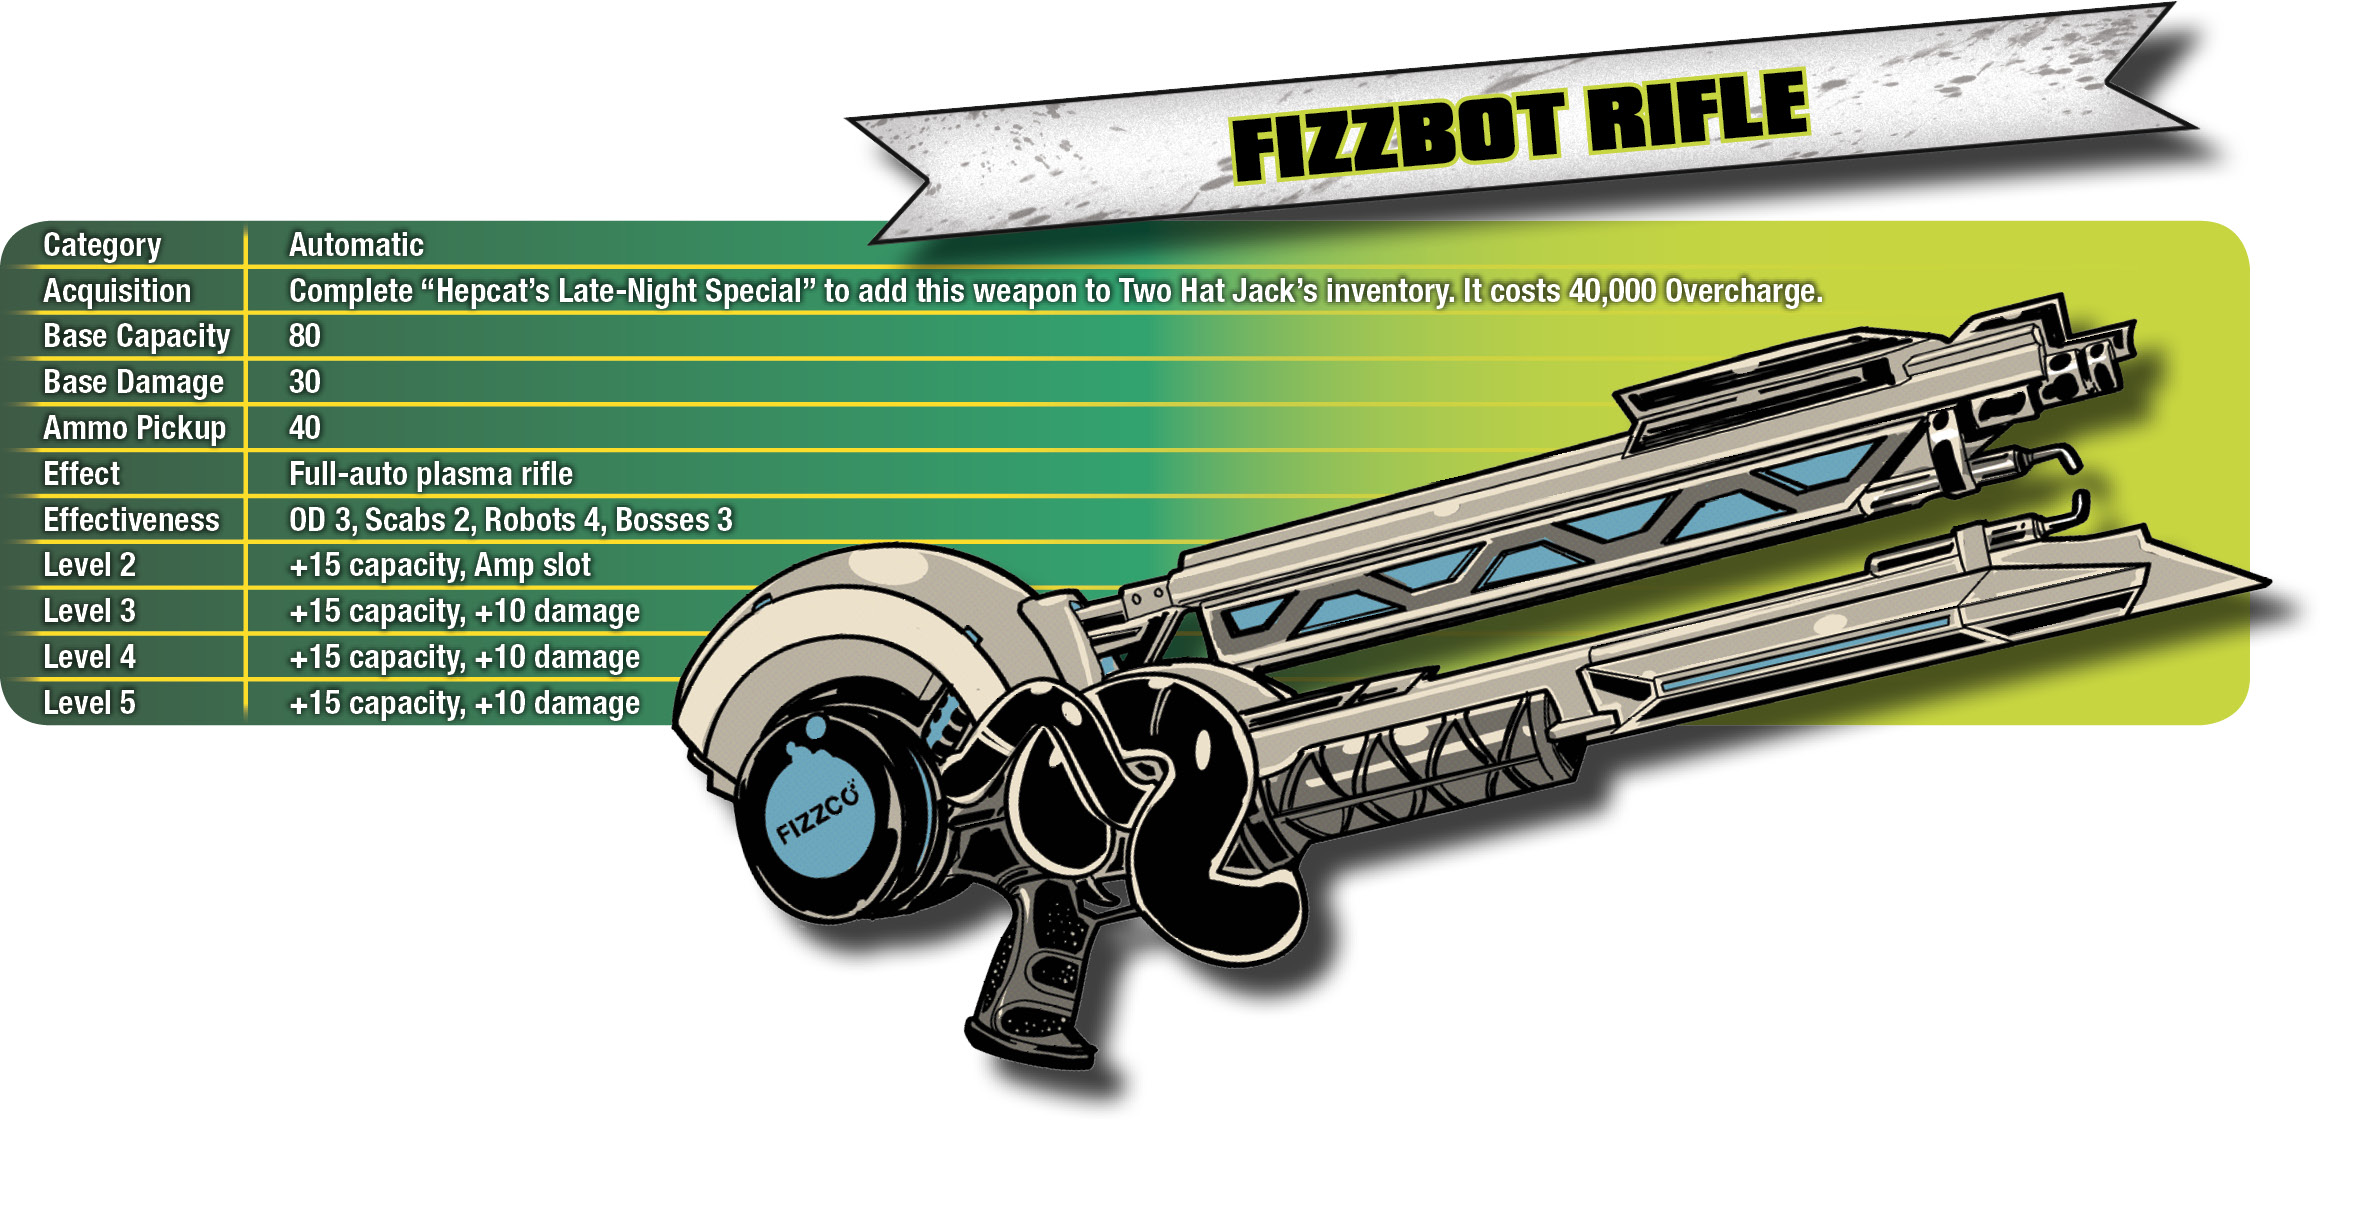
Once you start spending a lot of time in Downtown, where Fizzco’s robots more or less run the streets, the Fizzbot Rifle is an excellent go-to sidearm.
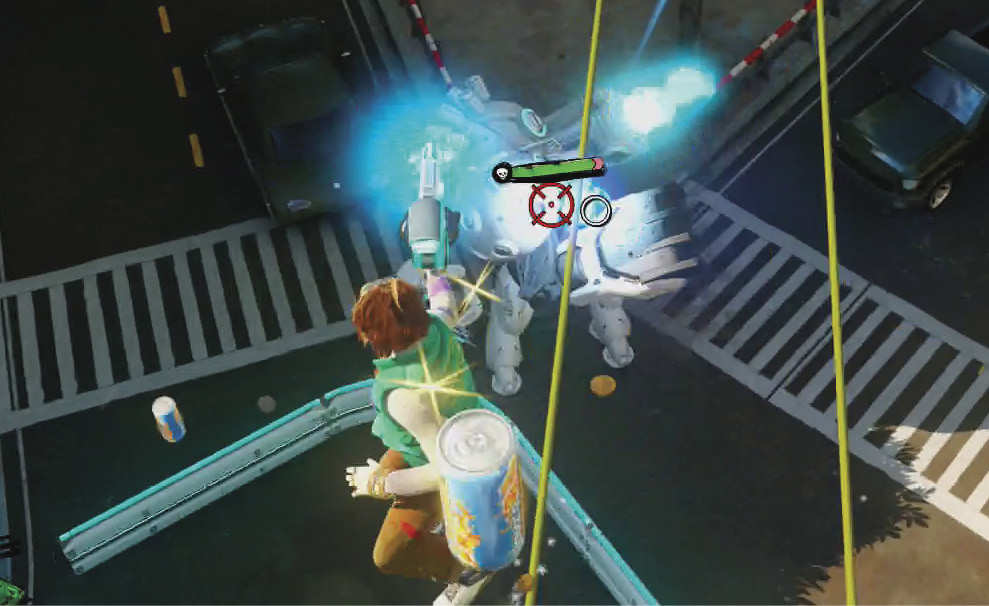
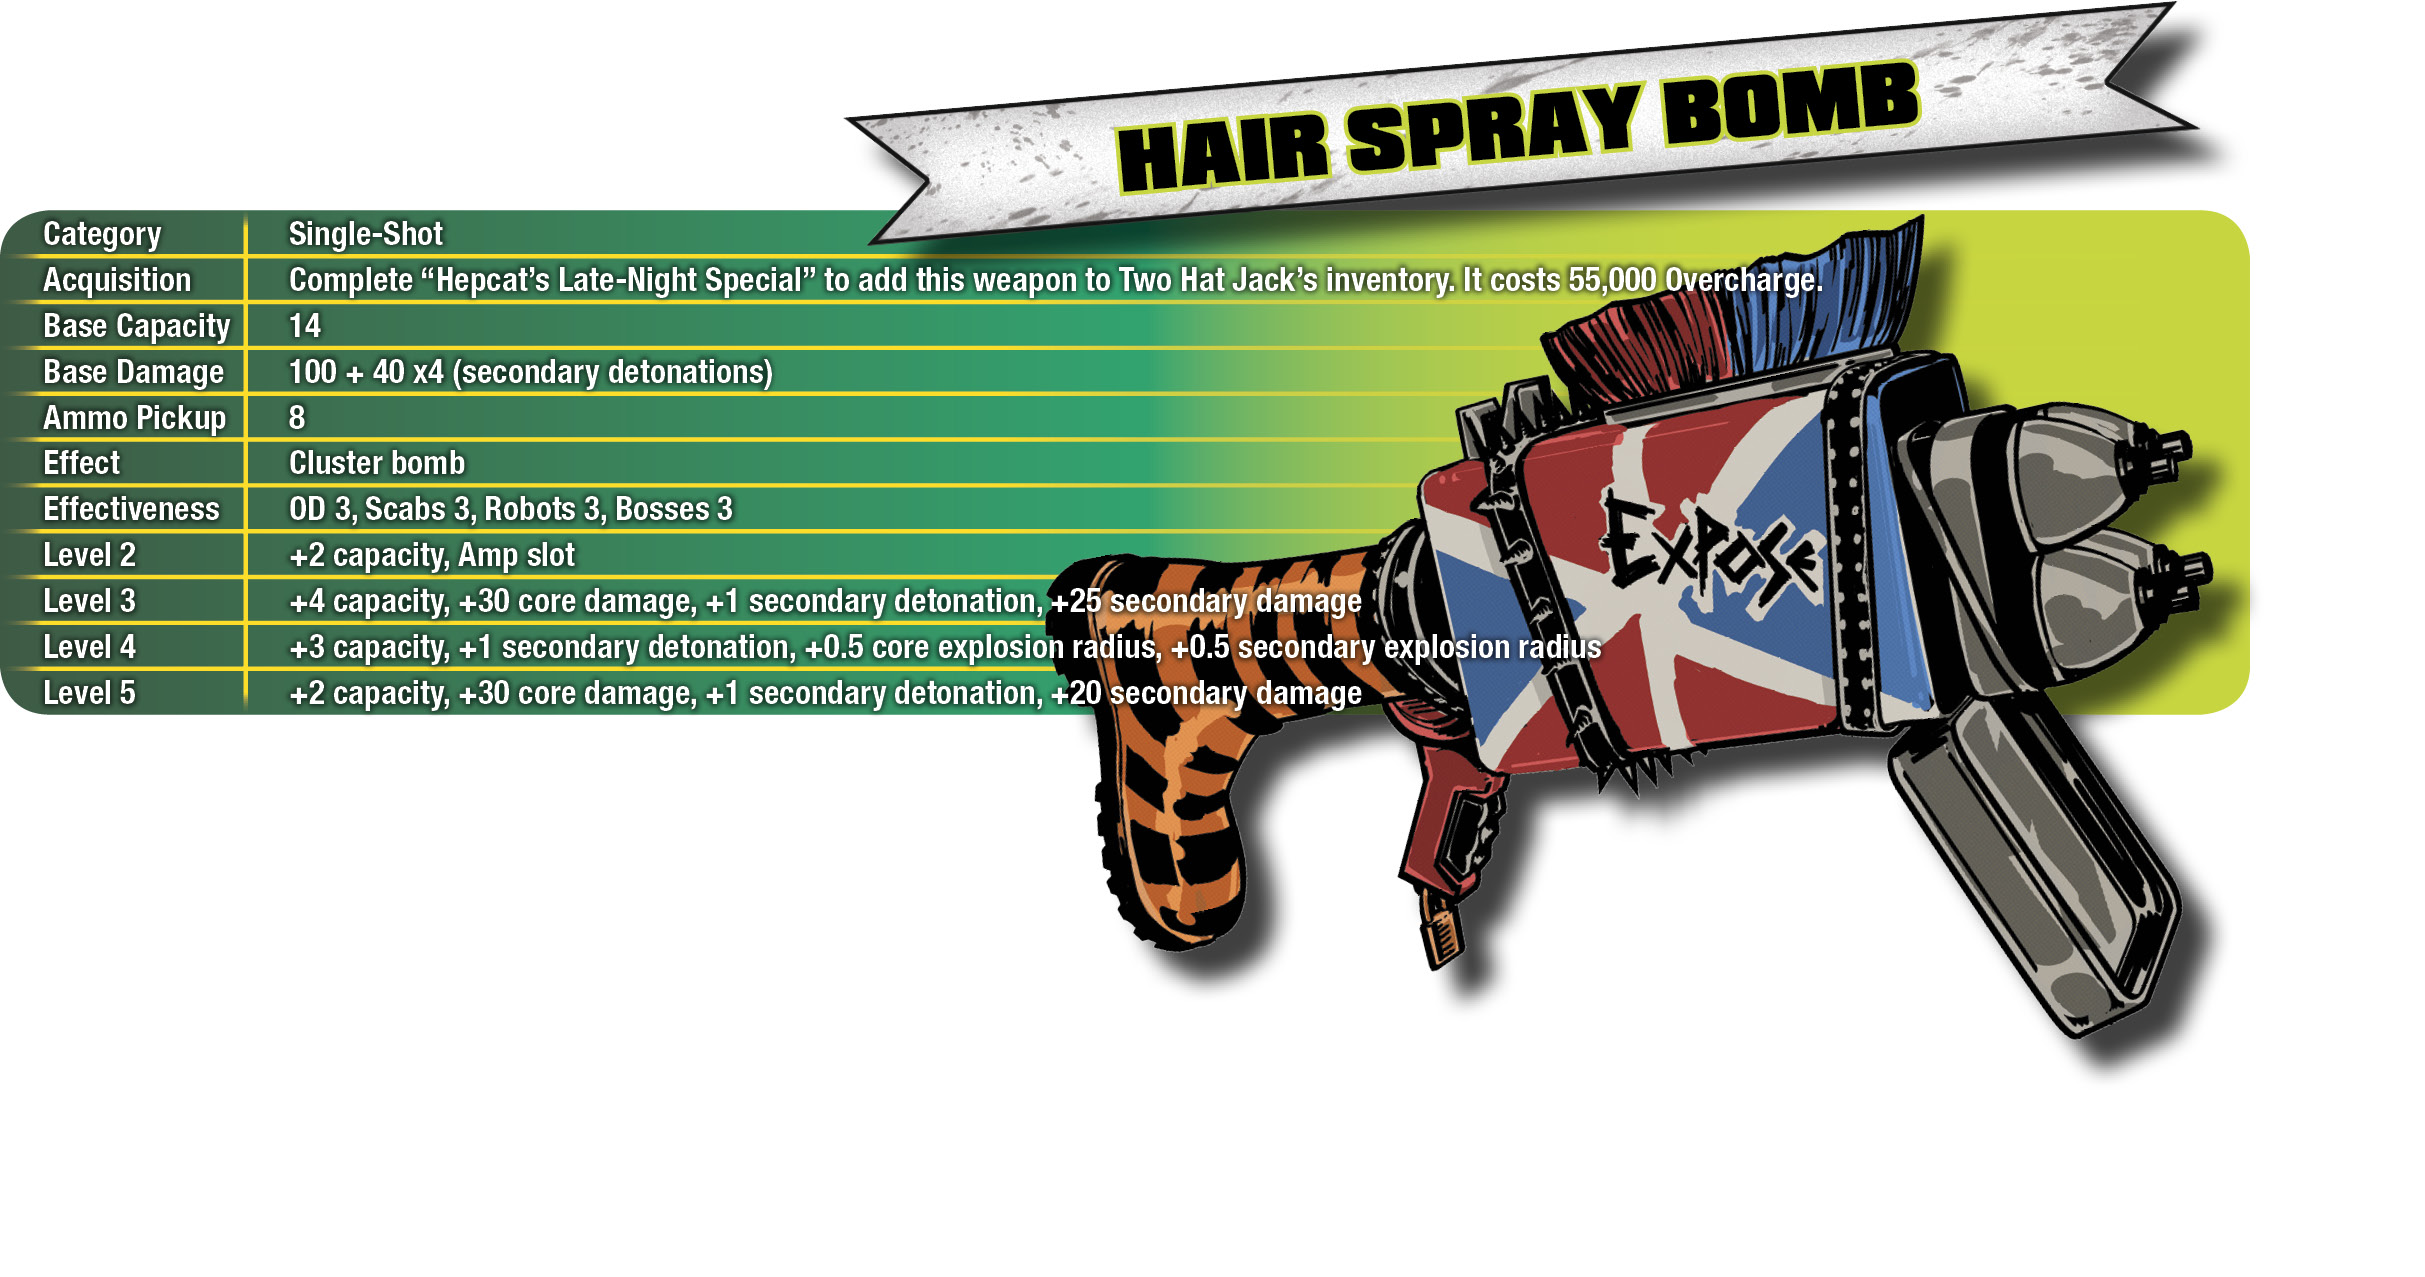
When a thrown Hair Spray Bomb hits its primary target, it explodes, dealing damage and spawning four to seven additional bombs that seek out nearby enemies and also explode. The range on the secondary explosions is fairly short, so if the primary target survived the initial blast, it’s usually caught in one or more of the follow-ups.
The TNTeddy frontloads its damage more than the Hair Spray Bomb does and inflicts a longer stun, which makes it a little more useful in Chaos Squad and against larger targets, but the Hair Spray Bomb is amazing for making entire streets full of enemies simply cease to exist. For casual use, the Hair Spray Bomb is one of the best “grenades” in the game.
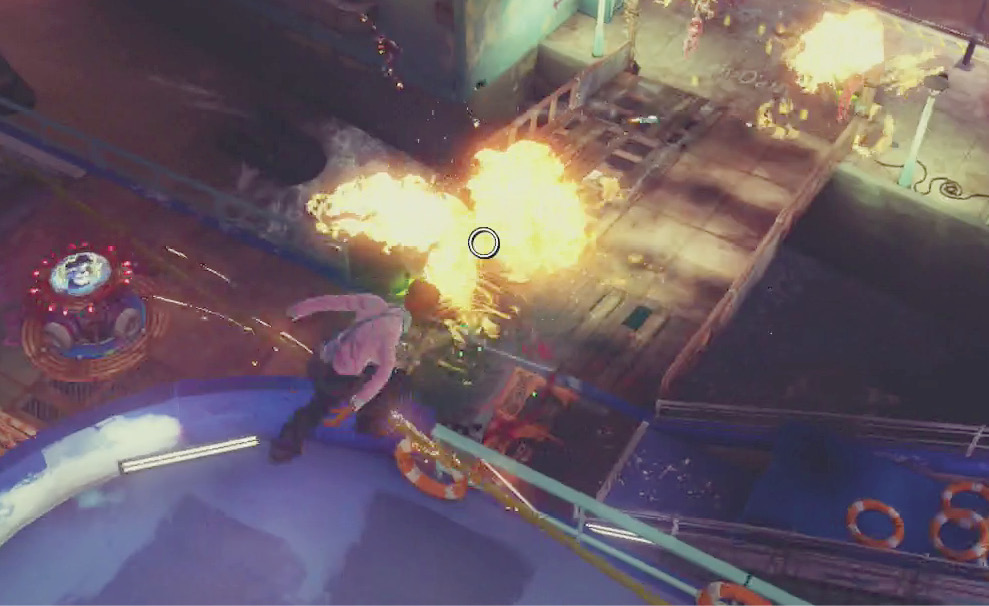
Once deployed, a Taunt Bot causes any enemies in the area to come after it. It can either zap enemies with a short-ranged electrical blast or hit from long range with a laser, but its primary use is as a decoy. Most opponents will ignore you to go after the Taunt Bot, allowing you to shoot them in the back or set up traps that surround the Taunt Bot’s position. You can have up to 2 Taunt Bots active at once; firing a third causes the first to immediately despawn.
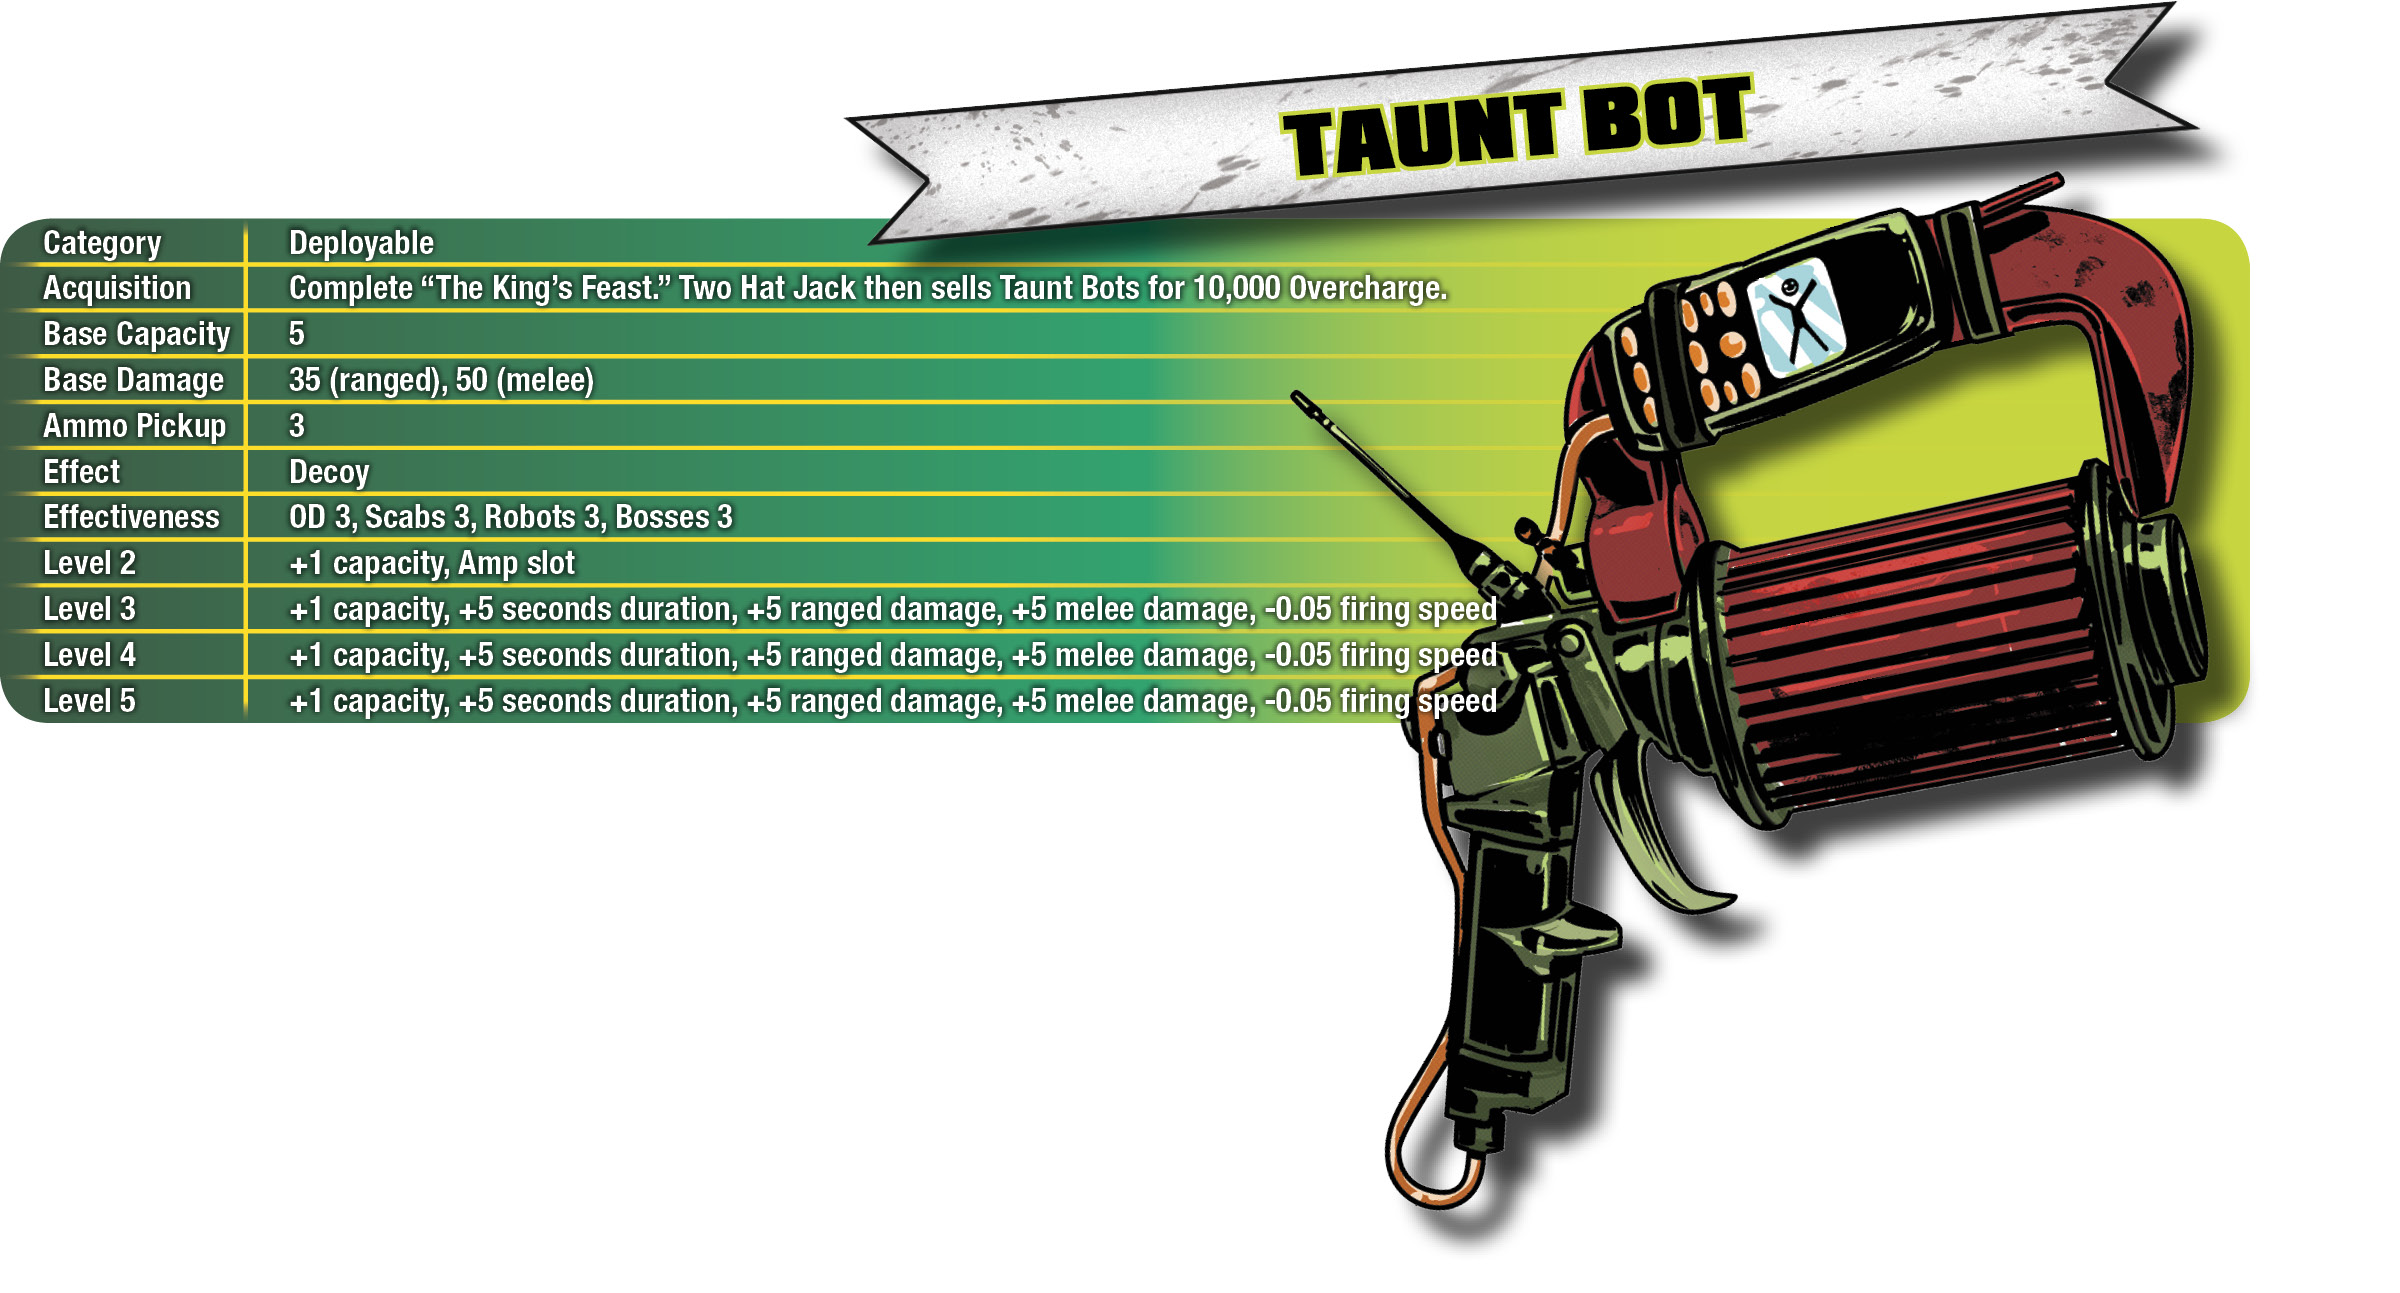
As the weapon levels up, the Taunt Bot’s firing speed goes up and it becomes more aggressive, which makes it more useful as a genuine offensive option. Like the Turret Copter, there aren’t many situations where deploying a few Taunt Bots won’t be helpful, especially if you take the time to protect them with Pulse or Proximity Mines.
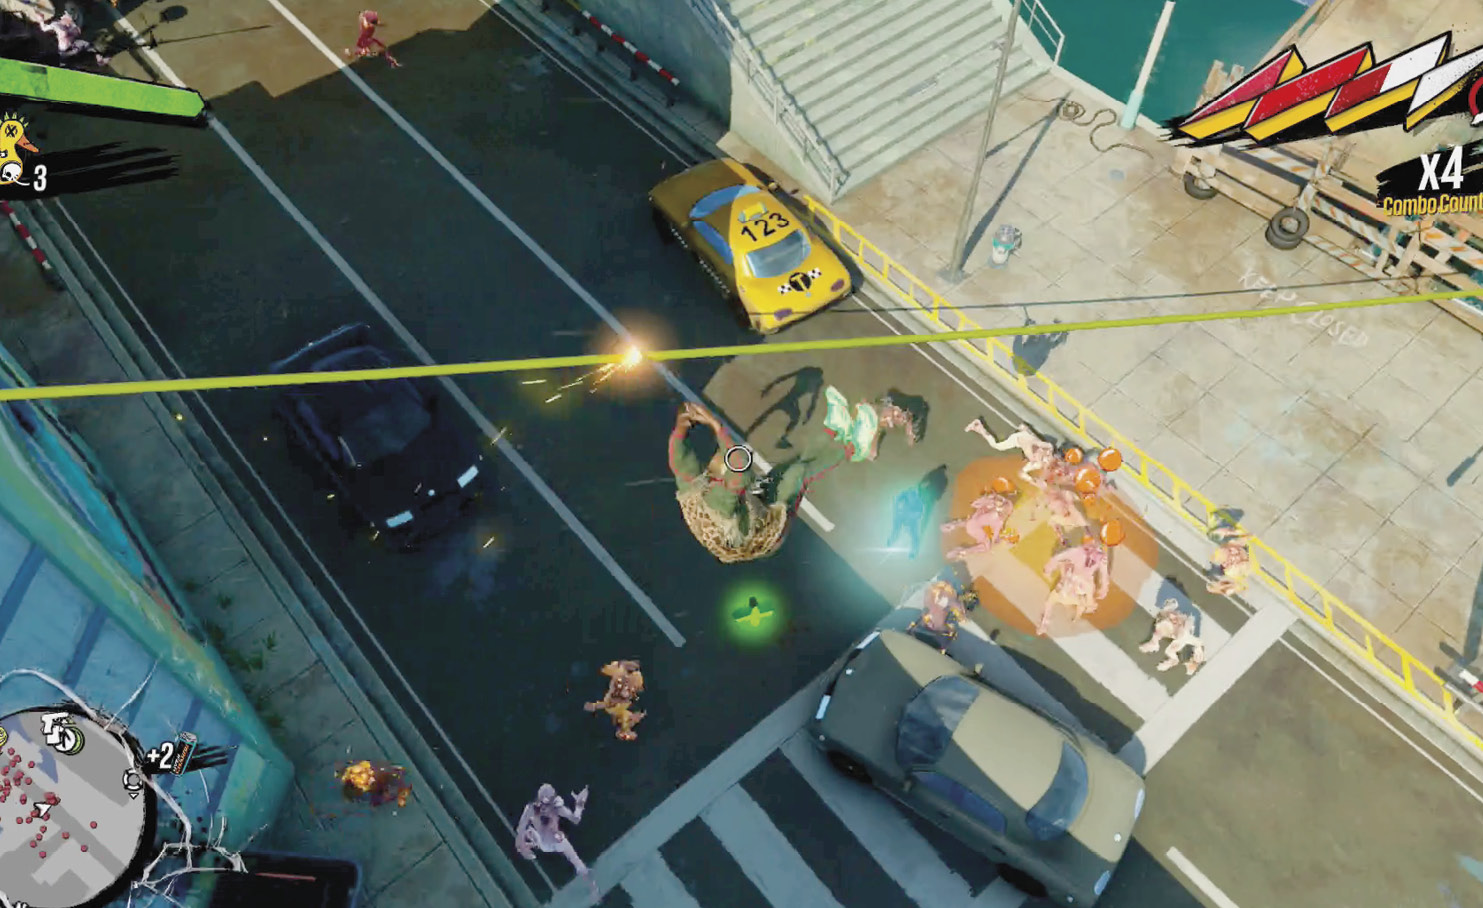
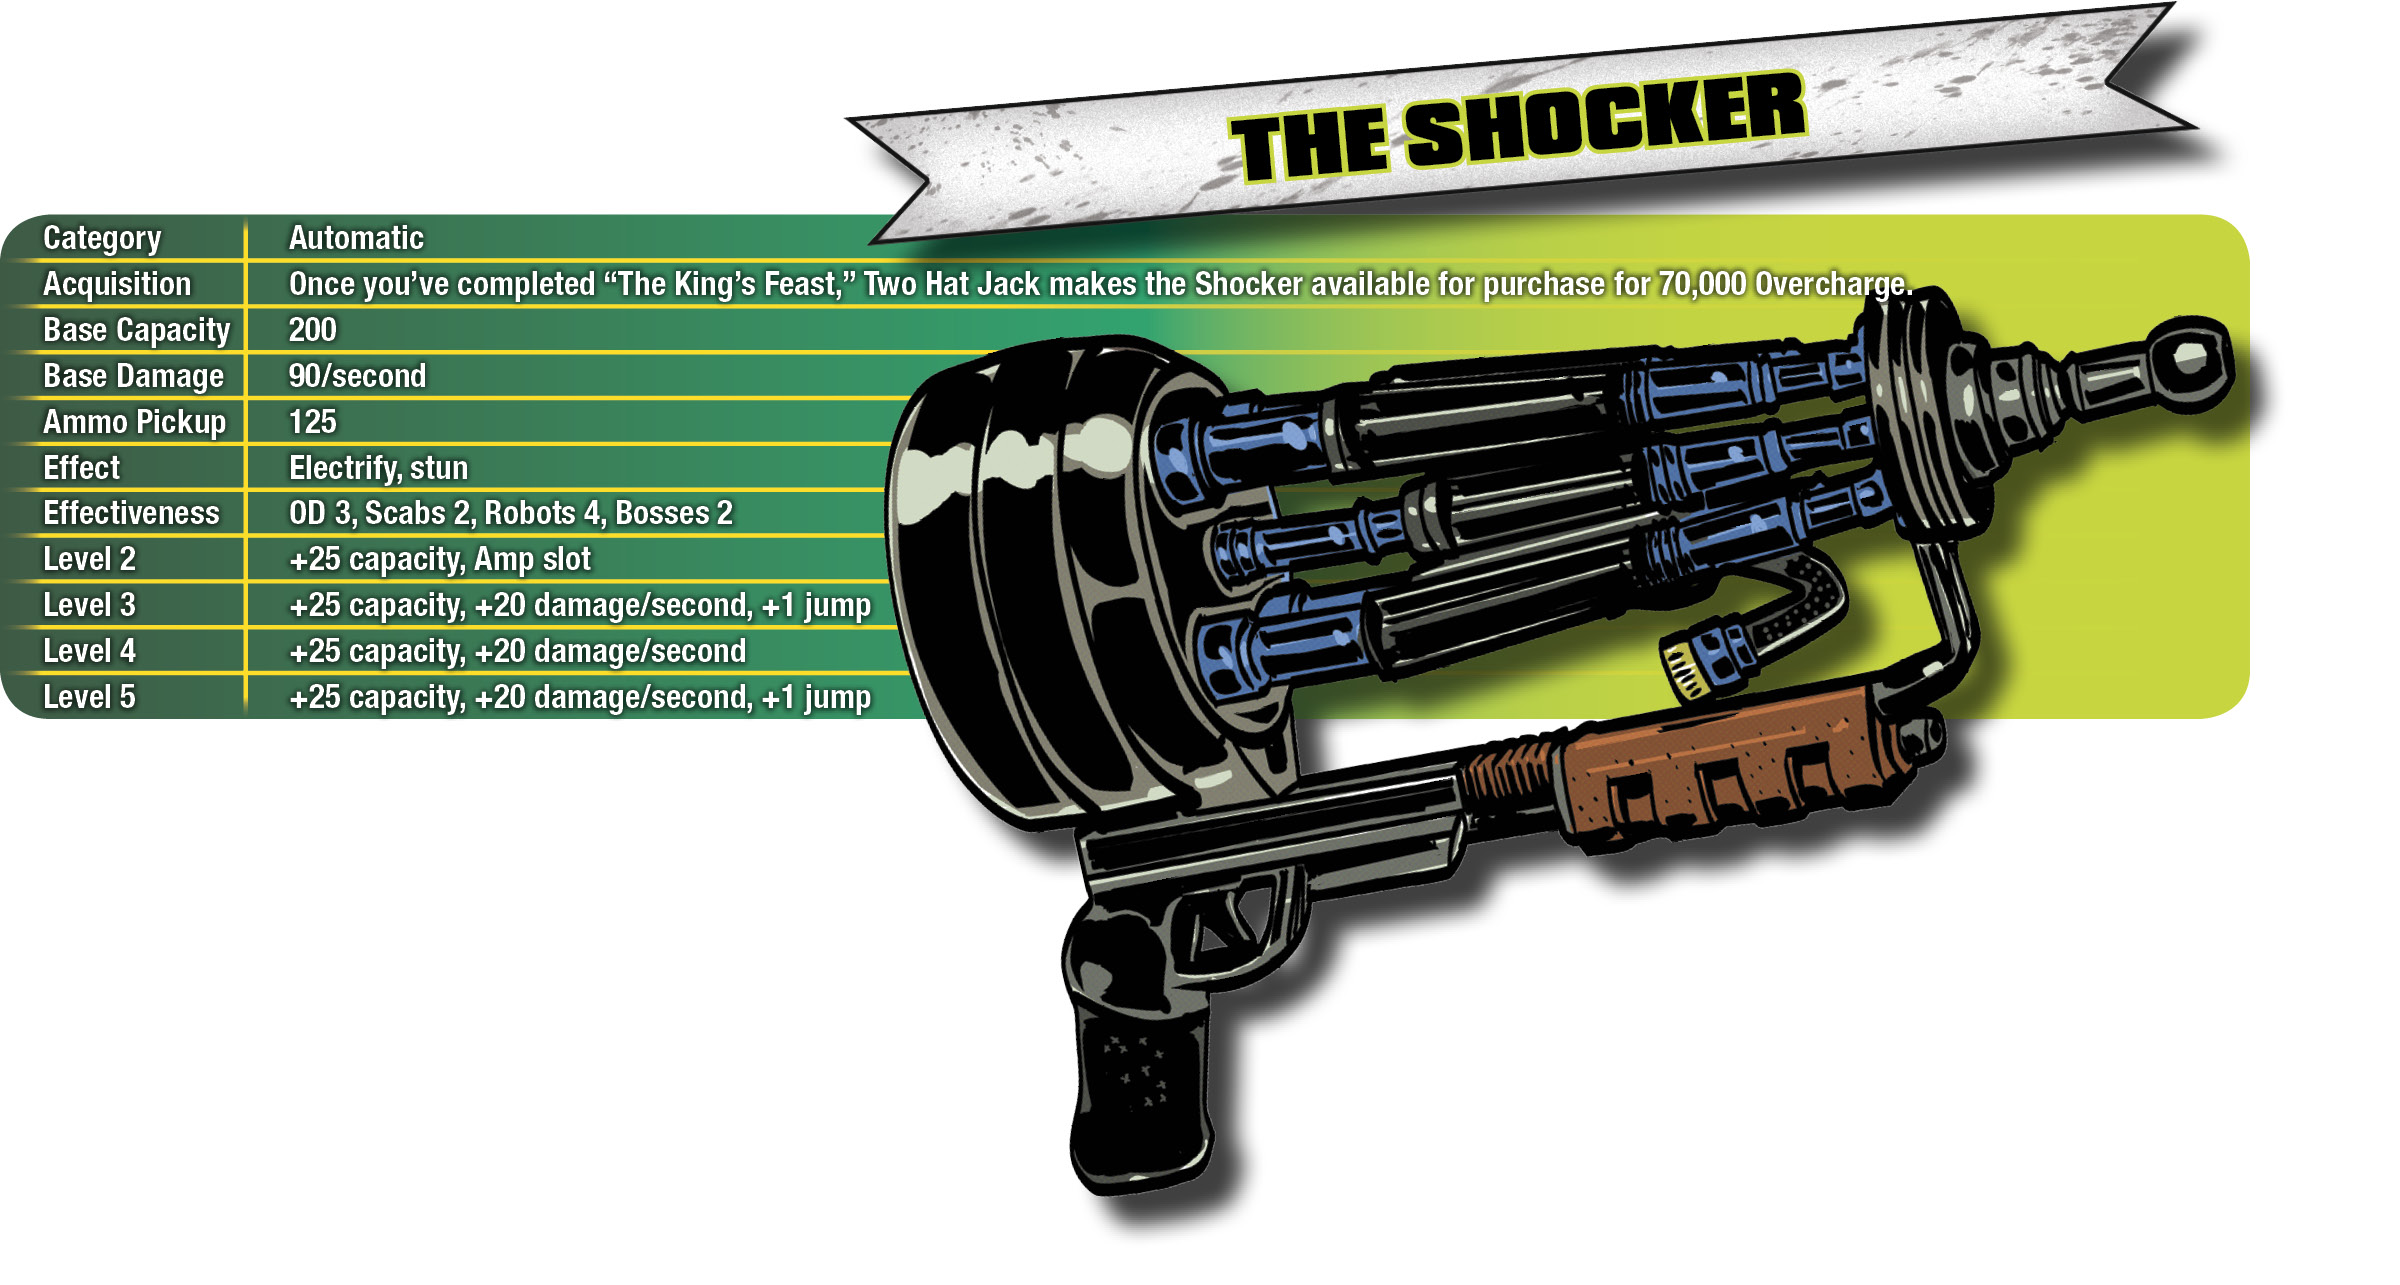
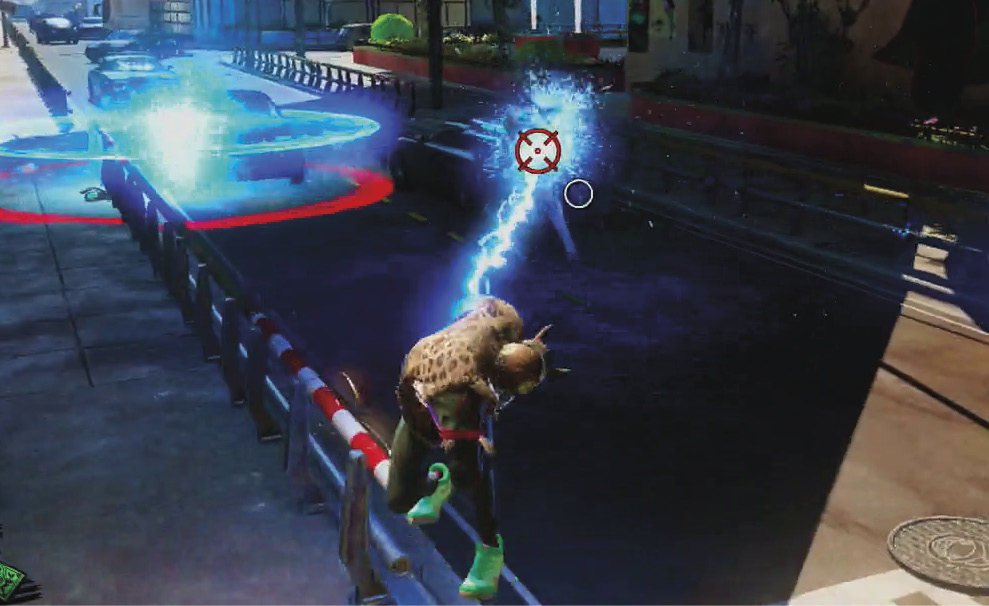
An enemy struck with the Shocker’s beam gets stunned and electrified for as long as you keep it focused, dealing damage every second and producing arcing bolts that jump to other nearby hostile targets. Even large enemies like Herkers are subject to the stun from the Shocker, so you can keep one paralyzed and electrified as long as the Shocker’s ammo holds out. The Shocker’s great for stopping a wave of OD dead in its tracks, keeping enemies at bay during Chaos Squad, or blowing up Fizzco Tank Bots.
There’s a reason it’s a classic. In a game that’s otherwise full of crazy improvised weapons, the AK-FU is “just” an assault rifle, but it does decent damage, fires quickly, and makes a satisfying racket as you hold down the trigger. Once you get it, it’s great for dealing with pesky Scabs and for “drive-bys” while grinding.
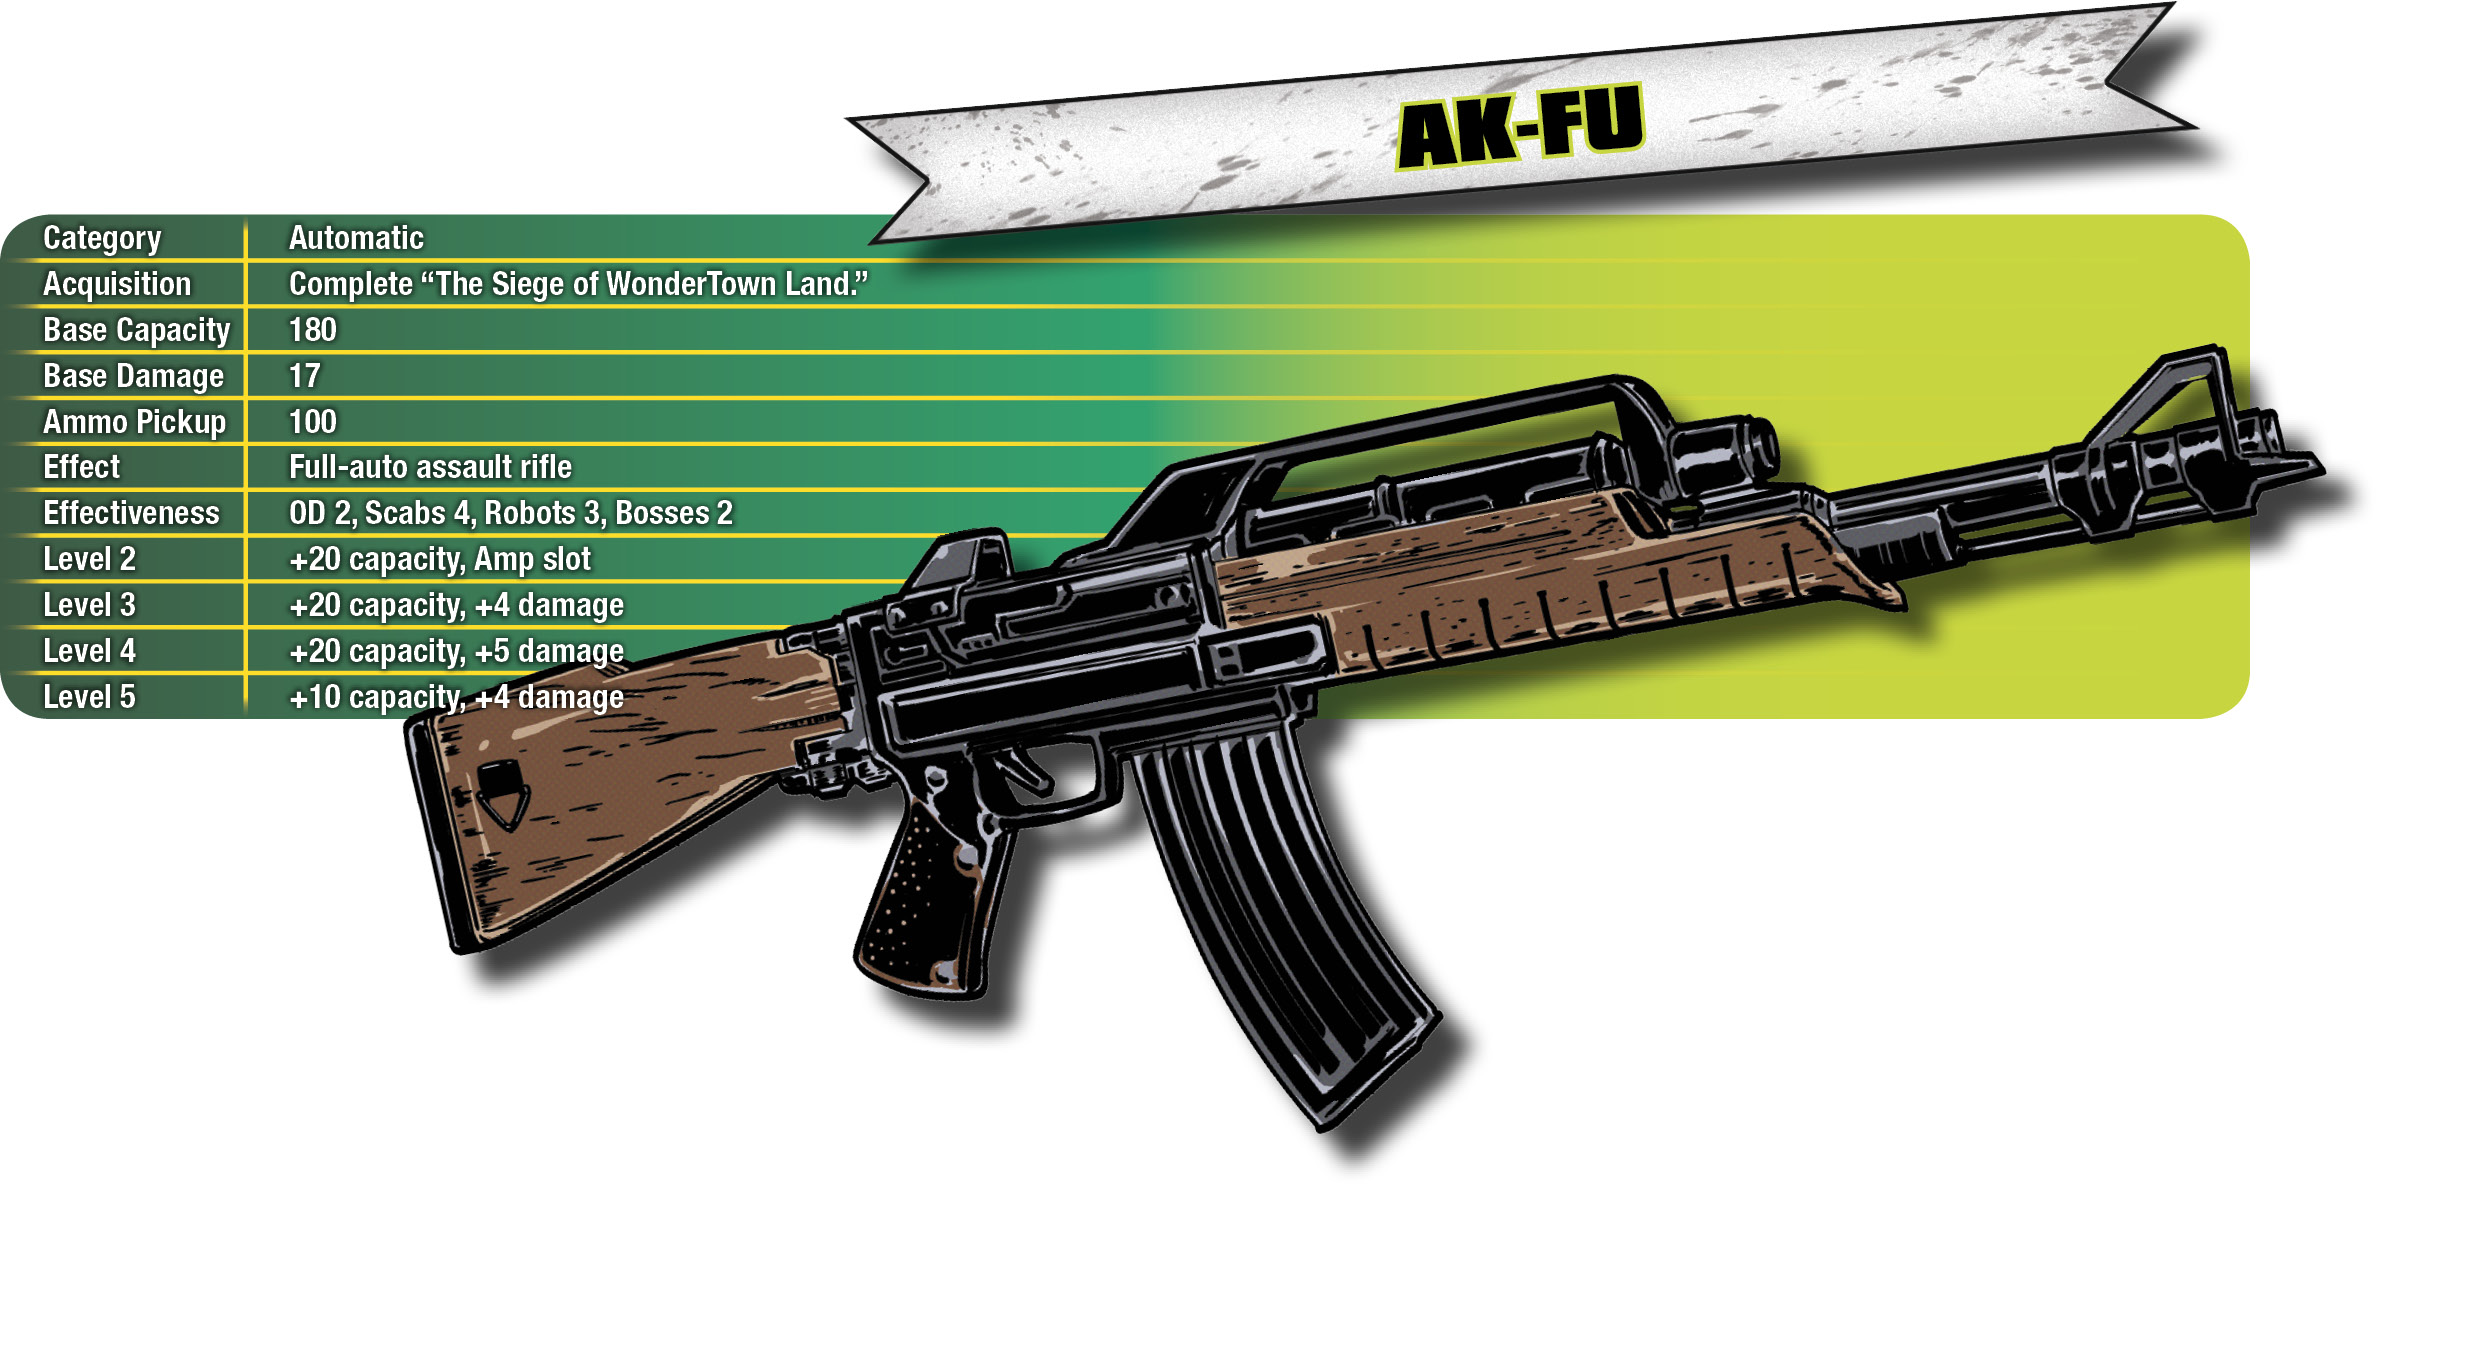
As with the High Fidelity, the low damage inflicted by each individual AK-FU bullet makes it an excellent method of using on-hit Weapon Amps like Rocket Man or Stun Rounds. The AK isn’t an awful gun in its own right, but when you give it a 12% chance per individual round of turning an enemy into a cluster bomb dispenser, it becomes one of the highest-DPS weapons in the game.
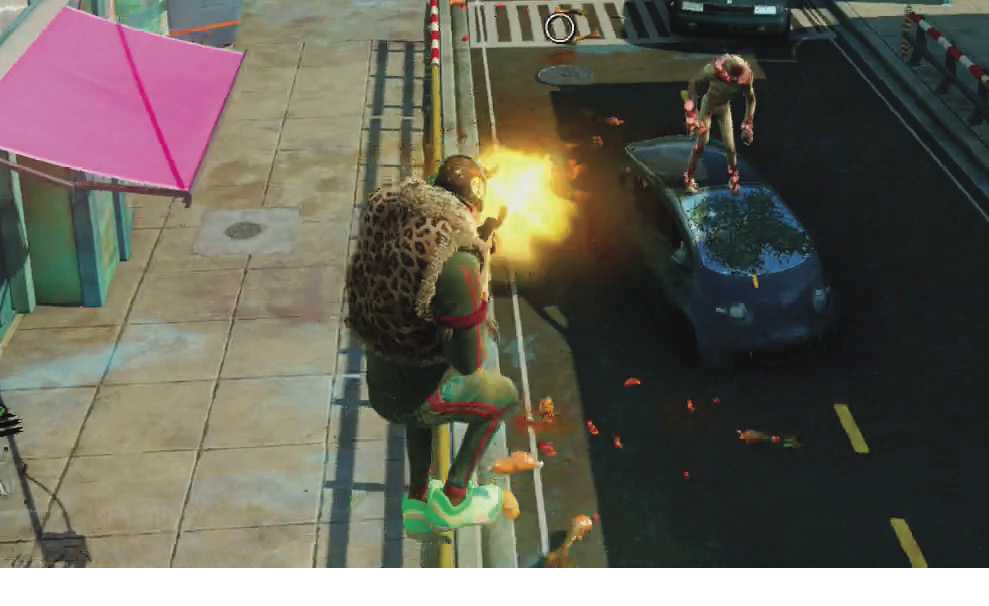
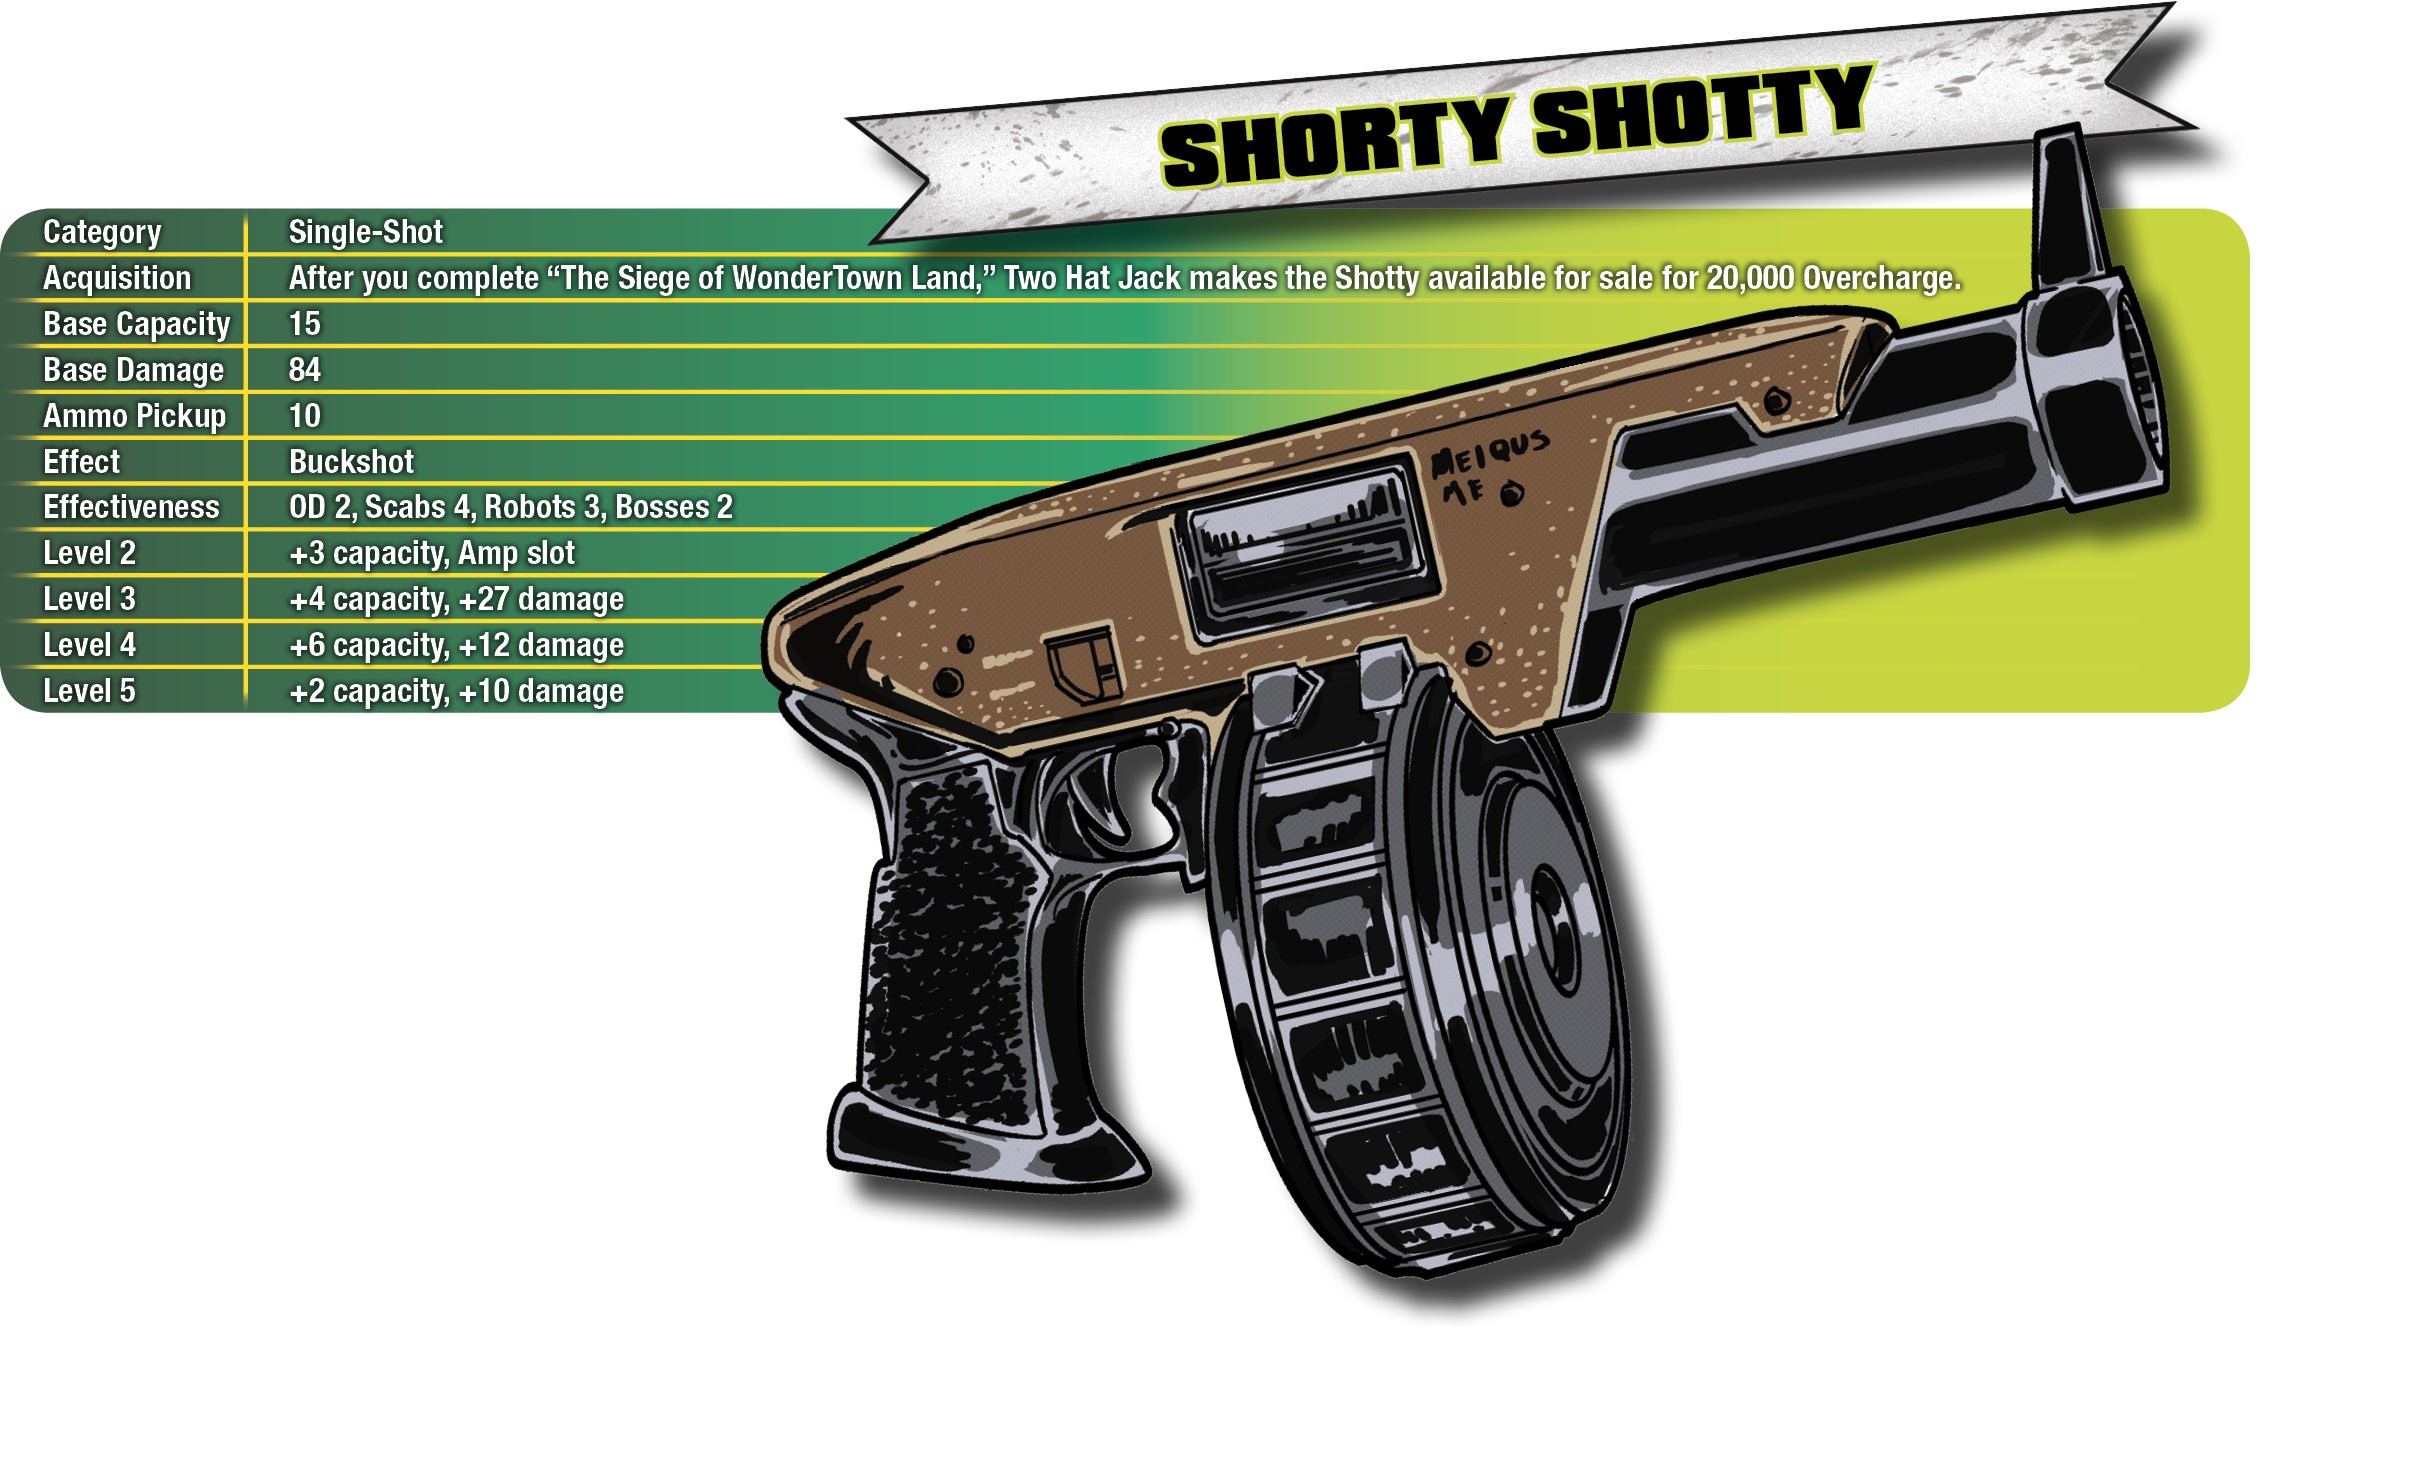
As one might expect from a short-barreled shotgun, the Shorty Shotty is an excellent close-combat weapon, but at any range other than point-blank, you’d do more damage if you threw buckshot at a target by hand. Unless you’re right up next to your target, you’re better off using any other gun.
It’s not great against the OD, but it makes mulch out of Scabs and can be useful against Fizzco robots that have invaded your personal space. Each shot has a wide spread, which makes aiming sort of pointless and can take out multiple enemies at once.
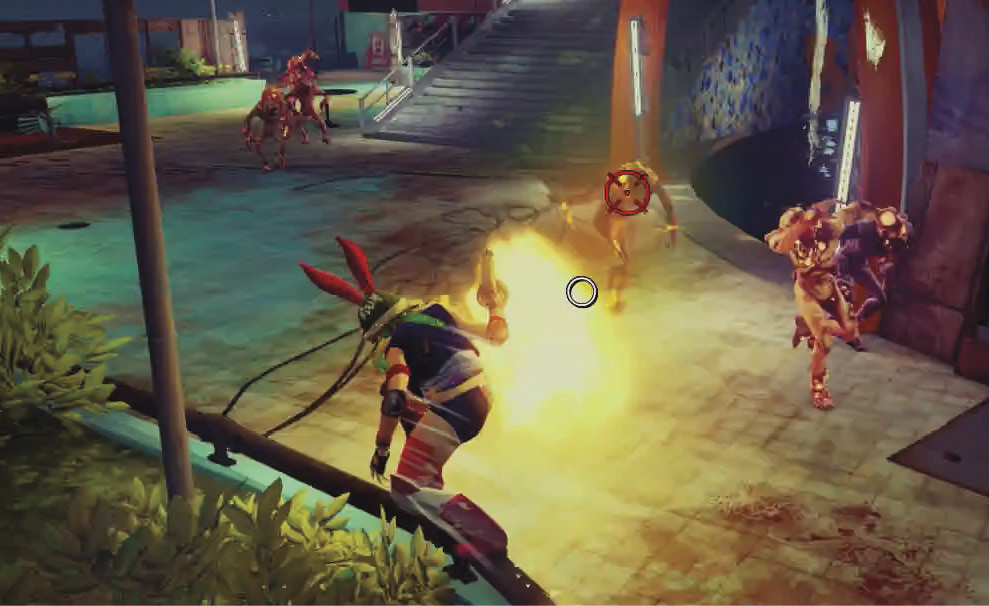
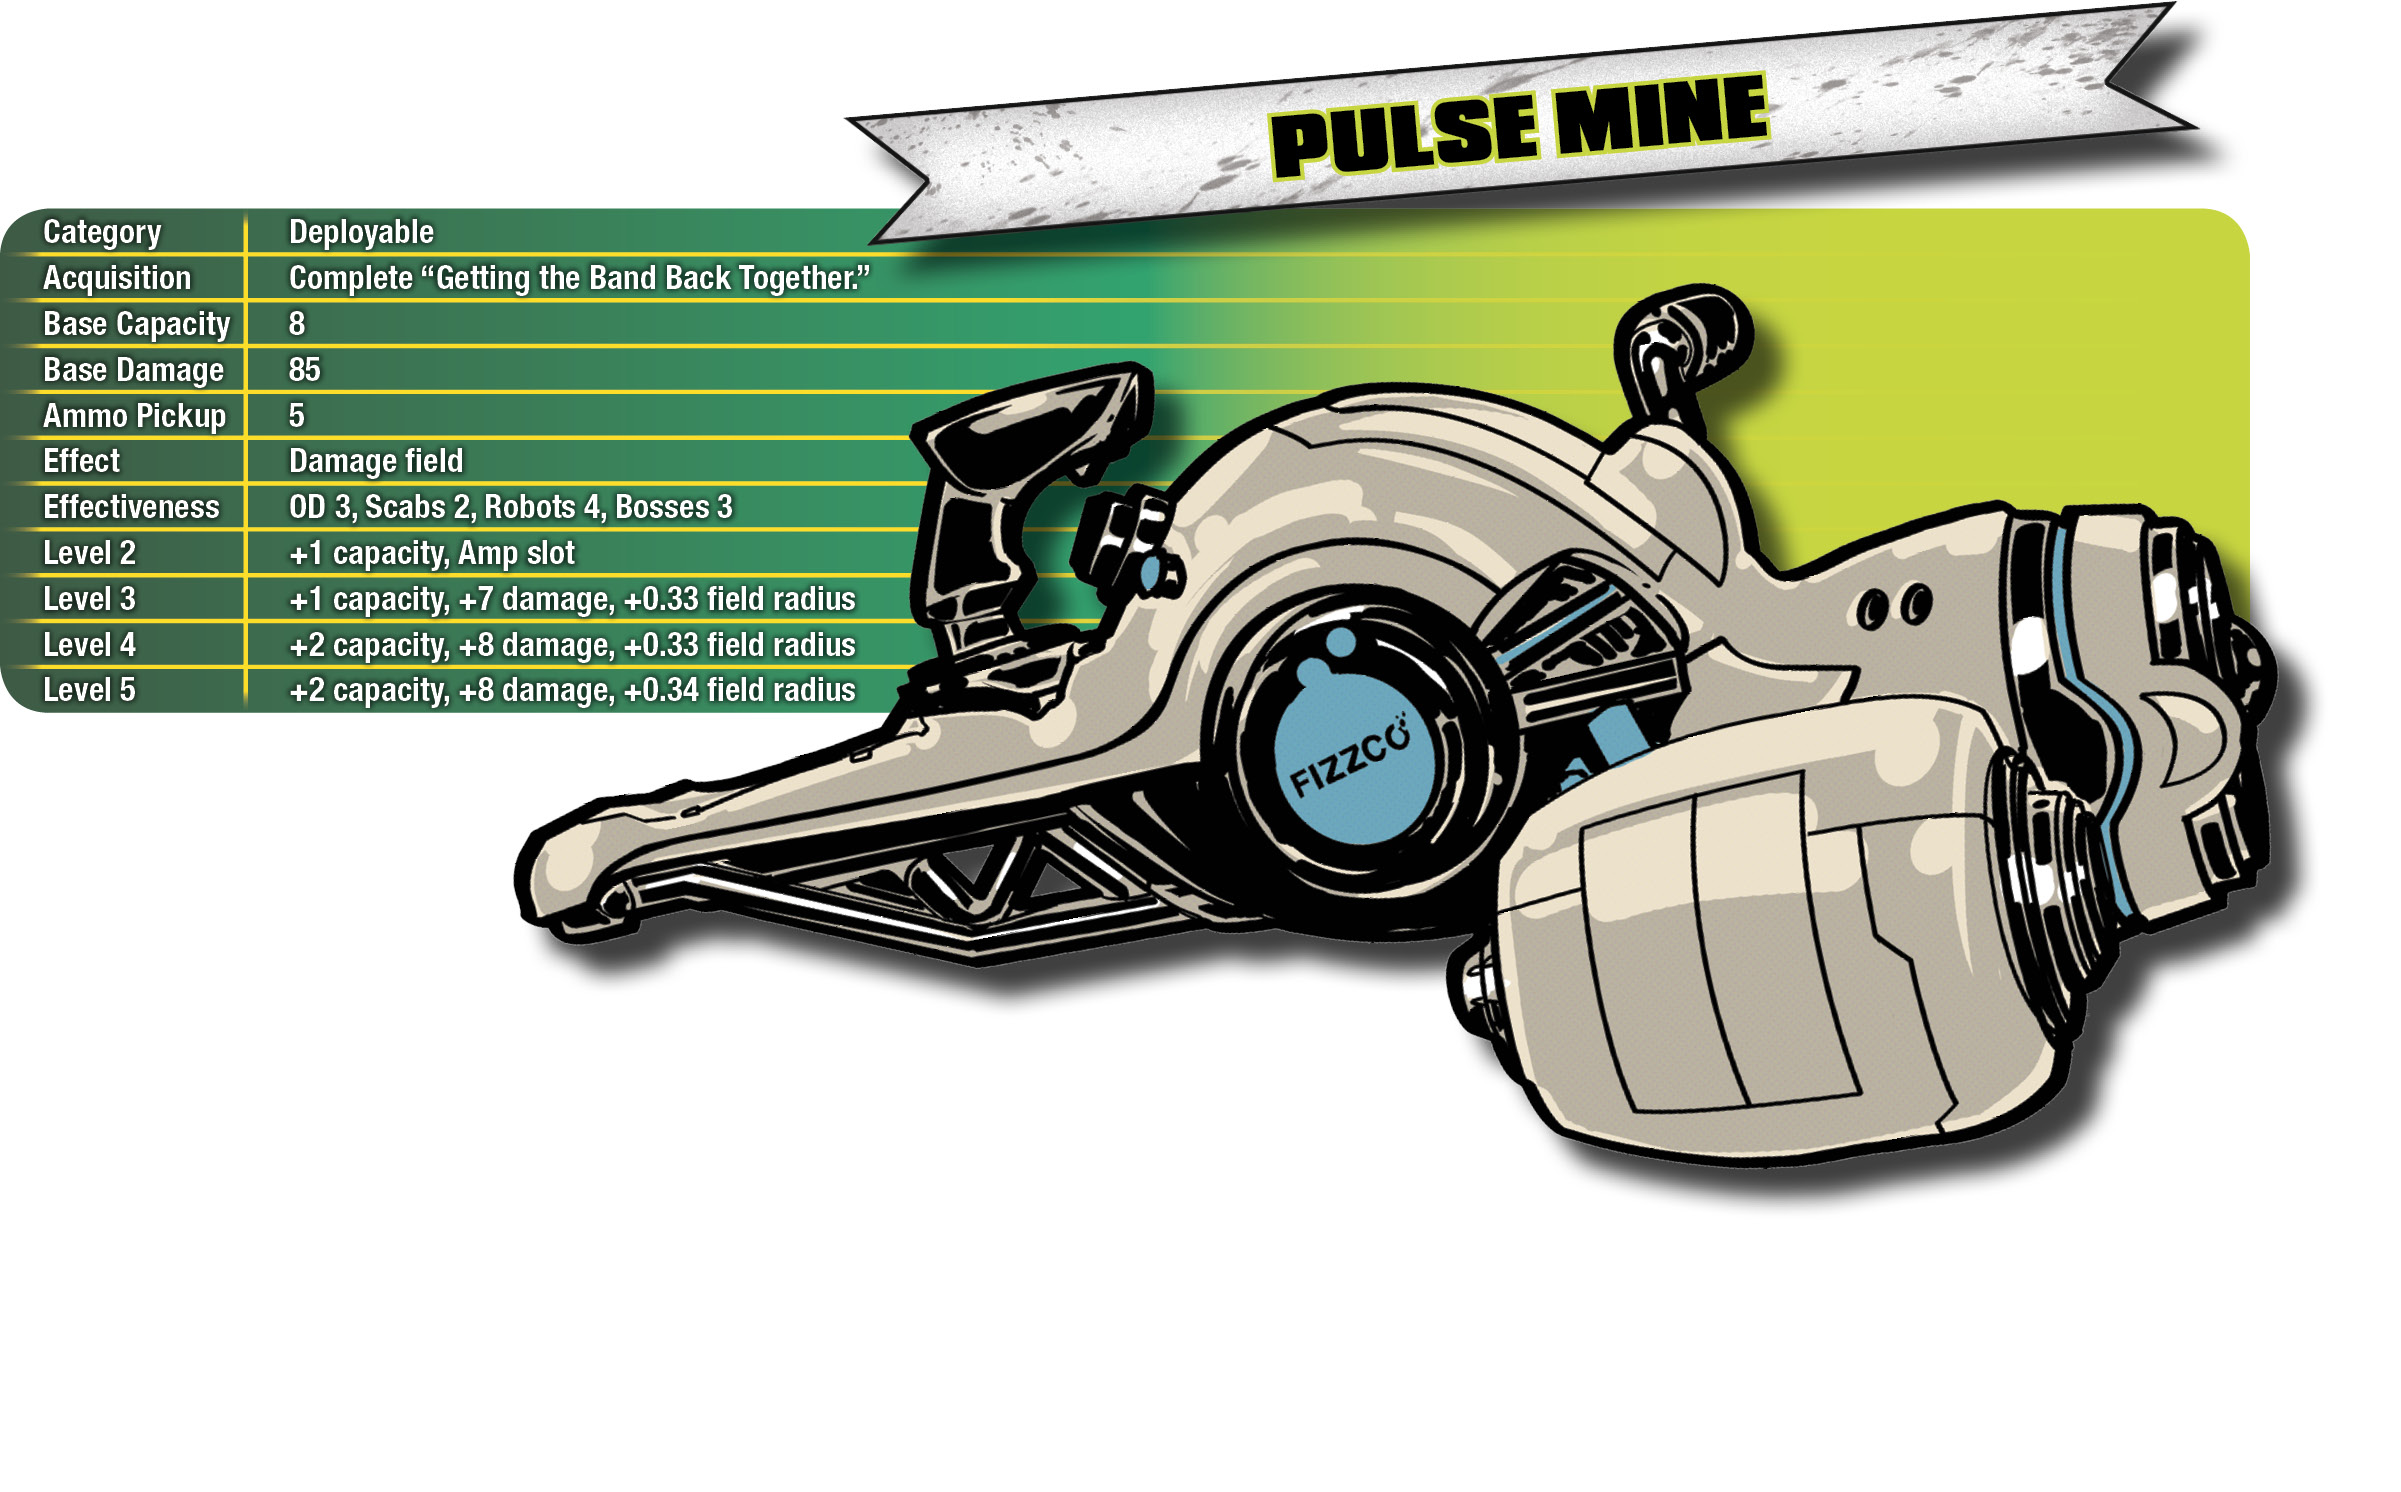
When placed, a Pulse Mine emits a green energy field for the next 15 seconds. The field, well, pulses, inflicting damage to any enemy that steps into it. It’s thus the most effective area-denial weapon in the game. In conjunction with Taunt Bots or the pool of Overcharge formed by the Ahab, you can construct your very own anti-OD bug zapper, mowing them down by the half-dozen as they approach, or use several Pulse Mines to keep enemies off of a survivor you’re trying to save.
You can set up to three Pulse Mines at once, and if their fields overlap, an enemy will take damage from each Mine simultaneously. The Pulse Mine also has no target cap, so you can throw one down in the middle of an oncoming horde and blast a couple of dozen OD at once. This makes it one of the easiest weapons to level, and you shouldn’t be surprised if the Pulse Mine is your first level-5 gun.
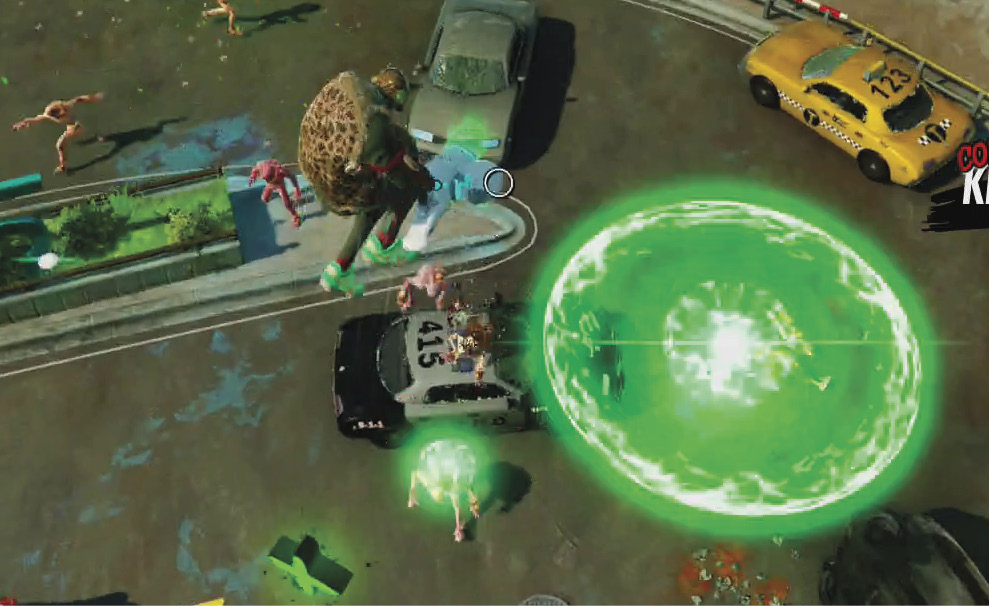
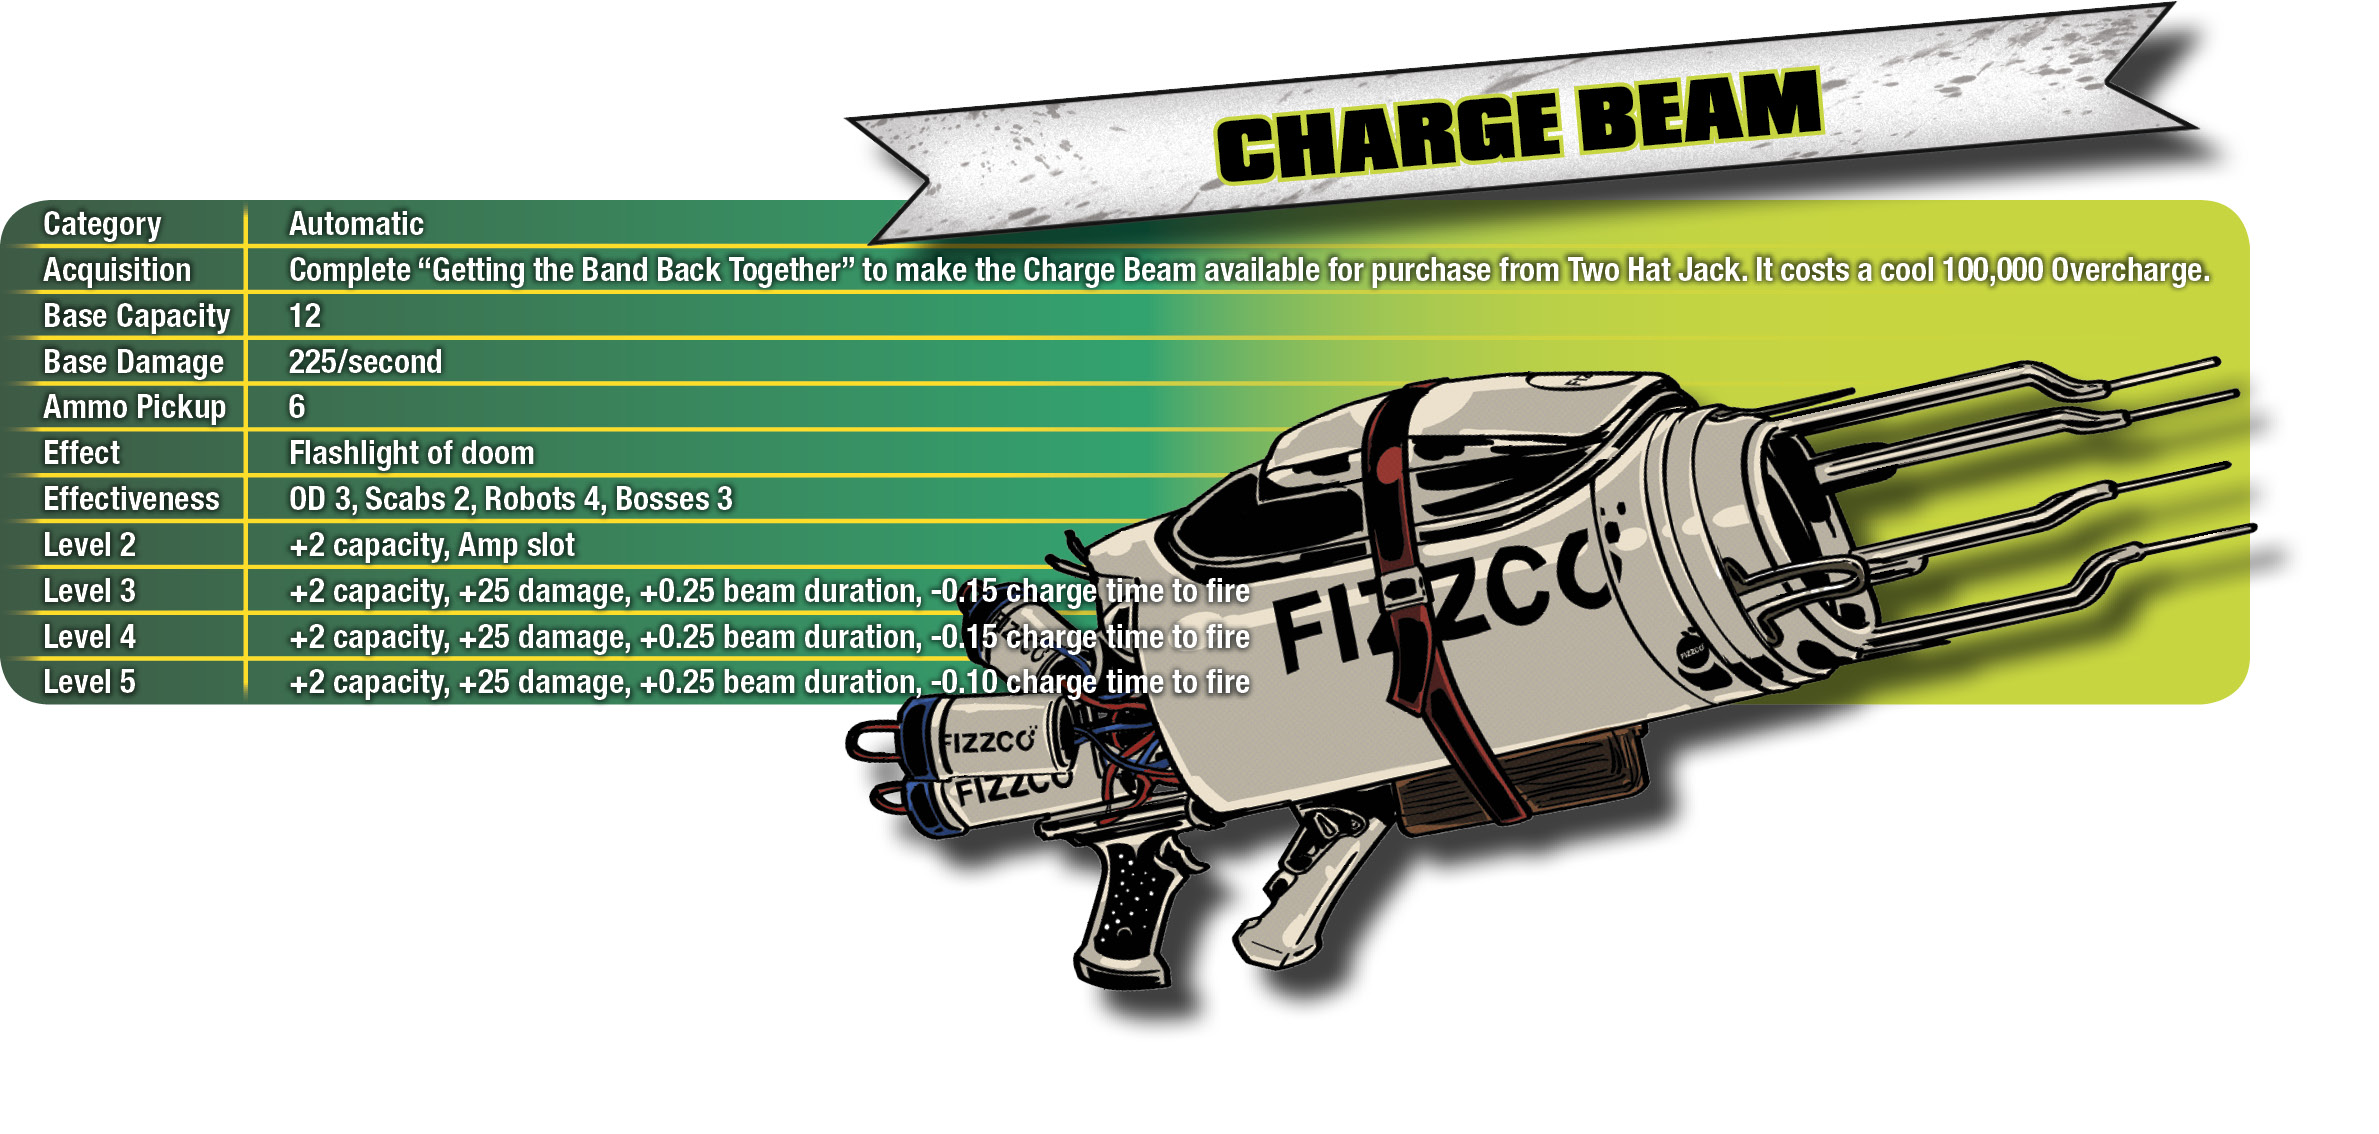
It takes a second to warm up, but once it does, each round in the Charge Beam represents a 2.5-second-long burst of hot plasma that pierces through anything it touches. The Beam will continue until it expires, you let go of the fire button, you take a hard enough hit that your character goes flying, or you pull off any traversal move that interrupts your firing, such as changing direction on a wire.
The Charge Beam boasts the highest DPS of any weapon in the game if you can keep it focused on a target for its entire duration, but that can be a tall order in a game that moves as quickly as this one does. What can be fun is to hold down the trigger ahead of time and grind past a crowd, clotheslining them all at once with a single Charge Beam and watching the bodies explode.
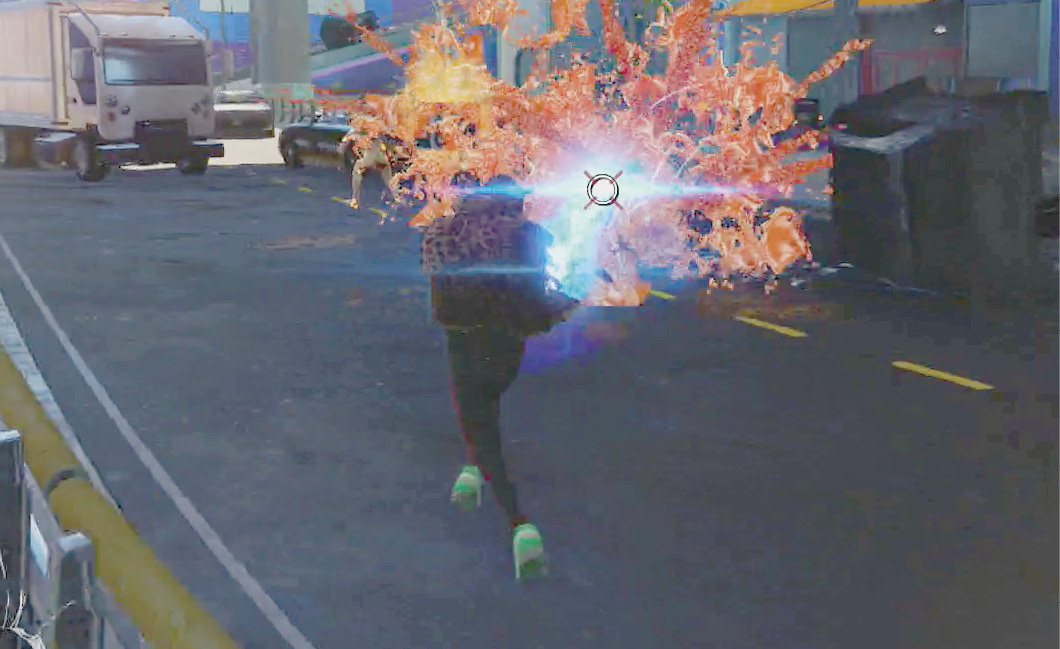
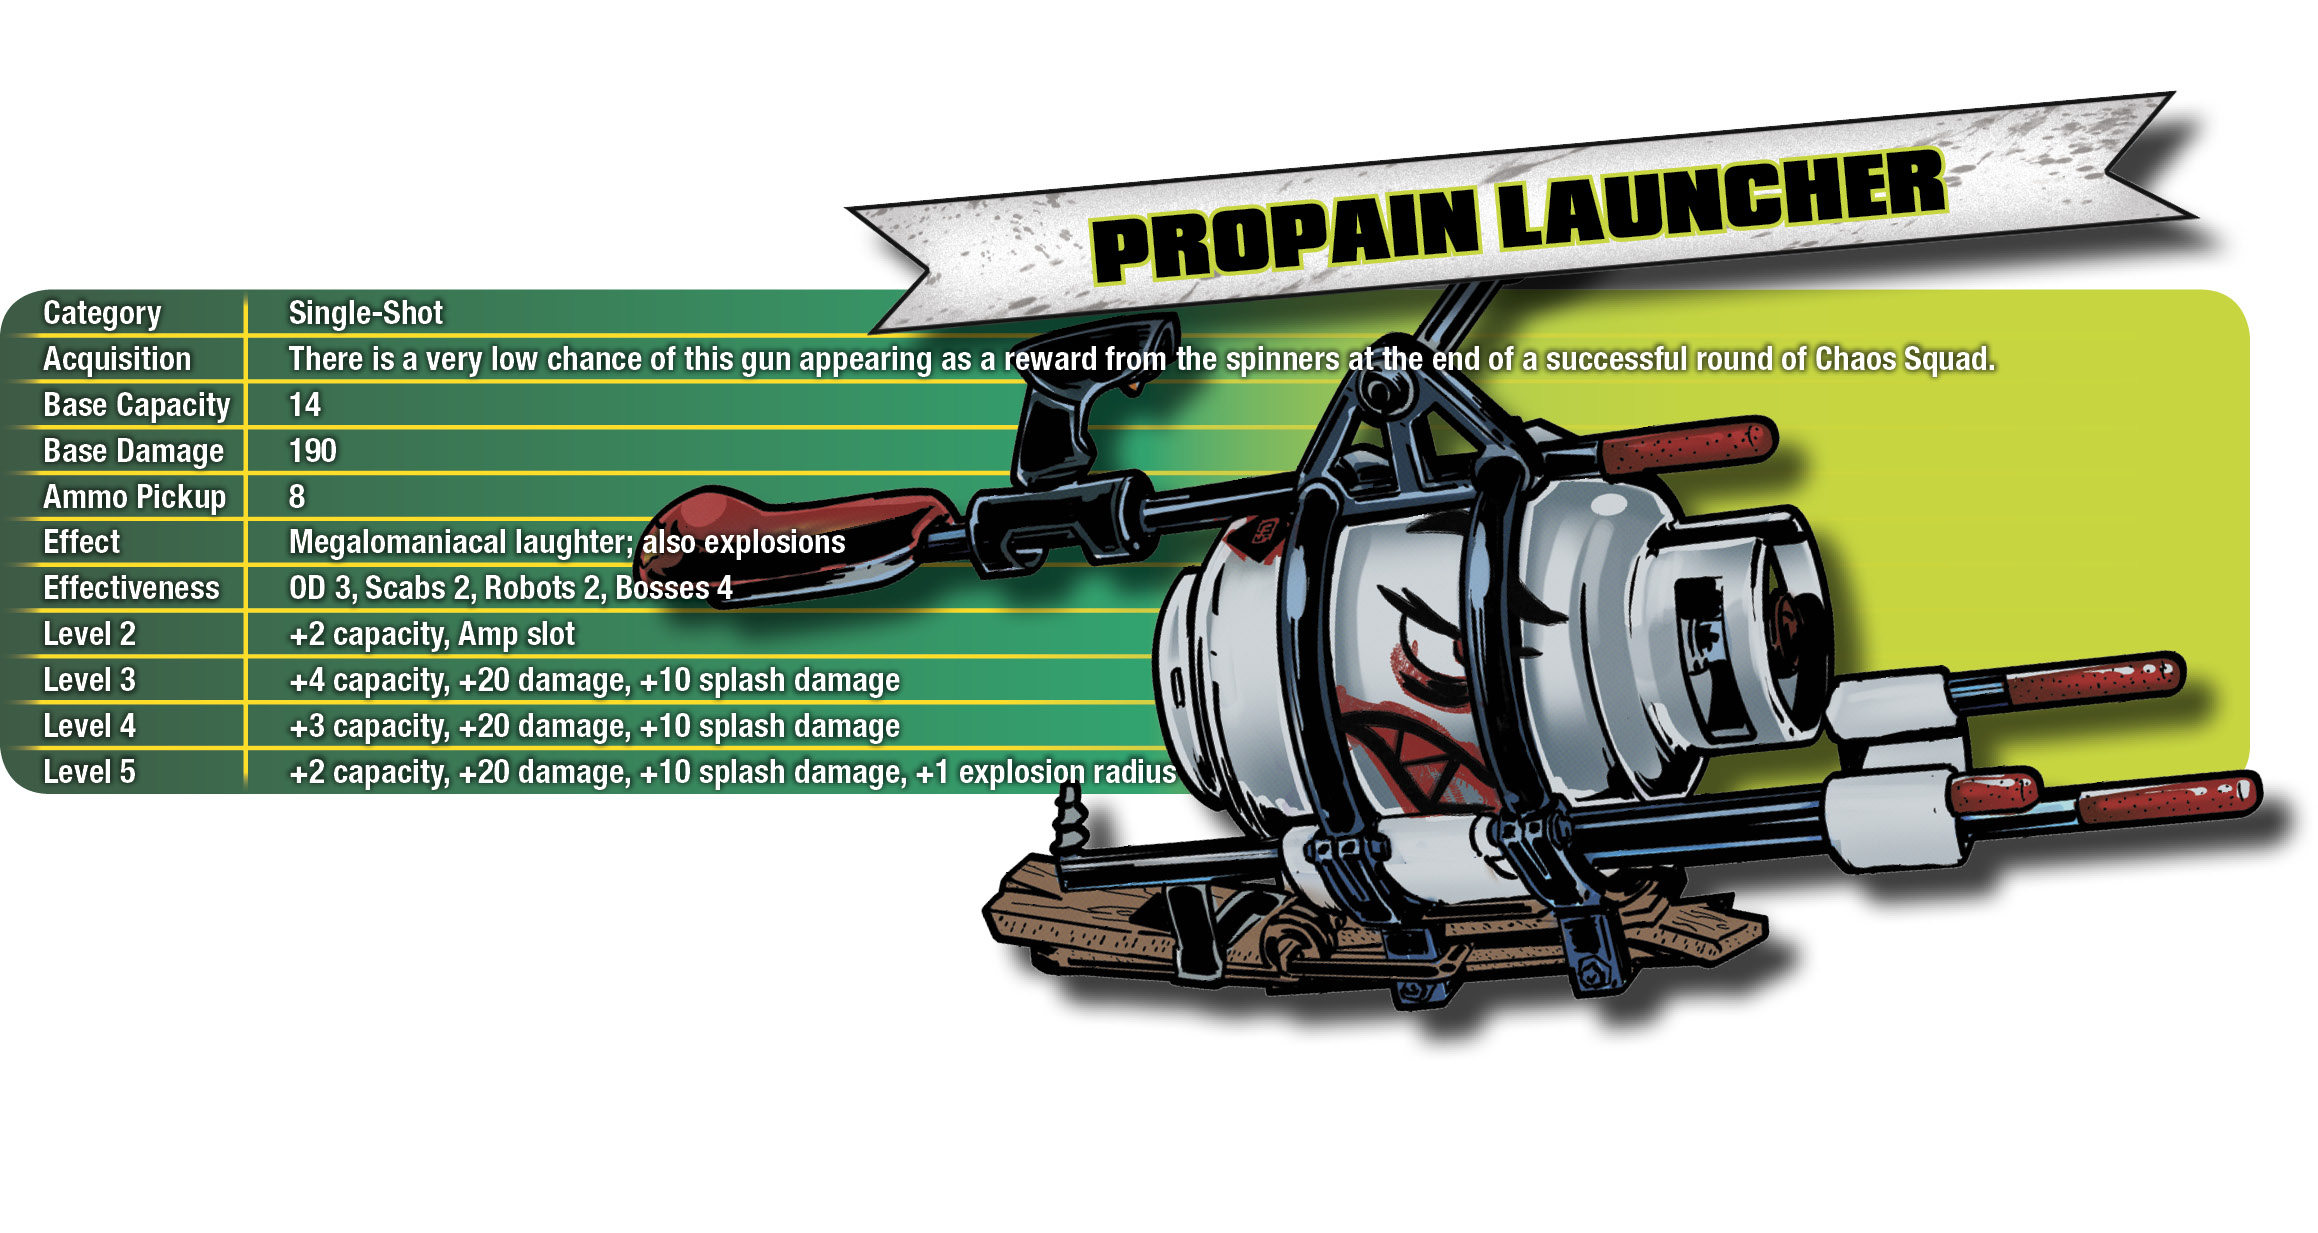
Try using any other gun once you have this. Go ahead. Try. This is Sunset Overdrive’s equivalent to a rocket launcher. It flings burning tanks of propane wherever you point it, has the highest base damage of any single-shot weapon, and is one of only four weapons in the game that gets a damage bonus against bosses. Herkers drop in six hits with a level 1 Launcher and the hilarity only increases from there.
The Launcher doesn’t have a huge ammunition pool, although that doesn’t create much of a drawback, since an empty Launcher typically means everything in six square blocks is already dead. It suffers a small damage penalty against both Scabs and Fizzco robots, but this only means you have to fire twice.
The real issue is that the ProPain Launcher is difficult to get, as it’s a rare random reward from Chaos Squad. You may get lucky and get it very early in the game, which means you now rule Sunset City with an iron fist, or it may take you a few dozen games before you see it.