
Sunset Overdrive Official Strategy Guide Enemies
The OD
One minute, you’re gulping down can after can of a brand-new energy drink; the next, you’re a globular orange fiend whose interests include homicide, getting more Overcharge, homicide, punk music, and murder.
The OD are the signature enemy of Sunset Overdrive, and are a growing concern throughout all four districts within the city. They’re also the most varied and mobile of your enemies, so you can look forward to running into them everywhere and anywhere, even when you’d think they’d have no way to reach you.
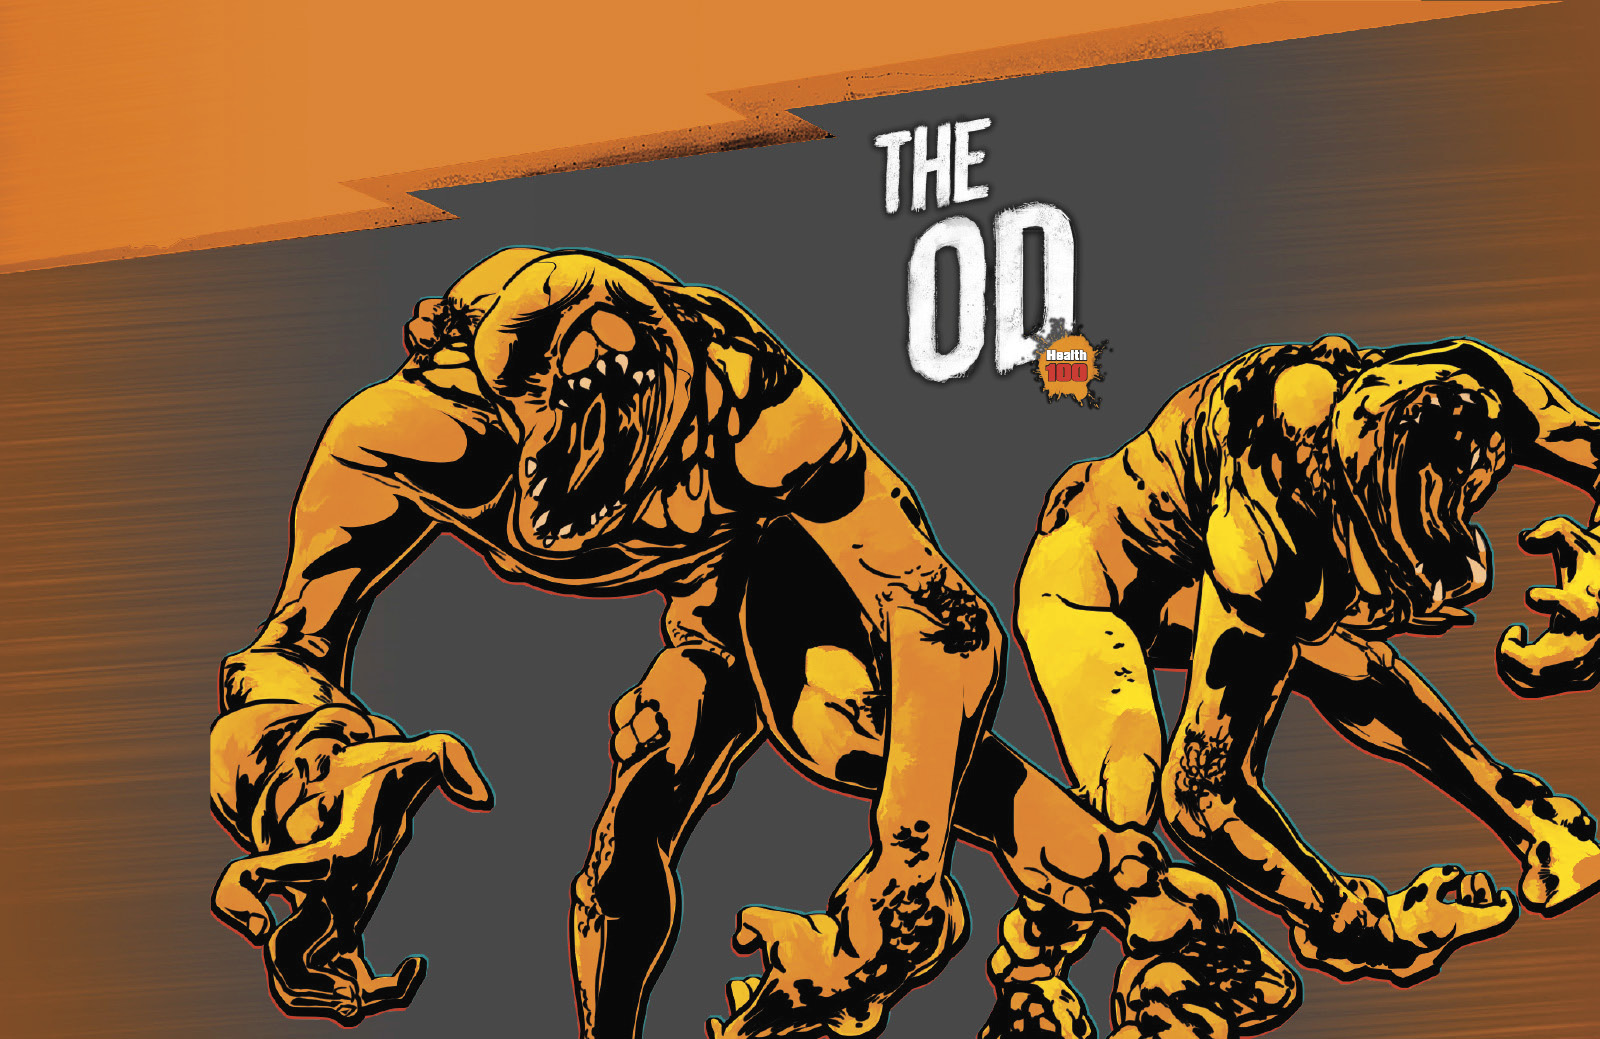
The standard-issue grunts, the run-of-the-mill mutated humans who roam the streets in groups ranging from one to a few hundred, have no particular designation besides “the OD.” They show up, they rush you down, and they try to punch your head off your neck.
The OD are cannon fodder, but you should take them a little seriously. Even towards the end of the game, a casual swat from a single OD can strip off a surprising amount of your health, and getting caught in a corner by several of them can send you to the respawn screen in short order. Once you’ve gotten a feel for how you’re supposed to play and are in constant motion, the OD fade into background noise.
If a standard OD is allowed to drink enough Overcharge, it mutates into a Popper. This takes 10 to 15 seconds and is only typically seen if they manage to overturn an Overcharge truck or during certain specific missions.
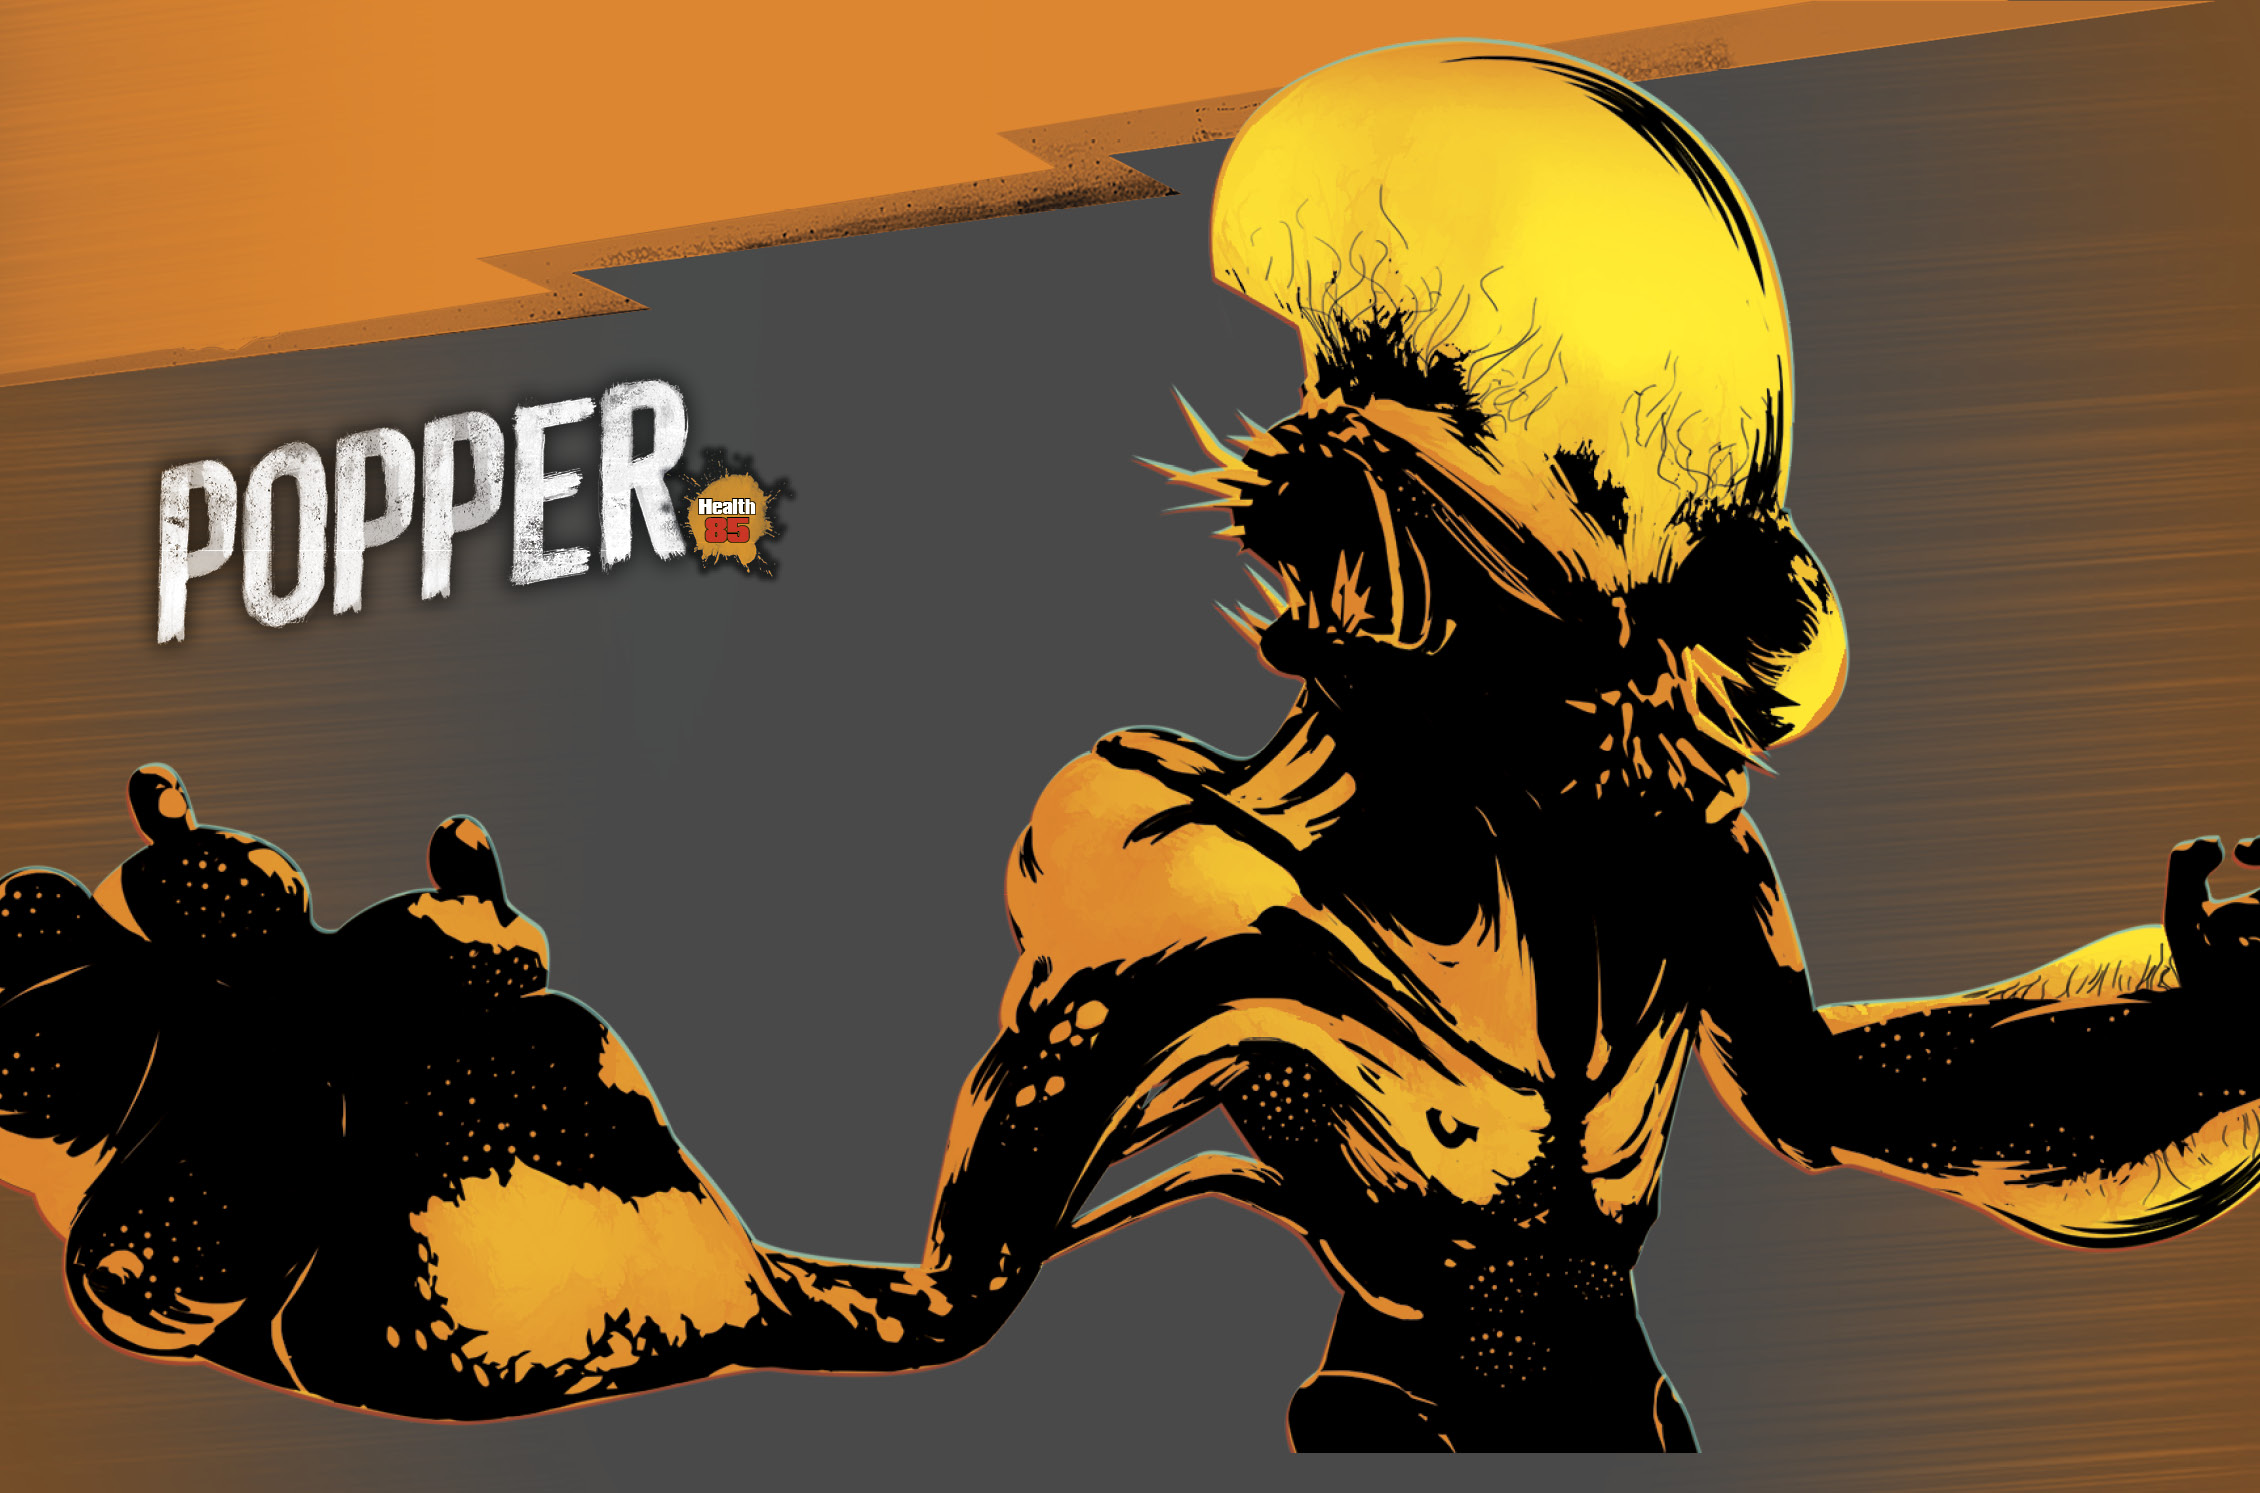
A Popper that sees a target runs at it in a suicide charge, exploding on contact for heavy damage. If one shows up next to you, it’s already too late to dodge-roll out of the way, as you’ll still get rocked by the explosion. The only way to avoid damage from a Popper that’s gotten into melee range is to swat it with your crowbar, which knocks it away from you.
If you spot one at range, Poppers have such low health that you can take them out with just about any weapon. Don’t try to kite them, as they move a lot faster than you think.
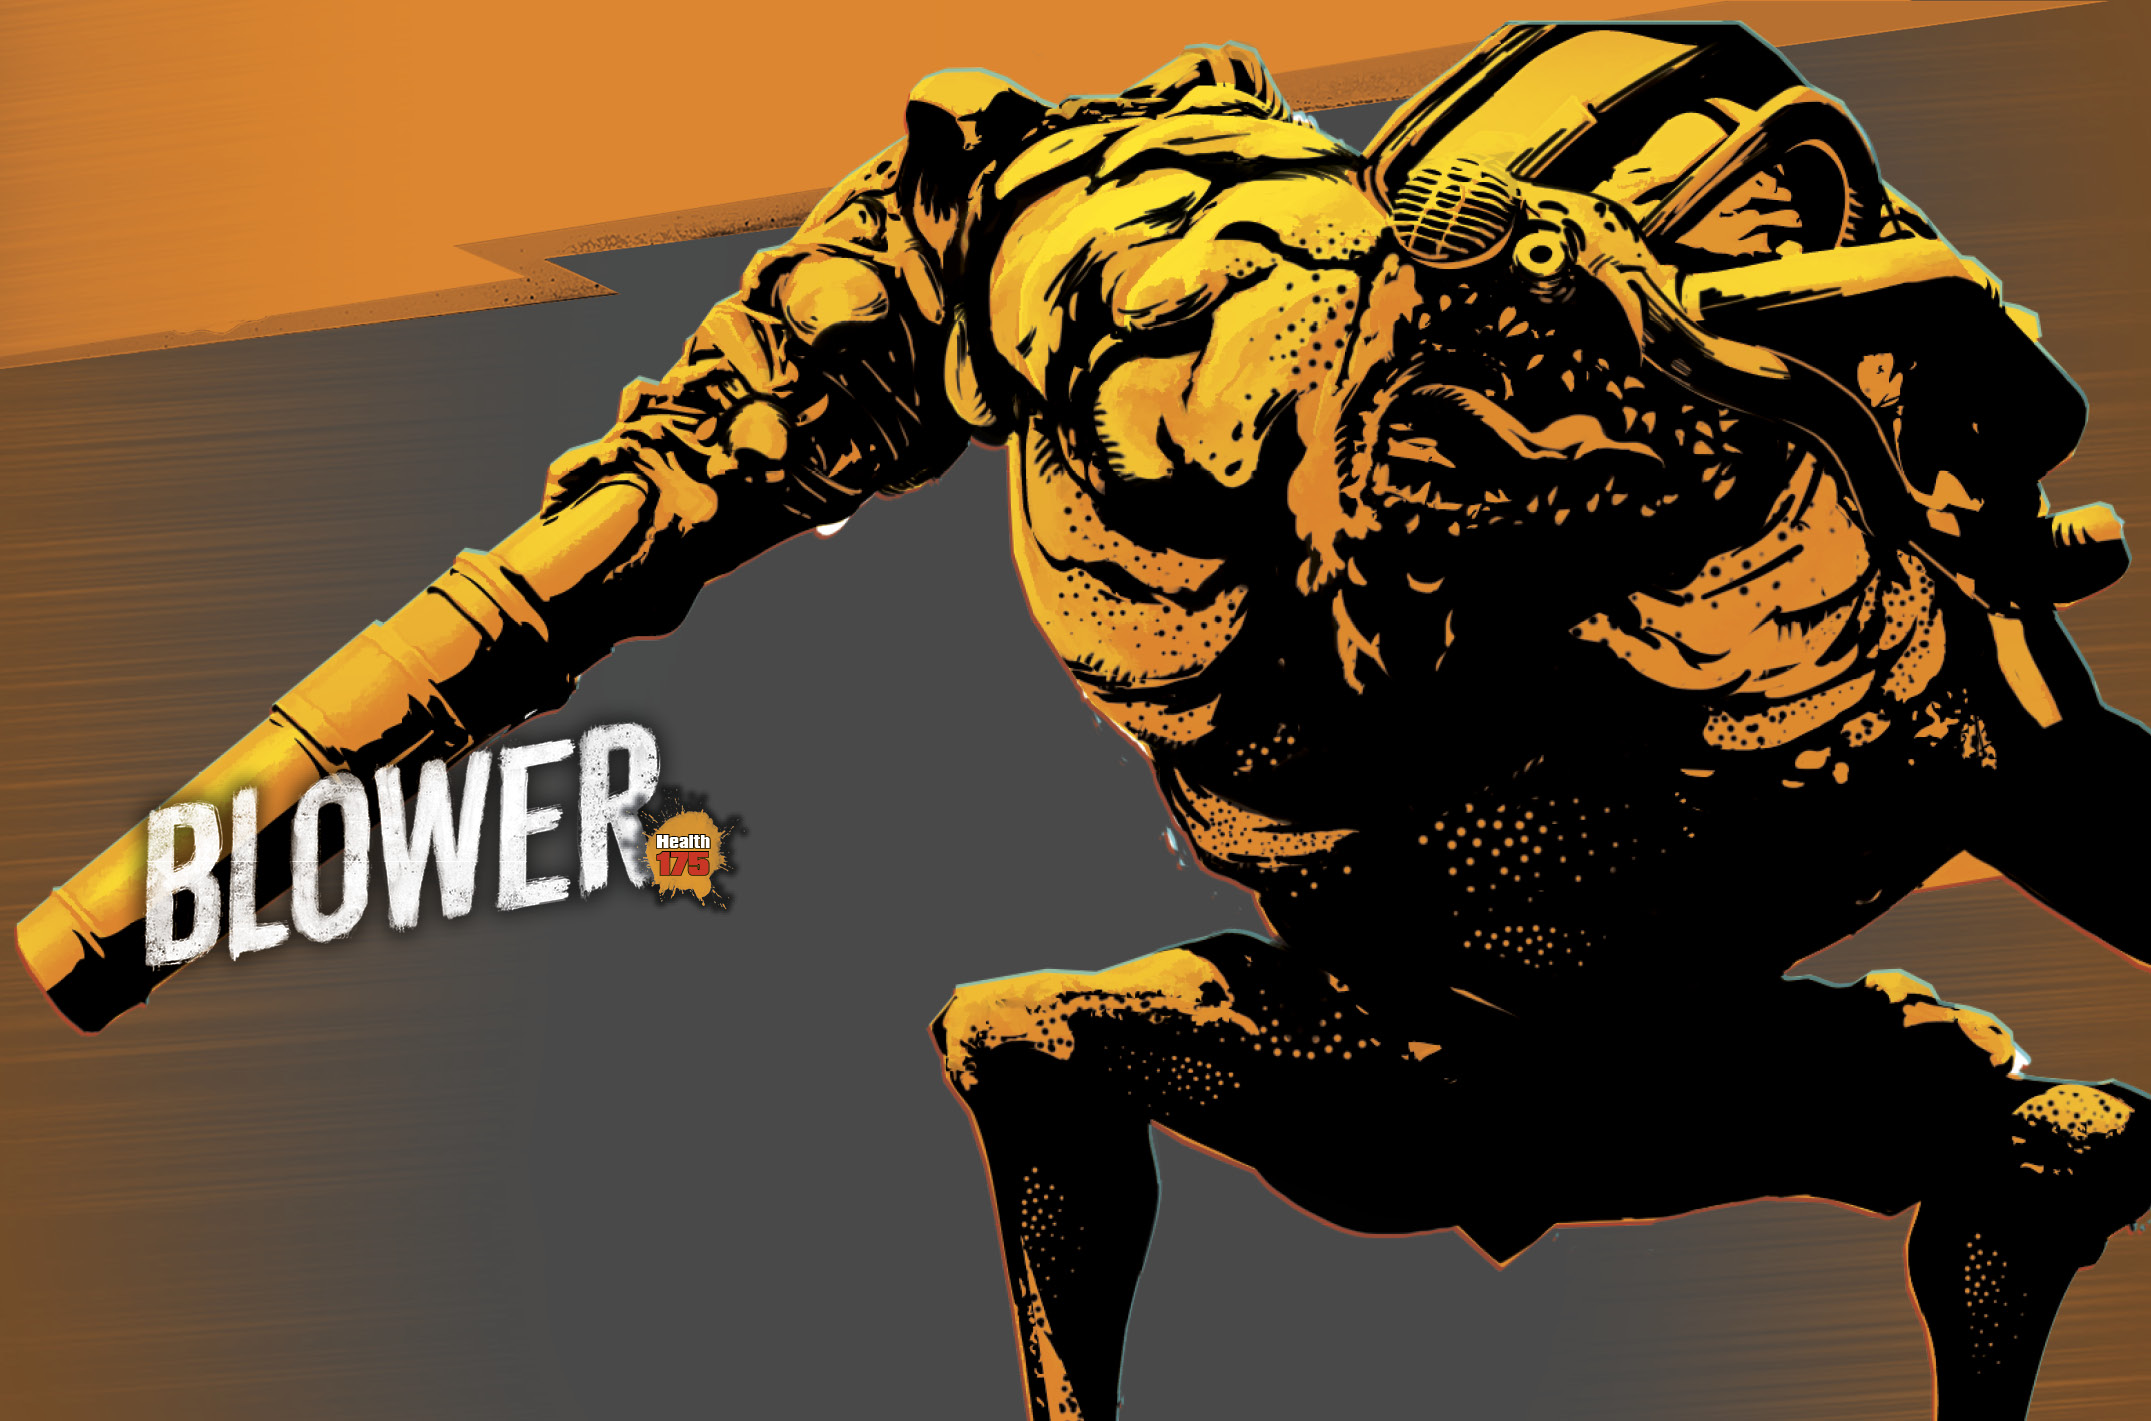
Blowers’ game plan is to hit and run, bouncing around at a distance and firing toxic slime into your current path. If the Blowers’ slime makes contact, you’ll take significant damage and go flying, which breaks your current grind but doesn’t necessarily stop your combo. The Blower, if you head towards it or deal any damage, often jumps clear and tries to take up a station somewhere else. They like to stand on top of cars or dumpsters.
You can see where a Blower’s slime is about to drop by watching for red targeting circles on your path and avoiding them, but keep in mind that each burst of slime hits in an area. You can’t simply avoid them by switching to an undergrind, for example, as the splatter will still hit you. The only way to dodge a Blower’s gouts of slime is to change direction or get off your current grind entirely.
One on one, a Blower has a bit more health than an average OD but shouldn’t present a serious problem. They’re mostly dangerous due to how they can complicate your maneuvering. When Blowers become a common encounter, that’s your cue to start being as unpredictable as possible as you traverse the city.
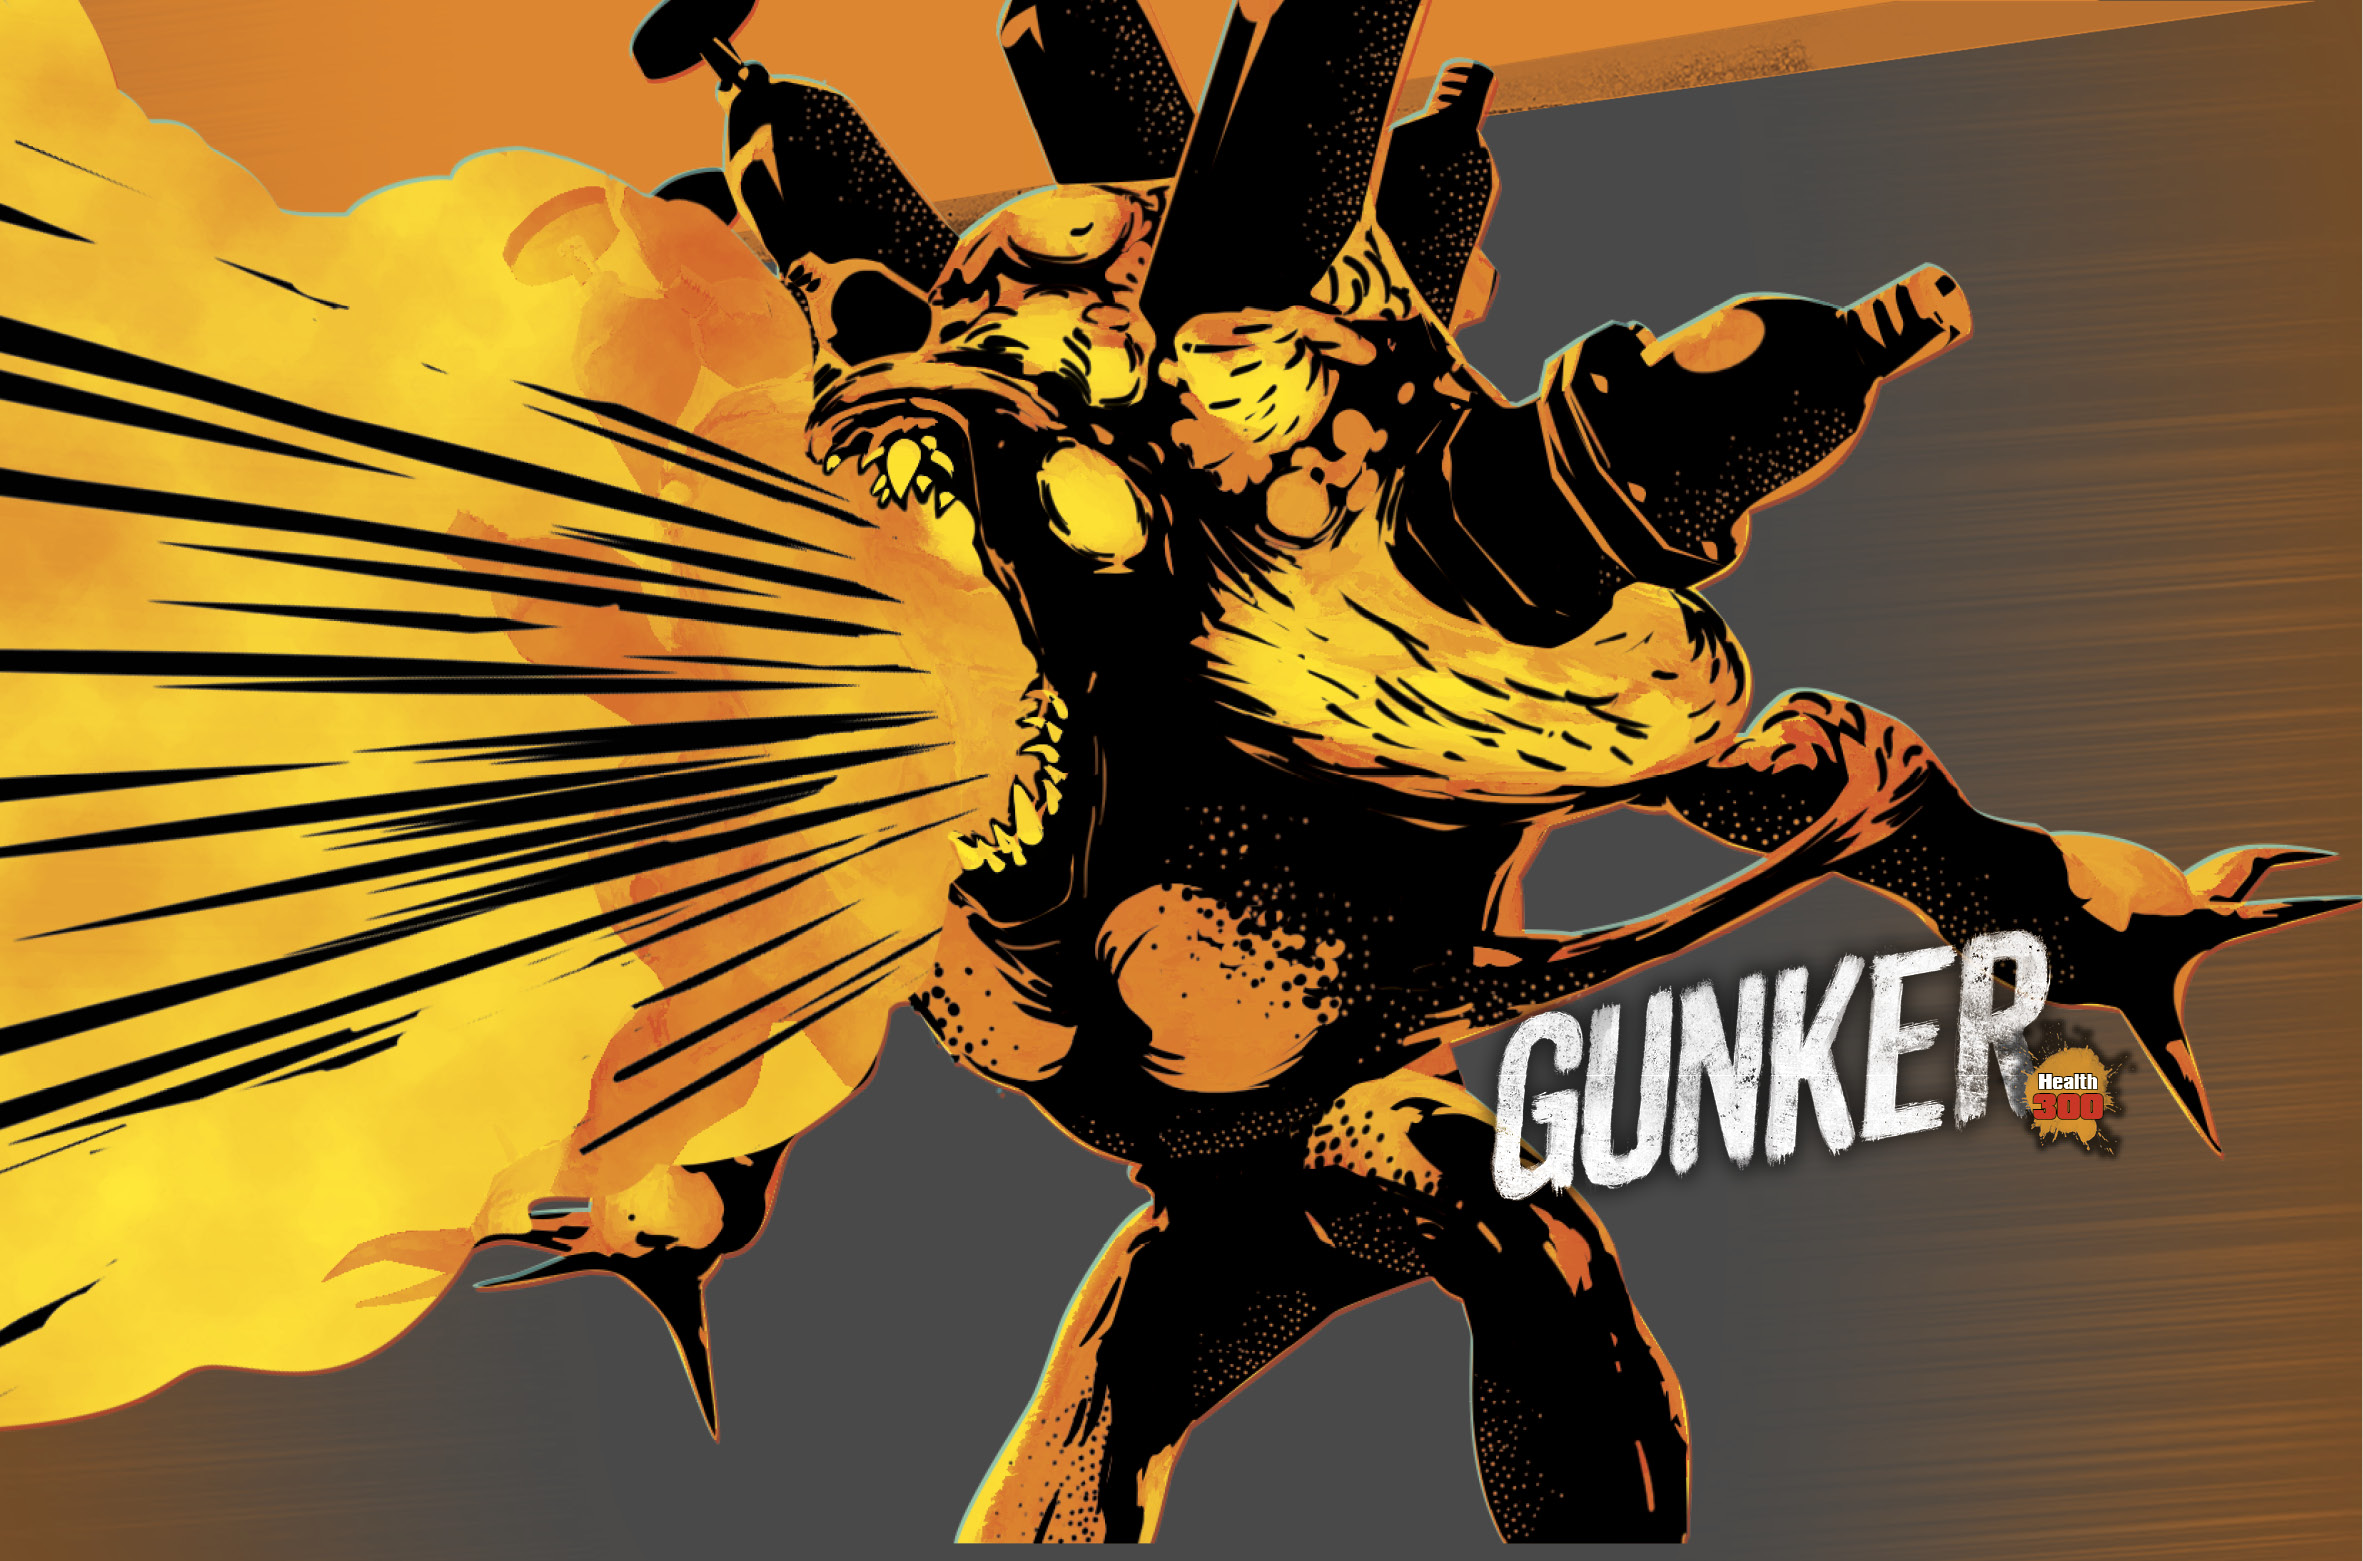
The Blowers are obnoxious, but once their slime pools land, you don’t have to dodge them anymore. Gunkers take that to the next level by throwing spiky clumps of ice onto every wire, curb, and rail in the area, even if you’re nowhere near them. Making contact with the ice shatters it, inflicting damage and knocking you over. The moment a Gunker’s on the scene, the entire area around them turns into an obstacle course.
When a Gunker dies, it explodes into a short-range cloud of ice, just as if you’d dropped a Freeze Bomb there. This will freeze and stun any enemies in the area, which can be a big help during night defense missions. If there are enough other OD surrounding the Gunker, or even other enemies that are fighting it, you can knock them all out at once by deliberately targeting the Gunker.
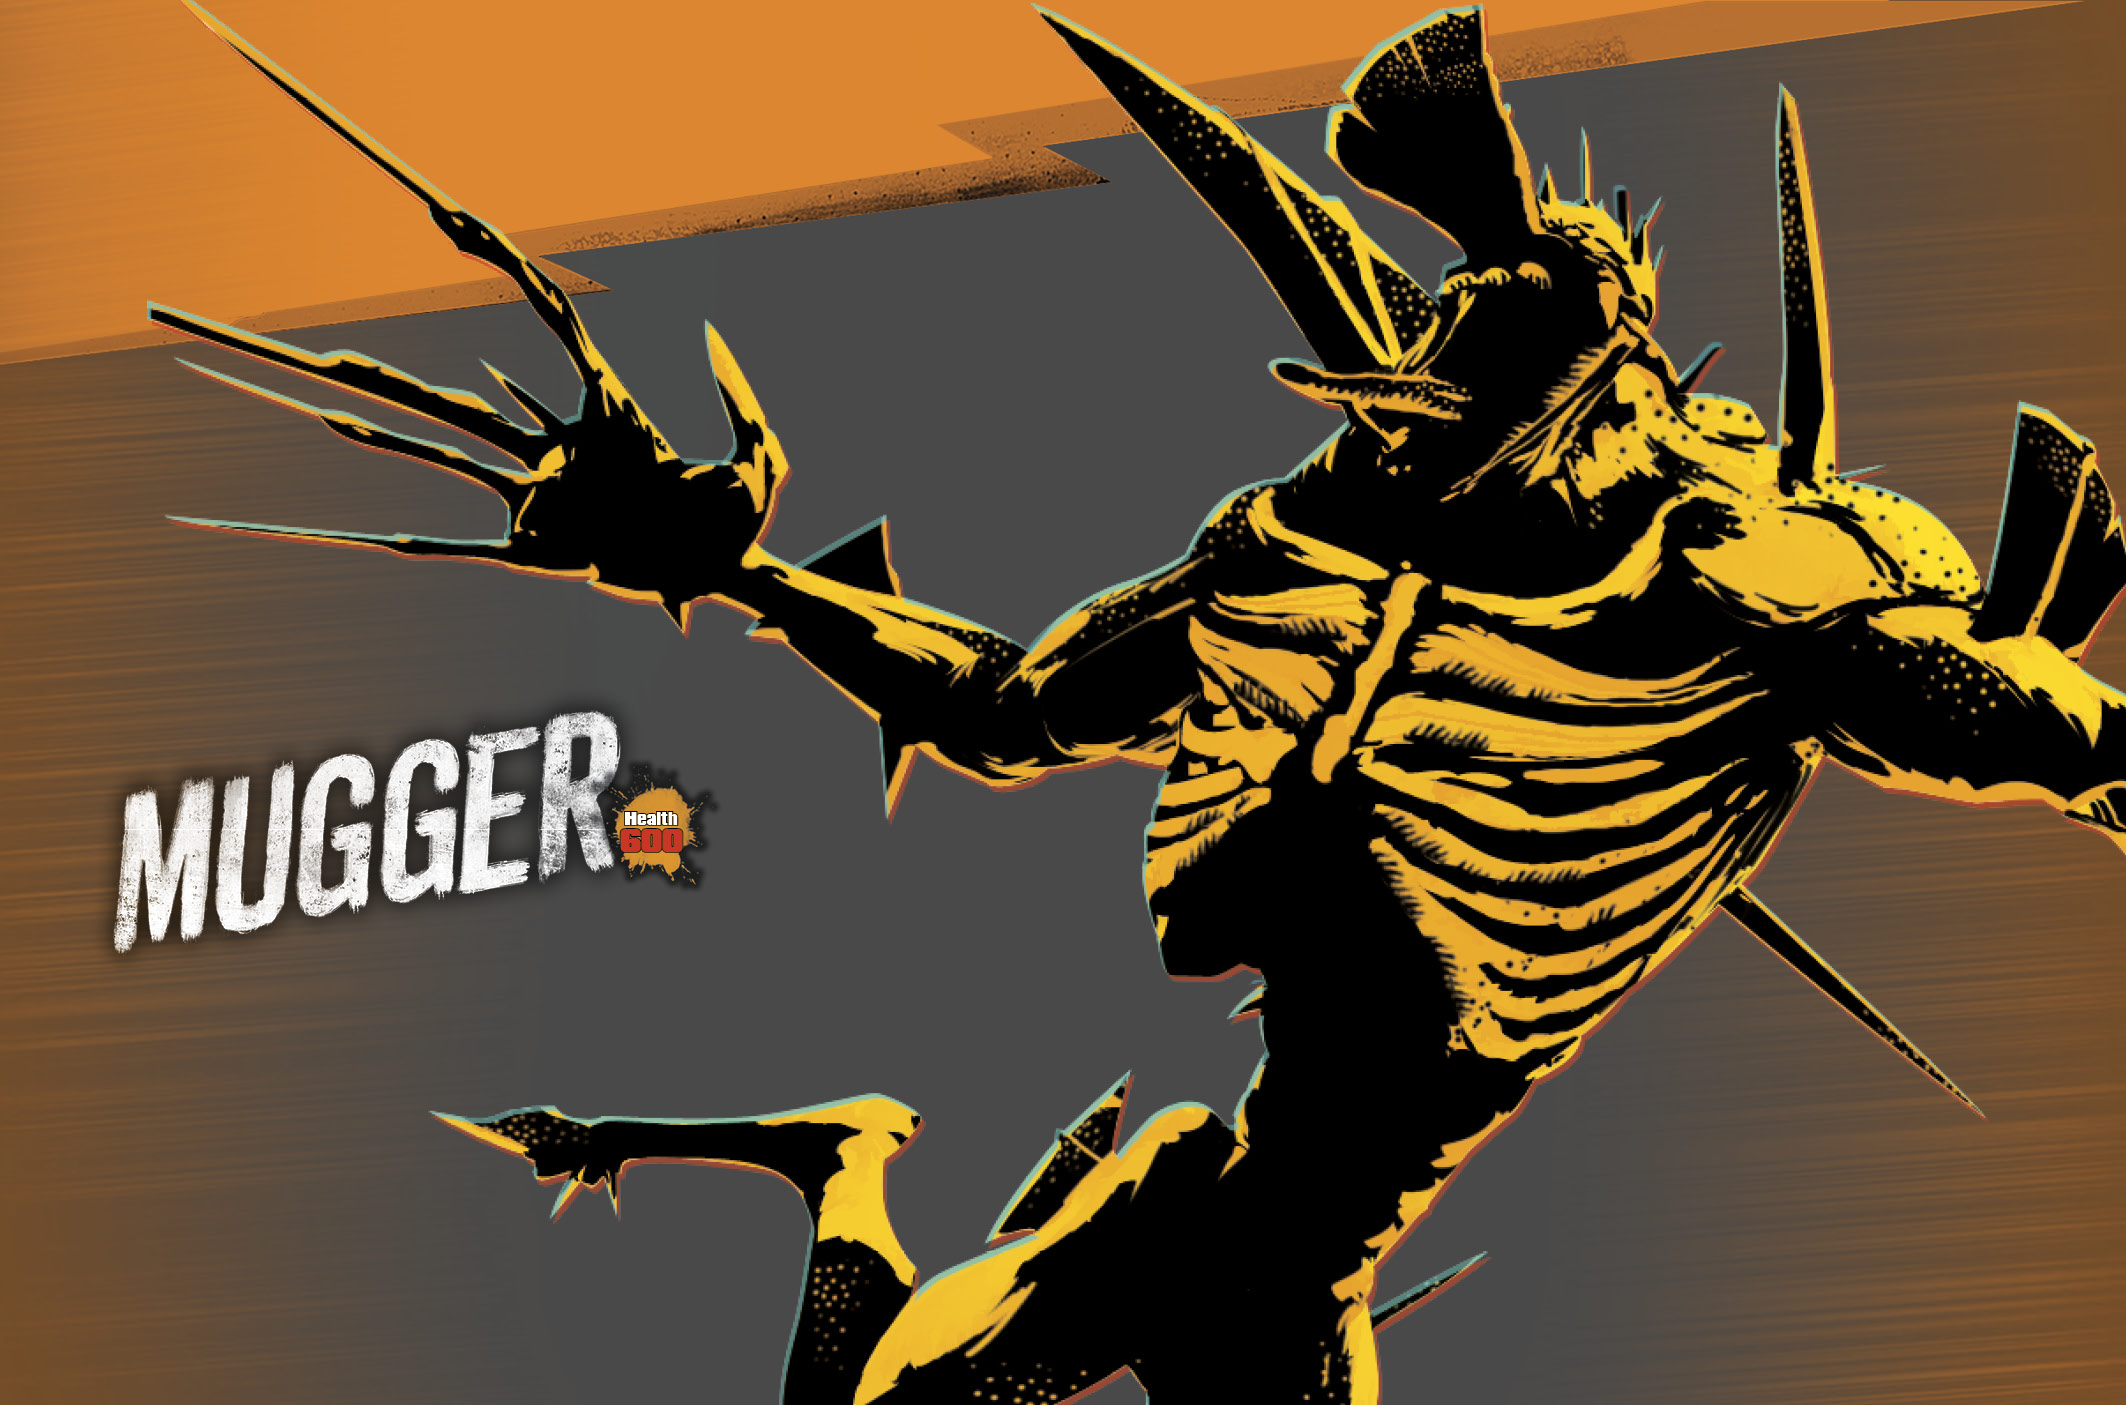
The first clue you get that a Mugger’s in the area is often when it lands on your face. Muggers can cling to walls, and their favored means of attack is to leap on you from overhead for heavy damage. You do receive warning of an impending Mugger dive-bomb in the form of a red targeting reticule, which is your cue to get out of the way as quickly as possible.
Muggers don’t count as bosses, but do appear on your minimap as larger-than-usual red dots. You can track their position by keeping one eye on the minimap, then hit them with the Ahab, One-Handed Dragon, or a Freeze Bomb while they’re setting up their next attack.
Another fun option is to wait for them to leap, then deliberately plant Proximity Mines or Acid Sprinklers in their target zone. When the Mugger lands, it either explodes or gets doused in industrial solvent.
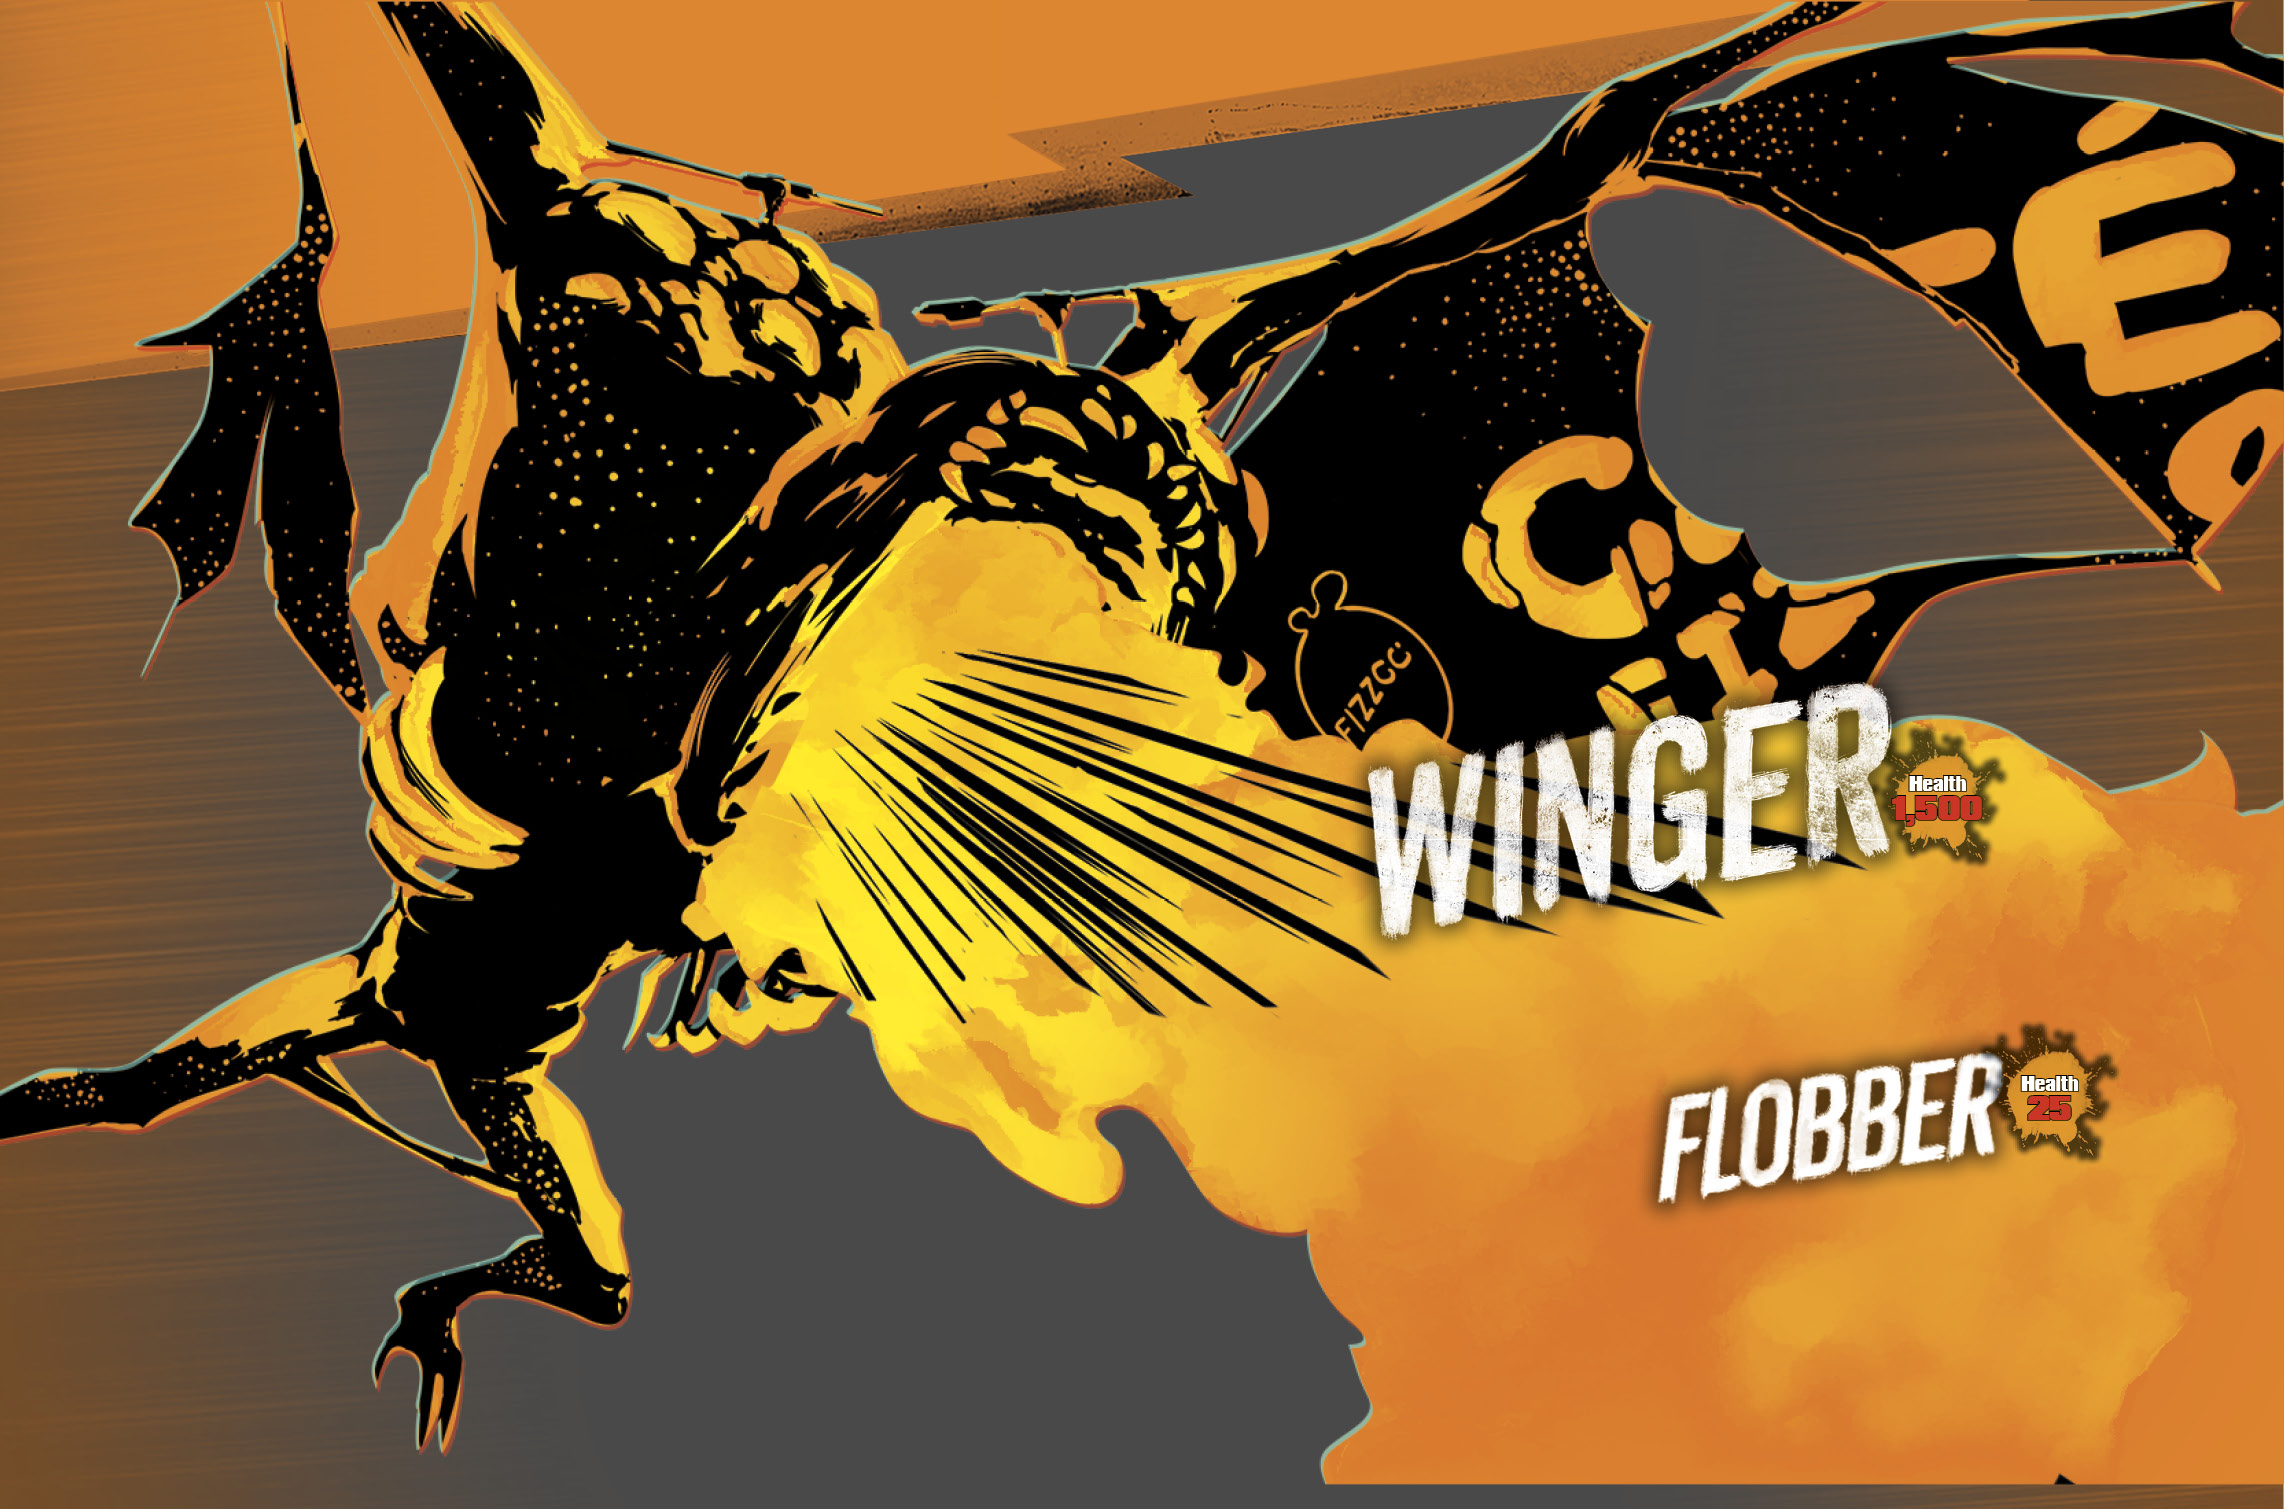
Wingers attack by spawning Flobbers or raking your current position with beams of fire. The beam leaves a short-lived trail of flames wherever it passes, which the Winger will often use as a blockade to keep you from moving across nearby rails or wires. You can undergrind, where it’s available, to avoid the Winger’s flames.
The best time to hit a Winger is when it is not melting your face off. When it attacks, it holds still for a few seconds, which is enough time to land a few hits. Wingers take damage as if they’re bosses, which makes the Ahab a surprisingly powerful weapon against them. A Freeze Bomb is also effective, especially in Chaos Squad where Wingers have a massive health pool; a few shots with the Freeze Bomb will freeze and shatter the Winger.
You won’t see these little guys until the second time you run into Wingers. They spawn from Wingers’ mouths and lock onto you, chasing you down until they either make contact or you shoot them out of the air. They’re persistent and do some damage if they connect, but their primary use is basically as chaff; they can intercept weapons fire before it’s able to hit and damage a Winger, or knock you off a grind.
As with Poppers, the most efficient way to deal with a Flobber is to swat it with your crowbar or other melee weapon, which knocks them away like wiffle balls. They’re mostly an annoyance.
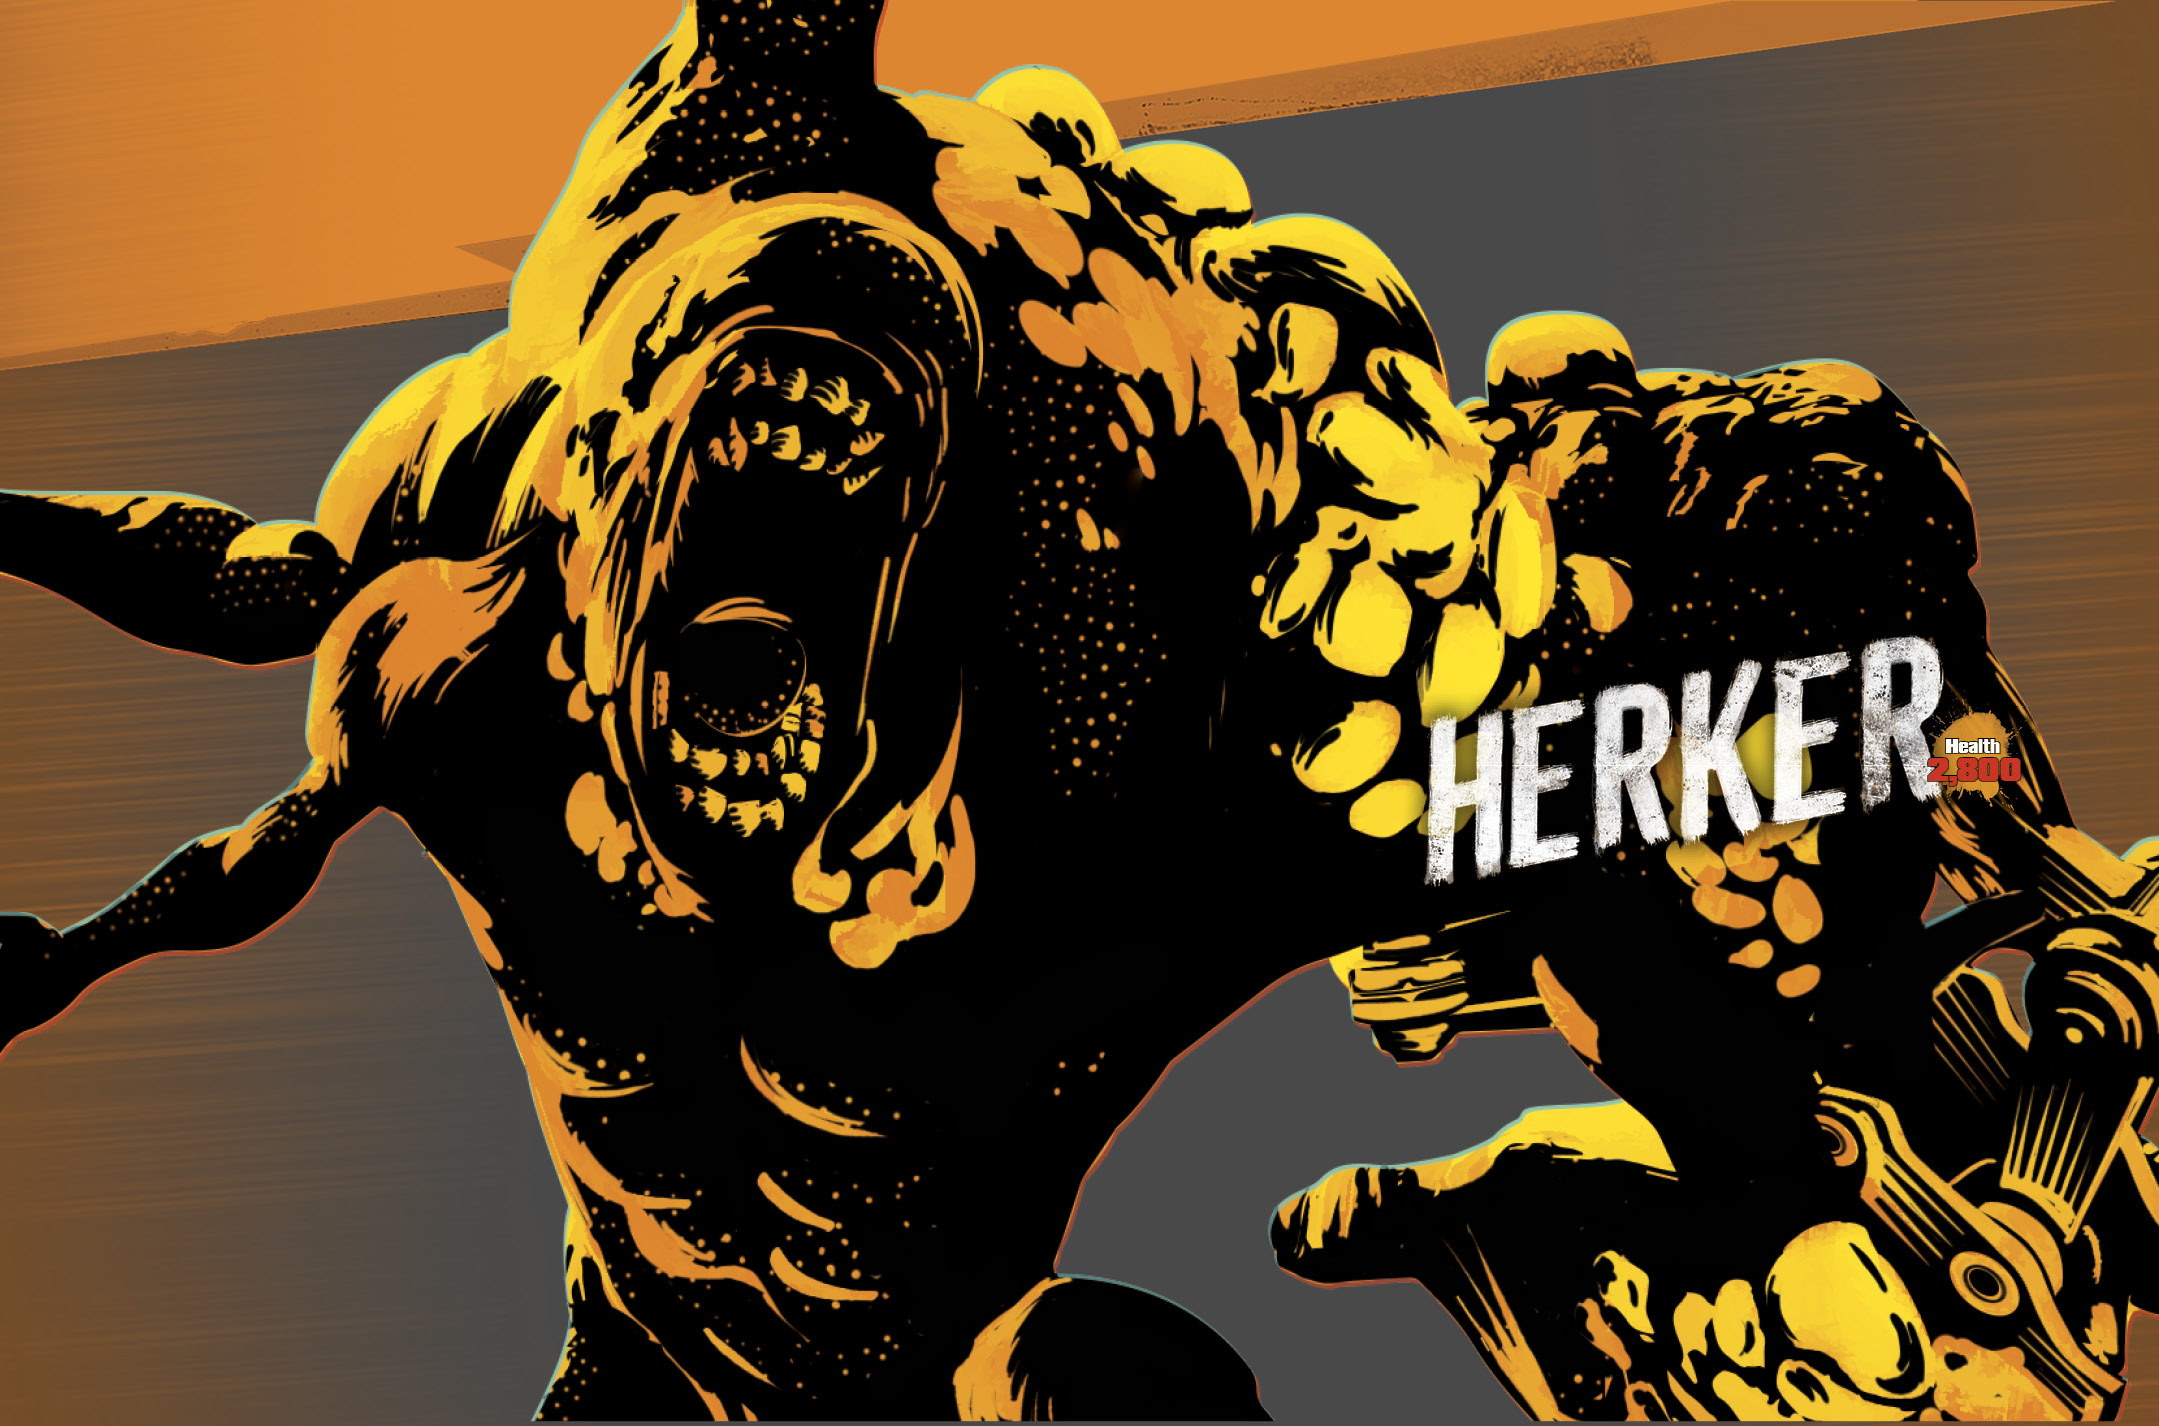
Herkers are walking tanks and can appear anywhere within Sunset City. At range, they use their construction-equipment limbs—don’t ask—to pick up and throw things at you, ranging from chunks of pavement to other OD. Nowhere is safe. They’re also much faster than anything their size has any right to be, and as bosses, they use a different set of weapon vulnerabilities than lesser OD. All in all, they’re a headache.
Early in the game, the best way to handle a Herker is to use the Freeze Bomb. A few hits will stun it for up to 12 seconds, which is enough time to set it on fire, then unload the Dirty Harry into the side of its head. This may not kill it, but it’ll do enough damage that you should be able to finish it off shortly thereafter.
As you get more weapons, the key to Herker disposal is to hit it as hard as you can, in as many ways at once as you can. Deploy Taunt Bots and Turret Copters for additional damage, lure it into your Proximity or Pulse Mines, set it on fire, douse it in acid, and bombard it with Ahab harpoons or explosives. The Herker has a lot of health, and you have a lot of ways to chew through it. Use them all. There is no such thing as overkill.
By itself, a Spawner is a giant wall of meat that isn’t quite as durable or aggressive as a Herker. If you give it an opening in which to do so, it’ll run you over with a headlong charge that’s difficult to avoid. But the Spawner’s primary job is to produce a never-ending number of standard-issue OD from the hatches on its back.
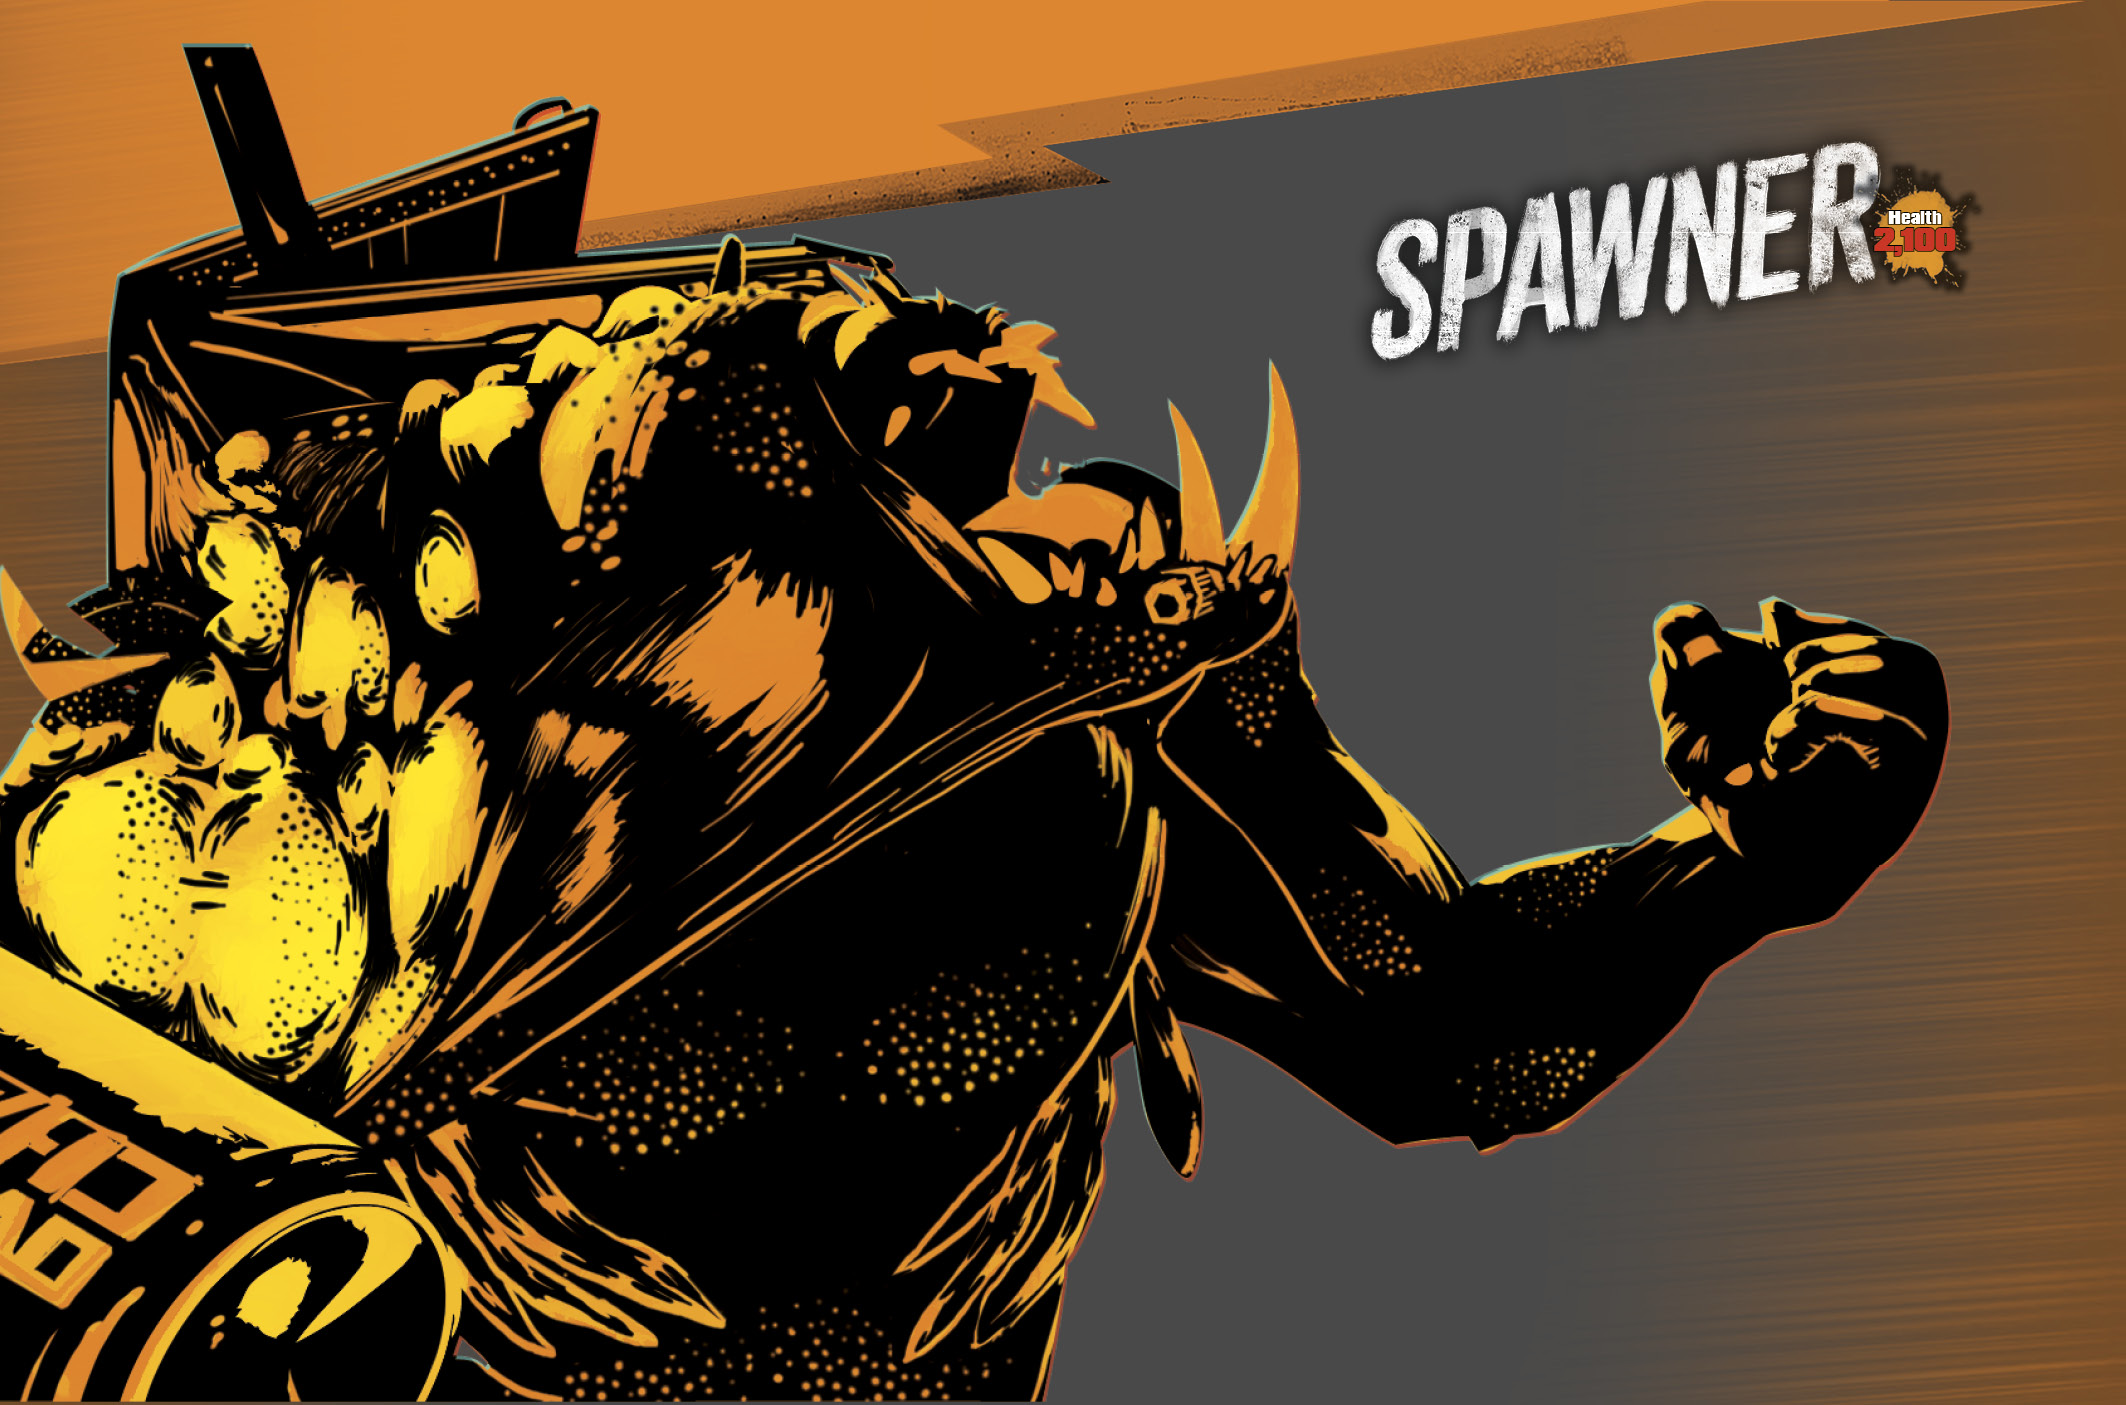
If it takes significant damage, it runs away, takes cover, and starts spitting out even more cannon-fodder to stand between it and you. Keep an eye on it and chase it down before it can furnish itself with reinforcements.
Stay off the ground whenever you can, as the Spawner has no real way to attack unless you’re standing next to it. Use damage-over-time effects whenever possible, particularly fire or acid, and keep on top of it. Otherwise, you end up too busy dealing with its OD posse to finish off the Spawner.