
Prima Games eGuides
primagames.com Browse Redeem a code Help
Darksiders II eGuide
Sign in My Guides

Sign in or create an account

We'll email you a link. No password needed, and if you don't have an account yet, the link makes one.

By creating an account or signing in, you agree to our Terms of Service and Privacy Policy.

Have a password?

Had an account on the old eGuides site, or a code from a printed guide? Help and troubleshooting

Sign in with a password

By signing in, you agree to our Terms of Service and Privacy Policy.

Check your email

A sign-in link is on its way. It works once and expires in 15 minutes. Open it and you're in, with an account if you didn't already have one.

Contents

  • Maps
    • Maps
      • Map Listing
  • Essentials
    • Exploration and Combat
      • Controls
      • Exploring
      • Combat
      • Leveling Up
      • Equipping Gear
      • Death’s Attributes
    • Skills and Combos
      • Skills
      • Moves and Combos
    • Appendix
      • Legendary Items
      • Secret Chests
      • Boatman Coins
      • Book of the Dead Pages
      • Stonebites
      • Relics
      • Soul Arbiter's Scrolls
      • GnoMAD Gnomes
      • Achievements
  • Walkthrough
    • The Keeper of Secrets
      • The Veil
      • Boss Battle: War’s Shade
    • The Fire of the Mountain
      • Forge Lands
      • Tri-Stone
      • Stonefather’s Vale
      • The Weeping Crag
      • Baneswood
      • East Trail
      • The Charred Pass
      • Passing Through
      • The Cauldron
      • Boss Battle: Gharn
    • Tears of the Mountain
      • Stonefather’s Vale
      • Shadow Gorge
      • The Fjord
      • The Drenchfort
      • Boss Battle: Karkinos
    • To Move a Mountain
      • The Nook
      • The Lost Temple
      • Boss Battle: Construct Hulk
    • Heart of the Mountain
      • The Foundry
      • The First Heart Stone
      • The Second Heart Stone
      • The Third Heart Stone
      • Boss Battle: Corrupted Custodian
    • The Tree of Life
      • Boss Battle: The Guardian
      • The Verdant Hollow
    • The Kingdom of the Dead
      • The Tree of Death
      • Leviathan’s Gorge
      • Breach
      • Breach Exterior
      • The Maw: West Valley
      • Serpent’s Peak
      • Eternal Throne
    • The Toll of Kings
      • Gilded Arena
      • The First Animus Stone
      • The Second Animus Stone
      • The Third Animus Stone
      • Boss Battle: Gnashor
    • Court of Bones I: Phariseer
      • Gilded Arena (Exterior)
      • The Maw
      • Phariseer’s Tomb
      • Boss Battle: Phariseer
    • Court of Bones II: Judicator
      • The Spine
      • Judicator’s Tomb
      • The First Soul
      • The Second Soul
      • Boss Battle: Tormentor
      • The Third Soul
      • Boss Battle: Bone Giant
    • Court of Bones III: Basileus
      • Gilded Arena
      • Psychameron
      • Boss Battle: Basileus and Achidna
    • The City of the Dead
      • The City of the Dead
      • Boss Battle: The Wailing Host
    • The Key to Redemption
      • Lostlight
      • The Crystal Spire
    • The Rod of Arafel
      • Earth
      • Boss Battle: The Noss
    • Stains of Heresy
      • The Ivory Citadel
      • Boss Battle: Jamaerah the Scribe
      • Boss Battle: Archon
    • The Lord of the Black Stone
      • Shadow’s Edge
      • The Black Stone
      • Boss Battle: Samael
    • The Well of Souls
      • Final Boss: Avatar of Chaos
    • Side Quests
      • The Crucible
      • Thane’s Side Quests
      • Muria’s Side Quests
      • Alya’s Side Quest
      • Vulgrim’s Side Quest
      • Blackroot’s Side Quest
      • Oran’s Side Quest
      • Ostegoth’s Side Quest
      • The Chancellor’s Side Quest
      • Nathaniel’s Side Quest
      • Uriel’s Side Quest
    • Side Areas
      • The Weeping Crag
      • Boss Battle: Gorewood
      • The Shattered Forge
      • The Scar
      • Boss Battle: Ghorn
    • Side Quests and Areas
      • Lair of the Deposed King
      • Boss Battle: Argul
      • Sentinel’s Gaze
      • Boneriven
      • Soul Arbiter’s Maze
      • Boss Battle: The Soul Arbiter
  • Extras
    • Behind the Scenes
      • Darksiders II Behind the Scenes
      • Creating Death
    • Behind the Scenes Videos
      • Video Interviews

Darksiders II Guide › Walkthrough › To Move a Mountain

Boss Battle: Construct Hulk

Boss Battle: Construct Hulk

The Construct Hulk pounds the earth with unbridled fury. Keep your distance from the monster and note that each time it slams the ground, a number of Shadowbombs fall from the high pods around the arena. Grounded Shadowbombs will erupt after a short time, so you’ll have to be quick when rushing over to the nearest bomb to use it.

Caution

Beware the Construct Hulk’s charge attack, when it slams the ground multiple times as it rampages toward Death. The wide radius of the boss’s single ground-pound is also worthy of concern—jump to avoid being caught by the shockwave.

Once you’ve obtained a Shadowbomb, immediately focus on the Construct Hulk and toss the bomb at it. The bomb will soon detonate, causing the boss to momentarily collapse.

Now’s your chance! Rush toward the Construct Hulk and strike at its exposed core with your most devastating combos. Call upon Death’s skills to pile on as much damage as possible in your brief window of opportunity.

Damaging the Construct Hulk only fuels its fury. When you do, the monster calls lesser Construct Warriors and Adjuncts to its aid. Avoid the boss and cut down its minions to simplify matters before focusing your attention on stunning the Construct Hulk again.

Tip

Defeat the lesser minions before stunning the Construct Hulk with a Shadowbomb, or else they’ll interfere when you try to strike at the Hulk’s exposed core.

Continue to stun the Construct Hulk and punish its core until the monster can take no more. With this final adversary lying in ruin, there’s nothing left to stop Death from completing his mission.

Rousing the Warden

Collect any loot that many lie strewn about the battle area, and then scale the west stairs and empty a quartet of chests to claim even more spoils. After pocketing your plunder, approach the giant stone Construct to the west and activate it with the Makers’ Key.

The Makers’ Key does its work, and the great Construct Warden awakens from its long slumber. As luck would have it, Corruption has not yet spread to this great Construct. The Warden agrees to assist the Rider in his quest to awaken the Guardian—the only being capable of destroying the Corruption that surrounds the Tree of Life.

Quest Advancement

The Construct Warden carries the Reaper to the foot of Tri-Stone. Enter the Makers’ city and find Eideard standing near the south door. Speak with Eideard to advance your quest.

Next, chat with Muria to complete her side quest. The special item she gives you in reward can be used to.

Grim Talisman

Note

The Grim Talisman causes Death to gain Reaper Energy with each successful attack. Equip this item after unleashing Reaper Form, and Death's Reaper Gauge will refill more quickly.

Tip

Return to the Lost Temple and search the area behind where the Warden had been standing to discover a secret chest!

Side Quest Complete: “Shaman’s Craft”

Finding the Foundry

Trade with Alya if you like, and then proceed through the Forge’s south door. Speak with the towering Construct Warden who awaits you just outside. Then, watch in awe as the Warden uses its ancient power to restore the bridge leading to the Foundry. Time is short, Rider—hurry across the bridge without delay!

Before entering the Foundry’s front door, crack open the chest that’s stashed off to the left. Once you’ve done that, head west and search behind a giant statue to the right of the door to discover a Boatman Coin in the shadows. All right, now you’re ready to enter the Foundry and begin your quest to awaken the Guardian.
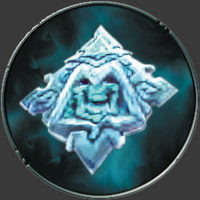
Boatman Coin 33

Keep reading with a free account

The first 3 sections of Darksiders II are open to everyone. An account opens the rest of it, and every other guide in the archive. It's free, and there's nothing to buy.

Bought guides on the old Prima Games site? Your account and every guide you own moved here, so there's nothing to buy again. Sign in.

Create a free account Or browse our free guides

PreviousThe Lost Temple NextThe Foundry