Prima Games eGuides
primagames.com Browse Redeem a code Help
Darksiders II eGuide
Sign in My Guides

Sign in or create an account

We'll email you a link. No password needed, and if you don't have an account yet, the link makes one.

By creating an account or signing in, you agree to our Terms of Service and Privacy Policy.

Have a password?

Had an account on the old eGuides site, or a code from a printed guide? Help and troubleshooting

Sign in with a password

By signing in, you agree to our Terms of Service and Privacy Policy.

Check your email

A sign-in link is on its way. It works once and expires in 15 minutes. Open it and you're in, with an account if you didn't already have one.

Contents

  • Maps
    • Maps
      • Map Listing
  • Essentials
    • Exploration and Combat
      • Controls
      • Exploring
      • Combat
      • Leveling Up
      • Equipping Gear
      • Death’s Attributes
    • Skills and Combos
      • Skills
      • Moves and Combos
    • Appendix
      • Legendary Items
      • Secret Chests
      • Boatman Coins
      • Book of the Dead Pages
      • Stonebites
      • Relics
      • Soul Arbiter's Scrolls
      • GnoMAD Gnomes
      • Achievements
  • Walkthrough
    • The Keeper of Secrets
      • The Veil
      • Boss Battle: War’s Shade
    • The Fire of the Mountain
      • Forge Lands
      • Tri-Stone
      • Stonefather’s Vale
      • The Weeping Crag
      • Baneswood
      • East Trail
      • The Charred Pass
      • Passing Through
      • The Cauldron
      • Boss Battle: Gharn
    • Tears of the Mountain
      • Stonefather’s Vale
      • Shadow Gorge
      • The Fjord
      • The Drenchfort
      • Boss Battle: Karkinos
    • To Move a Mountain
      • The Nook
      • The Lost Temple
      • Boss Battle: Construct Hulk
    • Heart of the Mountain
      • The Foundry
      • The First Heart Stone
      • The Second Heart Stone
      • The Third Heart Stone
      • Boss Battle: Corrupted Custodian
    • The Tree of Life
      • Boss Battle: The Guardian
      • The Verdant Hollow
    • The Kingdom of the Dead
      • The Tree of Death
      • Leviathan’s Gorge
      • Breach
      • Breach Exterior
      • The Maw: West Valley
      • Serpent’s Peak
      • Eternal Throne
    • The Toll of Kings
      • Gilded Arena
      • The First Animus Stone
      • The Second Animus Stone
      • The Third Animus Stone
      • Boss Battle: Gnashor
    • Court of Bones I: Phariseer
      • Gilded Arena (Exterior)
      • The Maw
      • Phariseer’s Tomb
      • Boss Battle: Phariseer
    • Court of Bones II: Judicator
      • The Spine
      • Judicator’s Tomb
      • The First Soul
      • The Second Soul
      • Boss Battle: Tormentor
      • The Third Soul
      • Boss Battle: Bone Giant
    • Court of Bones III: Basileus
      • Gilded Arena
      • Psychameron
      • Boss Battle: Basileus and Achidna
    • The City of the Dead
      • The City of the Dead
      • Boss Battle: The Wailing Host
    • The Key to Redemption
      • Lostlight
      • The Crystal Spire
    • The Rod of Arafel
      • Earth
      • Boss Battle: The Noss
    • Stains of Heresy
      • The Ivory Citadel
      • Boss Battle: Jamaerah the Scribe
      • Boss Battle: Archon
    • The Lord of the Black Stone
      • Shadow’s Edge
      • The Black Stone
      • Boss Battle: Samael
    • The Well of Souls
      • Final Boss: Avatar of Chaos
    • Side Quests
      • The Crucible
      • Thane’s Side Quests
      • Muria’s Side Quests
      • Alya’s Side Quest
      • Vulgrim’s Side Quest
      • Blackroot’s Side Quest
      • Oran’s Side Quest
      • Ostegoth’s Side Quest
      • The Chancellor’s Side Quest
      • Nathaniel’s Side Quest
      • Uriel’s Side Quest
    • Side Areas
      • The Weeping Crag
      • Boss Battle: Gorewood
      • The Shattered Forge
      • The Scar
      • Boss Battle: Ghorn
    • Side Quests and Areas
      • Lair of the Deposed King
      • Boss Battle: Argul
      • Sentinel’s Gaze
      • Boneriven
      • Soul Arbiter’s Maze
      • Boss Battle: The Soul Arbiter
  • Extras
    • Behind the Scenes
      • Darksiders II Behind the Scenes
      • Creating Death
    • Behind the Scenes Videos
      • Video Interviews

Darksiders II Guide › Walkthrough › Tears of the Mountain

Boss Battle: Karkinos

Boss Battle: Karkinos

The mound turns out to be a monstrous Earth Crag unlike anything Death has seen thus far. Slamming it with the orb-like object causes the creature to roar to life, and it isn’t happy!

Karkinos regularly rears back, screams, and then races toward Death with lethal intent. Evade to one side to dodge this linear rush.

Each time you dodge Karkinos’s charge, the monster slams into a wall and knocks an orb-like object from the ceiling. These are actually Earth Crag eggs, and in order to damage Karkinos, you must grab and shove an egg at the boss while it’s temporarily stunned from ramming the wall.

Caution

It doesn’t take long for Karkinos to recover after charging into a wall. Hurry and shove an Earth Crag egg at the brute before it rights itself!

Striking Karkinos with a high-velocity Earth Crag egg knocks the boss for a loop. Now’s your chance! Race into striking range and unleash Death’s most devious attacks and skills. Target the monster’s fleshy underside for maximum damage.

Caution

Launching Eart Crag eggs at Karkinos causes the eggs to hatch, unleashing additional enemies!

If Karkinos recovers before you can stun it, the monster will often leap into the air and come crashing back down, sending out a shockwave of lethal magnitude. Jump to avoid the wave, but beware: it will stir all Earth Crag eggs in the room, causing young Earth Crags to emerge! These baby brutes add an unwelcome layer of mayhem to the battle, but they can’t suffer much punishment. Eliminate Karkinos’s young before turning your attention back to the boss.
Note

Slaying Karkinos earns you a unique hammer: the Masher of Karkinos.

Masher of Karkinos

Tears Unleashed

Make a thorough search for loot after killing Karkinos, and then step out onto the sunlit south balcony. Pull the lever there to open the floodgates and send the Drenchfort’s torrent of Tears rushing off toward Tri-Stone. Well done!

With the Tears of the Mountain flowing strong, there’s only one thing left to do: use the fast travel option to exit this sacred place and hurry back to Tri-Stone.

Forge Restored

When you appear back at Tri-Stone, run south and open the giant doors to enter the Maker’s Forge. Speak with the Makers to advance your quest and receive a vital new item: the Maker’s Key. This wondrous tool has the power to awaken slumbering constructs!
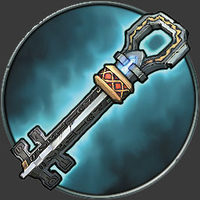
Maker's Key

Note

Now that you've obtained the Maker's Key, you can awaken the sleeping Construct you noticed back at the Fjord harbor. You will then be able to complete the side quest that involves tracking down the construct's four missing limbs. See the "Side Quests and Areas" section for further details.

Heart Stone Talisman

Side Quest complete: "Wandering Stone"

Chat with Alya after receiving the Maker’s Key to gain a new side quest that involves exploring the Shattered Forge—a ruin you’ve visited on your way to the Drenchfort. Now is an excellent time to clear this side dungeon-but first, shoot the Stonebite on the back (south) side of the Maker's Forge. Then see the "Side Quests and Areas" section for a complete walkthrough of the Shattered Forge.
Stone of Mystics 12
Boatman Coin 25
Omega Blades
Book of the Dead 7

Side Quest Complete: "The Shattered"

Taming Thane

Now that Death’s gear and skills have improved, it’s a good time to challenge Thane to a fight. The burly Maker’s attacks should seem very predictable—simply evade in a circle and flank Thane whenever he prepares to strike, and then counter-attack. Respect the Maker warrior’s might by fighting a strategic battle and you should have little trouble in besting him. Speak with Thane afterward to complete his side quest, and also to gain another which you won’t be able to complete until much later in Death’s adventures.

Note

Now that you’ve acquired the Maker’s Key, you can also advance the “Silent Stone” side quest that you acquired by discovering the giant sleeping construct in the Fjord. This side quest can be easily completed now if you would like to do so. Refer to the “Side Quests” chapter of this guide for further details.

Side Quest Completed: “The Maker Warrior”

Side Quest Acquired: "Find and kill bheithir"

Side Quest Acquired: "find and kill gorewood"

Side Quest Acquired: "find and kill the deposed king"

Side Quest Acquired: “Find and Kill Achidna”

Keep reading with a free account

The first 3 sections of Darksiders II are open to everyone. An account opens the rest of it, and every other guide in the archive. It's free, and there's nothing to buy.

Bought guides on the old Prima Games site? Your account and every guide you own moved here, so there's nothing to buy again. Sign in.

Create a free account Or browse our free guides

PreviousThe Drenchfort NextThe Nook